


Map Update Portal Landing Page
• https://vito.garmin.com/vito
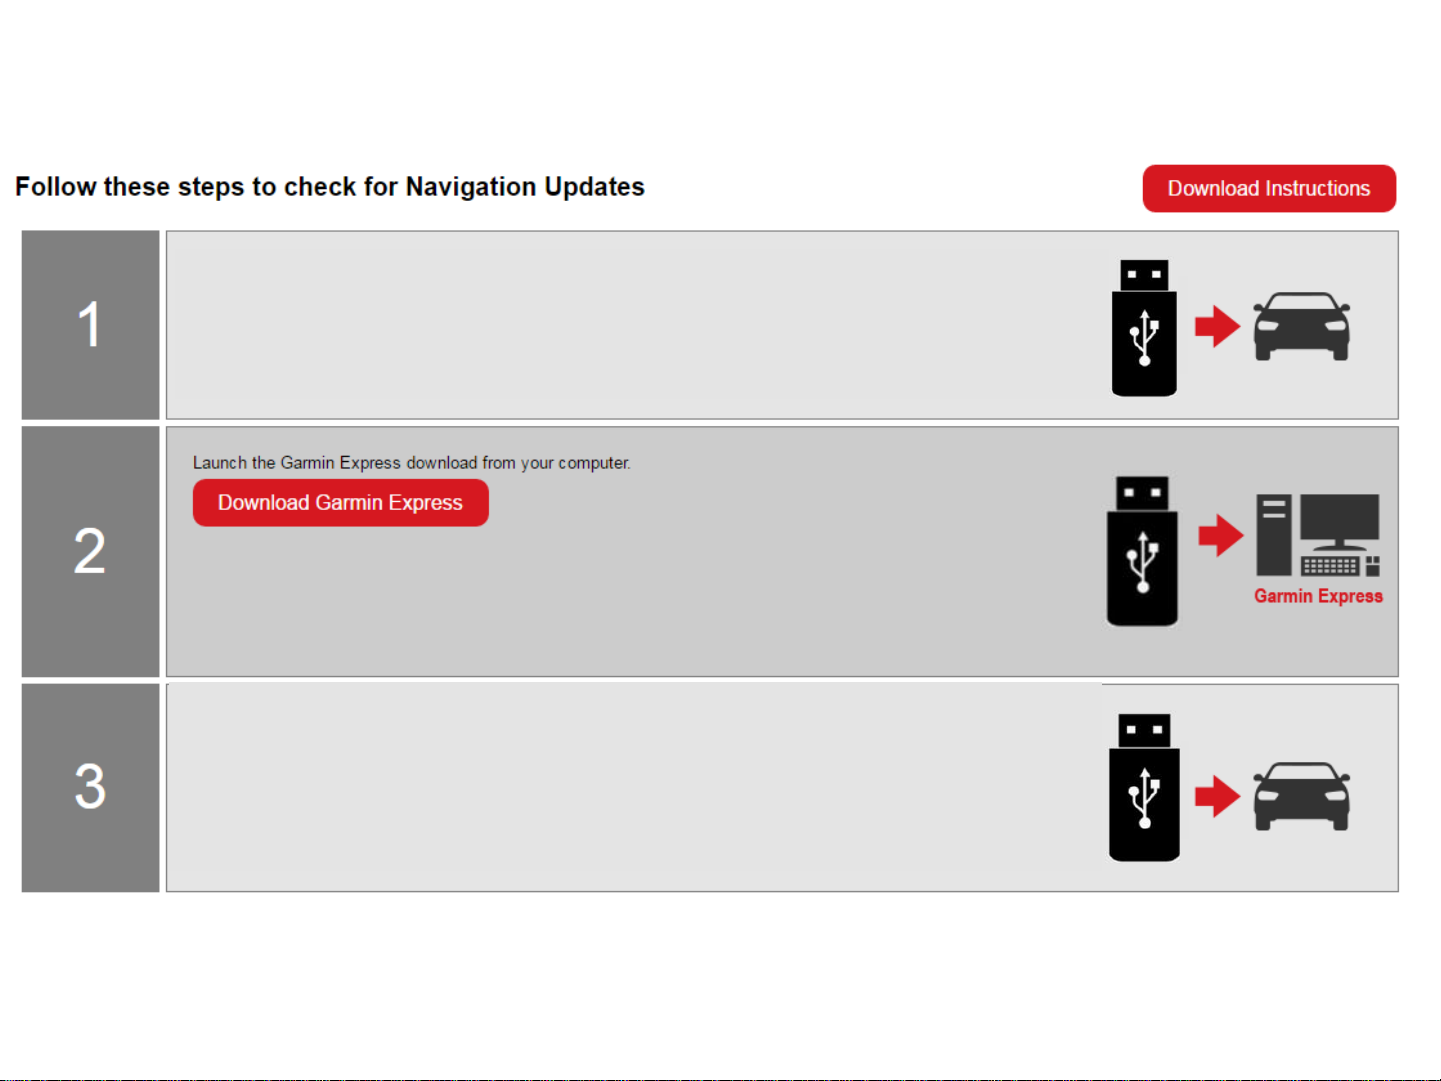
Map Update Portal
Insert the USB drive into computer and follow the prompts on Garmin Express.
Garmin Express will verify if there is a new map update available.
Once Garmin Express has finished you can remove the USB drive from the computer.
Note: The map download time varies based upon internet connection speed and map region.
2
Refer to your vehicle owner’s manual for the location of the USB drive slot. Insert the USB drive with at least 16GB of available
space into the USB drive slot in your vehicle.
On the Navigation System go to System > Navigation > Map > Map Updates. Follow the on-screen prompts until instructions
to "start the update process" on this website appear.
Remove the USB drive and return to your computer.
Remove the USB drive from the computer. Plug the USB drive back into the vehicle USB drive slot.
On the Navigation System go to System > Navigation > Map > Map Updates. Start the update process to complete the update.
Note: The map update may take up to one hour but may vary based on the map region. During this update your Daimler Vito
navigation system must maintain continuous power. Therefore, the engine must be running while the vehicle is parked outside
or in a well-ventilated area. Before getting started, familiarize yourself with and follow all applicable laws in your area. Please
contact your dealer with any questions or concerns.

Map Update Portal Requirements
• This portal is available to Windows and MAC systems only;
Tablets and Mobile devices are not supported.
– Windows
•
Windows 7 SP1 or newer, Microsoft .NET 4.7.2 (included)
•
1024 x 768 display, USB port and 1 GB RAM
•
High speed Internet access (Not for use with dial-up, mobile or satellite connections)
•
May require up to 20 GB free disk space
– Mac
•
OS X 10.11 or newer
•
1440 x 900 display, USB port and 1 GB RAM
•
High speed Internet access (Not for use with dial-up, mobile or satellite connections)
•
May require up to 20 GB free disk space
3
Step 1
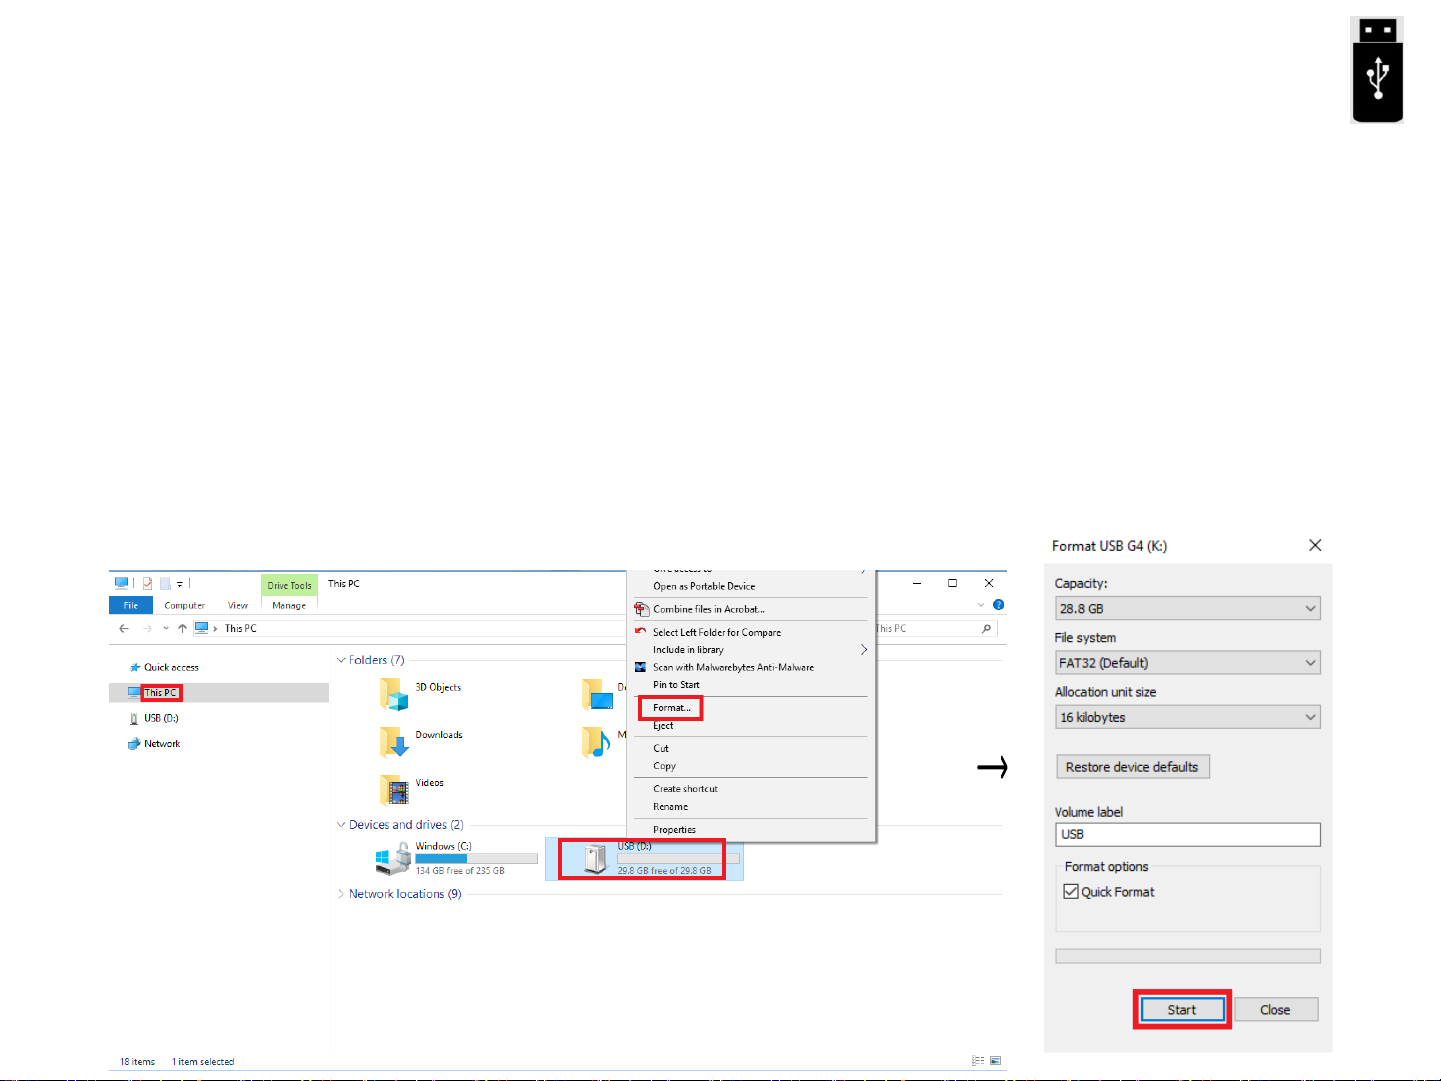
Prepare a USB drive
– Prepare a USB drive with storage of a minimum 16GB but not to exceed
32GB.
– Format the USB drive, following the steps below:
– Computer → Right click on the USB drive icon → Click Format
→ Click Start (Screen shot was taken from a Windows 10 system)
*Note: If you would like to update another vehicle with the same USB
drive, the USB drive has to be formatted again.
4
Step 2
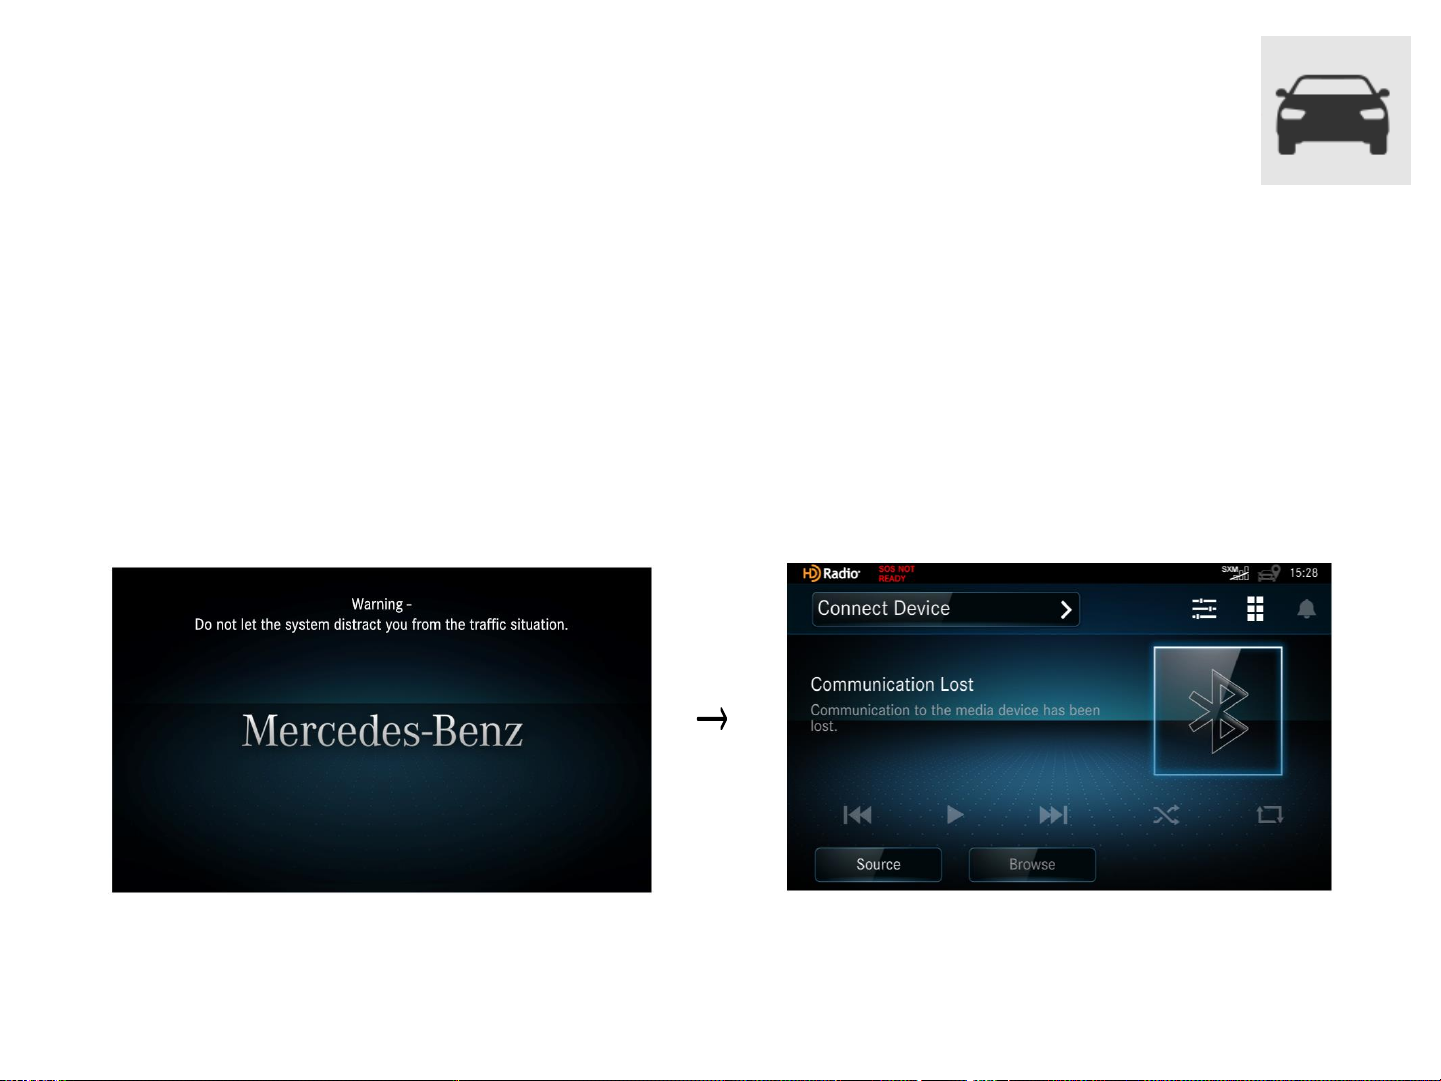
Prepare your vehicle
– Switch your vehicle to “ENGINE ON” until the navigation system enters
the Warning page.
– After a few seconds the screen will bring you back to the last screen you
were on before the vehicle powered down last.
*Note: Keep the Engine on throughout Step 2 to Step 2.3.
5
Step 2.1 for USB model
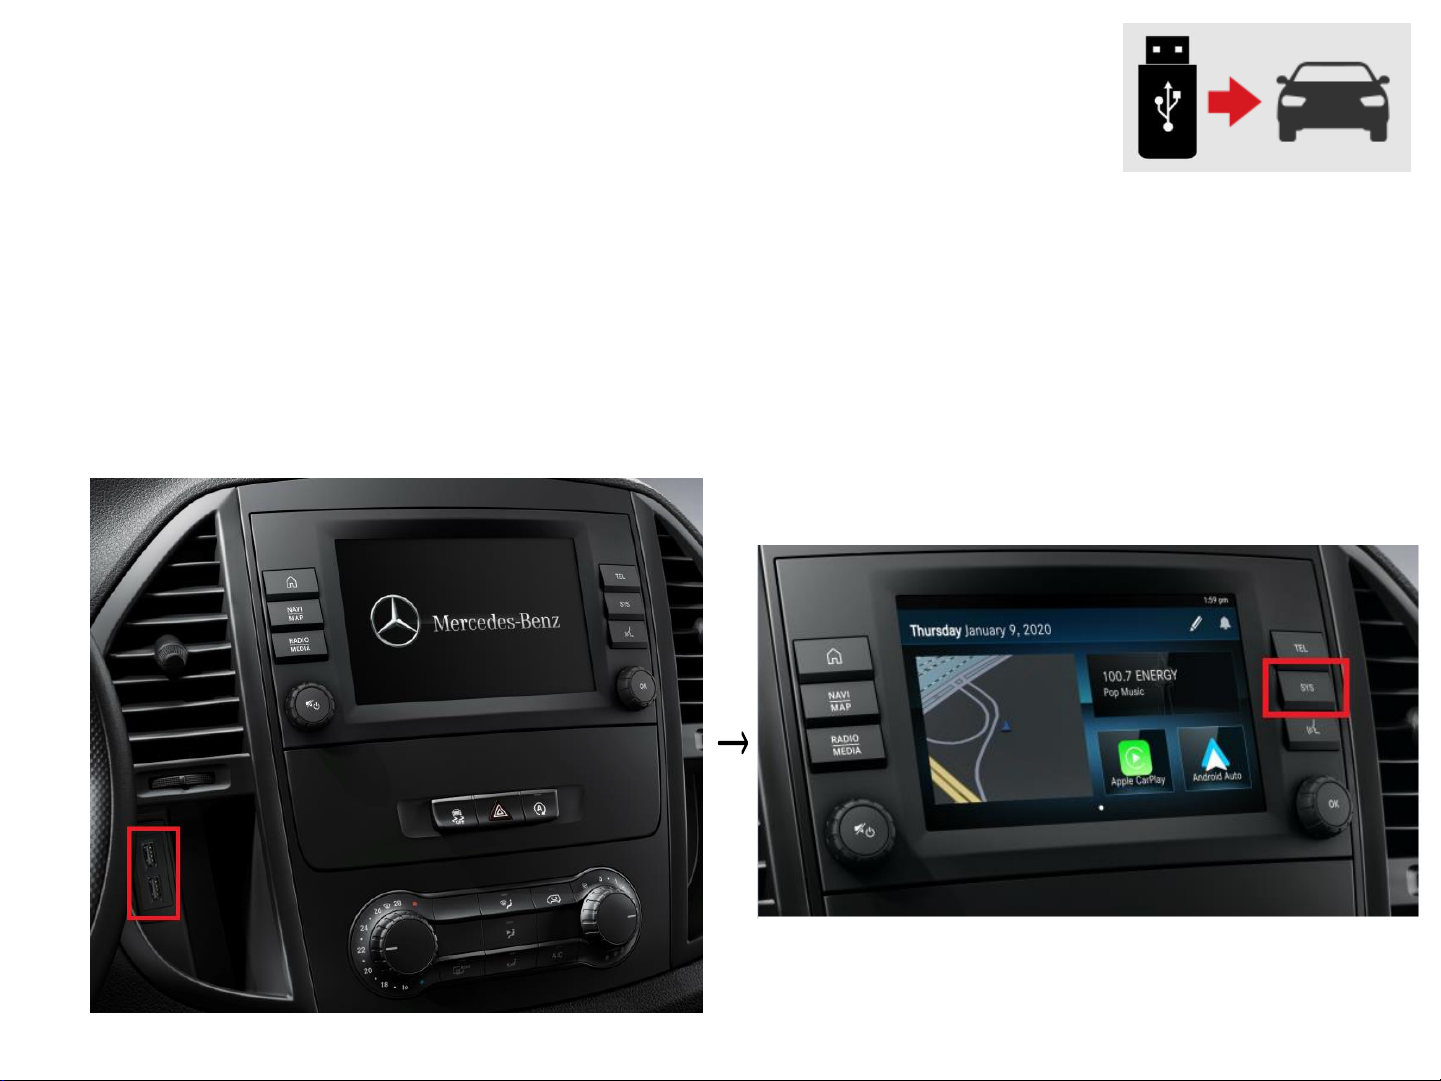
Create a Map Update USB
– Insert the formatted USB drive to the USB port on your navigation
system.
*Note: Either USB port will work for this process.
– Press the “SYS” key on the navigation device.
6
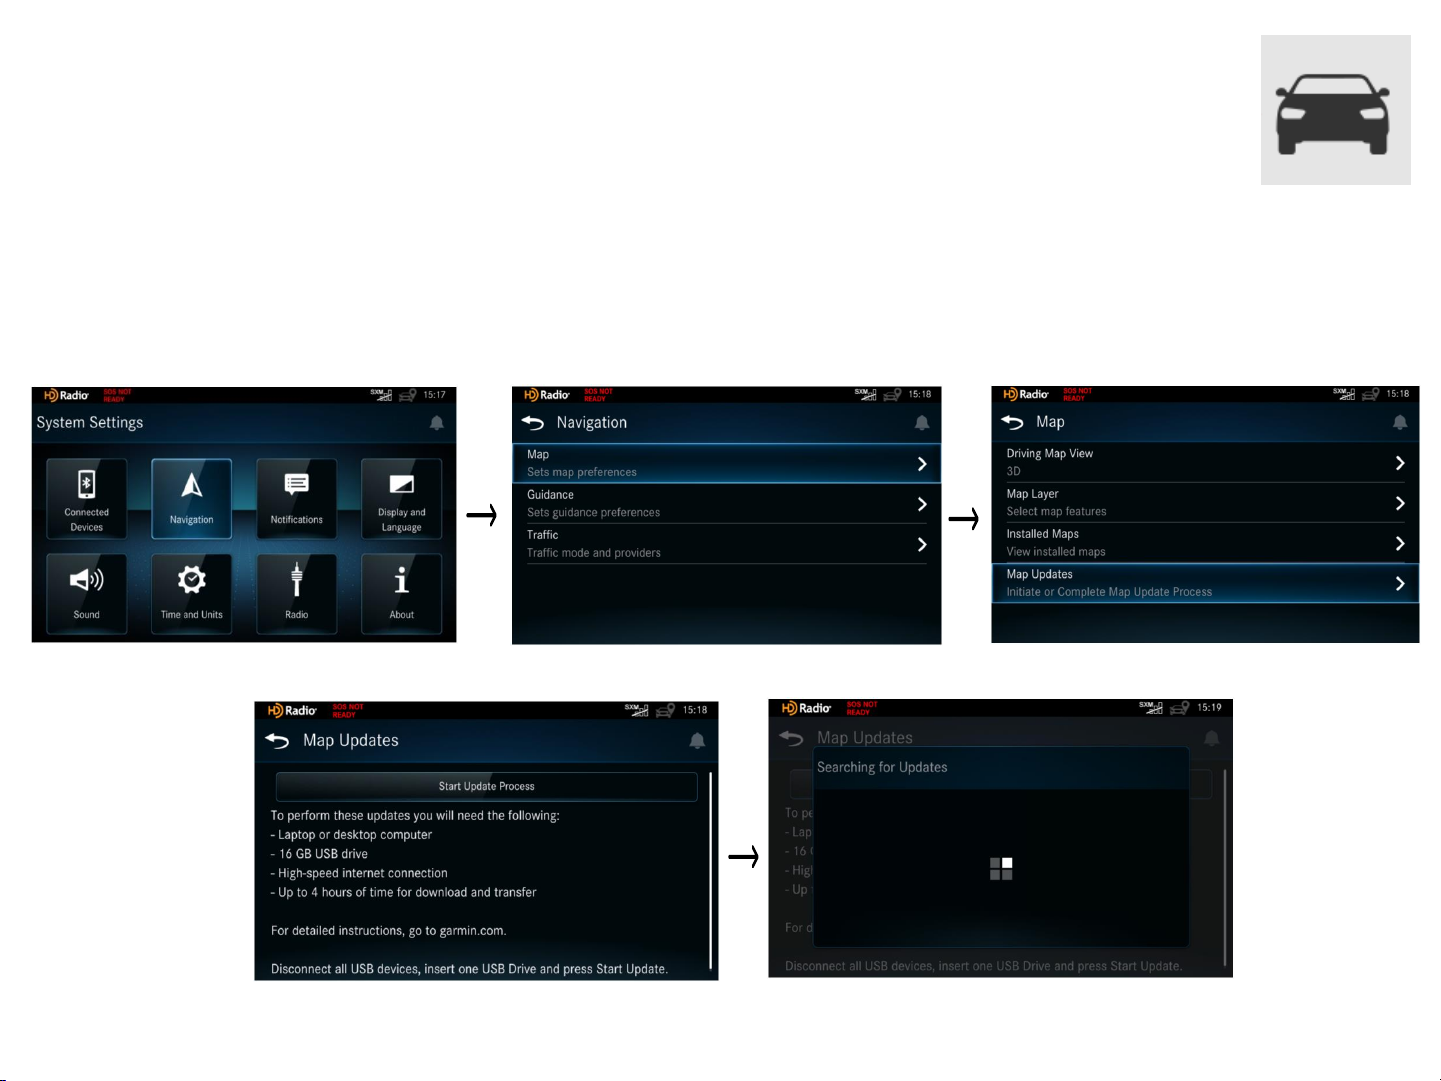
Step 2.2
Create a Map Update USB
– Go to System → Navigation → Map → Map Updates
– Touch “Start Update Process” on your navigation system.
7
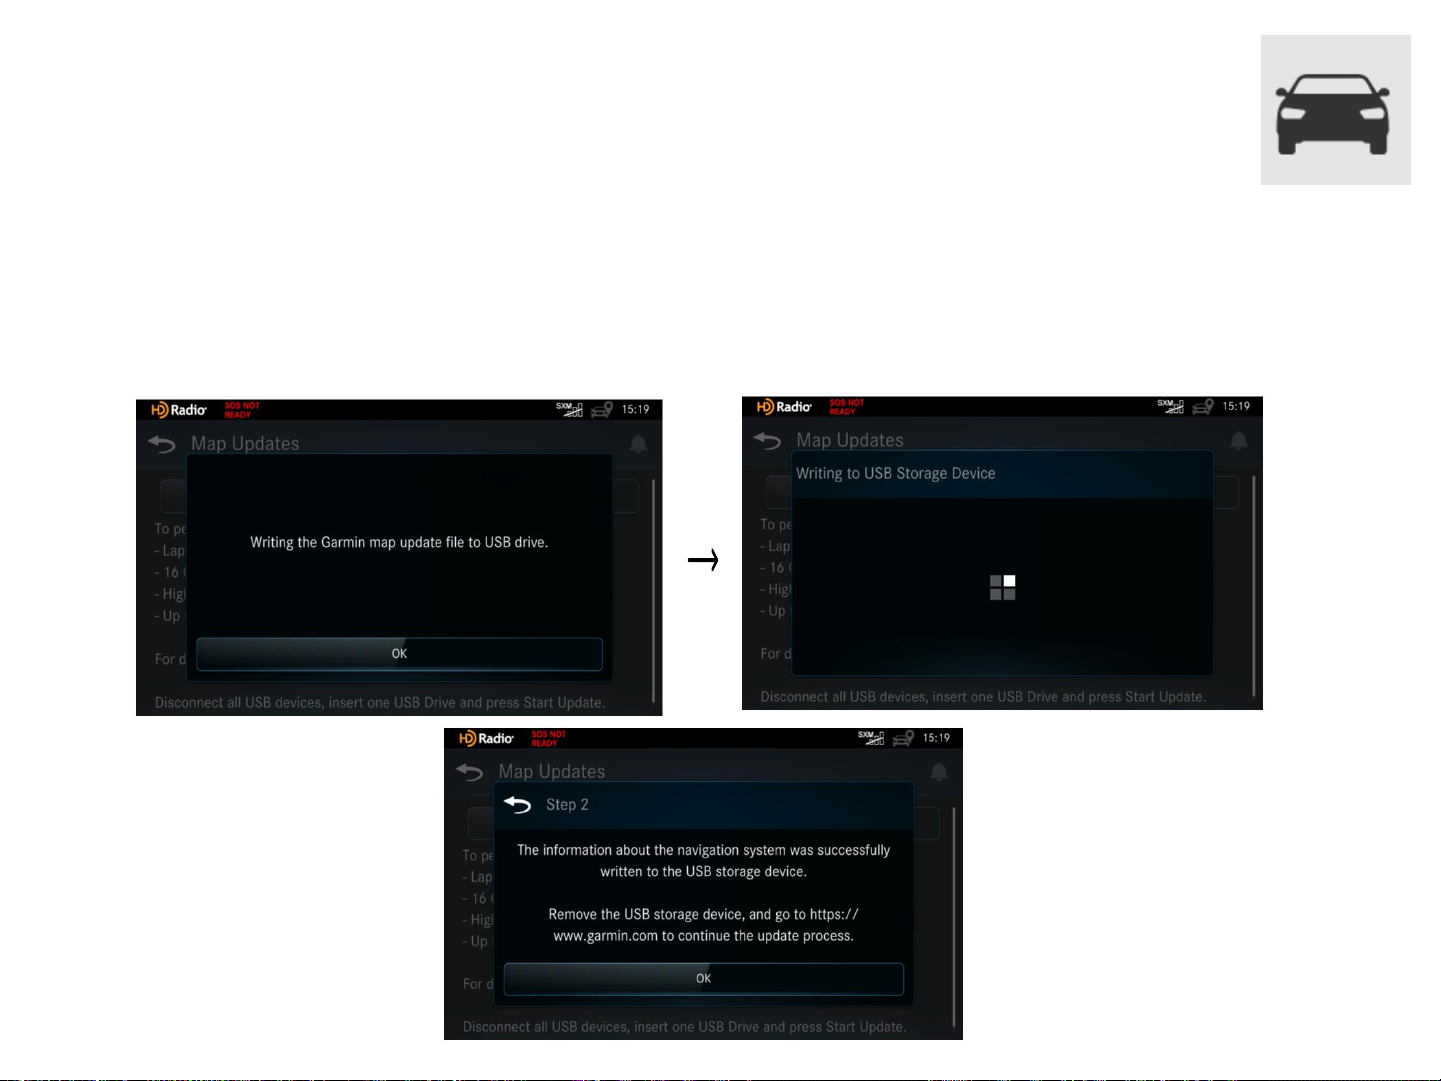
Step 2.3
Create a Map Update USB
– Touch “OK”. The Map Update will begin writing to the USB drive.
– Do not remove the USB drive from the vehicle until you see the
“Remove the USB storage device” screen.
– Remove the USB drive from the vehicle and bring it to the computer.
8

Step 3
Download Garmin Express to your computer
– If you already have Garmin Express installed to your computer,
make sure to update Garmin Express to 7.0.0 or above versions.
– Check versions by clicking → →
– Continue to Step 4 if the version is the latest.
9

Step 3.1
Download Garmin Express to your computer
System requirement of Garmin Express
– Windows
•
Windows 7 SP1 or newer, Microsoft .NET 4.7.2 (included)
•
1024 x 768 display, USB port and 1 GB RAM
•
High speed Internet access (Not for use with dial-up, mobile or satellite connections)
•
May require up to 20 GB free disk space
– Mac
•
OS X 10.11 or newer
•
1440 x 900 display, USB port and 1 GB RAM
•
High speed Internet access (Not for use with dial-up, mobile or satellite connections)
•
May require up to 20 GB free disk space
10

Step 3.2
Download Garmin Express to your computer
–
Click the link on the web portal to start download.
11

Step 3.3
Download Garmin Express to your computer
– Installation will start automatically.
12

Step 4
Activate Garmin Express on your computer
– Click on the Installation Complete window.
– Insert the USB drive into the computer, then click “Add a Device”.
13

Step 4.1
Garmin Express recognizes the USB drive
– The USB drive will be recognized automatically.
–
Click
when the “Device Found” message is shown.
14

Step 4.2
Go through the setup process on Garmin Express
– Product Registration is NOT required to complete map update.
– Nickname can use the default or input 1 to 20 characters in the case of
English.
15

Step 5
Check Map Update Status
16

Step 6
Map Reinstall
–
Click Map Options, then click Reinstall Map.
17

Step 6.1
Map Installation
–
Click Continue
18

Step 6.2
Map installation will start automatically
–
Estimated Time Remaining depends on your internet speed.
19

Step 6.3
Map installation complete
– “Installation complete!” will appear at the top once finished.
– Remove the USB drive from the computer and bring it to the vehicle.
20

Step 7
Prepare your vehicle
– Switch your vehicle to “ENGINE ON” until the navigation system
enters the Warning page.
– After a few seconds the screen will bring you back to the last screen you
were on before the vehicle powered down last.
*Note: Keep the Engine on throughout Step 7 to Step 8.
21

Step 7.1
Install the Map Update
– Insert the formatted USB drive to the USB port on your navigation system.
*Note: Either USB port will work for this process.
– Press the “SYS” key on the navigation device.
22

Step 7.2
Map installation on the Navigation System
– Go to System → Navigation → Map → Map Updates
– After searching for updates the screen will then display a brief message
indicating that the update will take time to complete.
– Press “Install” to begin the map update installation.
* Do not power off the unit, turn off the engine, or remove the USB drive
during the installation process.
23

Step 7.3
Map installation on the Navigation System
– The system will now perform a short reboot, then automatically power
back on.
– The map update screen will appear soon after.
24

Step 8
Update complete
– An “Update successful” message will be shown
when completed.
*Note: If you do not see the screen below, refer to Troubleshooting.
– Remove the USB storage device, then select “Restart”.
*Note: The system reboot will be long (restarting 2-3 times). The
display will go black at times. Please do not interact with the system
during this sequence.
25

Step 8.1
Update complete
– When the system is back on, press the “SYS” key on the navigation device.
26

–
Go to System → Navigation → Map → Installed Maps
Step 9
Check map version on the Navigation system
27

Step 9.1
Check map version on the Navigation system
–
Check if the Map Version is correct.
28

Troubleshooting
Update Failed During Installation
–
If the following message appears, please press retry to retry the map
installation.
Note: This will reboot the unit before attempting the retry.
–
If retrying isn’t successful, then please do a map reinstall using Garmin
Express (
Step 6).
29

Troubleshooting (cont.)
Map Update Compatibility Issue
–
If you receive the following message, please remove everything from the
USB drive and restart the process from Step 1 (
Prepare a USB drive).
30
 Loading...