

DVD RECORDER
DVD
User Manual
Vision Innovation
Technology for all


目 錄
頁
1 產品概述....................................................................................................................................1
安全警告..................................................................................................................................... 1
安全注意事項.............................................................................................................................. 2
機器總覽..................................................................................................................................... 2
接線............................................................................................................................................ 3
遙控器功能 ................................................................................................................................. 4
2 系統設定.................................................................................................................................... 5
2.1 DVR 功能設定的一般步驟................................................................................................ 5
2.2 各項設置說明................................................................................................................... 5
3 DISC 內容編輯檔......................................................................................................................10
MPEG4 格式時內容的編輯.........................................................................................................10
+VR 格式時內容的編輯..............................................................................................................10
4 錄製功能....................................................................................................................................12
4.1 方案一:遙控器上的[TIMER 預錄]按鍵 .............................................................................12
4.2 方案二:單鍵錄影............................................................................................................12
5 播放功能....................................................................................................................................12
5.1 開機 ...................................................................................................................................12
5.2 DVD/ USB 模式切換.............................................................................................................12
5.3 放置碟片..............................................................................................................................12
5.4 播放................................................................................................................................... 13
6 多媒體檔的播放 ....................................................................................................................... 14


1 產品概述
止
之列
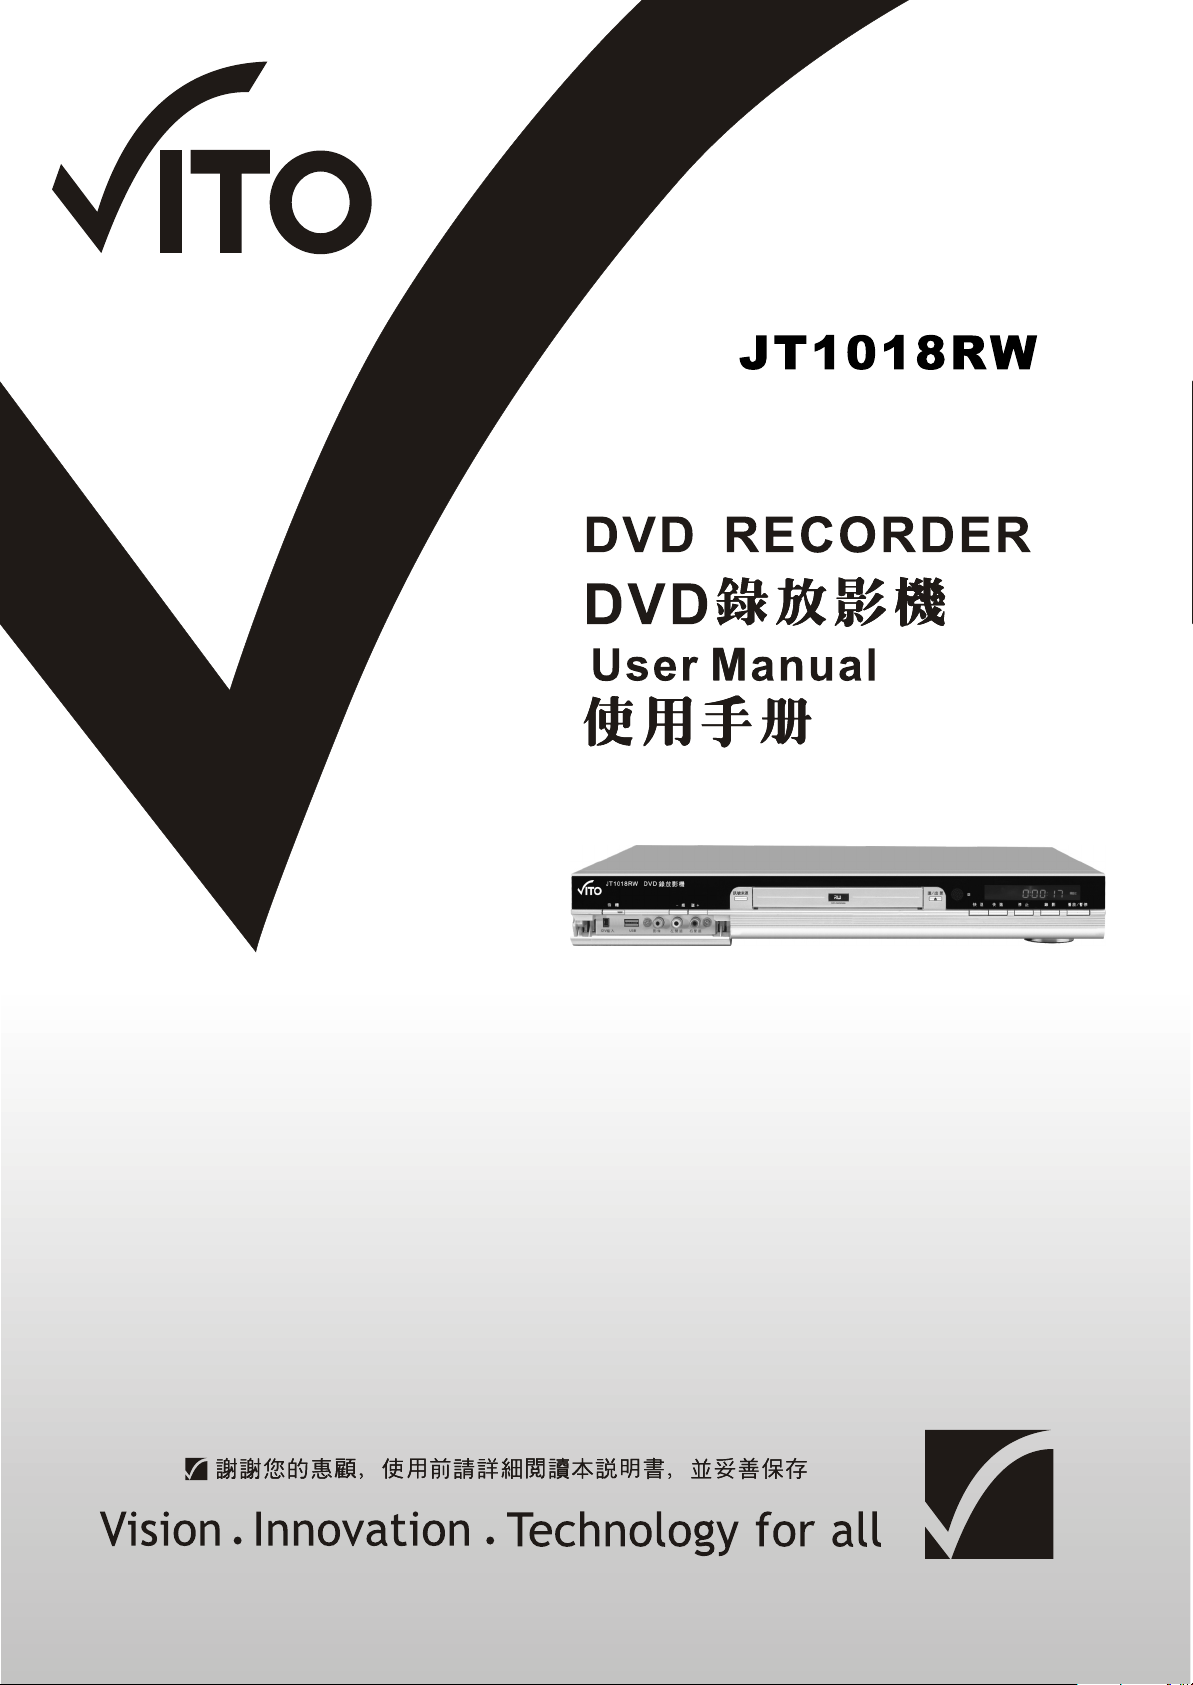
警告
必須在斷電的狀態下連接其他相關設備
歡迎
感謝你購買我們的產品,在你使用之前我們建議你先仔細閱
讀我們的使用說明書。.
通用特性
DHR 錄影機是包含DVD 播放機的所有功能另增加了普
通DVD 所沒有的錄製功能,它不但具有普通DVD 的高畫
質,高音質,還可將您喜歡的電視節目,美好的生活片
段等等通過媒體輸入錄製到DVD中,給您留下美好的回
憶。
最新DHR錄製功能
LPCM/MPEG 數位音頻解碼,杜比AC-3/DTS 數位
音頻輸出
Hi-Fi 音質,96KHz/24bit 音頻數位處理
光纖/同軸資料流程音頻輸出
軟體智慧升級
高清晰視頻分量輸出,支援未來等級顯像設備
可播放多種格式碟片,及USB 存儲設備
超強相容DVD-Video、HDCD、SVCD、VCD、CD、
MP3、MP4、KODAK PICTURE-CD 的媒體格式
區域碼
警告
:
為防止起火或觸電事故, 在使用過程中,請不
要將本機暴露於雨中或潮濕的環境裏,或置於
封閉的空間、紙箱或者其他類似物體內。機內
有危險的高壓配件,故不要打開機殼。如機器
需要維修,請就近與當地本公司授權的維修點
聯繫。
未經本公司授權,請勿擅自改裝本機。
本產品所使用的版權保護技術受美
國專利以及其他屬於 MACROVISION
CORPORATION 的知識產權保護。使用
該版權保護技術必須取得
MACROVISION CORPORATION 的同意,
如果不經 MACROVISION CORPORATION
的同意,則只能用於家庭或有限範圍
的觀賞。反向還原或解密等亦屬於禁
本數位影碟播放機屬於一類鐳射產品。機內有
。
為了保護版權,每一台 DVD 機器和 DVD 碟片所擁有的區域碼都
可能不同,唯有兩者匹配的時候才可以正常播放,當然,如果
是全區的碟片則可以在所有 DVD 播放器上正常播放。全區的碟
片封面上一般有這個
標誌以確認你需要播放的 DVD 碟片區域碼是否與之吻合。
標誌.請查看機器後面板區域碼印刷
鐳射裝置。為防止直接受到鐳射輻射,不要試
圖打開機殼和直視鐳射光束。
使用本機前,請仔細閱讀使用說明書,按說明
書的介紹和操作要求,實施有關本機的連接、
安全警告
提示用戶:“當心觸電”。
置放和操作。
將說明書妥善保存,以備日後參考。
機內有危險電壓。
由杜比實驗室授權製造。
提示用戶:“注意安全”。
此標識若在本機中出現,則表示為使用
安全,該元件只能採用原本規格的更
換。
1
“杜比”、“Dolby”和雙 D 標誌
是杜比實驗室的商標。
安全注意事項
1
.
閱讀使用說明書
在打開本機的包裝後,請仔細閱讀使用說明書,
並遵從所有操作及說明事項。
2. 電源
本機所使用的電源必
須與銘牌上標明的類
型相符。如果您對於
將要連接的電源情況
不大瞭解, 請就近與
經銷商或購買地點賣
場等聯繫。若您長時
間不使用本機,防止
雷擊造成損壞,請記
住將電源線從插座拔
下,不要用力拉扯電
源線。若暫不使用本
機,記住關掉電源。
如長時間內不會使用
本機,請拔掉電源插
頭。
3. 電源線
避免電源線受損,引
起觸電、火災,請勿
將重物壓在電源線上。對於插頭、插座以及從機
器中引出的電源線等部位要特別注意保護。
4. 超載負荷
插座上的電源不可超載或延長電源線, 集成式插
座的使用要倍加小心以避免引起觸電、火災。
5. 水分及潮氣
本機不能置放在有水分或易滴水、濺水的地方,
勿在機體上 放置盛有液體的物品。機器突然從一
個較冷的地方移至較暖的地方,可能會導致機內
凝結水氣,使本機不能正常工作,若此,只需將
本機接通電源 1-2 小時即可(暫不放入碟片)。
6. 通風
將本產品應放置在平坦的表面上及通風乾燥處。
請勿靠近熱源如暖氣機、加熱爐等,遠離陽光直
射、機械振動和較多灰塵的環境,避免置於其他
熱輻射物體的周圍。
7. 清潔
若要清潔機殼請在清潔之前先斷開電源,不要使
用清潔劑或噴霧器,只需用潔淨濕布擦拭即可。
8. 碟片
切勿播放破裂、刮花或變形的碟片,以免損壞影
碟機。
9. a)不可將裸露火源置於產品上方,如蠟燭。 b)本產
品適用於亞熱帶氣候。
本說明書僅用來指導用戶正確使用機器的作用。
10.
如配置與實物不一致,請以實物為准。
11.
非專業人員不可打開本產品外殼。維修保養必須
由合格的專業人員進行。
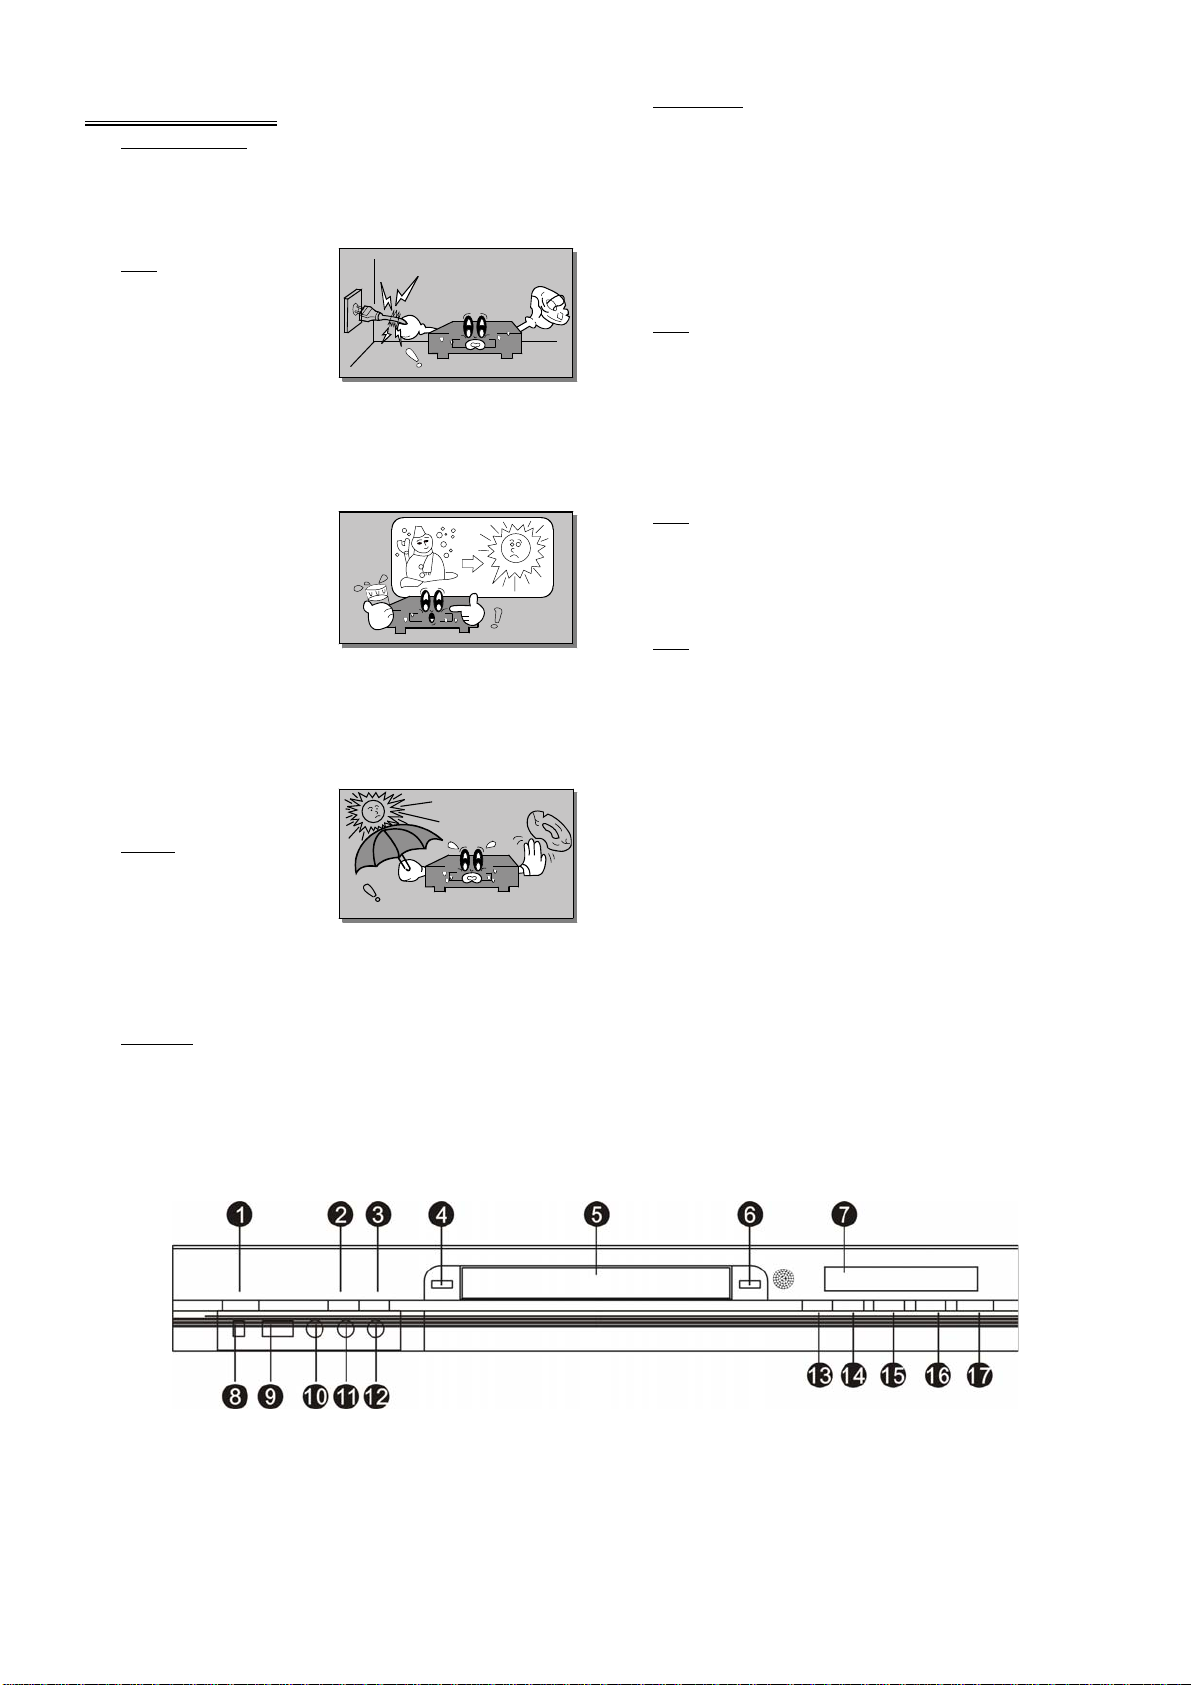
機器總覽
1. 待機
2. 頻道-
3. 頻道+
4.
訊號來源
5. 光碟托盤
2
6. 進 /出匣
7. LED 顯示
8. DV 輸入埠
9. USB 輸入埠
10.影像輸入埠
11.左聲道輸入埠
12.右聲道輸入埠
13.快進
14.快退
15.停止
16.錄製
17.播放/暫停
1. 複合影像輸出
2/3/4. YUV 色差影像輸出
5. 中置聲道輸出
6. 重低音輸出
7. 環繞左聲道輸出
8. 環繞右聲道輸出
接線
9. 前置左聲道輸出
10.前置右聲道輸出
11.光纖數位輸出
12.影像輸入埠
13.同軸數位輸出
14.左聲道輸入埠
15.右聲道輸入埠
16.TV 信號源輸入埠
17.TV 信號源輸出埠
18.電源開關
REC(錄影)
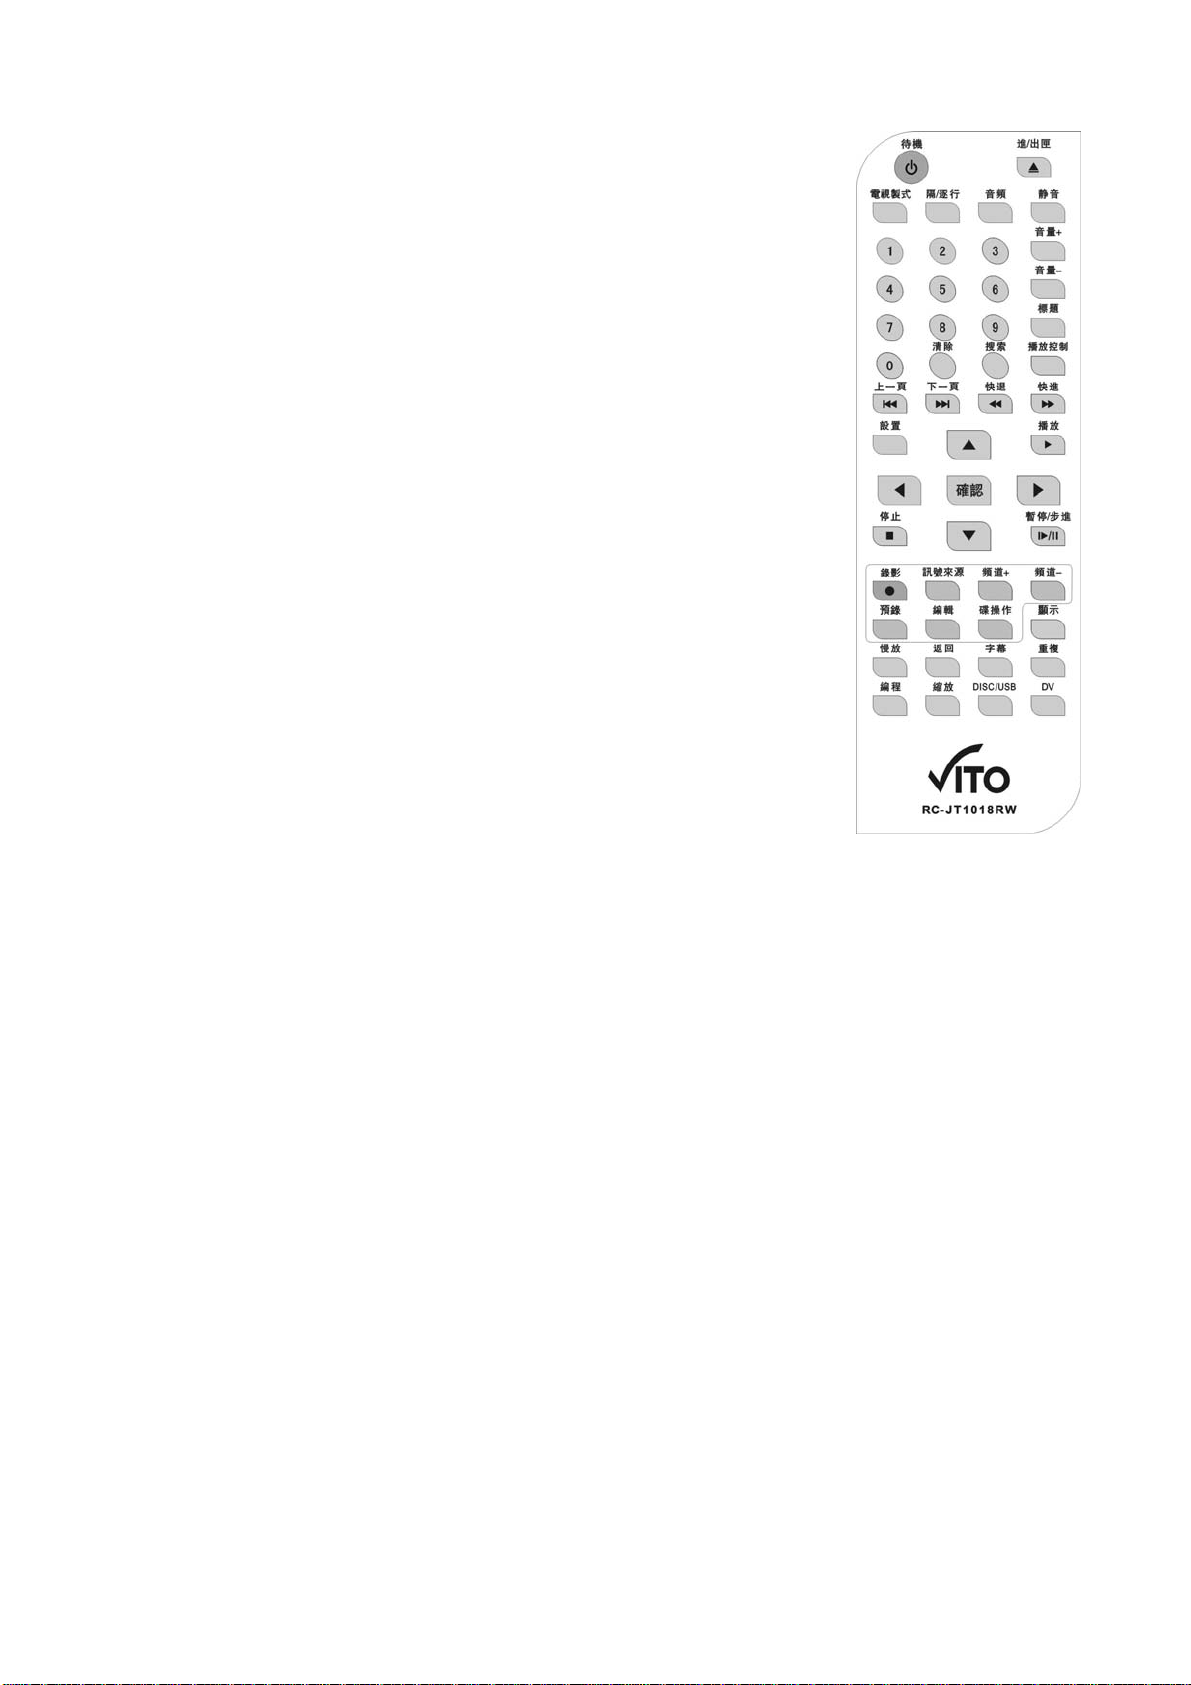
遙控器功能
STANDBY(待機)
可以遙控機器處於工作狀態或是待機狀態
OPEN/CLOSE(進出匣)
退出或是關閉光碟托盤
N/P(電視制式)
切換不同的制式 NTSC/PAL
P-SCAN(隔/逐行)
依次切換如下模式:逐行、隔行模式
STOP(停止)
♦ 第一次按鍵執行准停止功能,按 PLAY 鍵恢復播放;
♦ 第二次按鍵執行停止功能,按 PLAY 鍵重新播放
PASUE/STEP(暫停/步進)
♦ 第一次按鍵執行暫停功能;
♦ 第二次及以後的按鍵執行步進功能
SETUP(設置)
系統各功能的功能表頁面
TITLE(標題)
按下這個按鈕在播放 DVD 時可以快速瀏覽 DVD 的標題選單
MENU/PBC(播放控制)
♦ 播放 CDDA/MP3/JPEG 時,顯示“您按錯了”。
♦ 播放 VCD 時,執行 PBC 狀態的轉換。
♦ 播放 DVD 時,返回播放選單。
AUDIO
可以選擇不同的配音或不同的聲音格式,這個功能根據於你
所播放的碟片有關
SUBTITLE(字幕)
顯示
當前碟片播放“字幕”資訊。按此鍵根據碟片內容切換播
放字幕。
PLAY(播放)
執行播放功能
NUMBER BUTTONS
按目前選單樣式顯示所輸入數位
CLEAR(清楚)
字串輸入時的清除鍵
DIRECTION buttons(方向鍵)
執行上下/左右方向功能(包括 HIGHLIGHT 的移動和放大畫
面的移動)
PREV(上一曲)
執行向上一曲/章節功能
NEXT(下一曲)
.
執行錄影功能
TIMER(預錄)
執行預約
SOURCE(輸入模式)
選擇訊號來源
EDIT(編輯)
執行編輯操作(僅對碟片
為 DVD±R/RW 有用)
DISC(碟操作)
執行碟片編輯操作(僅對
碟片為 DVD±R/RW 有用)
CH+(頻道+)
選擇上一個頻道
CH-(頻道-)
選擇下一個頻道
SLOW(慢放)
慢速播放
MUTE(靜音)
錄影功能
靜音切換功能
RETURN(返回)
返回鍵
DISPLAY(顯示)
在電視上顯示機器的工作狀態
FAST FORWARD(快進)
順次執行快進×2 -- 快進×4 -- 快進×8 -- 快進×20 -- 播放
FAST BACKWARD(快退)
順次執行快退×2 -- 快退×4 -- 快退×8 -- 快退×20 -- 播放
VOLUME +(音量+)
執行連續升高音量功能
VOLUME –(音量-)
執行連續降低音量功能
DISC/USB
執行 DVD/USB 播放模式的轉換功能
REPEAT(重複)
執行單曲重複(CD、VCD)/章節重複(DVD);執行全碟重複
(CD、VCD、DVD)/標題重複(DVD);執行解除重複功能
第一次按鍵執行起始點設置功能,第二次按鍵執行中斷點設
置功能,第三次按鍵執行解除片段功能
PROGRAM (編程)
螢幕顯示編程功能表並執行編程播放設置功能,用上下左右
方向鍵選擇所編曲目放置位置,按播放鍵進入編程播放,按
清除鍵可清除所輸入數位;亦可移動 HIGHLIGHT 至相應的
“播放”和“清除”位置按下選擇鍵確認。
.
執行向下一曲/章節功能
2 系統設定
2.1 DVR
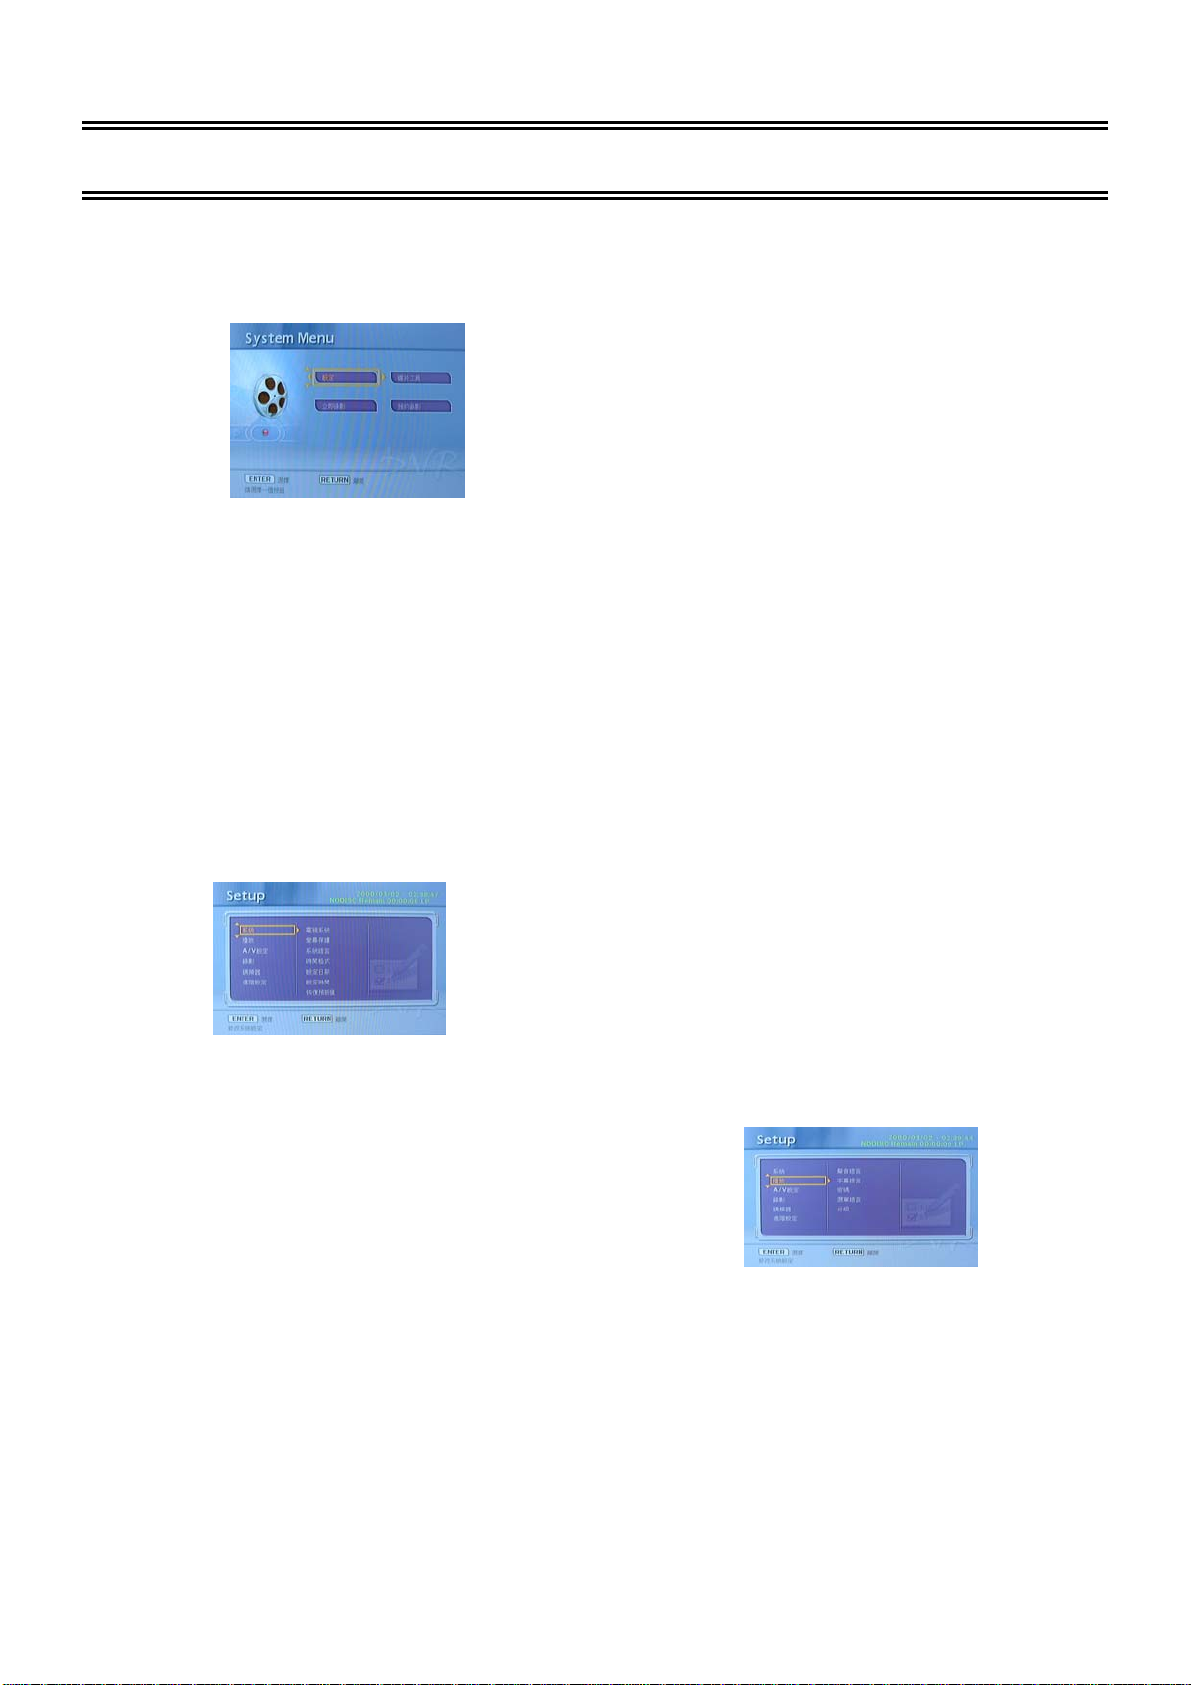
(1) 按 SETUP 鍵,電視螢幕顯示設定主功表:
2.2
各項設置說明
功能設定的一般步驟
2.2.1 Setup(設定)
Setup 選單包含初階及進階的設定。進階的 SETUP 選
單主要是一些 DVD 播放機內含的相關功能設定。
按 ENTER 鍵,進入如下電視螢幕顯示設定功能表:
按[↑] [↓]方向鍵移動遊標(黃色框)至所要設置的項
目組,下面將各項設置說明一下:
1.System
注:進入設置功能表後,系統自動轉為暫停狀態。
(2) 按方向鍵[→] [←] [↑] [↓]移動遊標(黃色框)至
所要設置的項目,按確認鍵即可進入相應項的設置。
示。Y_ M_D_ 24:年份_月份_日期_時間,其中時間
以 24 小時形式顯示。
Date Set(設定日期)
Time Set(設定時間)
如需使用預約錄影功能錄製電視節目,系統時間的設
定必須正確。斷電會導致時間與日期的設定不正確,
因此必須重設正確的時間及日期。 按方向鍵即可進行
日期及時間的設置。
• TV System(電視系統) 根據所連接的電視機
的彩色制式進行選擇。 NTSC 制式電視機可選擇
(臺灣使用 NTSC)。
“NTSC”項。 PAL 制式電視機可選擇 “PAL”項。
Screen Saver(螢幕保護)
ON 表示打開螢幕保護。OFF 表示關閉螢幕保護。
Sys Language(系統語言)
[Sys Language]的選擇,按[↑] [↓]選擇您所希望的
“系統語言”項,然後按[ENTER] 鍵確認;該項中有
七種模式可供選擇:英語、漢語、德語、西班牙語、
法語、葡萄牙。
Time Format(時間類型)
按[↑] [↓]選擇你喜歡的時間顯示方式。Y_M_D_ 12:
年份_月份_日期_時間,其中時間以 AM/PM 形式顯
Reset Setting(恢復預設值)
選擇該項後,則各功能設定欄恢復至初始狀態。
2.Playing(播放)
播放功能相關設置,包含 Audio Lang(聲音語言)、
Subtitle Lang(字幕語言)、Password( 密碼) 、Menu
Lang(選單語言)、及 Rating(分級) 。
AUDIO LANG(聲音語言)設置
按[↑] [↓]選擇您所希望的“音頻語言”項,然後按
“ENTER”鍵確認;該項中本機支援七種模式,可供
選擇項為:英語、漢語、德語、西班牙語、法語、葡
萄牙語和拉丁語。
Subtitle LANG(字幕語言)設置
按[↑] [↓]選擇您所希望的“字幕語言”項,然後按
“ENTER”鍵確認;該項中本機支援七種模式,可供
9

選擇項為:英語、漢語、德語、西班牙語、法語、葡
萄牙語和拉丁語。
PASSWORD(密碼)設置
通過該項可為系統設置密碼。其初始設定為“密碼未
鎖定”(即,已被設置了一個初始密碼)狀態,此時
不能對“級別”項進行選擇;亦不能修改密碼。若需
要對“級別”項進行設置,則需要按數字鍵輸入本機
的初始密碼,再按下 ENTER 鍵確認;需要修改密碼亦
需先輸入舊密碼,而後輸入新密碼。
初始密碼為:0000
Menu LANG(選單語言)設置
按[↑] [↓]選擇您所希望的“功能表語言”項,然後按
“ENTER”鍵確認;該項中本機支援七種模式,可供
選擇項為:英語、漢語、德語、西班牙語、法語、葡
萄牙語和拉丁語。
Rating(分級)設置
播放具有鎖定功能的碟片時,可根據碟片被劃分的等
級和您的實際需要,選擇合適的年齡控制級別。
年齡控制級別分為:1. Kid Safe 、2.G 、 3.PG、
4.PG-13、5.PG-R、6.R、7.NC-17、8.Adult/OFF。
初始設定為:無限制。
(注意:只有在密碼鎖打開狀態下方可進行級別選擇;
並且只有在密碼鎖鎖上的狀態下,級別的限制方起作
用。)
3.A/V 設定(音頻/視頻設置)
A/V 設定 包含 Video Output(視頻輸出)、TV Type
(電視型態)、Brightness(亮度)及 SPDIF Output(數位
輸出)。
TV Type (電視型態)
16:9(寬螢幕):本機與寬螢幕電視機連接時選擇此項。
LB 4:3(信箱):對於一般尺寸電視機,請選用此項。
播放寬銀幕圖像時,電視螢幕的頂部和底部出現黑色
邊框。
PS 4:3(全景掃描):適用於一般尺寸電視機。播放寬
銀幕圖像時,圖像左右邊緣被切除,把圖像放映到整
個螢幕。
初始設定為:LB 4:3(信箱)
注意:
播放效果與碟片錄製的畫面比例有關,某些碟片可能不
能按照您選擇的畫面尺寸播放。
對於只錄影有 4:3 模式的碟片,無論螢幕畫面比例設為
哪種,播出來的比例只能為 4:3。 螢幕畫面比例的選擇,
應與實際使用的電視機螢幕比例相符。
Brightness (亮度)
進行輸出亮度的設置。
SPDIF Output(數位輸出)
按方向鍵選擇您所希望的“數位輸出”項,然後按
[ENTER]鍵確認,該項中有三種模式可供選擇:PCM、
RAM(源碼)、OFF(關)。
PCM:當本機與兩聲道數碼式身歷聲放大器相連時,
選擇該項;當播放以杜比數碼、MPEG 錄製系統錄製
的碟片時,同軸或光纖的輸出埠將以 PCM 調製成兩聲
道的形式輸出。
RAM(源碼):當本機與功率放大器通過同軸或光纖介
面連接時,請選擇此項;當播放以杜比數碼、DTS、
MPEG 錄製系統錄製的碟片時,本機的同軸或光纖輸
出埠輸出為與之相對應的數碼(源碼格式)信號;此
時,所連接的功率放大器必須具有杜比數碼(Dolby
Digital)、DTS、MPEG 的解碼功能。
OFF(關):同軸或光纖輸出埠均無信號輸出。
4.Recording(錄影)
Video Output(視頻輸出)
視頻分量:影碟機使用 YCbCr 視頻線連接電視機時,
可選擇此項。P-SCAN:影碟機使用 YPbPr 視頻線連
接電視機,切換電視機到逐行掃描功能可選擇此項。
注意: 使用本機複合視頻輸出時,2 項可任意選
擇一項。初始設定為:隔行(YCbCr)。
7
按【->】鍵出現如下畫面:
Contrast(對比度)調節:可進行視頻輸出的對比度設
置。
Hue(色調)調節:可進行視頻輸出的色調設置。
SATURATION(飽和度)調節:可進行視頻輸出的飽
和度設置。
按【->】鍵移動到相應的選項上,按【enter】選擇錄
品質
製
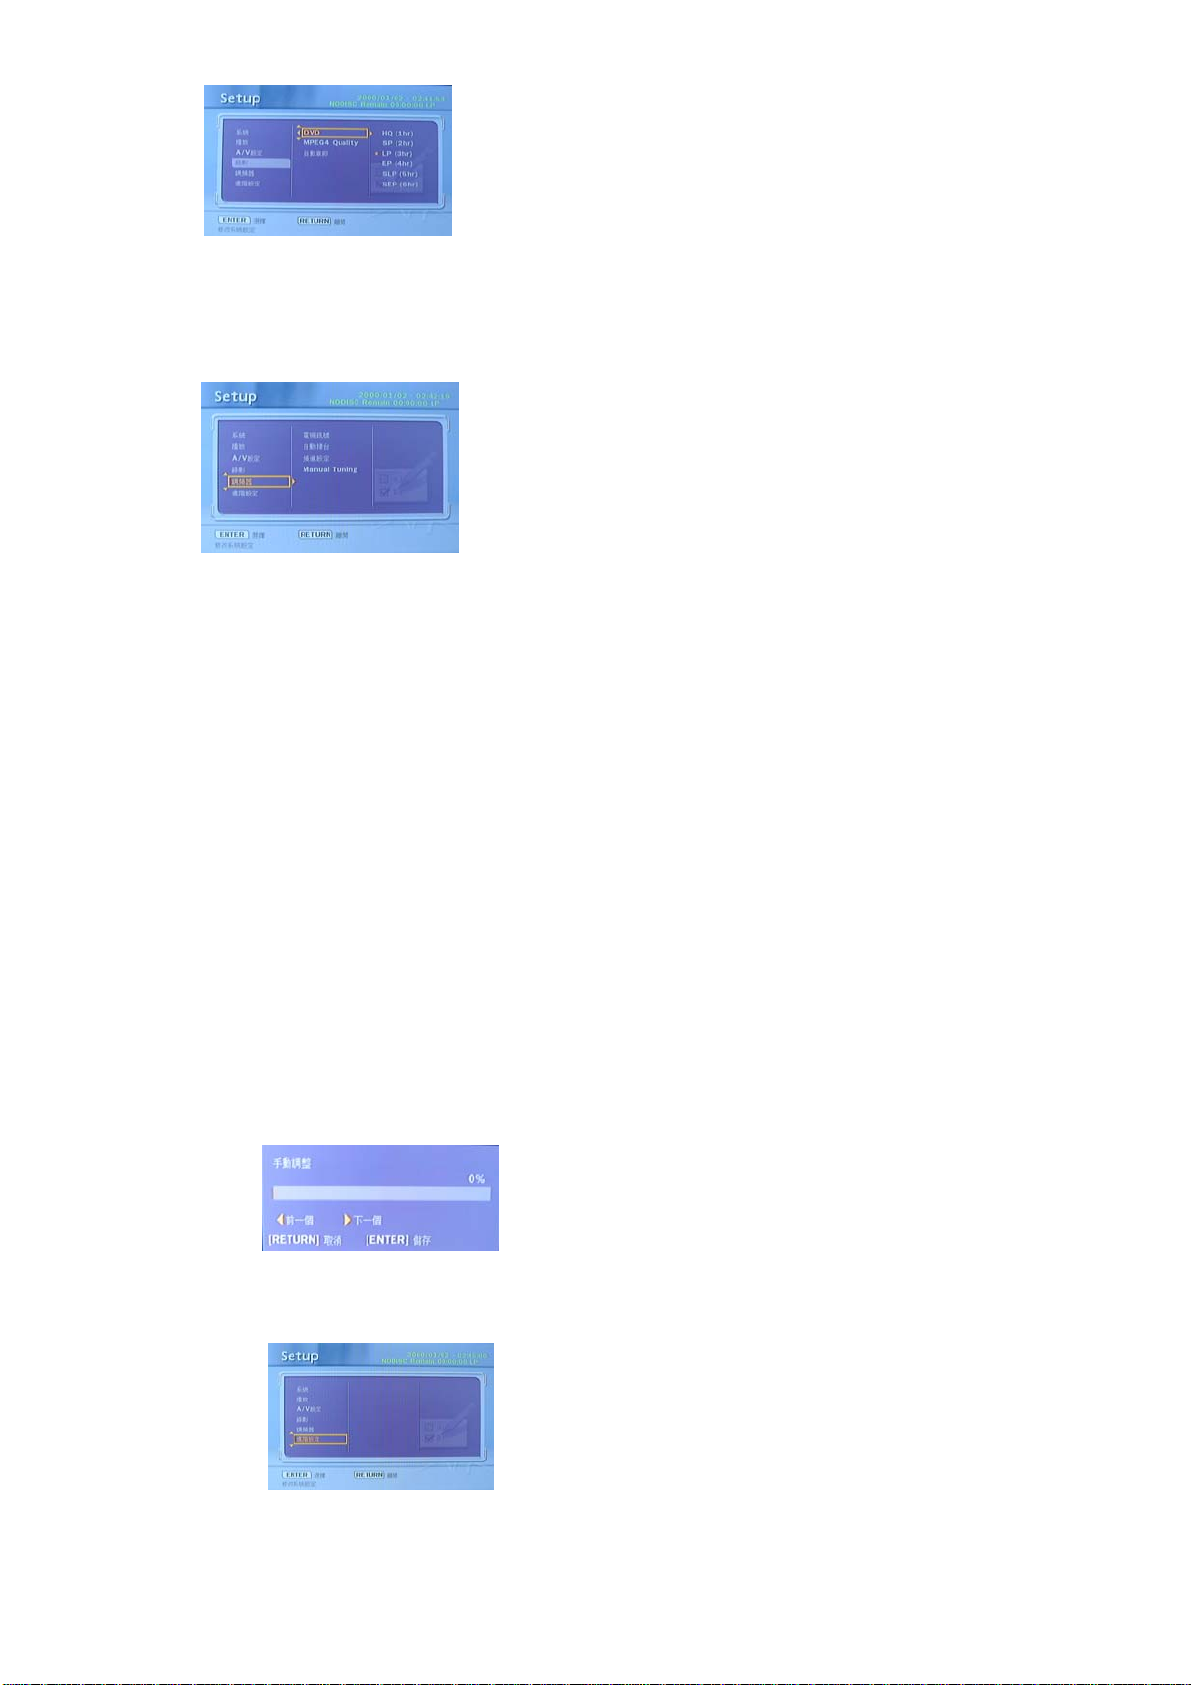
5.TV Tuner(調頻器)
TV Signal(電視訊號)
選擇電視信號的接入方式,其中有「Antenna 無線」
或「Cable 有線電視」兩種方式。
Auto Tuning(自動搜台)
l 啟動「Auto Tuning 自動搜台」功能時,會搜尋電視
頻道並以特定順序儲存於本機中。電視頻道業者變更
頻道分佈,或是重新安裝本機時,需重新啟動本功能
更新頻道位置設定。
Channel Set(頻道設定)
按[↑] [↓]選取「Channel Set 頻道設定」,該選項包含
一些電視頻道微調等一些調節。
按「 Enter 確認」進入頻道設定的截面,其中包括頻道
的選擇,Active 設定,微調和伴音制式的選擇頻道跳
躍,頻道編輯和手動搜台功能。
Manual Tuning
按【enter】手動搜台,出現如下畫面:
Speaker(喇叭)
Downmix
LT/R T:當您播放的碟片具有 PRO LOGIC 杜比立
體聲效果時,選擇該頂,則碟片信號經過主機解碼
系統解碼,能夠再現逼真的影院效果。
StEREO(立體聲):5.1 聲道輸出時,音頻輸出左、
右聲道兩路信號;兩聲道輸出時,音頻輸出普通兩
聲道立體聲信號。
VSS(虛擬環繞聲):播 放 5.1 聲道錄製的碟片時,
能從主聲道揚聲器中輸出虛擬環繞聲效果。
OFF(關):當該項被選中時,5.1 聲道模擬輸出方
有效。
Subwoofer
該項設置包括兩個選項:開/關。在“開”狀態下,
機器自動檢測超重低音有無輸入,若有聲音輸入則
輸出之聲音;在“關”狀態下超重低音輸入則無聲
音輸出;
Bass Mode(
Bass Mode(低音模式) 該項設置包括三個選項:大
揚聲器(All LG)、小揚聲器(All SM)、混合揚聲器
(mixed)。
Center Delay (
選擇該項可調節中置延遲的設定。
Rear Delay (
選擇該項可調節環繞延時的設定。
Digital Audio(數位音效)
(混合模式)
(重低音)
低音模式
中置延遲
環繞延遲
)
)
)
OP Mode
LINE OUT(線路輸出):對輸入信號進行線性壓
6.Adv A/V 進階選項
Video 影像
8
縮。音量較小,晚間使用選取該項較為適合。
RF REMOD(RF 調整):音量較大,適合日間使
用。
Dynamic RANGE
當選擇壓縮模式為“線路輸出”時,選擇該項,以
調整線性壓縮比,獲得不同信號的壓縮效果。選擇
FULL 項時,音頻信號的峰-峰最小,選擇 OFF
項時則為最大。
注意:此項在揚聲器設定中的混合模式設定為
“關”時方有效。
(放大模式)
(動態範圍)

Dual Mono
此項為設定音頻輸出 L、R 路信號的輸出方式;其
中包括四個模式:立體聲、左聲道、右聲道、混合
聲道。
(左右音效)
2.2.2 Disc Utility(碟片工具)
當前系統支援對DISC的格式化。
DVD 狀態
在DVD MODE 下選擇Disc utility(碟片工具) 會出現如
下對話方塊。
(6) 假如設定狀態正確的話,[Status 狀態] 欄位會顯示
「Ready」;假如設定狀態不正確的話,[Status 狀態] 欄
位會顯示「Bad」;假如設定狀態跟之前設定的狀態一
樣的話,[Status 狀態] 欄位會顯示「Overlapped」;假
如設定狀態為空的話,[Status 狀態] 欄位會顯示
「Empty」,假如可錄製的 DISC 沒有預約錄影所需的
足夠空間,[Status 狀態] 欄位會顯示「NoRoom」。
如需設定更多預約錄影的節目時,請按[↑] [↓]進入
[Empty] 清單中,然後同 3~7 項的操作依次設定各欄
位即可。設定完成後,按[RETURN 返回] 返回上一層
選單或者按[TIMER 預約錄影] 離開預約錄影的清單。
Format(格式化),按下【確認】鍵, 選擇DISC 需
選擇
要格式化成的格式,DVD+VR 或MPEG4 格式,如
選擇DVD+VR 格式,
系統進行格式化操作, 當進度達到100%後,系統格
式化成功。
選擇YES,按下【確認】鍵後,
2.2.3 Timer REC(預約錄影)
請先確認可錄製的 DISC 有預約錄影所需的足夠空間。
預約錄影
(1) 按[Timer 預約錄影] 或者在如上介面按確認鍵,開
啟「Timer Recording」選單。
(2) 按[→] [←]選取[Source 來源],然後按「ENTER 確
認」會出現選單。按[↑] [↓]及[確認] 選取項目。
(3) 按[→] [←]選取[日期],然後按「ENTER 確認」會
出現選單。之後按[↑] [↓]選取「Once(一次)」、「Daily(每
日)」或「Weekly(每星期)」,接者按[↑] [↓]或方向鍵
設定日期。
(4) 按[→] [←]選取[Start 起始時間],然後按「ENTER
確認」會出現選單。接者按[↑] [↓]或方向鍵設定起始
時間。
(5) 按[→] [←]選取[End 結束時間],然後按「ENTER
確認」會出現選單。接者按[↑] [↓]或數字鍵設定結束
時間。
選擇 DVD 錄製格式,提示框如下所示:
注意: 本機將節目源錄製到 DISC 上,錄製前請
注意相關設定。
2.2.4 Instant Rec (立即錄影)
在系統功能表的Instant Rec 欄裏,進入Instant
Recording 欄,
Instant Record是一個簡易的使用者操作介面,能夠
帶領你完成本機相關的錄影功能。使用
螢幕選單能夠節省操作本機的時間,不需經歷繁雜的操
作即能完成錄影功能。
相應介面如下,可以設置來源、畫面品質;設置好以
上要求後,選擇開始,開始執行錄影。
1. 錄製 DV 攝錄放影機訊號
(1) 將DV攝錄放影機及本錄放影機接上DV線。
(2) 開啟DV攝錄放影機的電源,並啟動DV攝錄放影機
的「播放模式」。
(3) 按[Setup設置]鍵顯示系統各功能的功能表頁
面,按[→] [↓] 鍵選取「立即錄影」,然後按「Enter
確認」進入「立即錄影」選單。
(4) 在「Source 訊號源」選項下按
來源,選取「DV」為訊號來源。
Instant Record
[→] [←]變更訊號
9

(5) 在「Quality 品質」選項下按[→] [←]選取錄影
品質(1Hr~6Hr)。
(4) 在「Quality 品質」選項下按
品質(1Hr~6Hr)。
(5) 按「開始」選項開始錄製。
[→] [←]選取錄影
(6) 按「開始」選項開始錄製。
(7) 按[■ STOP 停止] 停止錄製。按下停止鍵後,
會顯示對話方塊,本機需要一些時間來停止錄影功能。
(8) 按[ PAUSE 暫停] 暫停錄製。再按一次[ PAUSE
暫停] 即可繼續錄製。
2. 錄製電視節目
(1) 按[Setup設置] 鍵顯示系統各功能的功能表頁
面,按[→] [↓] 鍵選取「立即錄影」,然後按「Enter
確認」進入「立即錄影」選單。
(2) 按「SOURCE 訊號來源」選項下按
號來源,選擇「TV 電視」 為訊號來源。
(3) 在「SOURCE 訊號源」下的數位輸入選項內按
←]或數字鍵選取欲錄製的電視頻道。
[→][
[→] [←]變更訊
(6) 假如碟片是無法進行錄影的碟片,會出現如下的
畫面提示是否要換片或刪除碟片內容。
(7) 假如電視天線無信號輸入,將出現如下對話方塊
提示。
(8) 按[■ STOP 暫停] 鍵停止錄影。按下停止鍵
後,會彈出一個” 錄製停止,請等待…”對話方塊,對話
方塊消後,可進行其他對本機需要一些時間來停止錄影
功能。
(9) 按[PAUSE 暫停] 鍵暫停錄影,再按一次[PAUSE
暫停]或[RECORD 錄影] 即可開始錄製。
10

3 DISC 內容編輯檔
目前該 RW 系統支援對檔的編輯功能。
MPEG4
其中包括
Delet al(
格式時內容的編輯
Rename(
全部刪除)l三項
重新命名)、
Delete(
刪除)、
1. Rename功能
選擇要重新命名的檔按[編輯]鍵,會出現如下對話方
塊:
根據 UI 提示,進入 Rename(重新命名)選項,命名後
按 OK 即可操作成功。
具體如下所示。
1.Rename(重新命名)功能
選擇要重新命名的檔按[編輯]鍵,會出現如下對話方
塊:
根據 UI 提示,進入 Rename(重新命名)選項,命名後
按 OK 即可操作成功。
2. Protect(保護)功能
2. Delete(刪除)功能
選擇要刪除的檔按[編輯]鍵,然後根據 UI 提示操作。
+VR
在
格式時內容的編輯
Title List
狀態下
選擇要受保護的檔,按[編輯]鍵,然後根據 UI 提示操
作。
3. Delete(刪除)功能
選擇要刪除的檔,按[編輯]鍵,然後根據 UI 提示操作。
4. Merge Next Title 功能
選擇要合併下一個 Title 的檔,按[編輯]鍵,然後根據
UI 提示操作。
在播放
按[Edit]鍵,對該 Title 進行編輯,其主要包括的功能有
Insert Chapter 、 Delete Chapter Mark 、Delete All
Chapter Mark、CM Cut、Set index Picture、Hide/Unhide
Chapter 、Title Split 六項。具體如下所示。
Title
的狀態下
1. Insert Chapter(加入章節)功能
按[編輯]鍵,對 DISC 中檔進行編輯,其主要包括的功能
有 Rename、Protect、Delete、Merge Next Title 四項。
對正在播放的 Title 進行插入章節,按[編輯]鍵,選擇
Insert Chapter,會出現對話方塊,

2. Delete Chapter Mark(移除章節)
5. Hide/Unhide Chapter(隱藏章節)功
功能
對正在播放的 Title,刪除其中任意章節,按[編輯]鍵,
選擇 Delete Chapter Mark,(Delete All Chapter Mark
是刪除所有章節),會出現對話方塊,
3. CM Cut(剪接)功能
對正在播放的 Title List,刪除其中任意一段視頻內容,
按[編輯]鍵,選擇 CM Cut(Set A:刪除的起始點;Set
B:刪除的終止點;Cut:將設定的 A 點到 B 點的視頻
內容刪除),會出現對話方塊:
4. Set index Picture(索引圖)功能
如果要將當前正在播放的畫面作為該 Title 的索引圖
片,按[編輯]鍵,選擇 Set index Picture,
完成 Set index Picture 功能後,Title 的索引圖與設定
的索引圖片一致。
能
如果當前播放章節是 Unhide(非隱藏)狀態,按[編輯]
鍵,選擇 Hide/Unhide Chapter,會隱藏當前正在播放
的章節,
如果當前播放章節是 Hide 狀態,需要播放被隱藏的章
節,在 Title 處按[編輯]鍵,選擇 Play Full Title(播放完
整影片),
進入播放時,按[編輯]鍵,選 擇 Hide/Unhide Chapter,
取消隱藏章節。
6. Title Split(分割)功能(只有 DVD±RW 有此功
能)
如果要將一個 Title 拆分成兩個 Title,按 [編輯]鍵,選擇
Title Split。
完成 Title Split 功能後的介面顯示如下:
8

4 錄製功能
本機為了方便使用者使用 DVR 的燒錄功能,從
遙控器按鍵 Setup 的設置,準備了二種方案。
每種方案都可以實現用戶的錄製想法。
4.1
預錄]按鍵
4.2
方案一:遙控器上的
利用遙控器上的[預錄]按鍵來執行預約錄影,相關的操
作同[SYSTEM MENU 設置] 中[Timer REC 預約錄影]
的操作流程。
方案二:單鍵錄影
(1) 按「POWER 電源」開啟本錄影機電源。
[TIMER
(3) 按[RECORD 錄影] 鍵開始進行錄製。按下停止鍵
或光碟寫滿時,會顯示對話方塊,本機即會停止錄製。
(4) 按[■ STOP 停止] 鍵停止錄影。按下停止鍵後,
本機需要一些時間來停止錄影功能。
(5) 按[PAUSE 暫停] 鍵暫停錄影,再按一次[PAUSE
暫停] 或[REC]鍵 即可開始錄製。
注意:
本機可錄製節目在 DVD+R/+RW/-R/-RW 光碟上。
DVD+R/-R 光碟只能寫入一次。要在其他錄影機或放
影機播放的話,必須進行封片的動作,封片以後無法再
進行任何寫入的操作,也就是無法再用來錄製節目
(DVD-RW 也要封片)。
DVD+RW/-RW 光碟可進行重複寫入的操作。
(2) 按遙控器上「SOURCE 訊號源」鍵選擇訊號輸入
源。
5 播放功能
5.1
5.2 DVD/ USB
進入 DVD 模式
開機
按電源開關打開本機電源,電視機螢幕顯示“讀碟”。如
果機內無碟片,則電視機螢幕顯示“無碟”,螢光顯示
幕上顯示“Ndisc”。
系統在 USB 模式進入 DVD 模式需按下
“DISC/USB”按鍵,選擇”碟片”按[確認]鍵系統會進
入“DVD”模式,
如果匣內放有碟片,碟片將被播放,
如果沒有放入碟片,OSD 上將顯示“NdISC”。
模式切換
進入 USB 模式
系統在 DVD 模式進入 USB 設備需按下
“DISC/USB”按鍵,進入 USB 模式。
如果第一次進入 USB 設備,系統需要一定時間去搜
集 USB 相關資訊,在系統完成掃描後將會出現 USB
設備介面
5.3
放置碟片
按 OPEN/CLOSE 鍵打開匣門,電視螢幕上顯示“退出
片匣”。將碟片裝入本機,再按[進/出匣]鍵關閉匣門,
電視螢幕上顯示“關閉片匣”。本機讀取碟片資訊,讀
取完畢後,自動進入播放狀態。(注:播放某些碟片
時,讀出碟片類型後,需按播放鍵或選擇鍵本機方能
開始播放。)
9

5.4
播放
本機根據碟片中資料區的內容,顯示功能表供用戶選
擇。按暫停鍵後在播放和暫停兩個狀態之間切換。可
提供:功能表播放、標題播放、順序播放等播放模式。
1. 播放控制【適用於 DVD、超級 VCD、VCD2.0 碟
片】
(1) 按播放控制鍵:
若為 DVD 碟片,電視機上顯示的DVD 碟片功能表畫面
(ROOT MENU);
若為超級 VCD、VCD2.0 碟片,電視機上顯示超級 VCD、
VCD2.0 碟片的功能表畫面(PBC:[OFF]時)(此時,
第一次按下該鍵後顯示當前 PBC 的狀態)。
播放超級 VCD、VCD2.0 碟片時,本機初始化為 PBC ON.
(2) 對於 DVD 碟片,可按方向鍵移動遊標(黃色框)
選擇所要播放內容;對於超級 VCD、VCD2.0 碟片,使
用數字鍵直接選擇曲目播放(只有在 PBC/OFF 時才可
選曲)。
(3) 按[確認]鍵或[播放]鍵可從[HIGHLIGHT 黃色框]
所在位置開始播放。
(4) 在播放過程中返回選單:若為 DVD 碟片按下(播
放控制)鍵,則返回至 ROOT 選單;若為超級 VCD、
VCD2.0 碟片在 PBC 開時,按下(播放控制)鍵或返回
鍵,返回至功能表畫面。
(5) 停止播放:
− 第一次按 STOP 鍵,機器進入准停止播放,OSD 顯示
准停止。再按一次 STOP 鍵,機器進入停止狀態。
− 機器進入准停止播放時,按 PLAY 鍵則可從准停止
時間點繼續播放。
− 機器進入停止播放時,按[播放]鍵則進入順序播
放。
為了保護碟片,取出碟片時請先按停止鍵後再按[進/
出匣]鍵打開匣門,取出碟片,再 按該鍵關上匣門。
如果長期不使用,請把電源插頭拔掉。
2. 標題播放【僅適用於 DVD 碟片】
− 按“標題”鍵後,標題目錄出現在電視螢幕上。
− 按方向鍵移動遊標,選擇你所要播放之標題;亦可
直接用數字鍵選擇標題。
− 機器從被選擇標題的第一章節開始播放。
3. 順序播放【適用於 DVD、超 級 VCD、VCD、CD、CD+G、
HD-CD、DTS-CD、WMA、MP3/JPEG,BMP,GIF、MP4 碟片】
− 若為超級 VCD、VCD 碟,若在 PBC ON 狀態下,則按
下“播放控制
放;再按下“播放控制”鍵,則又可切回 PBC ON 狀態。
− 除超級 VCD、VCD 碟外,在停止狀態下,直接按“播
放”鍵,則可實現順序播放功能,該功能對適合本機播
放的所有碟片均有效。
4. 編程播放【適用於 DVD、超 級 VCD、VCD、CD、CD+G、
HD-CD、DTS-CD、WMA、MP3/JPEG,BMP,GIF、MP4 碟片】
使用編程播放功能,您可從碟片中隨意指定最多 16
首曲目依照所列之數字順序進行播放。
若主機原來處於“PBC 開”之狀態下,則該操作將在實行
編程播放的同時關閉 PBC。
− 根據遊標(HIGHLIGHT 黃色框)提示輸入數字,再
按“播放”鍵進行編程播放;或移動遊標之“播放”字樣
處,再按動“ENTER 確認”鍵,亦可實現編程播放。最多
可編 16 個標題、章節或曲目。
− 根據選單上的方向圖示指示,可按動方向鍵移動遊
標(黃色框 HIGHLIGHT)至所希望輸入數字之位置。
− 按動
鍵則可顯示編程播放之順序及內容,並取消編程播放
取消;亦可按[停止],再按[播放]鍵進入順序播放狀
態。
”鍵,切至“PBC OFF”狀態即可進行順序播
“播放”鍵進行編程播放後,再按“PROGRAM 編程”
注意:
若想清除全部編程數字,可移動遊標(HIGHLIGHT 黃色
框)到“清除”按“ENTER 確認”
若想修改播放順序,可按動方向鍵將遊標移至所想修改
的專案上,直接輸入所要求之數字。
10

6 多媒體檔的播放
放入碟片或插入 USB 後(碟片中包含有機器所支持的
MP3/WMA/CD/VCD/SVCD/DVD/MP4/ JPEG,BMP,
GIF 等檔),機器將自動搜索存放 WMA、MP3/JPEG、
BMP、GIF、MP4 的各個目錄,搜索完畢後,將自動
優先進入 MP3 的第一個目錄(對於混合放置的碟片,
若是單一檔類型的碟片則進入第一個目錄)並且播放該
目錄下的第一首歌曲。
通過方向鍵的移動命令可進入目錄區選擇您所希望播
放的目錄,同時播放該目錄下的第一曲;通過方向鍵的
移動命令,可進入檔案區選取所要播放之檔。
注意:
(1) 按左移、右移方向鍵可將 [HIGHLIGH 黃色框] 在
目錄區、檔案區及功能切換區間移動。
”、“ ”、“ ”各鍵含義如圖所示,已選
“
中(即正在播放)“按鍵”顯示為紅色,未選中的“按
鍵”則顯示為藍色。
在功能切換區中,若某個鍵中無資訊或檔案,則不能選
中。
(4) 對於 WMA、MP3、JPEG、GIF、BMP、MP4 混
合碟片,在播放 JPG 檔時,按返回鍵或停止鍵,畫面
回到 JPEG,BMP,GIF 功能表目錄。
(5) 可以按數字鍵直接目錄內檔,例:播當前目錄中的
第 15 首,先按“1”鍵一次,再按“5”鍵,就從 15
首開始播放。
(6) 注意:MP3 碟片是沒有圖像的碟片,只有數位音頻
音樂輸出。
(7) 在圖片的播放中或暫停時,可以通過按上/下/左/右
方向鍵來切換圖片的顯示角度;
UP(向上鍵): 上下翻轉
DOWN(向下鍵): 左右翻轉
LEFT(向左鍵): 逆時針旋轉 90 度
RIGHT(向右鍵): 順時針旋轉 90 度
(2) [HIGHLIGH 黃色框] 在目錄區與檔案區內如上圖
所示;在功能切換區內為一透明矩形方框。
(3) [HIGHLIGH 黃色框] 在功能切換內可利用左移右
移方向鍵移動,並按選擇鍵確認執行功能;
(8) 在圖片的目錄狀態時,按[播放控制]鍵進入 6 畫面
流覽顯示,即每頁顯示縮小的 6 幅圖片,按 NEXT(下
一頁)或者 PREV
上一頁 6 畫面,也可直接按數字鍵選擇圖片滿屏顯示
(上一頁)鍵選擇下一頁 6 畫面或者

Table of Content
Introduction..................................................................................................................................... 1
Features ..................................................................................................................................... 1
Handling Cautions...................................................................................................................... 1
Player Overview ......................................................................................................................... 2
Connect...................................................................................................................................... 3
Feature Key of the Remote Control ........................................................................................... 3
System Setup..................................................................................................................................5
Basic Steps ................................................................................................................................ 5
System Menu Items ................................................................................................................... 5
Playing and Editing Files ............................................................................................................. 10
Playing Files in a USB Device ................................................................................................. 10
Playing Files in a Disc.............................................................................................................. 10
Editing Files in a Disc............................................................................................................... 10
Recording Function...................................................................................................................... 12
By the TIMER key on Remote Controller................................................................................. 12
By the RECORD key on Remote Controller ............................................................................ 12
Basic Operations .......................................................................................................................... 13
Turn On the System ................................................................................................................. 13
DVD/ USB Mode Switch........................................................................................................... 13
Place a Disc ............................................................................................................................. 13
Play .......................................................................................................................................... 13
Playing Other Multimedia Discs..................................................................................................15
Specifications................................................................................................................................16
PAGE

Introduction
WARNING
Be sure to power off the unit before installing and connect to devices.
Welcome
Congratulations on your purchase of the DVR (DVD
Recorder) system.
Safety
TO REDUCE THE RISK OF ELECTRIC SHOCK, DO NOT
REMOVE THE COVER (OR BACK). NO
USER-SERVICEABLE PARTS ARE INSIDE. REFER
SERVICING TO QUALIFIED SERVICE PERSONNEL.
This symbol indicates important instructions
accompanying the product.
This symbol indicates “dangerous voltage” inside
the product that presents a risk of electric shock or
personal injury.
CAUTION: THE PLAYERS USE AN INVISIBLE LASER
BEAM WHICH CAN CAUSE HAZARDOUS RADIATION
EXPOSURE IF DIRECTED. BE SURE TO OPERATE
PLAYER CORRECTLY AS INSTRUCTED.
WARNING
To reduce the risk of fire or shock hazard, do not
expose the PLAYER to rain or moisture.
Features
Apart from general DVD player functions, the DVR
(DVD ecorder) system, RW+HDD+USB, features
recording of live TV programs and life slices with higher
video & audio quality, which will bring you sweet
memory.
Top recording function
LPCM/MPEG digital audio decoder, AC-3/DTS
Dolby digital audio output
Hi-Fi audio quality, 96KHz/24bit digital audio
processing
Optical/coaxial data stream audio output
Software smart upgrade
Support physical format discs & USB storage
devices (U_disc, etc.)
Available media: DVD-Video, HDCD, SVCD, VCD,
CD, MP3, MP4, KODAK PICTURE-CD
Compatible Discs
The unit can play discs with the following logos:
DVD Video (from DVD Disc, and DVD±R/RW)
MPEG-4 Video (from CD/DVD Disc, DVD±R/RW
and CD-R/RW)
Audio CD (from CD Disc, and CD-R/RW)
Video CD (from CD Disc, and CD-R/RW)
MP3 files (from CD/DVD Disc, DVD±R/RW and
CD-R/RW)
Kodak Picture CD (from CD Disc, and CD-R/RW)
Handling Cautions
Read this manual before installing and using this
recorder.
Be sure to turn off the recorder after use.
Disconnect the AC power cord from the AC outlet
when you don’t intend to use the recorder for long
period of time.
Do not open cover and do not repair yourself.
Refer servicing to qualified personnel.
Do not keep in rainy or moist place, or the recorder
may be damaged or you may get an electric shock.
Do not keep under direct sunlight or close to heat
sources.
Keep in a plain, cool ventilated area. Do not fill or
cover the blowhole.
High-quality YCbCr output, supporting future
display devices
1
Wipe the cabinet and panel with a soft cloth. Do
not use detergent or alcohol for cleaning.

This manual only guides you to use the recorder
properly. If it is not uniform with the real product,
refer to the real product.
number printed on the DVD disc does not correspond
to the region number of this unit, this unit can not play
that disc.
Region code
The region number of this unit is 3, if the region
Player Overview
1. STANDBY
2. CHANNEL-
3. CHANNEL +
4. SOURCE
5. DISC TRAY
6. OPEN/CLOSE
7. FRONT PANEL DISPLAY
8. DV INPUT PORT
9. USB INPUT PORT
DVD labeled “ALL” will also play on this unit
10.VIDEO INPUT PORT
11.LEFT AUDIO INPUT PORT
12.RIGHT AUDIO INPUT PORT
13. FAST FORWARD
14. FAST BACKWARD
15.STOP
16.RECORD
17.PLAY/PAUSE
1. Composite video output
2/3/ 4 . Component video(YUV) outpu
5. Center audio output
6. Sub-woofer audio output
7. Left surround audio output
8. Right surround audio output
9. Left front audio output
10. Right front audio output
2
11.Optical digital audio output
12. Composite video input
13. Coaxial digital audio output
14. Left audio input
15. Right audio input
16. Antenna in
17. Antenna out
18. Mains switch

Connect
Feature Key of the Remote
Control
STANDBY
Switch the unit standby on and off.
OPEN/CLOSE
Open/Close disc tray
N/P
Press it repeatedly the unit will switch the mode to
NTSC/PAL in turn
P-SCAN
Switches between Progresses scan and Interlace
scan
MUTE
Switches audio output ON or OFF
STOP
♦ Pre-stop playing at the first press (pressing PLAY
can resume playing).
♦ Stop playing at the
second press
(pressing PLAY can
restart playing).
PASUE/STEP
Pause current process at
the first press; go on step
by step at the subsequent
presses.
SETUP
Calls the screen for Player's
initial setting, such as Menu
language, parental level
TITLE
Recall DVD’s TITLE menu
during playback
PLAY
Start to play back in normal
speed, or activates the

selected item on interactive menu
DISC/HDD/USB
Press it repeatedly the unit will switch the working
mode to DVD/HDD/USB in turn
PREV
During playback, press to scan in slow forward. Press
to cycle through 1/2,1/3, 1/4,1/5,1/6 or 1/7x speeds.
SUBTITLE
Press the Subtitle-button to display the current
subtitle status.
Press this to move back to the beginning of the
previous chapter/track
NEXT
Press it to move ahead to the beginning of the next
chapter/track
REC
Record program immediately.
TIMER
Bring up the Timer Record setting interface directly.
SOURCE
Press to switch the Recording signal Source
EDIT
Edit multimedia files, such as deleting, renaming, and
copying.etc.(Only support recorder DVD ± R/RW
disc)
DISC
Press to enter DISC edit. (Only support recorder DVD
±R/RW disc)
CH+
Press to change the channel up.
CH-
Press to change the channel down.
DISPLAY
Display media information.
MENU/PBC
Recall DVD’s ROOT menu or VCD 2.0 menu during
playback ;enable/disable PBC function during VCD
playback, it can allow to you play VCD interactively
by following the menu on the TV screen;
AUDIO
Show and switch the audio language according to
current disc.
SLOW
Press the button several times if you would like to
activate or deactivate the subtitle function or if you
want to choose a different subtitle language.
The available subtitle languages depend on the DVD.
RETURN
Goes back to the specified position defined by
Contents provider
NUMBER BUTTONS
Select the item number you want by pressing the
number buttons directly
CLEAR
It is used to erase the wrong digit input
DIRECTION buttons
Move the highlight rectangle up/down/left/right.
DVD/MPEG4
Press to switch the unit Recording mode between
DVD mode and MPEG4 mode.
FAST FORWARD
Fast forward play
FAST BACKWARD
Fast reverse playback
VOLUME +
Increase the sound output level
VOLUME –
Decrease the sound output level
REPEAT
You can play all of the titles or tracks on a disc or a
single title, chapter, or track repeatedly.or all repeat.
4

Basic Steps
System Setup
1. Press the SETUP key on the remote to pop out the
System Menu.
System Menu Items
Setup
The Setup item is an entry for basic and advanced
system settings. And the advanced settings are
mainly for DVD playback.
After the Setup item is selected, the Setup menu will
appear.
By highlighting a proper item and then pressing
ENTER, you can set various options. For more
information, please see the following descriptions.
Note that once the System Menu appears, the
recorder system will auto pause.
2. Press UP/DOWN/LEFT/RIGHT to move the
highlight to the item you want to set, then press
ENTER.
To select one, press UP/DOWN/LEFT/RIGHT to
highlight a desired language and then press
ENTER.
Time Format
You can select a time format from the list by
pressing UP/DOWN/LEFT/RIGHT and then
ENTER.
M: Month; D: Date; Y: Year; 12: 12-Hr Time
(AM/PM Time); 24: 24-Hr Time.
System
TV System
Two options, PAL and NTSC, can be selected
according to your TV set.(default:NTSC)
Screen Saver
ON means enable the screen saver mode; OFF
means disable.
Sys Language
Seven system language selections for the UI
display: English, Chinese, German, Spanish,
French, Portuguese.
Date Set
Time Set
For Timer Recording, date and time should be
correct. Since “Power off” may effect date and
time settings, you should re-set them. (Just by
inputting digits for each section: MM, DD, YY, Hr,
Min, and A/P.)
Reset Setting
Set all options back to the factory settings.
Playing
This item includes the following settings: Audio Lang
(audio language), Subtitle Lang (subtitle language),
Password, Menu Lang (menu language), and Rating.
5

Audio Lang
Six selections for Audio language: English,
Chinese, German, Spanish, French, Portuguese.
To select one, press UP/DOWN/LEFT/RIGHT to
highlight a desired language and then press
ENTER.
Subtitle Lang
Seven selections for Title language: English,
Chinese, German, Spanish, French, Portuguese,
and Latin.
To select one, press UP/DOWN/LEFT/RIGHT to
highlight a desired language and then press
ENTER.
Password
Through this item, you can set a password to lock
the recorder (no initial password exists). When
the recorder is locked, you will be asked to input
the correct password before setting the Rating
(restriction level) item or changing the password.
Menu Lang
Seven selections for Menu language: English,
Chinese, German, Spanish, French, Portuguese.
To select one, press UP/DOWN/LEFT/RIGHT to
highlight a desired language and then press
ENTER.
Rating
The recorder provides the Rating (restriction level)
setting function for protecting kids from watching
unhealthy contents, up to eight levels according to
the disc type. When playing a lockable disc, you
can set a proper restriction level through this Rating
setting according to the disc level and your need.
Notes:
z Before setting the restriction level you will be asked to
input the correct password if the recorder is locked.
z The Rating setting goes into effect only when the
recorder is locked.
A/V Set
This setting item provides four options: Video Output,
TV Type, Brightness, and SPDIF Output.
Video Output
YCbCr: Choose it if the unit is connected to your
TV set with YCbCr video cable
P-SCAN: Choose it if the unit is connected to
your TV set with YPbPr video cable and the TV
set is in the progressive scan mode.
Notes:
z When using CVBS ut jack to connect to TV, you can
select any of them.
z The default is YCbCr.
TV Type
PS 4:3: Pan Scan, available for general TV.
The left and right edges of the picture will not be
seen and the rest will fill the TV screen when a
wide-screen object is played.
LB 4:3: Letter Box, available for general TV.
Black bars will appear at the top and bottom
edges of TV screen when a wide-screen object is
played. (Default)
16:9: Wide Screen, available for a wide-screen
TV.
Notes:
z In the aspect ratio you choose.
z The disc recorded with 4:3 mode can only be played
in 4:3 ratio.
z You should set the TV Type according to the TV
connected.
Brightness
By this item, you can adjust the brightness of
screen.
SPDIF Output
Three options are provided: PCM, RAW, OFF.
To select one, press UP/DOWN/LEFT/RIGHT to
highlight the desired option and then ENTER to
confirm.
PCM: Available when the recorder connects to
a dual-channel digital stereo amplifier. For a
6

Dolby Digital or MPEG disc, its audio data will be
modulated to dual-channel PCM data and
outputted from coaxial or optical jacks.
RAW: Available when the recorder connects to
a power amplifier via coaxial or optical jacks.
For a Dolby Digital, DTS, or MPEG disc, the
output data from the recorder will be the
corresponding raw digital data. Of course, the
connected amplifier should be capable of
decoding Dolby Digital, DTS, or MPEG. (Default)
OFF: Disable the SPDIF Output function. No
data will be outputted from coaxial or optical
jacks.
Recording
Tuning function should be run again if the TV channel
distribution is changed by channel providers or the
recorder is re-installed. The following picture is just
the Auto Tuning interface.
Channel Set
By the Channel Set item in the Setup menu, you can
see and fine adjust the detailed information of
channels.
Press UP/DOWN to highlight the Channel Set item,
and then press ENTER to enter the following
interface in which you can – Select a channel
number.
Set whether the selected channel is active.
Fine tune the channel.
Choose an audio format for the current channel
output.
Select another channel number for swapping with the
current channel.
Press LEFT,
Press LEFT/UP/DOWN to select a desired recording
quality and then press ENTER.
TV Tuner
Name the current channel.
Tune a TV channel manually.
Manual Tuning
Adv A/V
Video
Contrast: Select a contrast value for video output.
Hue: Select a hue value for video output.
TV Signal
Set the receiving mode of TV signal: Antenna or
Cable.
Auto Tuning
The recorder provides an Auto Tuning function that
can search TV channels automatically and save them
in the recorder in a certain order. However, this Auto
7
Saturation: Select a saturation value for video
output.
Speaker
Downmix
LT/RT: In this mode, you will feel like being in a
theatre if the original movie recorded into the disc
was encoded in the Dolby Pro Logic format.

Stereo: In this mode, if it’s 5.1-channel sound
playing, two channels of signals will be output
from the left and right soundtrack; if it’s 2-channel
sound playing, 2-channel stereo signal will be
output.
VSS: In this mode, when a disc recorded with
5.1-channel sound format is played, the virtual
surround sound effect will be heard from the main
soundtrack.
OFF: In this mode, 5.1-channel sound output is
active.
Subwoofer
There are two options: OFF and ON. When ON
is selected, the recorder will auto detect the
subwoofer input then output it. When OFF is
selected, the subwoofer input will not be output.
Bass Mode
There are three options: All LG, All SM, and
Mixed.
Center Delay
Disc Utility
The Disc Utility item can help you format storage
devices: disc.
In DVD Mode
After entering this item, you will see the following
menu through which you can format a disc.
Highlight the Format item and then press ENTER
on the remote. The following interface will appear.
Choose a format to which the disc will be formatted:
DVD+VR or MPEG4. If you select DVD+VR, the
following dialog will be shown.
Select Yes (by ENTER). The system begins to
format the disc with following progress prompt.
You can adjust center delay by this option.
Rear Delay
You can adjust rear delay by this option.
Digital Audio
OP Mode
Line Out: Choose this option to line out the
input signal. It will be more suitable for playing
at nighttime, for the output volume is low.
RF Mode: It will be more suitable to choose this
option for playing at daytime, for the output
volume is high.
Dynamic Range
When “Line Out” is selected, you can choose this
option to adjust the line out ratio and get different
effect. If the rate is adjusted to “8” (full), the
peak value of audio signal will be the minimum;
while adjusted to “0” (off), maximum. See the
following figure.
When formatting is completed (100%), the
following interface appears.
Timer Rec
Before recording, you need to check if there is
enough memory space in DISC for recording first.
Operations
Like the Timer Recording item in the Wizard menu,
through the Timer Rec item in System Menu, you
can start to record programs in schedule. But all
recording options are set at one place.
1. Highlight the Timer Rec item in the System
Menu and then press ENTER, or press TIMER
directly to open the following Timer Record
interface.
2. Press LEFT/RIGHT to select the Source item
and then press ENTER; you can choose a
video source on the pop-up menu.
Note that this option will be valid when the
Downmix option of speaker is OFF.
Dual Mono
By this option, you can set up the L and R mono
output mode. There are four modes in this
option: Mono L, Mono R, Mix Mono, and Stereo.
8
3. Press LEFT/RIGHT to select the Date item and

then press ENTER; you will see a menu with
Once and Repeat recording mode selections.
After selecting one, you can set the date by
UP/DOWN or digit keys.
4. Press LEFT/RIGHT to select the Start item and
then press ENTER; you will see a menu
through which you can set a start time by
UP/DOWN or digit keys.
5. Press LEFT/RIGHT to select the End item and
then press ENTER; you will see a menu
through which you can set an end time by
UP/DOWN or digit keys.
6. Press LEFT/RIGHT to select the Quality item
and then press ENTER; you will see a new
interface through which you can select a
recording mode and a recording quality by
UP/DOWN/LEFT/RIGHT key. There are four
recording modes available: DVD.
If you select DVD as the recording mode, the
following interface will appear.
old one, “Overlapped”; if no setup is filled in,
“Empty”; if there is no enough space in DISC,
“No Room ”.
In addition, you can schedule to record multiple
programs at different time by filling the “Empty”
list items with the same procedure.
After setup, you can press RETURN to go back
to the previous menu, or press TIMER to exit
the Timer Record interface.
Note:
Since the recorder can record video source to disc,
you should set a proper storage device before
recording.
Instant Rec
Like the Instant Recording item in the Wizard menu,
through the Instant Rec item in System Menu, you
can start to record immediately. But all recording
options are set at one place.
I
7. After a proper setup, the Status item will be
“Ready”. However, if the setup is illogical, the
Status item will be “Bad”; if the setup is just the
The corresponding interface is as follows. After
setting source, quality, you can choose GO! to start
recording.
9

Playing and Editing Files
Playing Files in a USB Device
In a USB Title List interface, the following three
supported multimedia file folders are displayed.
• MPEG4 – AVI Video file
• Audio – MP3/WMA Audio file
• Picture – JPG/BMP/GIF Image file
Take MPEG4 as an example to show you how to
play a multimedia file in a USB device.
1. Insert a USB device, and the MP3 folder will be
highlighted by default, for the system can
identify and locate MP3 folder automatically.
2. Press LEFT/RIGHT choose a MPEG 4
subfolder to list files.
3. You can choose to play a file in the selected
folder.
4. Highlight a desired file and press ENTER to
play.
In the same way we can play Audio and Picture
files.
The Recorder system affords the following
informative interface, which gives more
references for you to play a file. When you
select a Picture file, the thumbnail will appear on
the left side of the screen. But for Audio file,
only text information can be shown.
Playing Files in a Disc
appear. You can select the file you want to play by the
PREV/NEXT key on the remote controller and then
press ENTER to start playing.
For an MPEG4-format disc, following interface will
appear.
Editing Files in a Disc
The RW system also supports disk file editing.
Editing for an MPEG4-Format
Disc
When the disc is in MPEG4 format, you can edit the
files in it by these commands: Rename, Delete and
Delete All.
Rename
Select the file you want to rename from the file list
and press the EDIT key, and the system will prompt a
menu. See the figure as below.
The recorder supports two formats of discs:
DVD+VR format disc
MPEG4 format disc (AVI/ MP3/WMA/
JPG/BMP/GIF)
One disc supports only one format: DVD+VR or
MPEG4. These two formats of files can not be stored
in one disc.
For a DVD+VR-format disc, the following interface will
10
Select Rename from the menu and then press
ENTER to enter the following Text Input interface.

Input text by UP/DOWN/LEFT/RIGHT and ENTER
keys, and then press OK button to finish the rename
operation.
Protect
Delete
Select the file you want to delete from the file list and
then press the EDIT key, a menu will appear (as
below). Next select the Delete command from the
menu and then press ENTER to delete the file from
the disc. Finally follow the UI prompt to complete
the operation.
Editing for a +VR-Format Disc
In the Title List Interface
When the disc is in +VR format, you can edit the files
in it such as renaming, protecting, deleting, merging
next title,delete all chapter mark and paly full tite.
Rename
Select the file you want to protect from the title list
and then press EDIT, a menu will appear (as below).
Next select the Protect command from the menu and
then press ENTER to protect the file. Finally follow
the UI prompt to complete the operation.
Delete
Select the file you want to delete from the title list and
then press EDIT; next select the Delete command
from the menu; finally follow the UI prompt to
complete the operation.
Merge Next Title
Select a Title you want to merge from the title list and
then press EDIT; next select the Merge Next Title
command on the menu; finally follow the UI prompt to
complete the operation.
During Title Playing
When a title is playback, pressing EDIT will bring up a
menu which includes seven commands: Insert
Chapter, Delete Chapter Mark, delete all chapter
mark CM Cut, Set index Picture, Hide/Unhide
Chapter and Title Split. Then you can edit the title
with these commands.
Select the file you want to rename from the title list
and then press EDIT, and the system will prompt a
menu. See the figure as below.
Select Rename from the menu and then press
ENTER to enter the following Text Input interface.
Input text by UP/DOWN/LEFT/RIGHT and ENTER
keys, and then press OK button to finish the rename
operation.
11
Insert Chapter
During a program playback, you can press EDIT and
then select the Insert Chapter item on the pop-up
menu (shown as follows) to insert a chapter.
Delete Chapter Mark
During a program playback, to delete the chapter
marker, press EDIT and then select the Delete
Chapter Mark item on the pop-up menu (shown as
follows).
Note: Selecting the Delete All Chapter Mark item
will delete all the existing chapter marks.
CM Cut
During a program playback, you can delete a
specified segment with the following steps:
1. Press EDIT and then select the CM Cut item on

the pop-up menu. A sub-menu will be
expanded.
2. Highlight SET A in the sub-menu, and then press
ENTER to specify a start point.
3. Specify an end point by selecting SET B with the
similar operations.
4. ENTER the Cut option on the sub-menu, the
program between A and B will be cut. While if
you ENTER the Cancel option, the cut operation
will be canceled.
Set Index Picture
You can specify any playing picture as the program
index tab that will appear on the root menu.
1. Highlight the Set Index Picture item.
2. When a suitable picture appears, press ENTER
on the remote to select it.
After Set Index Picture finishes, the title index tab will
be the picture you choose.
Hide/Unhide Chapter
During a program playback in Unhide mode, you can
press EDIT and then select Hide/Unhide Chapter on
the pop-up menu to disable the current chapter (but
the chapter still exists).
During a program playback in Hide mode, if you want
to play a hidden chapter, press EDIT on a title and
then select Play Full Title on the pop-up menu as
follows.
During the program playback, you can press EDIT
and then select Hide/Unhide Chapter to unhide the
chapter.
Title Split(only support recorder DVD±RW disc)
You can press EDIT and then select Title Split on the
pop-up menu to split the title into two titles at this
playback location.
After Title Spilt finishes, the system shows the title
index as follows.
Recording Function
There are two methods for you to record content to
a disc. Press setup key on the remote controller to
bring up the System Menu interface.
By the TIMER key on Remote
Controller
Schedule recording by TIMER key on remote
controller. Please refer to the descriptions about
[Timer REC] in [SYSTEM MENU] for more detail
operations.
By the RECORD key on
Remote Controller
1. Press standby button on the front panel to turn
on the recorder.
2. Press SOURCE on the remote controller to
select a signal source.
3. Press RECORD to start recording.
During recording, you can press STOP key to stop
the recording (a while is needed to stop the
process), press PAUSE key to pause the recording,
press PAUSE again or press RECKEY to resume
the recording. However, when the disc is written full,
the recording will stop automatically.
Notes:
z The recorder can record video source to
DVD+R/+RW/-R/-RW discs.
z DVD+R/-R discs can be written only once for
that they must be finalized to play on other
DVD players.(DVD-RW)
z DVD+RW/-RW discs can be written repeatedly
12

Basic Operations
Turn On the System
Check to plug power cable in the recorder, then
press POWER to turn the recorder on. If there is a
disc in the tray, the TV screen will prompt “READ”;
otherwise prompt “NDISC”.
DVD/ USB Mode Switch
Entering DVD Mode
USB mode switch to the DVD mode:
1. Press the USB key on the remote
2. The system will enter the DVD mode with the
following OSD display.
If there is a disc in the tray, the disc will be
played automatically.
If there is no disc in the tray, the “NO DISC”
message will appear momently and then the
usb will be played auto matically.
the type, the PLAY or ENTER key should be
pressed to start playing.
Play
The contents of each disc menu vary according to
how the disc was authored and what features are
included. The disc menu will be turned on for you to
select, when MENU key is pressed. Also play and
pause can be switched with the PAUSE key on the
remote.
Moreover, three play modes are offered here:
Menu Play, Title Play and Sequence Play
1. Menu Play (compatible with DVD, SVCD,
VCD2.0 discs)
(1) Press MENU key on the remote
− TV screen displays the DVD Root Menu when a
DVD disc is loaded.
− When a SVCD or VCD 2.0 disc is loaded, SVCD
or VCD 2.0 menu will be displayed on the screen
(when PBC is off) (At this moment, press PBC key
once to display current PBC state).
Entering USB Mode
DVD mode switch to the USB mode:
1. Press the USB key on the remote
2. When finished, the recorder system will enter the
USB mode. The recorder system enters the
USB mode, it needs to scan some system
information on USB with the following screen
display.
Place a Disc
Press OPEN/CLOSE key on the remote to open
the disc tray with the TV screen prompting “OPEN”.
Then, place a disc into the tray and press
OPEN/CLOSE again to close the tray, “CLOSE”
appears and the recorder starts to read. Then the
disc starts playing automatically.
Note: Of some certain type discs, after reading out
− PBC is initialized ON when a SVCD or VCD2.0
disc is loaded.
(2) When a DVD disc is loaded, you can press
UP/DOWN/LEFT/DOWN keys to highlight the
menu item you want to choose; as SVCD or
VCD2.0, you can press digit keys to select a track
to play.
(3) Press the ENTER or PLAY key, you can begin
playing with the highlighted.
(4) Return when playing: When a DVD disc is
playing, press MENU (PBC) key, you can return to
the root menu; as SVCD or VCD2.0 discs, and
PBC is on, press MENU (PBC) or RETURN key,
you can return to SVCD or VCD2.0 menu.
(5) Stop:
When you press STOP key for the first time, the
recorder turns into quasi stop state.
At the same time the OSD appears “PRE STOP”.
One more press makes it stop.
− In quasi stop state, the recorder remembers
where you stopped, when you start playing the disc

again, it picked up where you left off.
− In stop state, when you press PLAY, the recorder
enters sequence playback mode.
Notes:
For the disc protection, before you press
OPEN/CLOSE to eject the disc tray when playing,
please press STOP at first. After taking out the disc,
press OPEN/CLOSE again to close the tray.
If you're not going to use the recorder for a long
time, be sure to remove the electronic plug.
2. Title Play (compatible with DVD discs only)
− Press TITLE key to display the DVD title content.
− Press the UP/DOWN/LEFT/DOWN key to
highlight the title you want to choose,
and press ENTER; also you can press digit key to
choose directly.
− The recorder begins with the chapter 1 of the
chosen title.
3. Sequence Play (compatible with DVD, SVCD,
VCD, CD, CD+G, HD-CD, DTS-CD,WMA, MP3/
JPEG,BMP,GIF, MP4 discs)
− When a SVCD or VCD disc is loaded and PBC is
on, once PBC key is pressed,
PBC switches off and then the recorder can play in
sequence playback mode; one
more PBC key press switches PBC on.
− In the stop state, when you press PLAY key, the
recorder then enters sequence
playback mode. This feature is effective to all the
compatible discs.
4. Program Play (compatible with DVD, SVCD,
VCD, CD, CD+G, HD-CD, DTS-CD,WMA,
MP3/JPEG,BMP,GIF, MP4 discs)
The Program Playback option allows you to enter
the order in which you want chapters or
tracks to play, maximum to 16.
− Program Menu:
DVD, WMA, MP3/JPEG, BMP, GIF, MP4 discs:
SVCD, VCD, CD, CD+G, HD-CD, DTS-CD discs:
If PBC is on, this operation will turn PBC off while
the chapters/tracks play in programmed order.
− According to the highlight, use the digit keys to
enter the chapter/track numbers in order you want
them to play. Then press PLAY key or use
UP/DOWN/LEFT/RIGHT key to highlight the
“PLAY” item and press ENTER, the selected
chapters/tracks will play in the programmed order.
You can program maximum 16
titles/chapters/tracks.
− According to the direction indicator on the menu,
you can press UP/DOWN/LEFT/DOWN keys to
highlight where you want to enter.
− During Program Playback, if PROGRAM key is
pressed, the programmed order and the contents
will be displayed on the screen, and the Program
Playback will be stopped; also you can press STOP
and PLAY to resume sequence playback.
Notes:
To clear the programmed order, use
UP/DOWN/LEFT/DOWN keys to highlight the
“CLEAR” item, then press ENTER.
To modify the programmed order, use
UP/DOWN/LEFT/DOWN keys to highlight the
modifying item and enter the new chapter/track you
want to program directly.
14

Playing Other Multimedia Discs
After placing a disc into the tray device (where the
supported files are saved: MP3/WMA/CD/VCD/
SVCD/DVD/MP4/JPEG, BMP, GIF, etc.), the recorder
will auto search the directories saving WMA,
MP3/JPEG, BMP, GIF, and MP4 files. Then, as for
the disc containing multiple types of files, the
recorder will auto go to the first directory saving MP3
files; as for the disc containing single type of files, it
will auto go to the first directory. Next the recorder
will play the first song in the directory.
Use the UP/DOWN/LEFT/RIGHT key to enter the
Directory region and highlight the desired directory,
then the first track under it starts playback; also you
can use the UP/DOWN/LEFT/ RIGHT keys to enter
the File Region and select the file you want to play.
and
picture. The selected button appears red, while
other buttons appear blue. When files of some
types are not saved in the system, the
corresponding button will be inactive.
4. To the disc with WMA, MP3, JPEG, GIF, BMP,
MP4 files, when playing a JPEG picture, press
the RETURN or STOP key to return to
JPEG/BMP/GIF list.
5. You can press the digit keys to select the file you
want to play. For example, if you desire the
15th track in current list, press the “1” key once
and then press “5”, the 15th will start playback.
Note: When playing a disc with MP3 files, only
digital audio can be outputted without video
output.
6. When playing or pausing a picture, press the
UP/DOWN/LEFT/RIGHT keys to change the
display angle:
buttons are illustrated in the above
Notes:
1. Press the UP/DOWN/LEFT/RIGHT keys, and
you can activate Directory Region, File Region
and File Switch Region respectively.
2. The highlight in Directory Region and File
Region is shown as the picture above; while in
File Switch Region, a transparent rectangle
appears.
3. In File Switch Region, you can switch the type of
files to be played by pressing the
UP/DOWN/LEFT/RIGHT keys to select a proper
button and then pressing ENTER; the
, ,
UP: flip vertically
DOWN: flip horizontally
RIGHT: rotate 90 counter-clockwise
Right: rotate 90 clockwise
7. When the images are listed in the directory,
press the MENU key, and the screen will display
small pictures. Up to 6 small pictures are
displayed per screen. To view the next 6
pictures, press NEXT key to go forward and the
PREV key to go back to the previous page.
You can also select and play a picture in full
screen by pressing corresponding digit key on
the remote.
Note that the 6-picture preview is disabled in
slide show state.
15

Specifications
Disc type
Read: DVD-R, DVD-RW, DVD+R, DVD+RW, CD-R, CD-RW
Write: DVD+R, DVD+RW, DVD- R (+VR logical), DVD-RW (+VR logical)
Built-in USB Port
Format
DVD-Video
DVD+VR
Video CD
Super Video CD
Audio CD
MPEG4
MP3 (maximum number of files recognizable: 999 files per folder, compression rate between 32 Kbps and 320
Kbps)
JPEG (maximum number of pictures recognizable: 999 files per folder)
Region Code of DVD video
This unit can play commercial DVDs compatible with the region code printed on the rear of the unit.
Region options are 3
Video Recording modes and formats:
HQ(hour) SP(hour) LP(hour) EP(hour) SLP(hour) SEP(hour)
+VR 1 2 3 4 5 6
MPEG4 2 4 6 8 10 12
Aspect ratio
Supported display aspect ratrios are: 4:3 (letter box), 4:3 Pan & Scan, 16:9
Video Performance
D/A converter: 10-bit/54MHz
Composite Output: 1 Vpp, 75 Ohm
Component Output: Y: 1 Vpp, 75 Ohm
Pb: 0.7 Vpp, 75 Ohm
Pr: 0.7 Vpp, 75 Ohm
Audio
Analog Output: 5.1-Channel
Digital Output: Coaxial , Optical
Playback formats: LPCM, Dolby Digital, MPEG1-Layer2, MPEG1-Layer 3 (MP3)
TV Tuner
NTSC
16

NuVsion Technology Co.,Ltd.
www.vitostyle.com
 Loading...