

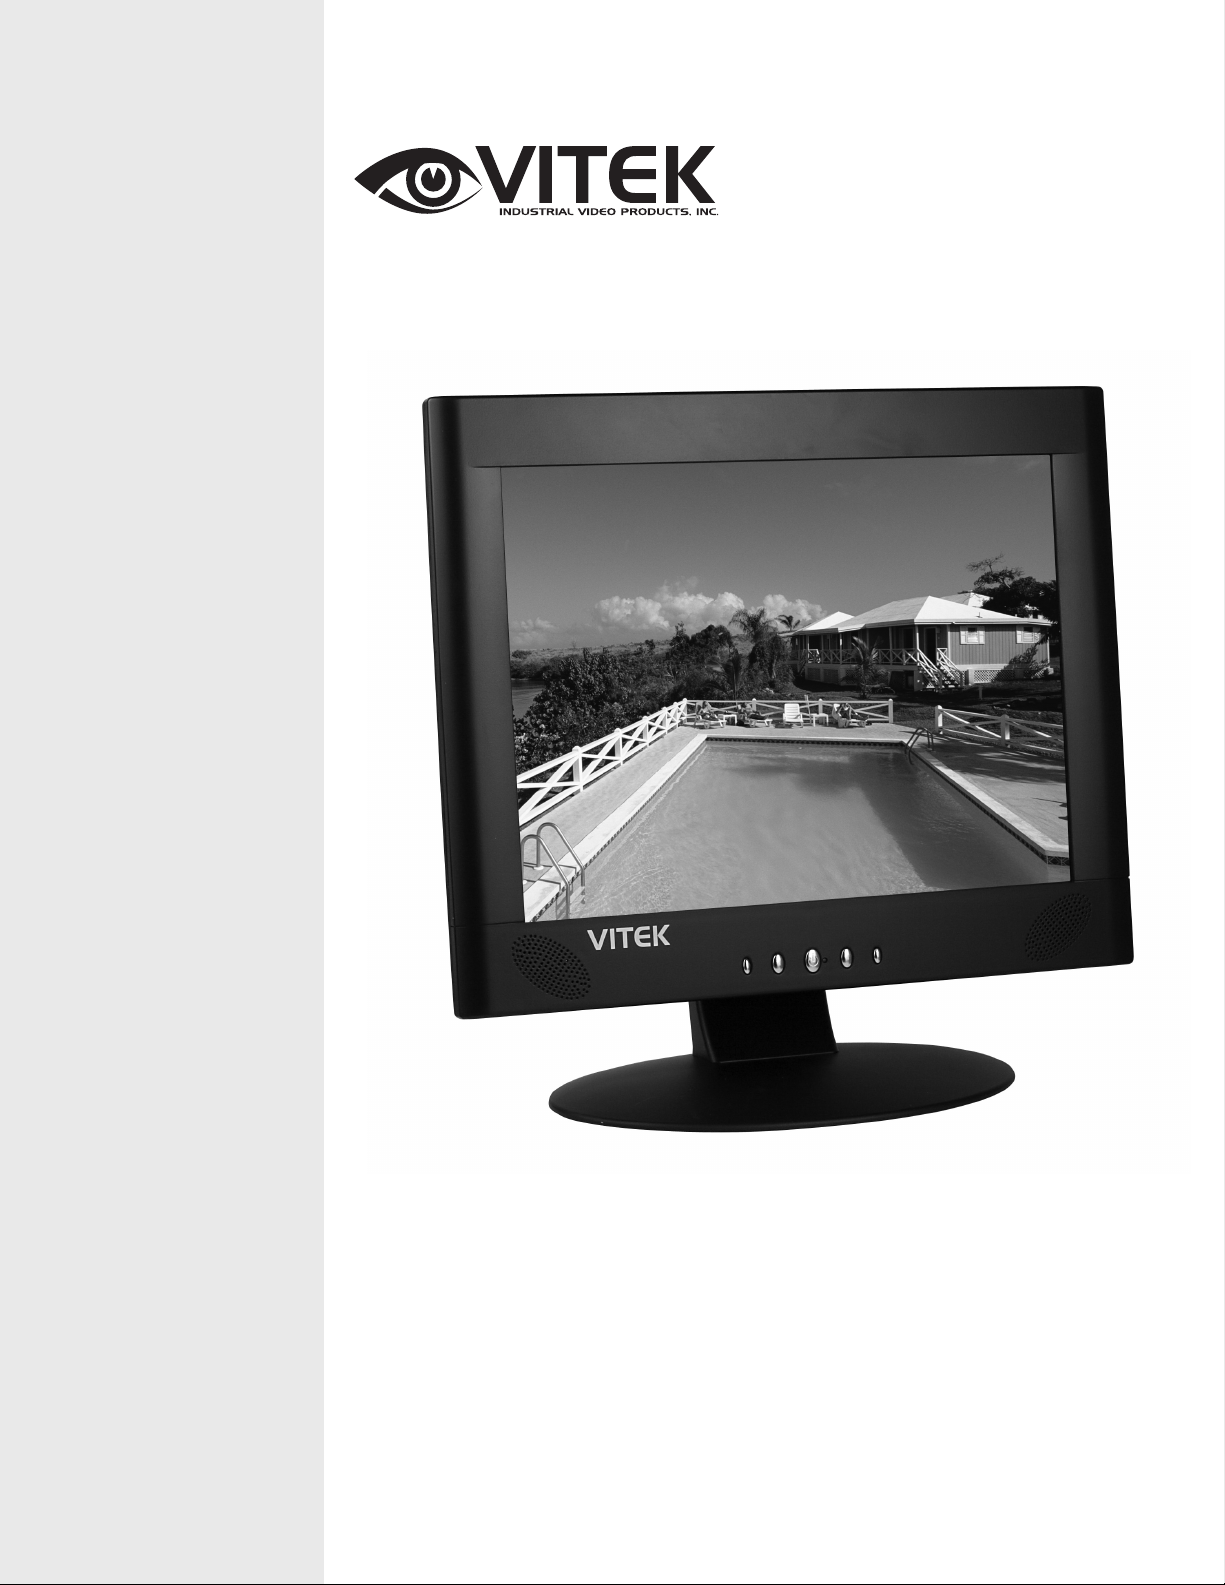
VITEK
VTM-LCD143
14” Professional LCD Monitor
• 14" LCD Display Panel
• VGA, S-Video, and Component Video In/Out
• Resolution up to 1024 x 768
• Front Panel Controls
• OSD Menu Programming
• VESA 75

VTM-LCD143
WARNING – To Prevent Fire or Shock Hazard, Do Not Expose This
Monitor To Rain or Moisture.
PRECAUTION
Graphic Symbol Explanation
The lightning flash with arrowhead symbol, within an equilateral triangle, is
intended to alert the user to the presence of uninsulated ‘dangerous voltage’
within the product’s enclosure that may be of sufficient magnitude to constitute a
risk of electric shock to persons.
The exclamation point within an equilateral triangle is intended to alert the user to
the presence of important operating and maintenance (servicing) instructions in
the literature accompanying the appliance.
SCOPE
The information in this instruction manual covers the installation and operation of the
color monitor. This unit should be installed with approved materials and wiring practices
in accordance with the National Electrical Cord and applicable local wiring ordinances.
1

VTM-LCD143
SAFETY PRECAUTION
All the safety and operating instructions should be read before the device is operated.
1. Retain instructions.
The safety and operating instructions should be retained for future reference.
2. Heed Warnings
All warnings on the monitor and in the operating instructions should be adhered to.
3. Follow Instructions
All operating and use instructions should be followed.
4. Cleaning
Unplug the monitor from the wall outlet before cleaning. Do not use liquid cleaners or
aerosol cleaners. Use a damp cloth for cleaning.
5. Attachments
Do not use attachments not recommended by the manufacturer as they may cause
hazards.
6. Water and Moisture
Do not use this monitor near water – for example, a bath tub, wash bowl, kitchen sink,
or laundry tub, in a wet basement, or a swimming pool, and the like.
7. Accessories
Do not place this monitor on an unstable cart, stand, tripod, bracket, or table. The
monitor may fall, causing serious injury to a child or adult and serious damage to the
device. Use only with a cart, stand, tripod, bracket, or table recommended by the
manufacturer, or sold with the monitor. Any mounting of the monitor should follow the
manufacturer’s instructions and recommendations.
8. Ventilation
Slots and openings in the cabinet are provided for ventilation and to ensure reliable
operation of the monitor and to protect it from overheating, and these openings should
never be blocked by placing the monitor on a bed, sofa, rug, or other similar surface.
This monitor should never be placed near or over a radiator or heat register. This
monitor should not be placed in a built in installation such as a bookcase or rack unless
proper ventilation is provided or the manufacturer instructions have been adhered to.
9. Power Source
This monitor should be operated only from the type of power source indicated on the
rear label. If you are not sure the type of power supply to use, consult with your dealer.
2

VTM-LCD143
10. Grounding or Polarization
For monitors equipped with a 3-wire grounding type plug with a third (grounding) pin.
This plug will only fit into a grounding-type power outlet. This is a safety feature. If you
are unable to insert the plug into the outlet, contact your electrician to replace the
obsolete outlet. Do not defeat the safety purpose of the grounding-type plug.
11. Power
Power supply cords should be routed well so that they are not likely to be walked on or
pinched by items placed upon or against them, paying particular attention to cords at
plugs, convenience receptacles, and the point where they exit from the monitor.
12. Lightning
For added protection for this monitor during a lightning storm, or when it is left
unattended and unused for a long period of time, unplug it from the wall outlet and
disconnect the cable system. This will prevent damage to the monitor due to lightning
and power-line surges.
13. Overloading
Do not overload wall outlets and extension cords as this can result in a risk of fire or
electric shock.
14. Objects and Liquid Entry
Never push objects of any kind into this monitor through openings as they may touch
dangerous voltage points or short-out parts that could result in a fire or electric shock.
Never spill liquid of any kind on the monitor.
15. Servicing
Do not attempt to service this monitor yourself as opening or removing covers may
expose you to dangerous voltage or other hazards. Refer all servicing to qualified
service personnel.
16. Damage Requiring Service
Unplug this monitor from the wall outlet and refer servicing to qualified service
personnel under the following conditions:
a. When the power-supply cord or plug is damaged.
b. If liquid has been spilled, or objects have fallen into the monitor.
c. If the monitor has been exposed to rain or water.
d. If the monitor does not operate normally by following the operating instructions.
Adjust only those controls that are covered by the operating instructions as an
improper adjustment or other controls may result in damage and will often require
extensive work by a qualified technician to restore the monitor to is normal
operation.
e. If the monitor has been dropped or the cabinet has been damaged.
f. When the monitor exhibits a distinct change in performance.
3

VTM-LCD143
17. Replacement Parts
When replacement parts are required, be sure the service technician has used
replacement parts specified by the manufacturer or have the same characteristics as
the original parts. Unauthorized substitutions may result in fire, electric shock or other
hazards.
18. Safety Check
Upon completion of any service or repairs to this monitor, ask the service technician to
perform safety checks to determine that the monitor is in proper operating condition.
4

VTM-LCD143
TABLE OF CONTENTS
WARNING.....................................................................................................................................1
SCOPE........................................................................................................................................... 1
SAFETY PRECAUTION............................................................................................................. 2
INTRODUCTION.......................................................................................................................... 6
CONTENT VERIFICATION........................................................................................................ 6
I. FRONT BUTTON LAYOUT....................................................................................................7
II. INPUT/OUTPUT PORTS........................................................................................................ 8
III. INSTALLATION...................................................................................................................... 9
IV. PROGRAMMING THE MONITOR....................................................................................10
1. COLOR............................................................................................................................ 11
2. PICTURE........................................................................................................................ 12
3. FUNCTION..................................................................................................................... 13
4. OSD MENU.................................................................................................................... 14
5. MISCELLANEOUS........................................................................................................ 15
V. TIMING MODE....................................................................................................................... 16
VI. POWER MANAGEMENT................................................................................................... 16
VII. SPECIFICATIONS.............................................................................................................. 17
5

VTM-LCD143
INTRODUCTION
This color video LCD monitor features versatile functions and produces crisp and high
quality video images for any discreet installation purpose. For industrial applications,
this monitor accepts a standard NTSC or PAL color input signals and loop-through
connectors. All of the controls are located on the front panel for easy access.
Furthermore, a regulated power supply maintains excellent performance during
fluctuation in line voltage. This monitor is suitable for specialized and industrial CCTV
surveillance applications where clear, high quality pictures and proven system reliability
are required.
Main Features:
• Wide auto-scanning compatibility range.
• Internal Microprocessor for digitally controlled auto scan. In each frequency
mode, the horizontal scan frequencies between 31.5 KHz to 60.2KHz and the
vertical scan frequencies between 56.3Hz to 75Hz. The microprocessor-based
circuitry allows the monitor to function at the precision of a fixed frequency.
• The resident memory allows user to adjust the parameters of the default settings
according to user’s demand.
• Compact and sleek cabinet design to save work space.
• VESA-DPMS compliant power management and VESA standard mount
compatibility.
CONTENT VERIFICATION
1. Video Cable with 15-pin D-Sub connector.
2. Power Cable.
3. 48-Watt Adapter.
4. Audio Cable.
5. User Manual.
6

VTM-LCD143
I. FRONT BUTTON LAYOUT
1
1. Menu Button
Pressing this button displays the On Screen Display (OSD) interface.
2. Up Button
Move up to the desired submenu or adjust the values of selected submenu.
3. Power Button
Press this button to power on or off the monitor.
4. Select Button
Execute a selected function or feature in the OSD menu.
5. Power Indicator
Green light indicates the monitor power on, amber light indicates the monitor is in
power save mode.
6. Down Button
Move down to the desired submenu or adjust the values of selected submenu.
*The Left or Right buttons can be used to adjust the volume when the OSD is not
displayed.
2 3 6 4
5
7

II. INPUT/OUTPUT PORTS
VTM-LCD143
DC 12V Signal Cable S-Video Looping Video PC Audio In Earphone Jack L - Audio - R
8

VTM-LCD143
III. INSTALLATION
1. Turn off the power switch of the PC and disconnect the power cord from the main
supply.
2. Connect the Signal Cable to the output port on PC. Tighten the thumbscrews for
good grounding.
3. Connect the DC 12V output jack on the adapter to the 12V DC input socket on
the LCD monitor.
4. Check all the connections one by one, then connect the power cord to the main
supply and turn on the PC’s power switch.
5. Press the LCD monitors power switch.
6. Turn on the PC system for image adjustment.
9
IV. PROGRAMMING THE MONITOR
There are five separate submenus in the On Screen Display (OSD).
1.
2.
3.
Color: Adjust the color tones of the image.
Picture: Adjust the horizontal and vertical position and size of the
video.
Function: Automatically adjust various parameters for optimum
adjustment.
4.
5.
On Screen Display: Adjust various OSD options.
Misc: Adjust other monitor related features such as video source,
mode selection and volume.
VTM-LCD143
10

VTM-LCD143
1. COLOR
a.
Contrast
Adjust the contrast to your preference.
b.
Brightness
Adjust the brightness for the best background picture.
c.
Gamma Correction
Select between 0 ~ 3 to choose the appropriate gamma correction level.
d.
Color Adjustment
Use the directional buttons to select from the following three options:
• 6500K
• 9300K
• Color Adj
Custom color adjustment is available if “Color Adj” is selected:
Red Green Blue
11
VTM-LCD143
2. PICTURE
a.
Horizontal Position
Shift the position of the image on screen horizontally.
b.
Vertical Position
Shift the position of the image on screen vertically.
c.
Sharpness
Select the sharpness level of the picture on screen. 1 is the lowest setting (dull) and 5
is the highest setting (sharp).
d.
Phase
Shift the phase value of the image. Phase is usually used to correct the focus of text or
lines.
e.
Clock
Shift the clock value of the image. Clock is also used to correct the focus of text or lines.
12

VTM-LCD143
3. FUNCTION
a.
Auto Adjust
Automatically adjust the screen image.
b.
Auto Position
Automatically adjust the image position.
c.
Auto Phase
Automatically adjust the phase of the image.
d.
Auto Clock
Automatically adjust the clock of the image.
e.
Auto Color
Automatically adjust the color of the image.
13

VTM-LCD143
4. OSD MENU
a.
Language
Select from six available languages, English, German (Deutsch), Spanish (Espanol),
Chinese Standard, Chinese Simplified and Japanese.
b.
OSD Horizontal Position
Adjust the horizontal position of the OSD.
c.
OSD Vertical Position
Adjust the vertical position of the OSD.
d.
OSD Timer
Adjust the duration of the OSD display time.
e.
Transparency
Adjust the transparency level of the OSD menu.
14

VTM-LCD143
5. MISCELLANEOUS
a.
Signal Source
There are three video sources to select from:
• D-Sub: Select to display video through the 15-pin D-sub (VGA) connector.
• CVBS: Select to display video through composite (BNC) connector.
• S-Video: Select this item to display through S-Video connector.
Mode Select
Select the desired display mode.
b.
Reset
Reverts to the factory default settings. Use the directional buttons to select between
“YES” and “NO”.
c.
Volume
Adjust the volume of the audio.
15

VTM-LCD143
V. TIMING MODE
* Preset
Mode Resolution V.
1 VESA 640 x 350 70 25.175 + - 11 VESA 800 x 600 75 49.000 + +
2
VESA 640 x
400
3 VESA 640 x 480 60 25.175 - - 13 VESA 1024 x 768 70 75.000 - 4 VESA 640 x 480 72 31.500 - - 14 VESA 102 4 x 76 8 75 78.750 + +
5 VESA 640 x 480 75 31.500 - -
6 MAC II 640 x
480
7 VESA 720 x 400 70 28.322 - +
8 VESA 800 x 600 56 36.000 + +
9 VESA 800 x 600 60 40.000 + +
10 VES A 80 0 x 6 00 72 50.000 + +
Band Width
freq.
70 25.175 - + 12 VESA 1024 x 768 60 65.000 - -
67 30.240 - -
(MHz)
Polarity Polarity
H V
Mod
e
Resolution V.
Freq.
(MHz)
Band
width
H V
*User Timing Mode Setup
The table above displays mostly commonly and frequently used timing modes. The
monitor automatically adjusts the picture size and image centering based upon the
video signal. For optimal performance, Auto Setup is recommended.
VI. POWER MANAGEMENT
The monitor is Energy Star compliant, and has four different power modes
State Hor. Sync Vert. Sync Power Consumption LED Light
ON ON ON < 36 Watts Green
Standby OFF ON < 5 Watts Amber
Suspend ON OFF < 5 Watts Amber
OFF OFF OFF < 3 Watts Off
*DDC (Display Data Channel):
The monitor is compatible with DDC Plug and Play protocol if your PC is DDC
compatible. The monitor supports DDC1 and DDC2B standards.
16

VTM-LCD143
VII. SPECIFICATIONS
Display Features Size 14” TFT LCD
Power Input AC 90 ~ 264 V, 50~60 Hz.
Display Area 285 mm x 214 mm.
Contrast Ratio 300 : 1
Viewing Angle
Operation Features Resolution 1,024x 768 75Hz (Max)
Brightness 160 cd/m2
Response Time Tr: 8 ms ; Tf: 15 ms.
Interface Analog RGB, C-Video ,S-Video
Connectors R/L Audio, Earphone Jack, Looping Video, S-Video
User’s Control Front Panel Controls Power on/off, Menu, Select, Up/Down, Auto.
Physical Specification Dimension 360mm x 360mm x 150mm
Net Weight 2.4 Kg
Power Power Saving VESA DMPS Standard.
Power Consumption Less than 24 Watts.
Hori: - 80 ~ + 85 ;Vert: - 65 ~ +55(Optional.)
17

VTM-LCD143
18

28492 CONSTELLATION ROAD VALENCIA, CA 91355
WWW.VITEKCCTV.COM | 888-VITEK-70
 Loading...