

Vita-Mix Inc. BARBOSS ADVANCE, DRINK MACHINE ADVANCE Operation Manual
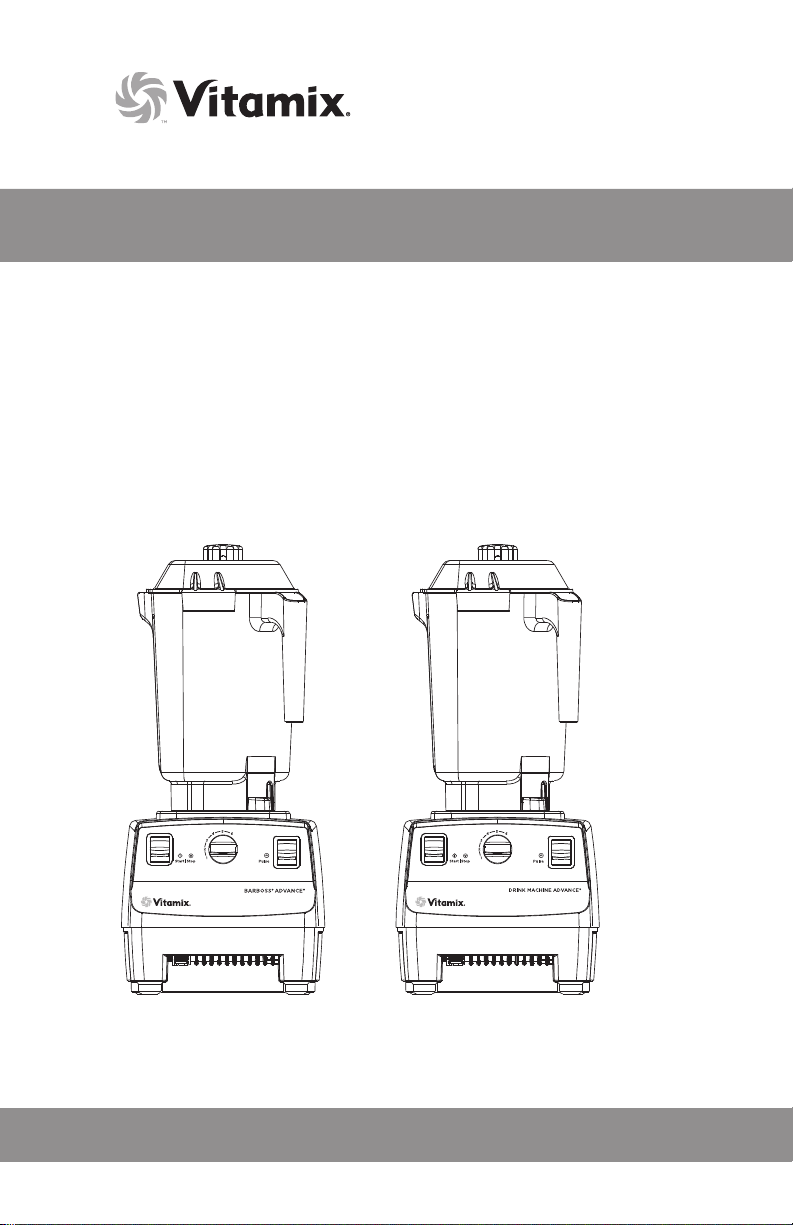
BarBoss® Advance® / Drink Machine Advance
Advance Performance Beverage Blending
ALL MODELS
Use and Care Manual
Read and save these instructions
®
BARBOSS® ADVANCE® DRINK MACHINE A DVANCE®
ENGLISH I ESPAÑOL I FRANÇ A I S

CONTENTS
English .............................................................................................................................1
Español ........................................................................................................................ 21
Français ....................................................................................................................... 41
Important Safeguards ..................................................................................... 4
General Instructions .......................................................................................... 6
Control Panel ........................................................................................................... 9
Programming .........................................................................................................10
Programming Custom Chip
Resetting Pre-Set Buttons
Machine Assembly ............................................................................................. 11
Lid Assembly
Blade Assembly
Caring for your Machine .............................................................................. 13
Troubleshooting ................................................................................................. 15
Warranty .................................................................................................................... 16
Parts List .................................................................................................................... 18
Product Specifications ................................................................................20
IMPORTANT SAFEGUARDS
1. Read all instructions.
2. To protect against risk of electrical shock, do not put motor
base in water or other liquid.
3. Close adult supervision is necessary when machine is used by or near children.
4. Unplug the power cord from the wall outlet when the Vitamix® machine is not in use,
before disassembling, putting on or taking o parts, and before cleaning, other than
washing the container.
5. Never contact moving parts, especially the blades.
6. Do not operate any machine that malfunctions, has a damaged cord or plug,
has been dropped or is damaged in any manner. If you purchased your equipment
in the U.S.A., call Vitamix Technical Support, 800-886-5235 for examination,
repair, possible replacement, or electrical or mechanical adjustment. If you purchased
outside of the U.S.A., please contact your local authorized Vitamix Distributor,
or contact the Vitamix International Division at +1.440.782.2450 or
email international@vitamix.com for a distributor near you.
7. The use of attachments, including canning jars, not recommended or sold by
Vitamix may cause fire, shock, or injury. Do not use attachments not recommended
or sold by Vitamix, doing so will void the warranty. Alteration or modification of this
product in any form is not recommended as such may result in bodily injury.
8. Do not use outdoors.
9. Do not let the power cord touch hot surfaces or hang over edge of table or counter.
10. Do not place the machine on or near a hot gas or electrical burner,
in a heated oven, or allow machine to touch hot surfaces. External heat
sources can damage the machine.
11. Keep hands and utensils out of container while motor is running to prevent the
possibility of severe personal injury and/or damage to the Vitamix machine.
A rubber spatula may be used, but only when the machine is not running. With the
flexible rubber lid in place, the Vitamix accelerator tool (sold separately) may be
used while motor is running.
12. WARNING: Blade is sharp. Handle carefully.
• Never try to remove blade while container is sitting on the motor base.
• Do not operate with loose, nicked or damaged blade – replace immediately.
• To reduce the risk of personal injury, never place blade assembly on motor base
without blender container properly attached.
13. The maximum normal load is equivalent to the ounces (liters) listed on the container,
i.e., 32 oz. / 0,9 L and substantially less with thick mixtures.
14. Container should not be more than ⅔ full when the accelerator tool is
left in place while blending. Do not exceed 30 seconds of continuous
blending with accelerator tool in place.
15. CAUTION: Cooling problems resulting in thermal shut-o and eventual
motor damage may result if machine is operated in sound chambers other
than those approved by Vitamix.
16. Always operate the Vitamix machine with a lid in place.
17. CAUTION: The light in the front panel Start/Stop switch, when lit, indicates the
power to blender is on and blender could start. Turn power o, or unplug the
machine before touching movable parts. Shut o power switch at night or
whenever machine will be left unattended.
Save These Safety Instructions
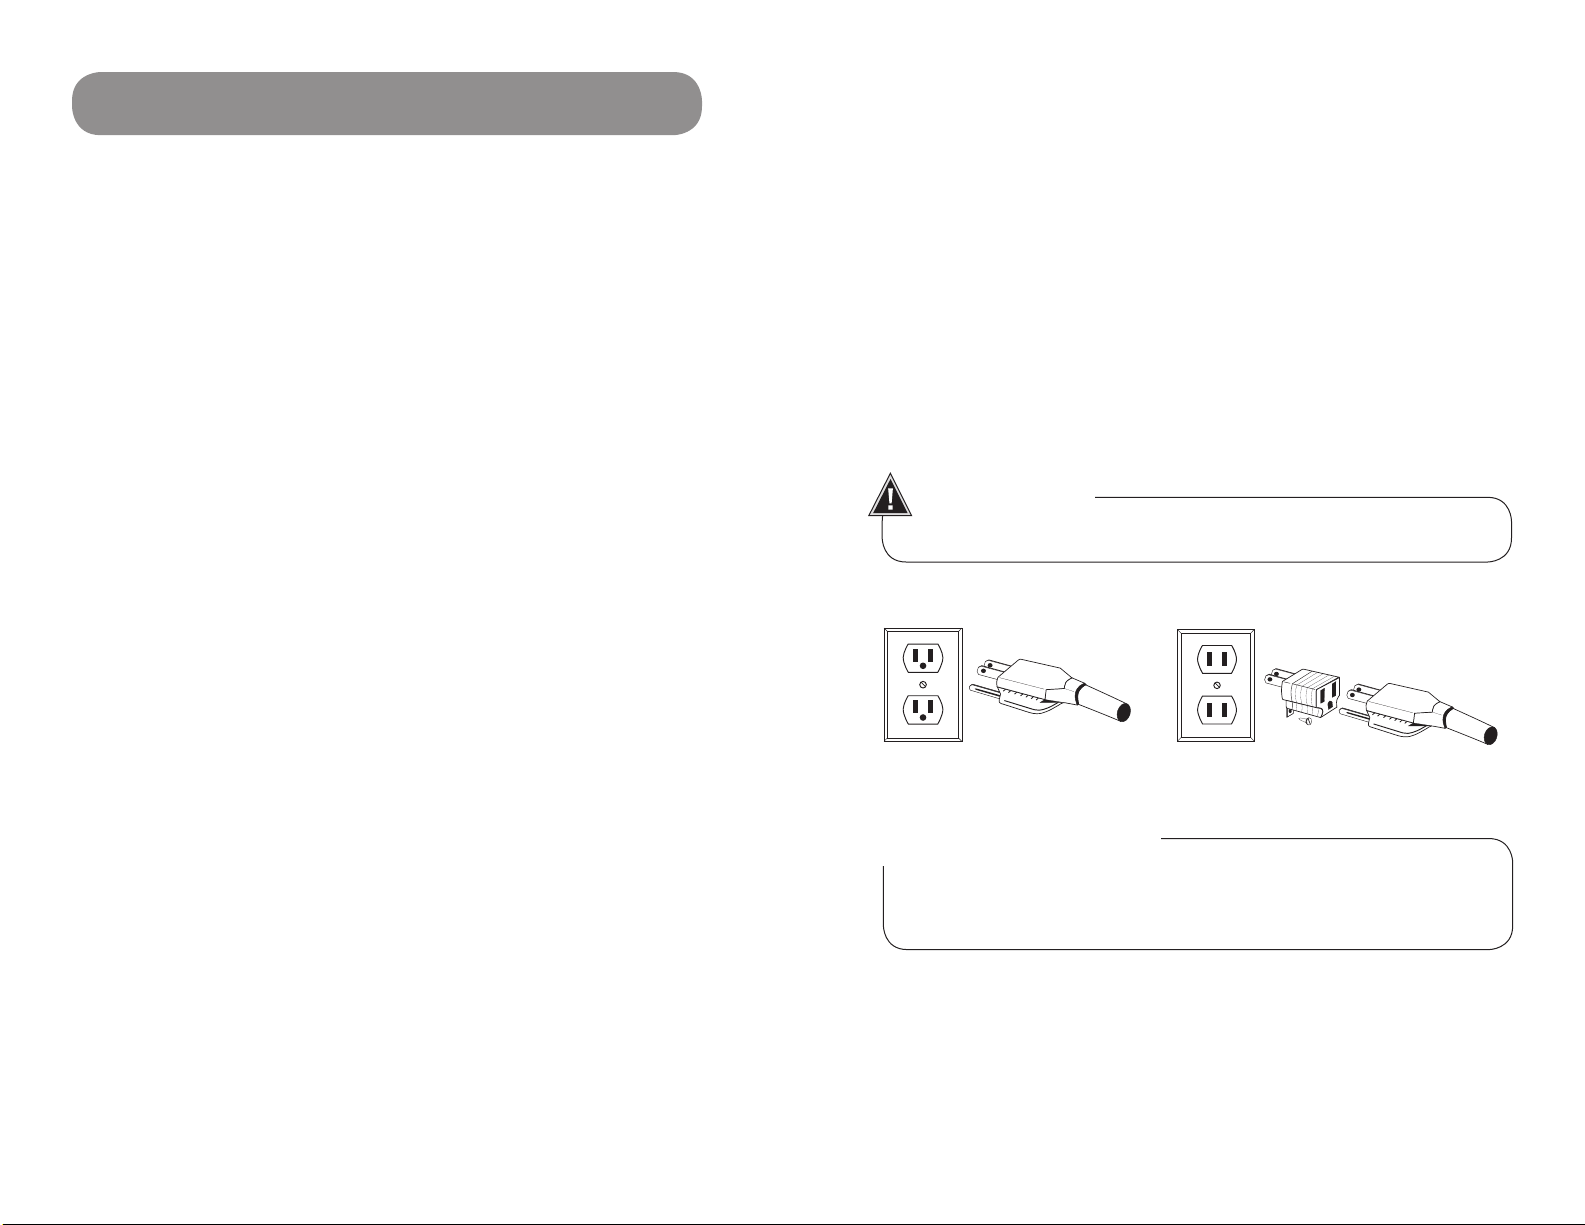
• The Vitamix blender’s U.S.A. power cord comes equipped with a three-prong
(grounding) plug which mates with a standard three-prong wall outlet (Figure A).
This cord will vary for countries outside the United States of America.
• Adapters (Figure B) are available for two-prong outlets. Do not cut or
remove the third (ground) prong from the plug or power cord.
• Consult your electrician if you are not sure if the wall outlet is grounded through
the building wiring. With a properly grounded two-prong wall outlet, ground the
machine by attaching the tab on the adapter to the wall outlet cover by means of
the screw in the center of the cover (Figure B).
WARNINGS!
Three-prong adapters are not to be used in Canada.
FIGURE A FIGURE B
IMPORTANT NOTES!
The instructions appearing in this Use and Care Manual cannot cover every possible
condition and situation that may occur. Common sense and caution must be
practiced when operating and maintaining any appliance.
4
5

GENERAL INSTRUCTIONS
BarBoss® Advance® & Drink Machine Advance®
Pre-Set Programs
The following are settings of the six Pre-Set Programs for the BarBoss Advance
and Drink Machine Advance machines. These programs, numbered 1 through 6, are
blending cycles designed for the most commonly made drinks. Depending on the
viscosity of the drink you are creating, selecting one of the six Pre-Set Programs
will run the machine for a full cycle. The machine will stop by itself when the cycle is
complete. A cycle varies in speed and length. Your machine’s Pre-Set options may
dier due to program revisions or if your machine was programmed specifically for
your business. Due to the dierence of recipes, your results may also vary.
SETTING 1: (:15) Blends thin drinks with just juice and ice.
SETTING 2: (:18) Blends light coee drinks.
SETTING 3: (:21) Creates a specialty drink with a thick viscosity.
SETTING 4: (:24) Creates ice cream and regular coee drinks that
need a little longer blending.
SETTING 5: (:27) Blends a regular smoothie.
SETTING 6: (:30) Blends thick frozen fruits & hard ingredients
for a thick but consistent smoothie.
Blending Tips
1. Place liquids and soft foods in the container first, solid items and ice last. Although
not necessary for processing, you may want to cut or break food into smaller pieces
for more precise measuring of ingredients. Thawed or partially thawed fruit is
recommended. High speed is recommended for heavy-duty blending.
2. Set the container on the motor base by aligning it over the centering pad anchored
to the base. (Motor must be completely stopped before positioning container).
Containers are not to be used for hard, dry materials. Avoid running your machine
with the container empty.
3. Always use a lid when blending. If blending hot ingredients, the lid must
be securely latched in place. When processing hot liquids, DO NOT use a
non-latching or one-piece lid.
4. Plug the machine into the nearest outlet (if unplugged). Press On/O switch to on.
Activate a program by selecting the desired setting on the dial and then depressing
the Start/Stop switch on the left.
• If mixture stops circulating, you have likely trapped an air bubble.
Either insert the accelerator tool (sold separately, see page 19) through
the lid while blending, or stop the motor, remove the container from the
base and stir or scrape the mixture from the sides of container into the
center using a rubber spatula to press any air bubbles away from the blades.
Replace the lid and continue blending.
• To prevent possible splashing, lightly rest your hand on the lid while
turning the machine on (except when processing hot liquids).
• Due to the blending speed of the machine, processing times are greatly
reduced over other manufacturers’ machines. Until you become accustomed to
the speed, watch your mixture carefully to avoid over-blending.
• If stopping the machine mid-cycle, use the Start/Stop switch, not the
On/O switch. If the On/O switch was used, wait 30 seconds for
power to recycle and the timer to reset before resuming operation.
5. After the blender has been stopped, wait until the blade comes to a
complete stop before removing the lid or container from the motor base.
6. To use the pulse switch to refresh drinks: Make sure the power is on.
With the container on the motor base, depress the pulse switch.
Release the switch to stop the motor.
7. Press the On/O Switch to O when not in use.
WARNINGS!
• When the machine is not in use, unplug the machine from the outlet.
• If you detect a change in the sound of the machine or if a hard or foreign object
comes into contact with the blades, do not serve the contents. Inspect your
blade assembly for loose, nicked or missing parts. If parts are loose, missing,
or nicked, replace with a new blade assembly. (See page 12.)
6
7
GENERAL INSTRUCTIONS
Maintenance Tips:
• Never bang the container against a surface to loosen the ingredients.
Remove the container from the base and use a rubber spatula to remove
thick mixtures from the bottom of your container.
• Never shake or rattle a container while in use.
• Never remove the container before the machine has come to a complete stop.
• Never start the motor before the container is in place.
IMPORTANT NOTES!
The automatic overload protection shuts the motor o to protect the motor.
The motor may stop working if it is overloaded or overheated.
If the motor shuts o, it could be due to:
• Recipe being too thick
• Recipe having too many ingredients in it
• Recipe was being processed too long at too low a speed
If the motor shuts o, review your processing techniques and your instructions.
Thermal Protector: The thermal protector may shut the motor o to protect it
from overheating. To restart, wait for motor to cool down with the power o (up to
45 minutes). Cooling may be quickened by placing the motor base in a cool spot.
(Unplug first.) To speed up the process, try circulating the air with a vacuum or fan
aimed at the bottom of the base. When the thermal protector shuts the motor o,
review your processing techniques and your instructions. Your recipes may be too
thick or have too much material in them. If the motor seems to be overheating but
the thermal overload protector has not turned the machine o, stop the machine
and remove the container from the base. Turn the machine on and let the machine
run for 20 seconds. Repeat this step 3 times for a total of 1 minute. Be careful never
to touch any moving parts while in use.
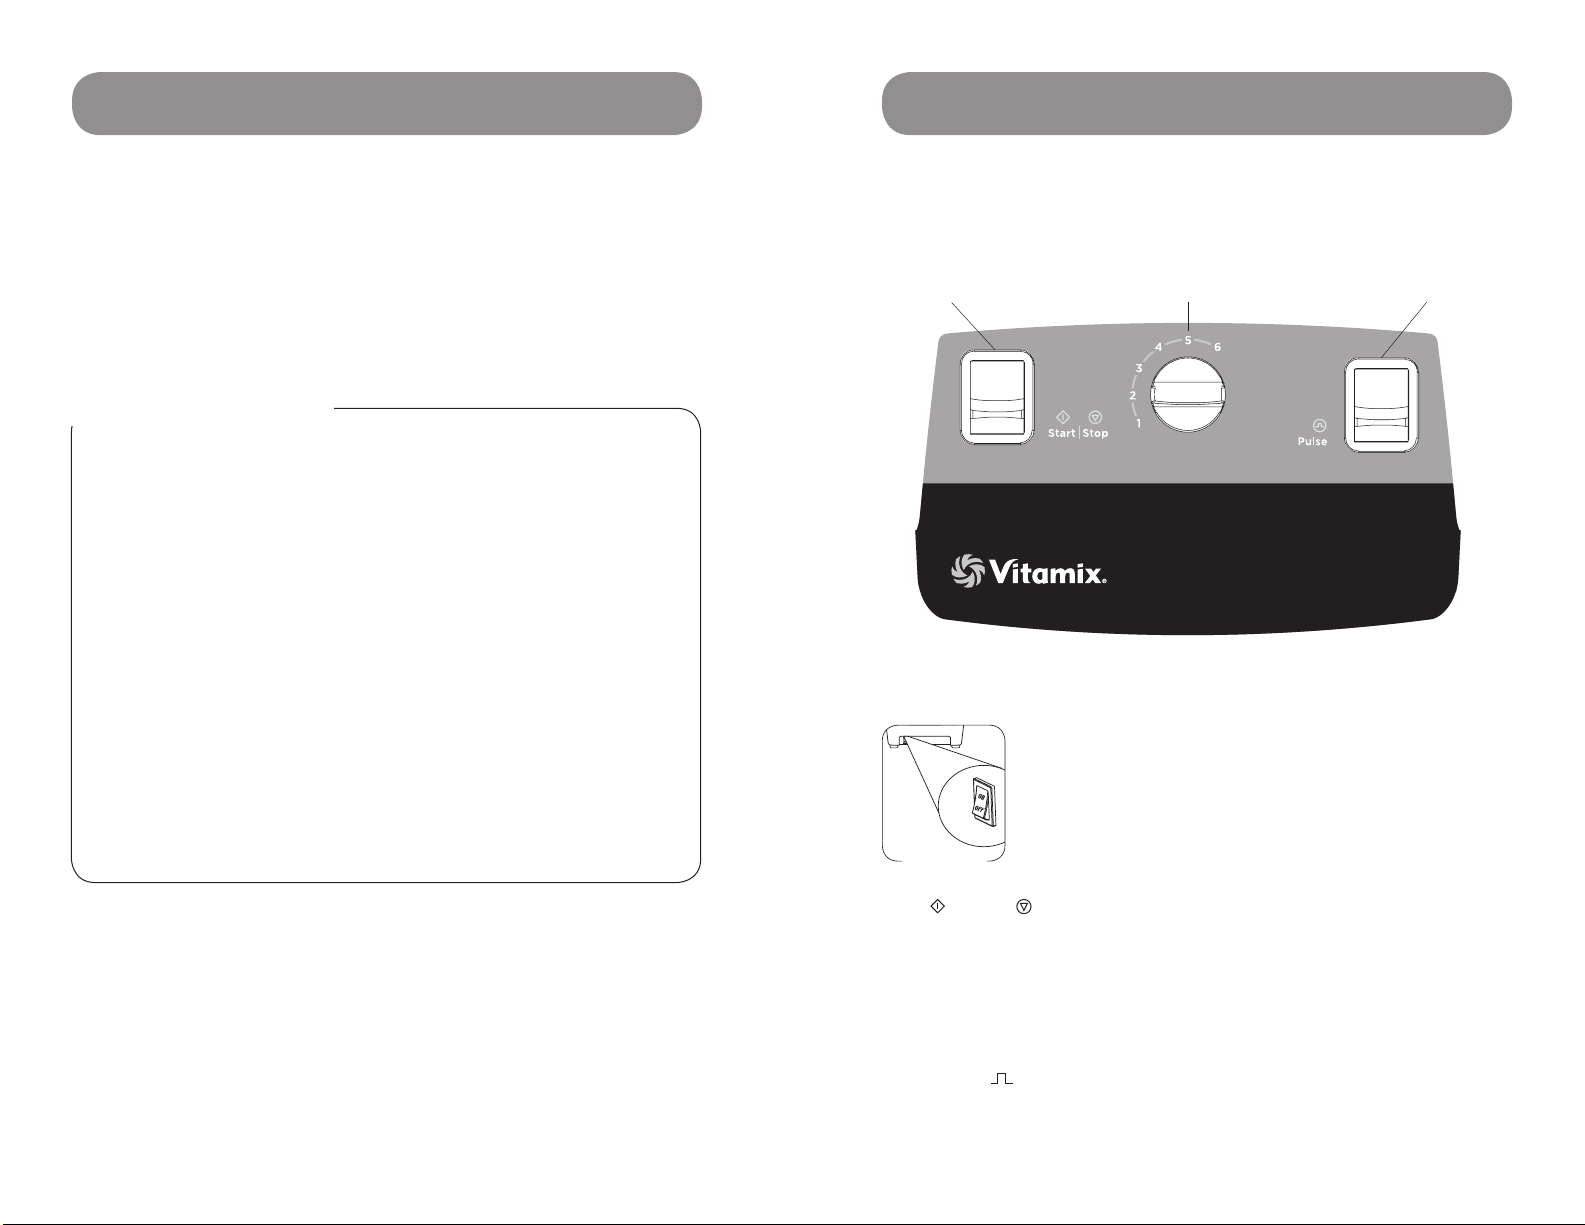
CONTROL PANEL
Start/Stop Switch Program Dial Pulse Switch
BarBoss® Advance®
and Drink Machine Advance®
On/O Switch: Located on the front of the machine below the
control panel (Figure A). The On/O switch controls the power
to the machine. While plugged in, switch to on to ready the
FIGURE A
Start
( )
/ Stop
power is on. Depress the start switch to activate program setting and again to
stop a program mid-blending cycle. During operation, you may interrupt a
program by pressing the Start/Stop switch.
Program Dial: Allows user to select a number of pre-programmed settings.
Machine will shut o automatically at the end of the program. Program is
activated only when the power switch is on. See page 10 for programming details.
Pulse Switch
container by depressing the switch and holding down as long as needed. The pulse
switch can only be used when the power switch is on.
machine for blending. Shut o the power switch at night or
whenever the machine will be left unattended.
( )
Switch: This is a lighted switch. When light is lit,
( )
: The pulse switch can be used to quickly refresh contents of the
8
9
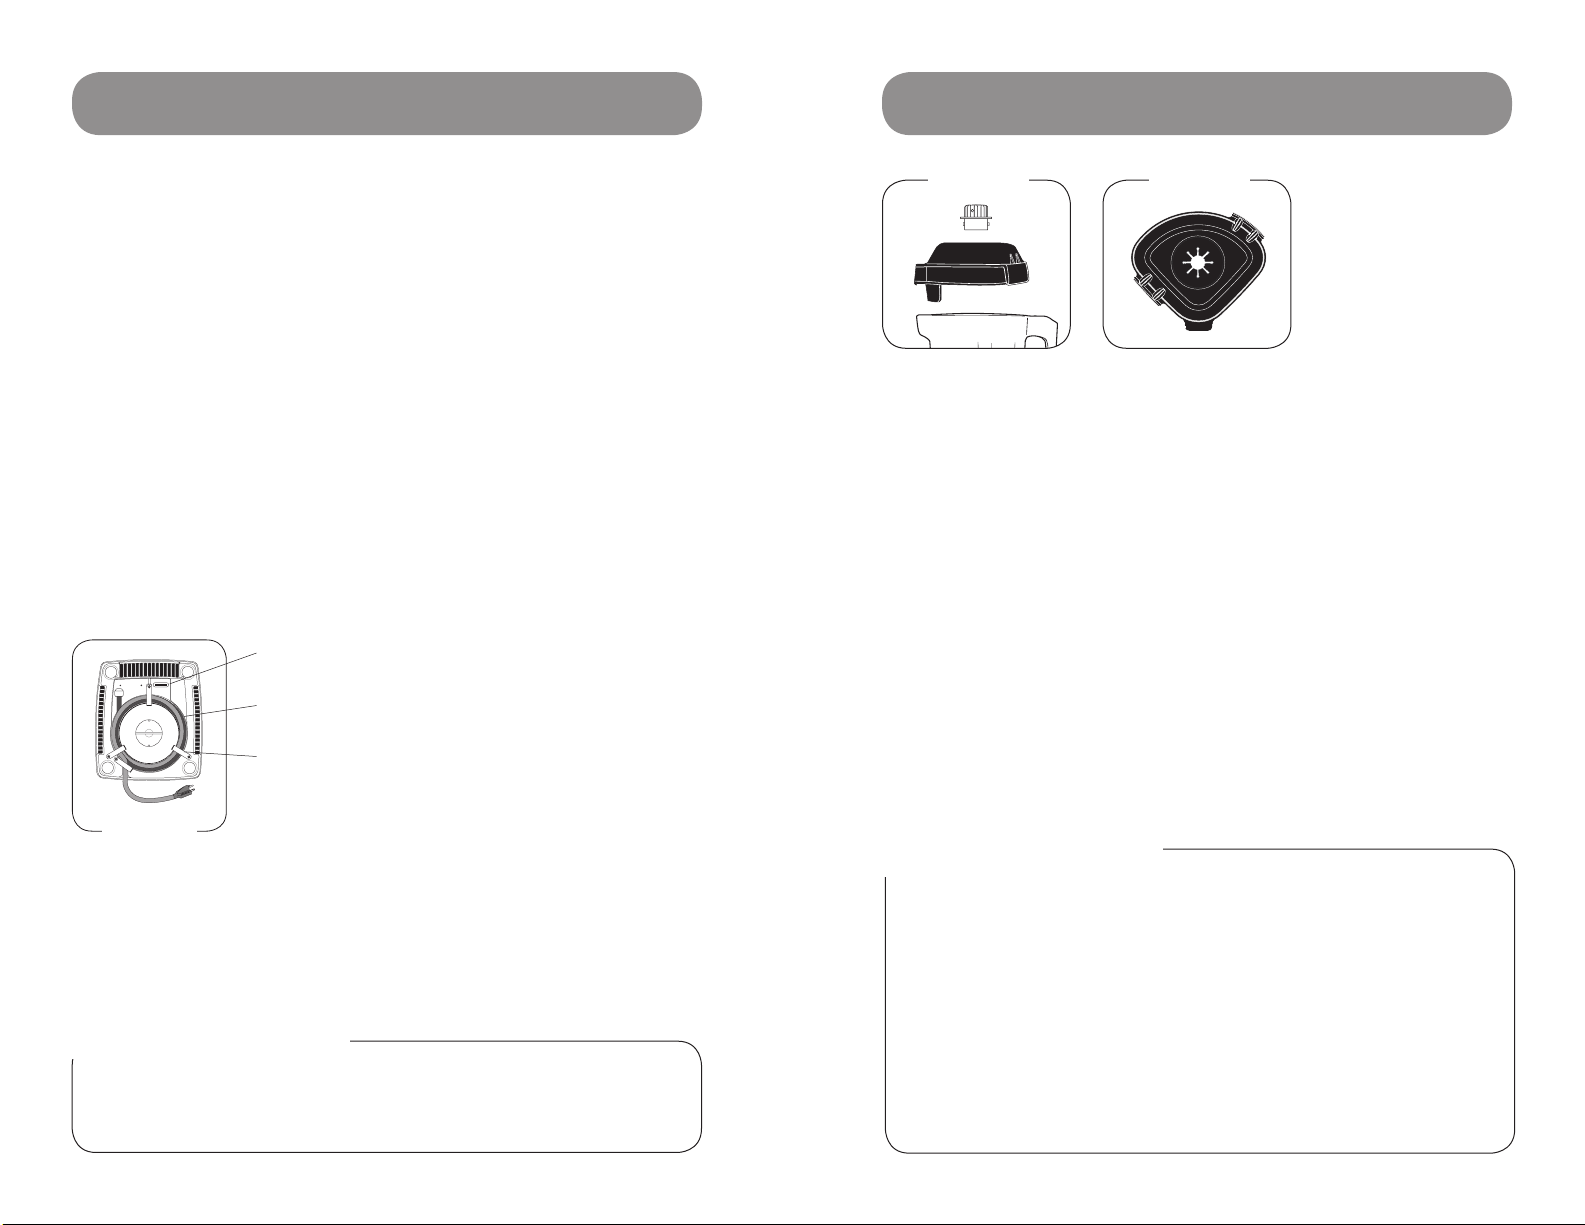
PROGRAMMING
MACHINE ASSEMBLY
The BarBoss® Advance® and Drink Machine Advance® are pre-programmed
with settings optimized for the Advance® container. The programs can be
customized by using a programming chip or programmer software kit available
from Vitamix®. Call your distributor or Customer Service for more information.
Although your machine comes from the factory pre-set with the programs,
follow these instructions when using a custom programming chip.
Programming with a Custom Chip
1. Turn the power to the machine on using the On/O switch located
on the front of the machine below the control panel.
2. Remove the container and lift the front of the machine so that you can
see the bottom programming port. Facing the front of the machine, insert
the custom programmed chip with the silver contact bars up and the words,
“THIS SIDE FACING TO THE FRONT OF THE MACHINE” toward you into the
port located below the label area.
3. Within 5 seconds, the six Pre-Set Programs will be re-programmed.
4. Remove the programming chip, return it to the original package and store
in a safe, easily accessible spot.
5. Place the machine back on its feet and replace the container.
Programming Port for the BarBoss Advance
and Drink Machine Advance.
6 ft. / 1,8 m Power Cord can be stored
neatly underneath when not in use.
Retainer Clips are flexible and will return to position after
cord is lifted out. There is no need to unscrew the clips to
let out more cord.
BOTTOM OF
MACHINE
Resetting Pre-Set Programs to original factory settings
1. Turn the power to the machine o using the On/O switch
located on the front of the machine below the control panel.
2. Hold down the pulse button while turning the power back
on using the On/O switch.
IMPORTANT NOTES!
Programming Chip: If the above programming steps are taken and the custom
programming does not appear with the first blend cycle, turn the chip 180˚
(side-to-side ) and try again.
FIGURE A FIGURE B
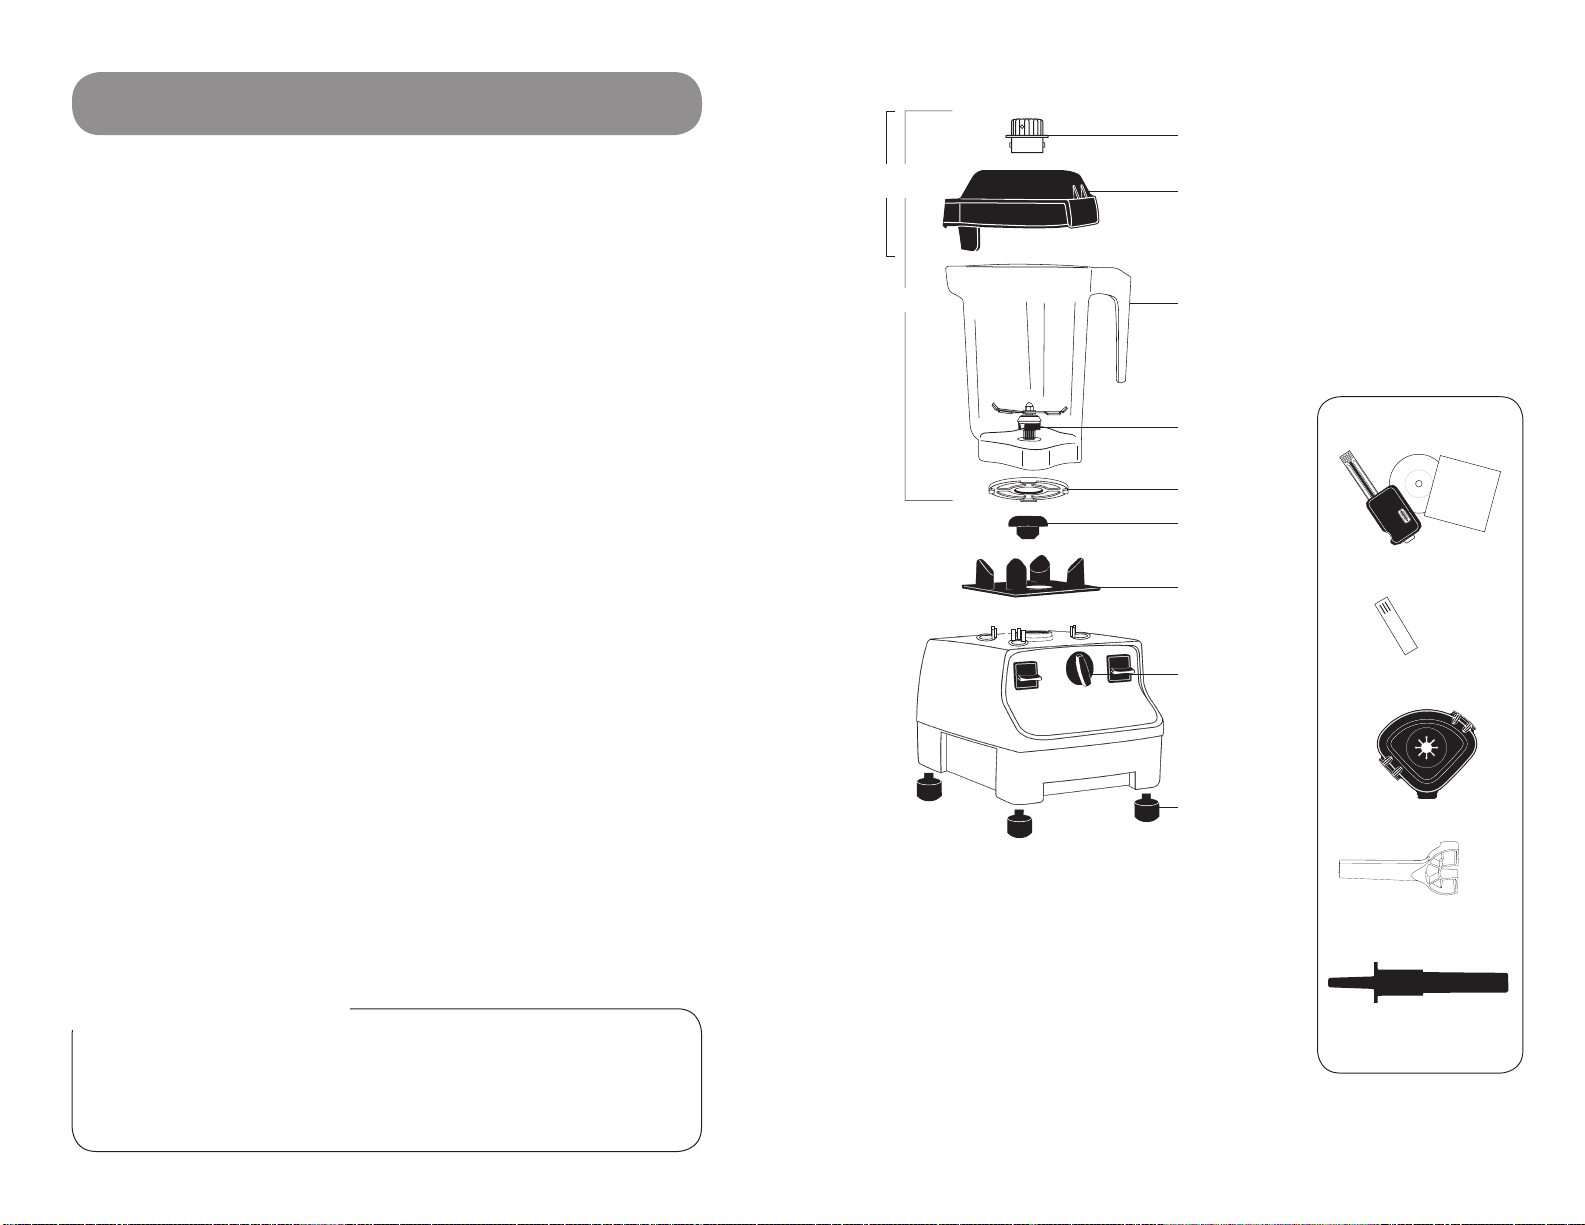
Lid Assembly
Two-Piece Lid, (Figure A) 32 oz. / 0,9 L Advance® Container
• The two-piece lid is easy to clean and easy to put on, take o and seal.
• To remove a fully latched lid, lift the two tabs and pull upward and o.
• Twist the center lid plug to fasten or remove.
One-Piece Lid, (Figure B, optional) 32 oz. / 0,9 L Advance® Container
• The one-piece lid is easy to clean and easy to put on, take o and seal.
• There is no lid plug for this lid.
• Add ingredients through port on top.
IMPORTANT NOTES!
Containers:
• BarBoss Advance and Drink Machine Advance machines are optimized for use
with the Vitamix 32 oz. / 0,9 L Advance container. Use of Vitamix Standard
containers (64 oz. / 2,0 L, 48 oz. / 1,4 L or compact 32 oz. / 0,9 L) may require
programming adjustments. The 32 oz. / 0,9 L Advance container will not work
with earlier Vitamix models. Call Vitamix Customer Service or your distributor for
more information.
• Outside the United States and Canada, your machine may come
with a dierent container configuration.
New Lids: To make new lids easier to insert and remove, rub a light coating of
cooking oil around rim where it seals. Place it in container for several minutes,
remove and lightly wipe oil o lid.
10
11
MACHINE ASSEMBLY
Blade Assembly
Blade Agitator Assembly: The blade assembly
includes a precision-hardened stainless steel blade
with enclosed double sealed steel ball bearings for
maximum durability. The rugged blade assembly
literally explodes molecules of food and ice in the
container, helping every batch to homogenize
more eectively. The blades do not need to
be removed for normal cleaning. (Refer to the
information below to remove or replace.)
Drive Spline: Inserts into drive socket on the motor
base to turn the blade.
Note: Removing and replacing your container
while the coupling is still rotating will strip the
drive spline “teeth.” (This part is NOT removable.)
Retainer Nut: Must be snug. Order the available
Retainer Nut Wrench for best results. (Refer to
the information below to remove or replace.)
CARING FOR YOUR MACHINE
Retainer Nut Wrench
Retainer Nut Wrench in use
WARNINGS!
Never use a blade assembly with loose, damaged or nicked components.
Caution: Do not remove blades or blade assembly unless absolutely necessary!
Never attempt to take the blade assembly itself apart. This will void the warranty.
12
Blade Assembly Removal
At times, it may be necessary to give your blades
additional cleaning. An easy-to-use blade assembly
removal wrench (Item #15596) may be purchased.
Turn the container upside down and grip firmly.
Insert retainer nut wrench in groove of retainer nut
and rotate counterclockwise to loosen. Then grip
blades with a cloth and remove retainer nut by hand.
Replacing Blade Assembly: With the container
upside down, grip blades with cloth, insert into
the container bottom and align with flat sides of
container opening. Place retainer nut on and hand
tighten. Using the retainer nut wrench, carefully
turn clockwise until secure, using wrench. Do
not force. If it is not tight enough, you will notice
increased container noise.
IMPORTANT NOTES!
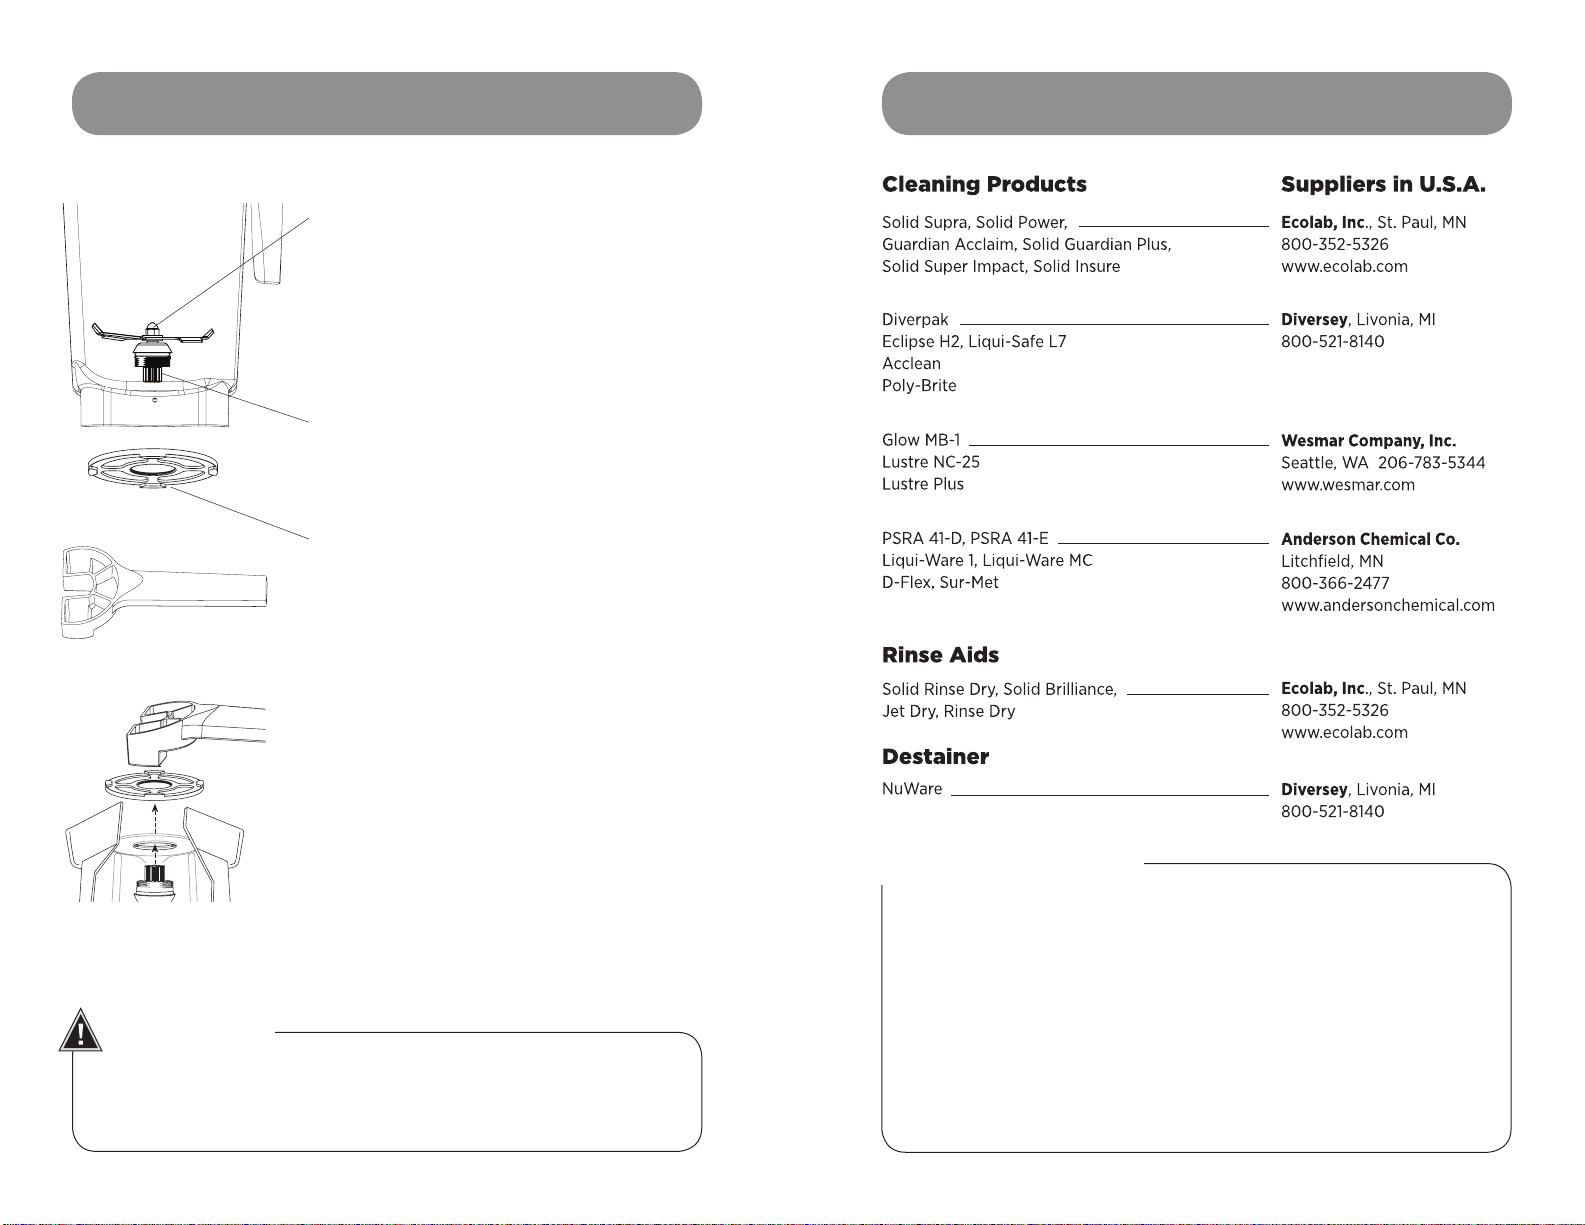
Cleaning Products: Do not use abrasive cleaning agents or concentrated bleach when
cleaning. Do not use any cleaners containing Quatinary Sanitizers on the containers.
Cleaning: Switches may become sticky from use. Unplug the machine and use a
wet cloth, moistened with water and a mild detergent, to clean around the edges
of the switch paddles until they function freely. Clean carefully, using caution not to
allow water or other liquids to infiltrate the switch. Dry with a soft cotton cloth.
Container: Do not let mixtures, liquids or food products dry in the container.
Dry product may lock around the blade and weaken/tear the bearings seal when
restarted. Do not place containers in the freezer, the blade may crack the container.
Due to the nature of polycarbonates, microwaving and automatic dishwashing are
not recommended. Follow the cleaning instructions on page 14.
13

CARING FOR YOUR MACHINE
TROUBLESHOOTING
Motor Base/Control Panel
1. Unplug the power cord.
2. Gently wash the outside surface with a damp soft cotton cloth moistened with a mild
solution of warm water and nonabrasive detergent or nonabrasive liquid spray cleaner.
Never immerse motor base in water or other liquid.
3. Thoroughly clean switches so that they work freely. They may become sticky from
use. Use a wet cloth, moistened with water* and a mild detergent, to clean around
the edges of the switch paddles until they function freely. Leaving switches sticky
will damage or burn out the switches. Clean carefully, using caution not to allow
water or other liquids to infiltrate the switch.
4. Dry with a soft cotton cloth.
Lid
Separate the lid and plug. Wash in warm soapy water. Rinse clean under running water
and dry. Reassemble before use.
Container
For maximum container life, do not wash in dishwasher.
1. To Clean: Fill container ¼ full with warm (110˚F / 43˚C) water and add a couple drops
of liquid dishwashing detergent.** Return container to motor base and firmly position
the two-piece lid. Run machine for 30 seconds. Empty container. Repeat this step.
2. To Rinse: Fill container ¾ full with warm (110˚F / 43˚C) water, do not add soap.
Return container to motor base and firmly position the two-piece lid. Run machine
for 30 seconds. Empty container.
3. If any solid residue remains, remove the blade assembly (see page 12) and wash all
container parts in warm soapy water. Rinse and drain. Reassemble before next step.
Do not soak the blade agitator assembly.
4. To Sanitize: If all solid residue is gone after step 2 or after completion of step 3,
fill container ¾ full with a sanitizing solution mix.*** Return container to motor base
and firmly position the two-piece lid. Run machine on a high speed for 30 seconds.
Turn machine o and allow mixture to stand in the container for an additional
1–½ minutes. Pour out mixture.
5. Return container to motor base and run machine empty for an additional 5 seconds.
Do not rinse after sanitizing. Allow container to air dry.
Problems:
• Increased vibration
• Leaking from bottom of container
• Increased container noise
• Machine will not run a. Double-check to make sure power
• Loud noise from blade area
• Blades don’t spin
• Machine will not run when
Start/Stop switch is activated
• Machine is running irregularly
• Setting selected starts the
wrong program
If you cannot fix your machine with these suggestions, technical help is available by calling
Vitamix technical support at 800-886-5235. If you purchased your equipment outside the
U.S.A., contact your local Vitamix Distributor or telephone the Vitamix International Division
at +1.440.782.2450 or email international@vitamix.com for a distributor in your country.
For online help, visit www.vitamix.com/foodservice.
Possible Actions:
a. Check blade assembly for loose, damaged
or nicked components and replace.
b. Tighten retainer nut with retainer nut
wrench moving clockwise until it is snug.
See page 12.
cord is firmly in power outlet.
b. Check to make sure switches are
clean and moving freely.
c. The thermal protector may have shut the
machine o. Turn power o for up to 45
minutes to reset.
a. Drive socket may be broken. Check for a
fine crack down the center or worn teeth,
replace with a new drive socket (Item
#891). Instructions are included with part.
b. Blade bearings need to be replaced. Spin
the blades using the drive spindle at the
bottom of the container. If blades spin
freely with no resistance, replace blade
assembly. See page 12.
a. Check On/O switch to make sure the
switch is in the on position. Note: Start/
Stop switch is lit when power is on.
a. Turn the machine o and on
again to reset the programming.
b. Reset the machine to its original
factory settings. See page 10.
IMPORTANT NOTES!
* Be sure to wring excess water out of cloth or sponge when
cleaning around the controls or any electrical part.
** To prolong container life, Vitamix® recommends using soaps with a
low Ph balance, such as a liquid dishwashing detergent (Ivory Liquid®).
*** Recommended sanitizing solution: 1.5 tsp. / 7,4 ml institutional or
household bleach in 2 qt. / 2,0 L water.
14
Cooling the Motor
Machine may stop working if it is overloaded on low speed. Reset by turning
power o for 30 seconds. Do not turn power o midway through a blending cycle.
To interrupt cycle, press Start/Stop switch one time.
Note: Cooling may be quickened by placing the motor base in a cool spot.
(Unplug first.) Try circulating the air with a vacuum or fan aimed at the
bottom of the motor base.
15

WARRANTY
LIMITED WARRANTY
In order to maximize the life and keep your Vitamix® product in good working order,
it is important that you follow a few simple maintenance tips:
1. Periodically inspect the drive socket for visible wear and tear, cracks, or
brakes to the socket. If damage is found, replace the drive socket with the
extra drive socket enclosed with your blender. To purchase additional
replacement drive sockets contact Vitamix at 1-800-437-4654 (1-800-4DRINK4)
for a dealer near you. For customers outside the U.S.A., contact your authorized
Vitamix Distributor, or call the Vitamix International Division at +1.440.782.2450 or
email international@vitamix.com for a distributor near you.
2. Manually rotate the blade bearing assembly to make sure it turns without
hesitation or doesn’t spin too freely. If the blade hesitates or spins too freely,
contact Vitamix at 1-800-437-4654 (1-800-4DRINK4) for warranty information or
a dealer near you. For customers outside the U.S.A., contact your authorized
Vitamix Distributor, or call the Vitamix International Division at +1.440.782.2450
or email international@vitamix.com for a distributor near you.
3. Never run the machine without the centering pad properly placed on the base.
Vita-Mix® Corporation (hereinafter “Vita-Mix”) warrants to the original end-user
(proof of purchase required) purchased in the U.S.A., that this commercial
Vita-Mix blender (hereinafter the “Equipment”) is free from defects in material
and workmanship for the warranty periods applicable to the Equipment as
described herein and subject to the conditions set forth below.
Motor Base
Vita-Mix warrants to the original end-user that:
• If the motor base fails within thirty (30) days from the date of purchase,
Vita-Mix will replace the motor base without charge.
• If the motor base fails after thirty (30) days but within one year from the date
of purchase, due to a defect in materials or workmanship, Vita-Mix will assume
the cost of all parts and labor necessary to repair the motor base.
• If the motor base fails after one year but within three (3) years from the date
of purchase due to a defect in materials or workmanship, Vita-Mix will assume
the cost of the parts deemed necessary to repair the base.
Container, Lid, Blade Assembly, Drive Socket and Sound Enclosure (if included)
The container, lid, blade assembly, drive socket and where included a Vita-Mix
manufactured sound enclosure, are warranted against defects in material and
workmanship for one year from the date of purchase.
Conditions
• The warranties contained herein run only to the original end-user and are
not transferable. To make a warranty claim, proof of purchase is required.
• This warranty is the sole remedy of the purchaser and sets forth the only obligations
of Vita-Mix and does not cover normal wear-and-tear, abuse, misuse,
negligent use, alteration of the base or container (or the sound enclosure),
or exposure to extreme conditions and is only valid if the Equipment is used in
accordance with the accompanying instruction booklet (which may also be
accessed at www.vitamix.com/foodservice).
• If applicable, improper installation or ventilation in the case of the in-counter model of
the Equipment, or placing the Equipment in a sound enclosure not manufactured by
Vita-Mix will void this warranty.
• This warranty is void in the event that repairs to the Equipment are performed
by someone other than Vita-Mix or an authorized Vita-Mix Service Center.
Vita-Mix will not be responsible for the cost of any unauthorized repairs.
• The sole obligation of Vita-Mix under this warranty is to repair or replace
the warranted part or parts as determined exclusively by Vita-Mix.
In no event, whether based on contract, indemnity, warranty, tort (including
negligence), strict liability or otherwise, shall Vita-Mix be liable for any special,
indirect, incidental or consequential damages whatsoever including, without
limitation, loss of profit or revenue. The above limited warranty is your exclusive
remedy, and you and Vita-Mix hereby expressly disclaim all other warranties or
conditions, express or implied, statutory or otherwise, including any implied
warranty of merchantability and any implied warranty of fitness for a particular
purpose, and, without limiting the generality of the foregoing, you and Vita-Mix
hereby expressly exclude, to the extent permitted by law, the application of any
sale of goods legislation and the United Nations Convention on Contracts for
the International Sale of Goods, as may be applicable.
Some jurisdictions do not allow a limitation on implied warranties
or on special, incidental or consequential damages.
No employee of Vita-Mix or any other person is authorized to make any
warranty in addition to or amendment of the warranties made herein.
For warranty details for machines purchased outside the U.S.A., contact your
authorized Vita-Mix distributor, or call the Vita-Mix International Division at
+1.440.782.2450 or email international@vitamix.com for a distributor near you.
In the event your Vita-Mix blender needs service or repair covered by
the terms of this warranty, please call the Vita-Mix Corporation for warranty
assistance. For machines purchased in the U.S.A., call Vita-Mix Technical Support:
800-886-5235. If purchased outside the continental U.S.A., contact your
authorized Vita-Mix Distributor, or telephone the Vita-Mix International Division
at +1.440.782.2450 or email international@vitamix.com for a distributor near you.
Any item sent to Vita-Mix pursuant to the terms hereof must be sent in
original or sucient packaging. Customer is responsible for in-bound freight
costs for warranty service. Do not return or send in products without the
approval from Vita-Mix. All product returns must have the Return Authorization
Number clearly marked on the outside of the box. Any product that is sent
to Vita-Mix without prior authorization or approval will be returned to the
shipper’s address “as is” without repair.
16
17
PARTS LIST
#15987
BarBoss® Advance® & Drink Machine Advance®
#15987 Lid plug for 32 oz. / 0,9 L Advance® container
#15986 Lid only (no plug) for 32 oz. / 0,9 L Advance® container
#15985 Lid assembly for 32 oz. / 0,9 L Advance® container
#15981 32 oz. / 0,9 L polycarbonate/stackable Advance® container,
ice blade & lid assembly
#15984 32 oz. / 0,9 L polycarbonate/stackable Advance® container only
#15990 Advance® blade agitator assembly
#15585 Advance® retainer nut
#891 Drive socket
#15578 Sound-reducing centering pad
#PLS207 Program control knob
#PLS112 Rubber Foot
#15985
#15981
#15986
#15984
#15990
#15585
#891
#15578
#PLS207
Items Sold Separately:
#15606
Software Kit - USB Version
#15644
Extra Programming Chip
for Software Kit
IMPORTANT NOTES!
• Outside the U.S.A. and Canada, your machine may come with a dierent
container configuration. Contact your local Vitamix Distributor for item numbers
• Other than the drive socket, blade assembly and retainer nut, this unit is
not user serviceable.
18
#PLS112
#15988
One-Piece Lid
#15596
Retainer Nut Wrench
#760
Accelerator Tool
19
 Loading...