

Page 1
Vitalograph micro
USER MANUAL
MODEL 6300
CERTIFIED UNDER THE
MEDICAL DEVICES DIRECTIVE
Page 2

2
Vitalograph
Vitalograph Ltd., Maids Moreton, Buckingham, MK18 1SW, England
Phone: (01280) 827110 Fax: (01280) 823302
e-mail: [email protected]
Vitalograph GmbH, Jacobsenweg 12, 22525 Hamburg, Germany
Phone: (040) 54 73 91-0 Fax: (040) 547 391- 40
e-mail: [email protected]
Vitalograph Inc., 13310 West 99th St, Lenexa, Kansas 66215, U.S.A.
Phone: (913) 888-4221 Fax: (913) 888-4259
e-mail: [email protected]
Vitalograph (Ireland) Ltd., Gort Road Business Park, Ennis, Co. Clare,
Ireland
Phone: +353 (0)65 6864100 Fax: +353 (0)65 6829289
e-mail: [email protected]
www.vitalograph.com
Copyright Vitalograph 2005
Current Edition (Issue 2)
Print Ref. No. 07064
Vitalograph is a registered trademark
Page 3

3
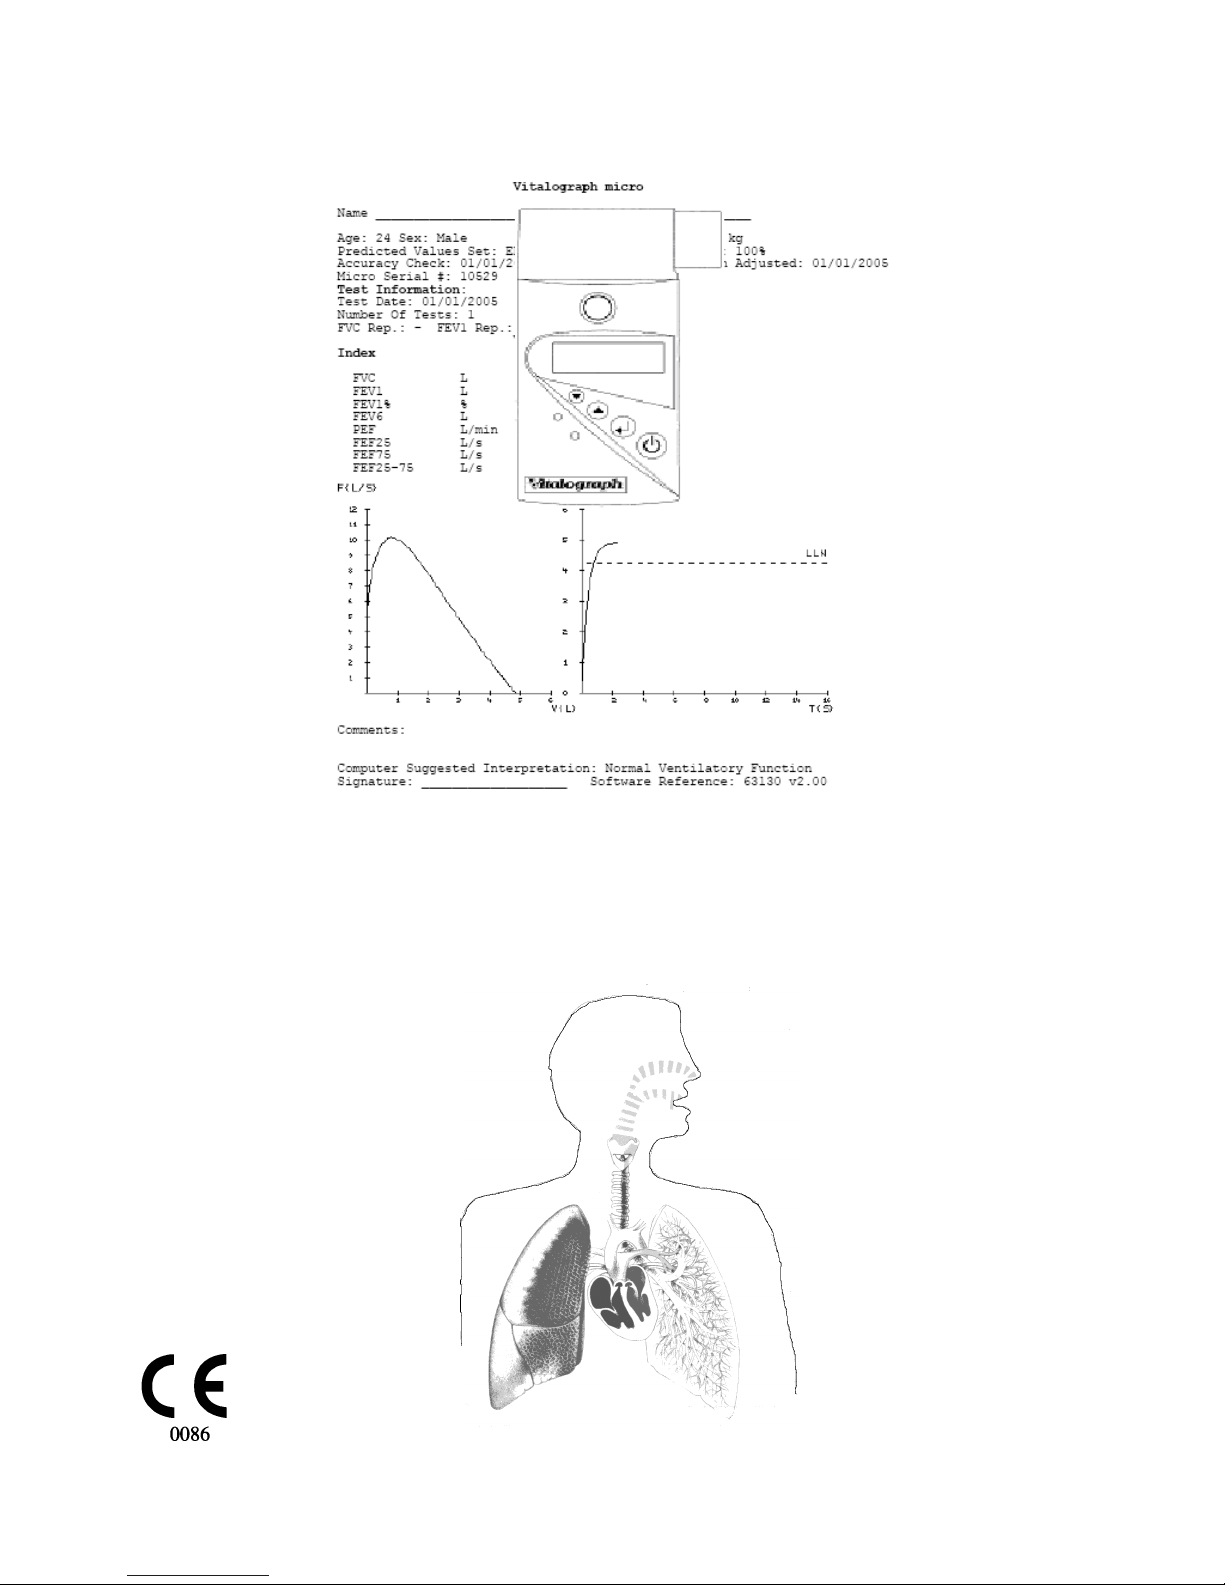
The Vitalograph micro is a portable and easy to use precision spirometer.
It offers total confidence in rapid spirometry tests as a part of the routine
physical examination of your subjects.
The Vitalograph micro features include:
• easy to use
• automatically calculates ‘best test’ in a series
• single breath calculation of a range of respiratory parameters
• displays FVC, FEV1, FEV1% and PEF after each manoeuvre
• prints predicted values, results and graphs
• prints computer suggested interpretation
• small, pocket size and light weight
• simple, clear display
• on screen battery-low indicator
• auto switch off after 2 minutes of no use
• long term stability with no moving parts
• flowhead, clips in and out for easy cleaning / replacement
• accuracy checking facility with 3-L Precision Syringe
• patented SafeTway™ mouthpiece for complete hygiene
• retains last best-test even when switched off (not overwritten until a
blow occurs after switch-on)
Page 4
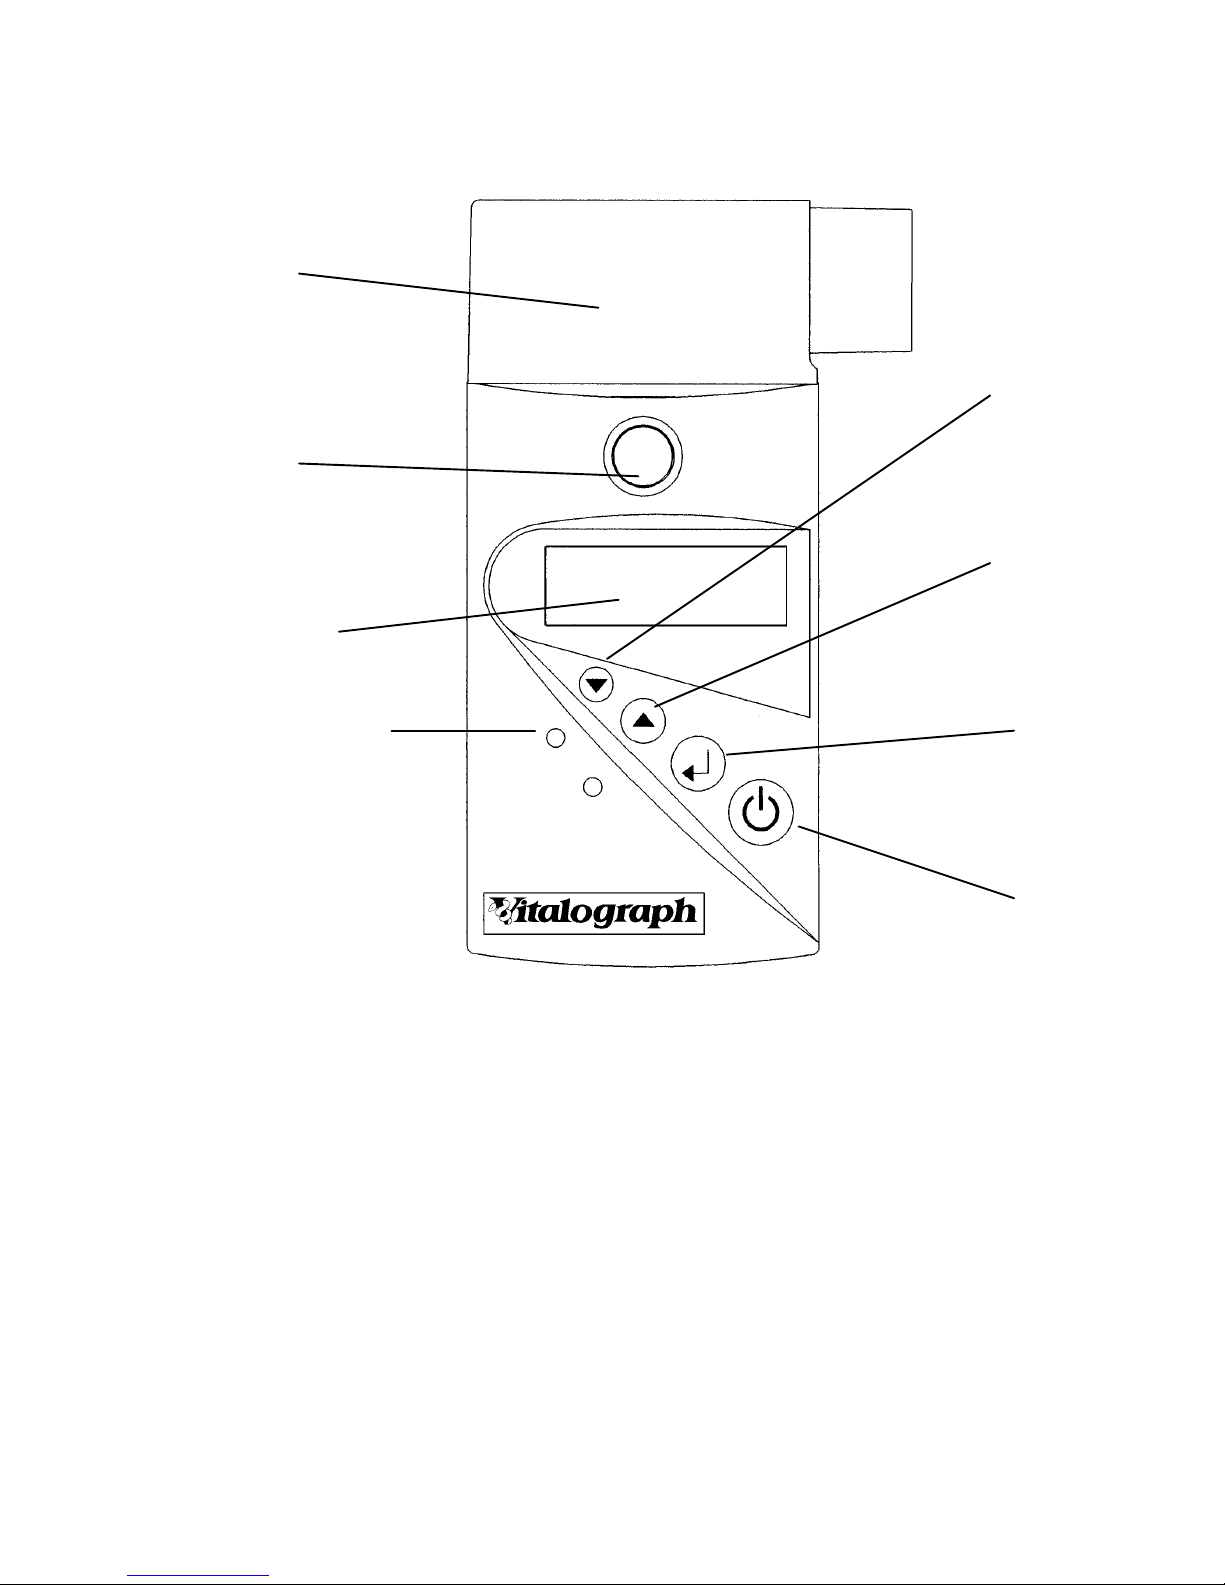
4
Vitalograph micro
Flowhead
Flowhead
Release
Button
LCD Display
(see below)
Down
Arrow
Button
Up
Arrow
Button
Enter
Button
On/Off
Button
Top Recess
Button
Page 5
5
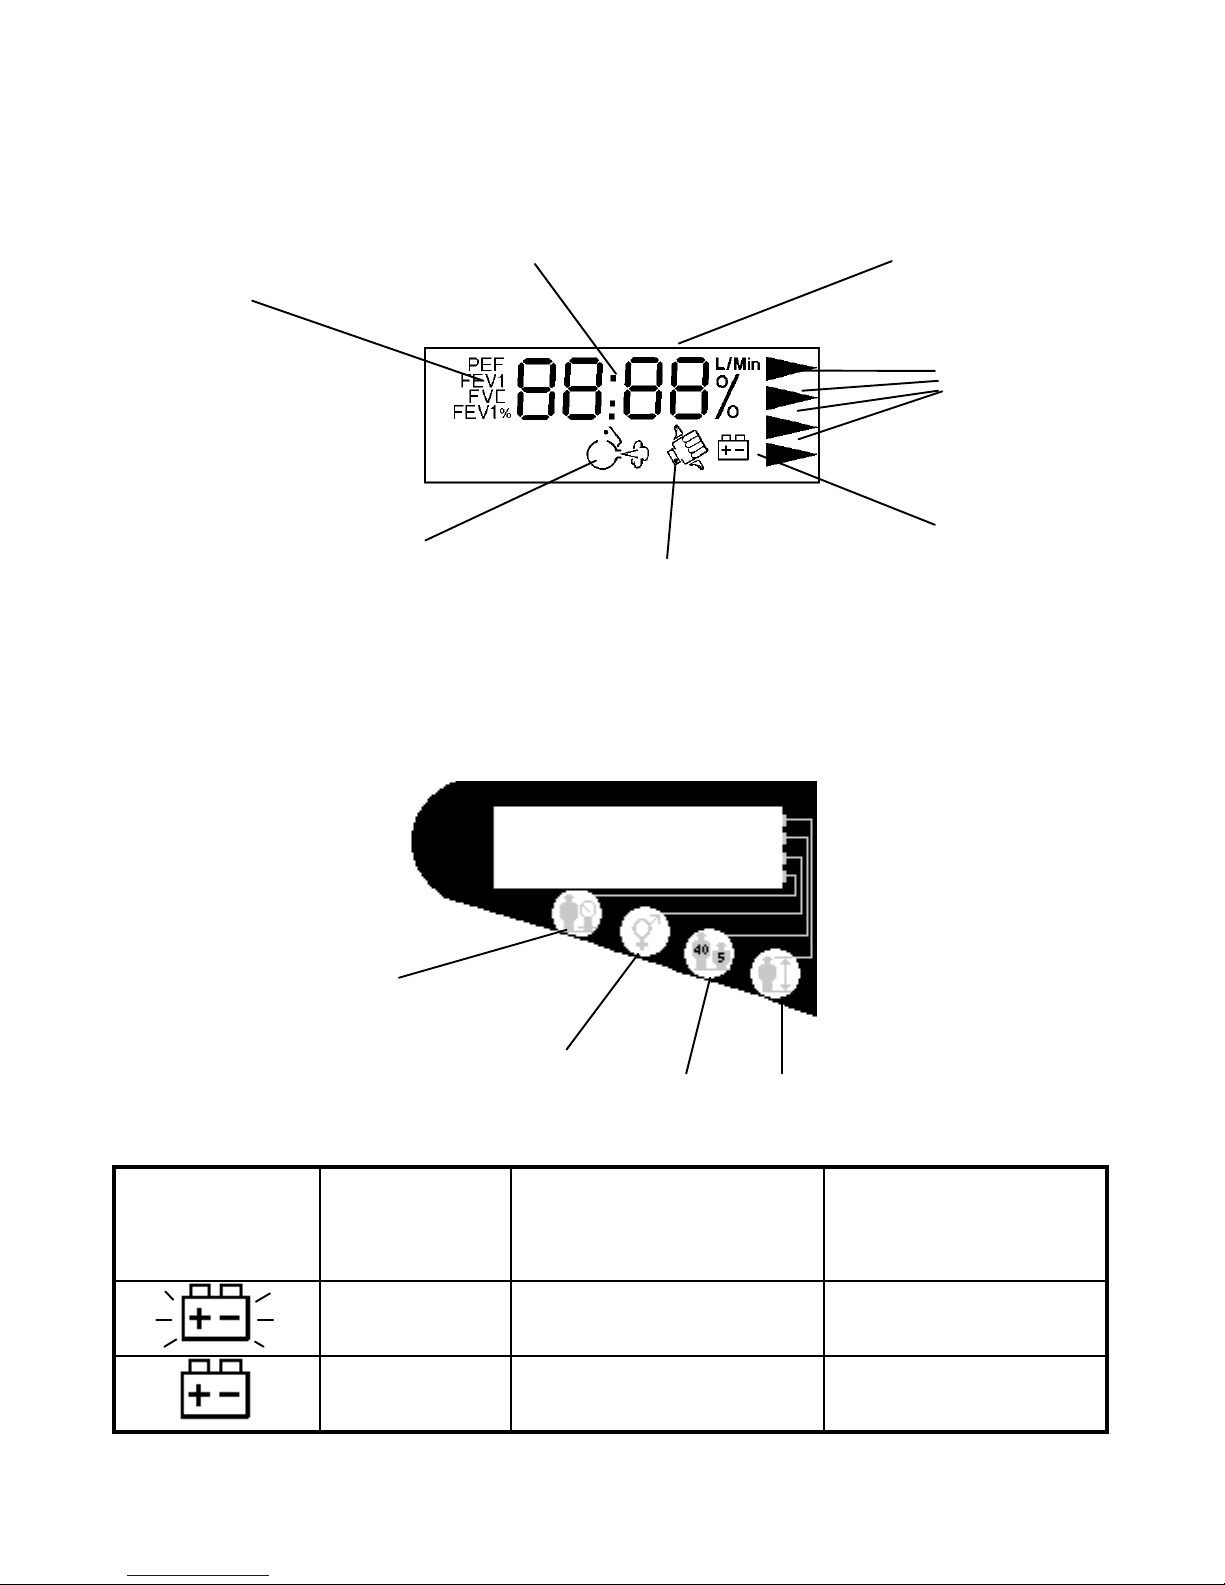
Vitalograph micro Display
Vitalograph micro Label
Symbol
(on or
flashing)
Condition Result Action
Battery Low
You can perform test Replace PP3
battery
Battery
Nearly Dead
You cannot perform
test
Replace PP3
battery
Displays test
parameters
Displays digits
and segments
Displays
units
Thumbs Up/Down Symbol
Blo
w Now Symbol, indicates
the unit is ready to do a test
Subject / Data
Input Indicators
Height
Age
Weight
Gender
Low Battery
Symbol (see
table below)
Page 6

6
Preparing For Use
The contents of the Vitalograph micro package are:
• The spirometer device
• User Instructions
• Firmware Description
• SafeTway™ Mouthpiece samples
• Adaptor for fitting Precision Syringe or BVF
• Serial Spirometry Record Card samples
• Vitalograph micro – Serial Cable
• Vitalograph Print Utility (Windows PC application)
A 9-V (e.g.PP3) alkaline battery (not provided) must be installed before the
Vitalograph micro is used for the first time.
Open the door at the back of the unit to insert the battery. Make sure the
the battery.
Note that it is recommended to remove the battery if you do not intend
using the Vitalograph micro for several weeks.
Installing the Print Utility software on your PC
Once installed, the Vitalograph Print Utility automatically runs in the
background, printing to your PC or network printer or simply creating PDF
spirometry reports for you to file, transmit or archive in your PMS
software. You need not even be aware of it’s presence.
The Print Utility must be installed before the Vitalograph micro will print a
PDF document or a paper spirometry report on your PC’s printer. You must
be running Windows 2000 or XP Pro to use this utility.
Insert the CD into your CD drive, it should auto-run. Read and answer the
questions as they appear in the Install Shield. Think carefully about where
to send the PDF files on your computer. If you are trying out the Print
Page 7

7
Utility for the first time you might like to point them to your desktop
initially.
Is is recommended to create the PDF files as an electronic archive. You
may also wish to set the ‘print’ setting, but note that the PDF files may be
printed at any time without using the ‘print’ setting.
Connecting the Serial Cable
If your PC has a Serial Port, simply plug the ‘D’ plug into the Serial socket.
Bring the jack plug end of the cable to the front of the PC ready to plug in
the Vitalograph micro after a test has been performed.
If you only have USB Ports (such as on a Laptop PC, you will need to buy
and install a USB to Serial converter, such as Vitalograph Cat No 77051.
Follow the install instructions on the CD.
IMPORTANT: If you use a USB/Serial converter, you will need to
change the setting of the Com Port in the Print Utility Application. Open
this by right clicking on the blue ‘V’ Icon at the bottom right-hand side of
your taskbar. If you do not know how to find which Com Port is being used
by the converter, seek help from your network administrator.
Setting Up the Units, Time and Date
Follow these instructions in sequence to set up the Vitalograph micro before
you use it for the first time, or to change settings later.
Step1: Entering configuration mode
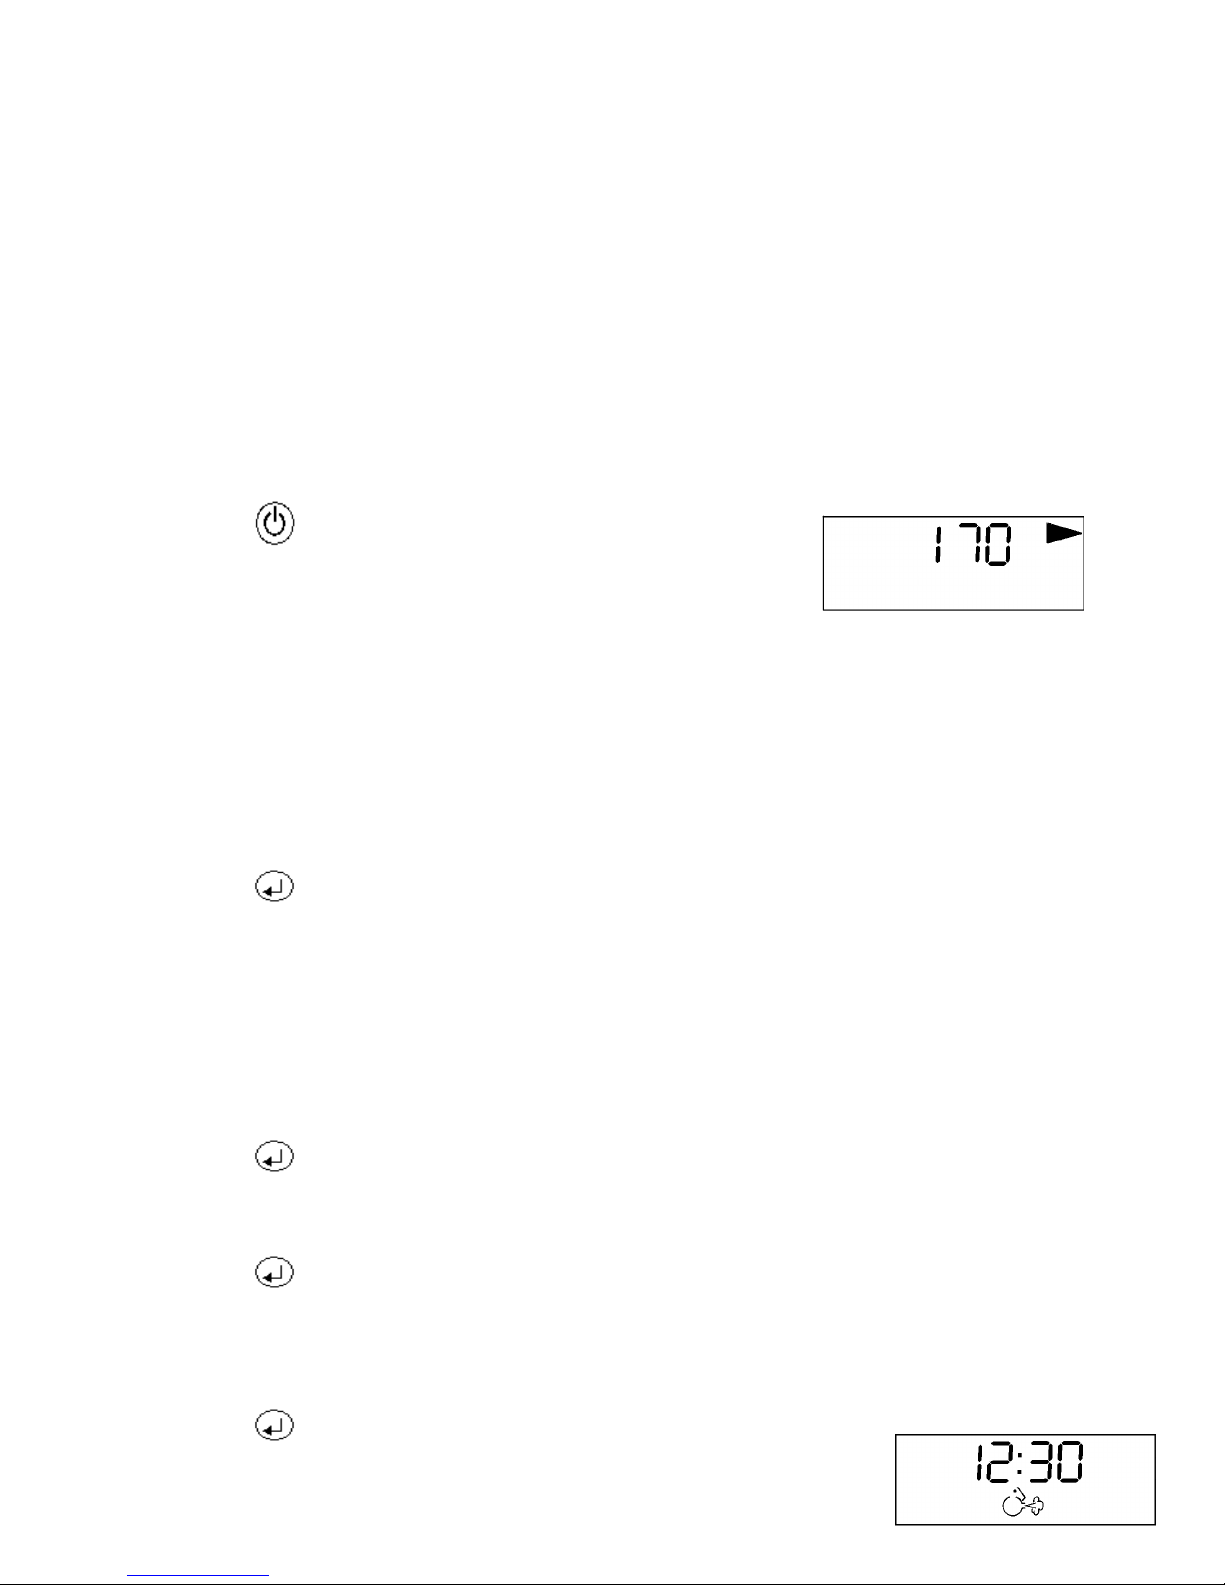
1. Press .
Note that the Vitalograph micro turns itself off if not used within two
minutes.
2. Press
repeatedly until the time is displayed…
3. Press the top recess button and at the same time.
Page 8

8
Step 2: Set Units
1. Press to change Thumbs Up/Down symbol.
means US format for date, means European format
2. Press to continue
Step 3: Set the Time
1. To select the correct hour press or . Note that pressing down
continuously on the button changes the number quickly.
2. Press
3. To select the correct minute press or .
4. Press
Step 4: Set the Date
1. To select the correct year press or .
2. Press
3. To select the correct month press or .
4. Press
5. To select the correct day press or .
6. Press
to finish.
Step 5: Accuracy Check Using A Precision Syringe
Page 9
9
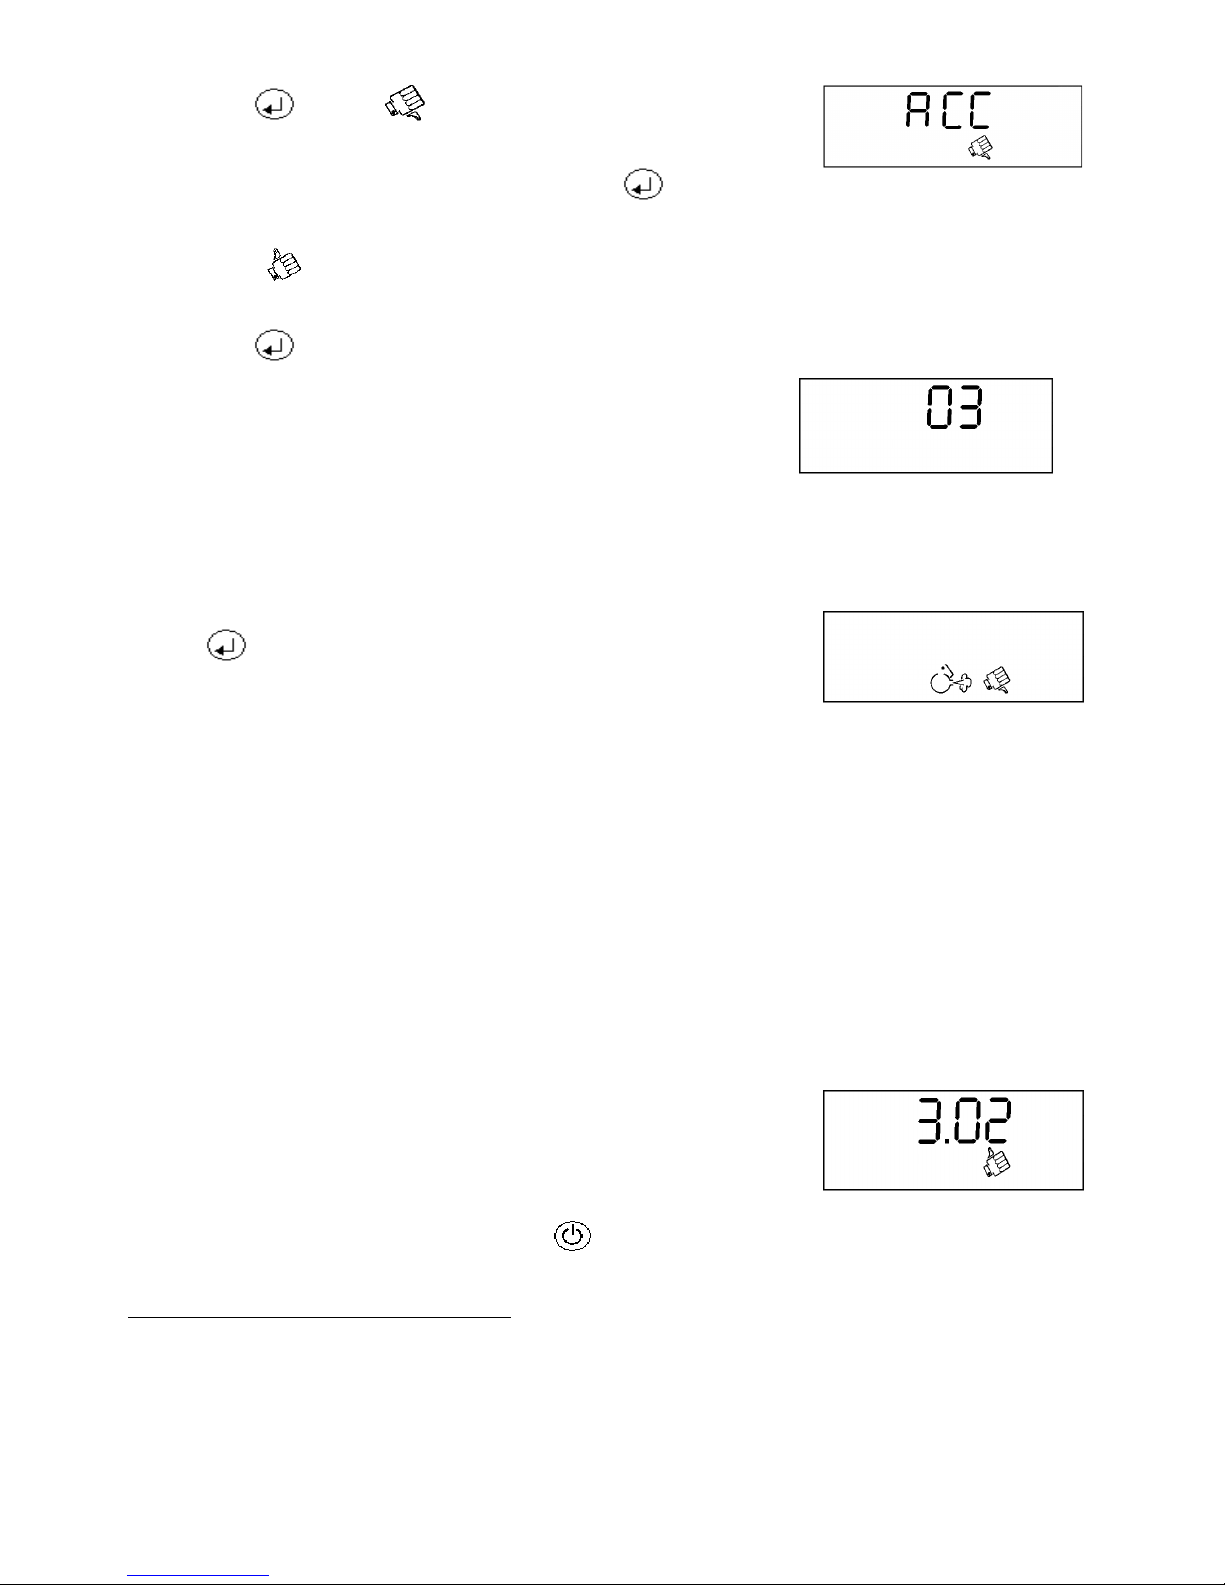
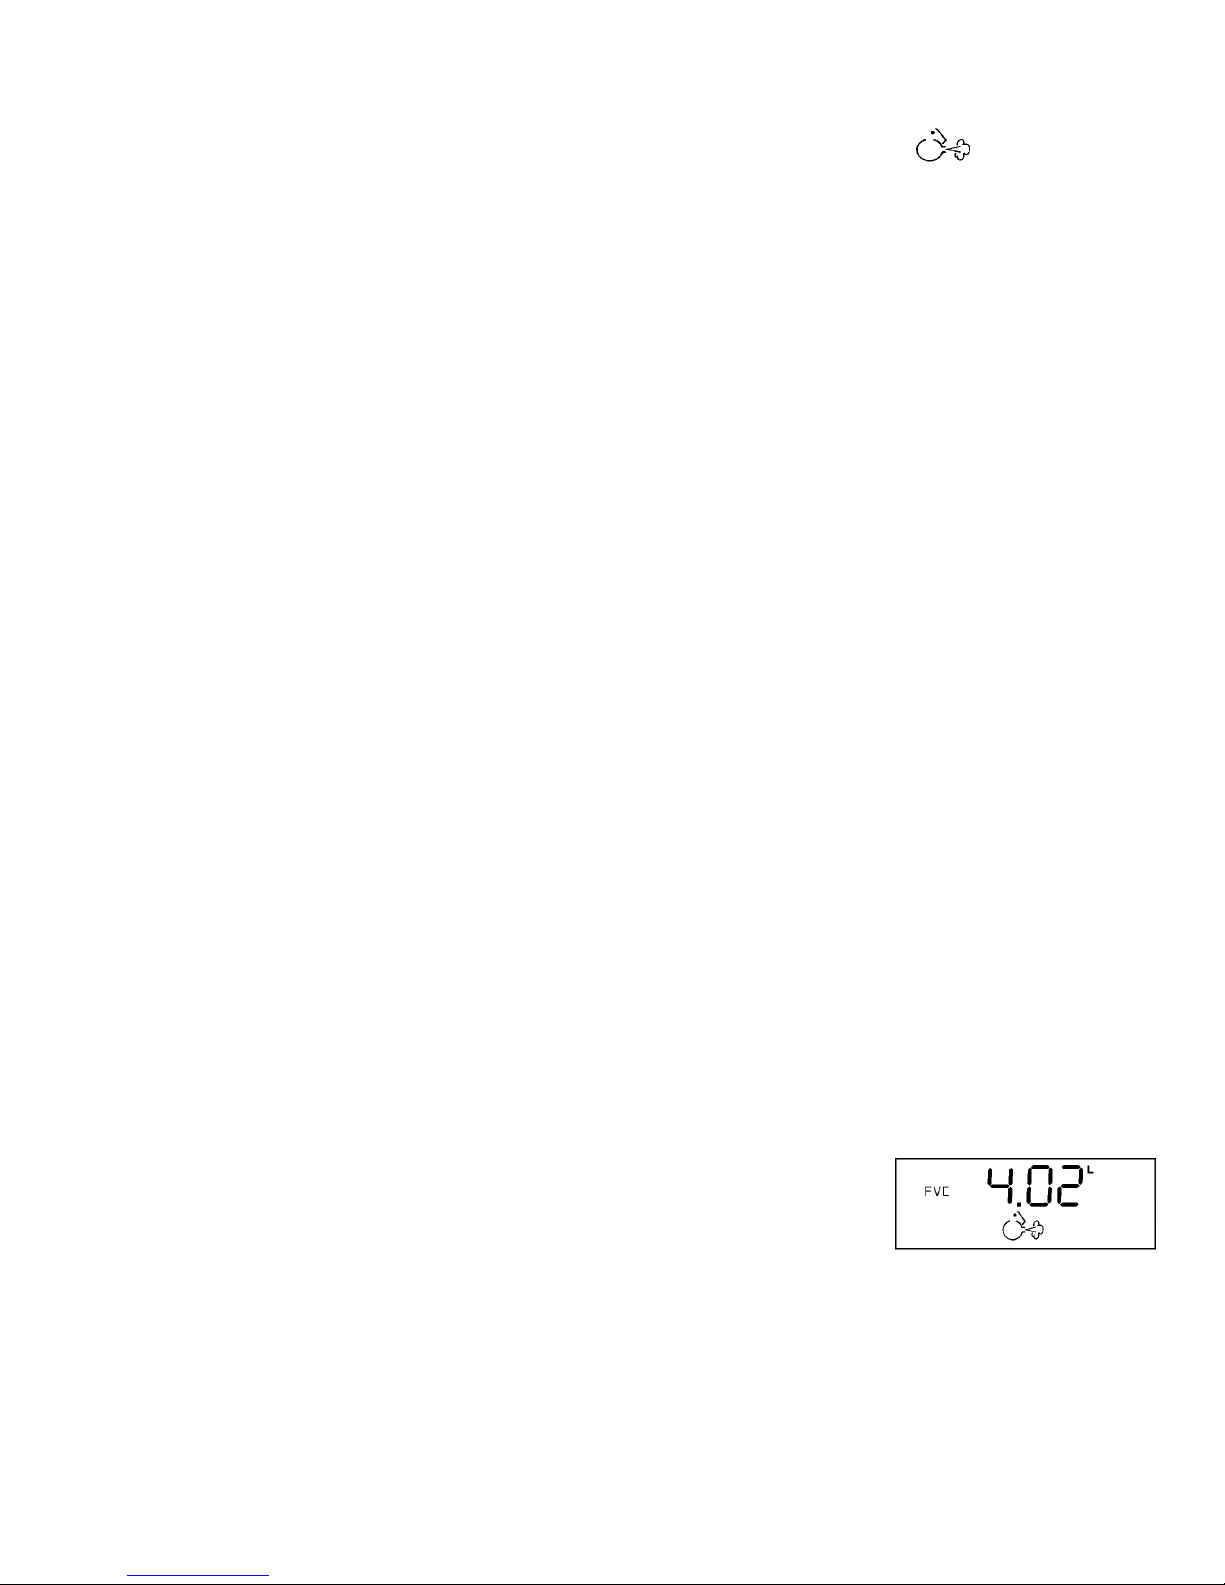
1. Press when is displayed, if you do not
wish to perform an accuracy check. If you do
not have a Precision Syringe press .
2. Select if you wish to perform an accuracy check on the Vitalograph
micro at this time. (Press to change the Thumbs Up/Down symbol)
3. Press
4. The display will look like…
5. This represents the stroke volume of your 3-L Precision Syringe,
not the total volume that will be delivered. It is very important to
adjust this if you are using a syringe with a different stroke volume;
otherwise, the accuracy check will be incorrect.
Press . The display will look like …
6. Ensure the syringe piston is fully withdrawn. At this point, connect the
unit to the syringe and leave it in a stable position - do not move the
unit during this procedure.
7. With an even stroke, pump the air from the syringe through the device. The
stroke must be at least one second in duration.
8. Wait for a double beep, then withdraw the syringe piston fully and repeat this
procedure of injecting the full syringe volume until five beeps sound. It is very
important to wait for the double beep before withdrawing the piston each
time.
If there is a Thumbs Up on the LCD, then the
unit is within the +/- 3% accuracy tolerance1.
9. Turn the unit off by pressing . The device will automatically switch
of after 2 minutes.
1
The user will be prompted (by means of a double beep) for another stroke of the syringe when the volume
difference of the present stroke is not within 3% of the previous stroke. If the maximum of five strokes is
executed, then the five beeps will occur, signifying the end of the accuracy check. If there is a thumbs down icon
on the LCD, the unit is outside the 3% accuracy tolerance. Check for faulty assembly of the flowhead and your
accuracy check procedure. Recheck the accuracy. If still outside tolerance seek technical assistance.
Page 10
10
Performing a Test
To obtain accurate and meaningful spirometry test results it is essential that
the operator is properly trained.
It is vital to conduct the test properly to ensure that there is proper use of
the device and interpretation of the test data during testing. There are many
types of training courses available. Please contact Vitalograph, your
distributor or your national lung association for more details.
Follow these steps to perform the FVC test.
1. Press . After several seconds, the display
will look something like…
Note: This time delay should be used to give a new SafeTway™™ mouthpiece to the
test subject. The Vitalograph micro will turn itself off if you do not blow into it
within two minutes.
2. Height in cm. Press or to enter in subject’s height between 0 and
250cm (or between 0 and 99 inches if in USA mode).
3. Press . The next data to enter is age. Press or to enter in
subject’s age between 0 and 99.
Note: If a value of 0 is entered for either height or age the rest of the demographic
entry will be skipped and will continue from step 6, also no predicted parameters
will appear on the printouts. To return to the previous screen, press and
together.
4. Press . The next data to enter is gender. Press or to enter in
subject’s gender (0 for male, 1 for female).
5. Press . The next data to enter is weight. Press or to enter in
subject’s weight between 0 kg and 250 kg (or between 0 and 550 lbs if
in USA mode).
6. Press
. After several seconds, the display will look
like…
Page 11
11
7. It is only possible to perform a test when the ‘blow icon’ is
displayed. Always watch for this to be displayed. It will be
accompanied by two beeps.
8. Fit a disposable SafeTway™™ mouthpiece (single use only). The use of a
nose-clip is also recommended. Give the following instructions to the
subject so that testing is performed properly.
a) Sit upright and fit the noseclip.
b) Hold the unit, keeping it away from your mouth. Do not jerk the unit
(this can de-stabilize the unit).
c) Inhale as deeply as possible, then insert the mouthpiece carefully into
your mouth, not like a trumpet, but clamping it gently between your
teeth.
d) Seal your lips round the mouthpiece.
e) Exhale as fast and as long as possible. Try to keep exhaling for at
least 6 seconds. (During exhalation the operator should encourage
the subject to keep going in an animated fashion. Keep eye contact
with the subject).
9. At the end of the blow the subject must remove the spirometer from
their mouth.
10. Wait for two beeps to indicate that the Vitalograph micro is ready for
the next blow. Repeat 3 times or more to ensure a good test.
11. After testing / session is completed, take the Vitalograph micro from
the subject and thank them for their co-operation.
12. The operator may view some parameters on the
display. The first parameter …
13. Press and to scroll through the spirometric parameters,
FEV1, FEV1%, PEF.
14. Make a provisional note of the result after each blow (remember, only the
last and not the best is displayed).
Page 12
12
Printing To The PC Utility
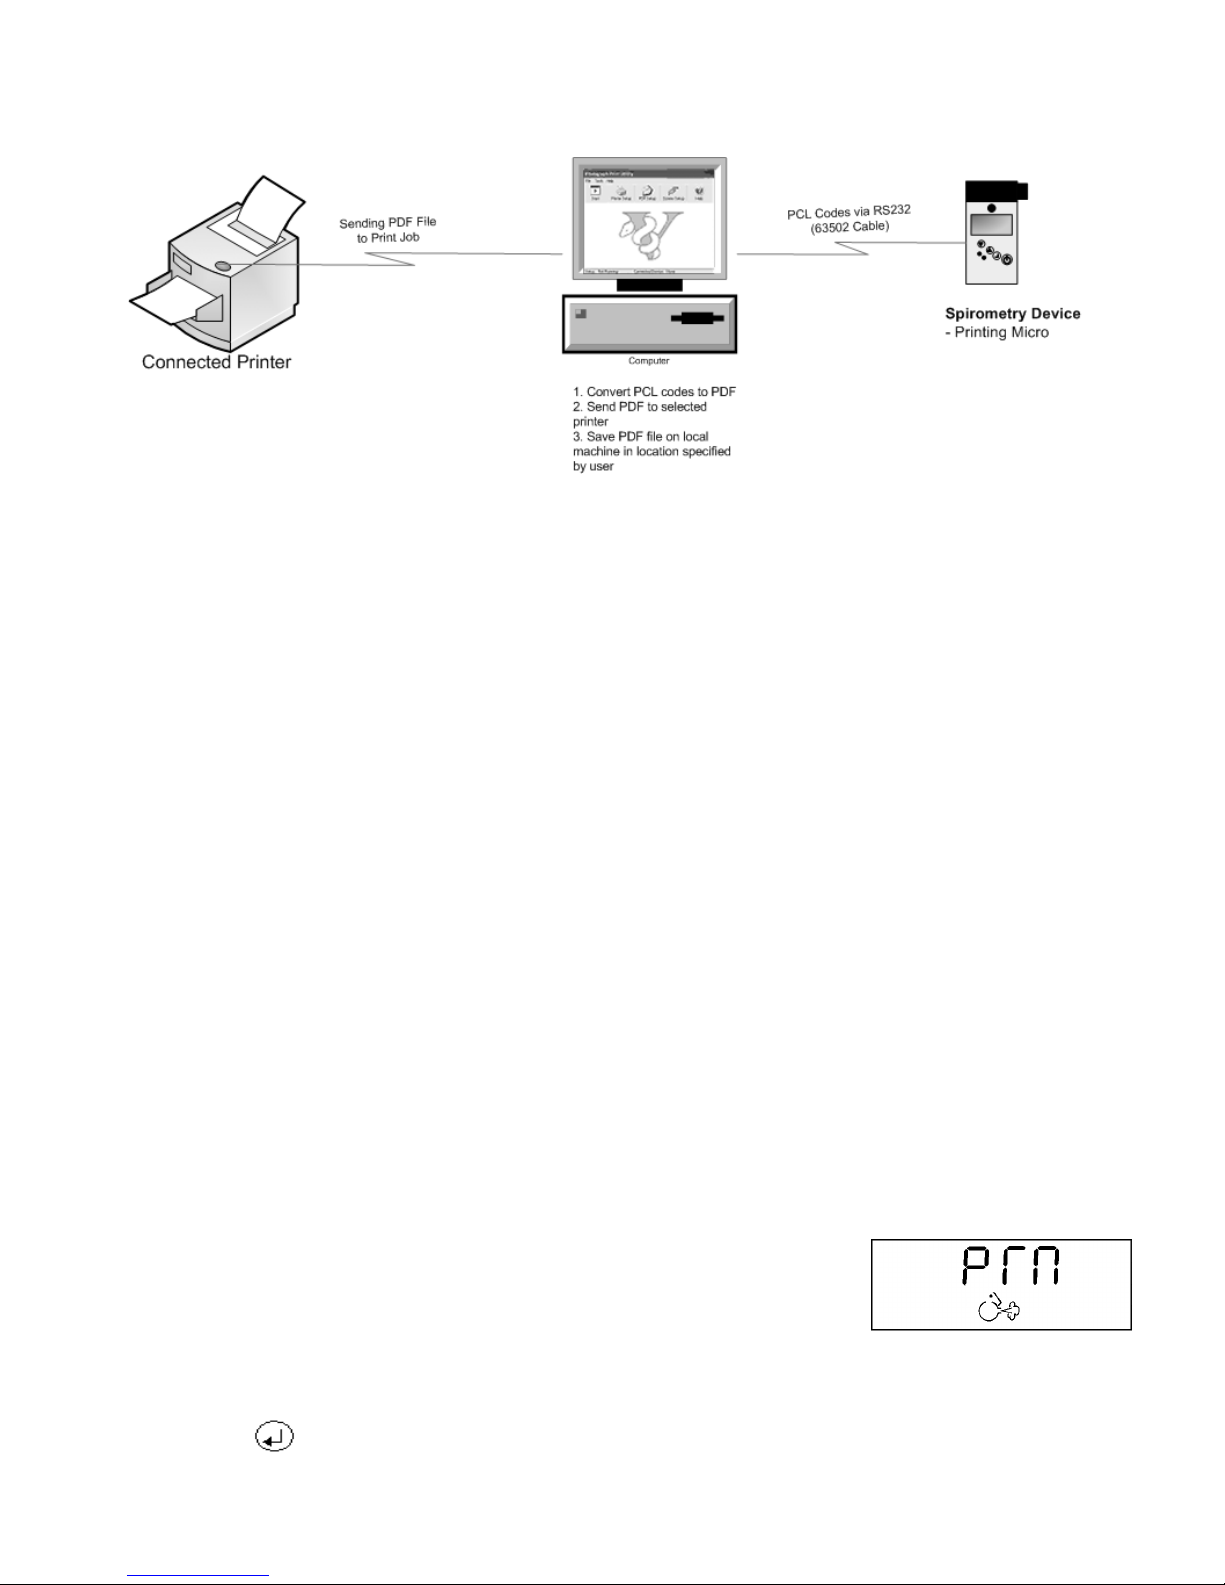
The PC Utility enables printing of a PDF file and/or to your PC Printer,
follow the steps below:
1) Immediately after a test session is completed, plug the jack plug into the
Vitalograph micro jack socket, which is located on the side of the
device.
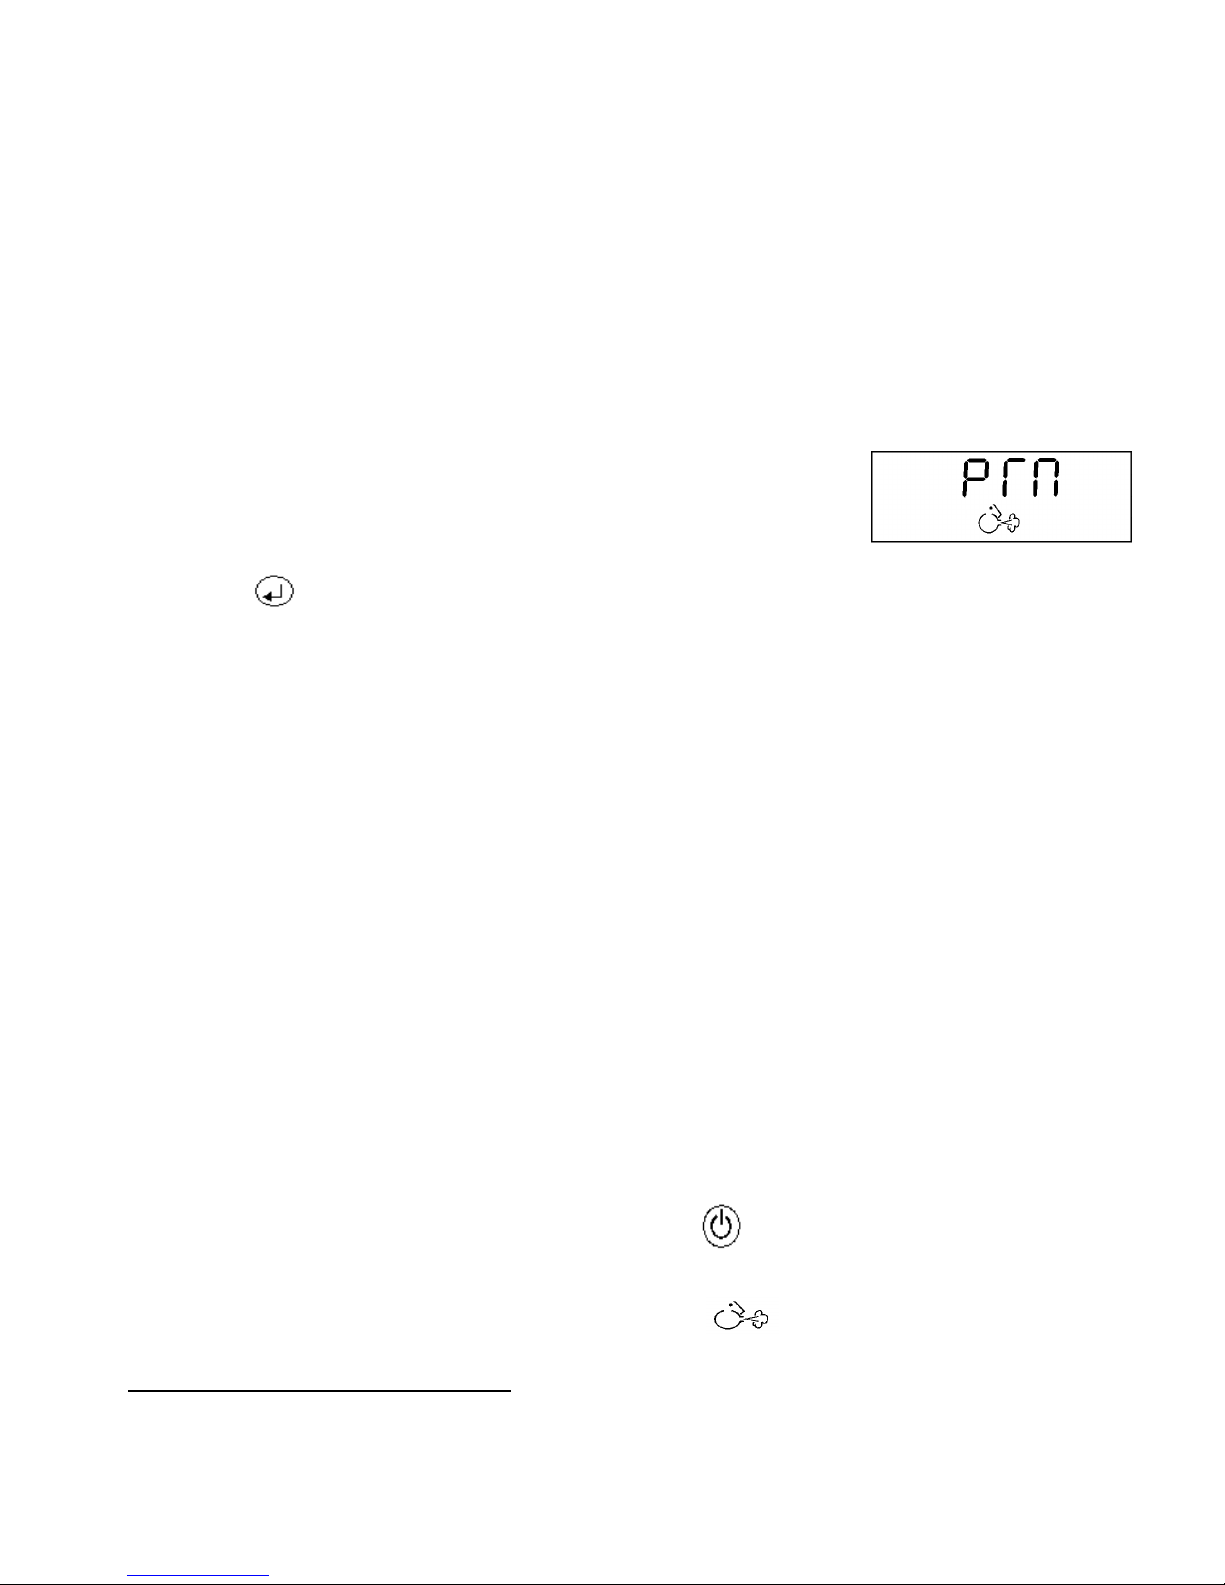
2) Press or on the Vitalograph micro until the
following screen is displayed.
3) Press . The screen should immediately go blank. Put the unit down
carefully and talk to your test subject. The Vitalograph micro will take
about two minutes to download all the test data during which time it
should not be interfered with.
4) After two minutes transmission, the device will ‘beep’ and briefly
display ‘PRN’ again.
5) At this time the creation of the spirometry report begins in the PC Print
Utility.
6) Depending on your settings, a PDF will be created and/or a print
command will be sent to your designated printer2.
Note: The best test in the session is printed, not necessarily the last test
which is still showing on the LCD screen.
7) To cancel at any time press and hold the switch for 15 seconds
approx.
8) Another test can be performed as long as
is displayed.
2
If you installed the Print Utility with default settings, no print command will be sent but
a PDF file will be created in the following location:
C:\Program Files\Vitalograph\VitalPrint\Data
Page 13
13
Figure 1 – Vitalograph Print Utility Product Perspective
Note: When the Vitalograph micro switches itself off, the best test from the
last session is retained until the next blow. This stored test may be printed at
any time as long as no new blow is detected by the device. Switch ON, press
Enter repeatedly until the Blow Icon and time are displayed, then press
and together to print.
Serial Spirometry Record
The subject’s session best test should be recorded on a Serial Spirometry
Record sheet to plot the FEV1 value against Lower Limit of Normality
(LLN). Pads can be ordered from Vitalograph (Cat. No. 63054).
Printing Directly To A Parallel Printer
If you have purchased the optional parallel printer/intelligent cable and
parallel printer, follow the steps below:
1) Ensure that the cable is correctly connected at both ends.
2) Press or until the following screen is displayed.
3) Make sure the printer is online and paper is installed.
4) Press
and walk away.
Page 14

14
Note: Because of the serial data transmission, converted to parallel in the
cable, and the large amount of data, the printing speed is very slow using
this method of printing.
5) Only the best test in the session is printed. To cancel at any time press
and hold the switch for 15 seconds approx.
6) After the data is sent, the device displays PRN on screen again. Another
test can be performed as long as is displayed.
Page 15

15
Care of the Vitalograph micro
Vitalograph recommends that you return this unit to your local service
centre for annual PPM servicing, which includes checks for function,
safety, performance, hygiene procedures, routine maintenance and
calibration certification.
Flowhead
It is recommended that the flowhead be removed for cleaning and
disinfecting at least monthly or every 50 tests. See below.
Hydrophilic Filters
You can see two small white cylindrical filters on the top of the unit after
the flowhead is removed. These are designed to prevent ingress of water
and should be replaced if they get accidentally immersed in water.
Otherwise, they are replaced once a year, as a part of the annual service.
SAFETY PRECAUTIONS
The Vitalograph micro does not offer protection against ingress of liquids
and must not be used in the presence of flammable agents.
The Vitalograph micro complies with EN60601-1-2: 1993 but does not
guarantee that other equipment in the vicinity will not be affected by
electromagnetic emissions from the Vitalograph micro. Similarly, other
equipment in the vicinity may affect the operation of the Vitalograph
micro.
It is recommended that all equipment used near the Vitalograph micro
complies with the relevant electromagnetic compatibility requirements for
that equipment and to check before use that no interference is evident or
disruptive. Increasing the distance between offending devices, and keeping
interconnecting leads as short as possible will help reduce the effect.
Page 16

16
CLEANING AND DISINFECTING
General Recommendation
To reduce the risk of cross infection the use of SafeTway® mouthpieces is
recommended. A Risk Assessment should be carried out to assess the risks
presented to both operator and subject, and an action plan devised by the
facility to minimise the chance of cross infection occurring, particularly
where known-infectious or immuno-deficient subjects are being tested.
An assessment should be made of methods of decontamination available to
the operator, and their effectiveness against potential risks - a table of
materials used in the Vitalograph micro is provided below to assist in this.
It is recommended that in cases of high risk with no effective disinfection methods available, that the contaminated parts are disposed of. For this
device, the Flowhead Assembly: FLOWHEAD COMPLETE.
Routine Practice
A new mouthpiece (SafeTway mouthpiece) should be used for each
subject. A period of at least 5 minutes should be allowed between subjects
to allow settling of aerosolised particles.
It is recommended that the Flowhead Assembly be regularly cleaned
according to the guidelines of the user’s facility and replaced as a part of
the routine annual service.
In the event of visible contamination to the FLOWHEAD - it should be
cleaned and disinfected or replaced. It should also be replaced in the event
of damage.
All parts of the Vitalograph micro require cleaning, i.e. the removal of
visible particulate contamination. The parts of the Vitalograph micro that
make up the flowhead also require disinfecting.
Hygiene
It is vital for the user to set guidelines for protective hygiene measures
whilst performing spirometry testing. There are three main potential
sources of cross contamination, skin contact; aerosolised particles and
saliva/body fluids. By far the most important is the last item – a minimum
requirement is to use a new disposable mouthpiece for each subject tested.
We recommend using the SafeTway mouthpiece. We also recommend that
a period of at least 5 minutes be allowed between subjects. This allows
aerosolised organisms to be removed by gravitational sedimentation
between tests. (Am J Respir Crit Care Med Vol 159. pp 610-612, 1999)
Page 17

17
Cleaning Instructions
All parts of the Vitalograph micro require regular cleaning, i.e. the removal of
visible particulate contamination. The parts of the Vitalograph micro that make up
the flowhead also require disinfecting. Vitalograph recommends that cleaning
and disinfecting should normally be carried out on a weekly basis. In addition to a
weekly cleaning and disinfection cycle, Vitalograph recommends cleaning and
disinfection of equipment to be carried out after use on infected subjects or prior to
use on immuno-compromised subjects. The user must determine what level of
disinfection is appropriate and acceptable in any particular circumstance.
Cleaning/Disinfecting- Recommendations Chart
Part Material Clean/
Disinfect
Autoclave
Possible?
Recommended
Disinfectants
Case Exterior ABS Clean
No Wiping with a 70%
Isopropyl Alcohol
impregnated cloth
provides a
suitable form of
cleaning and lowlevel disinfection.
Do not immerse
in liquid.
Display Glass Clean No
Keypad Rubber Clean No
Fleisch No2
Flowhead
Alumini
um,
Stainless
Steel,
ABS
Clean &
Disinfect
Yes Disinfect by
immersion in
sodium
dichloroisocyan
urate solution at
1000 ppm
concentration of
free chlorine for
15 minutes.
Hydrophilic
filters
Polyethy
lene
Replace
every year
or after
water
ingress.
No Dispose
Page 18

18
Definitions of cleaning and disinfection are as defined in “Sterilization,
Disinfection and Cleaning of Medical Equipment: Guidance on
Decontamination from the Microbiology Committee to Department of
Health Medical Devices Directorate, 1996”
Recommendations for chemical disinfectants are derived from the PHLS
publication “Chemical Disinfection In Hospitals” 1993.
Disassembling for Cleaning and Disinfecting
1. Press in the two round ‘flowhead release buttons’.
2. Lift off the flowhead.
Clean the flowhead by washing in a mild detergent to remove
particulate contamination. To clean the Fleisch element, swill
vigorously in water with mild detergent. Do not attempt to “rub” or
“scrub” at capillaries. If the flow conditioning meshes appear dirty or
blocked the flowhead should be replaced.
Rinse with clean water.
Disinfect by immersion in sodium dichloroisocyanurate solution at 1000 ppm
concentration of free chlorine for 15 minutes. Prepare disinfectant solution as
directed in the manufacturer’s guidelines.
Rinse with hot water to aid drying.
Leave to dry completely before reassembling. Drying the Fleisch
element assembly may require placing it in a warm place overnight. A
drying cabinet is ideal, alternatively another heat source could be used.
Wiping with a 70% Isopropyl Alcohol impregnated cloth provides a suitable
form of cleaning and low-level disinfection for the case exterior, display,
screen, and keypad. Repeat at least weekly to prevent build-up of grime from
normal handling and use.
Always follow the safety guidelines given by the manufacturer of cleaning
and disinfectant chemicals or equipment.
Page 19
19
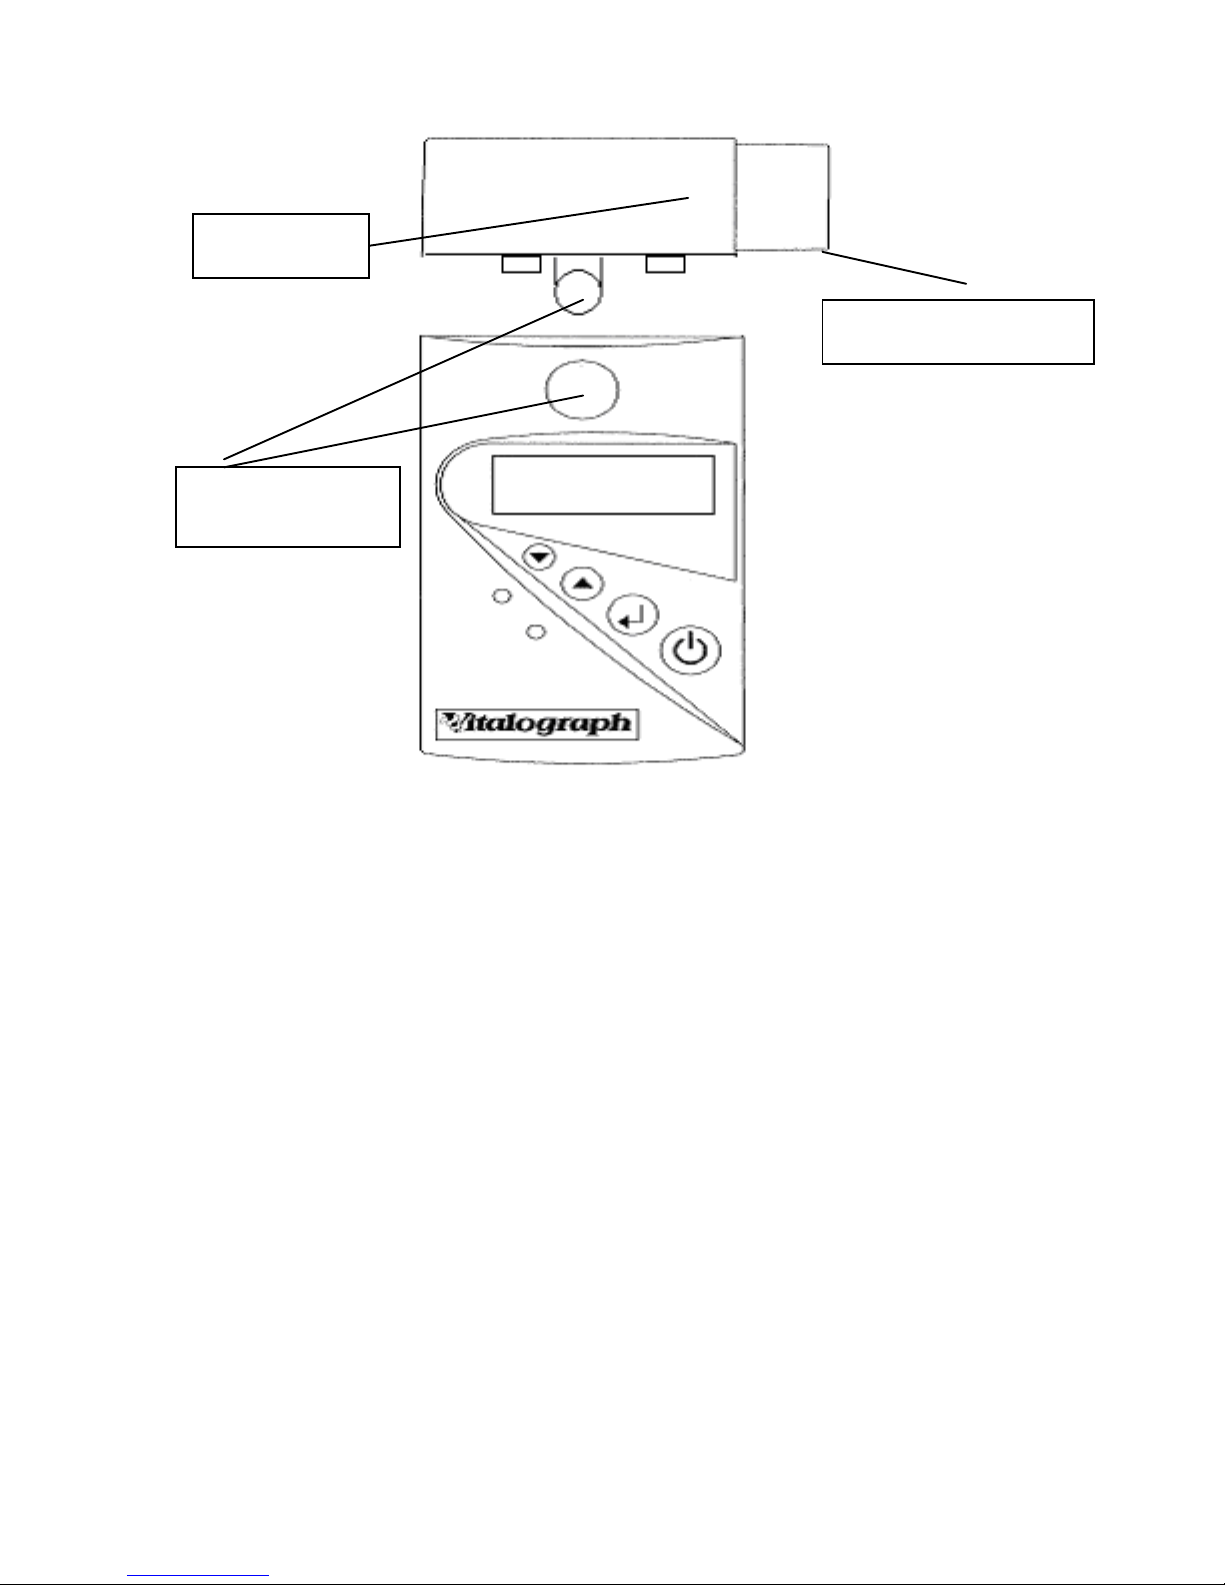
Reassembling the Fleisch Flowhead
1. Ensure that the hydrophilic filters are undamaged and dry.
2. Orient the two circular holes under the flowhead with the hydrophilic filters
in the body.
3. Push the flowhead onto the body, making sure that the two buttons click
into place.
4. It is advisable to check accuracy and perform a functional check after
cleaning and disinfecting.
Flowhead
Flowhead
release button
Hydrophilic Filters
Page 20

20
Consumables and Accessories
Only the approved consumables and accessories below should be used.
Complying with this will be more cost effective and ensure safety, hygiene
and accuracy. Your Warranty may be invalidated by the use of
inappropriate disposables.
Cat. No. Description
20242 SafeTway™ mouthpieces (200)
20303 Nose-clips (10)
63052 Small Carry Case
36020 3-L Precision Syringe
63054 Serial Spirometry Records (6x50)
63053 Flowhead for Vitalograph micro (10)
28200 BVF (50)
63051 Adaptor for Syringe and BVF
2110201 Hydrophilic Filters (20)
2100666
Inkjet Printer – Parallel Connector
63505
Intelligent Parallel Printer Cable for micro
63502
Serial Cable for PC Connection
65030
PC Print / PDF Utility
07064 User Manual
07060 Service Manual
There are no user serviceable components inside the Vitalograph micro.
Page 21

21
Technical Specifications
Symbols
Class II Equipment
Type BF Equipment
9V, PP3 Battery type - 9V PP3
Flow detection principle Fleisch No2 type pneumotachometer
Flow impedence Meets ATS/ERS guidelines
Volume measurement Flow integration
Maximum recorded flow rate 999 L/min
Maximum recorded volume 9.99 L
Measuring accuracy +/- 3% or +/-0.05L volume whichever is
greater and +/-10% flow or +/-20L/min
whichever is greater
Test duration 30 seconds
Operating temperature 15-37°C
Safety standards Certified to conform to EN60601-1
Spirometric standards ATS / ERS 2005 Guidelines
Power supply Alkaline battery, 9V, PP3
(Recommended battery capacity = 550 mAh
or greater)
Dimensions 145mm x 70mm x 87mm
Weight 165g (without PP3 battery)
Storage Temperature : 0-50ºC
Relative Humidity : 10%-95%
Regulatory Notices
The Vitalograph micro is manufactured in Ennis, Ireland under ISO
13485:2003.
CE Certificate of Conformance
Marking by the symbol indicates compliance of the Vitalograph
micro to the Medical Devices directive of the European Community. Such
marking is indicative that the Vitalograph micro meets or exceeds the
following technical standards:
• EN60601-1 - “General requirements for safety”
Page 22

22
• EN55011 - “Radiated and mains conducted emissions for industrial,
scientific and medical (ISM) radio-frequency equipment”
• IEC801-2 - “Electromagnetic compatibility for industrial-process
measurement and control equipment Part 2: Electrostatic discharge
requirements.”
• IEC801-3 - “Electromagnetic compatibility for industrial-process
measurement and control equipment Part 3: Radiated electromagnetic
field requirements.”
FDA Notice
Indications for Use: The Vitalograph micro is intended to measure FVC,
FEV1 PEF and FEV1% in subjects with respiratory conditions such as
Asthma, COPD etc.
Caution: Federal Law restricts this device to sale by, or on the order of a
physician.
Page 23

23
Customer Service
Only the manufacturer or service personnel specifically trained and
approved by Vitalograph Ltd. or its associated companies should carry out
SERVICE and REPAIRS.
Guarantee
Terms of Guarantee
Subject to the conditions listed below, Vitalograph Ltd. and its associated
companies, (hereinafter called the Company) guarantee to repair or at its
option replace any component thereof, which, in the opinion of the
Company is faulty or below standard as a result of inferior workmanship or
materials.
The conditions of this Guarantee are:
1. This Guarantee shall only apply to hardware defects which are notified
to the Company or to its accredited distributor within 1 year of the date
of purchase of the equipment, unless otherwise agreed in writing by the
company.
2. Software (meaning computer software, or user installable modules) is
guaranteed for 90 days from the date of purchase.
3. The company warrants that the software when correctly used in
conjunction with the hardware will perform in the manner described in
the Company's literature and user manuals. The company undertakes to
rectify at no expense to the customer any software failure notified within
the period stated above, provided that the failure can be recreated and
the software has been installed and used in accordance with the user
manual. Notwithstanding this clause, the software is not warranted to be
free of errors.
4. This Guarantee does not cover any faults caused by accident, misuse,
neglect, tampering with the equipment, use of consumable items or parts
not approved by the Company, or any attempt at adjustment or repair
other than by personnel accredited by the Company, nor does it cover
reinstatement of any configuration changes caused by the installation of
any software.
Page 24

24
5. If a defect occurs please contact the supplier from whom it was
purchased for advice. The Company does not authorise any person to
create for it any other obligation or liability in connection with
Vitalograph® equipment.
6. This Guarantee is not transferable and no person, firm or company has
any authority to vary the terms or conditions of this Guarantee.
7. To the maximum extent permitted by law, the Company does not accept
liability for any consequential damages arising out of the use of, or
inability to use any Vitalograph® equipment.
8. This Guarantee is offered as an additional benefit to the Consumer's
statutory rights and does not affect these rights in any way.
 Loading...