

Page 1
CUETY
MANUAL
© VISUAL PRODUCTIONS BV WWW.VISUALPRODUCTIONS.NL
Page 2

Revision History
Revision Date Author(s) Description
1 31.03.2015 ME Initial version.
8 07.01.2019 BZ Added revision history. Updated web-
site addresses. Updated showfile and
personality file location. Clarified subfixtures not being supported in Personalities chapter. Clarified wheel limitation. Added Minimal requirements
chapter. Added Kiosc section to appendices. Updated API appendix.
9 22.07.2020 BZ Updated various images. Corrected
and Changed API messages to be
easier to understand. Added vManager Tablet version. Added Protocols
chapter.
2
Page 3

Contents
1 Introduction 6
2 Protocols 14
3 Quickstart 17
4 Setting up 20
5 Cuety App 23
6 Remote App 34
7 Personalities 37
8 vManager 39
9 Minimum Requirements 41
Appendices 42
A API 43
3
Page 4

©2020 Visual Productions BV. All rights reserved.
No parts of this work may be reproduced in any form or by any means - graphic,
electronic, or mechanical, including photocopying, recording, taping, or information storage and retrieval systems - without the written permission of the
publisher.
While every precaution has been taken in the preparation of this document,
the publisher and the author assume no responsibility for errors or omissions,
or for damages resulting from the use of information contained in this document or from the use of programs and source code that may accompany it. In
no event shall the publisher and the author be liable for any loss of profit or
any other commercial damage caused or alleged to have been caused directly or
indirectly by this document.
Due to the dynamic nature of product design, the information contained in
this document is subject to change without notice. Revisions of this information or new editions may be issued to incorporate such changes.
Products that are referred to in this document may be either trademarks and/or
registered trademarks of the respective owners. The publisher and the author
make no claim to these trademarks.
4
Page 5

Declaration of Conformity
We, manufacturer Visual Productions BV, herby declare under sole responsibility,
that the following devices:
LPU-1
LPU-2
Is in conformity with the following EC Directives, including all amendments:
EMC Directive 2004/108/EG
And the following harmonized standards have been applied:
NEN-EN-IEC 61000-6-1:2007
NEN-EN-IEC 61000-6-3:2007
Full name and identication of the person responsible for product quality and
accordance with standards on behalf of the manufacturer
Date: Place:
December 12th, 2014 Haarlem, The Netherlands
ing. Maarten Engels
Managing Director
Visual Productions BV
VISUAL PRODUCTIONS BV
ROLLANDSTRAAT 55ZW
NL-2013 SM HAARLEM
THE NETHERLANDS
TEL +31 (0)23 551 20 30
WWW.VISUALPRODUCTIONS.NL
INFO@VISUALPRODUCTIONS.NL
ABN-AMRO BANK 53.22.22.261
BIC ABNANL2A
IBAN NL18ABNA0532222261
VAT NL851328477B01
COC 54497795
Page 6
Chapter 1
Introduction
Thank you for choosing the Cuety lighting controller. This manual will discuss
setting up the hardware and software as well as programming your light show.
1.1 System
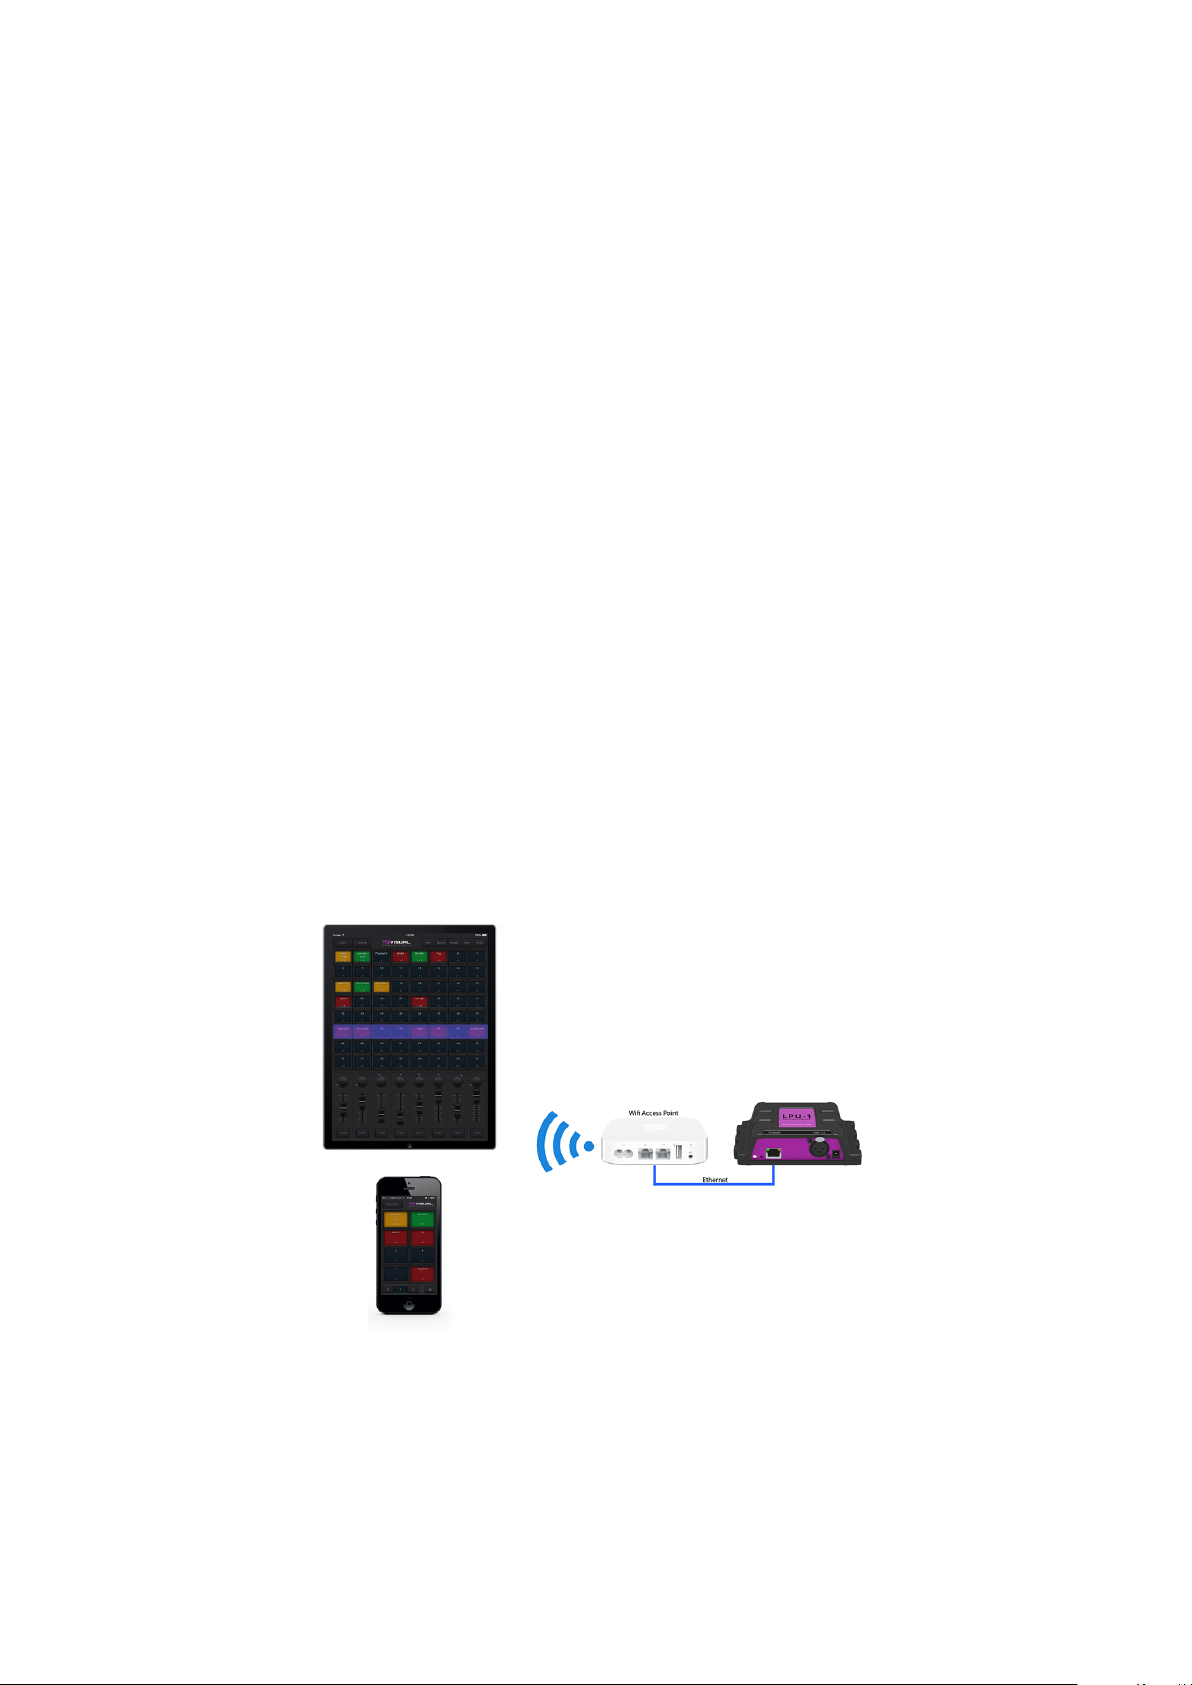
The Cuety system consists of the LPU hardware and the Cuety App. This
App is available on iOS and Android, as well as Windows, macOS and Ubuntu
Linux. In order for the LPU and the App to communicate you need to provide
a Wi-Fi access point yourself. You can expand the system by also running the
Remote App on your phone. See figure 1.1.
Figure 1.1: System
6
Page 7

1.2 Hardware
The LPU hardware device is the brain of your Cuety system. This box takes
care of all the calculation of DMX levels, cue timing and FX engine. Therefore,
all the information about the patch and cues are stored in this device. In a
way, the Apps are just ’user interface’. This means that when the communication between the LPU and the App is interrupted, perhaps because of a Wi-Fi
problem, then your show will continue to run.
This also means that when you use the LPU for lighting in a permanent installation then you only need to connect the (Remote) App when you want to
change to a different cue. When not connected to an App, the LPU will just
continue to run the currently active cues.
1.3 Saving data to memory
This manual will describe how to configure the LPU and program playbacks,
cues, etc. The Cuety App is used for editing these kinds of elements. When
changes are made, these changes are directly stored in the RAM memory of
the LPU and the programming will directly influence the behaviour of the unit.
RAM memory is, however, volatile and its content will be lost through a power
cycle. For this reason the LPU will copy any changes in the RAM memory to its
onboard flash memory. Flash memory retains its data even when not powered.
The LPU will load all its data back from the flash memory upon startup.
This memory copy process is conducted automatically by the LPU and should
not be of any concern of the user. One point of consideration is, however, that
after making a change the unit should be given time to perform the copy to
flash. As a rule of thumb, do not disconnect the power from the device within
30 seconds from making a programming change.
1.4 LPU-1 vs LPU-2
The LPU is available in two versions, the LPU-1 and the LPU-2. The difference
between the two units is that the LPU-2 has additional options to connect
to external systems. Only the LPU-2 has support for OSC, TCP, UDP and
HTTP protocols, making it very suitable to be integrated in permanent systems.
Appendix A discusses the LPU-2’s connectivity in detail.
7
Page 8
LPU-1 LPU-2
Market Entertainment Installation
DMX Channels 512 512
Fixtures 64 64
Sub-fixtures - -
Playbacks 64 64
Cues per Playback 48 48
FX Generator yes yes
Personality Files 3500+ 3500+
Art-Net yes yes
sACN yes yes
OSC - yes
UDP - yes
TCP - yes
HTTP - yes
Web-interface - yes
The LPU-2 web-interface is read-only. It is useful for checking the device’s status
and monitoring incoming and outgoing network messages. The web-interface
does not allow for modifying the LPU-2.
1.5 Apps
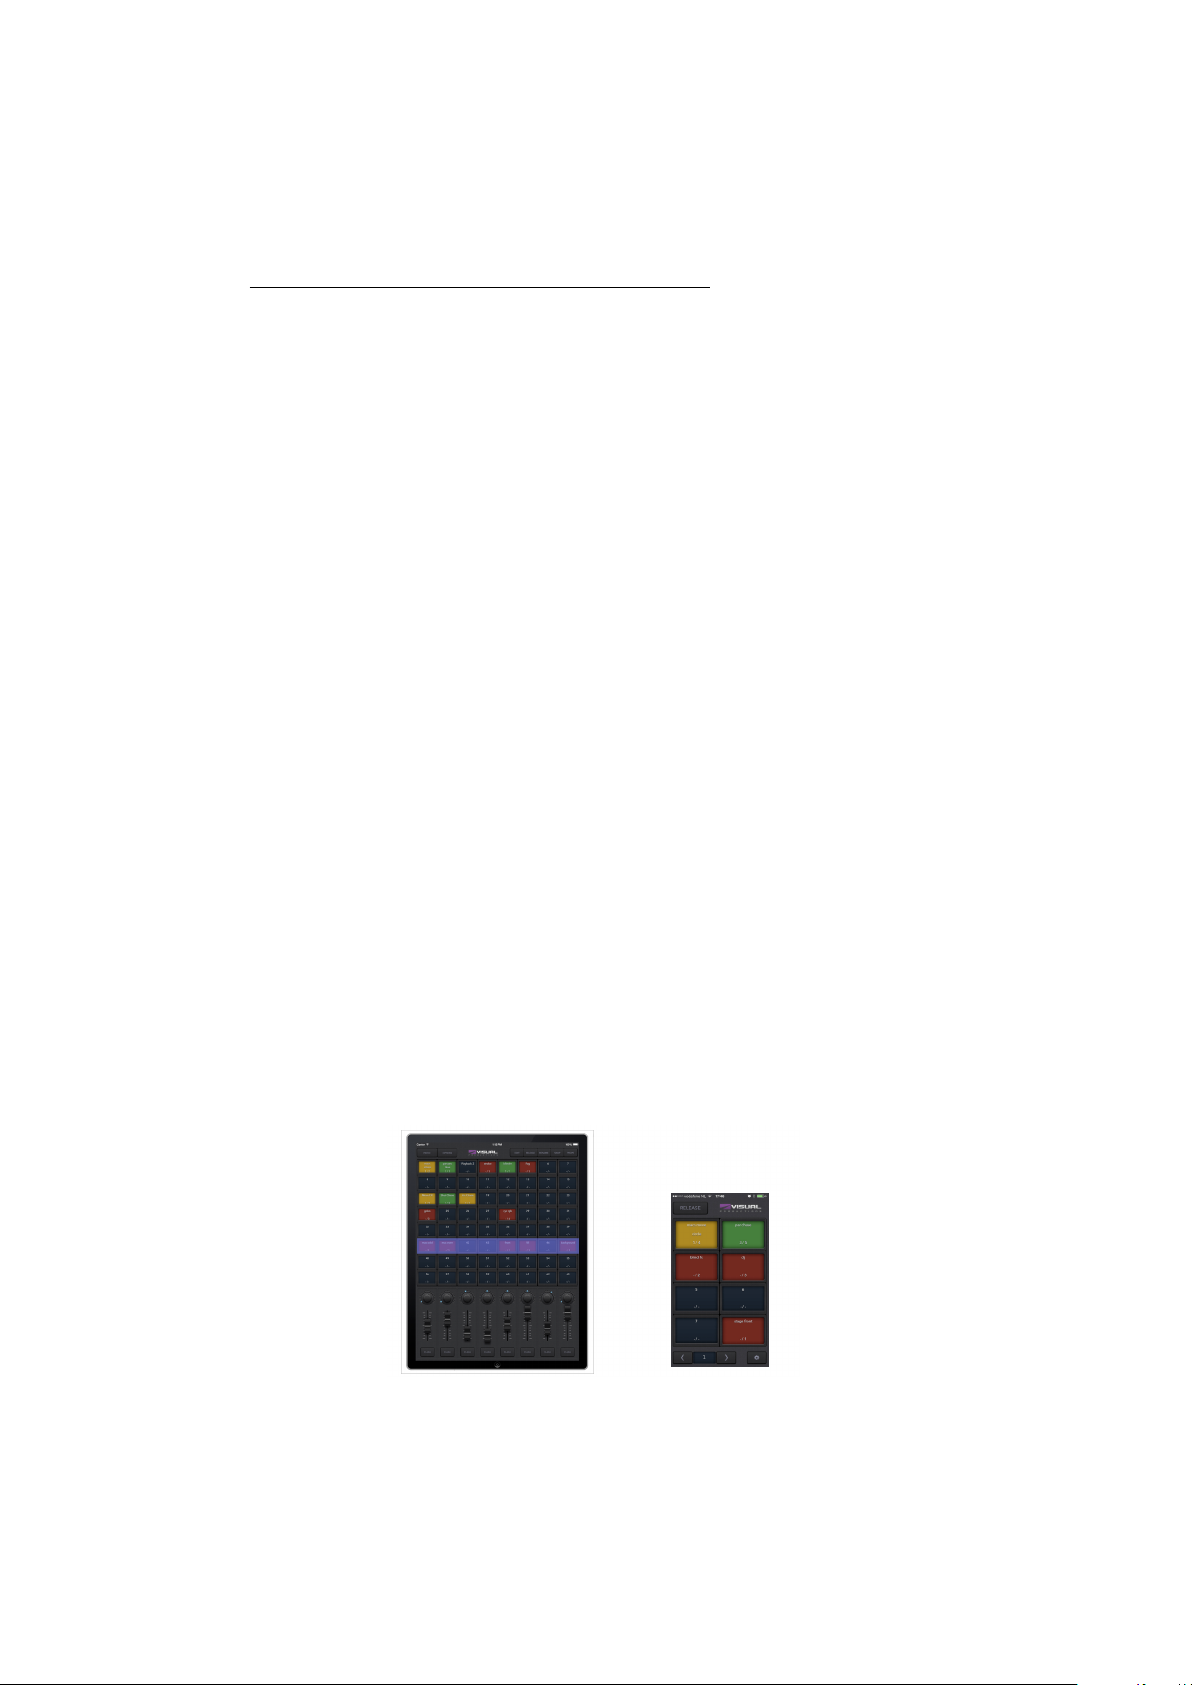
The main App is the Cuety App, designed for tablets. This App allows you to
create a patch (the list of fixtures you are controlling), program cues and FX
and operate the playbacks like a live lighting console.
Figure 1.2: Cuety and Cuety Remote Apps
8
Page 9
In some situations you might not need the ability to modify all the details of
your light show; sometimes you just want a simple way of choosing between the
pre-programmed cues. In this case you can use the Remote App, designed for
phones.
The Remote App is also useful to give to other users of your lighting that have
less privileges; the Remote App does not enable the user to make any changes
to the patch or cues.
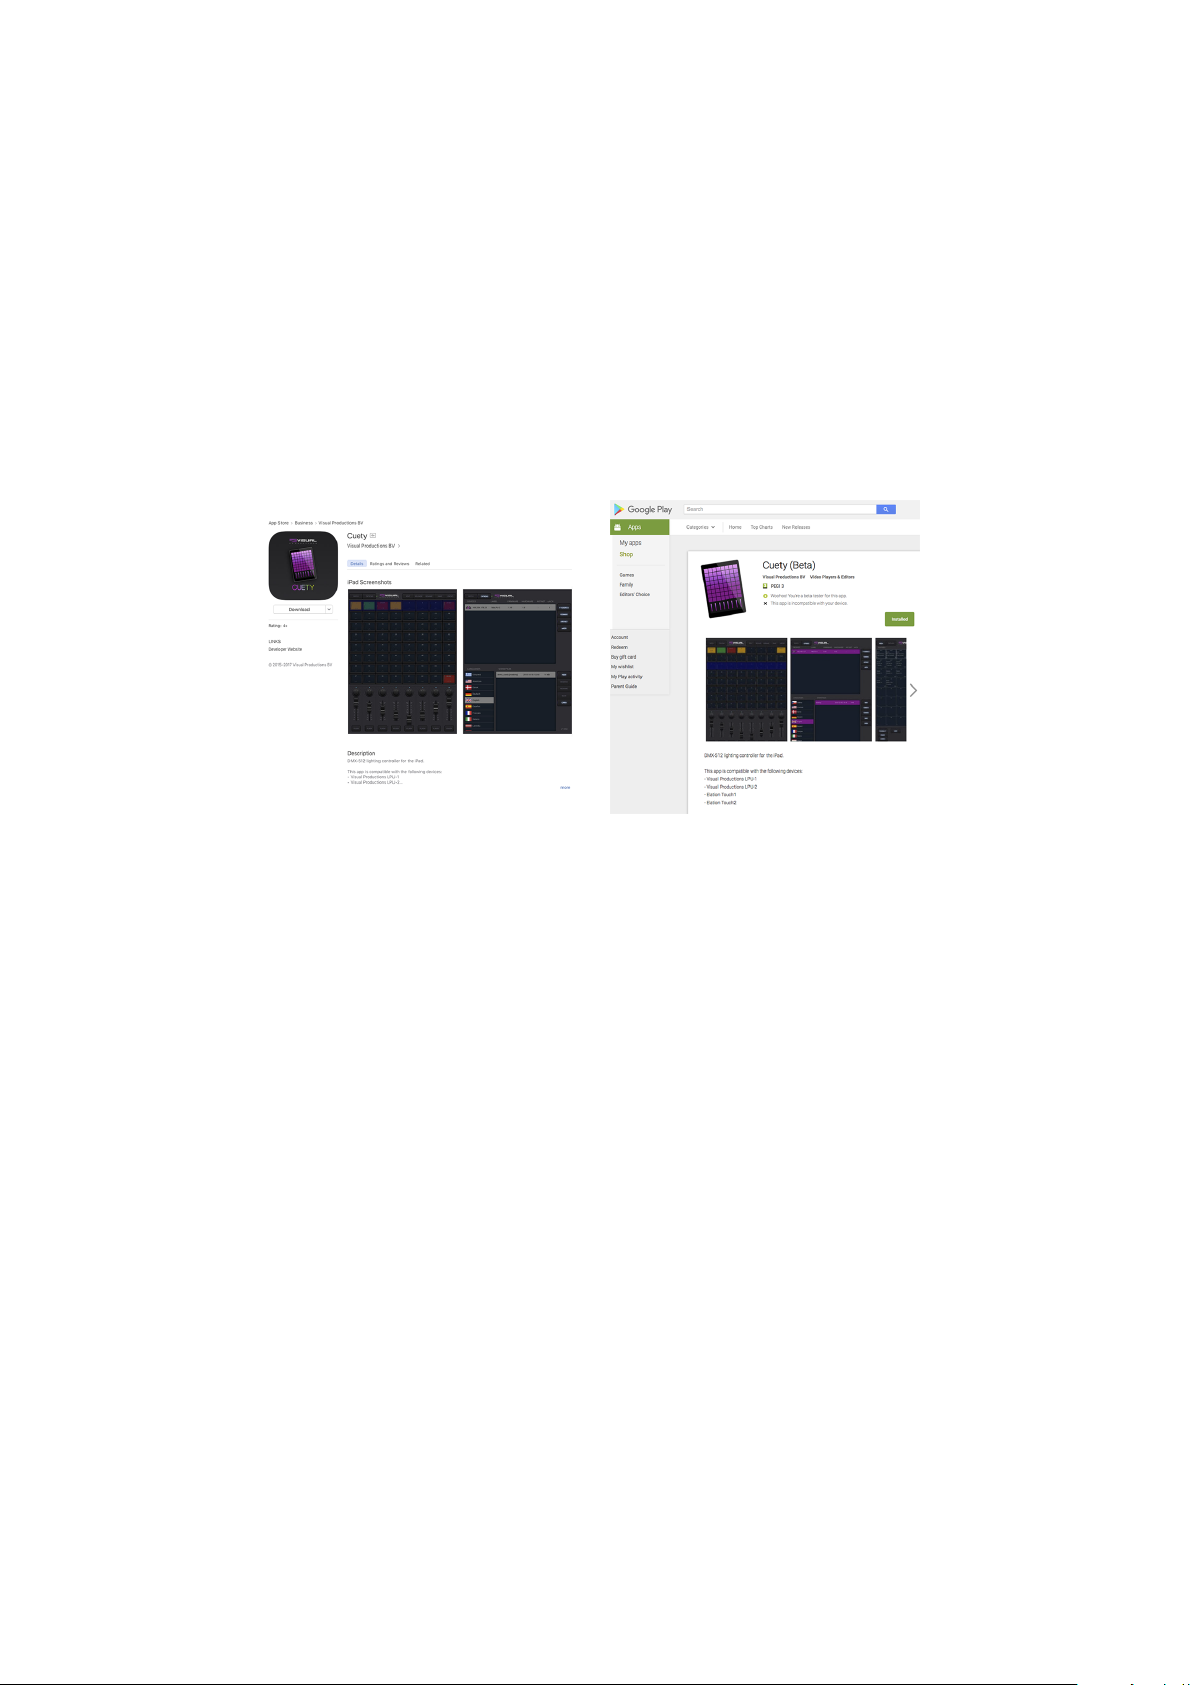
(a) iOS
(b) Android
Figure 1.3: App stores
Both Apps are available for iOS and Android and can be obtained via the Apple
App Store and Google Play store. See figure 1.3.
9
Page 10
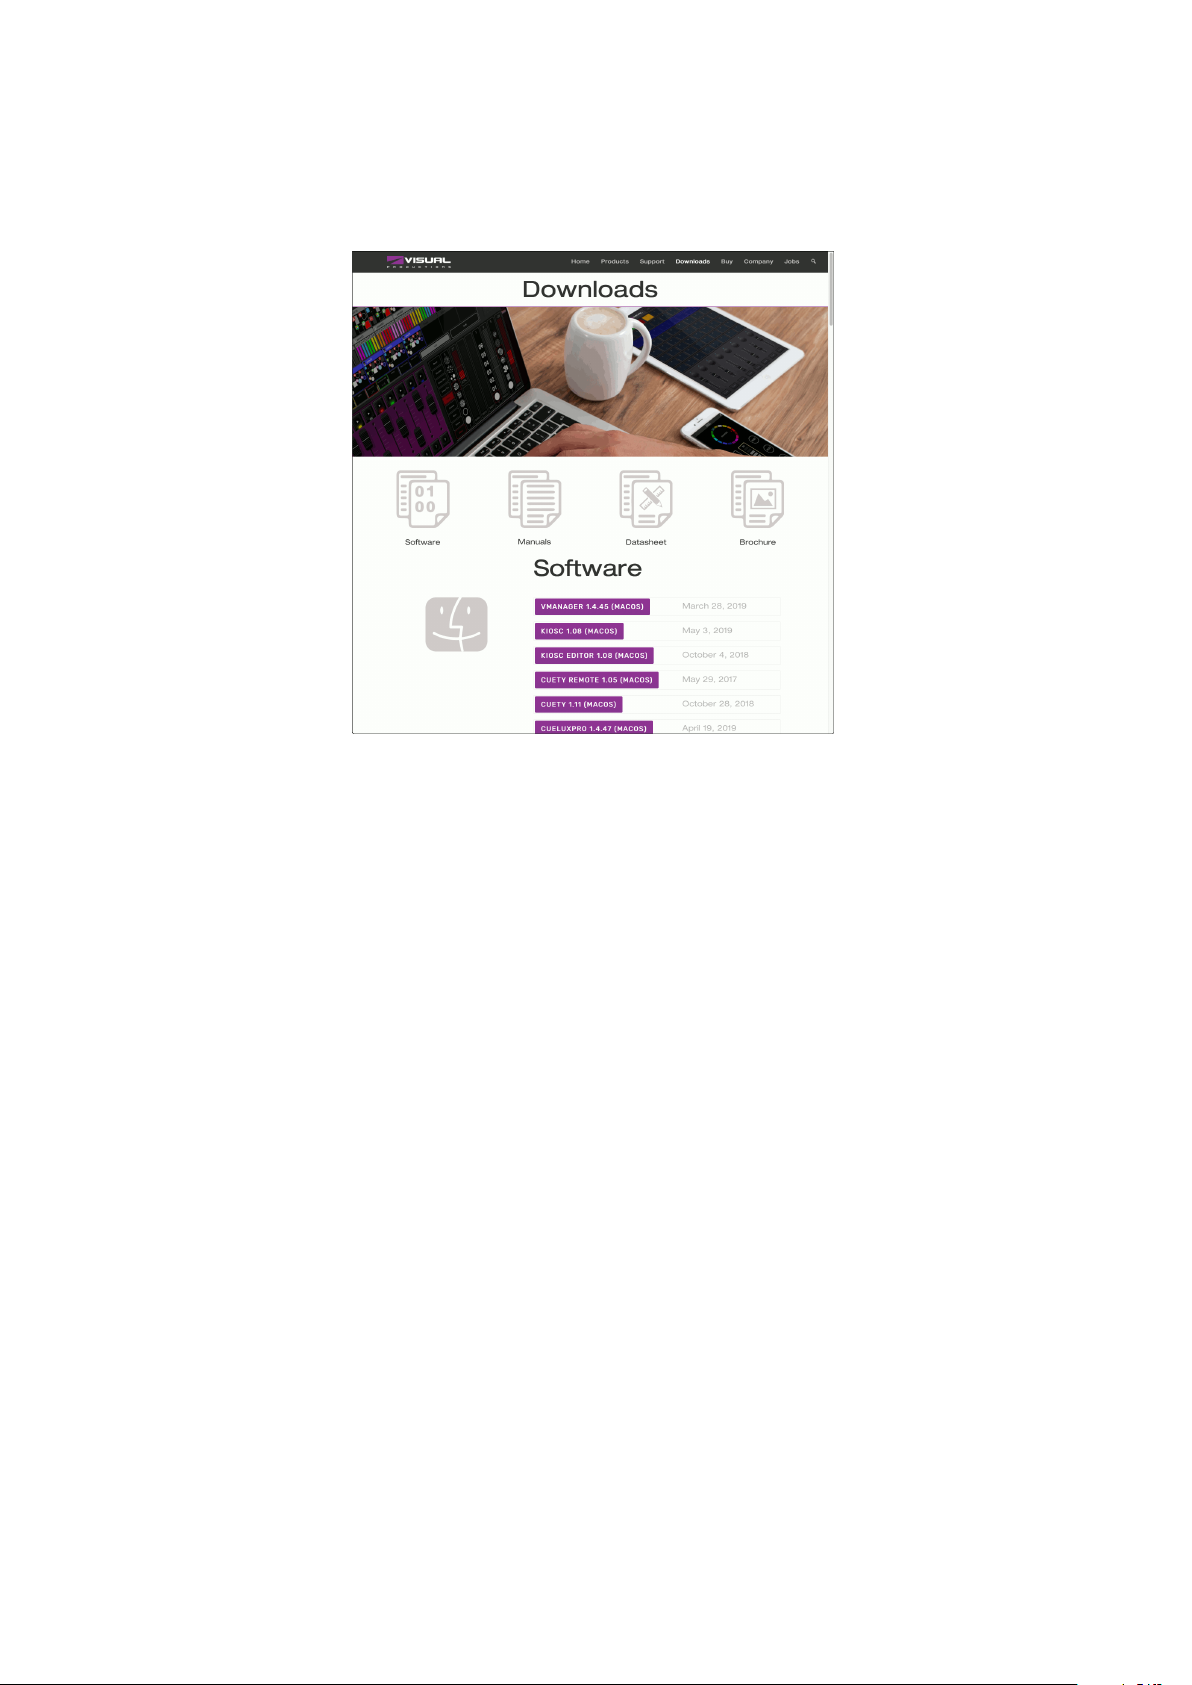
Figure 1.4: Download page
The Cuety and Cuety Remote software is also available on desktop operating
systems Windows, macOS and Ubuntu Linux. These releases can be downloaded
from http://www.visualproductions.nl/downloads/ (figure 1.4). Please bear
in mind that the Cuety app is designed for a tablet; the portrait view requires
a screen with a minimum of 1080 pixels in height.
1.6 What’s in the box?
The LPU packaging contains the following items (see figure 1.5):
• LPU
• Ethernet cable
• Power supply
• 4x international plug
• Info card
10
Page 11
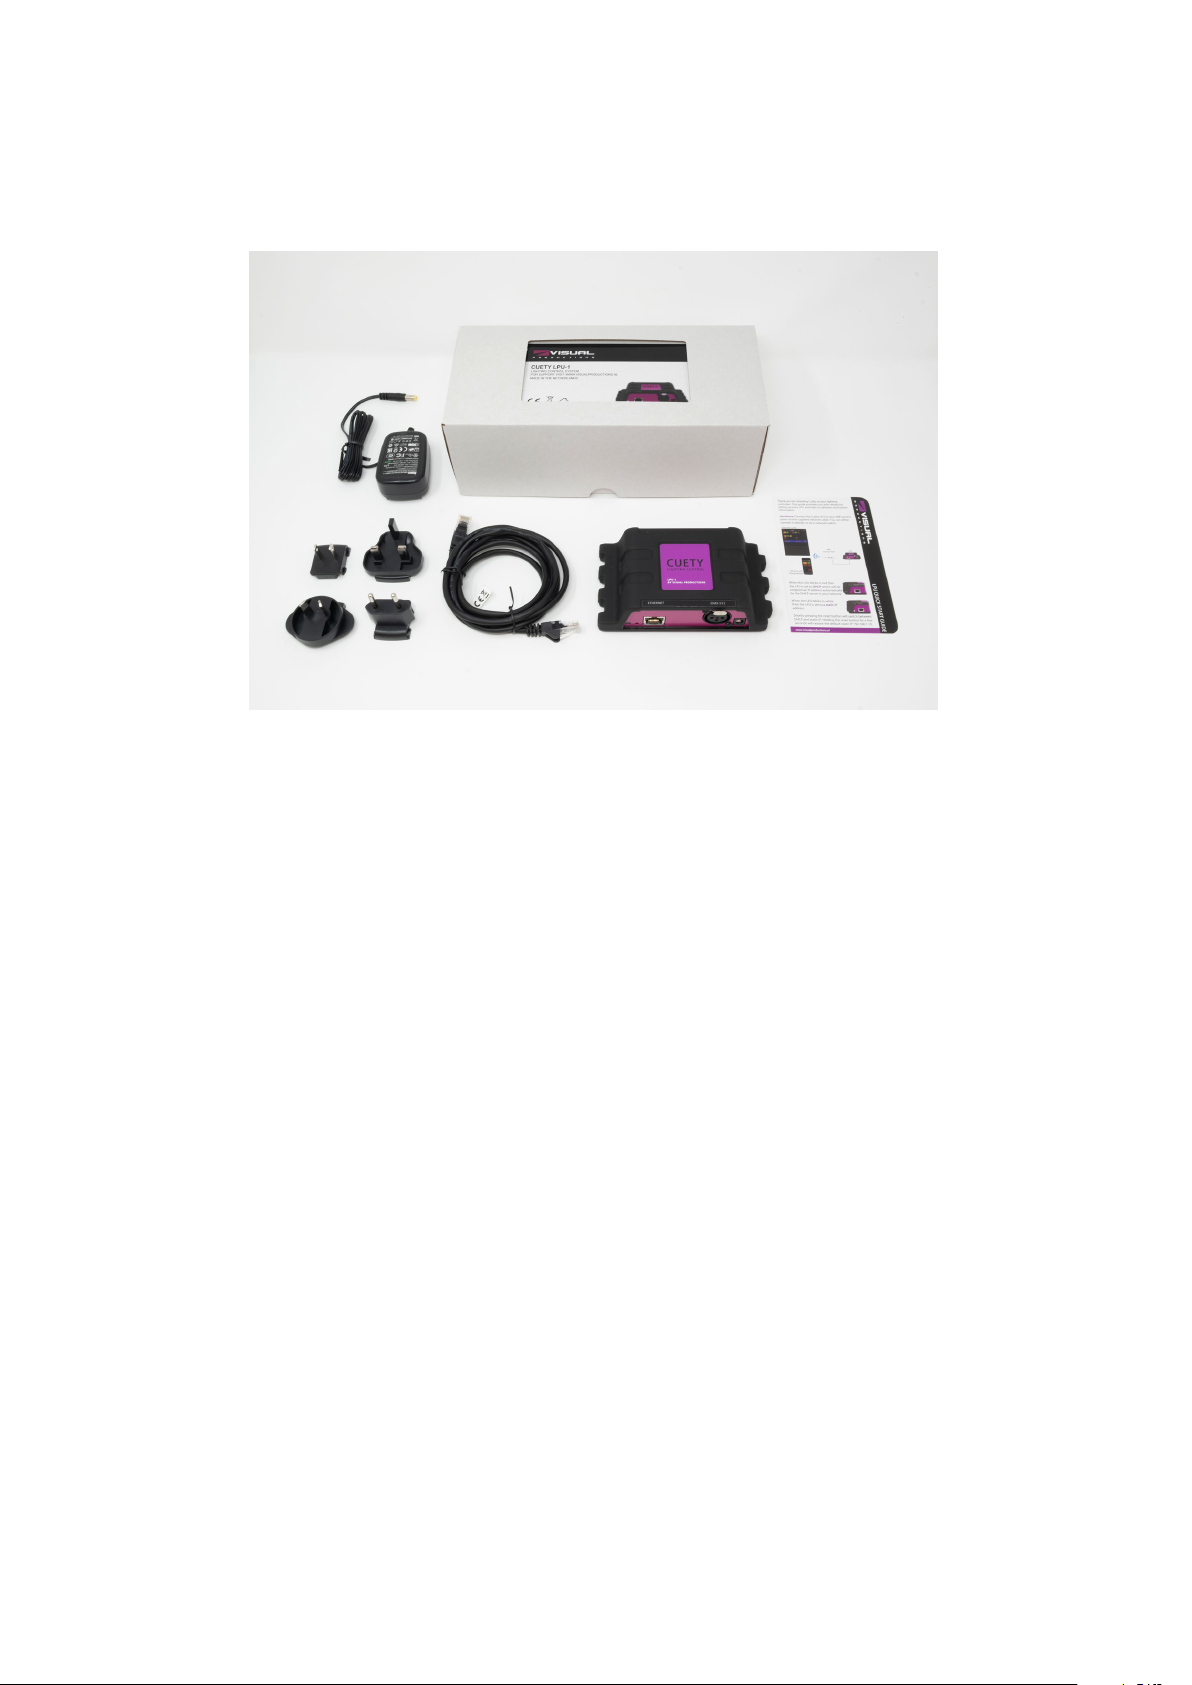
Figure 1.5: LPU box contents
1.7 Versions
At the time of writing this manual the Cuety App was at version 1.14, the Cuety
Remote App was at version 1.09 and the LPU firmware at version 1.25.
1.8 Further Help
We have prepared you several instruction videos on our YouTube channel (figure 1.6) at http://youtube.com/c/visualproductionsbvhaarlem. These tutorials address network-setup, programming cues, importing personality files,
upgrading firmware, etc.
11
Page 12
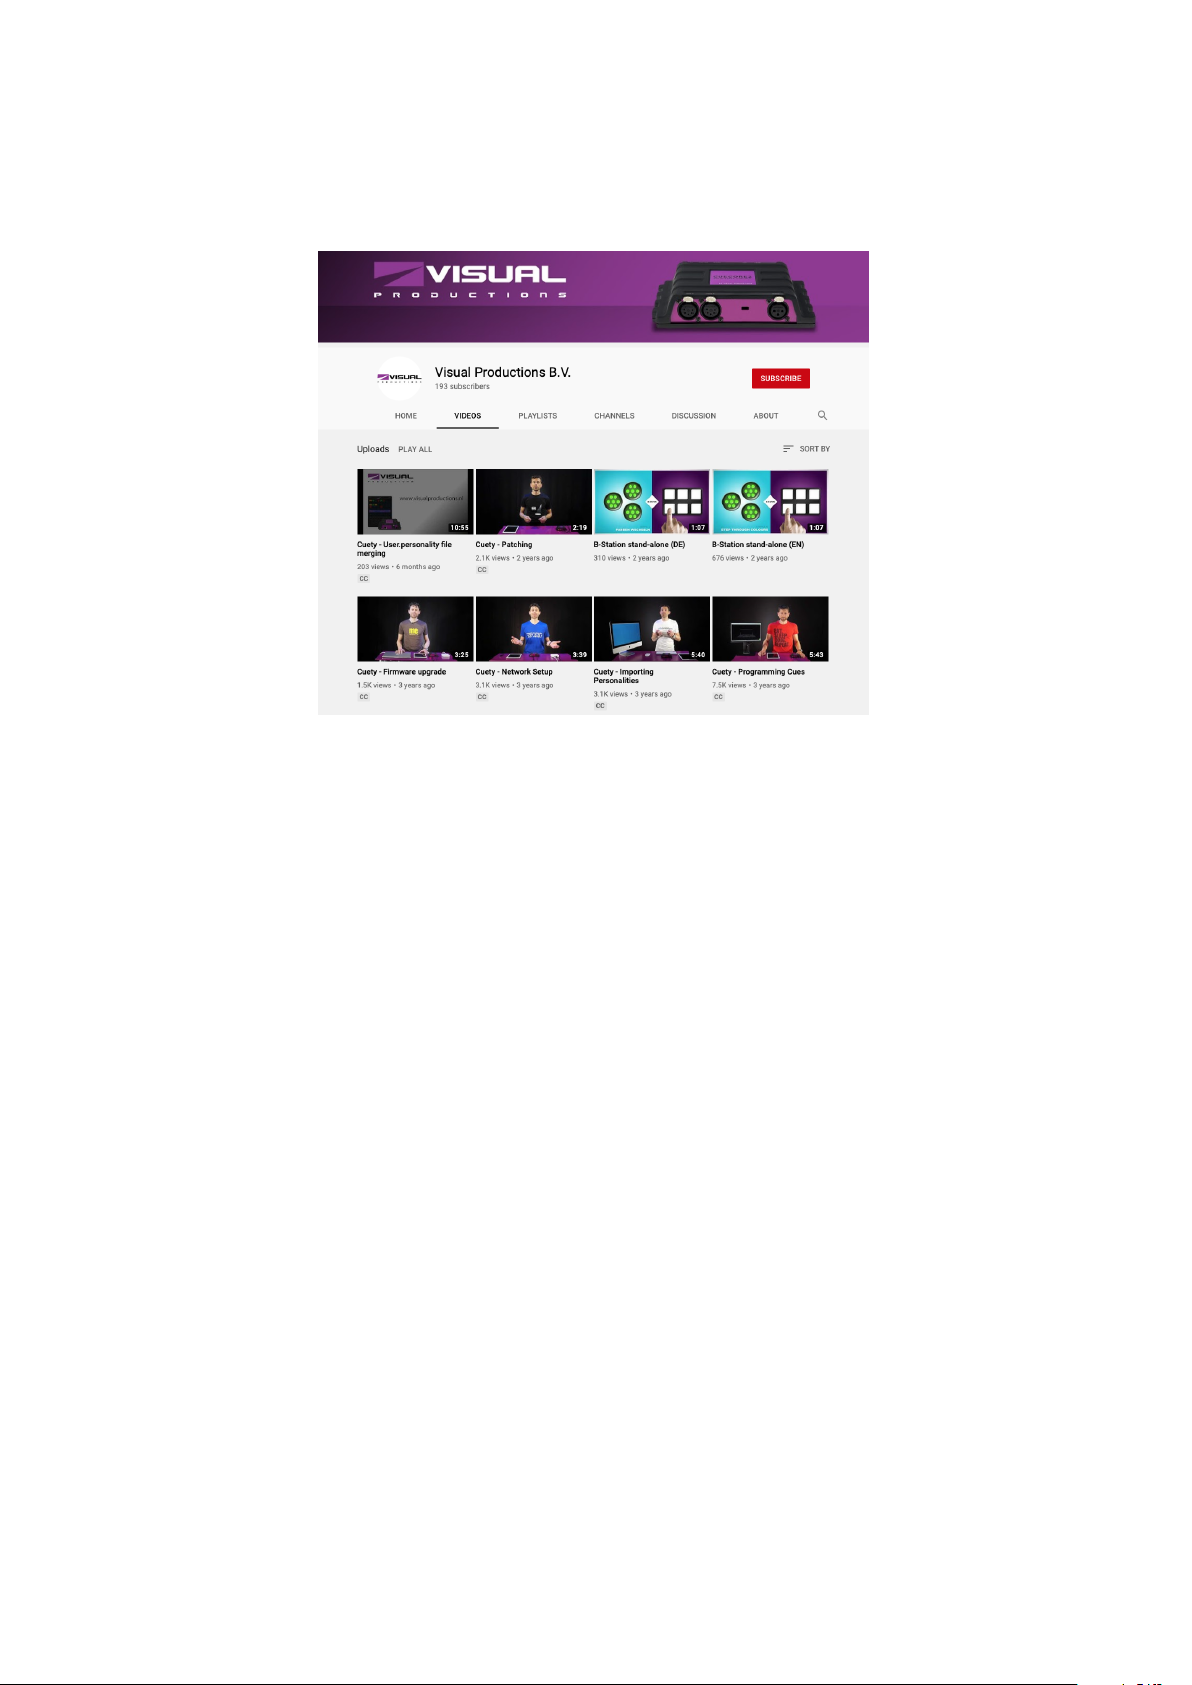
Figure 1.6: YouTube channel
If you have further questions then please consult the online forum at http://
forum.visualproductions.nl/forum/ for more technical support. See figure
1.7.
12
Page 13
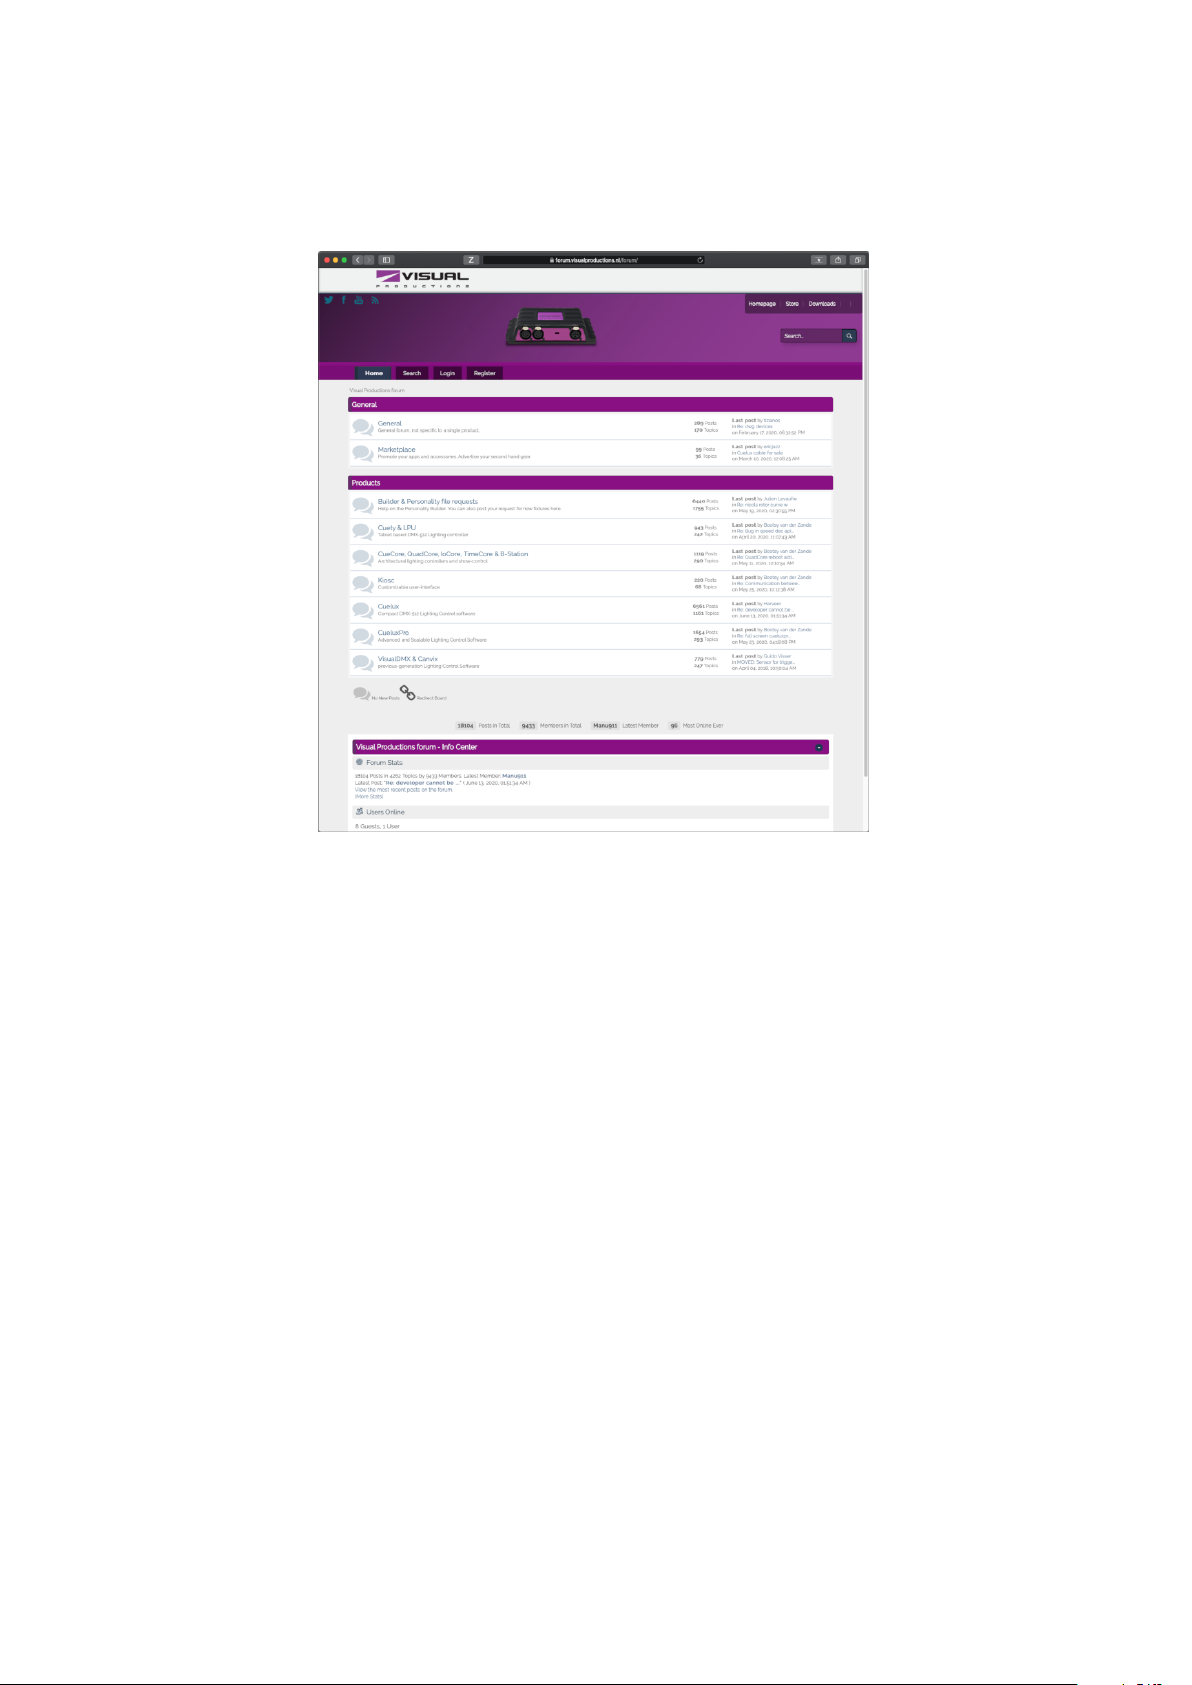
Figure 1.7: Forum
13
Page 14

Chapter 2
Protocols
The LPU-1 and LPU-2 support the output of DMX via the 3-pole XLR connector on the device. Art-Net and sACN output can also be enabled to transmit
the DMX data over the network. The following chapter will explain what these
three protocols are. The LPU-1 and LPU-2 support 1 universe, that can be
output simultaneously via DMX, ArtNet and sACN. It is important to note
that only output is supported.
2.1 DMX-512
DMX-512 is the standard communication protocol for stage lighting. One DMX
network contains 512 channels which is called a ’universe’. Each lighting fixture
connected to this universe will use one or more of these channels. On the lighting
fixture itself the DMX address can be set. This address corresponds to the first
channel that this fixture will listen.
As shown in figure 2.1 a simple RGB light might use 3 channels. Setting this
light to DMX address 1 will mean that the first three channels of the universe
control the red, green, and blue values of this light. When adding a second
RGB light, it would commonly be set to the next free address. In this case, that
would be address 4. It will then listen to channels 4, 5 and 6 for red, green and
blue.
14
Page 15

Figure 2.1: DMX example
How many channels a lighting fixture uses will always depend on the manufacturer/model. Often a light can have different operating modes. For example, a
simple RGB light can have a 3-channel mode where it uses 3 channels for red,
green and blue. But it might have a 4 channel mode for red, green, blue and
intensity. Maybe it even has a 5-channel mode, adding a channel for strobe. Information about DMX and operating modes can usually be found in the manual
of the lighting fixture.
It is advised to use a shielded twisted pair cable for DMX cabling. The cable
should be terminated with an 120 Ohm resistor.
DMX-512 is a very successful protocol with, however, a few limitations. The
maximum number of attached devices is limited to 32 and they all have to be
connected in bus-topology having one cable running via each device. Furthermore, a DMX-512 cable should not be longer than 300 meters.
2.2 Art-Net
The Art-Net protocol primarily transfers DMX-512 data over Ethernet. The
high bandwidth of an Ethernet connection allows Art-Net to transfer up to 256
universes.
The data sent out for Art-Net does put a certain load on the network, therefore
it is recommended to disable Art-Net when not in use.
Art-Net output can be enabled or disabled in the Options menu, see section 5.1.
15
Page 16

2.3 sACN
The streaming Architecture of Control Networks (sACN) protocol uses a method
of transporting DMX-512 information over TCP/IP networks. The protocol is
specified in the ANSI E1.31-2009 standard.
The sACN protocol supports multi-cast in order to take efficient use of the
network’s bandwidth.
sACN output can be enabled or disabled in the Options menu, see section 5.1.
16
Page 17

Chapter 3
Quickstart
This chapter offers you a brief step-by-step instructions on how to get your
Cuety system up and running. All steps are explained in further detail in the
subsequent chapters. In this Quick Start example we are using a simple 3channel RGB fixture that is set to start-address 1.
1. Connect
Power up your LPU device with the accompanied PSU. Use the network
cable to connect the LPU to your router.
2. DHCP
We assume here that you have a router that acts as a DHCP server.
Make sure your LPU device is also set to DHCP. The LED should be
blinking in red. If it’s blinking in white (static IP) then please use a
pencil to shortly push the reset button.
17
Page 18

3. Cuety
We assume you have an iPad that is already connected to your network.
Start your Cuety app on your iPad and go to the OPTIONS screen.
Select the LPU from the list. There now should be a green LED in the
Cuety GUI (right next to the OPTIONS button).
4. Patch
Go to the PATCH screen and select the first fixture cell (top left). Press
the PERSONALITY button and go to the ’Generic’ manufacturer, where
you choose a ’RGB 01x’ model.
18
Page 19

5. Edit
Exit the PATCH screen, you are now back in the main playback screen.
Press the EDIT button and then select a playback cell. This opens
the EDIT screen. Select the fixture and set some RGB values in the
’programmer’ below. Press ADD for >1 second to add a cue to the list
and record it immediately. Now set some other RGB values and press
ADD again for >1 second to create the second cue.
6. Playback
Press the BACK button to return to the main playback screen. Now you
can activate your edited playback by clicking on it. The playback status
should indicate a yellow colour and the attached fixture should show our
first RGB levels. By clicking the playback button again it will go to the
next cue.
You could go back into the EDIT screen to set fade times and change the
cues’ conditions to make it traverse automatically.
19
Page 20

Chapter 4
Setting up
This chapter discusses how to set up the LPU.
4.1 Mounting
The device can be placed desktop or it can be DIN Rail mounted. The device
is prepared for DIN Rail mounting by using the ’DIN rail holder TSH 35’ from
Bopla (Product no. 22035000).
Figure 4.1: Bopla DIN rail adapter
This adapter is - amongst others - available from:
• Farnell / Newark (order code 4189991)
• Conrad (order code 539775 - 89)
• Distrelec (order code 300060)
4.2 Kensington Lock
The device can be secured by using a Kensington style laptop lock.
20
Page 21

Figure 4.2: Kensington lock
4.3 Power
The LPU device requires a DC power supply between 9 and 12 Volts with a
minimum of 500mA. The 2,1 mm DC is center-positive.
Figure 4.3: Polarity
4.4 Network
Connect the LPU device to a Wi-Fi access point by using the supplied CAT-5
cable. You can either connect it directly to the access point (Figure 4.4a) or
via a network switch. The LPU’s Ethernet port is auto-sensing so it does not
matter whether you use a cross or straight cable.
When running Cuety on a desktop OS (Windows, macOS, Ubuntu) you can also
consider making a wired network by omitting the access point (Figure 4.4b).
(a) Wireless
Figure 4.4: Network arrangements
(b) Wired
4.4.1 DHCP vs Static IP
Per factory default the LPU is set DHCP. It will be automatically assigned
with an IP address by the DHCP server in your network (usually incorporated
in your router). When set to DHCP the heartbeat LED on the LPU indicates
red.
21
Page 22

You switch the LPU to a static IP address by briefly pressing the reset button on
the device (Figure 4.5). When set to static, the heartbeat LED on the LPU will
indicate white. Static IP addresses are useful when you have no DHCP server
in your network, for instance when you make a direct peer-to-peer connection
between your LPU and your tablet/computer. It is also useful in case you
want to make sure that the IP address of the LPU will never change, e.g. in a
permanent installation.
When using static IP addresses you have to make sure that all equipment on
your network have unique IP addresses.
You can also change the IP settings from inside the Cuety App.
4.4.2 Reset
By pressing the reset button on the device (Figure 4.5) for 3 seconds or more,
you will reconfigure the unit to the factory default IP address and sub-net mask.
No other settings will be changed. The default IP address is 192.168.1.10 with
the sub-net mask set to 255.255.255.0
Figure 4.5: Reset switch
If you wish to fully erase the patch and playback memory in the LPU then you
can perform a ’Factory Defaults’ by using the vManager software tool. This
tool is discussed on page 39.
22
Page 23

Chapter 5
Cuety App
The Cuety App is the main tool to program your light-show and to operate it
live. Please note that you first need to connect to a LPU hardware before you
can create a patch or record cues.
5.1 Options
To connect to your LPU hardware, first open the Options page.
Figure 5.1: Options screen
23
Page 24

5.1.1 Devices
Here you can choose your LPU device from the list. Once your LPU is selected
it will be possible to change the IP address of the unit. When changing the IP
be careful to keep it within the IP range of your tablet. Moving the IP address
of your LPU outside this range will result in the device disappearing from the
list. In this case press the physical reset button shortly on the LPU to switch
back to DHCP (red LED) or press it long to revert back to the default static
IP address (white flashing LED) which is 192.168.1.10.
Device Lock
The selection of the device can be locked. The lock prevents accidental deselection of the LPU. Select the device and then press the ’IP Address’ button
for 10 seconds. A lock icon will appear, see 5.2.
Figure 5.2: Device Lock
Art-Net & sACN
You can also enable the Art-Net and/or sACN protocols. These protocols are
not required for normal use of the Cuety system. The protocols will allow you
for instance to connect to a 3D visualizer for rendering your lighting rig.
5.1.2 Show files
All the show data is located in the LPU hardware, however, it is possible to
create a backup show file on a tablet. This show file can later be read back by
the LPU.
Please note that when creating a new show file this file will be empty; you still
need to ’save’ the file for it to contain the current patch and cue information.
The files will be stored at the following location:
• Windows: C:\Users\[username]\Documents\Visual Productions\Programmer\
24
Page 25

• macOS: Go to the options menu by pressing the OPTIONS button. Then
press the folder button to open a file window, showing the appropriate
folder.
• iOS: Transfer by using iTunes or via Finder
• Ubuntu linux: Go to the options menu by pressing the OPTIONS but-
ton. Then press the folder button to open a file window, showing the
appropriate folder.
• Android: Device/Internal storage/Visual Productions/Programmer/App data/
Read-only
A show file can be made read-only as in figure 5.3.
Figure 5.3: Read-only show file
This is done by editing the XML-based show file with a standard text editor.
When the readonly="true" attribute is added to the <show> tag - as seen in
figure 5.4 - this file can no longer be removed, renamed or overwritten by the
Cuety App.
Figure 5.4: XML show file
25
Page 26

Importing from Cuelux
It is possible to import a show file made in Cuelux, another lighting software
package made by Visual Productions. After copying the Cuelux show file to the
iPad using iTunes it will become visible in the show file listing. The Cuelux
show files remain read-only. Opening this file will import the patch and some
playback settings. The cues, however, will not be imported as Cuelux saves this
information in different style.
5.2 Patch
After successfully connecting to the hardware the logical next step would be to
create a patch. A patch is a configuration in which you tell the Cuety which
DMX fixtures you are using. Cuety supports a maximum of 64 fixtures. These
fixtures can be of many different types and brands.
5.2.1 Adding fixtures
To add fixtures to your patch first select one or more fixture cells. Then press
the ’Personality’ button. This will popup a dialog (figure 5.5) that lets you traverse through the library of personalities (also known as profiles). Personalities
are descriptions of a DMX-512 capable apparatus. Cuety is equipped with a
large library of approximately 3.500 personalities. It includes popular and even
obscure brands, it ranges from moving lights to special effects.
26
Page 27

Figure 5.5: Personality library
A special ’manufacturer’ to take into consideration is ’Generic’. This collection
contains many typical DMX fixtures with common traits like dimmers and RGB
spots. It is likely that some of your DMX equipment will correspond with items
from the Generic list. In case you have a DMX fixture that is not represented
in the Cuety library then please consult page 37.
5.2.2 Addressing
Each DMX fixture needs to be set to a ’start address’. It is needed to set
the addresses on the actual fixtures. Then you need to make sure that the
same addresses are set in the patch of Cuety. Please refer to the fixture’s
documentation on how to set it on the actual fixture. In Cuety, you select
one or more fixture cells and press the ’address’ button. If you have multiple
fixtures selected Cuety will automatically increment the addresses between the
consecutive fixtures.
27
Page 28

5.2.3 Invert Pan/Tilt
When using moving lights like yokes then depending on the orientation of your
fixture you might want to invert the pan and/or tilt movement. This way you
can make sure that moving ’left’ on your controller in reality also makes the
lights to go ’left’. In case you attach your moving head to a vertical truss you
might want to use the Swap Pan/Tilt option.
5.2.4 Virtual Dimmer
If the fixture has RGB(AW) colour mixing but no DMX channel for intensity
you would need to lower all RGBAW faders identically to reduce the intensity
but to keep the colour. This can be quite awkward. You can enable the Virtual
Dimmer; this option will give the fixture intensity capability separate from the
RGBAW control. The LPU device will calculate the necessary DMX levels
internally.
5.2.5 Sub-Fixtures
Cuety does not support sub-fixtures. We use sub-fixtures in our personality files
when fixtures have multiple ’parts’ like RGB-pixels or dimmer channels. Our
other softwares, Cuelux & CueluxPro, take use of that. In Cuety all personality
modes with sub-fixtures are ignored. The way how to add a fixture with multiple
dimmer channels in Cuety is to add several ’Generic - Dimmer 01x’ fixtures. You
can control multiple-pixel lights by adding several ’Generic – RGB 01x’ fixtures.
5.2.6 Limitation
The Cuety system is designed for entry level lighting control and offers an impressive value for the cost, however, there are some restrictions to the capacity
of the system that limit the control of high-end moving lights.
In Cuety, a fixture can have a maximum of 27 channels. One fixed-colour wheel,
one gobo wheel and one prism wheel is supported. Any additional wheel is not
supported and consequently set at 0.
Alternatively, personality files can be programmed to use any of the two custom
faders for controlling additional wheels. E.g. a second gobo wheel.
If your requirement is to control complex moving lights and you are challenged
by the restrictions of Cuety, then we recommend choosing the Cuelux control
system instead. (For more information, see http://www.visualproductions.
nl/cuelux/ ).
5.3 Playback
The Playback view (figure 5.6) presents you with 64 playback buttons. Each
Playback can contain one or more cues. Cues are explained in more detail later
on.
You can directly access all the playback buttons to start and stop them. To
start a playback just hit the playback button one time. To release a playback
28
Page 29

(that means to stop it) you can either press the playback button for longer
than one second, or first enable the ’Release’ button at the top and then choose
a playback button. To release all playbacks in the system press the ’Release’
button longer than one second.
Figure 5.6: Playback screen
To change the intensity and speed of a playback you first need to select the
appropriate bank. The blue bar indicates the currently selected bank. You can
move the bar around by using three fingers (on a tablet) or by using the mouse
wheel or PageUp/PageDown keys (on Windows, macOS & Ubuntu).
5.3.1 Swap
You can move the contents of a playback to another location by enabling the
Swap button at the top, then click on the playback you would like to move and
then click on the destination playback. The contents of those two playbacks will
be swapped.
29
Page 30

5.3.2 Properties
Each playback has a few properties. You can change them by enabling the Props
button at the top and then choose a playback button.
• By enabling Background the playback will start automatically when the
LPU device is powered on. Also, the playback will ignore the Release All
command (a long press on the ’Release’ button). The Background feature
is useful for controlling fixtures that should never turn off; e.g. some lights
backstage that provide safety to artists coming on stage.
• When you have multiple playbacks on the same bank that have Exclusive
enabled, then only one of them will be active at the same time. Starting
a new exclusive playback will automatically release the other exclusives.
Please note that the scope of the Exclusive feature is limited within the
bank, i.e. an exclusive playback in one bank will not influence an exclusive
playback in another bank. By using Exclusive you can create LTP-like or
palette-like behaviour, both features usually found in professional-grade
lighting controllers.
• Go Mode will change the behaviour of the playback button. By default
it is set to Go; the button will send a Go Forward (Go+) command to
the playback which then will start, or if it was running already it will
progress to the next cue. Pressing the button for a long time will release
the playback. The next option is Toggle; in this case pressing the button
for the first time will start the playback and pressing it again will release
it. The Flash mode will make the playback active while the button is
depressed. The Solo mode does the same, however, it will also temporarily
blackout all other playbacks.
• Repeat. This property determines what the playback does when it fin-
ishes the last cue. When set to Loop it will just start over from the
beginning. Bounce will make it traverse back to the beginning; it will
keep going back and forth. In the Random mode the order of the cues will
be random; the playback will continue indefinitely. When set to Off the
playback will automatically release when reaching the end of the cues.
5.3.3 Blackout
The blackout function can be enabled by clicking on the ’Visual Productions’
logo in the main screen. The purple icon will blink in red to indicate the blackout
is active, see figure 5.7.
Figure 5.7: Blackout
30
Page 31

5.4 Edit
This page (figure 5.8) allows you to edit the contents of a playback.
Figure 5.8: Edit screen
5.4.1 Cues
A cue is a step in a lighting sequence. A cue is sometimes also called a scene,
it means the same. We, however, prefer to use the word cue. Sometimes you
just need a single cue e.g. to create a static lighting ’look’. Sometimes you need
multiple cues; perhaps when you created a look for each scene in a theatre play.
In this case you step through the cues as each scene starts.
You can also use multiple cues to create a ’chase’ for example for a disco party.
To build a chase you just make a cue for each step of the chase and tell Cuety
to run through the cues automatically.
You can use the ’Add’ and ’Remove’ buttons change the number of cues inside
31
Page 32

this playback. A newly added cue is still empty. Pressing the ’Remove’ button
for longer than one second will remove all cues. Once you select a cue (it will
indicate in blue) you can alter its properties by using the ’Rename’, ’Condition’,
’Delay’ and ’Fade’ buttons.
5.4.2 Condition
The Condition property determines whether there is a pause between each cue.
When set to ’Halt’ the playback will pause after the fading of the cue is finished.
It will wait until the user presses the playback button to give a Go command.
When receiving the Go command it will start playing the next cue. When
set to ’Follow’ the playback will automatically continue to the next cue. This
condition is useful for creating automatic chases.
5.4.3 Delay
The delay time is only applied when using the Follow condition. In this case,
once the cue has finished cross-fading the playback will automatically progress
to the next cue. It will then first wait for the time specified by ’Delay’ before
starting its cross-fading.
5.4.4 Fade
The cue will fade from the current levels to its programmed levels. The time it
takes to cross-fade is specified by ’Fade’. When fade is set to 0 then there will
be no cross-fade; the values will snap instantly.
5.4.5 Fixtures
This grid enables you to select fixtures. The changes you make in the ’Programmer’ area below are applied to the selected fixtures. The fixture cells will
indicate in red when one of their attributes are set in this playback.
5.4.6 Programmer
The view at the bottom of the Edit page is called the Programmer. The Programmer contains a lighting ’look’ i.e. it can contain levels for various attributes
for various fixtures. Basically, you build up your lighting ’look’ inside the Programmer and then save it to a cue by using the ’Record’ button. This overwrites
the contents of the cue by whatever is present in the Programmer. A single cue
needs to be selected in order to use the ’Record’ button.
When you long-press the ’Add’ button it will automatically record the current
programmer content in the new cue.
To modify a cue, you first transfer the contents of the cue back to the Programmer by using the ’Load’ button. After that the procedure is the same as
making a new cue: change the values inside the Programmer and store it in the
cue with the ’Record’ button.
32
Page 33

Use the ’Clear’ button to remove values from the Programmer. When you have
certain fixtures selected and hit ’Clear’ then only the values of those fixtures are
reset. When the fixtures have no values set any more or no fixtures are selected
when you hit Clear then all values of all fixtures inside the Programmer are
cleared. In practice, clicking twice on the Clear button will completely erase
the Programmer.
The controls will indicate in red when a certain attribute is set in this playback.
5.4.7 FX
Your playback consists of cues and cues are static lighting ’looks’. To animate
your lighting you usually create multiple cues and have the playback chase
between them. However, you can use FX to quickly create a dynamic animation
in your lighting. For example a smooth circular movement on your moving head
or scan would require you to program many steps. With FX you simply used the
FX dialog (see figure 5.9) to select the ’Circle’ effect for your position attribute,
set a few parameter levels and it’s done.
Figure 5.9: FX dialog
There are also FX for RGB colour mixing e.g. a rainbow effect. FX also exists
for the intensity attribute. You can use intensity effects for quickly creating
some chases by using the ’Phase’ parameter.
33
Page 34

Chapter 6
Remote App
The Cuety Remote App (figure 6.1) is a small tool for remote controlling the
LPU device. The Remote App does not allow you to edit the settings inside the
controller. It is assumed that you would have already programmed the contents
of the LPU by using the Cuety App.
Figure 6.1: Cuety Remote
34
Page 35

The Remote App allows you to trigger playback buttons.
Figure 6.2: Settings
To connect to a LPU device open the settings page (figure 6.2) and choose your
device from the list.
35
Page 36

Figure 6.3: Remote App on tablet
The Remote App can also be run on a tablet, see figure 6.3.
6.1 Cuelux
The Remote App can also be used to control the Cuelux lighting control system
from Visual Productions. Cuelux is a DMX control system larger and more
powerful than Cuety. More information about Cuelux can be found at http:
//www.visualproductions.nl/cuelux/
36
Page 37

Chapter 7
Personalities
Cuety has a large library of personality files built in. It is possible, however,
that a lighting fixture you wish to control does not yet exist in our library. If
you like to add a new personality file to Cuety then you can request via our forum at http://forum.visualproductions.nl/forum/. Please make sure you
mention that the personality is required for Cuety and include (a link to) the
fixture’s manual.
Alternatively you can create your own personality file by using the vBuilder software. This tool can be downloaded from our website at http://www.visualproductions.
nl/downloads/. You will need vBuilder v1.3.88 or higher.
Figure 7.1: vBuilder
In order to create the personality and use it in Cuety you have to make the
following steps:
37
Page 38

• Create the personality file by adding all the channels needed for your
fixture. A detailed explanation can be found in the vBuilder user manual
Please note that Cuety does not support sub-fixtures.
• Press the “Cuety Export” button.
• Go to the folder User/Visual Productions/vBuilder.
• Copy the file “user.personality” to your Cuety App:
-iOS: Transfer by using iTunes or via Finder
-MacOS: Go to the options menu by pressing the OPTIONS but-
ton. Then press the folder button to open a file window, showing the
appropriate folder.
-Linux: Go to the options menu by pressing the OPTIONS button.
Then press the folder button to open a file window, showing the appropriate folder.
-Windows: C:\Users\[username]\Documents\Visual Productions\Programmer\
-Android: Device/Internal storage/Visual Productions/Programmer/App data/
• Shut down and restart the Cuety app
Now you can select the personality from the top of the listing in Cuety’s patch
menu. Custom manufacturers in the patch library are surrounded by square
brackets like [this].
38
Page 39

Chapter 8
vManager
A special software tool called vManager (figure 8.1) has been developed to manage the various network-based lighting controllers supplied by Visual Productions. This tool is available for desktops on Microsoft Windows, MacOS and
Ubuntu Linux and is available via our website, free of charge. It is also available
for tablets in the Apple App Store and the Google Play store.
vManager allows you to perform a firmware upgrade on your LPU device. The
firmwares are contained in the vManager software. Downloading a new vManager version might give you a new firmware for your LPU device.
Figure 8.1: vManager
Please note that vManager has more features that are dedicated to other equipment from Visual Productions such as the CueCore and IoCore. Some buttons
39
Page 40

will be disabled while working with a LPU device because they do not apply to
this piece of hardware.
8.1 Blink
You can set the device’s LED to blink fast for identifying a particular unit
amongst multiple devices. The blinking is enabled by double-clicking on a device
in the ’Devices’ list or by selecting a device and then clicking the ’Blink’ button.
8.2 Upgrade Firmware
To upgrade the firmware, first select the device and press the Upgrade Firmware
button. The dialogue in figure 8.2 allows for selecting from the list of firmware
versions available.
Figure 8.2: Firmware upgrade
Warning: Make sure the power to the device is not interrupted during the
upgrade process.
8.3 Factory Defaults
The memory containing all user data like patch and playbacks is completely
erased and all settings are reverted to their defaults by pressing the ’Factory
Defaults’ button. This action does not affect the device’s IP settings.
40
Page 41

Chapter 9
Minimum Requirements
This chapter discusses the minimum system requirements for running Cuety.
9.1 Mobile devices
For Cuety the minimum screen size is 7 inch, with a resolution of at least
768x1024. Alternatively, Cuety Remote can be used for devices that don’t fit
the minimum requirements of Cuety.
Current OS requirements as of Cuety version 1.14
Operating System Minimum
iOS 13
Android 7
9.2 Desktop computers
Although Cuety is designed for tablets, there are versions available that run on
Windows, macOS and Ubuntu Linux. These programs are fully functional and
can be used to program and operate the LPU-1 and LPU-2. Please note that
the Cuety program is designed for a tablet screen resolution in portrait mode.
The desktop monitor requires a minimum of 1080 pixels in height.
Current OS requirements as of Cuety version 1.14
Operating System Minimum
Windows 10
macOS 10.14
Ubuntu 18.04
41
Page 42

Appendices
42
Page 43

Appendix A
API
The following functionality is only supported by the LPU-2, not by the LPU-1.
Figure A.1: Kiosc
A.1 Kiosc
The LPU-2 can be controlled through the OSC and UDP protocols. There are
various apps available for this purpose. We recommend using Visual Productions’ Kiosc.
Kiosc is available on desktop and mobile operating systems. You can download
Kiosc for Windows, MacOS, Ubuntu Linux, iOS and Android via the corresponding App stores.
See http://www.visualproductions.nl/kiosc/ for more information about
Kiosc.
43
Page 44

A.2 OSC
OSC (Open Sound Control) is a protocol for communicating between computers,
software and various multi-media type devices. OSC uses the network to send
and receive messages, it can contain MIDI and custom information.
The LPU-2 uses port 8000 for receiving the OSC messages.
OSC is also integrated in the CueCore, IoCore and B-Station from Visual Productions. It is the preferred way of connecting equipment like the B-Station to
a LPU-2.
The functionality within the LPU-2 can controlled by using the following OSC
messages:
Description URI Parameter Type Parameter Range
Set playback intensity /pb<playback index>/in float 0.0 → 1.0
Get playback intensity /pb<playback index>/in bool false / true
Increment playback intensity /pb<playback index>/in++ float -1.0 → 1.0
Decrement playback intensity /pb<playback index>/in- - float -1.0 → 1.0
Set playback speed /pb<playback index>/sp float -1.0 → 1.0
Get playback speed /pb<playback index>/sp bool false / true
Increment playback speed /pb<playback index>/sp++ float -1.0 → 1.0
Decrement playback speed /pb<playback index>/sp- - float -1.0 → 1.0
Control playback button
Control playback flash /pb<playback index>/fl bool false / true
Release playback /pb<playback index>/re - -
Playback go forward /pb<playback index>/go+ - -
Playback go back /pb<playback index>/go - - -
Playback jump /pb<playback index>/ju int 1 → 48
Set all intensity /pbxx/int float 0.0 → 1.0
Set all speed /pbxx/spd float -1.0 → 1.0
Release all playbacks /pbxx/rel - -
Hello /hello - -
Set blackout /blackout bool false / true
1
/pb<playback index>/bu bool false / true
44
Page 45

1
This command mimmics the button in the Cuety interface. It can be short-
pressed for Go+ and long-pressed for Release. It expects a 1 first, and then
0. The time between these commands determine wheter it is a long-press or a
short-press.
A.2.1 OSC Feedback
The following commands are used for feedback. For more information about
feedback send by the LPU-2, see A.5 ”Receiving API Feedback”
Description URI Parameter Type Parameter Range
Playback intensity /pb<playback index>/in float 0.0 → 1.0
Playback speed /pb<playback index>/sp float 0.0 → 1.0
Playback button /pb<playback index>/bu bool false / true
Playback active /pb<playback index>/ac bool false / true
Hello API /hello - -
Blackout /blackout bool false / true
A.3 TCP & UDP
TCP (Transmission Control Protocol) is a protocol for sending messages across
an Ethernet network. TCP provides reliable, ordered and error-checked delivery
of messages between programs running on computers connected to a local area
network, intranet or the public Internet.
UDP (User Datagram Protocol) is a simple protocol for sending message across
the network. It does not provide any error checking. Although UDP is a bit
faster than TCP, it is less secure.
Typically either TCP or UDP is supported by various media devices like video
projectors and show controllers. The LPU-2 uses port 7000 for receiving the
TCP and UDP messages.
The functionality within the LPU-2 can controlled by using the following ASCII
strings (human readable text) messages:
45
Page 46

Description String Parameter Range Example
Set playback intensity pb<playback index>/in int 0 → 100 pb01/in=55
Get playback intensity pb<playback index>/in - - pb00/in
Increment playback intensity pb<playback index>/in=++ int -100 → 100 pb01/in=++10
Decrement playback intensity pb<playback index>/in=- - int -100 → 100 pb01/in=–10
Set playback speed pb<playback index>/sp int -100 → 100 pb33/sp=-20
Get playback speed pb<playback index>/sp - - pb00/sp
Increment playback speed pb<playback index>/sp=++ int -100 → 100 pb33/sp=++10
Decrement playback speed pb<playback index>/sp=- - int -100 → 100 pb33/sp=–10
Control playback button
1
pb<playback index>/bu int 0 / 1 pb59/bu=1
Control playback flash pb<playback index>/fl int 0 / 1 pb64/fl
Get active cue pb<playback index>/cue - - pb01/cue
Release playback pb<playback index>/re - - pb10/re
Playback go forward pb<playback index>/go+ - - pb21/go+
Playback go back pb<playback index>/go- - - pb21/go-
Playback jump pb<playback index>/ju int 1 → 48 pb45/ju=17
Set all intensity pbxx/int float 0.0 → 1.0 pbxx/int=0.5
Get all intensity pbxx/int - - pbxx/int
Set all speed pbxx/spd float -1.0 → 1.0 pbxx/spd=0.5
Get all speed pbxx/spd - - pbxx/spd
Get all active Cues pbxx/cue - - pbxx/cue
Get all playback status pbxx/ac - - pbxx/ac
Release all playbacks release - - release
Hello API hello - - hello
Set blackout blackout int 0 / 1 blackout=1
1
This command mimmics the button in the Cuety interface. It can be shortpressed for Go+ and long-pressed for Release. It expects a =1 first, and then
=0. The time between these commands determine wheter it is a long-press or
a short-press.
46
Page 47

A.3.1 UDP & TCP Feedback
The following commands are used for feedback. For more information about
feedback send by the LPU-2, see A.5 ”Receiving API Feedback”
Description String Parameter Range Example
Playback intensity pb<playback index>/in int 0 → 100 pb01/in=100
Playback speed pb<playback index>/sp int 0 → 100 pb01/sp=10
Playback button pb<playback index>/bu int 0 → 1 pb01/bu=1
Playback active pb<playback index>/ac int 0 → 1 pb01/ac=1
Playback cue pb<playback index>/cue int 0 → 48 pb01/cue=32
All intensity pbxx/all/intensity float Array 0.0 → 1.0 pbxx/all/intensity=[0.25,0.75,0...
All playback speed pbxx/all/speed float Array 0.0 → 1.0 pbxx/all/speed=[0.00,0.80,0.40...
All playback active pbxx/all/ac int Array 0 / 1 pbxx/all/ac=[1,1,0,1,0,0,0,0...
All active Cues pbxx/all/cue int Array 0 → 48 pbxx/all/cue=[1,-,4,-,-,-,1,1...
Hello API hello - - hello
Blackout blackout int 0 / 1 blackout=0
A.4 HTTP
HTTP (Hyper Text Transfer Protocol) is the standard protocol to access web
pages. It can also be used to control the LPU-2, using the URLs listed below.
You can send your HTTP GET requests to port 80.
47
Page 48

Description URL Range Example
Set playback intensity /ajax/pb<playback index>/int= 0.0 → 1.0 http://192.168.1.10/ajax/pb01/int=0.55
Get playback intensity /ajax/pb<playback index>/int - http://192.168.1.10/ajax/pb01/int
Increment playback intensity /ajax/pb<playback index>/int=++ 0.0 → 1.0 http://192.168.1.10/ajax/pb01/int=++0.05
Decrement playback intensity /ajax/pb<playback index>/int=- - 0.0 → 1.0 http://192.168.1.10/ajax/pb01/int=–0.05
Set playback speed /ajax/pb<playback index>/spd= -1.0 → 1.0 http://192.168.1.10/ajax/pb33/sp=-0.20
Get playback speed /ajax/pb<playback index>/spd - http://192.168.1.10/ajax/pb33/sp
Increment playback speed /ajax/pb<playback index>/spd=++ 0.0 → 1.0 http://192.168.1.10/ajax/pb33/spd=++0.1
Decrement playback speed /ajax/pb<playback index>/spd=- - 0.0 → 1.0 http://192.168.1.10/ajax/pb33/spd=–0.1
Control playback button
1
/ajax/pb<playback index>/btn= - http://192.168.1.10/ajax/pb59/btn=0
Control playback flash /ajax/pb<playback index>/fla= - http://192.168.1.10/ajax/pb64/fla=1
Release playback /ajax/pb<playback index>/rel - http://192.168.1.10/ajax/pb10/rel
Playback go forward /ajax/pb<playback index>/go+ - http://192.168.1.10/ajax/pb21/go+
Playback go back /ajax/pb<playback index>/go- - http://192.168.1.10/ajax/pb21/go-
Playback jump /ajax/pb<playback index>/jmp= 1 → 48 http://192.168.1.10/ajax/pb45/jmp=17
Set all playback intensity /ajax/pbxx/int= 0.0 → 1.0 http://192.168.1.10/ajax/pbxx/int=0.6
Get all playback intensity /ajax/pbxx/int - http://192.168.1.10/ajax/pbxx/int
Set all playback speed /ajax/pbxx/spd= 0.0 → 1.0 http://192.168.1.10/ajax/pbxx/spd=0.2
Get all playback speed /ajax/pbxx/spd - http://192.168.1.10/ajax/pbxx/spd
Get all active cues /ajax/pbxx/cue - http://192.168.1.10/ajax/pbxx/cue
Get all active playback status /ajax/pbxx/ac - http://192.168.1.10/ajax/pbxx/ac
Release all playbacks /ajax/pbxx/rel - http://192.168.1.10/ajax/pbxx/rel
Hello API /ajax/hello - http://192.168.1.10/ajax/hello
Blackout /ajax/blackout= 0 / 1 http://192.168.1.10/ajax/blackout=1
1
This command mimmics the button in the Cuety interface. It can be shortpressed for Go+ and long-pressed for Release. It expects a =1 first, and then
=0. The time between these commands determine wheter it is a long-press or
a short-press.
48
Page 49

A.5 Receiving API Feedback
The LPU-2 is capable of sending messages back to the external control system
when communicating via OSC or UDP. As soon as the LPU-2 receives a command via OSC or UDP it will store the IP and port of the external system in
a list. When a status changes inside the LPU-2 (e.g. a playback gets released)
then all ’clients’ in this list will receive a message indicating the new status.
The LPU-2 can store a maximum of four OSC clients plus four UDP clients.
This internal client list will be cleared by a power-cycle.
The ’hello’ command can be used to poll the LPU-2. The LPU-2 will respond
to a incoming Hello by sending a Hello message back to the client.
Clients can also get the current levels of certain properties. Some properties (e.g.
playback intensity) can be polled by sending the command message without a
parameter. For example, the following UDP command will get the speed level of
playback 9: pb09/spd The LPU-2 will now reply with pb09/spd=-0.5 indicating
the speed level is at -50%.
49
Page 50

Index
Address, 27
Android, 9
API, 43
App Store, 9
Art-Net, 15, 24
Auto-sensing, 21
Background, 30
Blackout, 30
Blink, 40
Bounce, 30
Box contents, 10
Condition, 32
Cue, 31
Cuelux, 26, 36
Delay, 32
Device lock, 24
DHCP, 21
DMX-512, 14
Edit, 31
Effect, 33
Exclusive, 30
Factory Defaults, 40
Fade, 32
Firmware, 40
Flash, 30
Follow, 32
forum, 12
FX, 33
Go, 30
Go Mode, 30
Invert Pan/Tilt, 28
iOS, 9
Kensington, 20
Kiosc, 43
Lock, 24
Loop, 30
LPU-1, 7
LPU-2, 7
Memory, 7
Network, 21
Operating Systems, 10, 41
Options, 23
OSC, 44
Patch, 26
Personality Files, 37
Playback, 28
Power, 21
Programmer, 32
Programming App, 23
Properties, 30
Quickstart, 17
Random, 30
Read-only, 25
Remote App, 34
Repeat, 30
Requirements, 41
Reset, 22
Resolution, 41
Halt, 32
Hardware, 7
HTTP, 47
Instruction Videos, 11
sACN, 16, 24
Screen size, 41
Show file, 24
Solo, 30
Static IP, 22
50
Page 51

Sub-Fixtures, 28
Swap, 29
TCP, 45
Toggle, 30
Tutorials, 11
UDP, 45
vBuilder, 37
Versions, 11
Virtual Dimmer, 28
vManager, 39
web-interface, 8
YouTube channel, 11
51
 Loading...