

VISUALINT Mini Maxx Series, Mini Maxx VI-M-8-2002 Quick Manual
Mini Maxx Quick Guide
Quick Setup Guide
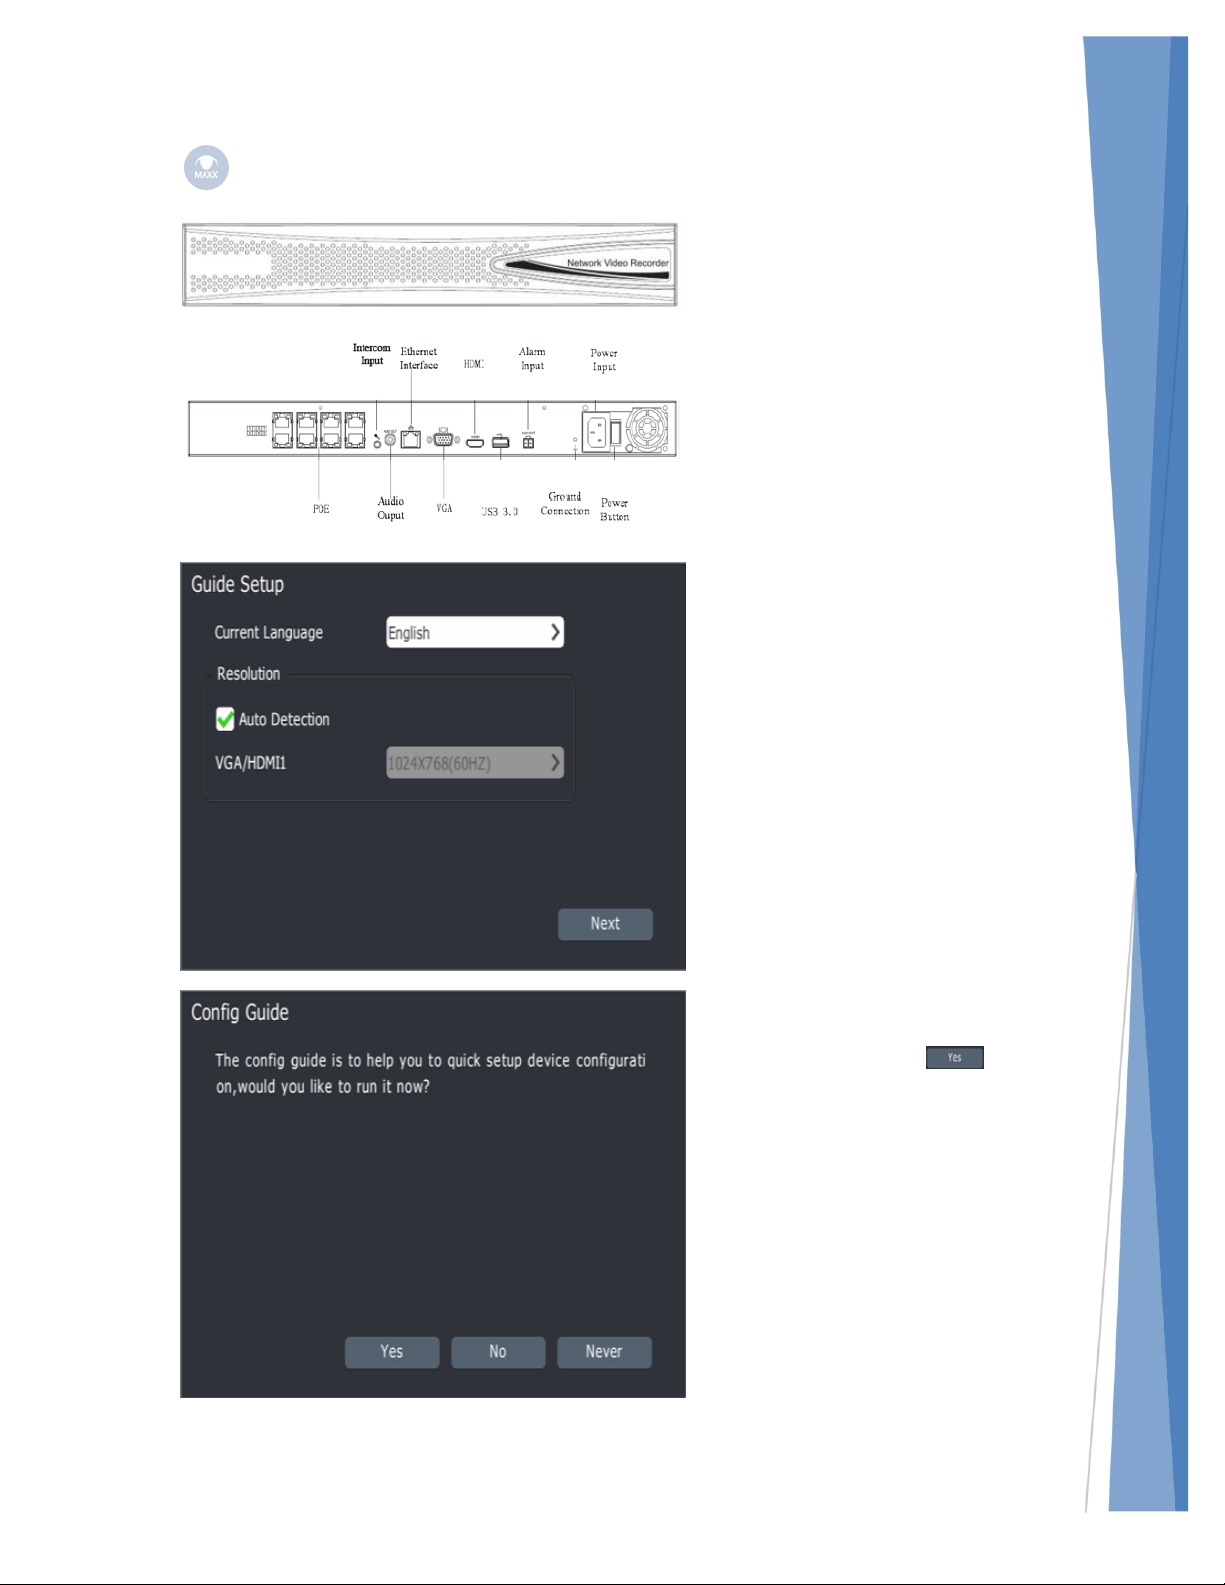
The Mini Maxx NVR comes with
a built in PoE Switch. The NVR is
primarily designed for our VIM
Cameras; however, if
preconfigured any Onvif
compatible camera can be
connected. VIM cameras are
automatically added to the
switch through the quick guide
setup menus on the NVR.
Before starting the Mini Maxx
NVR, please make sure ground
protection is in place and an
external monitor, mouse and
keyboard are connected.
Select the Current Language to
English. Check the Auto
Detection box and confirm your
video settings.
Confirm all of your cameras are
connected to the onboard PoE
switch, and click to
confirm you would like to run
the Config Guide now.
Note: The Config Guide will auto
add all VIM cameras connected
to the onboard PoE Switch. This
process may take several
minutes.
2
Quick Setup Guide
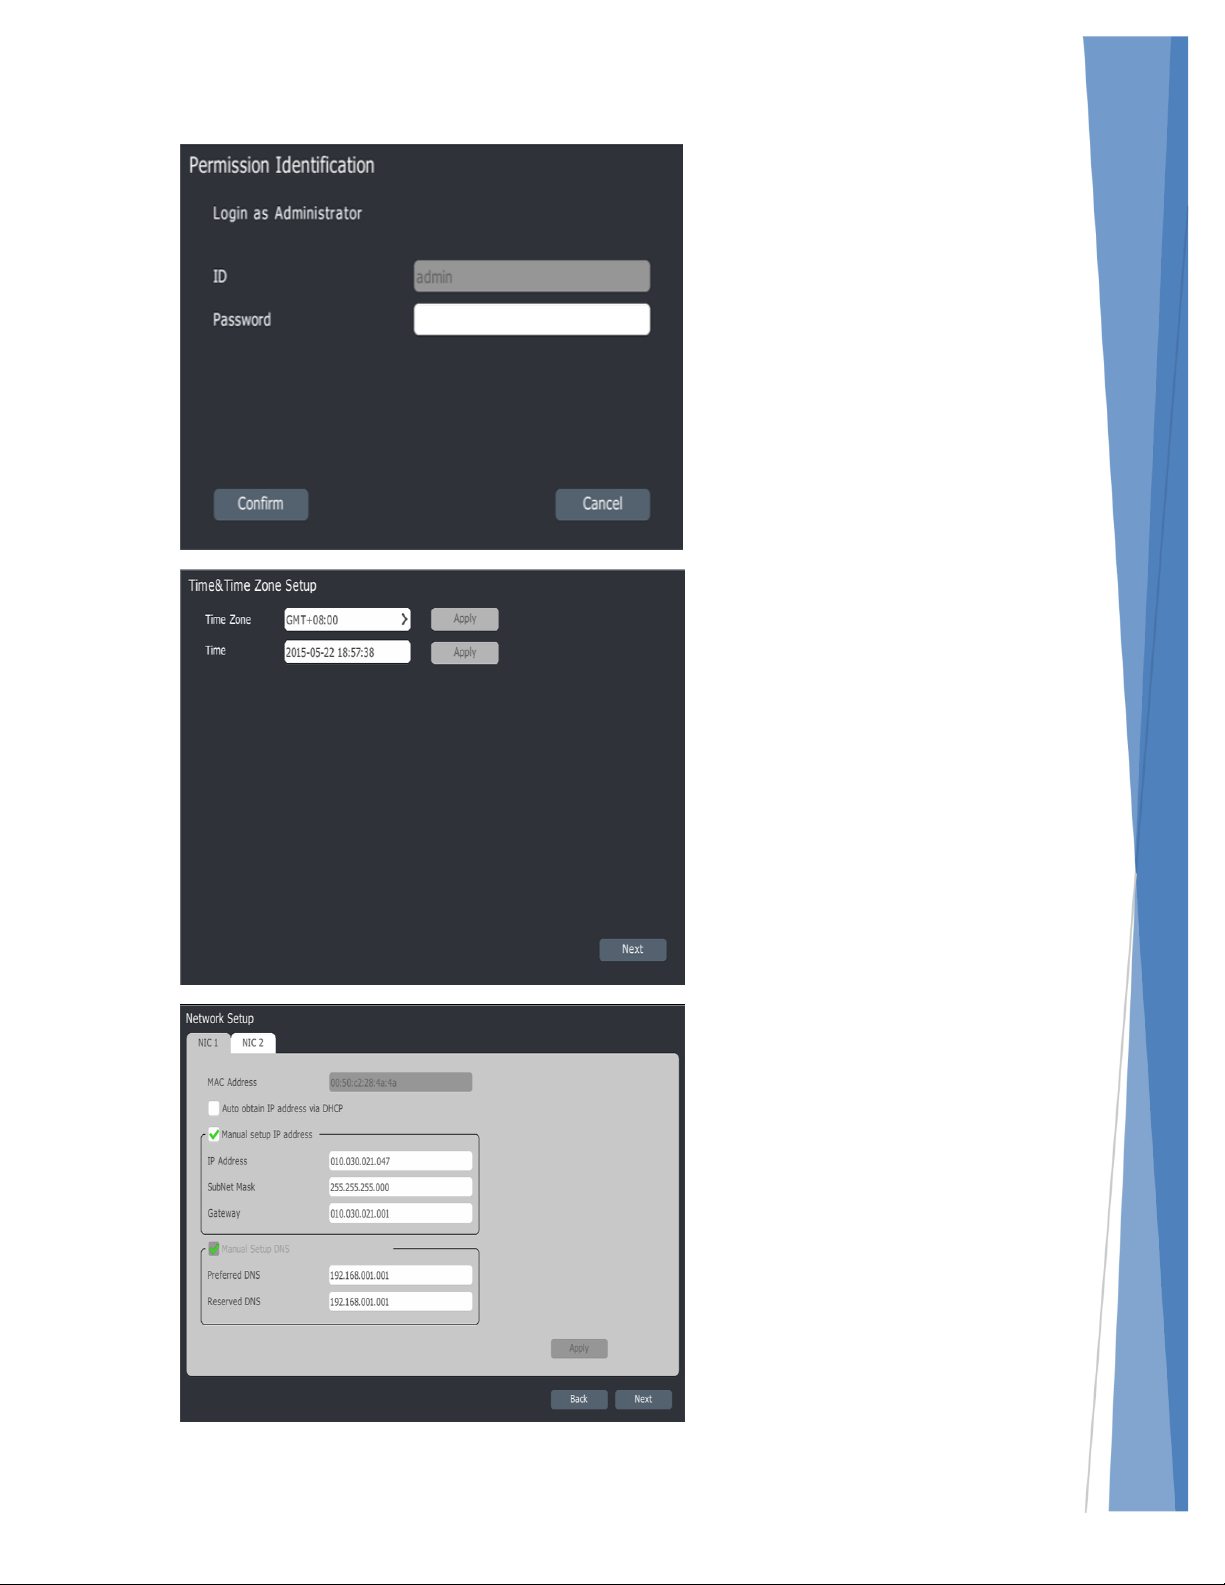
Login as an Administrator.
Default login: admin
Default password: admin
Click Confirm.
Set your Time Zone
Confirm the Time is correct.
Click Next.
EST = GMT-0500
CST = GMT-0600
MST = GMT-0700
PST = GMT-0800
Set your static IP address for
your Mini Maxx NVR outside of
the DHCP range of your Router.
Note: Confirm IP address is
available either with your site
contact or using the ping
command to confirm no other
device is assigned the desired IP
address.
Enter the appropriate
information in the provided
boxes and click next.
 Loading...