

Page 1
ASSEMBLY INSTRUCTIONS
DRY
B
A
Robinson Small Pendant
Item # TOB5751
WE RECOMMEN D INSTALLATION OF THIS LIGHTI NG FIXTUR E BE DON E BY A
LICENSED E LECTRICIAN.
WARNING *** SWITCH OFF THE MAIN ELECTRICAL SUPPLY FROM THE MAIN
FUSE BOX/CIRCUIT BR EAKER B EFOR E INSTALLATION.
INS PECT ITEM CAREFULLY BEFORE ATTEMPTING TO INSTALL. IF THE RE IS
ANY DAMAGE OR OBVIOUS DE FECT, DO NOT INSTALL.
ITEM MAY NOT BE RETURN ED ONCE IT HAS B EEN INSTALLED.
D
E
F
G
H
C
I
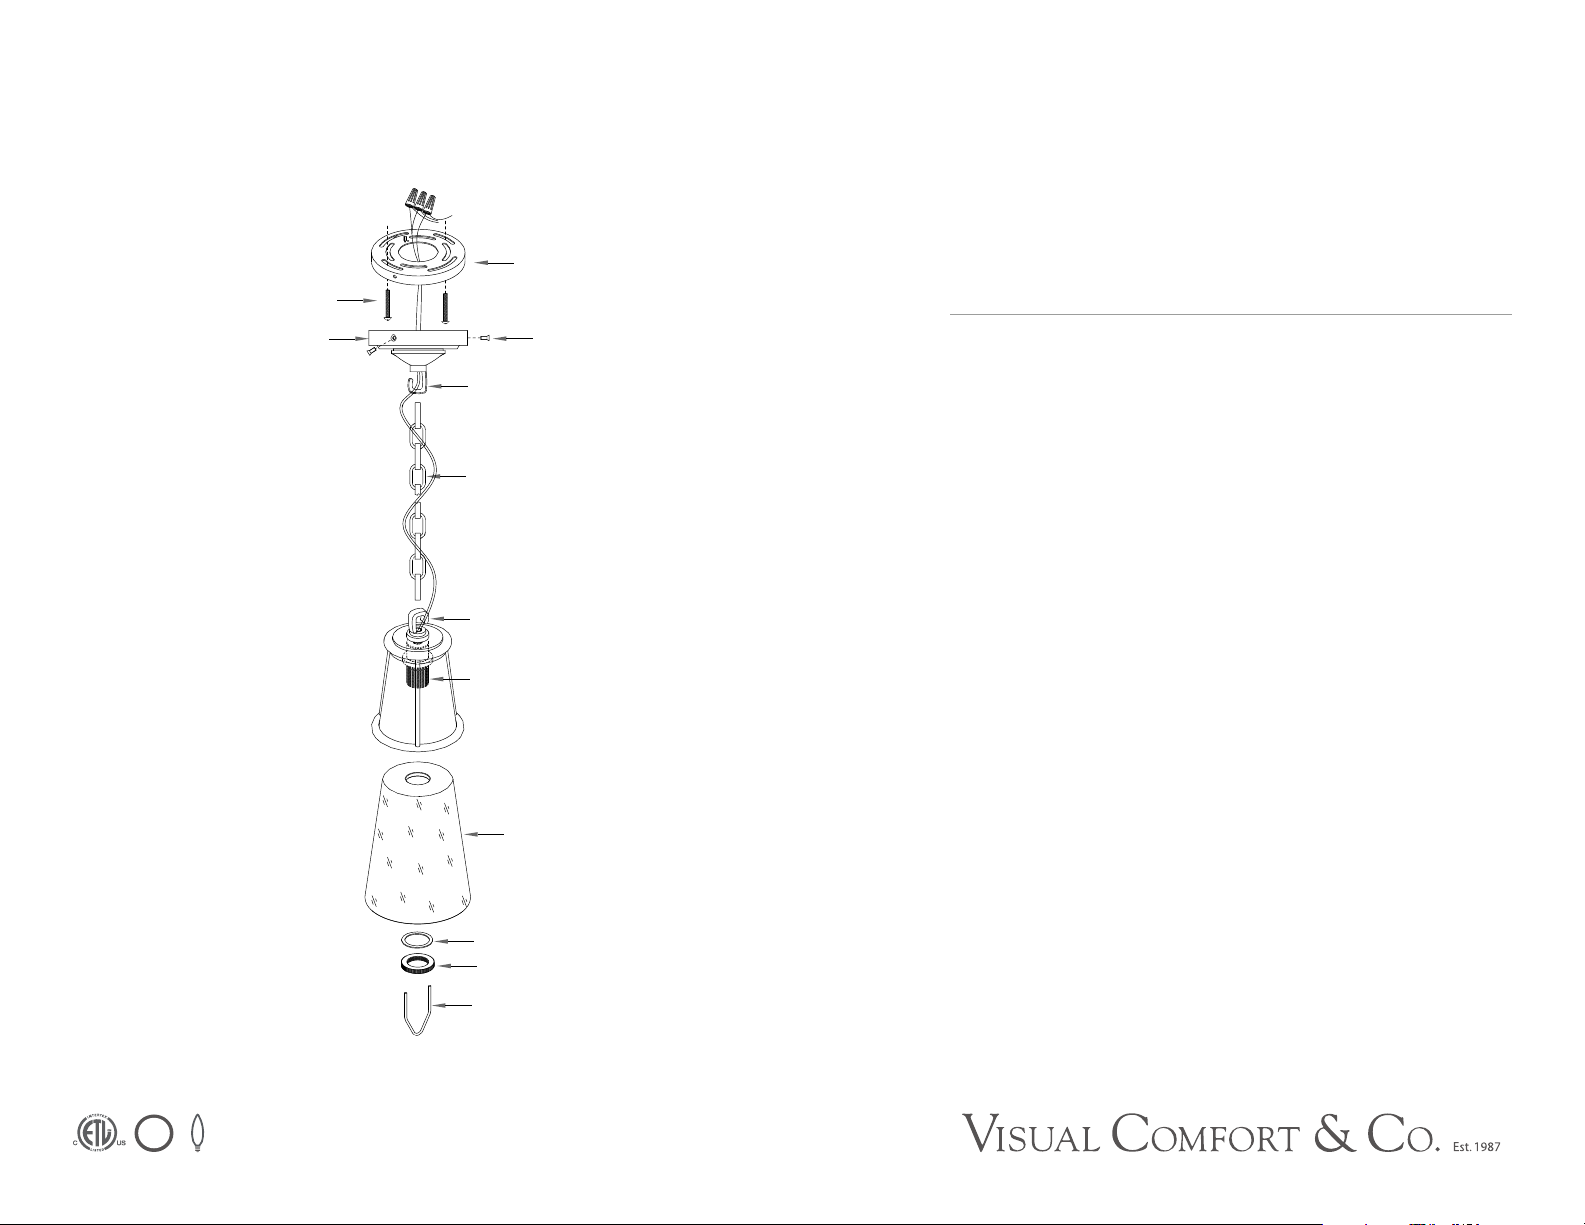
1. Attach one side end link of chain (F) to top loop (G).
2. Feed wire through chain (F), come out from back side of canopy (D).
3. Attach chain (F) with light fixture to chain mounting loop (E) at desired height.
4. Remove mounting plate (A) from canopy (D) by removing canopy screws (C) in
5. counter-clockwise direction.
6. Affix mounting plate (A) to ceiling outlet box with mounting screws (B)
provided.
7. Gently pull the wires from the ceiling outlet and allow the wires to hang.
Thread the wire through the center hole of mounting plate (A).
8. Attach the bare copper ground from the fixture (copper or nickel in color) to
the ground junction box wire (usually green or copper), fasten together with
a plastic wire connector. Tighten wrap the wire connector with electrical tape.
Be sure no wire strands are exposed. IT IS IMPERATIVE THAT THE OUTLET
BOX IN YOUR HOME BE PROPERLY GROUNDED.
9. Connect neutral wire from fixture (ridges molded wire) to the neutral wire from
the junction box (usually white) . Fasten both wires together with a plastic wire
connector and tightly wrap the wire conncetor with electrical tape. Be sure no
wire strands are exposed.
J
K
L
10. Connect the hot wires from the fixture (smooth wire) to the hot wire (usually
black ) from the junction box. Fasten each together with a plastic wire
conncetor and wrap the connection with eletrical tape. DO NOT REVERSE
THE HOT AND NEUTRAL CONNECTIONS OTHERWISE SAFETY WILL BE
COMPROMISED.
Page 2
ASSEMBLY INSTRUCTIONS
DRY
B
A
Robinson Small Pendant
Item # TOB5751
WE RECOMMEN D INSTALLATION OF THIS LIGHTI NG FIXTUR E BE DON E BY A
LICENSED E LECTRICIAN.
WARNING *** SWITCH OFF THE MAIN ELECTRICAL SUPPLY FROM THE MAIN
FUSE BOX/CIRCUIT BR EAKER B EFOR E INSTALLATION.
INS PECT ITEM CAREFULLY BEFORE ATTEMPTING TO INSTALL. IF THE RE IS
ANY DAMAGE OR OBVIOUS DE FECT, DO NOT INSTALL.
ITEM MAY NOT BE RETURN ED ONCE IT HAS B EEN INSTALLED.
D
E
F
G
H
C
11. Tuck wire connections neatly into ceiling outlet box.
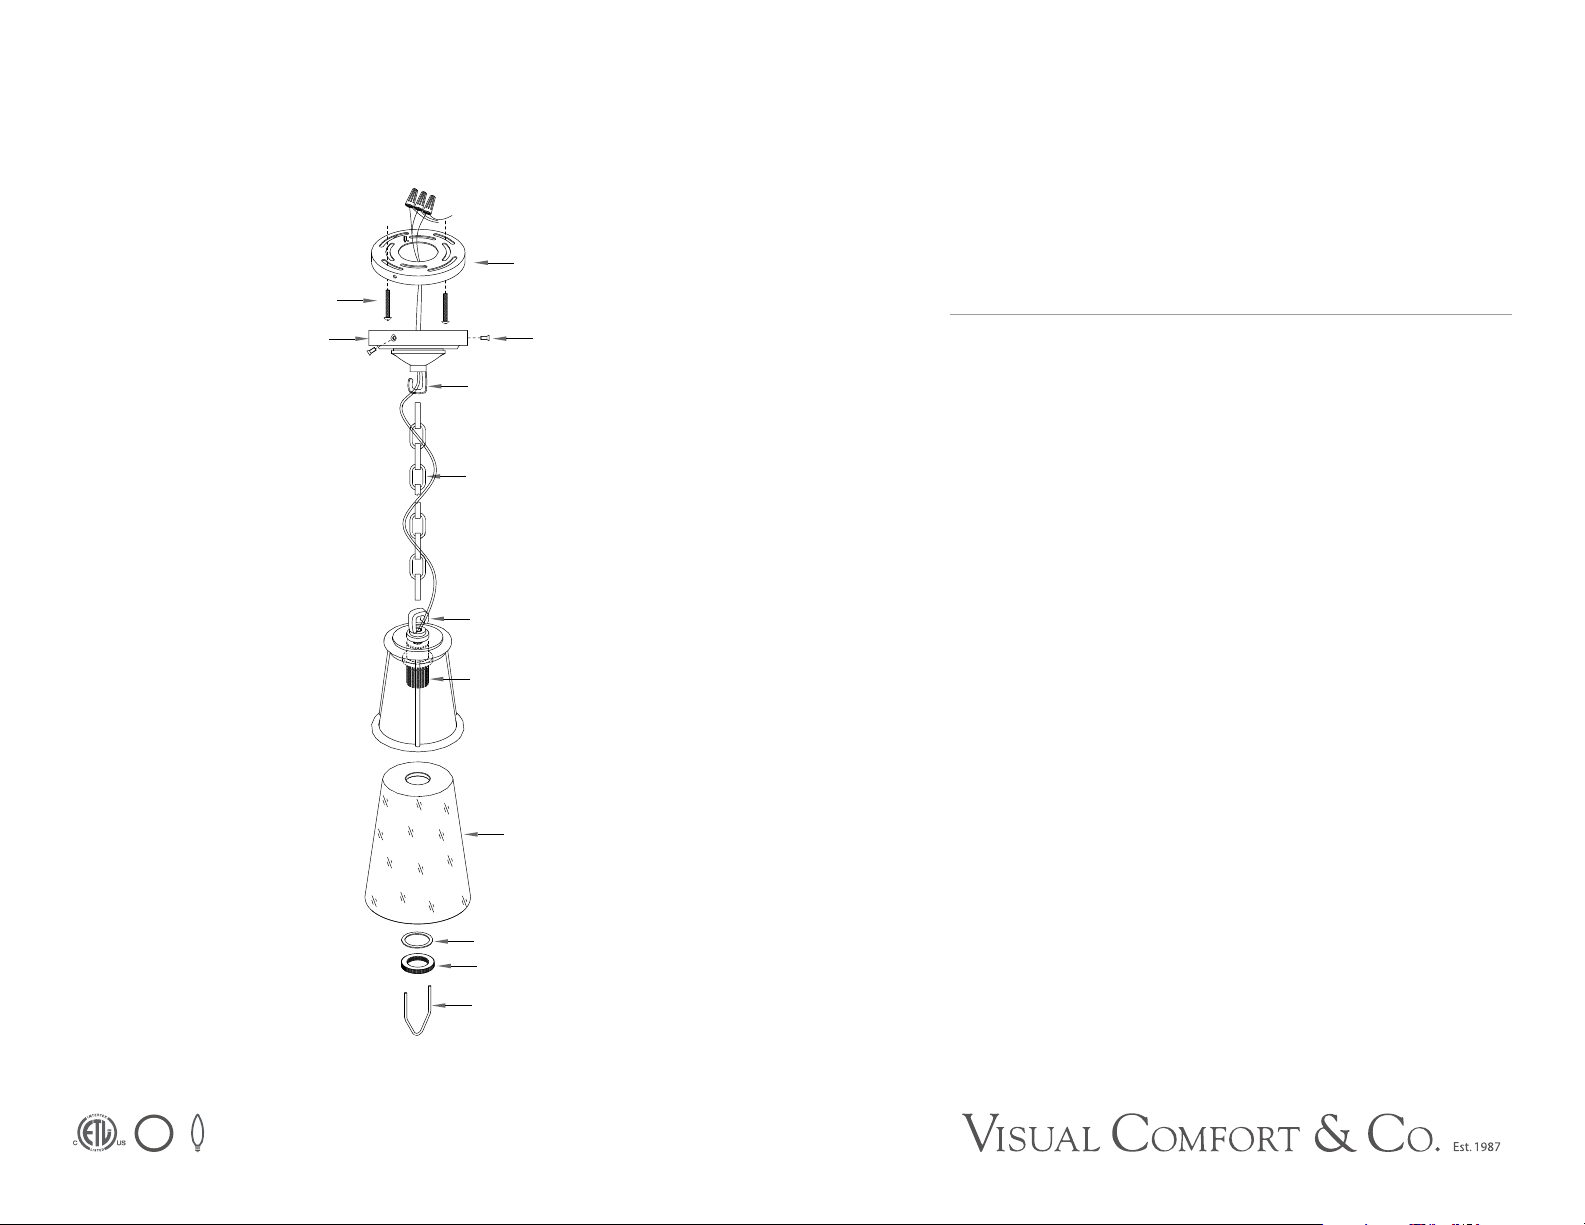
12. Attach canopy (D) to the affixed mounting plate (A) and secure canopy screws
(C).
13. Remove socket ring (K) and washer (J) from threaded socket (H) by using
wrench (L), carefully place shade (I) onto threaded socket (H) and secure by
replacing washer (J) and socket ring (K).
14. Tighten with wrench (L).DO NOT OVER TIGHTEN OTHERWISE GLASS WILL
BE DAMAGE.
15. Insert light bulb (not included) into socket.
*** Clean with a dry, soft cloth only. Do not use harsh abrasives or chemical agents.
I
J
K
L
 Loading...