

Page 1
ASSEMBLY INSTRUCTIONS
DRY
Goodman Large Hanging Lamp
Item # TOB5014
WE RECOMMME ND INSTLLATION OF THIS LIG HTING FIXTURE BE DNE BY A
LICENSED E LECTRICIAN.
WARNING *** SWITCH OFF THE MAIN ELECTRICAL SUPPLY FROM THE MAIN
FUSE BOX/CIRCUIT BR EAKER B EFOR E INSTALLATION.
INS PECT ITEM CAREFULLY BEFORE ATTEMPTING TO INSTALL. IF THE RE IS
ANY DAMAGE OR OBVIOUS DE FECT, DO NOT INSTALL.
ITEM MAY NOT BE RETURN ED ONCE IT HAS B EEN INSTALLED.
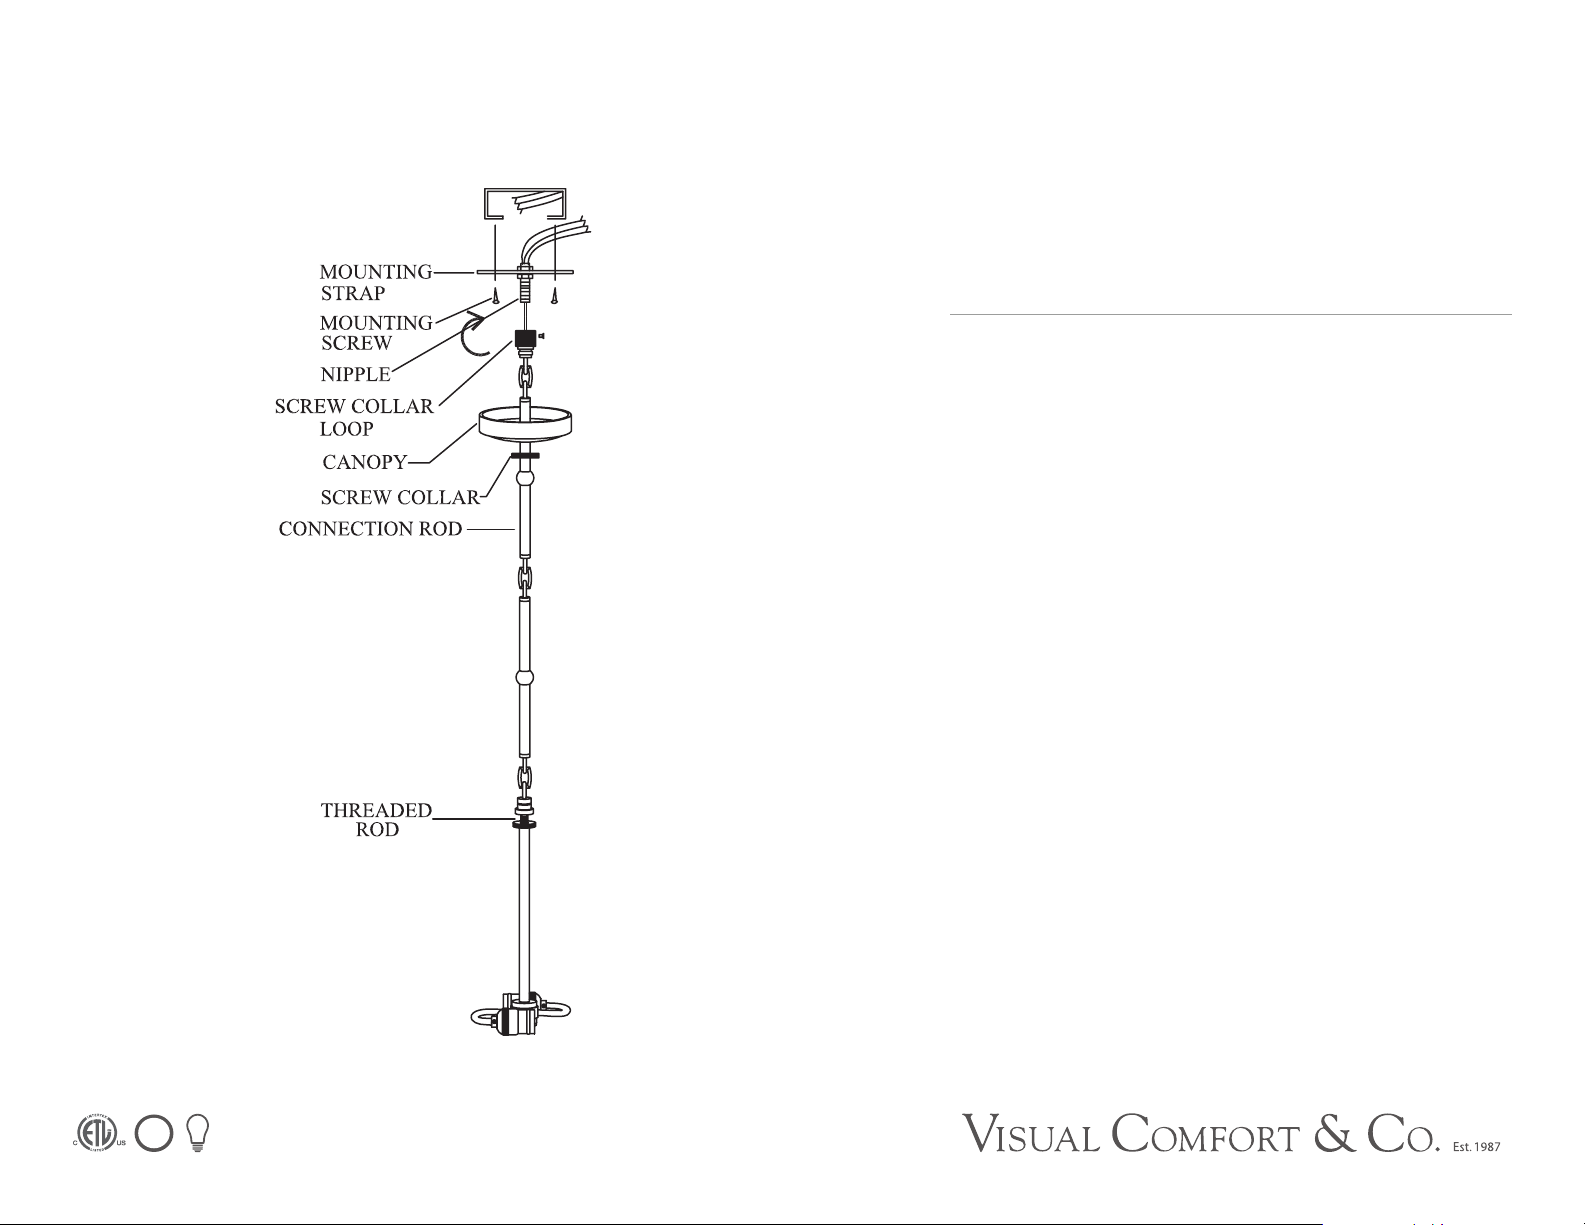
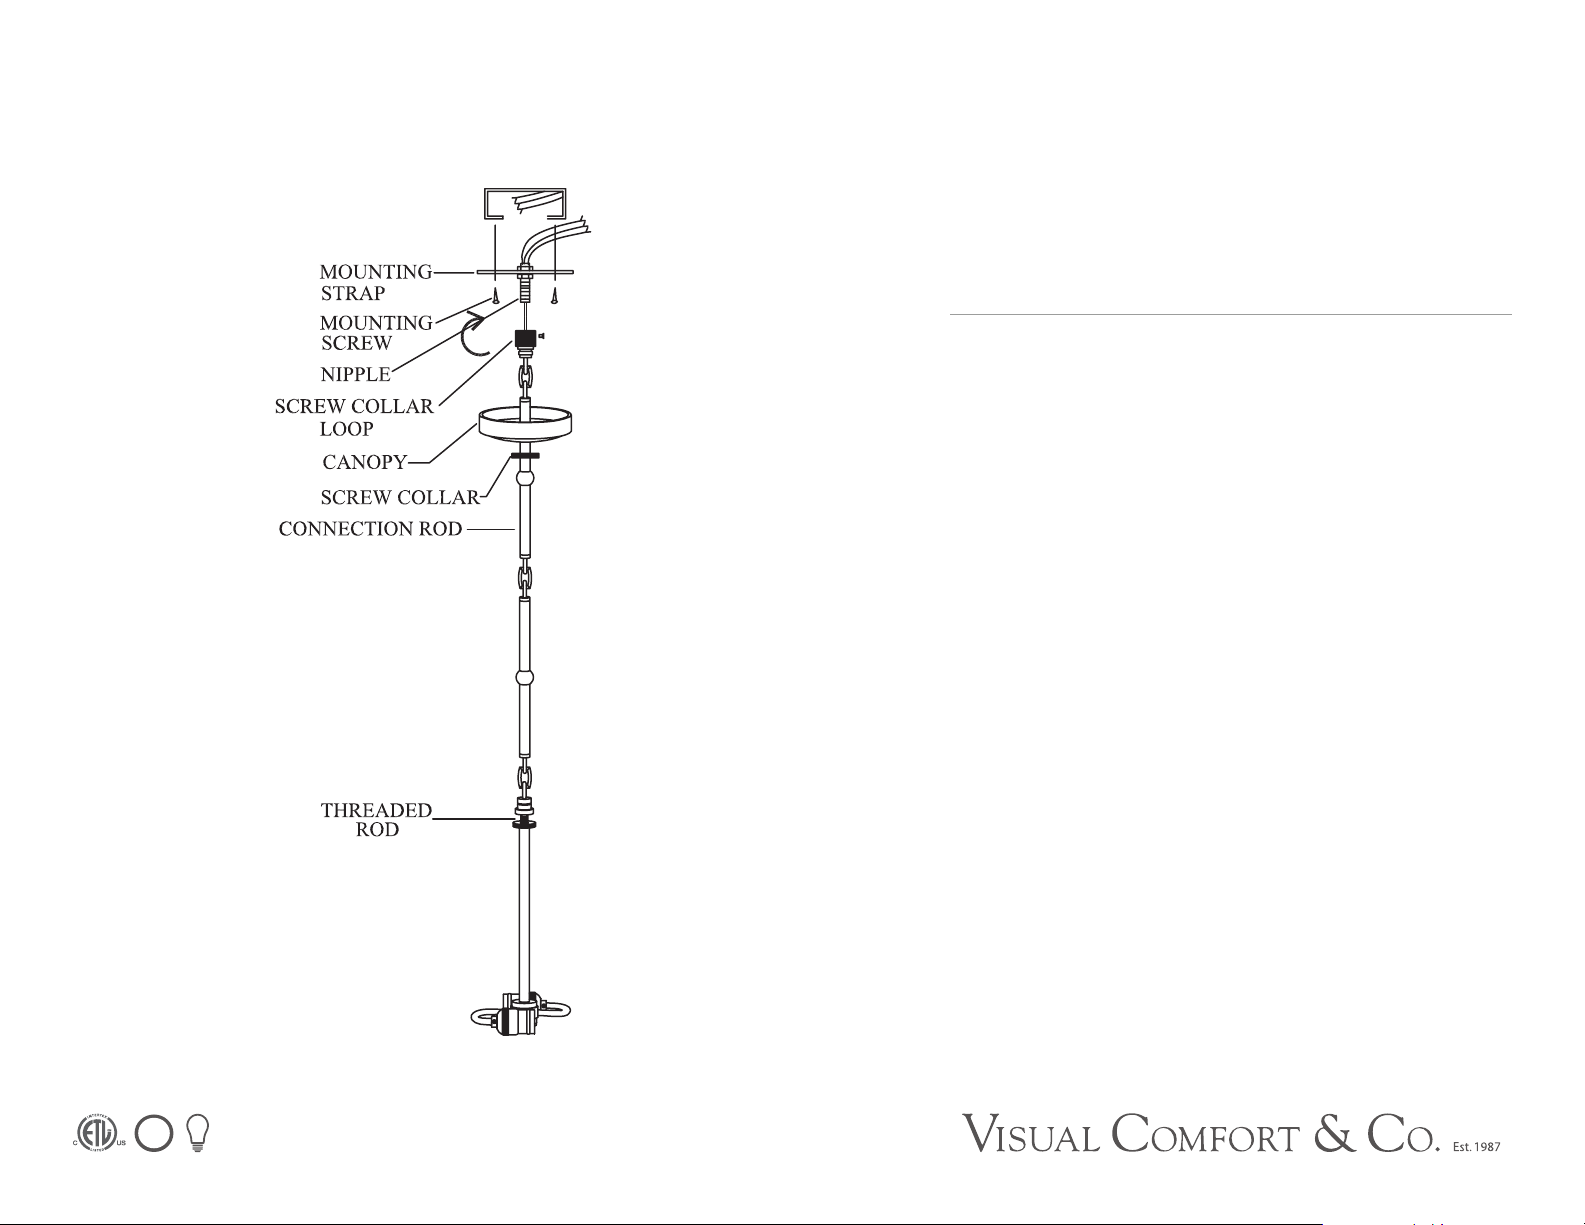
1. Screw fixture stem onto threaded rod on top of fixture body.
2. Attach ceiling box strap to ceiling outlet box using proper size screws and
tighten securely.
3. Attach nipple into ceiling box strap and lock into place using included nut. Attach
screw collar loop to nipple and lock into place using included nut. Be certain
to use the canopy and screw collar to check that it will fit flush before locking
everything into place.
4. Install canopy against ceiling and loosely install screw collar.
5. Loosen the screw collar from the loop and slip it and the canopy down over the
connection rods.
6. Attach the steel support cable (if applicable) to the structure of the house.
Separate the power wires coming from the fixture by gently pulling them apart
from one another. You will need to separate at least 8”.
7. Strip 5/8” insulation from each of the two power wires coming from the fixture
using properly gauged wire strippers.
8. Attach ground (copper or silver in color) fixture wire to ground wire from ceiling
outlet box (usually green or copper in color), and fasten together with a plastic
wire connector. Tightly wrap the wire connector with electrical tape so the end of
the connector is sealed.
IT IS IMPERATIVE THAT THE OUTLET BOX IN YOUR HOME BE PROPERLY
GROUNDED.
9. Connect the neutral (RIBBED, without any marking) fixture wire to the neutral
(usually white) wire from ceiling outlet box. Fasten both wires together with a
plastic wire connector and tightly wrap the wire connector with electrical tape.
Page 2
ASSEMBLY INSTRUCTIONS
DRY
Goodman Large Hanging Lamp
Item # TOB5014
WE RECOMMME ND INSTLLATION OF THIS LIG HTING FIXTURE BE DNE BY A
LICENSED E LECTRICIAN.
WARNING *** SWITCH OFF THE MAIN ELECTRICAL SUPPLY FROM THE MAIN
FUSE BOX/CIRCUIT BR EAKER B EFOR E INSTALLATION.
INS PECT ITEM CAREFULLY BEFORE ATTEMPTING TO INSTALL. IF THE RE IS
ANY DAMAGE OR OBVIOUS DE FECT, DO NOT INSTALL.
ITEM MAY NOT BE RETURN ED ONCE IT HAS B EEN INSTALLED.
10. Repeat the procedure with the hot (ROUND, with UL marking on) wire to
hot (usually black) outlet wire. Always make sure that no wire strands are left
outside of the connections. DO NOT REVERSE THE HOT AND NEUTRAL
CONNECTIONS OR SAFETY WILL BE COMPROMISED.
Tuck wire connecitons neatly into ceiling outlet box
11. Slip canopy to ceiling and secure with screw collar.
12. Clip lamp shade (not included) onto the threaded rod.
13. Insert light bulbs (not included) the sockets.
 Loading...