

Page 1
TOB5003
ASSEMBLY & INSTALLATION GUIDE
WE RECOMMEN D INSTALLATION OF THIS LIGHTING FIXTUR E BE DON E BY A LICENSED ELECTRICIAN.
WARNING *** SWITCH OFF THE MAIN ELECTRICAL SUPPLY FROM THE MAIN FUS E BOX/CIRCUIT
BREAKER BE FORE INSTALLATION.
INSPECT ITEM CAREFULLY BE FORE ATTEMPTING TO INSTALL. IF THERE IS ANY DAMAGE OR
OBVIOUS DEFECT, DO NOT INSTALL.
ITEM MAY NOT BE RETURNED ONCE IT HAS B EEN INSTALLED.
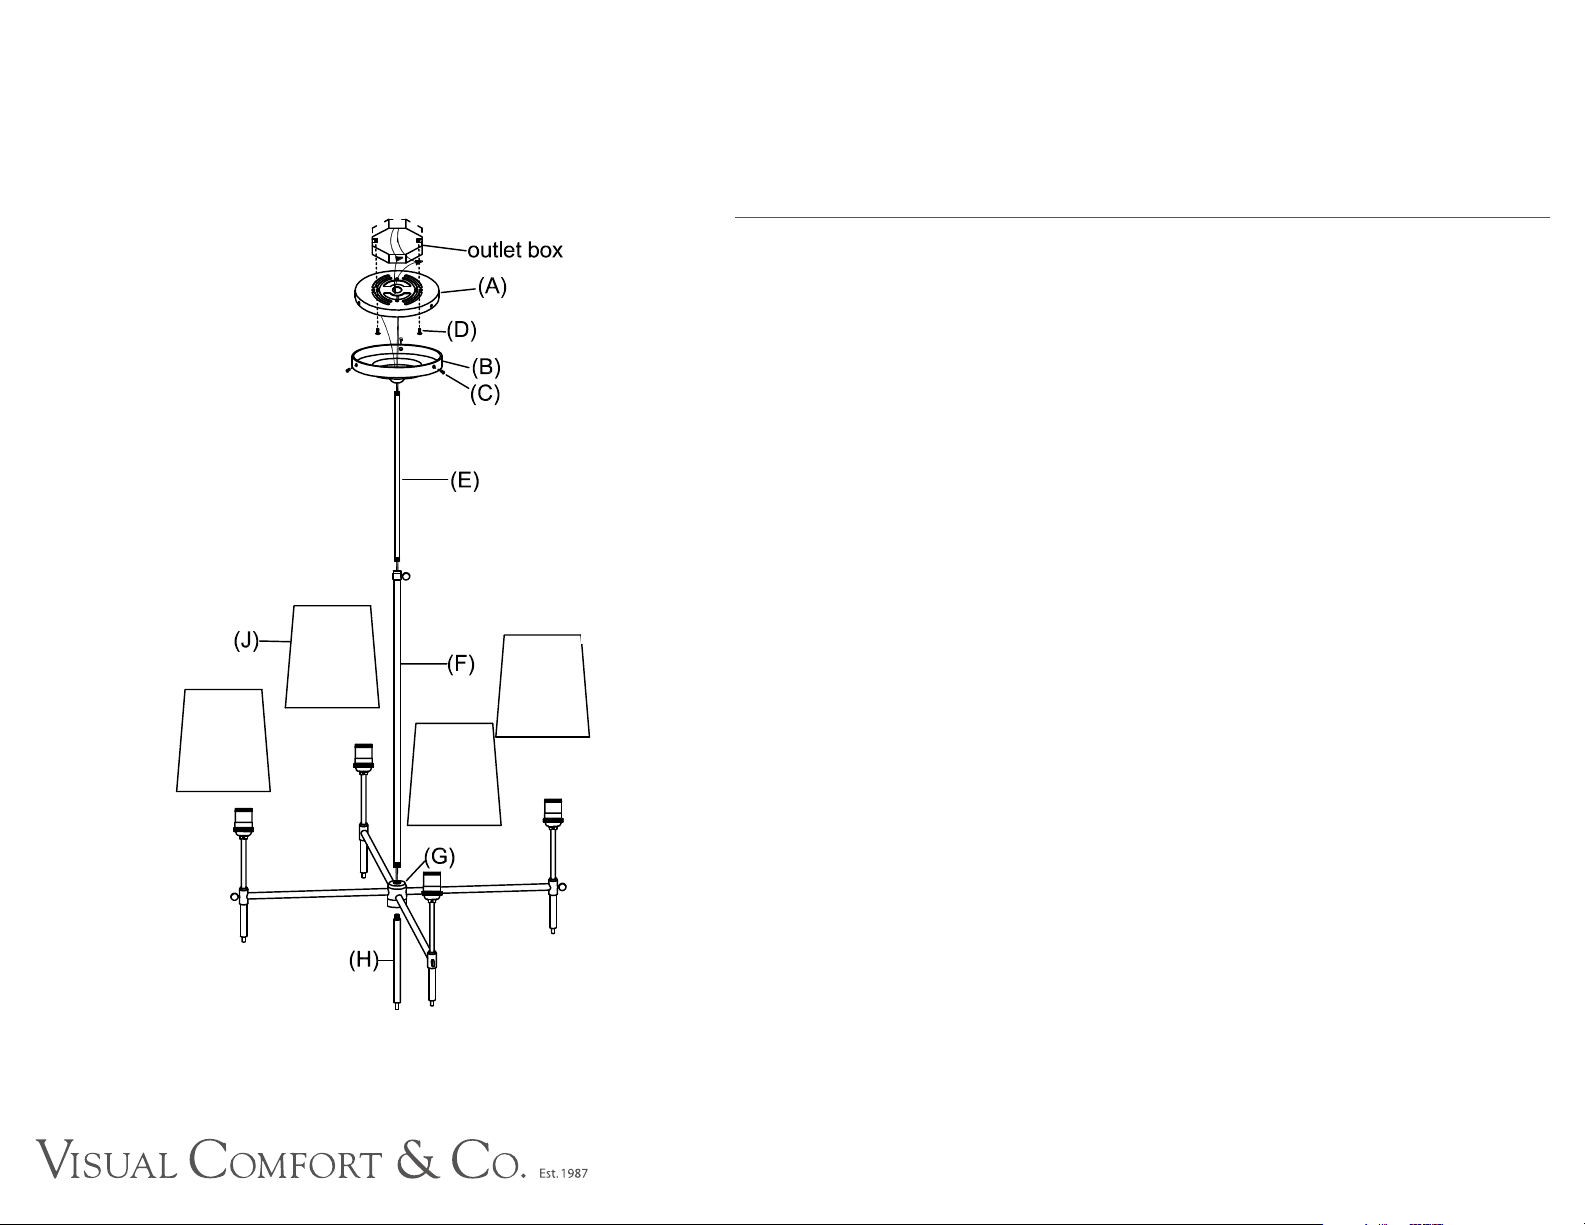
1. Insert pole (H) into bottom threaded opening of part (G).
2. Thread pole (F) into top threaded opening of part (G).
3. Thread pole (E) into top threaded opening of pole (F).
4. Remove back plate (A) from base (B), unscrew base screws (C) and set aside.
5. Affix back plate (A) to ceiling outlet box with back plate screws (D) provided.
6. Attach ground (copper in color) fixture wire to ground wire from ceiling outlet box (usually green or copper in
color), and fasten together with a plastic wire connector. Tightly wrap the wire connector with electrical tape so the
end of the connector is sealed. IT IS IMPERATIVE THAT THE OUTLET BOX IN YOUR HOME BE PROPERLY
GROUNDED.
7. Connect the neutral (RIBBED, without any marking) fixture wire to the neutral (usually white) wire from ceiling outlet
box. Fasten both wires together with a plastic wire connector and tightly wrap the wire connector
8. Repeat the procedure with the hot (ROUND, with UL marking on) wires with electrical tape.
9. Always make sure that no wire strands are left outside the connectors. DO NOT REVERSE THE HOT AND
NEUTRAL CONNECTIONS OR SAFETY WILL BE COMPROMISED.
10. Attach fixture base (B) to back plate (A) and tighten with base screws (C). II. Insert light bulbs into sockets.
11. Clip the shades (J) onto the light bulbs.
 Loading...