

Page 1
ASSEMBLY INSTRUCTIONS
C
D1
McClain 30" Hardwired Picture Light
Item # SP 2603
WE RECOMMEN D INSTALLATION OF THIS LIGHTI NG FIXTUR E BE DON E BY A
LICENSED ELECTRICIAN.
WARNING *** SWITCH OFF THE MAIN ELECTRICAL SUPPLY FROM THE MAIN
FUSE BOX/CIRCUIT BREAKER BEFORE INSTALLATION.
INS PECT ITEM CAREFULLY BEFORE ATTEMPTING TO INSTALL. IF THE RE IS
ANY DAMAGE OR OBVIOUS DE FECT, DO NOT INSTALL.
ITEM MAY NOT BE RETURN ED ONCE IT HAS B EEN INSTALLED.
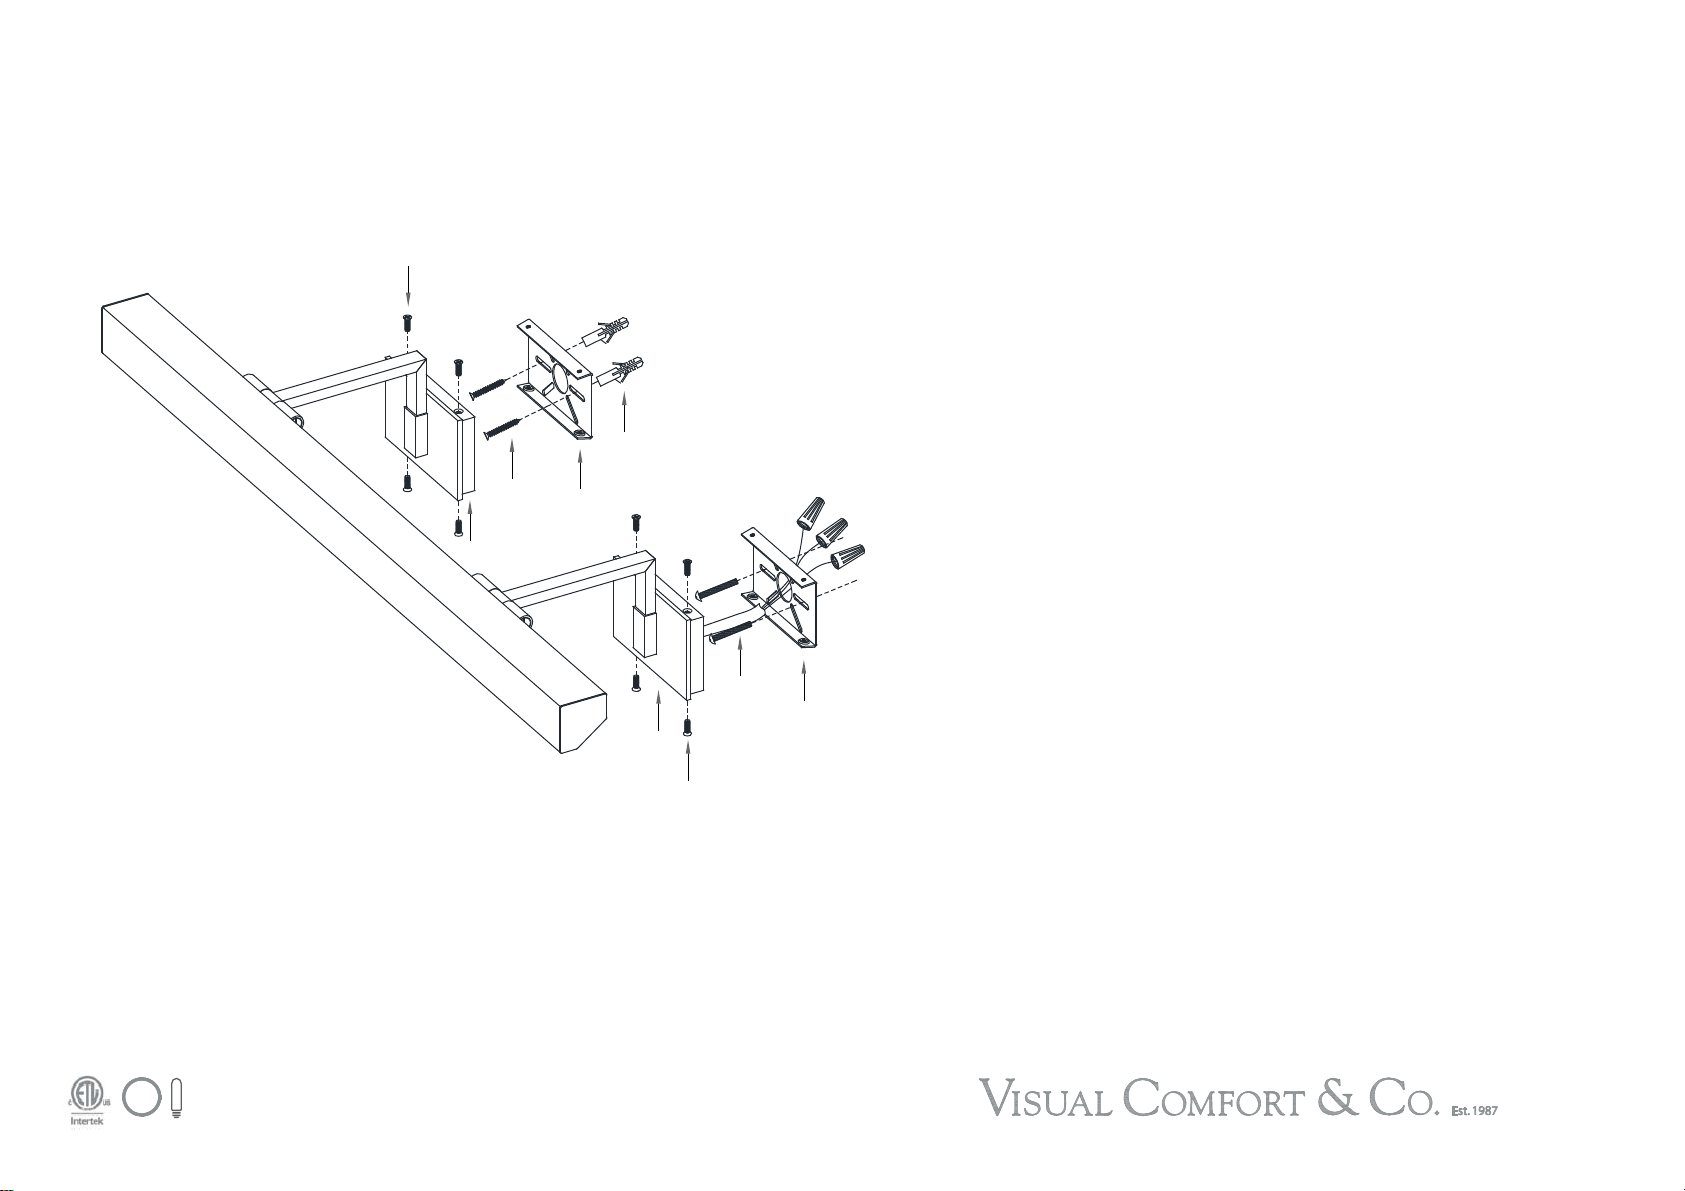
1. Carefully remove all parts from the carton.
2. Remove both mounting plates (A) & (A1) from base of light fixtures (D) & (D1) by removing
E
F
A1
B
A
D
C
base screws (C) in counter-clockwise direction.
3. Place mounting plate (A) to wall outlet box and secure with mounting screws (B) provided.
4. Place fixture base (D) on the affixed mounting plate (A), mark outer line for fixure base (D1),
make sure it is horizontal to the affixed mounting plate (A). Remove the whole light fixture.
5. Place mounting plate (A1) to the markded area, mark center points for the mounting slots for
mounting plate (A1) on the wall. Remove mounting plate (A1).
6. Drill small holes on the marked location, the holes should be big enough to accommodate
with plastic anchors (E). Push plastic anchors (E) into the holes.
7. Affix mounting plate (A1) to the wall, inserting mounting screws (F) to plastic anchors (E) to
secure mounting plate (A1) to the wall.
8. Attach ground (green) wire to ground wire from wall outlet box (usually green or copper
in color ), fasten together with a plastic wire connector. Tightly wrap the wire connector
with electrical tape. so the end of the connector is sealed. IT IS IMPERATIVE THAT THE
OUTLET BOX IN YOUR HOME BE PROPERLY GROUNDED.
9. Connect neutral (white ) fixture wire coming from fixture base to neutral (usually white )
outlet wire. Fasten both wires together with a plastic wire connector and tightly wrap the
wire connector with electrical tape.
10. Repeat the procedure with the hot (black) wires. Always make sure that no wire strands are
left outside the connectors. DO NOT REVERSE THE HOT AND NEUTRAL CONNECTIONS
OTHERWISE SAFETY WILL BE COMPROMISED.
11. Attach fixture bases (D) & (D1) to the affixed mounting plates (A) & (A1) and secure with base
screws (C).
12. Insert light bulbs into sockets.
13. Restore power and test fixture. Installation is complete.
*** Clean with a dry, soft cloth only. Use no harsh abrasives or chemical agents.
.
DRY
 Loading...