

Page 1
ASSEMBLY INSTRUCTIONS
DAMP
Davis Pendant
Item # SL5125
WE RECOMMEN D INSTALLATION OF THIS LIGHTI NG FIXTUR E BE DON E BY A
LICENSED E LECTRICIAN.
WARNING *** SWITCH OFF THE MAIN ELECTRICAL SUPPLY FROM THE MAIN
FUSE BOX/CIRCUIT BR EAKER B EFOR E INSTALLATION.
INS PECT ITEM CAREFULLY BEFORE ATTEMPTING TO INSTALL. IF THE RE IS
ANY DAMAGE OR OBVIOUS DE FECT, DO NOT INSTALL.
ITEM MAY NOT BE RETURN ED ONCE IT HAS B EEN INSTALLED.
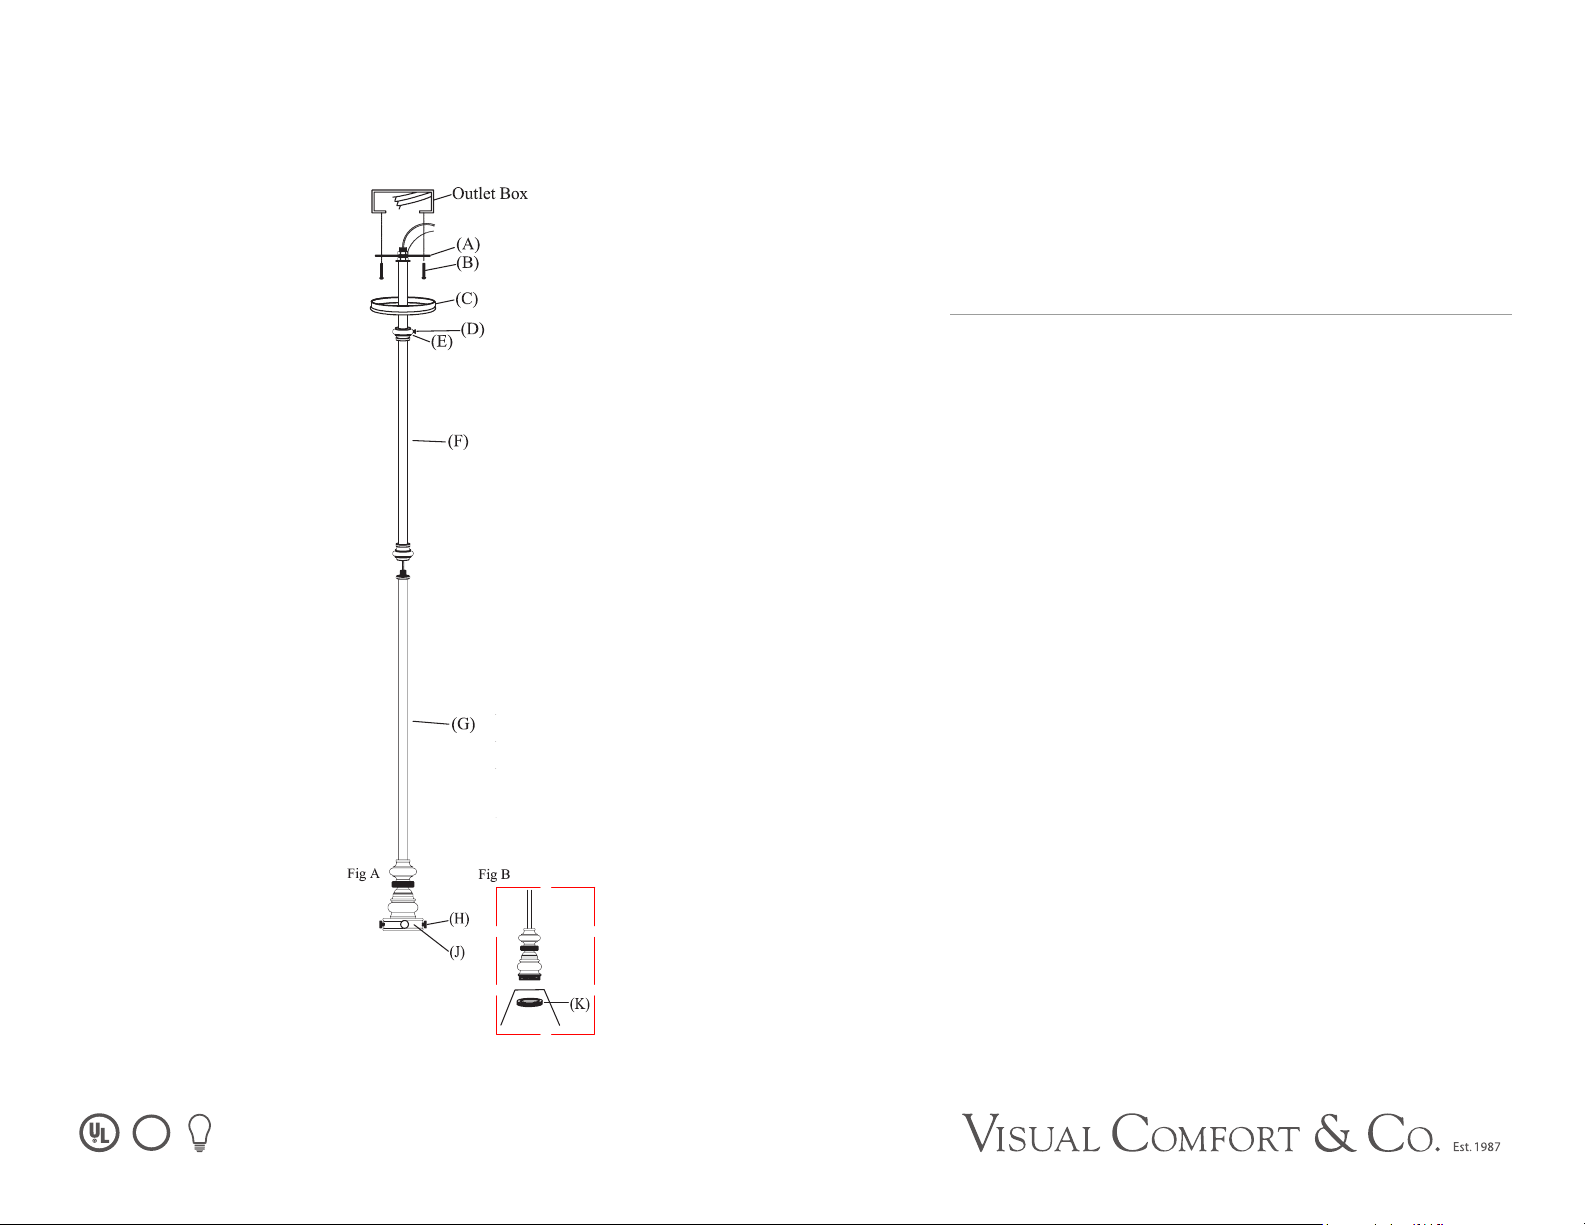
1. Loosen set screw (D), lower break (E) and canopy (C).
2. Thread top nipple of pole (G) into bottom threaded opening of pole (F).
3. Attach mounting strap (A) to ceiling outlet box with screws (B) provided.
4. Connect the hot wires from the fixture (SMOOTH) to the hot outlet box wire
from the outlet box (udually BLACK). Fasten them together with a plastic wire
connector provided and wrap connection with electrical tape.
5. Repeat this procedure for the RIBBED neutral wires from the light fixture to
the wire from the outlet box (usually WHITE).
6. Connect the ground wire from the light fixture (bare copper or silver in color) to
the ground wire from ceiling outlet box. (usually GREEN or BARE COPPER).
7. Tuck all wires into ceiling outlet box.
8. Raise canopy (C) and break (E) to cover ceiling outlet box, and secure by
tightening set screw (D).
9. Loosen thumns screws (H) at the side of shade holder (J).
10. Insert shade into shade holder (J) and secure with thumbscrews (H). (FIG. A)
11. Another option: Remove shade holder (J) by turning in counter-clockwise
direction, and secure shade with the ring (K). (FIG. B)
12. Insert light bulb (not included) into socket.
 Loading...