

Page 1
ASSEMBLY INSTRUCTIONS
DRY
LANDON HANGING PENDANT
Item # S5030
WE RECOMMEN D INSTALLATION OF THIS LIG HTING FIXTURE BE DONE BY A
LICENSED E LECTRICIAN.
WARNING *** SWITCH OFF THE MAIN ELECTRICAL SUPP LY FROM THE MAI N
FUSE BOX/CIRCUIT BR EAKER B EFOR E INSTALLATION.
INS PECT ITEM CAREFULLY B EFOR E ATTEMPTING TO INSTALL. I F THERE IS
ANY DAMAGE OR OBVIOUS DE FECT, DO NOT INSTALL.
ITEM MAY NOT BE RETURNE D ONCE IT HAS BE EN INSTALLE D.
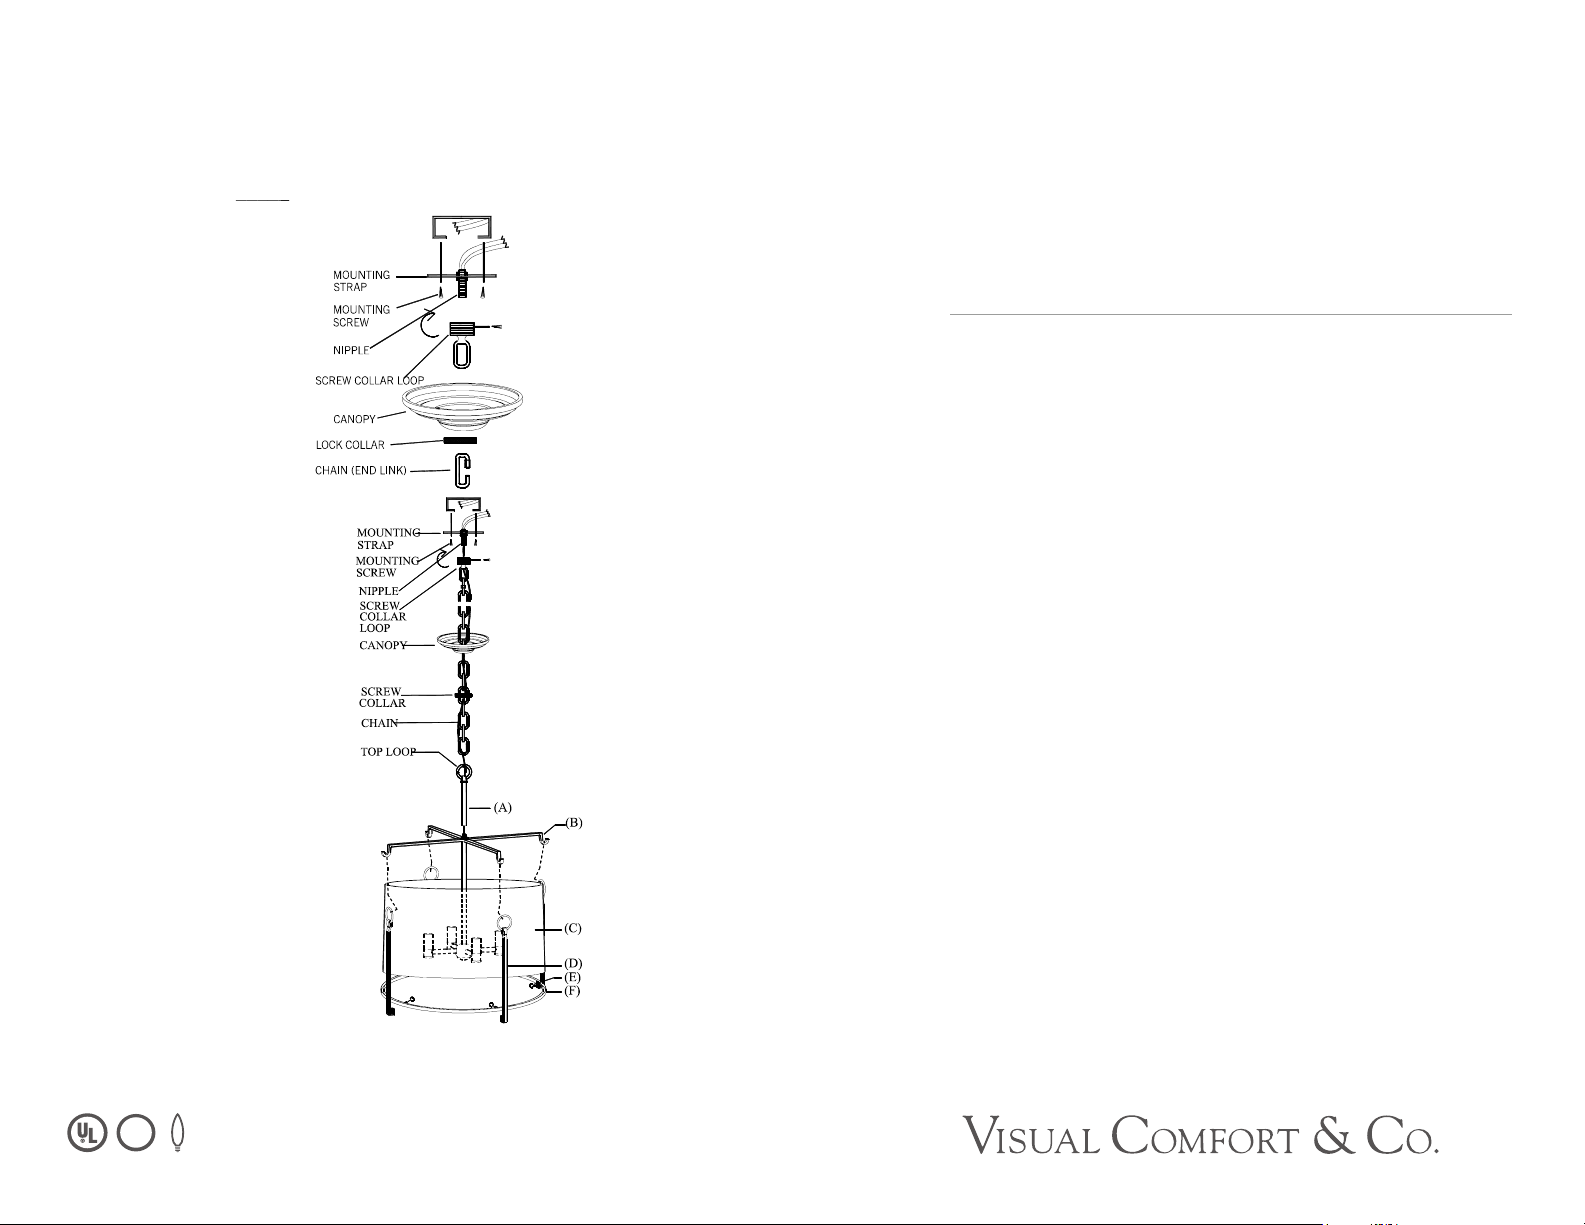
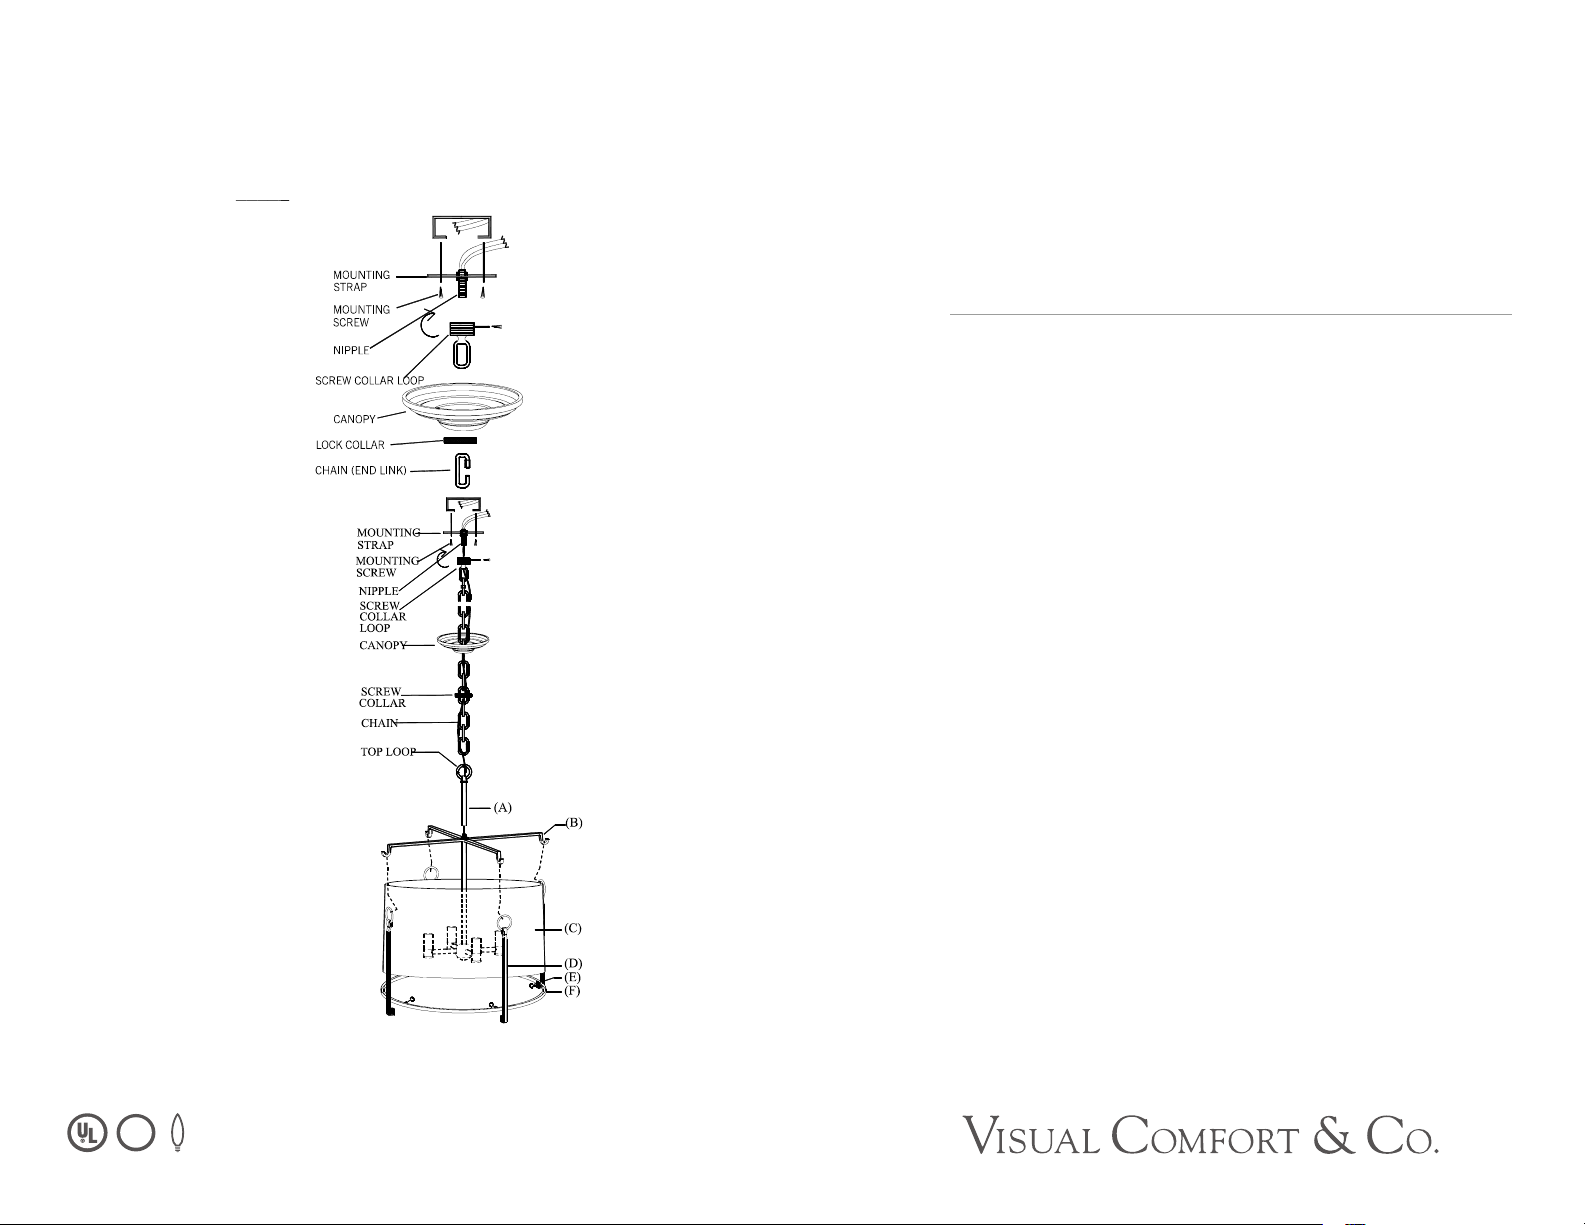
1. Screw connection rod (A) onto top threaded nipple of shade spider (B).
2. Insert shade (C) into top groove of shade rim (F), clip part (D) onto shade
rim (F) and secure with cap nut (E). (see illustration)
3. Raise the assembled shade, attach top loop of part (D) onto four hooks at
the end of shade spider (B).
4. Shut off the power at the circuit breaker and remove old fixture from ceiling,
including the old crossbar.
5. Carefully unpack new fixture and lay all the parts on a clean surface.
6. Thread nipple into screw collar loop until snug. Thread other end of nipple
with loop attached into mounting strap until snug.
7. Place lock washer over end of nipple protruding through mounting strap
and thread hex nut onto nipple until tight. Take this mounting assembly and
mount to ceiling junction box with mounting screws. Tighten screws securely
with screwdriver. The side of the mounting strap marked “GND” must face out.
8. Use a pair of pliers to open one end link of the chain provided and connect to
the top loop. Close the link.
9. By measuring, determine correct number of links needed for proper
hanging height. Using pliers, disconnect and discard remaining chain.
10. Lace the fixture wires through the chain.
11. Slip screw collar over the chain, then do the same with the canopy.
12. Open the other end link of the chain and hang the fixture on the screw collar
loop. Close the link.
13. Feed the fixture wires through the screw collar loop and nipple and pull until
taut.
Page 2
ASSEMBLY INSTRUCTIONS
DRY
Aspen Large Hanging Shade
Item # S5030
WE RECOMMEN D INSTALLATION OF THIS LIGHTI NG FIXTUR E BE DON E BY A
LICENSED E LECTRICIAN.
WARNING *** SWITCH OFF THE MAIN ELECTRICAL SUPPLY FROM THE MAIN
FUSE BOX/CIRCUIT BR EAKER B EFOR E INSTALLATION.
INS PECT ITEM CAREFULLY BEFORE ATTEMPTING TO INSTALL. IF THE RE IS
ANY DAMAGE OR OBVIOUS DE FECT, DO NOT INSTALL.
ITEM MAY NOT BE RETURN ED ONCE IT HAS B EEN INSTALLED.
14. At this point, connect the electrical wires as shown in Fig.3 making sure all
wire nuts are secured. You May have to wrap the connections with electrical
tape. If your outlet has a ground wire (green or bare copper) connect
fixture’s ground wire to it. Otherwise connect fixture’s ground wire directly to
the junction box.
15. Tuck these wire connections neatly into the ceiling junction box.
16. Raise the screw collar and thread onto screw collar loop protruding
through canopy.
17. Insert light bulbs (NOT INCLUDED) into sockets.
18. Your installation is now complete. Return power to the junction box and test the
fixture.
 Loading...