

VistaQuest DV500 User Manual
DV500
User’s Manual

1
1. Getting to know your camera............................................................ 3
1.1 Configuration and installation..................................................... 3
1.2 On-screen display...................................................................... 4
2. Preparation before capture............................................................... 5
2.1 Battery ....................................................................................... 6
2.2 Insert the memory card.............................................................. 6
2.3 Format the memory card ........................................................... 7
2.4 Setting the date and time........................................................... 8
3. Using this video camera ................................................................... 8
3.1 Turn on / off the camera............................................................. 8
3.2 Change the record mode ........................................................... 9
3.3 Video recording........................................................................ 10
3.4 Capture still image ................................................................... 10
3.5 Using the Zoom Function......................................................... 11
3.6 Audio recording........................................................................ 12
3.7 Playback mode ........................................................................ 12

2
3.8 Delete files............................................................................... 14
4. Menu setting................................................................................... 14
4.1 Menu in capture mode.................................................................. 15
4.2 Menu in video mode ................................................................ 17
4.3 Setup menu ............................................................................. 18
4.4 Menu in playback mode........................................................... 21
5. Making connections........................................................................ 24
5.1 Image or video files download ................................................. 24
5.2 Connecting the video Camera to a TV..................................... 25
6. Software Installation ....................................................................... 26
6.1 Install Driver............................................................................. 27
6.2 How to use the PC Camera ..................................................... 27
7. Troubleshooting.............................................................................. 28
8. Specifications & system requirements............................................ 30
3
1. Getting to know your camcorder
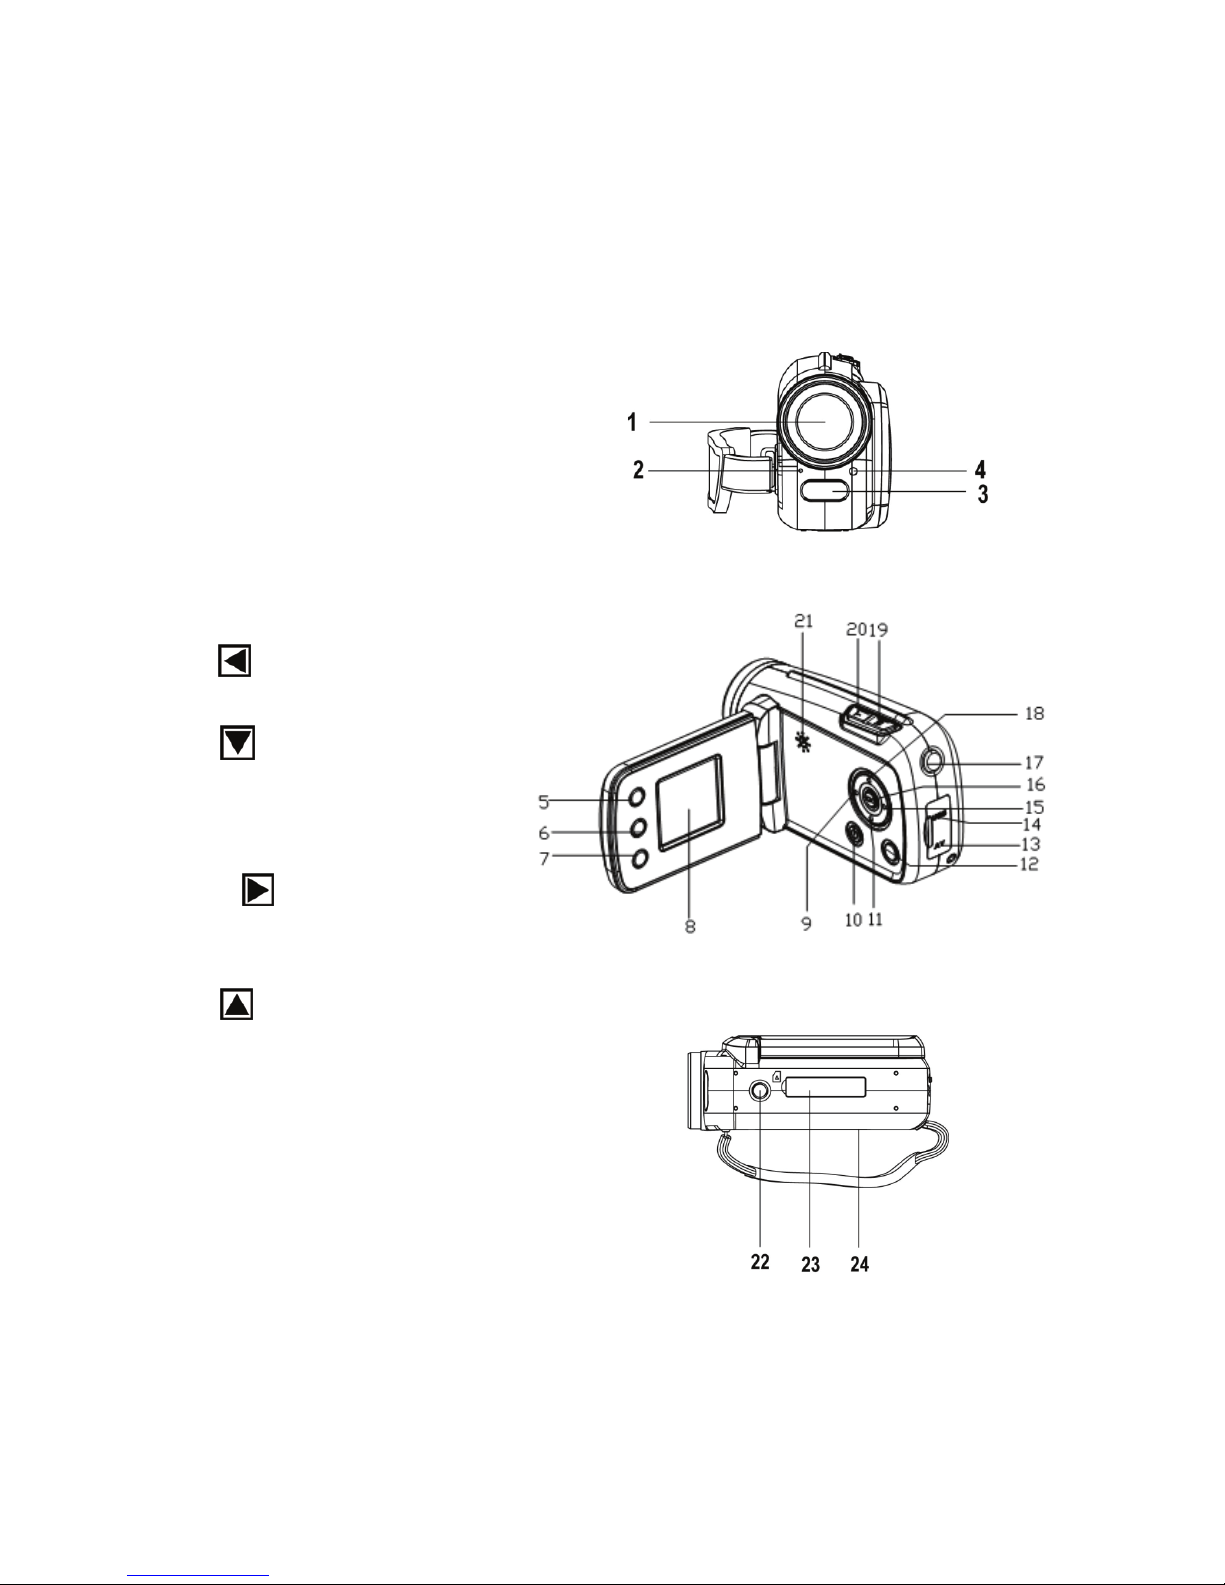
1.1 Configuration and installation
1:Lens
2: Microphone
3: Compensating lamp
4: Self-Timer LED
5: Delete
6: Playback
7: Mode
8: TFT LCD Screen
9: Left
/Self-Timer
10: Power
11: Down button
12: Menu
13: AV Out jack
14: USB jack
15: Right
/LED on or off
16: OK
17: Shutter
18: Up
/Display
19: W/Zoom in button
20: T/Zoom out button
21: Speaker
22: Tripod socket
23: Card slot
24: Battery cover

4
1.2 On-screen display
A. When shooting movies
B. When shooting still images

5
C: When recording audio file
D. When playing back
2. Preparation before capture
6
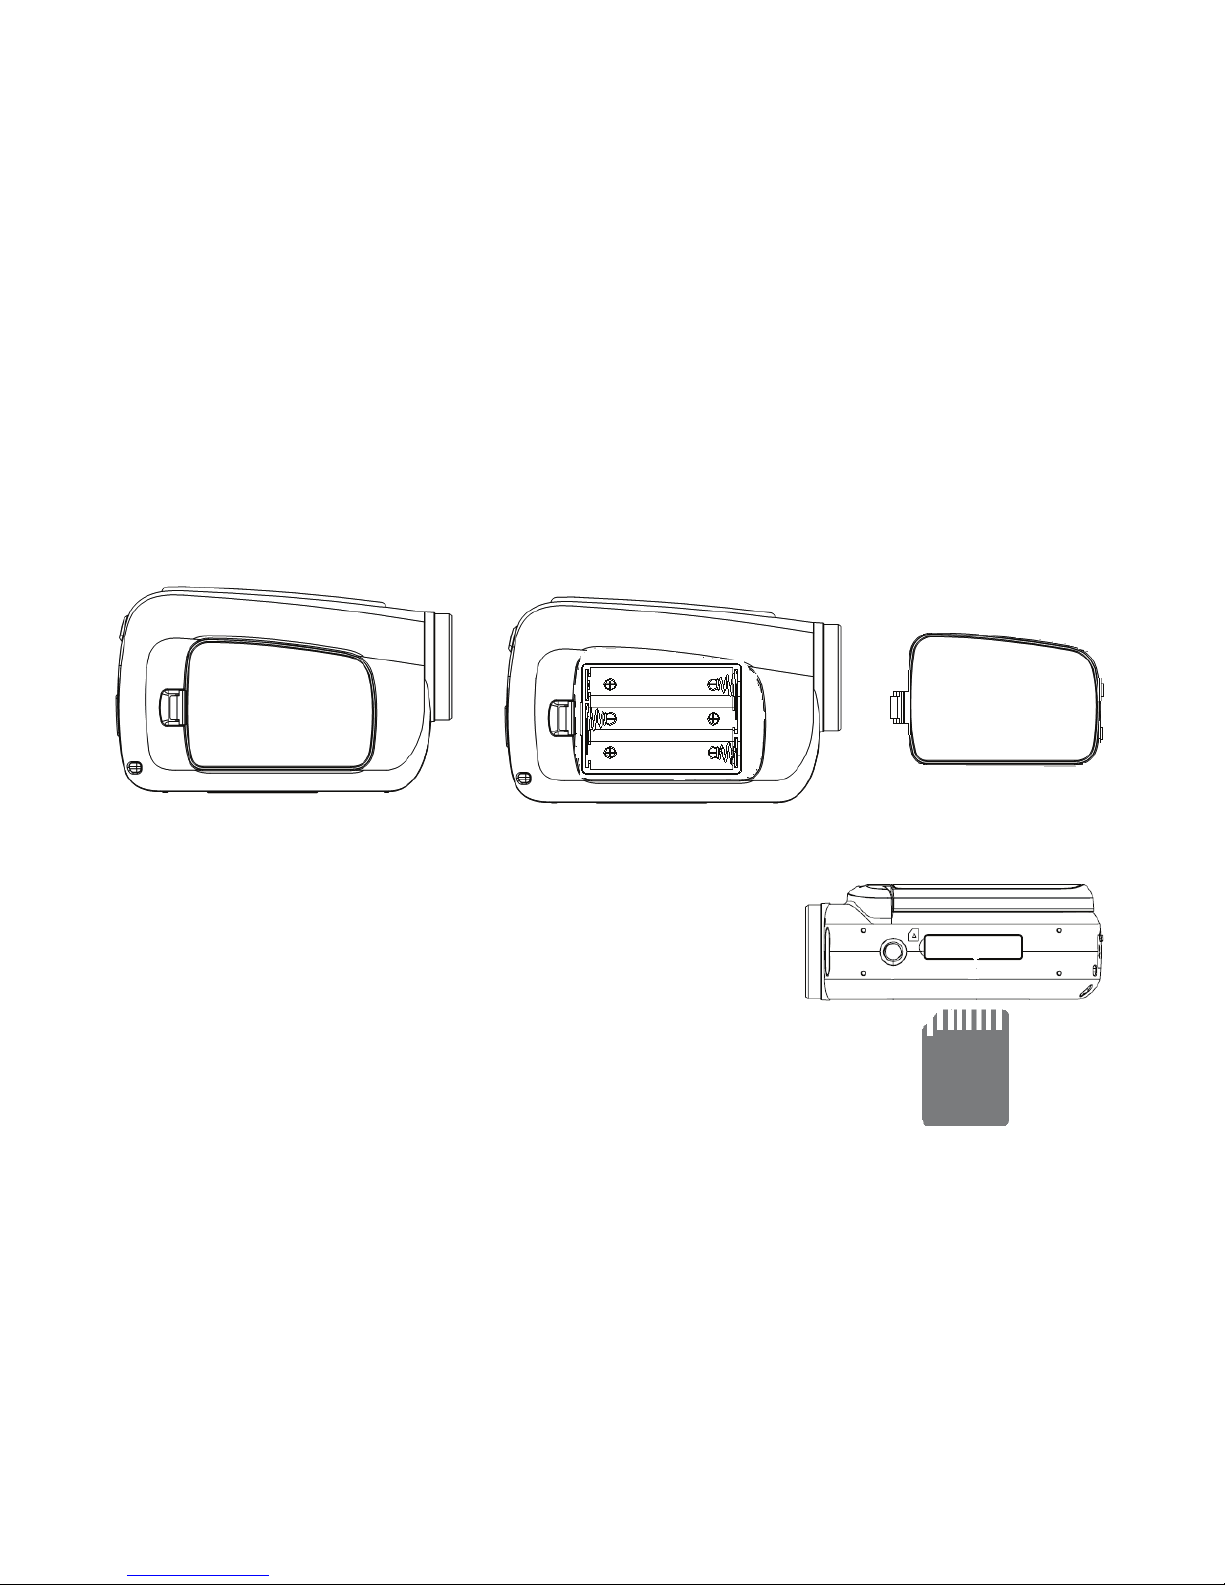
2.1 Battery
1: Open the video camera battery door.
2: Insert 3 AAA batteries according to the positive (+) and negative (-)
poles indicated on the battery cover.
3: Close the battery door.
2.2 Insert the memory card
Turn off the video camera before inserting or
removing the memory card. Insert the memory
card in the card slot carefully. Check the right
direction before inserting the memory card.
Never try to force the memory card into the
slot when you feel resistance. The memory card has a write protect switch,
which is used to protect data from accidental deletion. Therefore, whenever
you want to record, format or delete files in the SD card, disable the write

7
protection first.
z Never insert any other object which is not a SD/MMC card into
the video camera’s SD card slot. Doing so will cerate the risk of
damaging to the camera and the card.
z Never remove the SD card from the video camera while the
video camera is powered on. Doing so can cause failure to the
picture recording operation, and even damage the memory
card.
2.3 Format the memory card
All data will be deleted including protected files. Be sure to download
important files to your computer before formatting.
1: Turn the power on, and set the video camera to the Setup Menu.
2: Press the UP or DOWN button to select [Format.] then press the OK
or RIGHT button to launch the submenu.
3: Press the UP or DOWN button to select the item [YES] and then press
the OK button to erase all data.

8
2.4 Setting the date and time
1: Turn the power on, and set the video
camera to the Setup Menu.
2: Press the UP or DOWN button to select
[Date&Time] then press the OK or
RIGHT button to launch the submenu.
3: Press the UP or DOWN button to change the highlighted value. Press
the LEFT or RIGHT button to move the cursor between settings.
4: Press the OK button to confirm the setting.
5: Press the MENU button to close the menu.
3. Using this video camera
3.1 Turn on / off the video camera
1: Open the LCD panel.
2: Press the power button to turn on / off the camera.
9
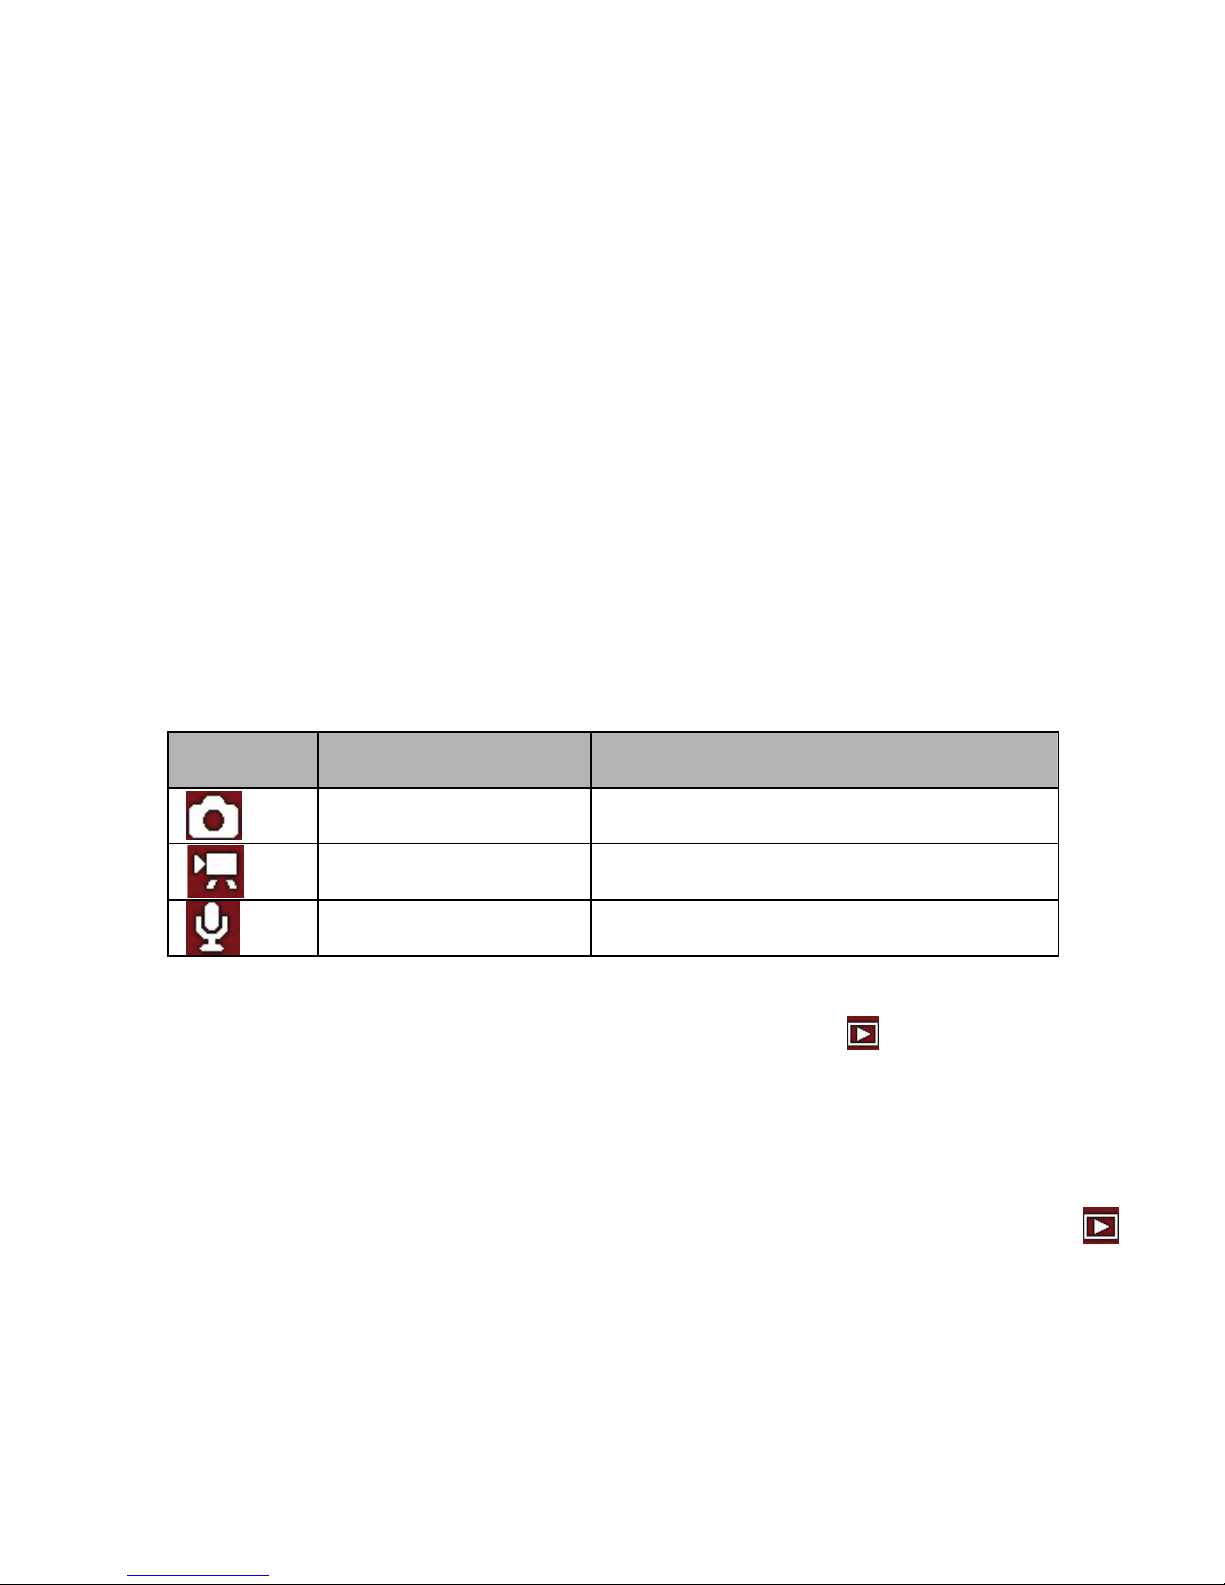
3.2 Change the record mode
There are three record modes in this video camera.
1: Press the POWER button to turn on the video camera, and the video
camera get into the default video mode.
2: Press the MODE button to change the mode. Each time the MODE
button is pressed the mode icon is changed.
z When the video camera is in playback mode
you must press
the PLAYBACK button to change it to record mode firstly then
you can use the MODE button to change mode.
z If you want to review the record files you can press the
PLAYBACK button to set the video camera to playback mode
.
Display Title Description
Capture mode For taking still photos.
Video mode For recording movie clips.
Audio mode For recording audio files.
 Loading...