

Calibration Adjustment
In the event that adjustment of the calibration is required,we recommend the
gravimetric method under controlled environment,or an authorized calibration
service.Pipettes can be returned to MLA Systems for recalibration and repair as
part of the Lifetime Warranty.It is highly recommended that the pipettes be returned
to the manufacture for recalibration using controlled conditions and procedures
consistent with ISO and NCCLS standards which are important to achieve accuracy
at microvolume ranges.
Adjustment Procedure
Determine the pipette delivered volume by gravimetric test procedure.A minimum
of five weighing is required.If out of specification,allow pipette and materials to
equilibrate to ambient temperature,and retest.If still out of range,proceed to adjust
volume.The range of adjustment is ± 10%.
1. Insert the provided allen key into the push button end of the pipette.(See Figure 4 )
2. Turn the key clockwise to increase volume,or counter-clockwise to decrease
volume.Hold the plunger button while turning the key.See table for volume
change per turn of allen key.
For Micro D-Tipper
Change in Volume per Turn
Volume
2 µL 0.15 µL per turn
3 - 4 µL 0.28 µL per turn
5 - 10 µL 1.25 µL per turn
3. Retest pipette by same method to determine volume.
Figure 4: Pipette Volume Adjustment
WARRANTY
Your new Micro D-Tipper pipette is the only pipette available with a Lifetime Warranty.
Complete the registration card enclosed to activate your new pipette warranty.Once
the completed registration card has been returned,the lifetime warranty becomes
effective.
MLA Systems guarantees that your new pipette will be free from defects in materials
and workmanship.
Should the pipette be received in any other condition,please contact MLA Systems
Technical Services at 1 -888-652-6520 immediately for Return Authorization and
replacement.
Should the pipette fail to operate or require repair, for any reason, return your pipette
to MLA Systems Pipette Repair Department.See enclosed warranty card for details.
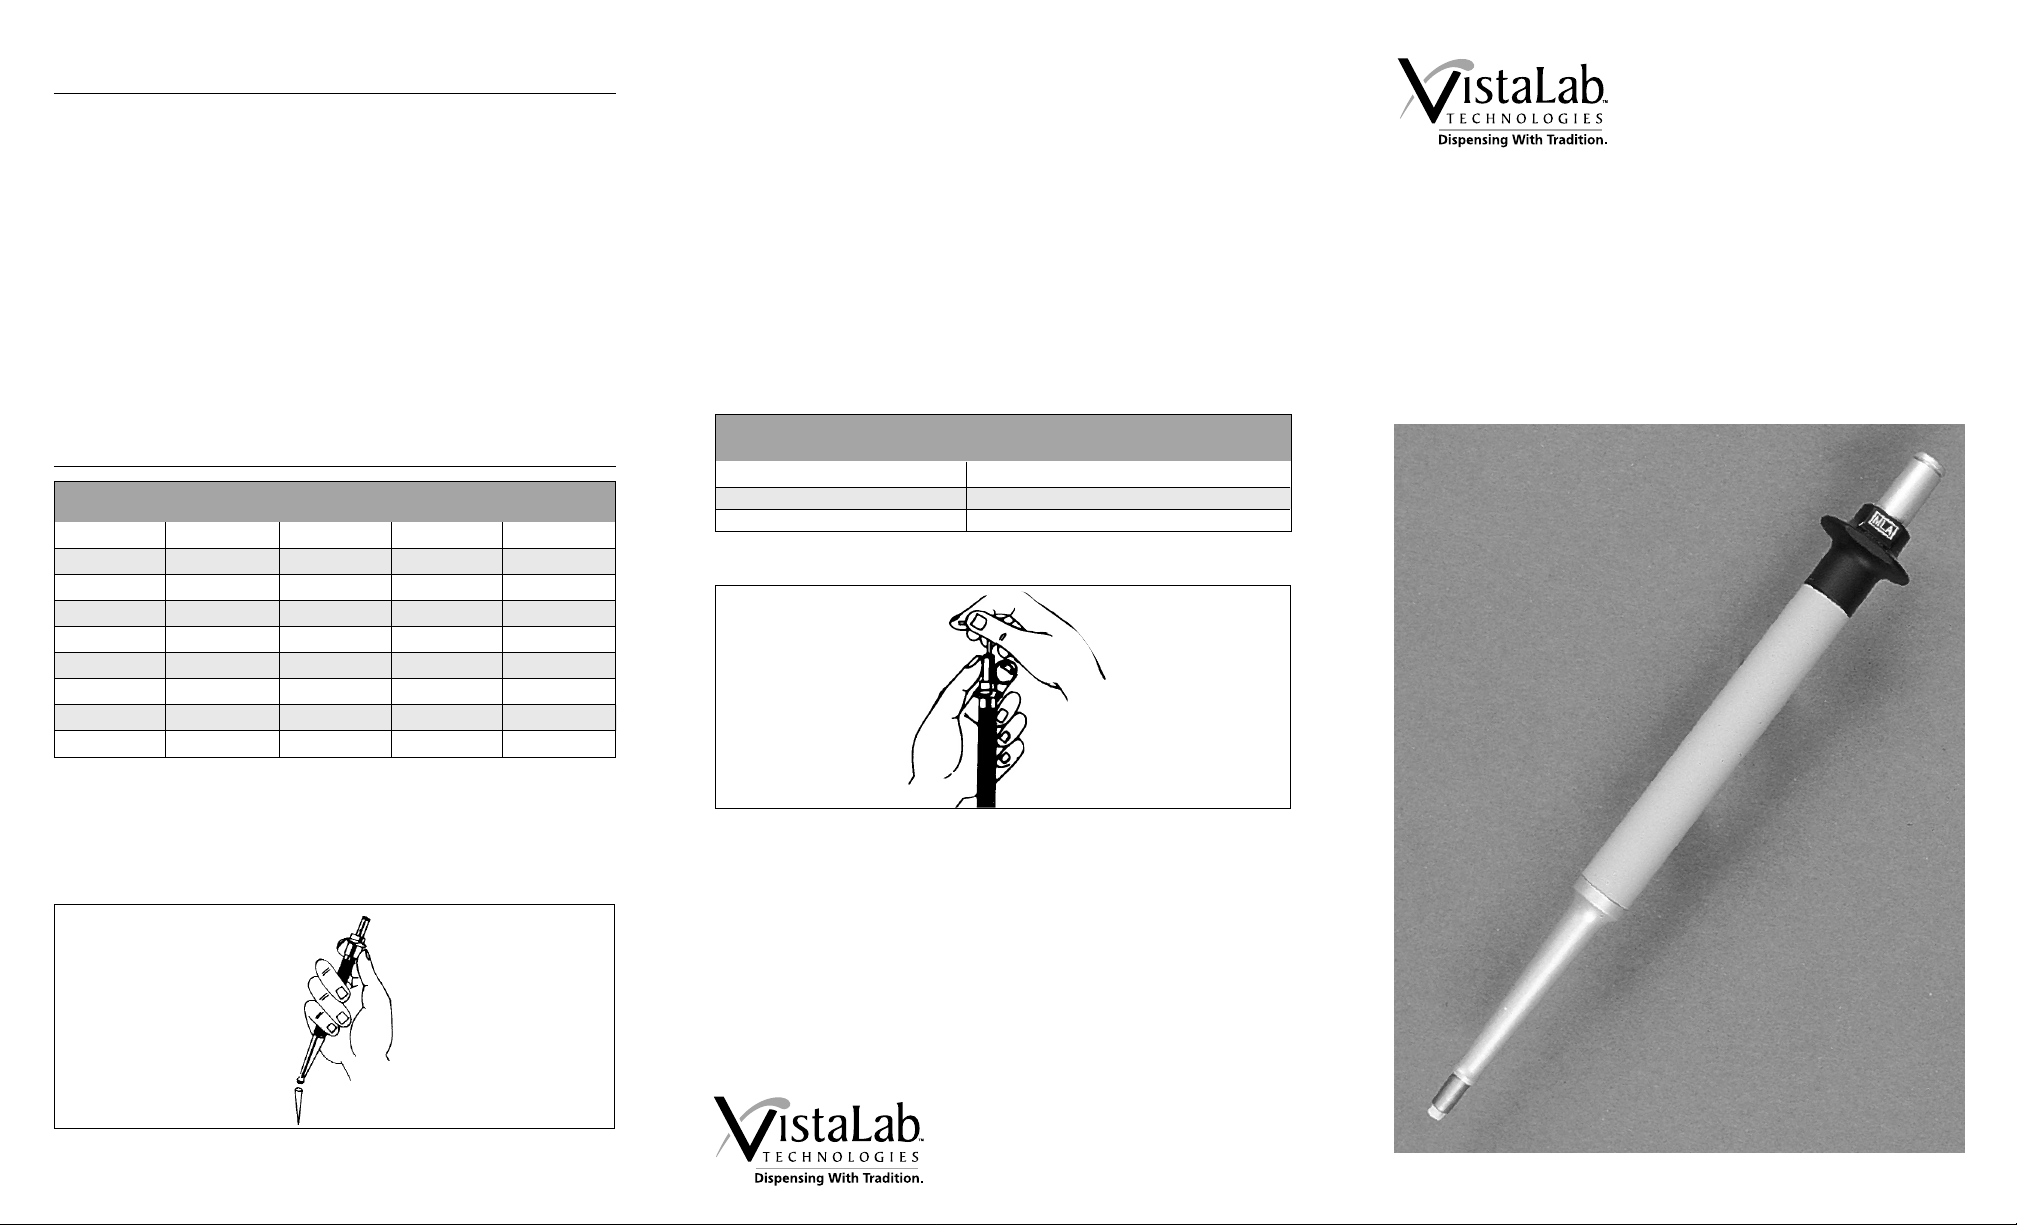
Figure 1: Automatic De- Tipping
VistaLab Technologies, Inc.
27 Radio Circle Drive
Mt. Kisco, NY 10549 USA
(888) 652-6520
www.vistalab.com
MLA Micro D-Tipper
TM
Fixed Volume Pipette
Operating Instructions
L038-0610 -001 Rev. B
DESCRIPTION
The Micro D -TipperTMFixed Volume Pipettes are general purpose pipettes for
sampling and dispensing liquids when accuracy, precision and convenience are
required.The Micro D -Tipper pipettes are available in nine volumes ranging from
2 µL to 10 µL and use a standard MLA small tip.
Micro D -Tipper pipettes are piston stroke,air displacement instruments with tip
ejection.The Micro D -Tipper is a two stroke pipette with overblow,enhancing the
accuracy and precision at volumes below 10 µL.The first stop is the measuring
stroke. The second stop is the dispense and blow-out stroke.
The Micro D -Tipper is factory calibrated to dispense the volume engraved on the
pipette.Calibration can be verified and easy in -lab adjustment is possible. This
feature is useful for compensation when samples with viscosity or specific gravity
significantly different from distilled water are measured.
The standard MLA small tip is recommended for use with the Micro D-Tipper.
These are available in stacked,bulk or EconoPak.Trace metal,individually wrapped
sterile and pyrogen-free sterile tips are also available for special applications.Like
all MLA mechanical pipettes,the Micro D-Tipper has a Lifetime Warranty.
PERFORMANCE SPECIFICATIONS
Cat. No. Volume Color Accuracy Precision
1802 2 µL Red 2.0% 2.5%
1803 3 µL Gray 1.5% 2.0%
1804 4 µL White 1.5% 2.0%
1805 5 µL Silver 1.0% 1.5%
1806 6 µL Green 1.0% 1.5%
1807 7 µL Purple 1.0% 1.5%
1808 8 µL Black 1.0% 1.5%
1809 9 µL Blue 1.0% 1.5%
1810 10 µL Orange 1.0% 1.0%
Specifications are subject to change without notice.
Pipettes are factory calibrated and verified gravimetrically using distilled water and
analytical balance.Water temperature and ambient conditions are stabilized and
controlled in accordance with documented procedures.Statistical process control
is used to ensure consistent lot to lot quality.
PIPETTE OPERATION
PIPETTE TIP
The pipette is a precision instrument.System performance depends on the pipette
and tip system used.Using tips which were not used to calibrate the pipette
may effect accuracy and precision.For best results,use the manufacturer
recommended tips.
ASPIRATING/FILLING
1. Securely attach the appropriate,unused pipette tip.
2. Press plunger button down to the first stop.
3. Hold pipette vertically and immerse the tip approximately 3 mm into the
sample solution.
4. Gently and slowly return the plunger button to up position.Do not let it snap back.
5. Withdraw the tip from the liquid so that no drops remain attached on the
outside of the tip.Should any liquid remain,wipe the outside of the tip with a
lint- free tissue, taking special care not to touch the tip opening.
DISPENSING/EMPTYING
6. Place the tip against the side wall of the receiving vessel.
7. Depress the plunger slowly to the first stop.Pause.
8. Depress the plunger further to the second stop (blow out) or bottom of stroke,
dispensing all liquid from tip.
9. With the plunger still fully depressed,slowly withdraw the tip while sliding
along the wall of the vessel.Release plunger to up position.
10. Eject tip by lifting the tip ejector bonnet.
Figure 2: Nozzle Inser t Removal and Replacement
SPECIAL NOTES
• Do Not pre -wet tips.
• Use a new tip for each aspirate/dispense.
• Dispensing must be performed along the vessel wall or directly into liquid.
Perform blow-out stroke, hold plunger down, and withdraw pipette from vessel.
• With small sample volumes,results can be optimized by rinsing the tip after
dispensing.After the first dispense is performed,keep the tip in the receiving
vessel and aspirate and dispense several times.Perform blow-out and slide tip
out along the vessel wall.
OPERATIONAL LIMITATIONS AND PRECAUTIONS
• Consistent technique and smooth,steady movements are key to precision.
• Keep the pipette in a vertical position at all times when in use.
• Always depress the plunger to the proper stop before putting the tip into liquid
to avoid air and incorrect volume intake.
• Differences in the temperature of the pipette and solution can result in inaccurate
dispensing.
RECOMMENDED MLA PIPETTE TIPS
Cat. No. Description U/M
9025 Stacked Dense Pack,5 trays;200 tips per tray 1000 tips
4025 Protectainer Bulk Pack 1000 tips
4225 Econo- Pak 1000 tips
2025 Sterile,Individually wrapped 200 tips
2027 Pyrogen-free Ster ile, Individually wrapped 200 tips
9022 Trace Metal Certified,Stacked Dense Pack 1000 tips
SERVICE AND MAINTENANCE INFORMATION
During factory assembly,the internal par ts of the pipette (plunger,seals,etc.) are
lubricated with a silicone grease.Normally,cleaning,replacement of seals and nozzle
inserts,and lubrication should be necessary only every 6 months.If the pipette is
used with corrosive chemicals or solvents,or roughness in the plunger movement is
observed,cleaning and lubrication may be necessar y more often.
Cleaning
The pipette should be checked each day of use for dirt and dried liquids on the
outside surfaces of the pipette.Wipe clean with soapy water and lint-free cloth.
If stronger cleaning agents are used,rinse well with water and wipe dry.
Inspect the nozzle insert for cleanliness.Remove and rinse clean if debris is seen.Dr y
with jet of air.
Maintenance
Every six months,or as required, replace seals and lubricate.Refer to Maintenance
and Repair Kits for proper replacement parts to have on hand.
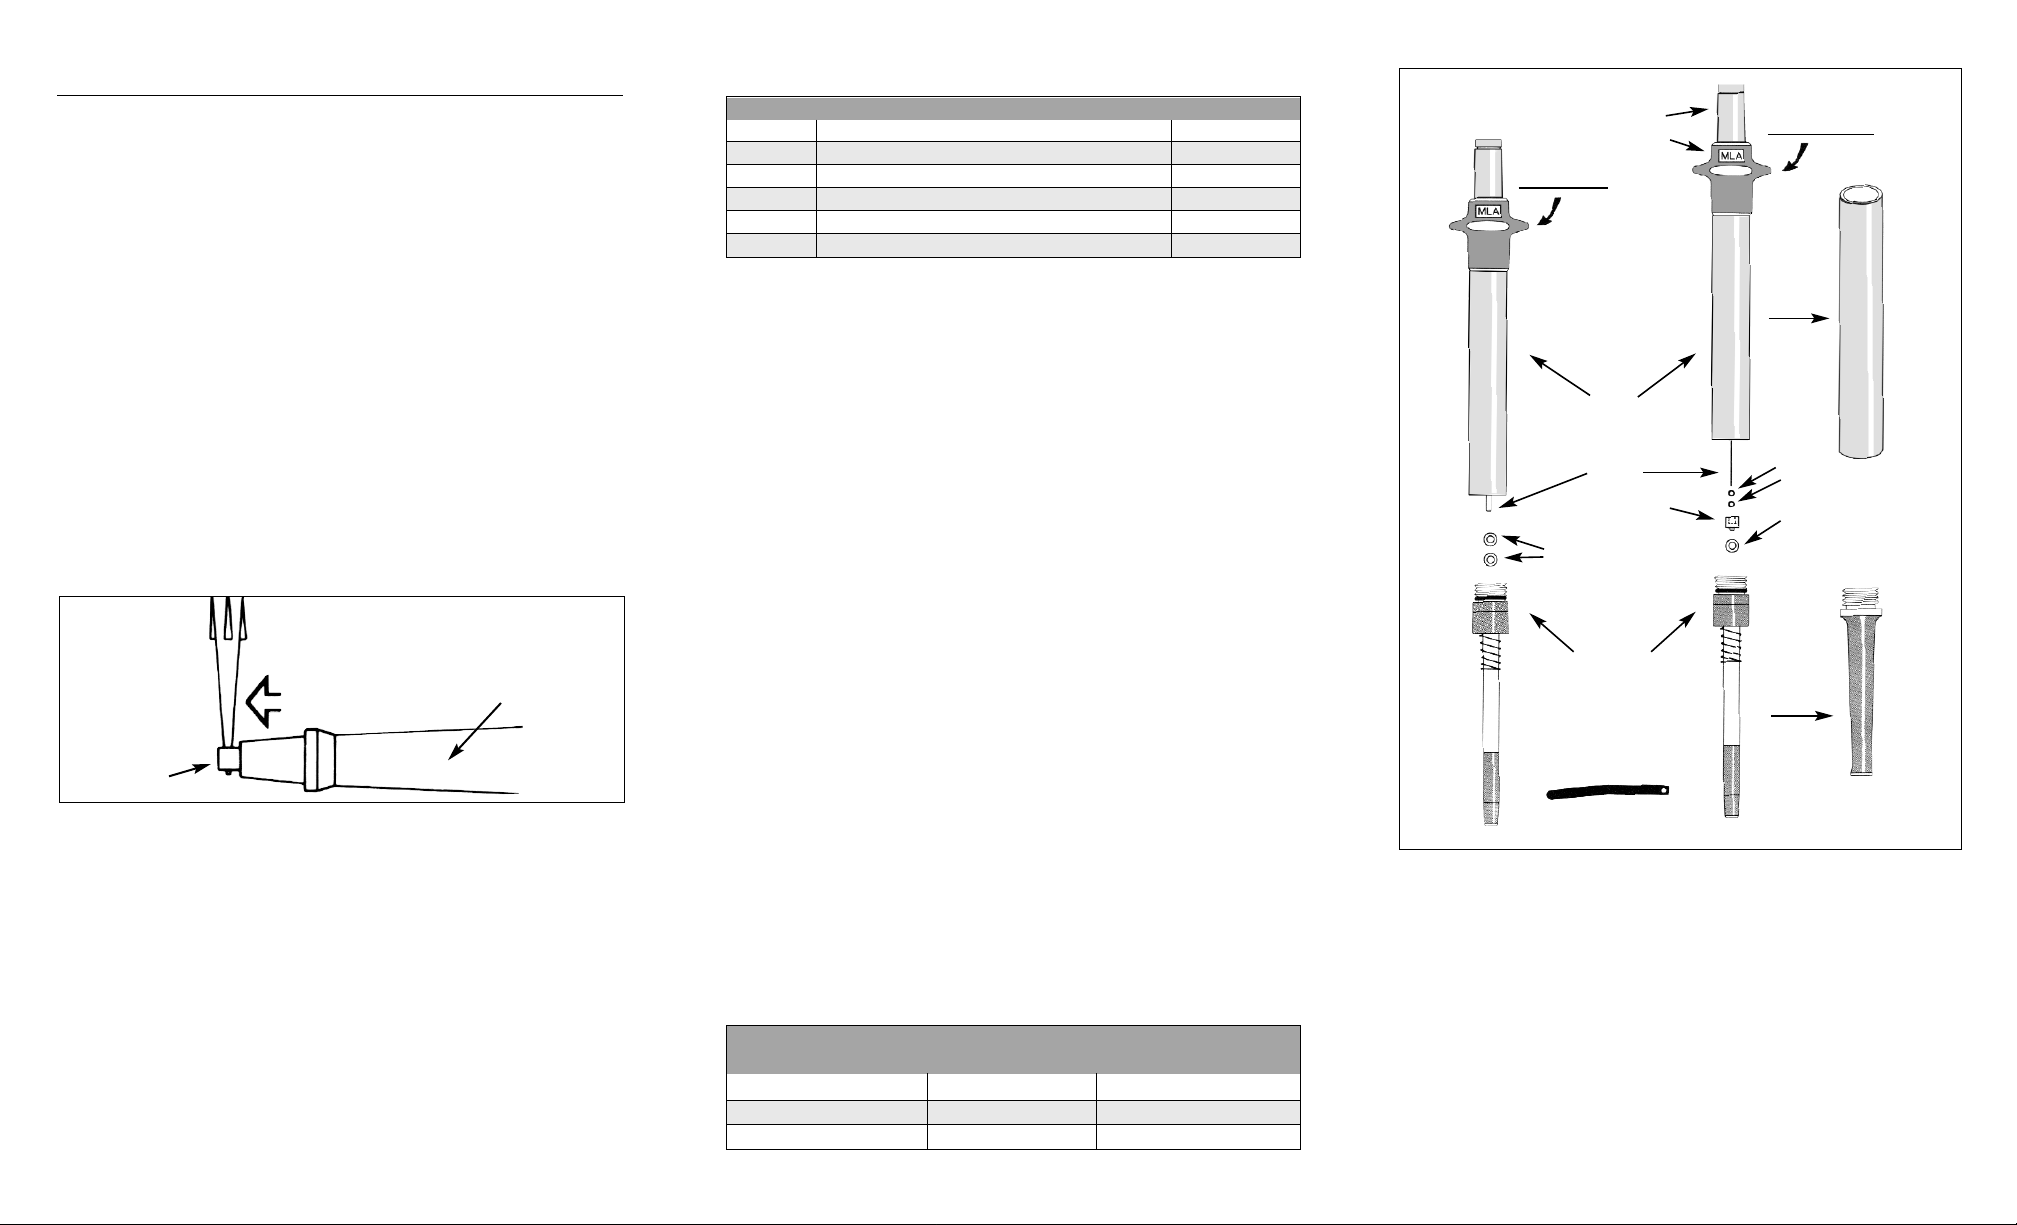
1. Hold the pipette around the sleeve and pull the nozzle away from the sleeve to
expose the spring cap assembly.
2. Grasp the spring cap with your thumb and forefinger and unscrew the nozzle.
Remove the nozzle and sleeve.
3. Unscrew and remove the spring cap assembly.
4. Remove and discard old seals. Note: The 2 µL,3 µL and 4 µL pipette models
includes a separate part,a metering seal housing, with two small “O”rings. This
housing should stay on the plunger when the nozzle assembly is removed. If
metering seal housing remains in the spring cap assembly,remove it,the two “O”
rings and the quad ring from the spring cap assembly,using a small straight pin.
Remove the two “O”rings from the seal housing and discard seals.
5. Depress and hold the button plunger to advance the plunger mechanism.Wipe
exposed surface with soft clean cloth. Lubr icate with a thin film of grease from kit.
6. Apply grease to the new seals and carefully place on plunger.Use only the silicone
grease supplied in the Seal Maintenance Kit.
Note: When replacing the “O”rings
for 2 µL,3 µL and 4 µL pipette models assemble both “O” rings,then the metering
seal housing and then the quad ring onto plunger.
7. Reassemble pipette being careful while inserting plunger and seals into seals in
nozzle assembly.
MAINTENANCE AND REPAIR KITS
For Micro D-Tipper Seal Kits Nozzle Insert
Volume Cat. No. Cat. No.
2 µL 9075 8066
3 - 4 µL 9076 8066
5 - 10 µL 9077 8066
CALIBRATION
The pipettes have been calibrated at the factory to perform within the specifications
in table.Ordinarily the pipettes do not need to be calibrated but they are designed
to permit easy in- la b calibration. (Warning: Experienced and proper training is
required to accurately perform calibration using gravimetric method.All procedures
are to be performed under controlled environment conditions.)
Calibration Verification
Verification of pipette calibration is recommended every six months.This should be
performed after the routine maintenance is completed.
Some laboratories may not have access to facilities capable of performing the
gravimetric method.In these instances,you may consider using the MLA Pipette
Verification Calibration Kit or returning the pipettes to MLA Systems for calibration
and/or repair.
5- 10 µL.Sizes
Tubing
2, 3 & 4 µ L. Sizes
Sleeve
Button
Bonnet
TUBING
PLUNGER
ASSEMBLY
NOZZLE TIP
ASSEMBLY
Plunger
Metering Seal
Housing
Nozzle
Body
“O” Rings
Quad Ring
Quad Rings
Spring Cap
Nozzle Insert
Figure 3: Pipette Disassembly and Seal Replacement
Insert pipette tip in hole,
and
PULL to remove.
Nozzle insert
Nozzle
 Loading...