

Vista VVRD28V12DN-650 Installation Manual
VVRD28V12DN-650
Installation manual
Ultra Hi-resolution (650TVL), vandal
resistant, day/night, vari-focal dome.
Including scene analytics and alarm
output functions

2

IMPORTANT SAFETY INSTRUCTIONS
1. Read these instructions.
2. Keep these instructions.
3. Heed all warnings.
4. Follow all instructions.
5. Do not use this apparatus near water.
6. Clean only with dry cloth.
7. Do not block any ventilation openings. Install in accordance with the m
anufacturer‟s instructions.
8. Do not install near any heat sources such as radiators, heat registers,
stoves, or other apparatus (including amplifiers) that produce heat.
9. Do not defeat the safety purpose of the polarized or grounding-type plu
g. A polarized plug has two blades with one wider than the other. A gro
unding type plug has two blades and a third grounding prong. The wid
e blade or the third prong are provided for your safety. If the provided p
lug does not fit into your outlet, consult an electrician for replacement o
f the obsolete outlet.
10. Protect the power cord from being walked on or pinched particularly at
plugs, convenience receptacles, and the point where they exit from th
e apparatus.
11. Only use attachments/accessories specified by the manufacturer.
12. Use only with the cart, stand, tripod, bracket, or table specified by the
manufacturer, or sold with the apparatus. When a cart is used, use
aution when moving the cart/apparatus combination to avoid injury
from tipping over.
13. Unplug this apparatus during lightning storms or when unused for long
periods of time.
14. Refer all servicing to qualified service personnel. Servicing is required
when the apparatus has been damaged in any way, such as power-su
pply cord or plug is damaged, liquid has been moisture, does not oper
ate normally, or has been dropped.
15. CAUTION – THESE SERVICING INSTRUCTIONS ARE FOR USE
BY QUALIFIED SERVICE PERSONNEL ONLY. TO REDUCE THE
RISK OF ELECTRIC SHOCK DO NOT PERFORM ANY SERVICING
OTHER THAN THAT CONTAINED IN THE OPERATING
INSTRUCTIONS UNLESS YOU ARE QUALIFIED TO DO SO.
16. Use Certified/Listed Class 2 power source only.

4
CONTENTS OF PACKAGE
The package contains the following
Camera in Housing -----------------------------1no
Instruction Manual (This Document)--------1no
Accessory Kit for Installing -------------------1no
Drilling guide label ------------------------------1no
TABLE OF CONTENTS
INTRODUCTION --------------------------------------------------------------------------------------- 4
CAMERA CONNECTIONS -------------------------------------------------------------------------- 6
INSTALLATION ----------------------------------------------------------------------------------------- 8
LENS ADJUSTMENT --------------------------------------------------------------------------------- 9
DC AUTO IRIS LENS --------------------------------------------------------------------------------- 9
OPERATING CAMERA ------------------------------------------------------------------------------- 9
CAMERA ADJUSTMENT ---------------------------------------------------------------------------- 9
EXTERNAL DIMENSION----------------------------------------------------------------------------- 20
SPECIFICATIONS ------------------------------------------------------------------------------------- 21

5
INTRODUCTION
The camera provides high-quality image using a Sony Wide Dynamic 1/3” Super-HADII
PS 960H (Effio) CCD and digital signal processing LSIs.
Features:
1/3” Super-HADII PS 960H CCD (Sony Effio)
Super high-resolution of 650TV lines
0.4 lux(Colour), 0.04 lux(B/W), 0.001 lux(Low-Shutter) @ F1.4 Sensitivity
Auto Electronic Shutter [1/50 ~ 1/100,000] and manual electronic shutter
modes [1/50 ~ 1/10,000]
On Screen Display (OSD)
Auto and Manual white balance modes
Supports Line-Lock external synchronization
Digital PTZ
Digital Effect (H/V reverse, 180 degree rotate, inverse, freeze)
2D-NR, 3D-NR (DNR Demo)
Back Light Compensation
Back Light Masking (MAX. 15 area)
Excessive High-Light Compensation
Wide Dynamic Range (~x512)
Various Detection Methods (zone detection, motion trace, face trace, mine
area, absent detection, cross object counting, entrance counting)
Day & Night(Auto, Manual, External, Filter delay)
Various Alarm Methods (Period, Snooze, Polarity Select)
Privacy Mask or Mosaic (MAX. 15 area/4-point polygonal/transparency)
Scene Change Detection
Sens-Up (~x32)
White Pixel Removal
Frame Control (Auto, 1~7 sec)
System Lock (4-Digit password)
RS-485 Remote camera control
F1.4 D&N DC iris vari-focal lens
Operates in 12VDC or 24VAC
Use Certified / Listed Class 2 power source only
6
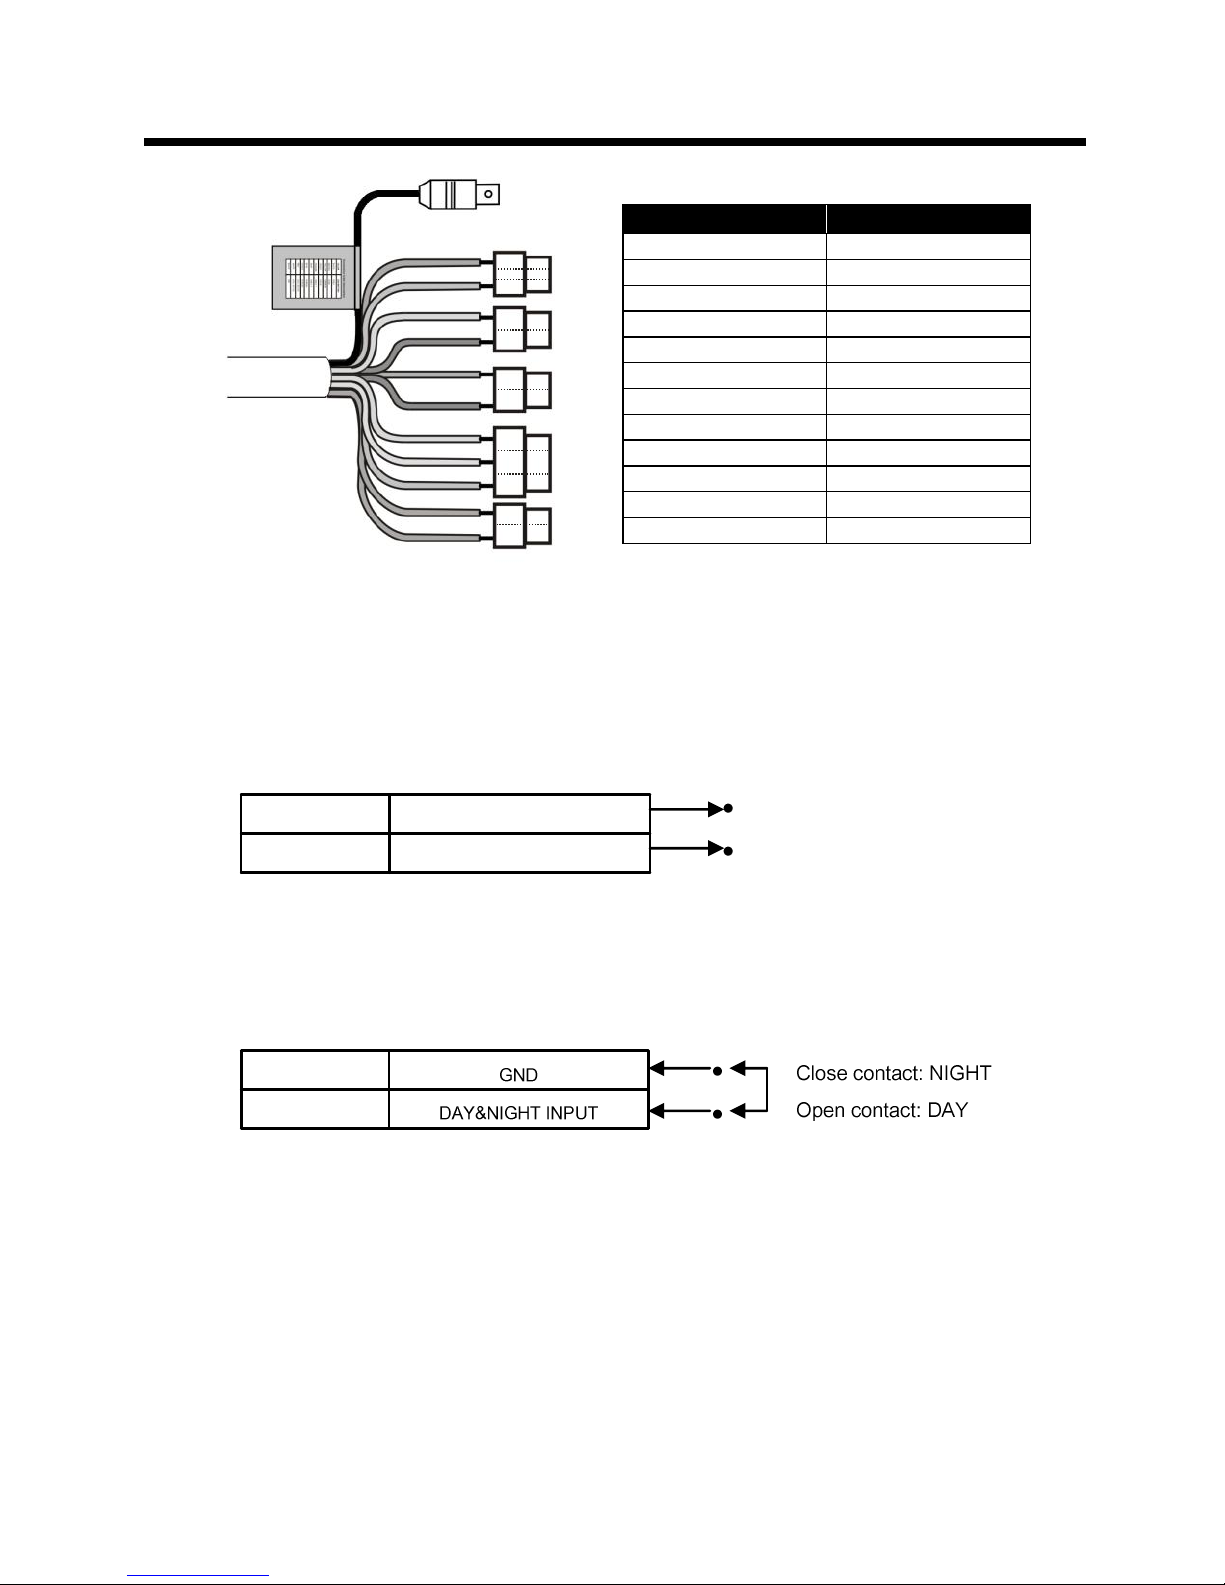
CAMERA CONNECTIONS
Connection Cable Description
COLOR
Description
RED
AC24V/DC12V
WHITE
AC24V/DC12V
ORANGE
ADKEY
BROWN
GND
BLUE
RS485(-)
GREEN
RS485(+)
YELLOW
ALARM OUT
GREY
DN EXT-IN
BLACK&WHITE
DN EXT-OUT
BLACK
GND
SKY BLUE
Not used
PINK
Not used
1) External Day/Night Control: To select Day/Night mode using external equipment,
connect control lines to the appropriate terminals.
DAY & NIGHT OUTPUT (Black / White)
This function allows the switching on of an external device such as lights, when
the camera switches to its night time mode. The Day/Night mode in the OSD
menus must be set to “AUTO”
DAY & NIGHT EXTERNAL INPUT (Grey)
This function allows the cameras Day/Night Switching to be controlled by an
external switch such as a Photo Cell. The Day/Night mode in the OSD menu
must be set to “External”
2) Alarm out (5vTTL)
Event detection signals are output through this port. (YELLOW AND GND)
Active state is configurable.
Low going high in alarm (approx 3.5v > 5v)
Gray
Black
GND
Black
DAY&NIG
Black/ White
5V/10mA : IR LED ON (NIGHT)
0V : IR LED OFF (DAY)
7
2) Power Input Terminal
RED: +
WHITE -
If using a 12vDC PSU then it is recommended it is not less than 0.75A.
4) Camera Control
GREEN: RS485+
BLUE: RS485-
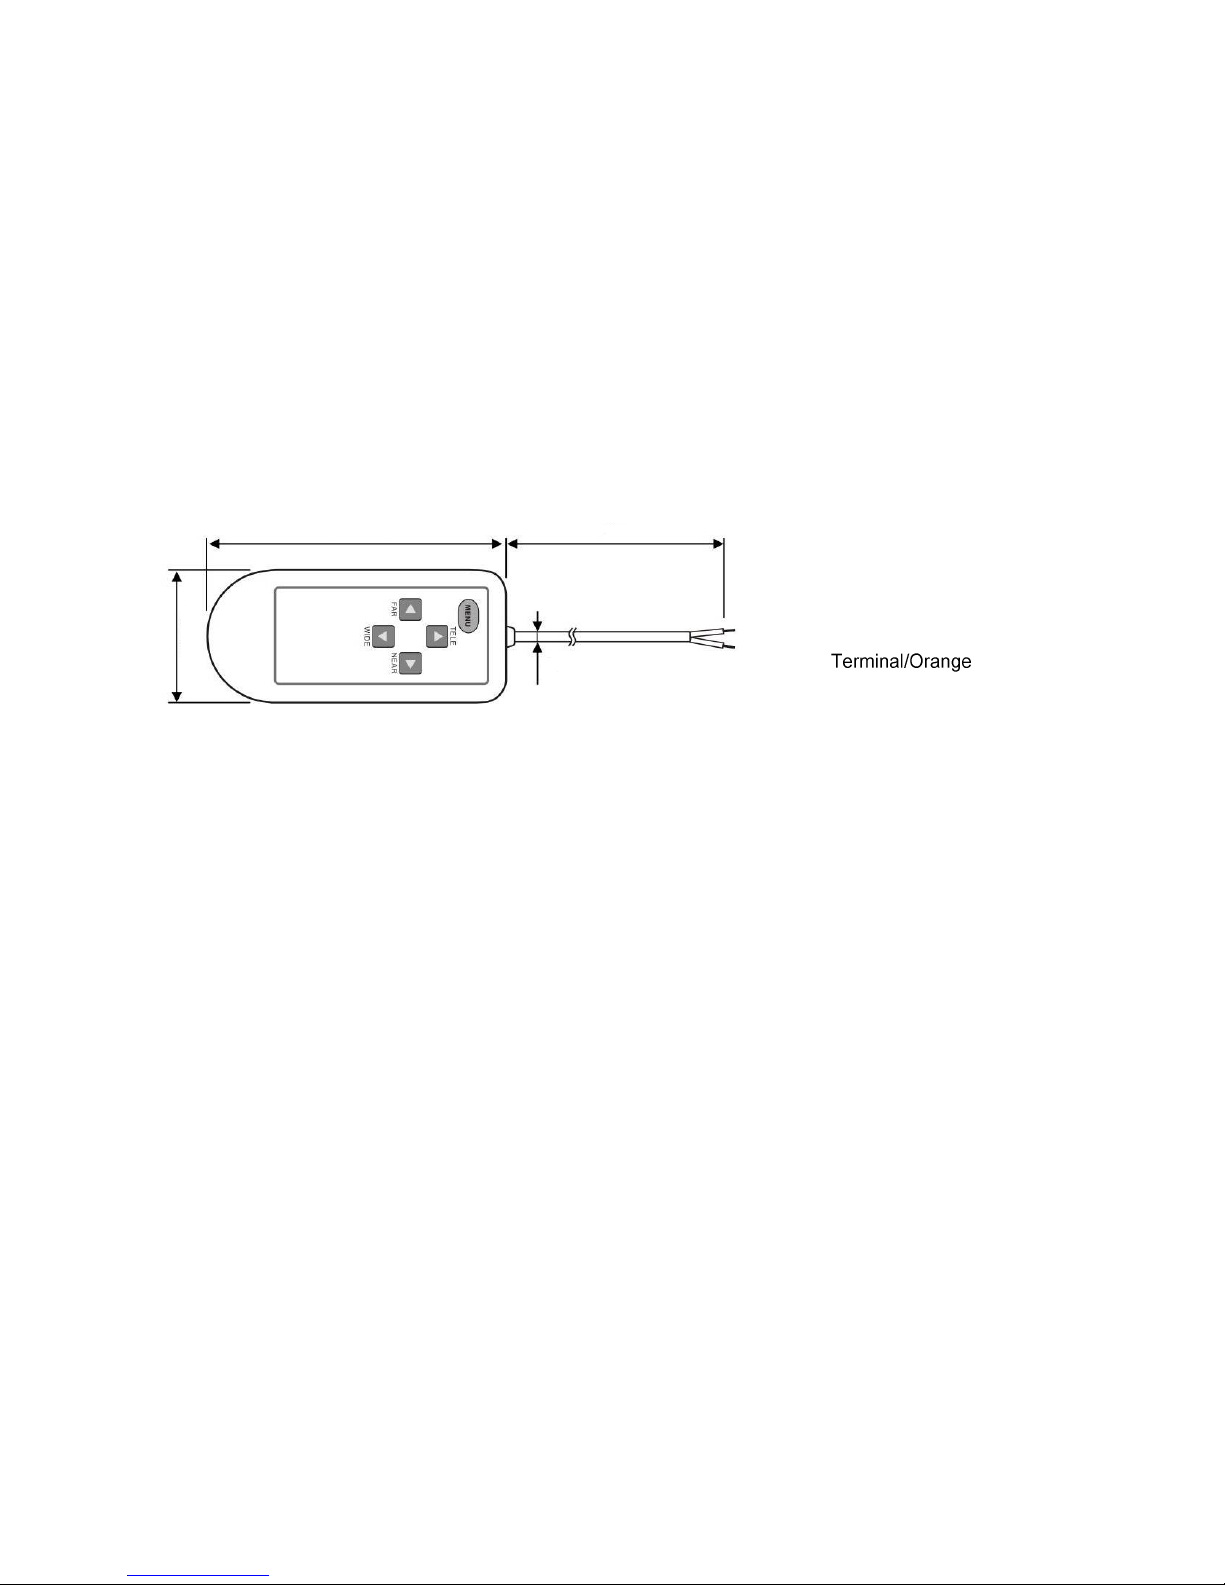
5) AD Control via optional hand held set up controller (VZM22/REM)
GND Terminal/Brown
AD Key
 Loading...