

Vision Tech VTB190MV User Manual
Advanced Rear View Camera User Manual
CAUTION
Before installing the Rear View Camera, please ensure that you read and
understand the User Guide.
- The normal operating power source for this device is DC12V.
(Operating Voltage is DC5V to DC15V)
- Please ensure that the power is off when installing.
- The camera has been waterproofed. Do not open, damage, alter or place heavy
items on the power cord.
Any of these actions may cause an electrical short circuit, which may lead to fire
or electrical shock.
- There is a distance difference between an actual camera and the monitor,
so please give attention to user after installation.
- Do not wipe out or scratch by using sharp things, it may cause a blur the image
(faulty image. In this case, we could not offer a warrant service)
- Use only the recommended power accessories. Use of power sources not expressly
recommended for this equipment may lead to overheating, distortion of the
equipment, fire, electrical shock or other hazards.
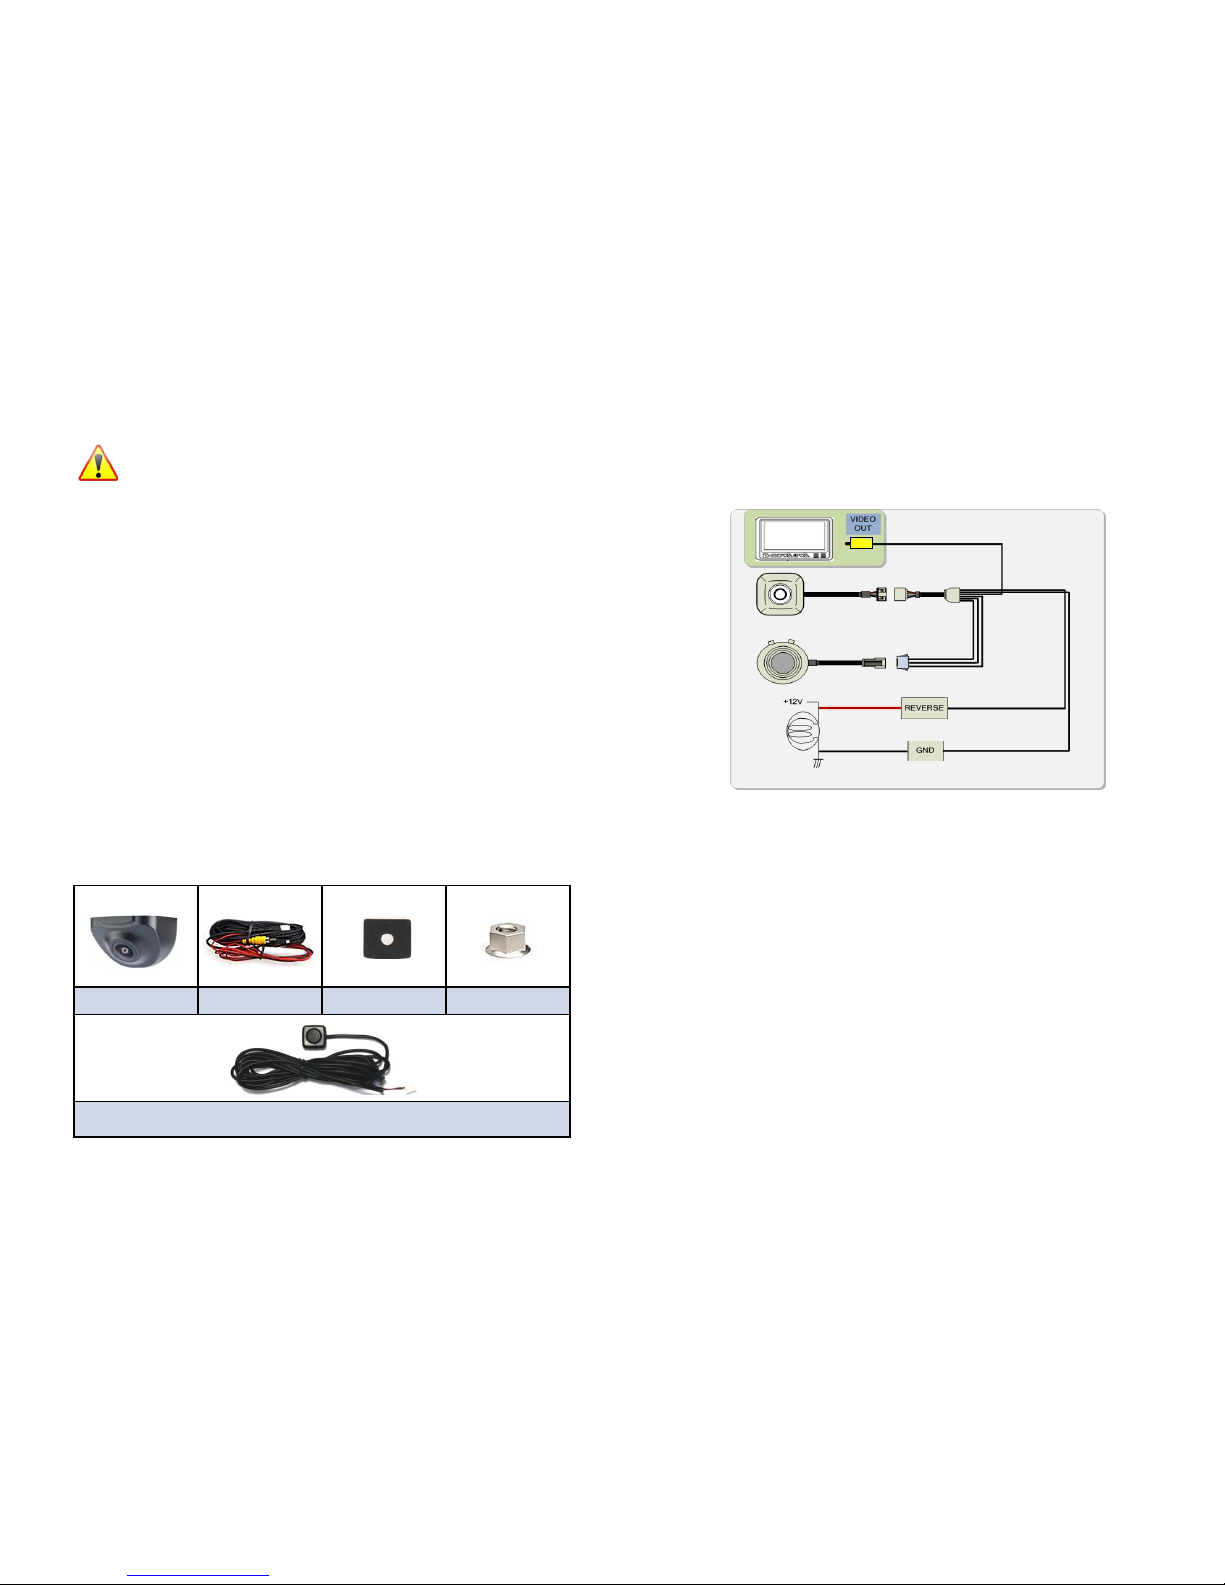
2. Installation & Connections
System Configuration Diagram
1) Select a position for the camera installation on rear of the vehicle.
(Rear garnish or side of number plate lamp)
2) Please make a space to put the cable harness inside the trunk after
installing the camera.
3) Like picture above, please connect the extension cables to the camera
cables.
4) Connect RED wire to +DC12V power cable of the rear lamp,
and connect BLACK wire to the body of vehicle or GND of the lamp.
5) Connect RCA cable to video input port of the monitor.
6) Connect the Extension Cables with the View Mode Controller.
※ Rear lamp will be turned on when changing ‘R’ gears and the Rear View
Camera is going to be operating at the same time.
The camera images will be displayed with the monitor.
Made In Korea
1. Package Contents
Camera
Cables
Fixing Tape
Fixing Nut
View Mode Controller
Rear Lamp
COLOR(BLACK)
COLOR(RED)
VIEW MODE CONTROLLER
CAMERA
MONITOR

Advanced Rear View Camera User Manual
Made In Korea
Item
Specifications
Video Format
Composite Video NTSC 720H x 480V
Frequency
15.734KHz(H),59.94Hz
Frame Rate
30fps (60 Field)
Sensor
¼” Aptina CMOS Image Sensor / ASX340CS(M139)
DSP
Nextchip NVP2610
Effective Pixels
728*560, 410K Pixels
Resolution
450TVL
Operating Voltage
DC 12V
Performance Guarantee
Temperature
-86ºF ~ 158ºF (-30℃ ~ 70℃ )
Operating Temperature
-104ºF ~ 185ºF (-40℃ ~ 85℃)
Power Consumption
Max. 60mA
Lens
FOV
H : 190° , V : 142° , D : 212°
Focal Length
0.9mm
Relative aperture
1.8
S/N Ratio
46db
Min. Illumination
0.1Lux
Exposure
Auto
White Balance
AWB
2 DNR
Auto
Lens Distortion Correction
ON
Camera IP Rating
IP 68
Dimension
18mm×32mm
3. Specifications
4. View Mode Controller
User can change various view modes by using the controller as below.
When push the button of the controller, view mode is to be changed to the
next view and the last view mode will be saved automatically.
1) LDC (Lens Distortion Correction) + Top View
2) LDC (Lens Distortion Correction)
3) PGL (Parking Guide Line)
4) Top View
5) Original Image
 Loading...