

VisionQuest PVR-5000-250G, PVR5000 User Manual
USB DV
VIDEO
L---AUDIO--- R
OPEN
PVR5000
HDD DVD RECORDER

Technical Specifications
Audio Specifications
Output
Input
Audio level:1.0~2.0 Vrms (10k ohm load)
Frequency response: 4Hz~44KHz (2dB)
S /N ratio 90dB
Audio distortion+noise -65dB(1KHz)
Audio Level 2.0 Vrms (10k ohm Load)
General specifications
Power supply
AC110-230V 50/60Hz
Power consumption: 40W
Standby power consumption: 3W
Size: 430mmX48mmX308mm
Weight
Net: 4.65kg
Gross: 5.3kg
Working humidity Relative humidity: 15~75%(without water condensation)
Technical Specifications
53
1
Safety Instructions
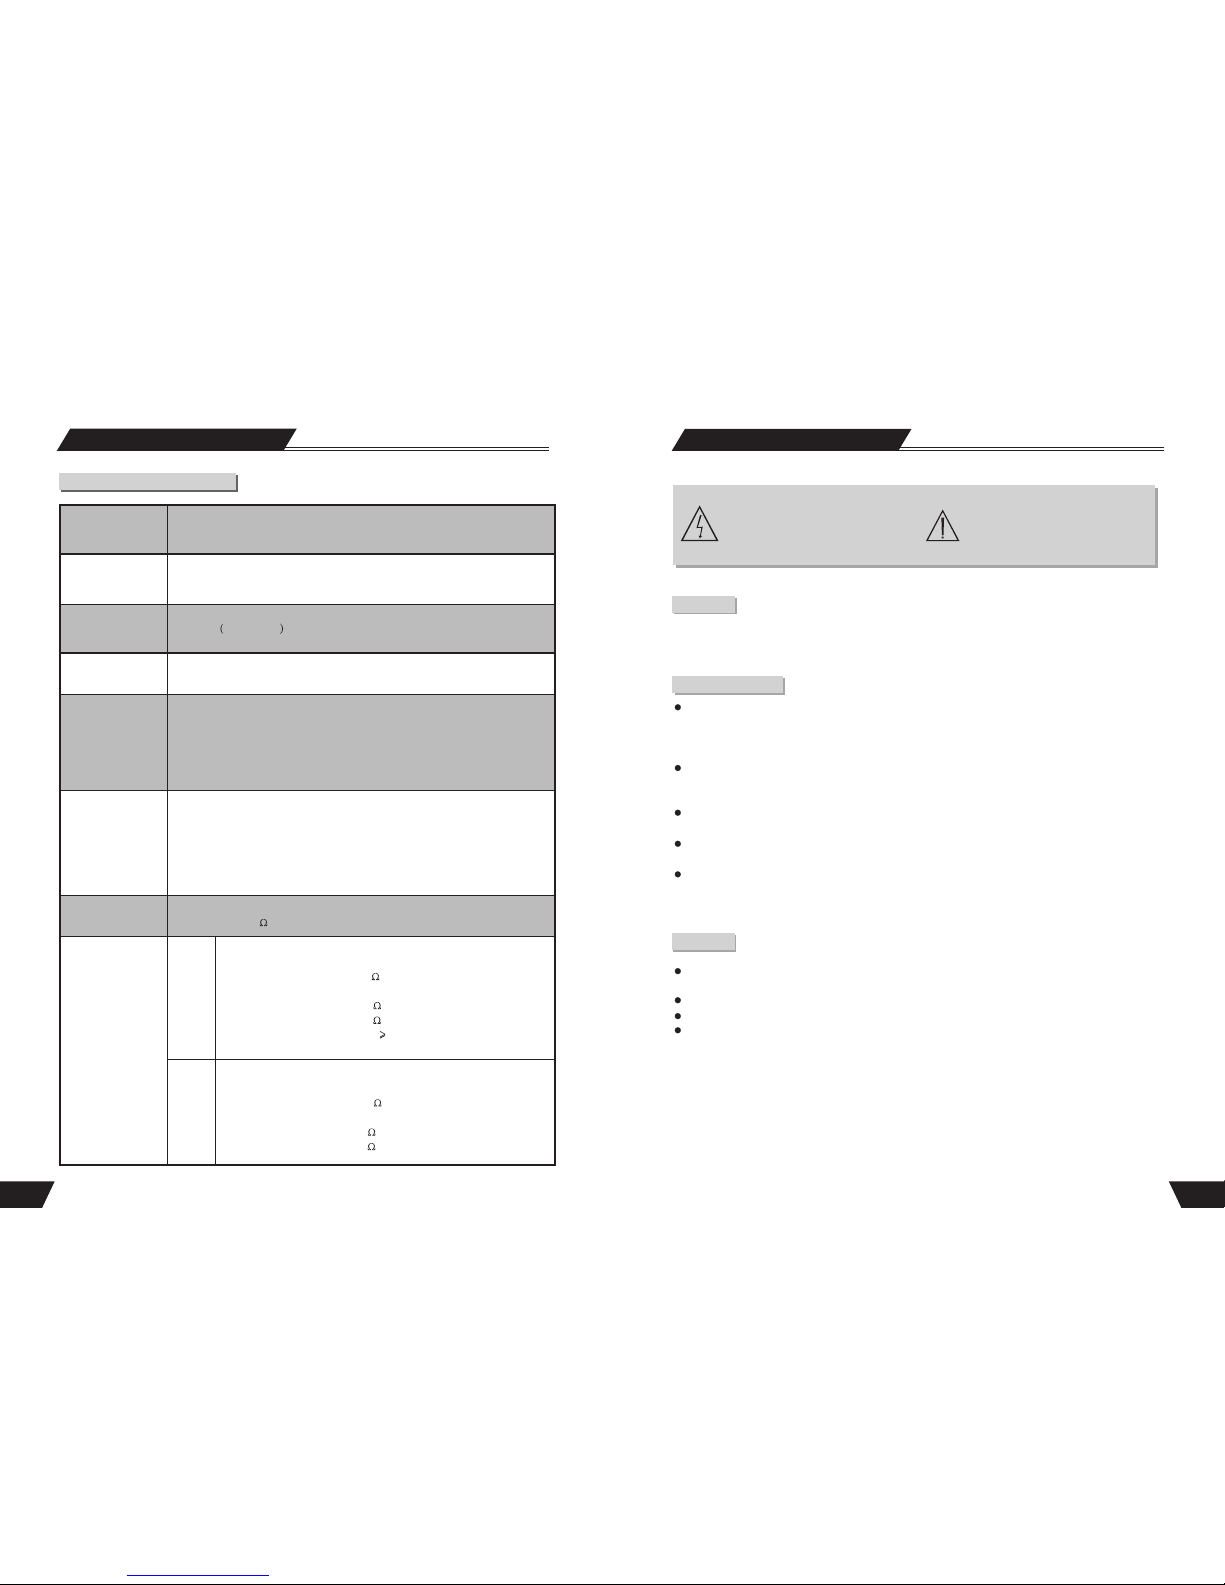
Danger Symbol
The lightning flash with arrowhead symbol
within an equilateral triangle is intended to
alert the user to the presence of dangerous
voltage in the unit
Warning Symbol
The exclamation point within
an equilateral triangle is intended to
alert the user to the presence of
important operation and maintenance
(servicing) instructions in the manual
accompanying the unit.
WARNING
To prevent fire or electric shock, do not expose the unit to rain or moisture. Never attempt to open the cabinet,
dangerous high voltages are presented in the unit. Refer servicing to qualified service personnel when necessary.
Do not put the unit: near strong magnetic field, somewhere exposed to direct sunlight or near heat radiation
equipment (such as a heater), at top of other heat radiation objects, in a place with bad ventilation and much
dirt, somewhere subject to vibration and instability, somewhere exposed to moisture or rain. The unit shall be
installed in a smooth and dry place with good ventilation.
When the unit is moved from a cold place to a warm one, the laser head might get dewed and the unit might
not work normally. In this case, keep the power on for an hour or two (with no disk loaded) before playing
normally.
Clean the surface of the unit with some neutral detergent. Do not use organic solvent such as alcohol or
gasoline. Never polish the unit with sand paper.
If the unit is not to be used for a long time, disconnect the power plug from the wall outlet. Note: Do not pull
the power cord. When disconnect the unit from the wall outlet.
For optimum performance, do not place heavy objects on the unit.
Caution
Maintenance Notice
The unit employs a laser system. To prevent direct exposure to the laser radiation, do not attempt to open the
cabinet. Visible laser may radiate when the cabinet is opened or the interlocks are defeated.
Do not stare into the laser beams.
To ensure the proper use of the unit, read this manual carefully.
Keep this manual properly for future reference. If the unit requires servicing, please contact the seller or our
service center
Technical Specifications
Supported disc
formats
DVD, DVD+R/RW, DVD-R/RW, SVCD, VCD, CD-DA, JPEG
Supported
recordable disc
DVD+R/RW, DVD-R/RW
Recording format
DVD MPEG-II
Recording quality
HQ(Perfect Quality), SP(Standard Play), SP+, EP(Extend Play), LP,
SLP(Standard Long Play) .
Input
Composite Video Input
S-Video Input (Y+C)
DV Input(1394)
RF Input
Analog Audio Input
USB Input
Output
Composite Video Output
S-Video Output(Y+C)
Component Video Output
Analog 5.1-Channel Audio Output
Digital Audio Coaxial Output
Digital Audio Optical Output
Input RF Features
System: PAL SECAM
Impedance: 75 imbalance coaxial cable
Video
Features
Output
Input
Composite Video
System: NTSC/PAL
Video Level: 1.00.2Vp-p 75
S-Video
Y Output Level: 1.0 Vp-p 75
C Output Level: 0.3 Vp-p 75
Video Horizontal resolution: 500 lines
Y S/N 65dB
Composite Video
System: NTSC/PAL
Video Level: 1.00.2Vp-p 75
S-Video
Y Input Level: 1.0 Vp-p 75
C Input Level: 0.3 Vp-p 75
Technical Specifications
52
2
Table of Contents
Terms
Identification of Controls
Front and Rear Panels
Remote Control
Installation and Remote Control Usage
System Connections
Connect to a TV
Connect to 5.1 channel amplifier
Connect to an amplifier with digital decoder
System connection for recording external signals
NAVIGATION Mode
Recording Mode
Introduction
Entering the recording mode and menu description
Manual Record
Recording to DVD or HDD
Recording Quality
One Touch Record (OTR)
DV Controlled Recording
Copy from HDD to Optical disc
Copy from Optical to HDD
PIP (Picture in Picture)
File manager
Timer Recording
Chapter Editing
Introduction
Entering the Chapter Editing mode
Menu description
Operation steps
Selecting the title to be edited
Split title
Chapter Marker
Hide/Unhide the title
Index Picture
Play
Exiting the Chapter Editing
Features of the recorder
5
6
8
9
10
11
12
12
13
14
14
14
15
15
15
16
16
16
17
17
17
18
20
20
20
20
20
21
21
21
21
21
21
Basic Information
Before contacting service personnel, please check possible causes according to the following
instructions.
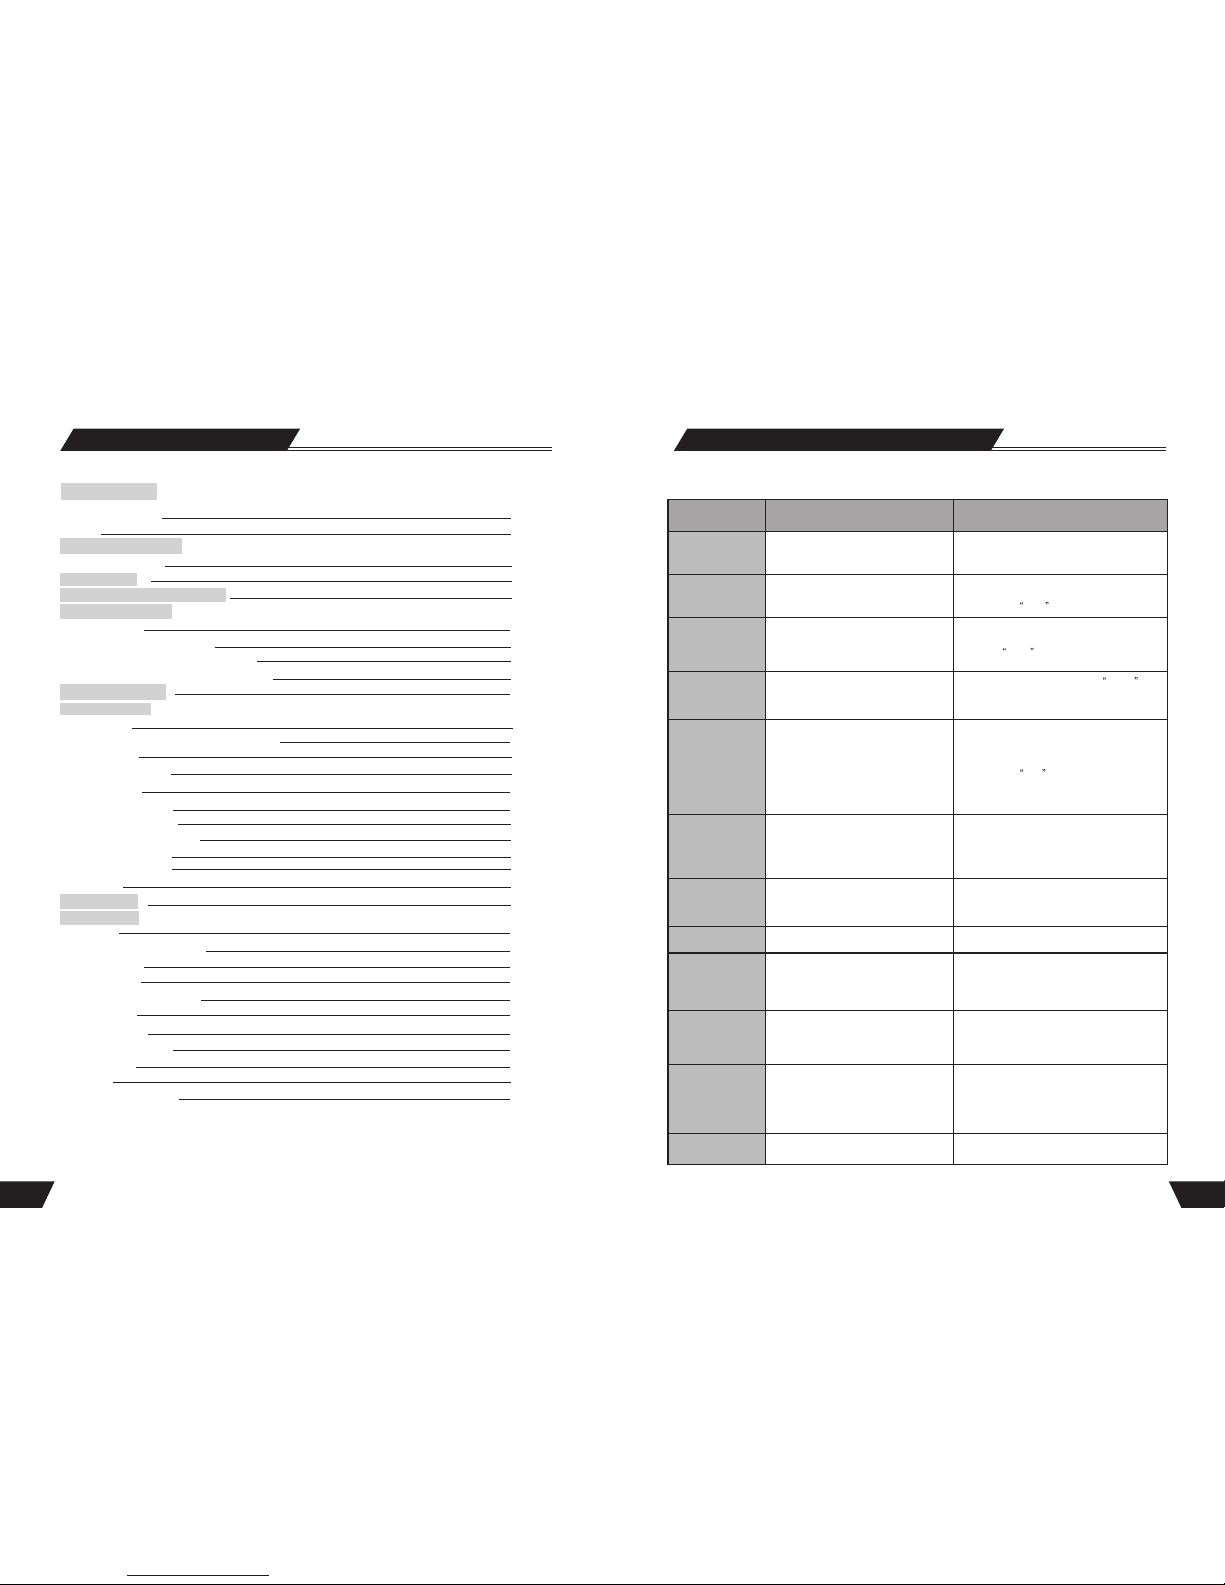
Appendix (Troubleshooting Guide)
Symptom
Possible Cause
Remedy
No Power
1.Power supply disconnected;
2.Bad contact between the power plug
and the receptacle;
3. The power of the receptacle is switched off.
1. Connect to the power supply.
2. Plug again or replace the receptacle with a new one.
3. Switch on the receptacle.
No sound
1.Incorrect signal connection;
2.The disc is deformed or dirty;
3. The system is in the mute status.
1. Connect the signals properly.
2. Clean or fix the disc.
3. Press the Mute button.
No picture
1. Incorrect signal connection;
2. Incorrect TV status.
3. TV system out mode is Progressive,
but your TV system is Interlace mode
1. Connect the signals properly.
2. Adjust the TV/AV status.
3. Press PS/IS to angle to mode.
No color
1. Wrong selection of TV system;
2. Improper color adjustment;
3. Incorrect video output settings
1. Set up the system by pressing the System
button of the remote controller.
2. Readjust the color.
3. Check if the video output settings are correct.
Disc cannot
be played
1. No disc in the drive;
2. Disc placed wrongly;
3. Moisture has condensed in the unit;
4. Not in a playing status;
5. Wrong disk format;
6. Disc is dirty.
1. Insert a disc;
2. Put the disc on the disc tray properly
with the label side up.
3. Leave the unit on for about an hour
(without disc) before using it again.
4. Press the Play button to switch to
playing status.
5. Replace it with a supported disc.
6. Clean the disc with a soft cloth from the
centre to the edge.
Remote controller
malfunction
1. The remote controller is not directed at the
sensor;
2. The receiving distance is more than 8 meters;
3. Low voltage of the RC batteries;
4. There is an obstacle between the unit and RC.
1. Direct the remote controller at the
sensor.
2. Reduce the receiving distance.
3. Replace all the batteries.
4. Remove the obstacle.
Sudden malfunction
1. Bad disc quality;
2. Press other buttons by mistake;
3. Static from the outside.
1. Wait for 5~10 seconds and the playing
will be restored.
2. Operate again.
3. Shut off the unit for 1-2 minutes and
open it again.
Picture dividing
1. The selected system is incompatible
with the disc;
1. Set up the correct system.
External signals
cannot be recorded
1. Incorrect system connection;
2. No disc or non-recordable disc;
3. The disc has been finished;
4. There is no free space in the disc.
1. Connect properly.
2. Insert a recordable disc.
3. Change a disc.
4. Change a disc.
No monitoring signal
1. Input source not prepared;
2. Wrong video output system;
3. The actual input source is not
consistent with the selected one.
1. Prepare the input source.
2. Switch the video output system.
3. Select a proper input source.
Timer recording
cannot be done
1.The disc does not meet the requirement;
2. Wrong time settings (System Clock or
Recording Time);
3. The input source doesn't work properly
during the recording time;
4. System power failure.
1. Replace it with a new DVD+R or
DVD+RW disc.
2. Set up the time again.
3. Ensure the input source work properly
during the recording time.
4. Set the system to standby status.
Recording
aborted halfway
1. There is no free space in the disc;
2. Bad disc quality.
1. Replace it with a blank disc.
2. Replace it with a high quality disc.
51
51
3
HDD EDITING
HDD Editing
Delete
Split
Segment
Change Index Picture
Rename
Lock
Protect
Disc Operation
Introduction
Entering the Disc Operation mode
Menu Description
Operation Steps
Erase Optical Disc
Lock Disc
Rename Disc
Record a New Title
Overwrite Disc
Finalize Disc
EXIT
Title Editing
Introduction
Entering the Title Editing Mode
Play Mode
Entering the Play Mode
Menu Description
Operation
Direct Play
Entering the Title before Playing
Entering Menu before Playing
End Play
Play Mode Control
Normal Play
Repeat Play
Program Play
Random Play
22
22
22
22
23
23
24
24
25
25
25
25
25
25
26
26
26
26
26
27
27
27
27
28
28
29
29
29
30
30
30
31
31
Table of Contents
1
SETUP MENU -TimeShift
Tuner(ON)
Refresh
Preserve
Automatica
Go!
OK
1
SETUP MENU -TimeShift
Tuner(ON)
Tuner(OFF)
F-CVBS(ON)
F-CVBS(OFF)
Automatica
Go!
OK
1
SETUP MENU -TimeShift
Tuner(ON)
Refresh
Show
Automatica
Manually
OK
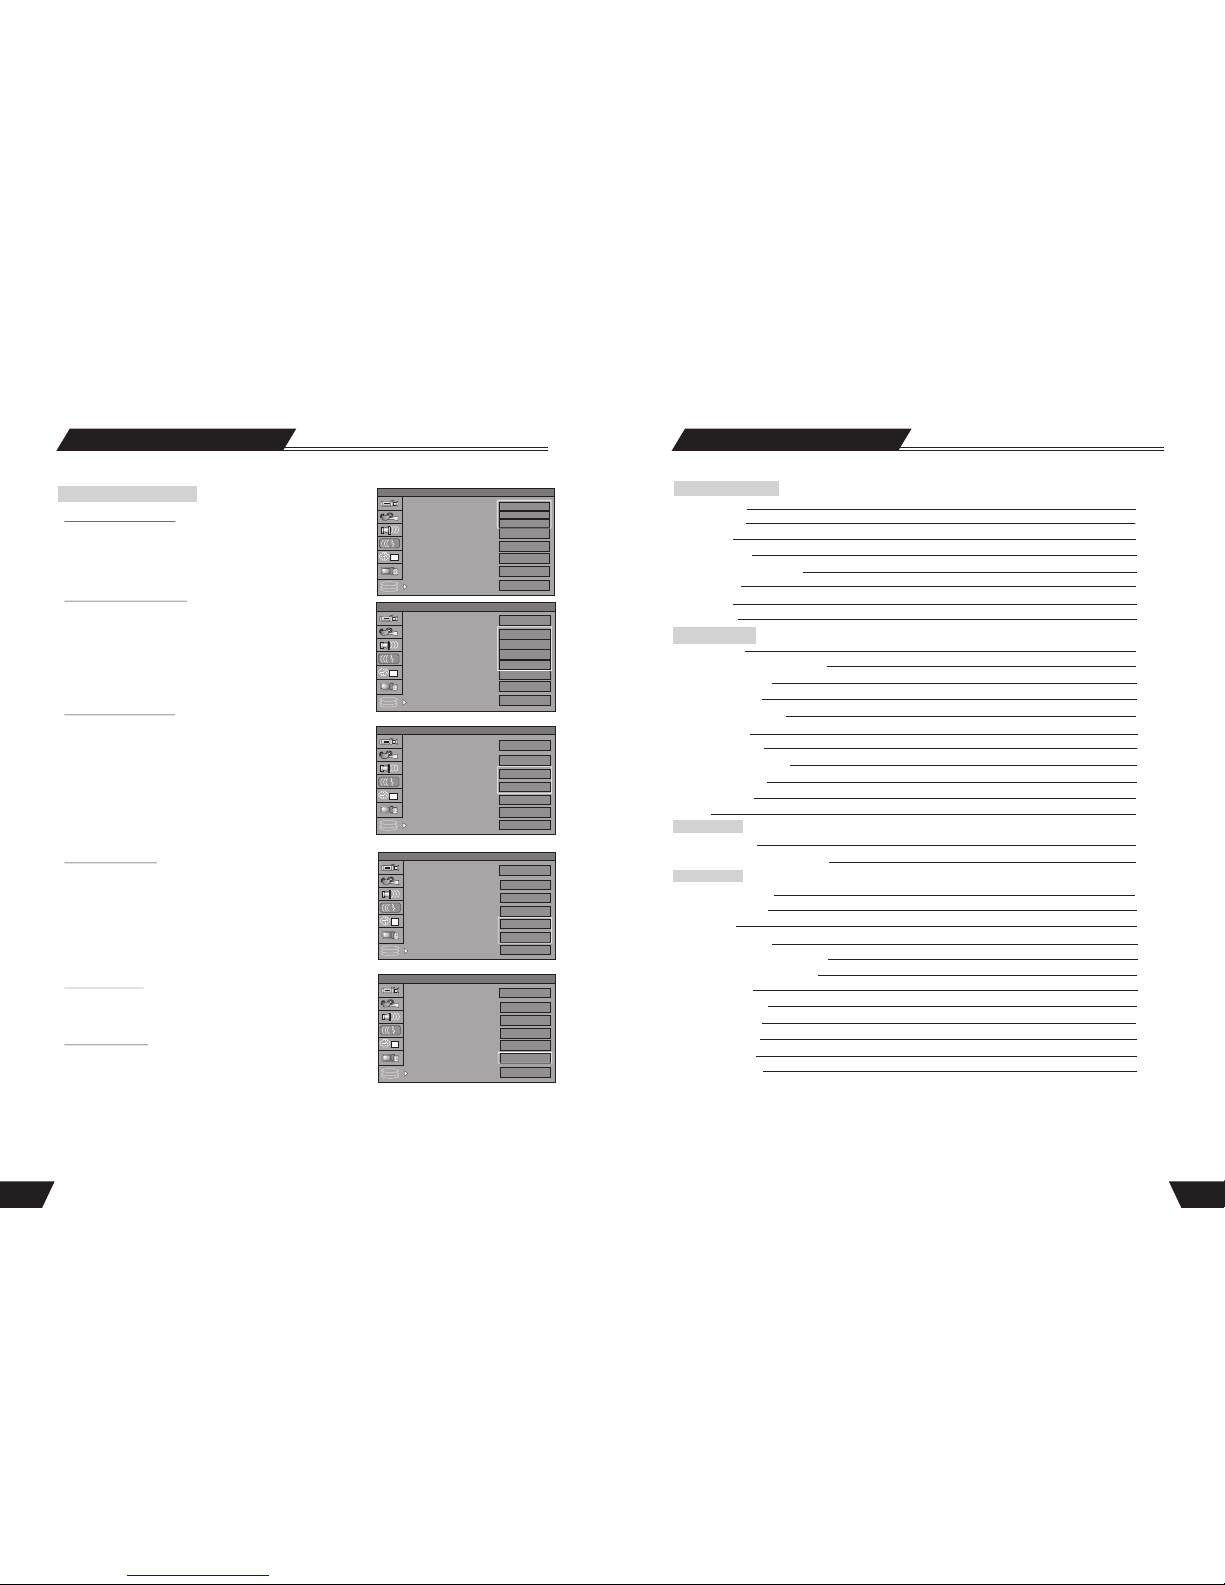
Basic Information
SETUP MENU -Time shift
Timeshift buffer length
In this “ Timeshift buffer length” option, you can select 60 minutes,
180 minutes and 360 minutes difference option.
Timeshift default source:
Tuner(ON): When the system is turn on, it will enter the tuner
and timeshift on state automatically.
FCVBS(OFF): It will enter FCVBS and timeshift OFF state
automatically.
Timeshift buffer mode:
Use the arrow button to highlight the Time Shift butter mode
row, press select button to select Refresh or Preserve.
Refresh (or flush) mode refreshes the buffer upon changing the
TV channel.
Preserve maintains the content of the buffer upon changing
the TV channel.
NOTE: Refer to Time Shift introduction page for detailed
explanation.
Space Management
Automatic: When Space Management is 'Automatic' and the
HDD is full, the system should overwrite un-protected titles
in FIFO scheme (the exception is when the title is selected to
be dubbed - in which case, the title shall be kept until dubbing
is over)
When Space Management is 'Manual' and the HDD is full.
System will show the Popup message: The hard disk drive is full.
Please erase some programs to perform further recording.
Empty hard disk
Erase all programs on HDD. A message will be shown: All
video programs on the hard disk drive will be lost, the system
must be restarted continue? GO, No (default)
Erase optical disc
Erase all programs on optical disc. A message will be shown:
All video programs on the optical disc will be lost, continue?
OK, No (default)
50
Timeshift buffer Length
Timeshift default source
Timeshift buffer mode:
Hard disk Info
Space Management
Empty hard disk
Erase optical disc
180 minutes
Timeshift buffer Length
Timeshift default source
Timeshift buffer mode:
Hard disk Info
Space Management
Empty hard disk
Erase optical disc
180 minutes
Timeshift buffer Length
Timeshift default source
Timeshift buffer mode:
Hard disk Info
Space Management
Empty hard disk
Erase optical disc
180 minutes
1
SETUP MENU -TimeShift
Tuner(ON)
Refresh
Show
Automatica
GO!
OK
Timeshift buffer Length
Timeshift default source
Timeshift buffer mode:
Hard disk Info
Space Management
Empty hard disk
Erase optical disc
180 minutes
1
SETUP MENU -TimeShift
Refresh
Show
Automatica
GO!
OK
Timeshift buffer Length
Timeshift default source
Timeshift buffer mode:
Hard disk Info
Space Management
Empty hard disk
Erase optical disc
180 minutes
60 minutes
360 minutes

4
Table of Contents
Play Process Control
Menu Operation
Forward Play
Back Play
Pause/Step Play
Volume Control
Selection Play Mode
Selection Play
Usage of the GO TO Button
Audio Selection
Audio Channel Selection
Subtitle Selection
Multi-angle Switch
PBC ON/OFF(Available only for VCD 2.0 or above versions)
Picture Zoom Function
Play a USB DISC
HDD Play mode
HDD Playback
Time shifting introduction
System Setup
Operation Interface and General Steps
Auto Chapter Marker
Record Quality
APS (Auto program scan)
Modify Channel
Program Table
Country Selection
SETUP MENU-VIDEO
SETUP MENU-AUDIO
SETUP MENU-LANGUAGE
SETUP MENU-DATE/TIME
SETUP MENU-PREFERENCES
SETUP MENU-Time shift
Appendix(Troubleshooting Guide)
Technical Specifications
32
32
32
32
33
33
33
34
35
35
35
36
36
36
36
37
37
38
41
41
42
42
42
42
44
44
45
46
47
48
50
51
52
49
System Setup
HDD To Disk Copy Option
In setup menu: with remote control arrow button, highlight the” HDD to Disk Copy Option” option, you may select
fit to Disk. High speed and Hightest speed mode.
Fit to Disk: If the select title do not fit on the DVD with the current bit-rate, the system should calculate if a lower
bit rate will allow the recording to ‘fit’ on the available disk space. If so, there shall be a message:“The system has
to process the video to enable recording on the current optical disk. During the copy operation, no other operation is
allowed “Copying in progress....XX% has been completed. Press Stop to Abort”.
High speed: Copy from the HDD program content to optical disc, if the titles fit then copying is possible, if not put
a message: “ Disk is full” . Combination fits on the disk, copying is possible. No further bit rate change is needed.
Highest speed: During ‘highest speed’ dubbing, if there is a timer recording, the following message should appear 3
minutes prior to the scheduled timer recording. “ A previously scheduled recording is about to start. This may reduce
the dubbing speed. Press OK to accept the scheduled recording, press Cancel to ignore the scheduled recording and
continue with highest speed dubbing”. Default value is OK and should be assumed if there is no response from the
user up to 1 minute before the timer recording is due to start. If Ok is pressed or assumed, the system should continue
dubbing and graciously reduce the speed to the maximum possible while timer recording is underway.
Change Password
1. To modify a password, use arrow buttons to select the Change
password display chart. Press the SELECT button and a dialog
box will pop up as shown in the right chart.
2. Use arrow buttons to select the Enter password here editor
box, enter the password with the number buttons.
3. Use arrow buttons to select the Input new password editor box, input the new password with the number buttons.
Then input the new password again with the number buttons in the Input new again edit box.
4. Use the arrow buttons to select the OK button.
After the setting of authorization level has been done, each time when the unit play a disc of such level, a password
is required. If you forget the password, you can enter the super password.
Reset to Factory Default
1. In the General Settings menu, use the or button to select the Reset to Factory Default item and press the
SELECT button. The OSD will display as follows.
2. Use the or button to select OK .
3. Press the SELECT button to restore all default settings.
When your unit doesn't work properly, it is possibly due to
some wrong settings. Please try the Reset to Factory Default
function to see if the unit can restore to its normal working status.
Screen Saver
The Screen Saver function means that when the unit is idle (or without monitored output) for some time, some
interesting pictures will appear automatically on the screen as a screen saver.
1. In the General Settings menu, use the or button to move the cursor and select the Screen Saver item.
2. Press the SELECT button and the Screen Saver item will drop down a list as shown in the chart.
3. Use the or button to move the cursor, and select ON or OFF .
4. Press the SELECT button to activate or inactivate the Screen Saver function. When the screen saver appears,
press any button to exit .
5. Press the RETURN button to return to the upper level menu and set up other items.
Reset to Factory Defaults
System will reset all setup items to the
defaull valoes. OK to confirm, Cancel to
exit.
OK
Cancel
New Password
Enter password here.
Input new password.
Input new again.
OK
Cancel

Basic Information
The machine is capable of processing and recording various video signals into high quality DVD disks and HDD,
such as the input signals of TV, ordinary disk player and DV.
In addition, the machine can be used as a DVD player of excellent performance. It has all the functions of an
ordinary DVD player. The two-in-one function of the machine will increase your life quality and enhance your
enjoyment of entertainment.
Permit multiple-signal input Supply multiple-signal output
Features of the recorder
1 Composite Video input
2 S-Video input
3 TV TUNER input
4 DV input
5 Analog audio input
6.USB input
1 Composite Video output
2 S-video output
3 Component Video output
4 5.1 CH output
5 Optical / Coaxial output
The machine provides users with 6 recording qualities. And the resolution and recording time
varies according to different recording qualities. You can balance between the high resolution against
long recording time.
Multiple DVD recording quality
Multiple recording modes
The machine permits 3 modes of recording such as normal manual recording, timer recording and OTR,
so as to facilitate your use.
Simple menu operation
The machine employs interface-friendly menu operation. You do not have to memorize the complicated
functional keys and can finish most of operations using only several arrow keys and the select key.
Stand-by Function
Remote control stand-by function will make you use the machine more easily and freely. And it can help
you finish timer recording in a power conserving manner.
Suitable for the following disks:
It can play DVD, DVD+R/RW, VCD, SVCD, CD-DA, Mixed CD-DA, MPEG 4(3.xx,4.xx,5.02,5.05),
JPEG and so on multi format discs. It can record DVD+R/RW and DVD-R/RW disks.
5
Date(dd/mm/yy)
·Press the SETUP button on the remote control to display
the SYSTEM SET-UP MENU.
·Use the CURSOR buttons of the remote control to select
the Date(dd/mm/yy) and press
the SELECT button to confirm.
·Enter the correct date in mm/dd/yy format (Month/Day/Year) using the 0...9 keys.
Time(hh/mm)
·Use the CURSOR button of the remote control to select TIME and press SELECT to confirm.
Enter the correct time in hh:mm:ss format (Hour: Minute: Seconds) using the 0...9 keys..
·After the date and time have been entered, press the SETUP button on the remote control to exit.
SETUP MENU - PREFERENCES
Parental Level
Setting authorization level and password of the unit renders some discs which contain restricted
content playable only after the input of password. This function enables you to impose restrictions
on the playing of some discs which are not suitable for children.
System Setup
1. In the Play Settings menu, use the or button to move
the cursor, select the Parental Level item, and press the
SELECT button. Then the OSD displays:
2. Enter the password, and press the SELECT button. The
TV screen will display the dialog box as shown in the right chart.
The super password is 3308.
3. Select the Parental Level list box, and press the Factory
button to drop down a menu as shown in the right chart.
4. Use the or button to select an authorization level (Off, 8: Adult...Safe) and press the SELECT button to
confirm.
5. If the original password is not to be modified, use arrow buttons to select the OK button and press the
SELECT button.
Preview Type
In the“Preview Type” option, with the remote control you may select the Static and Dynamic option. In set up menu
select the “Static” option, the program title on the HDD title list is repose, select the “Dynamic” option the picture
is sport.
1
SETUP MENU -PREFERENCES
NO PARENTAL
1.kid Safe
2.G
3.PG
ON
48
Parental Level
Change Password
Reset to Factory Default
Screen saver
Preview Type Static
HDD to Disk Copy Option Fit to Disk
SETUP MENU-DATE/TIME
Date(dd/mm/yy)
Time(hh/mm)
1
SETUP MENU -DATE/TIME
08 07 2006
23 29

6
Basic Information
Terms
HDD/DVD disk
HDD/DVD disk is a highly compact device for storing. The high quality audio and video information is
stored in it after being compiled in MPEG-II format. There are 4 types of DVD disks such as bosseyed single
-layer DVD-5 with the capacity of 4.7 GB, bosseyed bi-layer DVD-9 with the capacity of 8.5GB, double-faced
singled-layer DVD-10 with the capacity of 9.46GB and double-faced bi-layer DVD-18with the capacity of 17GB.
DVD+RW disk
DVD+RW disk is also called DVD + Rewritable disk. It can be recorded for about 1000 times.
DVD+R disk
DVD+R disk is also called Write-one DVD disk. It can be recorded for only one time. The recorded disk can be
played on other DVD player after being closed and then it can not be recorded again.
Erasing the disk
Erasing the disk means removing information stored on the optical disc or hard disc.
Compatibility (Finalize)
Compatibility (Finalize) means to process the information stored in the disk so as to make it compatible with
other DVD players. Without this process, the disk can only be played on this machine. This function is relevant
to DVD+R disks only.
Preparation for recording
Formal preparation for recording includes examining the eligibility of the disk and the recording format, doing
necessary optical adaptation and prewriting the content area.
Recording quality
For DVD±R/RW disk with the capacity of 4.7 GB, there are 6 different recording quality in accordance with the
compressing program.
SLP: Ordinary resolution, a bosseyed recordable DVD disk can record 6-hour programs
LP: Ordinary resolution, a bosseyed recordable DVD disk can record 4-hour programs
EP: Good resolution, a bosseyed recordable DVD disk can record 3-hour programs
SP+: Ordinary resolution, a bosseyed recordable DVD disk can record 2.5-hour programs
SP: Better resolution, a bosseyed recordable DVD disk can record 2-hour programs
HQ: Best resolution, a bosseyed recordable DVD disk can record 1-hour programs
Title
The images and music in the DVD disk are divided into several parts and the biggest unit for each part is title.
For ordinary image of video software, it is film. And for ordinary music of audio software, it is music. Each
title corresponds with a serial number so that it can be easily searched.
47
System Setup
Note
Disc Menu Language
1. In the Languag e Settings men u, use the or button to select the Disc Menu Language item, and
press the SELECT button to drop down a menu, as shown in the following chart.
2. Use the or button to select the language you want
and press the SELECT button.
* The system will give priority to this setting as the
DVD audio output language. If the DVD played does
not support the selected language, the setting will be
invalid.
You can change the audio language at any time during playing.
See Play Mode for details.
3. Press the RETURN button to return to the upper level menu and set up other items.
For the DVD language settings in this section, some discs might not contain the language you set. In this case.
your settings will be invalid. The language played will be the one that is provided by the disc.
Some discs may contain a language selection menu, your selection in this menu rather than the corresponding
settings of the unit will be effective.
System Language
Audio Language
Sublille Language
Disc Menu Language
1
SETUP MENU -LANGUAGE
English (GB)
English
English
English
French
German
Italian
7
Chapter
It refers to the subtitle of the title of each division of the DVD image or music. Normally one title contains
several chapters. And each chapter has its own mark number so that it can be searched easily.
Progressive and Interlace
Interlace means a frame picture be scanned to two field, first scan odd field, then scan even field, the Images
of resolution is ordinary. Progressive means a frame picture be scanned at one field, the images of resolution
is higher, The machine provides both Progressive and Interlace modes.
Region code
In order to protect intellectual property, the relevant organization has devided the world into 6 regions. And each
region can only use DVD players and DVD disks with certain region code. The illustration on the right
introduces the symbols of the six regions. The DVD players of one region cannot play the DVD disks of
another one. The six regions are:
1 Canada, USA and its possessions.
2 Japan, Europe, South Africa, Middle East ( including Egypt)
3 Southeast Asia, East Asia (including Hong Kong)
4 Australia, New Zealand, Central America, Mexico, South America, Caribbean Sea
5 Former USSR region, India, Africa (including South Korea and Mongolia)
6 Mainland China
Multiple Subtitle function
Some DVDs record the picture description in multiple languages. Press the SUBTITLE key while
watching, and record of subtitle in different languages will appear.
Multiple languages function
Some DVDs record sound in several different languages. And the different languages can be released
according to the corresponding function on the menu.
Multiple angles function
Some DVDs record different images of one view taken from different angles.
Track
Music or image in CD-DA or VCD is divided into several areas. Each area is a track. Each track has its own
mark number so that it can be searched easily.
Basic Information
Terms(continued)
1 2
3 4 5 6
System Setup
System Language
Audio Language
Subtitle Language
Disc Menu Language
1
SETUP MENU -LANGUAGE
English
English
English
English
SETUP MENU -LANGUAGE
1. To satisfy the needs of consumers in different regions, the unit provides various interface languages.
2. Enter the system setup mode.
In the System Setup control bar menu, use the or button to move the cursor, select the Language
item, and press the SELECT button to enter the Language Settings menu, which contains four items,
as shown in the chart.
System Language
Audio Language
1. In the Language Settings menu, use the or button to
select the System Language item, and press the
SELECT button to drop down a menu.
2. Use the or button to select the language you want and
press the SELECT button to confirm. The interface
language will change immediately according to the settings.
1. In the Language Settings menu, use the or button
to select the Audio Language item, and press the
SELECT button to drop down a menu.
2. Use the or button to select the language you want
and press the Select button.
* If you play a DVD disc supporting the selected language,
the system will adopt that language as the DVD menu
language.
* If the disc doesn't support the selected language, the system will adopt the language provided by the disc.
Some DVD discs may contain various subtitle languages. This setting is to determine the default DVD subtitle
language.
1. In the Language Settings menu, use the or button to select the Subtitle Language item, and press the
SELECT button to drop down a menu.
2. Use the or button to select the language you want and press the SELECT button.
* Off means the subtitle output is off.
* The system will give priority to this setting as the DVD subtitle language. If the DVD played does not support
the selected language, the setting shall be invalid.
* You can change the subtitle language at any time during playing. See Play Mode for details.
Subtitle Language
System Language
Audio Language
Subtitle Language
Disc Menu Language
1
SETUP MENU -LANGUAGE
English
English
French
German
Italian
LPCM Output
The unit can set the LPCM96K and LPCM48K difference Audio Sampling frequency.
Dynamic Range
The unit can set the full 3/ 4 1/ 2 1/ 4 off value, You can select different value to compress Audio
output range. You can feel the difference of Audio output effect under different values.
46
 Loading...