

Visionite VCV-F850H, VCV-F850N Owner's Manual
Unpacking
COLOR MINI VANDAL CAMERA
OWNER’S MANUAL
Specification
VCV-F850H/N
Please read these instructions carefullybefore operating this unit, and retain this manual for future reference.
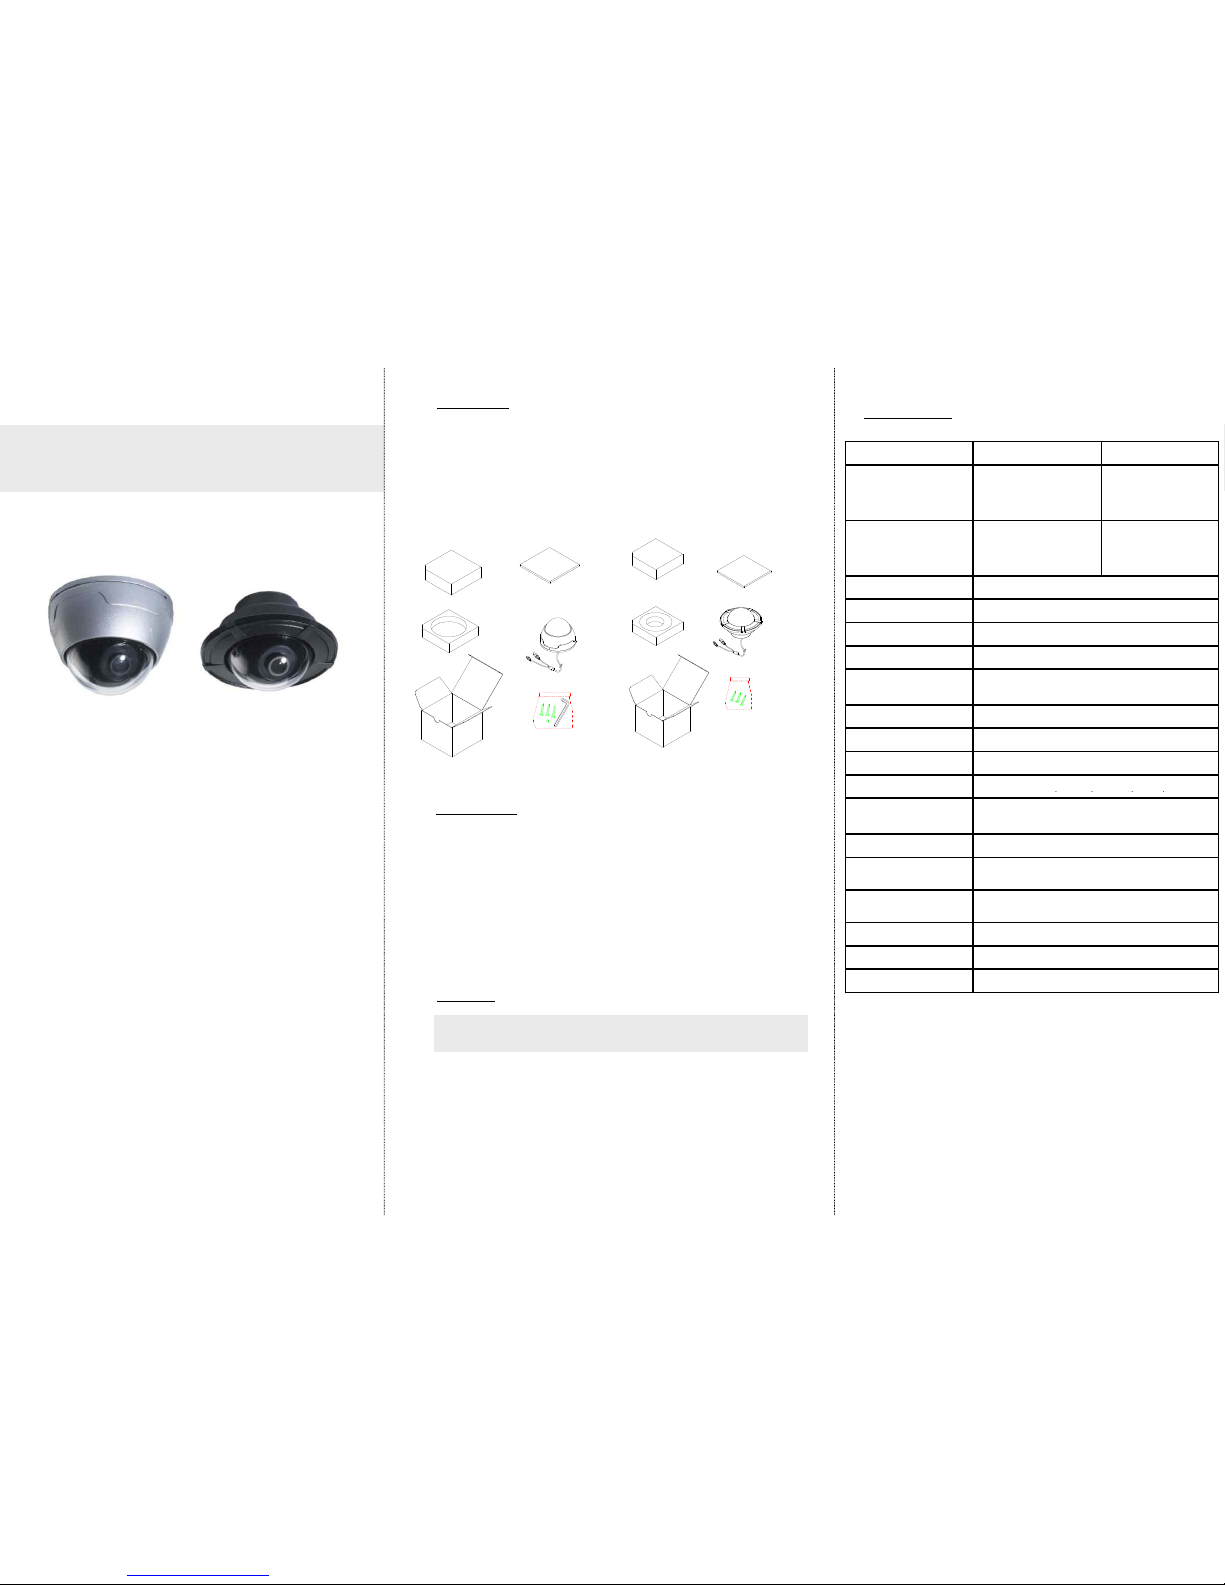
Below items should be included with the VCV- series of camera.
Please check the items before use.
1) VCV-Series of camera
2) Three of installation screws
3) Connecting cable (Video and Power)
4) Owner’s Manual
< Unpacking >
Surface Mount
Flush Mount
Surface mount
Flush mount
MANUAL
Model
VCV-F850H
VCV-F850N
Total Pixels Number
NTSC:811(H) x 508(V)
PAL:795(H) x 596(V)
NTSC:537(H) x 505(V)
PAL:537(H) x 597(V)
Effective Pixels Number
NTSC:768(H) x 494(V)
PAL:752(H) x 582(V)
NTSC:510(H) x 492(V)
PAL:500(H) x 582(V)
Pick-up Device
1/3" 960H Super HAD CCD ll (SONY)
Lens Mount
Fixed Iris
Scanning System
2:1 Interlace
Sync. System
Internal
Scanning Frequency
NTSC:59.94Hz(VD)
PAL:50Hz(VD)
IP Ration
IP66(Waterproof)
S/N Ratio
More than 48dB (AGC Off)
Video Output
1.0 Vpp composite(75Ω)
Min. Illumination
0.1Lux(Std-Res) / 0.2Lux(Hi-Res)
Features
☞ 1/3 inch Sony Super HAD CCD
☞ 410K pixels, 550 TV lines, 0.2lux low light sensitivity
☞ Vandal resistance with polycarbonate dome cover and aluminum body
☞ 12Vdc power voltage
☞ Easy and quick installation
VCV camera series are mini-sized vandal dome cameras
adopting Sony 1/3” CCD image sensor.
• Do not install the camera in extreme temperature conditions.
Do use the camera under conditions where temperatures are within
-10℃~+ 50℃. Especially be careful for ventilation under high temperature.
• Do not drop the camera or subject them to physical shocks.
It can cause malfunctions to occur.
• Do not install the camera under unstable lighting conditions.
Severe lighting change or flicker can cause the camera to work improperl y.
• Do not disassemble the camera.
There are no user-serviceable parts inside it.
• Do not expose the camera to rain or spill beverage on it
If it gets, wipe it dry immediately. Liquids can contain minerals that corrode
the electric parts.
Precautions
Min. Illumination
0.1Lux(Std-Res) / 0.2Lux(Hi-Res)
Shutter Speed
NTSC:1/60 ~ 1/100,000sec
PAL:1/50 ~ 1/100,000sec
Power Consumption
DC12V, Max. 100mA
Operating Temperature
-10℃ ~ 50℃ (Humidity : 0%RH ~ 80%RH)
Storage Temperature
-20℃ ~ 60℃ (Humidity : 0%RH ~ 85%RH)
Humidity
Less than 80%
Dimension(mm)
Window (Ø57), Ø80 x 60.5
Option
Digital Day & Night, Audio
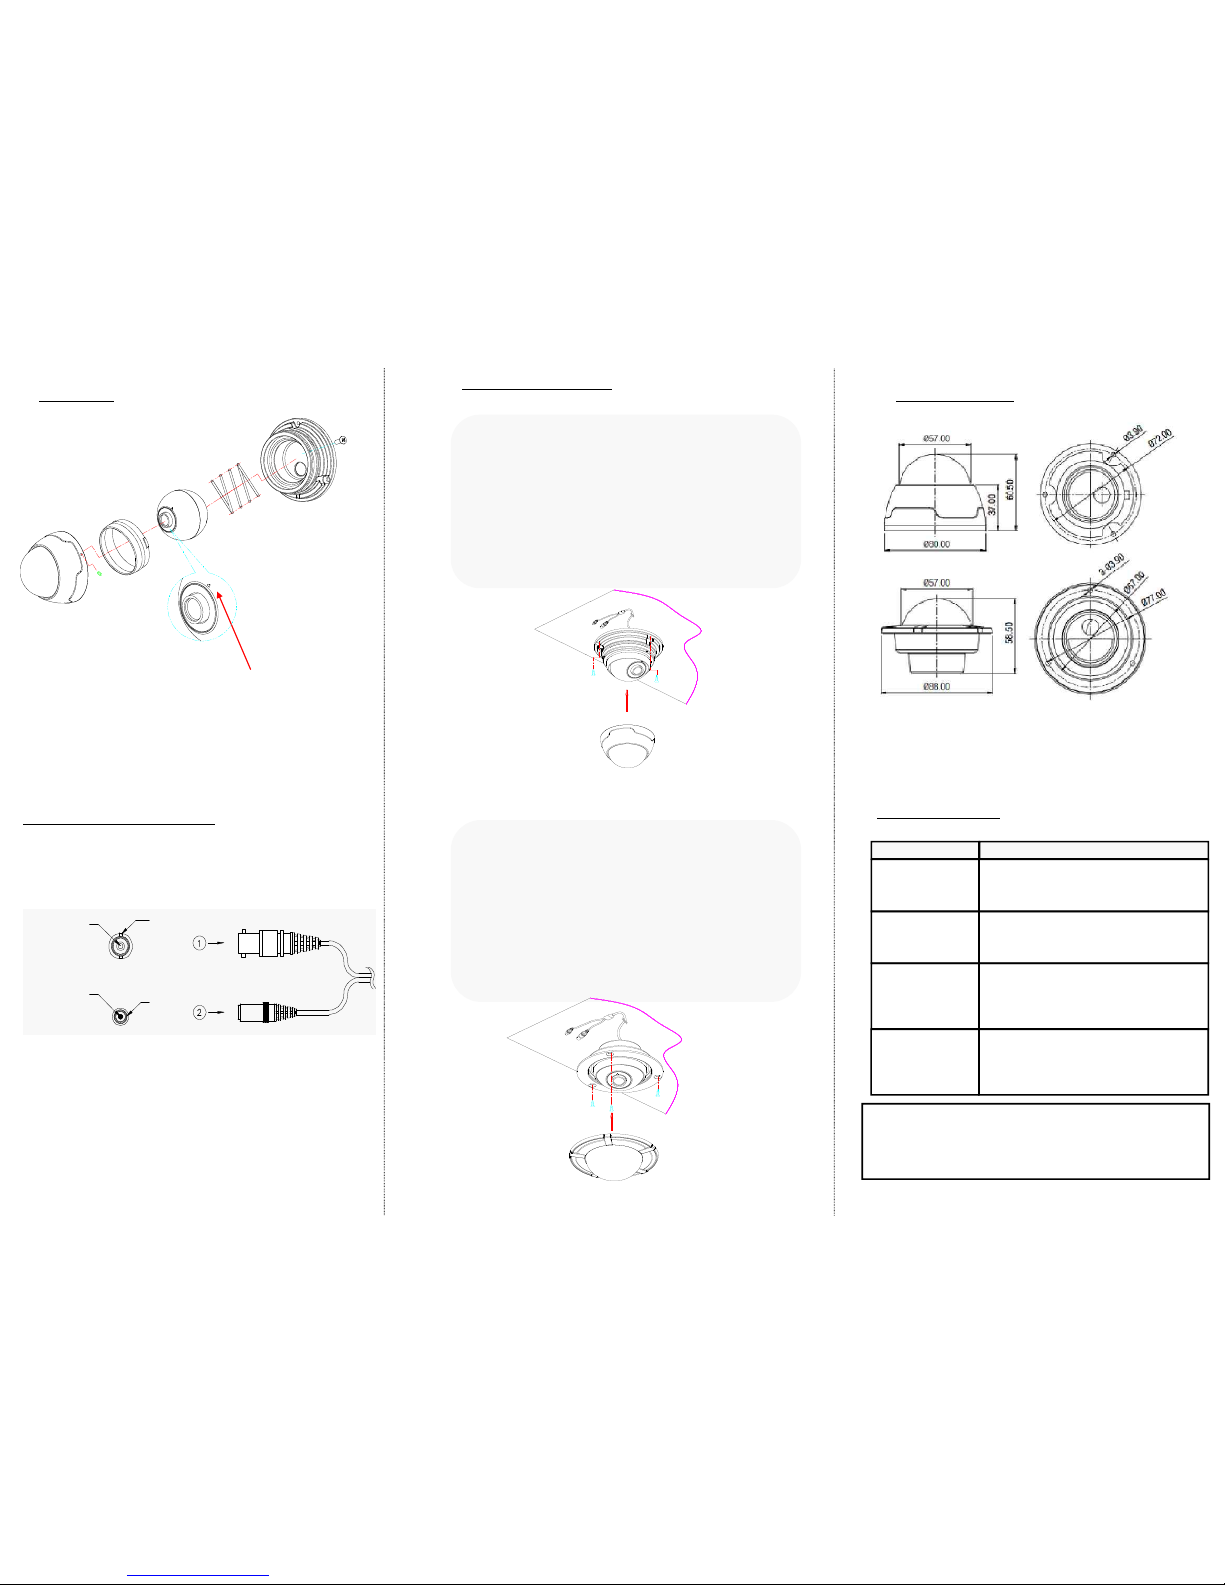
Installation Of Camera
Dimensions (mm)
Design and specifications are subject to change without notice.
Installation
Make sure that this arrow
indicates camera image
direction.
③ Put the DOME COVER over the BASE HOUSING and turn it
clockwise by hand.
② Adjust desired scene by turning and moving the CAMERA
BRACKET.
① Fix the BASE HOUSING to the desired place with screws
supplied.
Surface mount
④ To fix DOME COVER tight, use SET SCREW.
DECORATION RING
STOPPER RING
CAMERA BKT
BASE HOUSING
SCREW
DOME COVER
SET SCREW
Power and Video connection
Video Out
GND
Power(+)
GND
- Check camera and monitor power.
- Check the power polarity.
- Check the video cable connection.
No video on the
monitor screen.
What to do?Trouble
Trouble shootings
- It happens when the camera is exposed
between too strong and too weak light.
- It isn’t a faulty problem and please
change the camera position.
Color rolling
- Check if the lens is stained. If dirty, clean
the lens with soft and clean cloth.
- The image is dimmer at night than
daytime. If focus is not right, adjust it at
daytime.
The image on the
screen is dimmer.
Black and thick
bars roll and too
noisy on the screen.
-Check the power adaptor capacity.
If the capacity is less than 300mA,
please change it to over 300mA.
-If there are too noise, check video coaxial
cable.
The serial number of this product may be found on the top of the unit. You should note the
serial number of this unit in the space provided and retain this book as a permanent record of
your purchase to aid identification in the event of theft.
Model No. _____________________________________
Serial No. ___________________________________ ___
③ Adjust desired scene by turning and moving the CAMERA
BRACKET.
④ Put the DOME COVER over the BASE HOUSING and turn it
clockwise by hand.
② Place the BASE HOUSING on the hole and fix it with screws
supplied.
Flush mount
① Use “Ceiling processing sticker” on the desired place to install
camera and make a hole on that place.
 Loading...