

Page 1
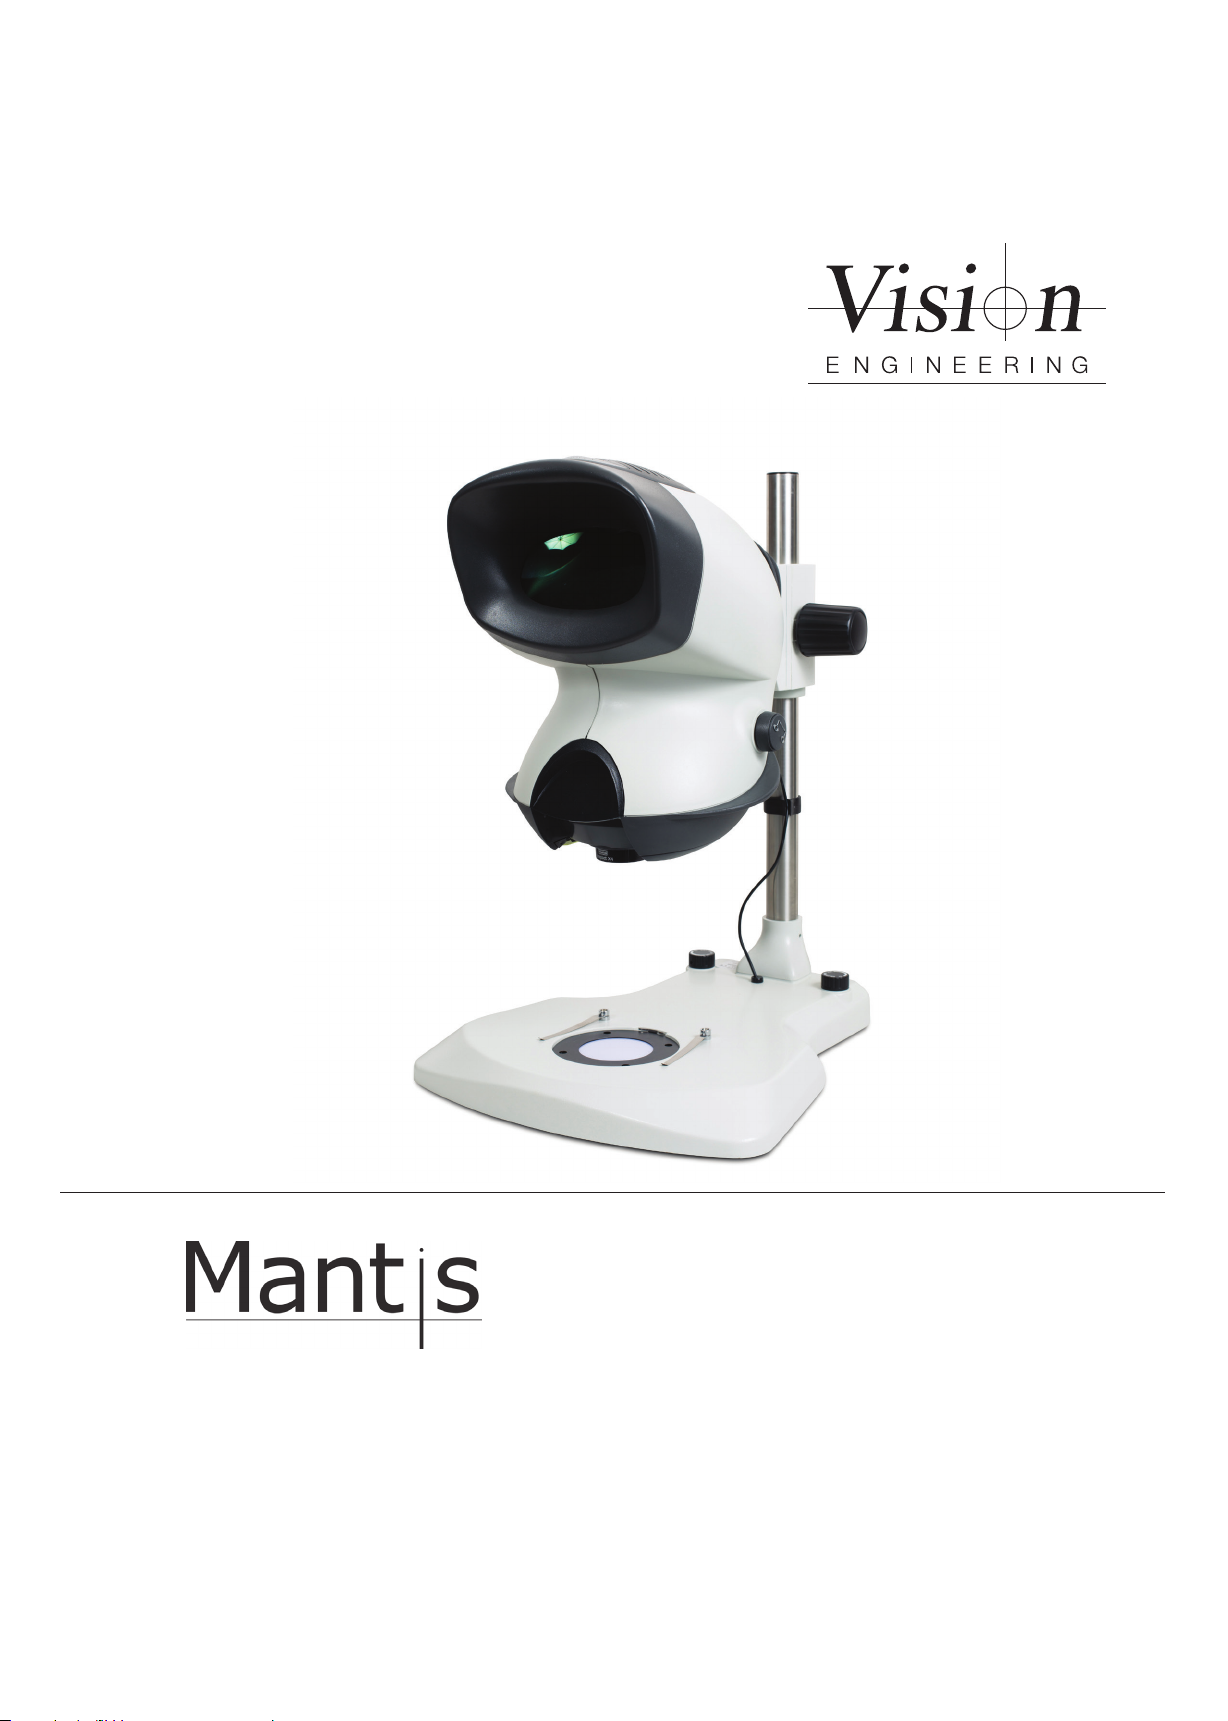
User Guide
Compact & Elite with low prole
Bench Stand
Page 2
MANTIS COMPACT
3
1
2
4
6
5
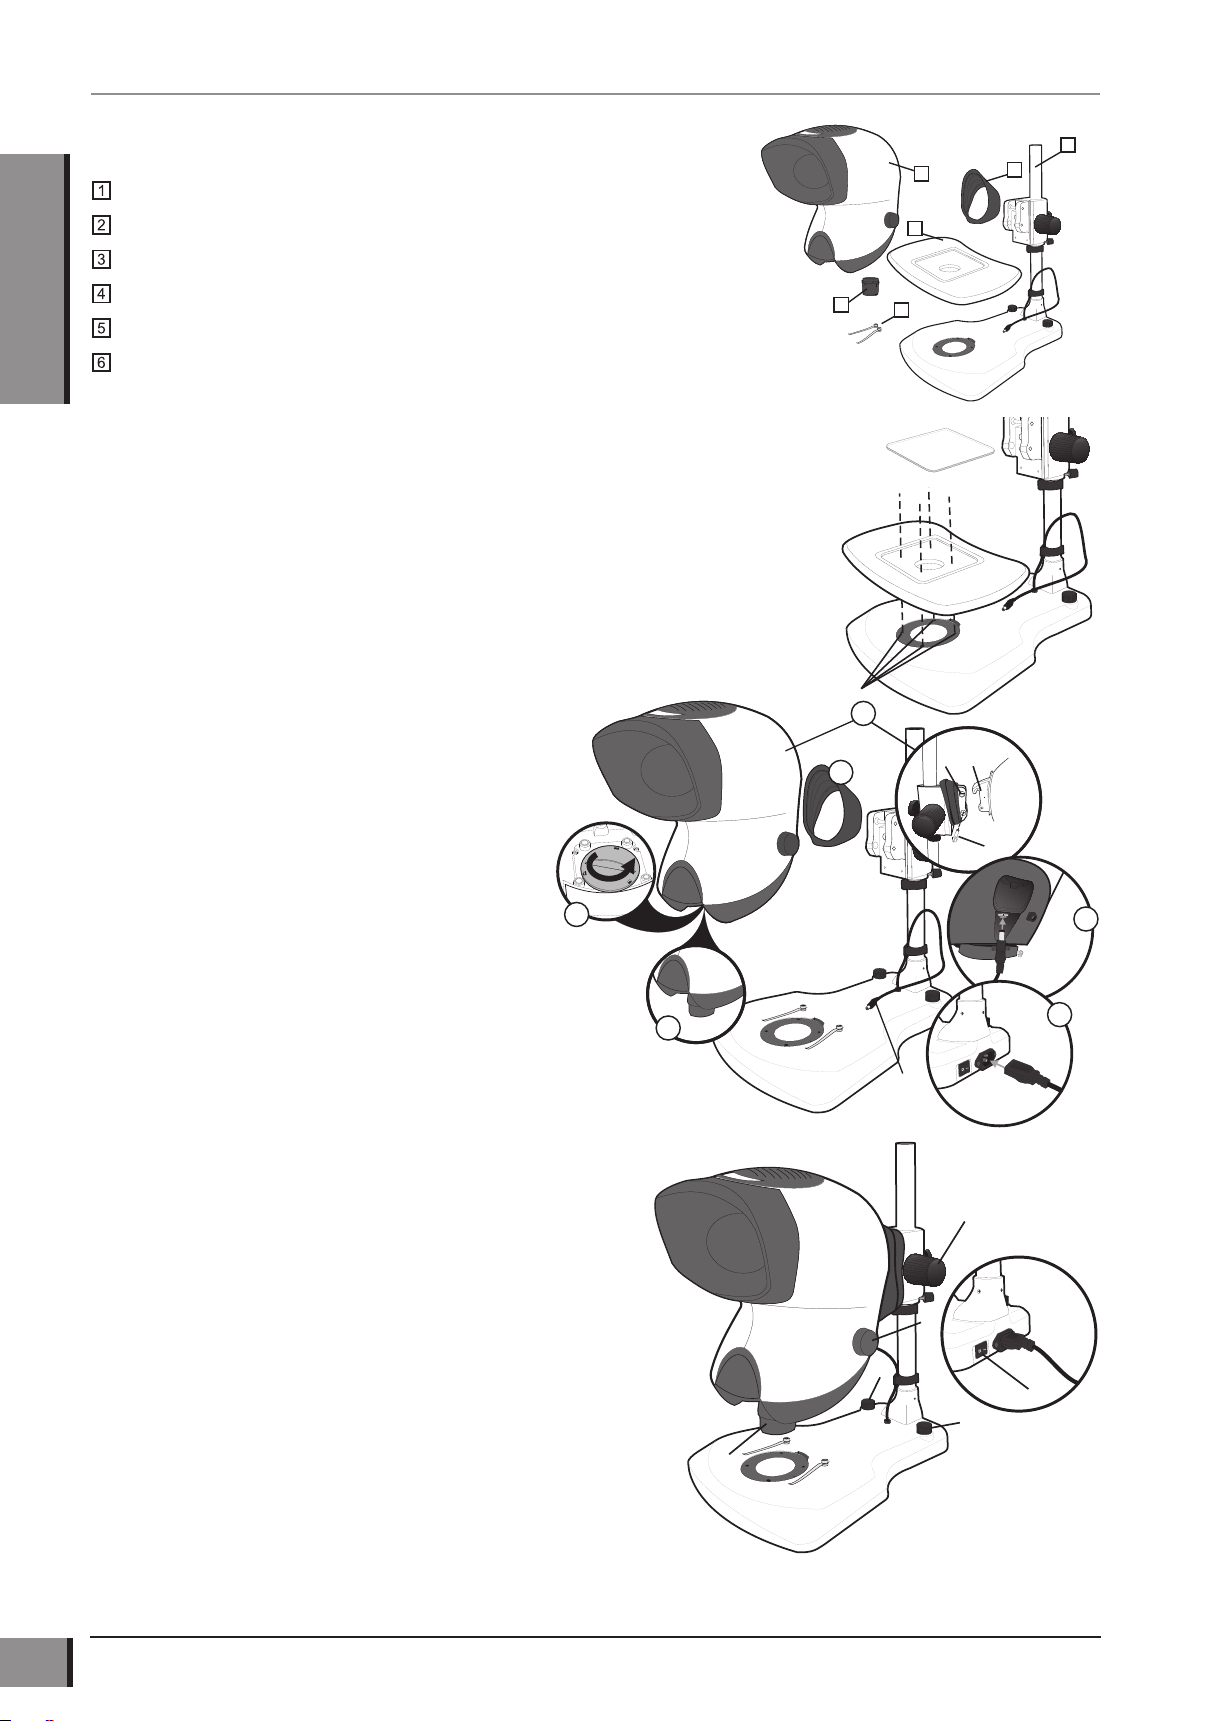
Packing Contents
Bench stand
English
Viewing head
Objective lens
1
2
5
4
Rubber gaiter
Floating stage (optional)
Specimen holders
Assembly
Floating stage (optional)
X With the stage glass u removed, place the oating stage v in position
and secure it into its locating holes w with the bolts supplied using the
Allen key located on the underside of the oating stage.
X Replace the stage glass.
X The removal of the oating stage is the reversal of the assembly procedure.
Head & Power Connectors
j Place the rubber gaiter over the stand neck.
k Loosen the upper retaining bolt
retaining bolt v. Carefully place the locating hook of the Mantis viewing
head w over the upper retaining bolt on the bench stand.
Replace the lower retaining bolt, ensuring the lower retaining bolt passes
through the lower locating mount of the Mantis viewing head.
Tighten the upper and lower retaining bolts then re-seat the rubber gaiter.
l Remove the red transit plug from the underneath of the viewing head.
m Connect the head power lead
of the viewing head.
n Connect the mains lead plug to a suitable power outlet and its output
connector to the rear of the bench stand.
o Fit and lock the chosen objective lens into the objective seat.
on the stand neck. Remove the lower
u
between the stand base and the rear
x
3
6
Operation
Overview
X Turn on the power switch u and place the subject on to the stage beneath
the Mantis lens.
Focus
X Use the focus controls v (one each side) to raise or lower the viewing head
until the subject is in focus.
Eye Spacing
Adjust the eye spacing control w to obtain a comfortable stereo view.
Note: Adjusting the eye spacing is very important for viewing
comfort and must be adjusted for each Mantis user.
Changing Lenses
X To change the objective lens, twist and remove lens x. Store the lens in the
supplied container.
X Fit and lock the chosen objective lens into the objective seat.
Illumination
X Turn on the substage illumination switch y and use it to increase or decrease
the illumination level.
X Turn on the surface illumination switch z and use it to increase or decrease
the illumination level.
Mantis Compact with Bench Stand - User Guide www.visioneng.com/support
6
Page 3
Routine maintenance
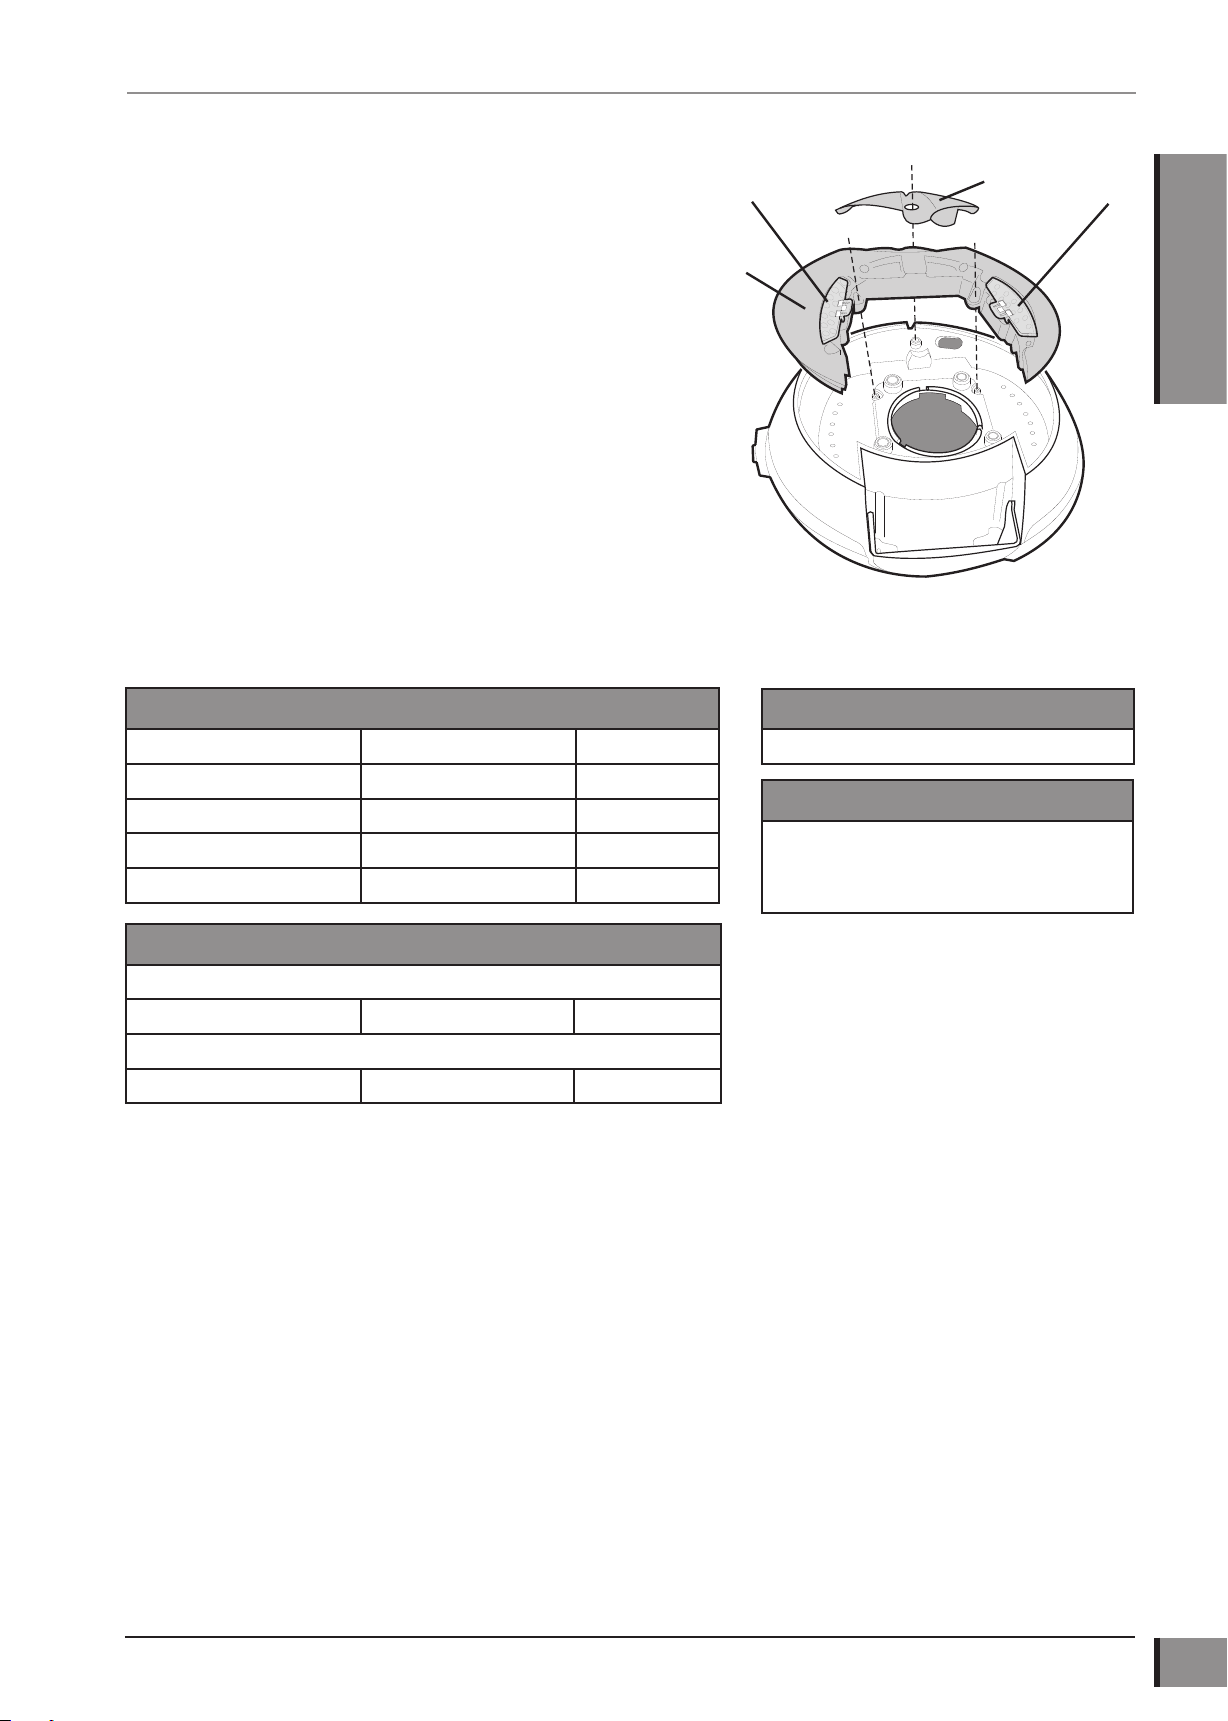
Desiccant Replacement
The desiccant removes excess moisture from the optical head.
X Disconnect the power supply from the bottom of the head.
X Remove the screw securing the desiccant cover u, lift the cover off
and remove the old desiccant.
X Insert the new desiccant and replace the desiccant cover.
LED Arrays
X Remove the desiccant cover u.
X Remove the two crosshead screws that secure the LED array v and
remove the array complete with lters w.
X Reassembly is the reverse of this procedure.
General care
X Cover your Mantis with a dust cover when not in use.
X Remove dust with a soft brush or cleaning cloth.
X The Mantis viewing screen and lenses should be cleaned with a lens cleaning cloth.
X Keep accessories in a dust-free environment when not in use.
Service
Service and repair work must only be carried out by service engineers authorised by Vision Engineering.
MANTIS COMPACT
English
Specication
Objective Lenses
Objective Lenses Working Distance Field of View
x2 167mm 45.0mm
x4 96mm 27.5mm
x6 73mm 19.2mm
x8 58.5mm 14.3mm
Power Supply
100-240VAC 50-60HZ 1.0A Max
Accessories
Lens protection caps
Floating Stage (for bench stand only)
Dust Cover
Replacement surface LED array
Lighting Data
LUX intensity measured at subject plane with colour correction lters.
20 LEDs 9,400 LUX 10,000 hours
Substage illumination (bench stand only)
58 LEDs 2,700 LUX 10,000 hours
Warranty
This product is warranted to be free from defects in material and workmanship for a period of one year from the date of invoice to the original purchaser.
If during the warranty period the product is found to be defective, it will be repaired or replaced at facilities of Vision Engineering or elsewhere, all at the option of Vision
Engineering. However, Vision Engineering reserves the right to refund the purchase price if it is unable to provide replacement, and repair is not commercially practicable or
cannot be timely made. Parts not of Vision Engineering manufacture carry only the warranty of their manufacturer. Expendable components such as fuses carry no warranty.
This warranty does not cover damage in transit, damage caused by misuse, neglect, or carelessness, or damage resulting from either improper servicing or modication by
other than Vision Engineering approved service personnel. Further, this warranty does not cover any routine maintenance work on the product described in the user guide or
any minor maintenance work which is reasonably expected to be performed by the purchaser.
No responsibility is assumed for unsatisfactory operating performance due to environmental conditions such as humidity, dust, corrosive chemicals, deposition of oil or other
foreign matter, spillage, or other conditions beyond the control of Vision Engineering.
Except as stated herein, Vision Engineering makes no other warranties, express or implied by law, whether for resale, tness for a particular purpose or otherwise. Further,
Vision Engineering shall not under any circumstances be liable for incidental, consequential or other damages.
www.visioneng.com/support Mantis Compact with Bench Stand - User Guide
7
 Loading...