

Vision Engineering DX41 User Manual
User Guide
Routine Laboratory Microscope

This manual is written for the routine laboratory microscope the
DX41.
We strongly recommended that you carefully read this manual before using the microscope to familiarise yourself
with its functions & controls, for best practice when using the DX41 and ultimately for your health & safety.
Contents
Maintenance - Page 3
Packing Contents - Page 4
Assembly
Assembly Diagram - Page 5
Installing the mechanical stage support device - Page 6
Installing the trinocular viewing unit - Page 7
Installing and replacing the lamp - Page 7
Installing the lamp housing - Page 7- 8
Installing the objectives - Page 9
Installing the eyepieces - Page 10
Installing the video port (optional) - Page 10
Adjustments
Adjustments of the DX41 Diagram - Page 11
Adjustments of the DX41 Diagram Cont. - Page 12
Operation
Turning on the lamp - Page 13
Adjusting the intensity - Page 13
Adjusting the Tension Adjustment Collar - Page 13
Adjusting the interpupillary distance - Page 14
Adjusting the Dioptre - Page 14
Focusing - Page 15
Adjusting the Swing-out Condenser - Page 15
Using the Swing-out Condenser - Page 16
Adjusting the Aperture Diaphragm - Page 16
Adjusting the Field Diaphragm - Page 17
Switching the Light Path Selection - Page 17
Technical Specifications
Technical Specifications - Page 18
Warranty
Warranty - Page 19
1
www.visionbiomed.com Routine Laboratory Microscope

DX41 Routine Laboratory Microscope
Safety notes
1. Carefully open the box, taking care not to damage any of the delicate accessories like the lenses.
2. Keep the instrument out of direct sunlight, high temperature or humidity, and dusty & dirty environments.
Make sure the stage is placed on a smooth, horizontal and even surface.
3. When moving the instrument, please use both hands to grip the two sides of the microscope's body.
4. If the bacterium solution or water splash onto the stage, objective or viewing tube, turn off the microscope
at the mains immediately and wipe the microscope using the soft cloth provided (preventing any damage to
the DX41).
5. When the DX41 is in use, the lamp housing and nearby parts will be very hot. Please ensure there is
enough room surrounding them to enable them to cool down.
6. Make sure the instrument is earthed, to avoid any electric shocks.
7. For your safety, make sure the main switch is off (“O”) before replacing the halogen lamp or the fuse. Turn
the power off, and perform the operation after the lamp bulb and the lamp house are completely cool.
8. Check the input voltage: make sure the input voltage which is marked on the back of the microscope is
consistent with the power supply voltage otherwise, it will cause serious damage to the instrument.
9. Please use the power cord supplied.
2
www.visionbiomed.com Routine Laboratory Microscope

Maintenance
1. All the lenses have been thoroughly checked and adjusted - do not try and disassemble them yourself!
2. The nosepiece and coarse/fine focus unit have a compact and precise frame. Please don’t disassemble
them.
3. Keep the instrument clean by wiping dust regularly and avoid contaminating the optical elements.
4. Contamination on the prism, like finger prints and smears, can be gently wiped with a piece of soft cloth or
gauze which has been immersed in pure alcohol or xylene*. *(note that the alcohol and the xylene are
flammable, avoid using near direct heat).
5. Do not use an abrasive solvent to wipe the non-optical elements, use a soft detergent only.
6. If the microscope is splashed by any form of liquid, turn off the power immediately, and wipe up the
moisture.
7. Do not disassemble any part of the microscope. This will affect the function and the performance of the
microscope.
8. Place the instrument in a cool, dry position. After using the microscope, remember to cover it with dust
cover. Wait for the lamp housing to cool completely before covering.
3
www.visionbiomed.com Routine Laboratory Microscope
Packing Contents
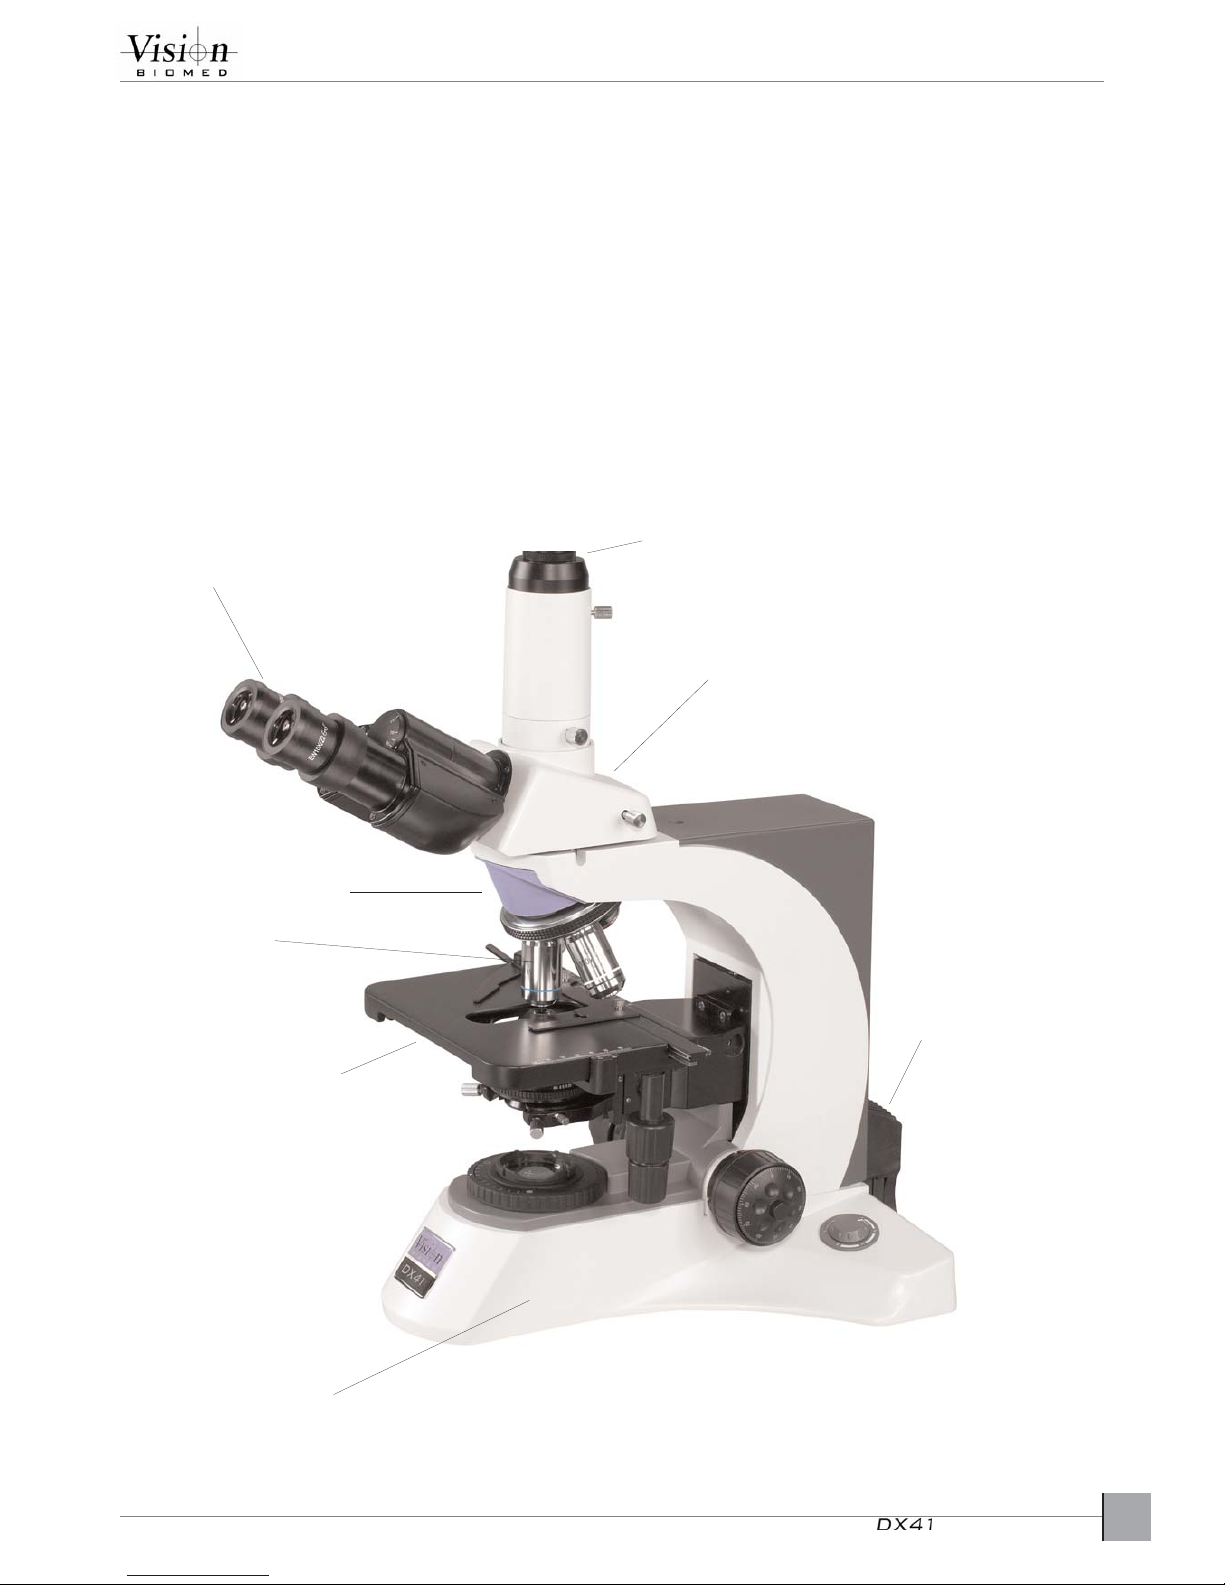
1. Eyepiece (Ocular)
2. Video Port (optional)
3. Trinoclular Viewing Unit
4. Nosepiece
5. Objective
6. Mechanical Stage
7. Lamp Housing
8. Microscope Body
4
www.visionbiomed.com Routine Laboratory Microscope
Eyepiece (Ocular)
Video Port (optional)
Trinocular Viewing Unit
Lamp housing
Microscope body
Mechanical Stage
Objective
Nosepiece
Assembly
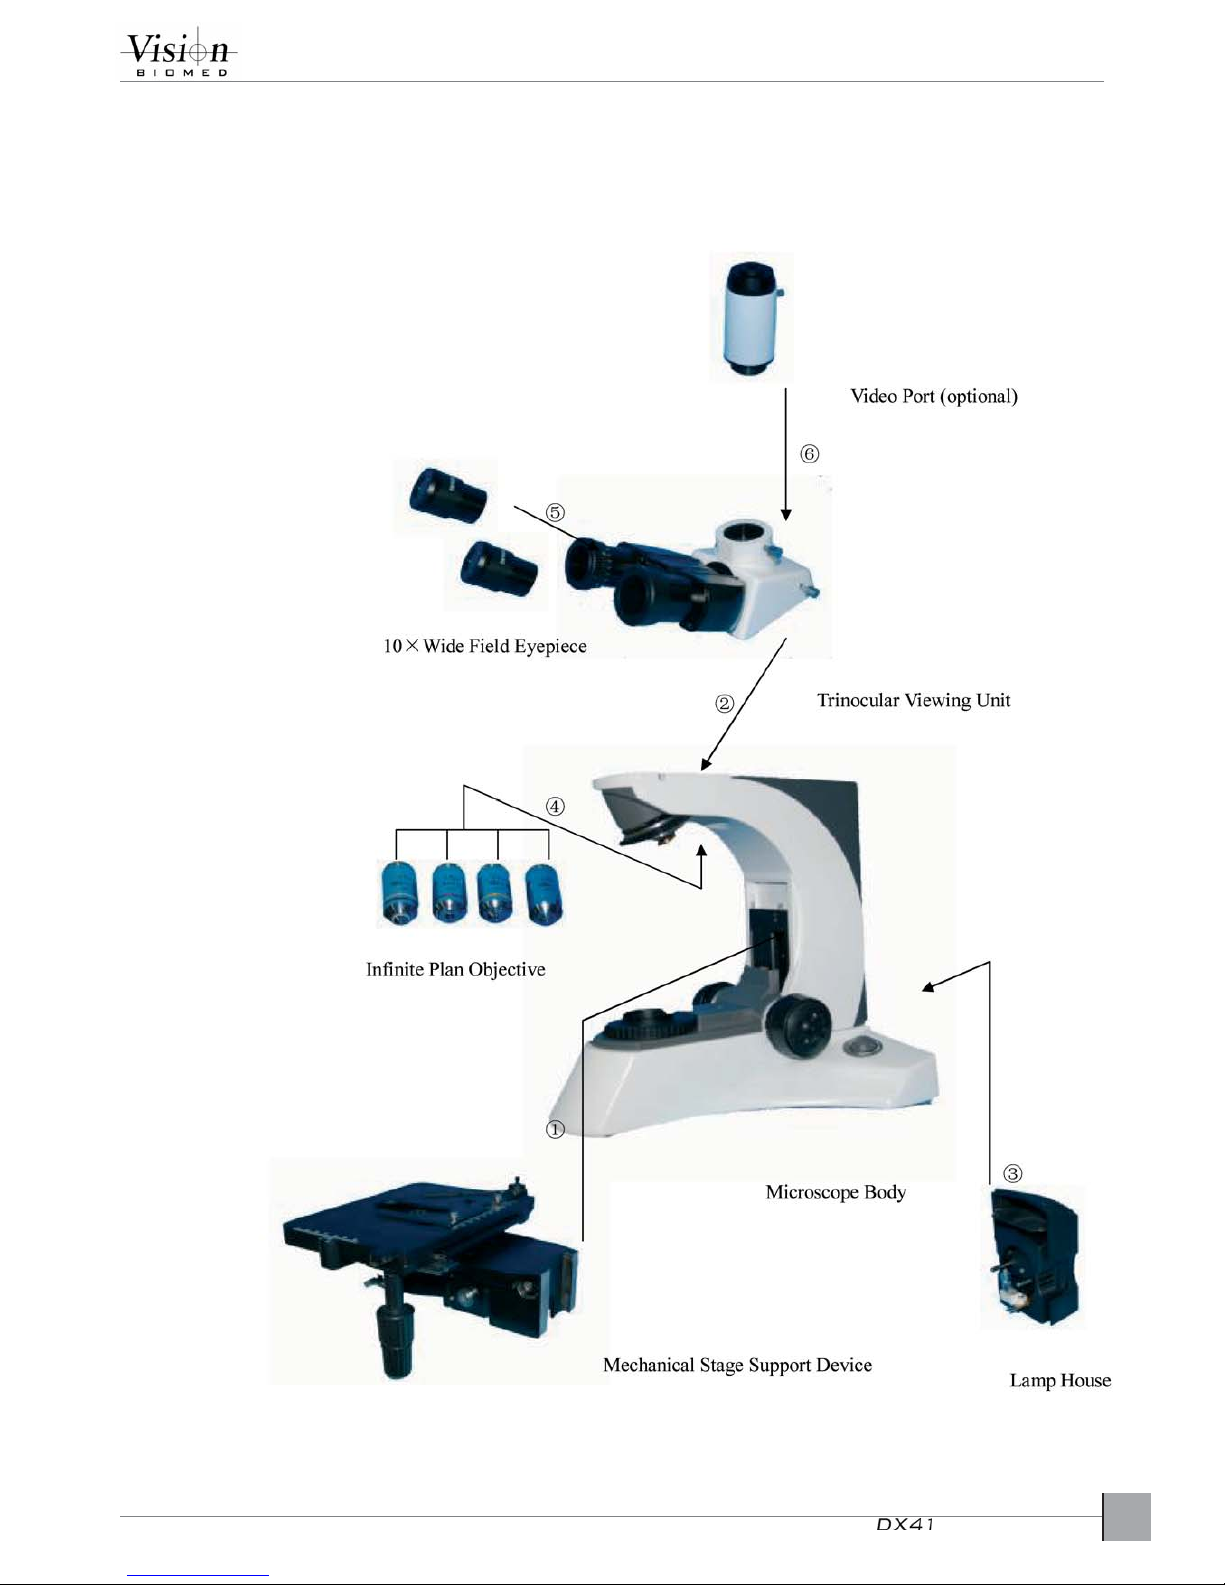
Assembly Diagram
The following diagram shows the assembly
sequence of the components.
The number in the figure shows the assembly steps.
Before assembling, make sure every component is
clean and be careful not to scratch any of the parts or
glass surfaces.
Keep the hexagon wrench
(supplied) in a safe place.
If you plan to change any of
the components in the
future, you will need
it again!
5
www.visionbiomed.com Routine Laboratory Microscope
 Loading...