

Page 1

PaperPort Deluxe
™
User’s Guide
FOR WINDOWS
Page 2

COPYRIGHT INFORMATION
PaperPort 6.0™ Software for Windows. Copyright ©1998 Visioneer, Inc. All rights reserved.
Reproduction, adaptation, or translation without prior written permission is prohibited, except as allowed under the copyright laws.
AnyPort, AutoFix, AutoLaunch, Visioneer® FormTyper, MicroChrome, PaperEnable, PaperLaunch, PaperPort, PaperPort Deluxe, PaperPort ix,
PaperPort Links, PaperPort mx, PaperPort OneTouch, PaperPort PowerBar, PaperPort vx, PaperPortation, PaperPort Strobe, PaperPort 3000, PaperPort 3100,
PaperPort 3100B, PaperPort 6000, PaperPort 6000A, PaperPort 6000B, PaperPort 6100, ScanDirect, SimpleSearch, SharpPage, Visioneer Pro OCR 100, and
Visioneer are trademarks of Visioneer, Inc. PaperPort, Visioneer® Visual Explorer, and the Visioneer logo are registered trademarks of Visioneer, Inc.
Microsoft is a U.S. registered trademark of Microsoft Corporation. Windows is a trademark of Microsoft Corporation. TextBridge is a registered trademark
of Xerox Corporation. ZyINDEX is a registered trademark of ZyLAB International, Inc. ZyINDEX toolkit portions, Copyright © 1990-1996,
ZyLAB International, Inc. All Rights Reserved. All other products mentioned herein may be trademarks of their respective companies.
OutsideIn® Viewer Technology ©1992–1997 Inso Corporation. All rights reserved. Portions of this product were created using LEADTOOLS ©1991–1998,
LEAD Technologies, Inc. All rights reserved. Powered by dtSearch. www.dtsearch.com
Information is subject to change without notice and does not represent a commitment on the part of Visioneer, Inc. The software described is furnished under
a licensing agreement. The software may be used or copied only in accordance with the terms of such an agreement. It is against the law to copy the software on
any medium except as specifically allowed in the licensing agreement. No part of this document may be reproduced or transmitted in any form or by any
means, electronic or mechanical, including photocopying, recording, or information storage and retrieval systems, or translated to another language, for any
purpose other than the licensee’s personal use and as specifically allowed in the licensing agreement, without the express written permission of Visioneer, Inc.
Part Number: 06-0008-000
Restricted Rights Legend
Use, duplication, or disclosure is subject to restrictions as set forth in contract subdivision (c)(1)(ii) of the Rights in Technical Data and Computer Software
Clause 52.227-FAR14. Material scanned by this product may be protected by governmental laws and other regulations, such as copyright laws. The customer
is solely responsible for complying with all such laws and regulations.
Visioneer’s Limited Product Warranty
If you find physical defects in the materials or the workmanship used in making the product described in this document, Visioneer will repair, or at its option,
replace, the product at no charge to you, provided you return it (postage prepaid, with proof of your purchase from the original reseller) during the 12-month
period after the date of your original purchase of the product.
THIS IS VISIONEER’S ONLY WARRANTY AND YOUR EXCLUSIVE REMEDY CONCERNING THE PRODUCT, ALL OTHER
REPRESENTATIONS, WARRANTIES OR CONDITIONS, EXPRESS OR IMPLIED, WRITTEN OR ORAL, INCLUDING ANY WARRANTY OF
MERCHANTABILITY, FITNESS FOR A PARTICULAR PURPOSE OR NON-INFRINGEMENT, ARE EXPRESSLY EXCLUDED. AS A RESULT,
EXCEPT AS SET OUT ABOVE, THE PRODUCT IS SOLD “AS IS” AND YOU ARE ASSUMING THE ENTIRE RISK AS TO THE PRODUCT’S
SUITABILITY TO YOUR NEEDS, ITS QUALITY AND ITS PERFORMANCE,
IN NO EVENT WILL VISIONEER BE LIABLE FOR DIRECT, INDIRECT, SPECIAL, INCIDENTAL OR CONSEQUENTIAL DAMAGES
RESULTING FROM ANY DEFECT IN THE PRODUCT OR FROM ITS USE, EVEN IF ADVISED OF THE POSSIBILITY OF SUCH DAMAGES.
All exclusions and limitations in this warranty are made only to the extent permitted by applicable law and shall be of no effect to the extent in conflict with the
express requirements of applicable law.
FCC Radio Frequency Interference Statement
This equipment has been tested and found to comply with the limits for the class B digital device, pursuant to part 15 of the FCC Rules. These limits are
designed to provide reasonable protection against interference in a residential installation. This equipment generates, uses and can radiate radio frequency
energy and if not installed, and used in accordance with the instructions, may cause harmful interference to radio communications. However, there is no
guarantee that interference will not occur in a particular installation. If this equipment does cause harmful interference to radio or television reception, which
can be determined by turning the equipment off and on, the user is encouraged to try and correct the interference by one or more of the following measures:
• Reorient or relocate the receiving antenna.
• Increase the separation between the equipment and receiver.
• Connect the equipment into an outlet on a circuit different from that to which the receiver is connected.
• Consult the dealer or an experienced radio/TV technician for help.
This equipment has been certified to comply with the limits for a class B computing device, pursuant to FCC Rules. In order to maintain compliance with
FCC regulations, shielded cables must be used with this equipment. Operation with non-approved equipment or unshielded cables is likely to result in
interference to radio and TV reception. The user is cautioned that changes and modifications made to the equipment without the approval of manufacturer
could void the user's authority to operate this equipment.
This device complies with part 15 of the FCC Rules. Operation is subject to the following two conditions: (1) This device may not cause harmful interference,
and (2) this device must accept any interference received, including interference that may cause undesired operation.
Page 3

TABLE OF CONTENTS
Chapter 1: Welcome to the PaperPort Software
. . . . . . . . . . . . . . 1
View items in a variety of ways . . . . . . . . . . . . . . . . . . . . . . . . . . 2
Capture Web pages . . . . . . . . . . . . . . . . . . . . . . . . . . . . . . . . . . . 3
Organize all your items in folders . . . . . . . . . . . . . . . . . . . . . . . . 3
Scan items with your scanner . . . . . . . . . . . . . . . . . . . . . . . . . . . 4
Combine items into stacks . . . . . . . . . . . . . . . . . . . . . . . . . . . . . . 5
Improve image quality . . . . . . . . . . . . . . . . . . . . . . . . . . . . . . . . . 5
Add notes, highlight areas, and mark up a page . . . . . . . . . . . . . . 7
Link to many other applications . . . . . . . . . . . . . . . . . . . . . . . . . 7
Fax it . . . . . . . . . . . . . . . . . . . . . . . . . . . . . . . . . . . . . . . . . . . . . . 8
E-mail it . . . . . . . . . . . . . . . . . . . . . . . . . . . . . . . . . . . . . . . . . . . 8
Convert image text to text that you can edit . . . . . . . . . . . . . . . . 9
Fill in a preprinted form . . . . . . . . . . . . . . . . . . . . . . . . . . . . . . . 9
Use SimpleSearch to find an item . . . . . . . . . . . . . . . . . . . . . . . 10
Import items from other applications . . . . . . . . . . . . . . . . . . . . 11
Export items in other formats . . . . . . . . . . . . . . . . . . . . . . . . . . 11
View PaperPort items on other computers . . . . . . . . . . . . . . . . . 11
Use right mouse button shortcuts . . . . . . . . . . . . . . . . . . . . . . . 12
Visit Visioneer’s Web site . . . . . . . . . . . . . . . . . . . . . . . . . . . . . 12
Chapter 2: Viewing Items
. . . . . . . . . . . . . . . . . . . . . . . . . . . . . . . 13
Viewing items in Desktop View . . . . . . . . . . . . . . . . . . . . . . . . 14
Using Desktop View . . . . . . . . . . . . . . . . . . . . . . . . . . . . . . 15
Using the Command Bar in Desktop View . . . . . . . . . . . . . 16
Viewing items in Page View . . . . . . . . . . . . . . . . . . . . . . . . . . . 17
Using Page View . . . . . . . . . . . . . . . . . . . . . . . . . . . . . . . . . 19
Using the Command Bar in Page View . . . . . . . . . . . . . . . . 20
Zooming in or out . . . . . . . . . . . . . . . . . . . . . . . . . . . . . . . 22
Changing between Desktop View and Page View . . . . . . . . . . . 23
Viewing items by using the application that created them . . . . . 23
Setting the Double-Click Action preference . . . . . . . . . . . . . . . 24
Quitting Desktop View or Page View . . . . . . . . . . . . . . . . . . . . 25
iii
Page 4

iv
T
ABLE OF CONTENTS
Chapter 3: Filing Items
. . . . . . . . . . . . . . . . . . . . . . . . . . . . . . . . . 27
PaperPort’s filing system . . . . . . . . . . . . . . . . . . . . . . . . . . . . . . 27
Displaying folders and items . . . . . . . . . . . . . . . . . . . . . . . . . . . 28
Adding and removing folders from Folder View . . . . . . . . . . . . 31
Adding a folder to Folder View . . . . . . . . . . . . . . . . . . . . . . 31
Removing folders from Folder View . . . . . . . . . . . . . . . . . . 32
Arranging folders in Folder View . . . . . . . . . . . . . . . . . . . . 33
Working with folders and items . . . . . . . . . . . . . . . . . . . . . . . . 34
Dragging and dropping items into folders . . . . . . . . . . . . . . 35
Filing items in multiple locations . . . . . . . . . . . . . . . . . . . . 36
Duplicating items . . . . . . . . . . . . . . . . . . . . . . . . . . . . . . . . 37
Creating new folders . . . . . . . . . . . . . . . . . . . . . . . . . . . . . . 38
Giving folders new titles . . . . . . . . . . . . . . . . . . . . . . . . . . . 39
Dragging and dropping folders into folders . . . . . . . . . . . . . 40
Creating new items . . . . . . . . . . . . . . . . . . . . . . . . . . . . . . . . . . 40
Using Windows Explorer to manage items . . . . . . . . . . . . . . . . 41
Using SimpleSearch to find an item . . . . . . . . . . . . . . . . . . . . . 43
Chapter 4: Stacking PaperPort Items
. . . . . . . . . . . . . . . . . . . . . . 47
Combining items into stacks . . . . . . . . . . . . . . . . . . . . . . . . . . . 48
Using drag and drop to create stacks . . . . . . . . . . . . . . . . . . 48
Selecting and deselecting items . . . . . . . . . . . . . . . . . . . . . . 49
Giving titles to items and stacks . . . . . . . . . . . . . . . . . . . . . . . . 50
Moving between stacked pages . . . . . . . . . . . . . . . . . . . . . . . . . 52
Unstacking items . . . . . . . . . . . . . . . . . . . . . . . . . . . . . . . . . . . . 53
Tiling items . . . . . . . . . . . . . . . . . . . . . . . . . . . . . . . . . . . . . . . . 55
Chapter 5: Capturing Web Pages
. . . . . . . . . . . . . . . . . . . . . . . . . 57
Using a supported browser . . . . . . . . . . . . . . . . . . . . . . . . . . . . 57
Capturing Web pages . . . . . . . . . . . . . . . . . . . . . . . . . . . . . . . . 58
Updating captured Web pages . . . . . . . . . . . . . . . . . . . . . . . . . . 60
Viewing captured Web pages . . . . . . . . . . . . . . . . . . . . . . . . . . . 61
Searching Web pages using SimpleSearch . . . . . . . . . . . . . . . . . 62
Page 5

T
ABLE OF CONTENTS
v
Chapter 6: Using Links
. . . . . . . . . . . . . . . . . . . . . . . . . . . . . . . . . 63
The basic steps for using links . . . . . . . . . . . . . . . . . . . . . . . . . . 63
Setting a link’s preferences . . . . . . . . . . . . . . . . . . . . . . . . . . . . . 65
Managing the Link Bar . . . . . . . . . . . . . . . . . . . . . . . . . . . . . . . 66
Changing how links appear on the Link Bar . . . . . . . . . . . . 66
Showing and hiding the Link Bar . . . . . . . . . . . . . . . . . . . . 67
Removing a link from the Link Bar . . . . . . . . . . . . . . . . . . . 68
Reordering links on the Link Bar . . . . . . . . . . . . . . . . . . . . 68
Chapter 7: Sending a Fax or E-Mail Message
. . . . . . . . . . . . . . . . 69
Overview . . . . . . . . . . . . . . . . . . . . . . . . . . . . . . . . . . . . . . . . . . 69
Sending an item as a fax . . . . . . . . . . . . . . . . . . . . . . . . . . . . . . 70
Sending an item with an e-mail message . . . . . . . . . . . . . . . . . . 72
Sending a self-viewing file using an e-mail link . . . . . . . . . . . . . 74
Chapter 8: Converting Items to Text With OCR
. . . . . . . . . . . . . 77
What is OCR . . . . . . . . . . . . . . . . . . . . . . . . . . . . . . . . . . . . . . 78
Converting an item to text . . . . . . . . . . . . . . . . . . . . . . . . . . . . 80
Converting part of a page to text . . . . . . . . . . . . . . . . . . . . . . . . 84
Converting a scanned spreadsheet to text . . . . . . . . . . . . . . . . . . 85
Converting an item using another OCR application . . . . . . . . . 88
Setting the Visioneer OCR preferences . . . . . . . . . . . . . . . . . . . 88
Chapter 9: Using ScanDirect
. . . . . . . . . . . . . . . . . . . . . . . . . . . . . 91
Starting ScanDirect . . . . . . . . . . . . . . . . . . . . . . . . . . . . . . . . . . 91
The ScanDirect control panel . . . . . . . . . . . . . . . . . . . . . . . . . . 93
Running PaperPort and ScanDirect together . . . . . . . . . . . . . . . 94
Using ScanDirect . . . . . . . . . . . . . . . . . . . . . . . . . . . . . . . . . . . 94
Using a TWAIN scanner with ScanDirect . . . . . . . . . . . . . . . . . 98
Selecting the source scanner . . . . . . . . . . . . . . . . . . . . . . . . 98
Chapter 10: Filling In Preprinted Forms With FormTyper
Filling in a form . . . . . . . . . . . . . . . . . . . . . . . . . . . . . . . . . . . 100
FormTyper tools . . . . . . . . . . . . . . . . . . . . . . . . . . . . . . . . . . . 102
Printing a filled-in form . . . . . . . . . . . . . . . . . . . . . . . . . . . . . 103
. . . . 99
Page 6

vi
T
ABLE OF CONTENTS
Chapter 11: Annotating a Page
. . . . . . . . . . . . . . . . . . . . . . . . . . 105
Using the annotation tools . . . . . . . . . . . . . . . . . . . . . . . . . . . 107
Pointer . . . . . . . . . . . . . . . . . . . . . . . . . . . . . . . . . . . . . . . 108
Selection . . . . . . . . . . . . . . . . . . . . . . . . . . . . . . . . . . . . . . 109
Eraser . . . . . . . . . . . . . . . . . . . . . . . . . . . . . . . . . . . . . . . . 110
Straighten Page . . . . . . . . . . . . . . . . . . . . . . . . . . . . . . . . . 111
Pan . . . . . . . . . . . . . . . . . . . . . . . . . . . . . . . . . . . . . . . . . . 112
Note . . . . . . . . . . . . . . . . . . . . . . . . . . . . . . . . . . . . . . . . . 112
Mark-Up . . . . . . . . . . . . . . . . . . . . . . . . . . . . . . . . . . . . . . 114
Highlighter . . . . . . . . . . . . . . . . . . . . . . . . . . . . . . . . . . . . 114
Freehand . . . . . . . . . . . . . . . . . . . . . . . . . . . . . . . . . . . . . . 115
Arrow . . . . . . . . . . . . . . . . . . . . . . . . . . . . . . . . . . . . . . . . 115
Picture . . . . . . . . . . . . . . . . . . . . . . . . . . . . . . . . . . . . . . . 116
Displaying and hiding annotations . . . . . . . . . . . . . . . . . . . . . 118
Chapter 12: Editing Images
. . . . . . . . . . . . . . . . . . . . . . . . . . . . . 119
Using the image editing tools . . . . . . . . . . . . . . . . . . . . . . . . . 119
Rotate right or left . . . . . . . . . . . . . . . . . . . . . . . . . . . . . . . 121
AutoFix Picture . . . . . . . . . . . . . . . . . . . . . . . . . . . . . . . . . 122
Adjust Picture . . . . . . . . . . . . . . . . . . . . . . . . . . . . . . . . . . 123
Picture Wizard . . . . . . . . . . . . . . . . . . . . . . . . . . . . . . . . . 124
Sharpen Picture . . . . . . . . . . . . . . . . . . . . . . . . . . . . . . . . . 124
Remove Red Eye . . . . . . . . . . . . . . . . . . . . . . . . . . . . . . . . 125
Crop Page . . . . . . . . . . . . . . . . . . . . . . . . . . . . . . . . . . . . . 126
Invert Page . . . . . . . . . . . . . . . . . . . . . . . . . . . . . . . . . . . . 127
Remove Stray Dots . . . . . . . . . . . . . . . . . . . . . . . . . . . . . . 127
Enhance Lines . . . . . . . . . . . . . . . . . . . . . . . . . . . . . . . . . . 128
Automatically starting an image’s application . . . . . . . . . . . . . 128
Creating wallpaper from an item . . . . . . . . . . . . . . . . . . . . . . . 129
Page 7

T
ABLE OF CONTENTS
vii
Chapter 13: Importing, Exporting, and Printing
. . . . . . . . . . . . 131
Importing files created in other applications . . . . . . . . . . . . . . 132
Exporting PaperPort items . . . . . . . . . . . . . . . . . . . . . . . . . . . 133
Exporting with compression . . . . . . . . . . . . . . . . . . . . . . . . . . 136
Opening an item in Page View . . . . . . . . . . . . . . . . . . . . . . . . 137
Saving an item in a different format . . . . . . . . . . . . . . . . . . . . 138
Printing items to the printer . . . . . . . . . . . . . . . . . . . . . . . . . . 139
Printing from other applications . . . . . . . . . . . . . . . . . . . . . . . 139
Appendix A: PaperPort Viewer
Index
. . . . . . . . . . . . . . . . . . . . . . . . . . . . . . . . . . . . . . . . . . . . . . . 143
. . . . . . . . . . . . . . . . . . . . . . . . . 141
Page 8

viii
T
ABLE OF CONTENTS
Page 9
CHAPTER 1
Welcome to the
PaperPort Software
Welcome to the PaperPort software. This guide explains how to use the
main features of your PaperPort software. In addition to this guide, you
can get more information from a variety of sources:
Web.
Visit Visioneer’s Web site at www.visioneer.com where you can
find Technical Notes, Frequently Asked Questions (FAQs), software
updates, and more. For a quick way to access information on the Web
site, use the Internet menu.
Getting Started Guide.
started using PaperPort.
CD.
Access the Visioneer CD, your source for installing additional
software that works with the Visioneer software and for viewing the
online documentation.
Help.
how-to procedures, dialog box reference, and troubleshooting advice.
For a quick overview of PaperPort features, see the rest of this chapter.
Get help fast. Everything you want to know about PaperPort—
Review this printed guide to quickly get
1
Page 10
2
HAPTER
C
ELCOME TO THE PAPERPORT SOFTWARE
1: W
V
IEW ITEMS IN A VARIETY OF WAYS
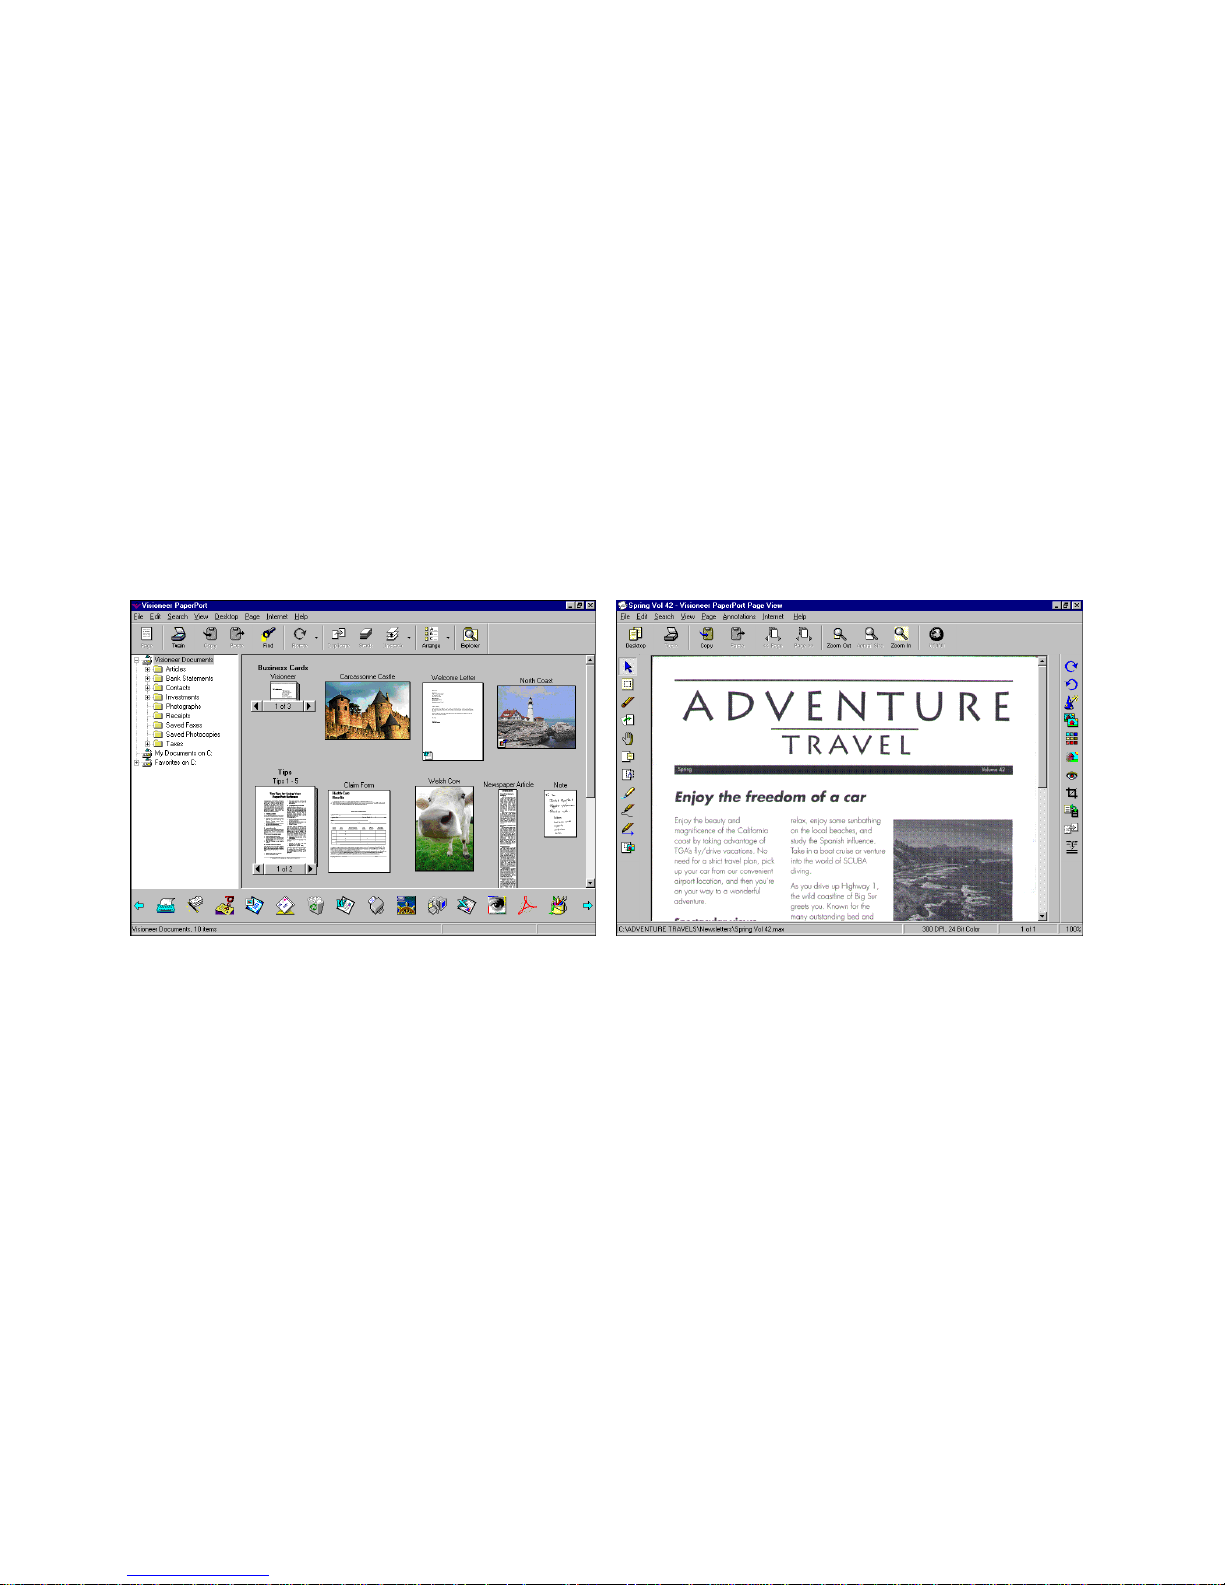
PaperPort provides several ways to view items:
thumbnail
, a small graphic that represents each item in a Desktop or
Desktop View
displays a
folder. You can see PaperPort items (MAX files) and non-PaperPort
items (files created using other applications, such as Microsoft Word).
Both types of items appear; no extra steps are necessary to see nonPaperPort items.
Page View
displays a close-up of a single page. You can
open both PaperPort items and non-PaperPort items in Page View.
Desktop View and Page View are separate applications that you can run
independently or at the same time. You can also display a non-PaperPort
item in the application that created it.
Desktop View displays
items as thumbnails.
Page View displays each
item as a full page.
Page 11

APTURE WEB PAGES
C
3
Capture the visible
portion of a Web page
or the entire page.
C
APTURE
With PaperPort’s Web Capture, you can easily add Web pages as
PaperPort items directly to the Desktop View and update the captured
page the next time you connect to the Internet. You have the option of
capturing only the visible portion of a page or an entire page.
O
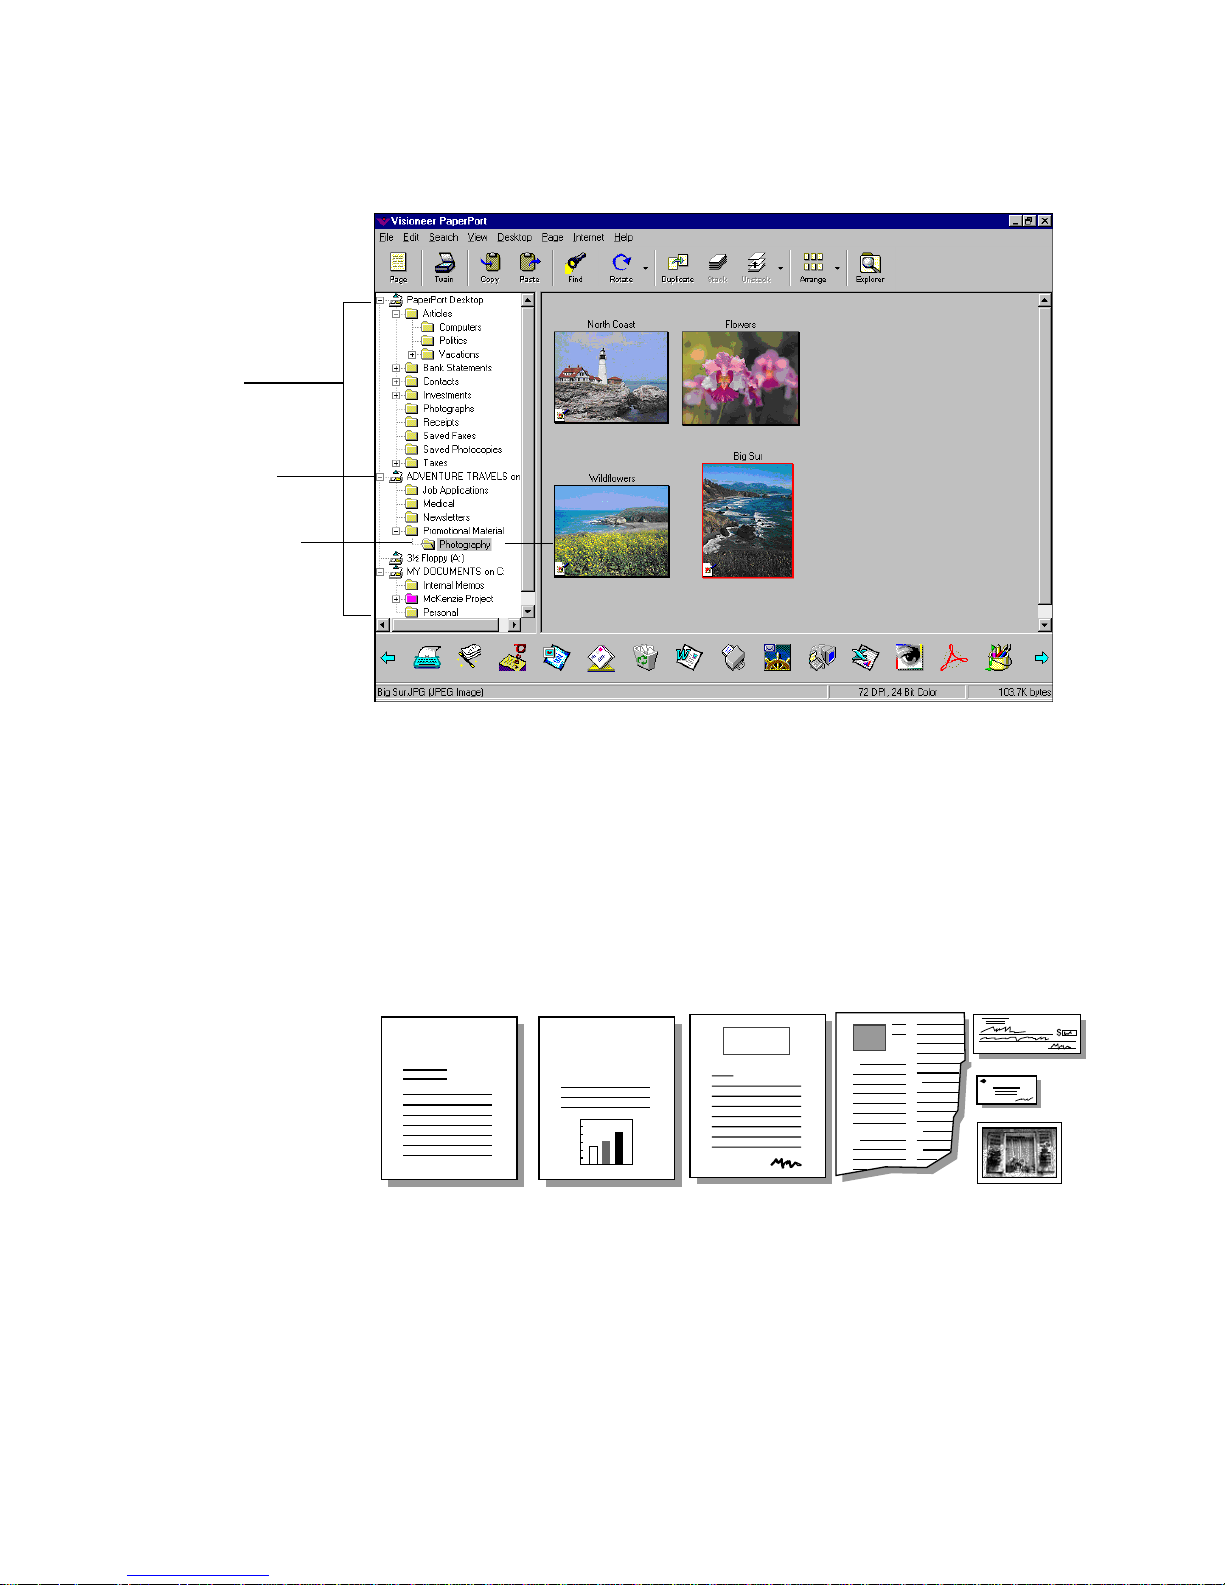
RGANIZE ALL YOUR ITEMS IN FOLDERS
PaperPort has an easy-to-use filing system for organizing your items.
The filing system consists of folders and items that you select to view in
Desktop View. A folder can be located any where on your computer or
on a device attached to your computer, such as an external drive or Zip
disk. (You cannot view items on a network.) An item can be a PaperPort
item or non-PaperPort item (a file created using another application,
such as Word). You decide which folders to show in the Folder View.
WEB
PAGES
Folders are arranged in a “tree” structure in the Folder View. You use
•
this pane to select folders and view their items in Desktop View.
You can simply drag and drop an item onto a folder. When the folder
•
is highlighted, release the mouse button and the item is stored in that
folder.
Folders can be “nested”—that is, stored in other folders.
•
•
When you double-click a folder, its items (both PaperPort (MAX)
files and other files) appear on the Desktop.
•
You can also use Windows Explorer to manage the folders and items
shown in Desktop View.
Page 12
4
Folder View.
A folder added to
the Folder View.
Items in the selected
folder appear on the
Desktop.
HAPTER
C
1: W
ELCOME TO THE PAPERPORT SOFTWARE
S
CAN
ITEMS WITH YOUR SCANNER
The PaperPort software works with a variety of scanners. Depending on
the scanner you’re using, you can scan small items, such as business cards,
or larger items up to 30 inches (76.2 cm) long. Typical items include
newspaper clippings, reports, magazine articles, brochures, letters,
memos, receipts, canceled checks, business cards, and color photos.
MEMO SALES
REPORT
FAX
For more information about scanning items, see the Installation Guide
that came with your scanner.
Page 13
A stack.
COMBINE ITEMS INTO STACKS 5
COMBINE ITEMS INTO STACKS
Many items that you place on the PaperPort Desktop will probably be
more than one page. You can combine individual PaperPort items into a
multipage item, called a stack. For example, you could save all of your
medical claims in one stack or combine the pages of an article.
A single page.
IMPROVE IMAGE QUALITY
PaperPort has special features to improve the quality of an image. For
example, you can lighten underexposed color photographs that are too
dark, sharpen fuzzy pictures, adjust the colors of color graphics and
photographs, straighten pages scanned in crooked, remove “dirt spots”
with a single mouse click, and enhance the lines of a form.
Page 14

6 CHAPTER 1: WELCOME TO THE PAPERPORT SOFTWARE
Here are some “before and after” examples of images:
This picture of a flower cart is improved by clicking the AutoFix Picture
tool. The image is lightened and sharpened.
This picture of a cow was slightly blurred and out of focus. The focus
was improved by using the Sharpen Picture tool.
The original picture of the family dog had the “red eye effect” caused by
an indoor flash. The red was removed with the Remove Red Eye tool.
Page 15
Circle information
with the Freehand tool.
Use the Highlighter
tool to highlight
an area.
ADD NOTES, HIGHLIGHT AREAS, AND MARK UP A PAGE 7
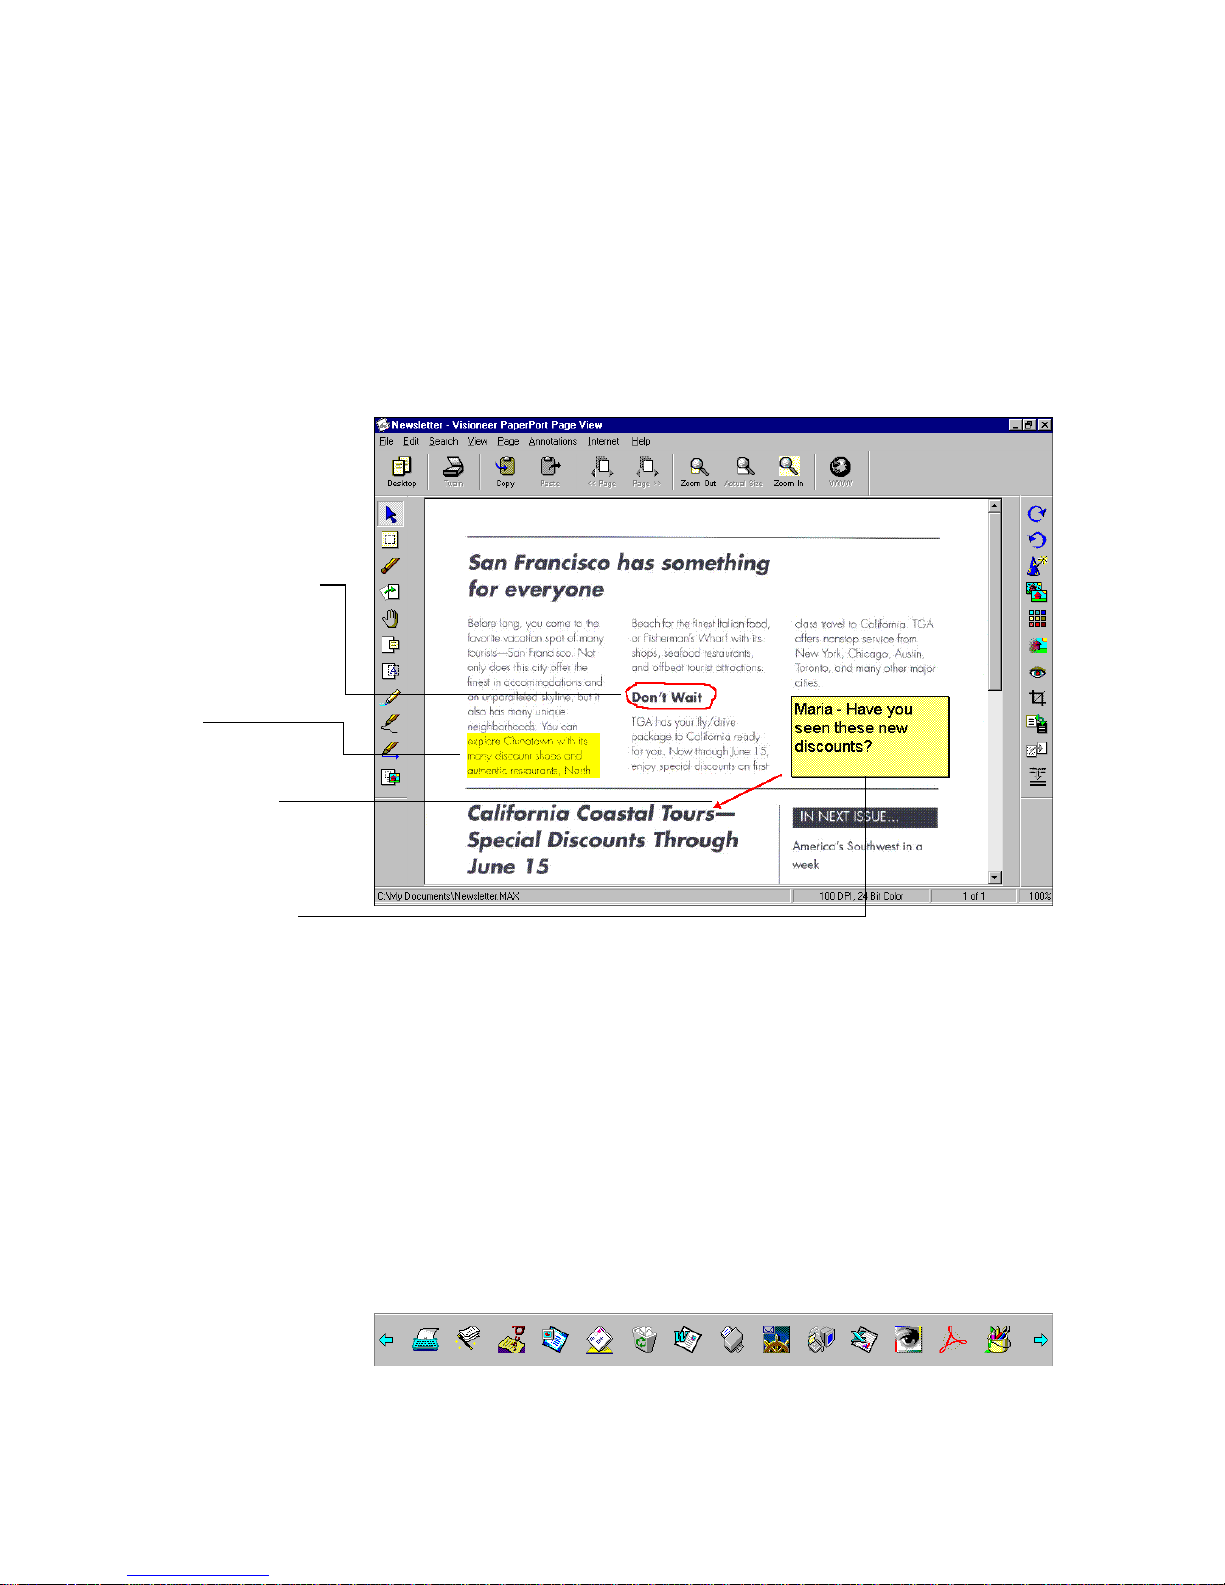
ADD NOTES, HIGHLIGHT AREAS, AND MARK UP A PAGE
With the annotation tools in Page View, you can add a note, highlight
text, draw lines or arrows, circle information, or paste a picture or
graphic from another application into a PaperPort item. The following
figure shows an example of how you can use the tools.
Draw the reader’s
attention by adding
arrows.
Use the Note tool to
add notes to a page.
LINK TO MANY OTHER APPLICATIONS
PaperPort automatically recognizes many other applications on your
computer and creates a “working link” to them. The Link Bar at the
bottom of Desktop View shows icons of those linked applications.
To use a link, drag an item onto one of the icons to start the application
represented by the icon. A typical use of the Link Bar is to select an item
and then fax it.
This sample Link Bar shows several applications with links to PaperPort.
Page 16
8 CHAPTER 1: WELCOME TO THE PAPERPORT SOFTWARE
If PaperPort does not automatically recognize one of the applications on
your computer, you can manually create a link using the Create New
Link command. See the PaperPort Help for more information about
creating new links.
FAX IT
If your computer has a fax modem and fax software, you can use the fax
link to quickly send an item in PaperPort as a fax. The fax link is
represented by a fax link icon on the Link Bar at the bottom of Desktop
View.
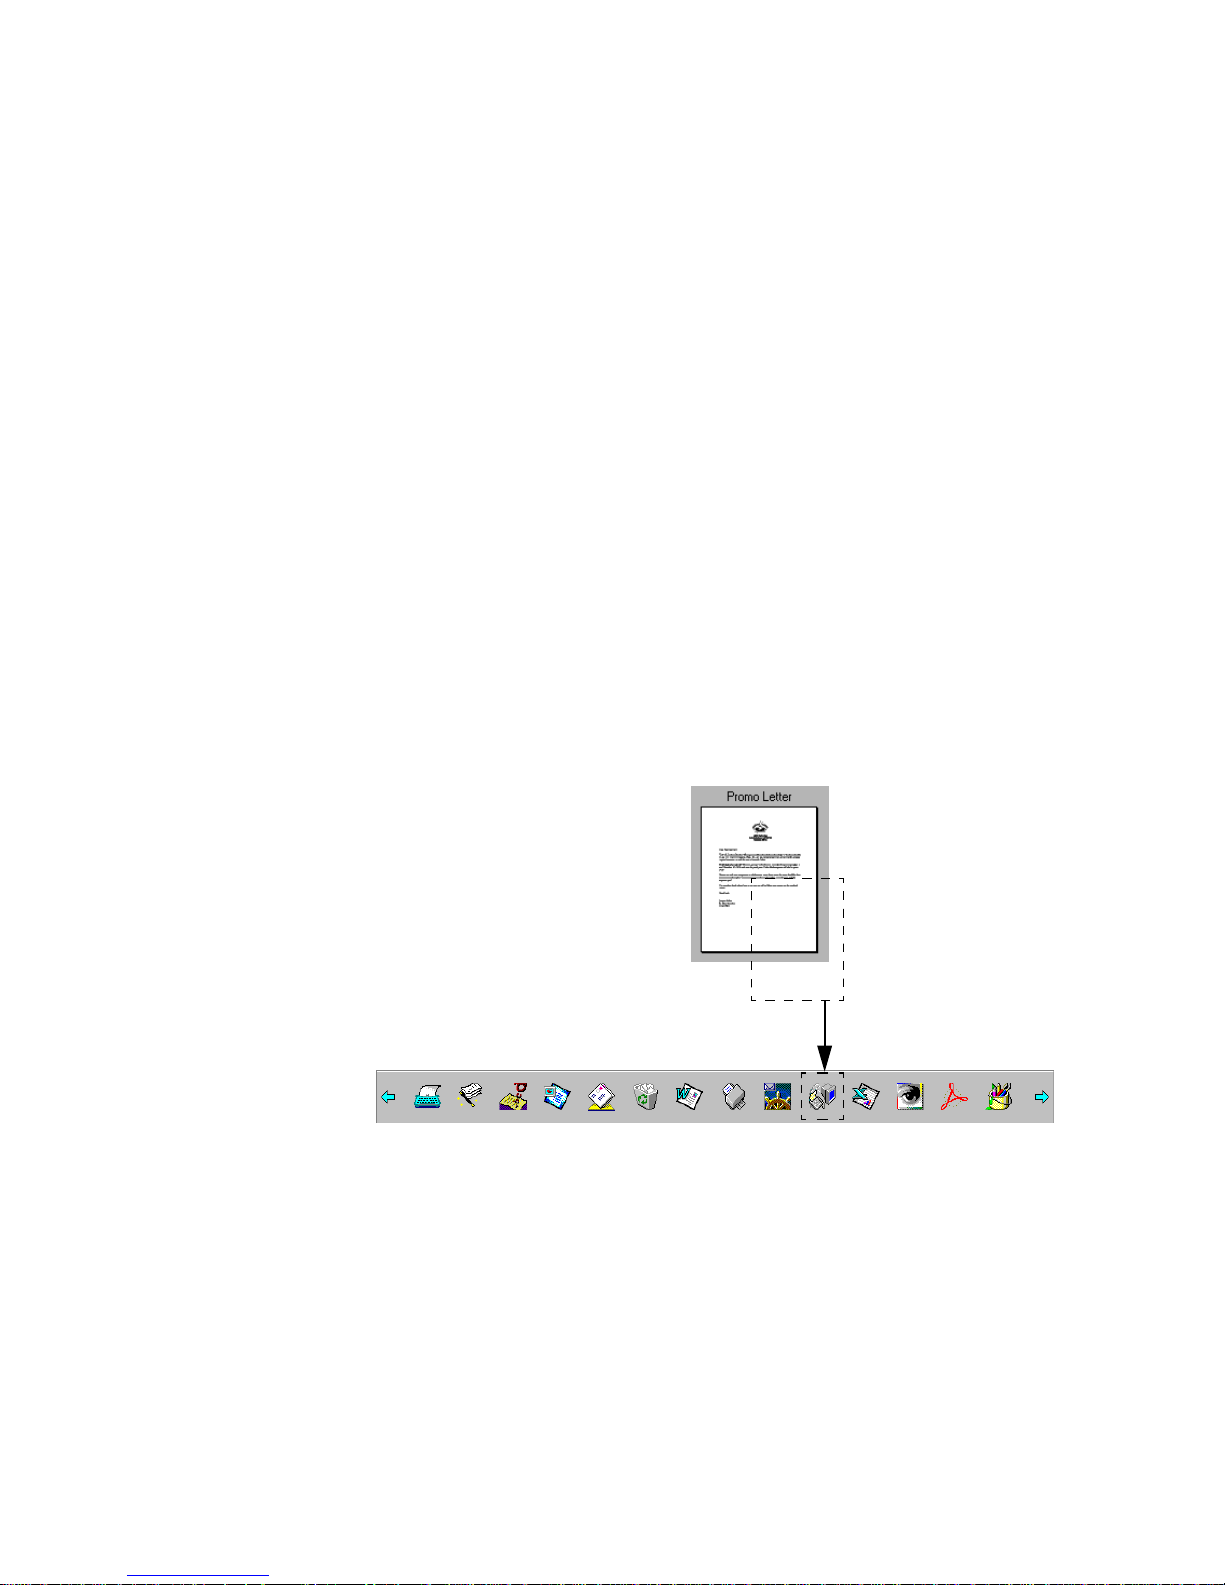
Send an item by dragging and dropping it onto a link icon. This
example shows dragging and dropping an item onto the WinFax Pro
link icon.
When the fax link icon is highlighted, release the mouse button. Your
fax application starts and you can send the item as a fax.
E-MAIL IT
If you can send e-mail from your computer, you can send any item as an
e-mail attachment, including pages, graphics, and photos. You can use
either the e-mail link icon or a convenient Send command to attach an
item to an e-mail message.
Page 17
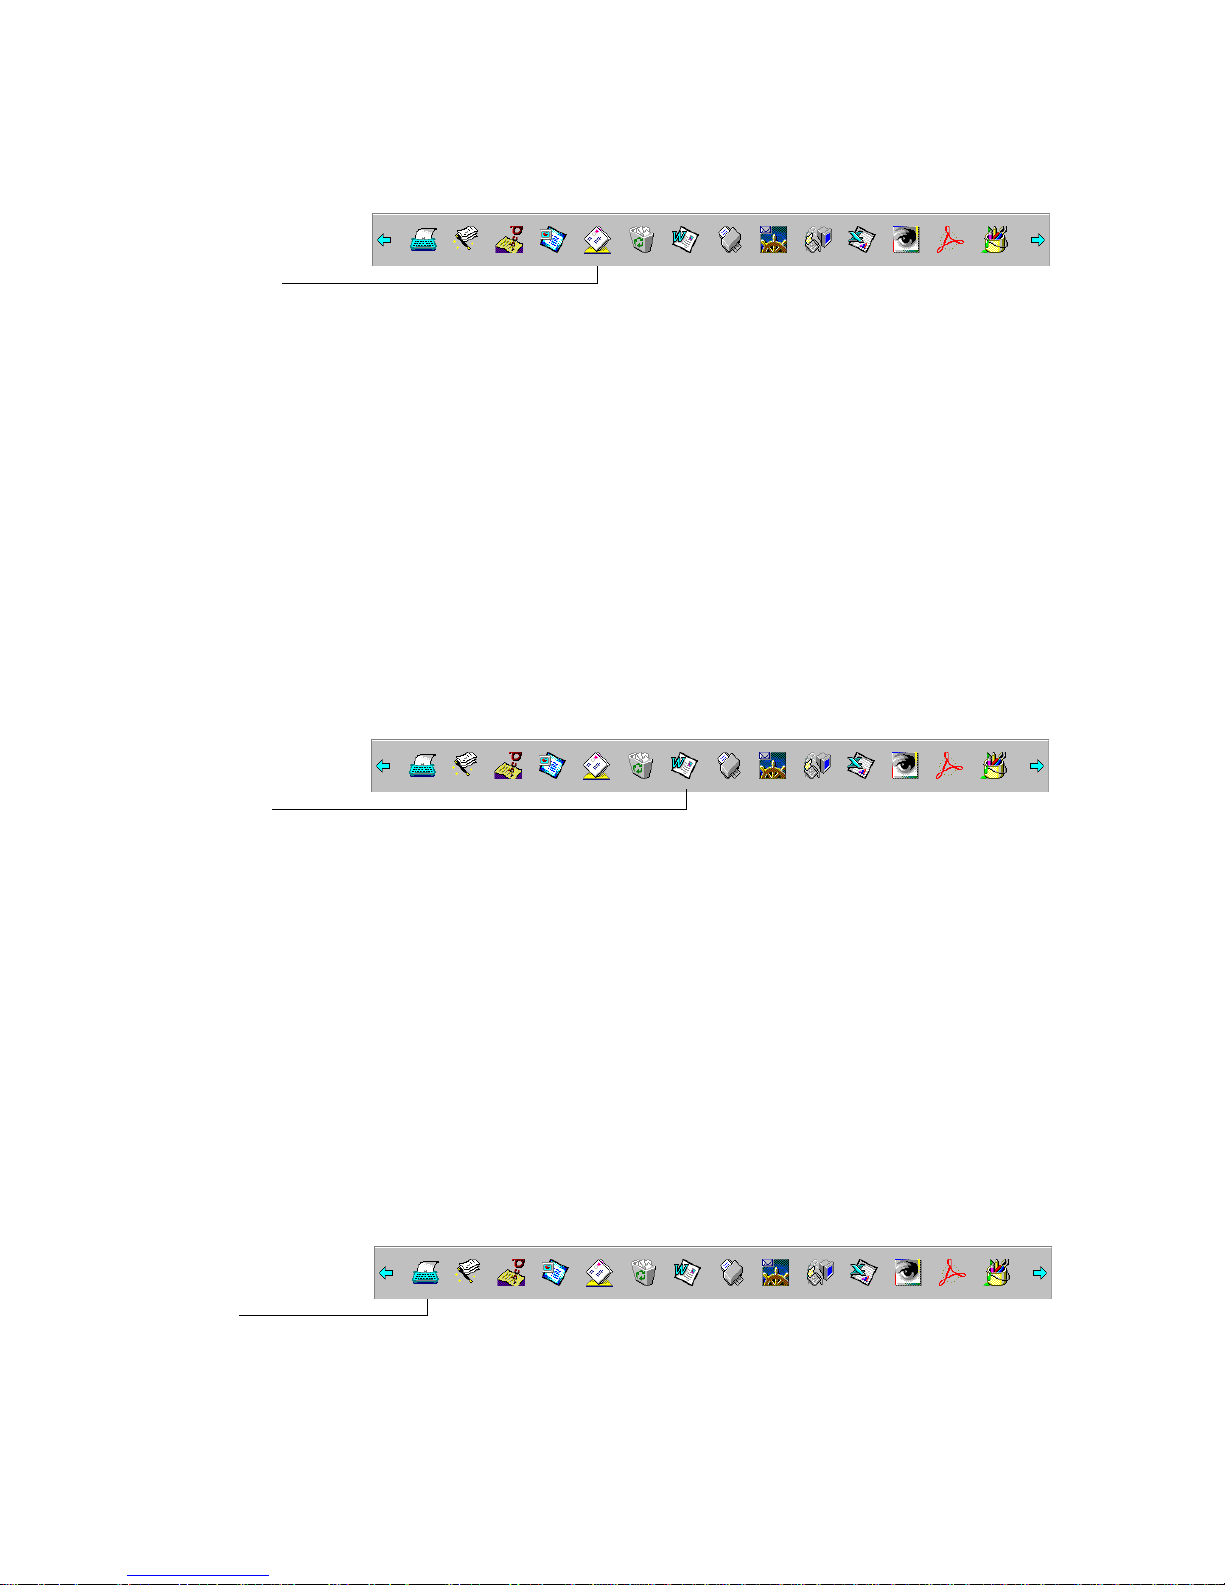
The e-mail link icon
for Lotus cc:Mail.
CONVERT IMAGE TEXT TO TEXT THAT YOU CAN EDIT 9
CONVERT IMAGE TEXT TO TEXT THAT YOU CAN EDIT
PaperPort can quickly convert the text on a PaperPort item (which is
really just a picture of the text) into text that you can edit with a wordprocessing application. PaperPort converts the text using either the
optical character recognition (OCR) application that comes with
PaperPort, or your OCR application if it is already on your computer.
You can convert the entire item, or by using the Copy As Text
command, you can select only a portion of the text to convert.
Dragging an item onto a word-processing link icon starts PaperPort’s
built-in OCR application, or you can use your own OCR application.
The link icon for
Microsoft Word.
The link icon
for Visioneer
FormTyper.
FILL IN A PREPRINTED FORM
A built-in PaperPort application named FormTyper is designed
specifically for filling in the fields on preprinted forms, such as insurance
forms, registration cards, or tax forms, which often ask you to “Please
Type the Information.” Using FormTyper, you can type the information
by using your computer keyboard (instead of a typewriter), and then
print the filled-in form. The FormTyper icon is on the Link Bar. Drag a
scanned form onto the FormTyper icon and the form’s fields will be
ready for you to begin typing.
Page 18
10 CHAPTER 1: WELCOME TO THE PAPERPORT SOFTWARE
USE SIMPLESEARCH TO FIND AN ITEM
The PaperPort software has a wide range of options for finding items. In
addition to the standard methods of searching for items by name, date,
or keywords, a powerful PaperPort feature named SimpleSearch can find
items based on the textual content.
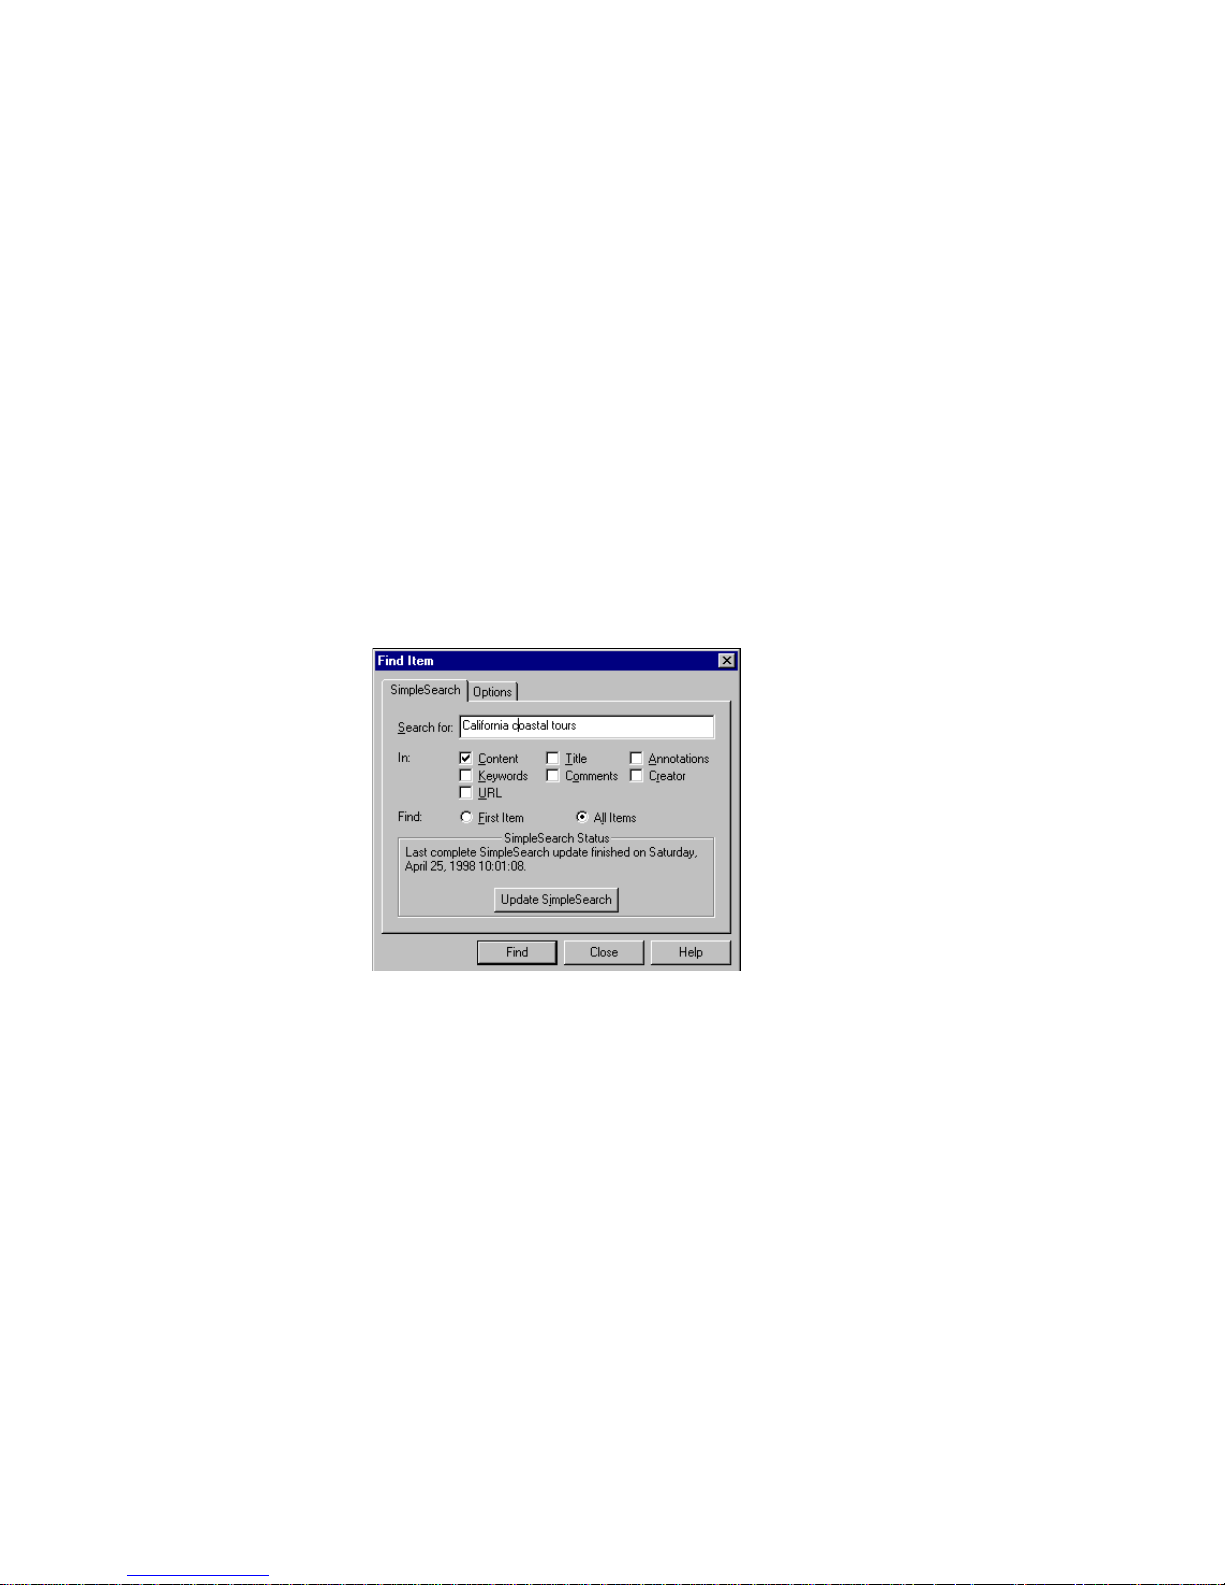
For example, if you only remember that the item included the word
“California” or the phrase “California coastal tours,” SimpleSearch can
find the item containing that word or phrase for you. SimpleSearch
finds items this way because it actually indexes all of your items (both
PaperPort and non-PaperPort items) that are included in a folder in
Folder View and remembers the textual content. You simply enter a
word or phrase, and SimpleSearch finds the items that have it.
Page 19

IMPORT ITEMS FROM OTHER APPLICATIONS 11
IMPORT ITEMS FROM OTHER APPLICATIONS
In addition to scanning items, you can bring items into PaperPort in a
variety of ways and convert them to PaperPort (MAX) files in several
different ways:
• Print to the Desktop View from another application, such as
Microsoft Excel.
• Import files saved in other file formats, such as Windows Bitmap
(BMP) or Tag Image File Format (TIFF).
• Duplicate an item as a PaperPort item.
• Capture a Web page.
EXPORT ITEMS IN OTHER FORMATS
You can export or save PaperPort items in several popular file formats,
such as BMP, JPEG, TIFF, or self-viewing. For example, to create a file
for an Internet Web site, export it as a JPEG file. Web pages often use
JPEG files for displaying images.
VIEW PAPERPORT ITEMS ON OTHER COMPUTERS
PaperPort Viewer, a separate application, comes with PaperPort and lets
others view PaperPort items without PaperPort. PaperPort Viewer is
available for free on the Visioneer Web site at www.visioneer.com. You
can also embed a mini PaperPort Viewer application with an e-mail
message or export a file as self-viewing. The recipient of a message or of
the self-viewing file simply double-clicks the attachment or file to see the
PaperPort file.
Page 20
12 CHAPTER 1: WELCOME TO THE PAPERPORT SOFTWARE
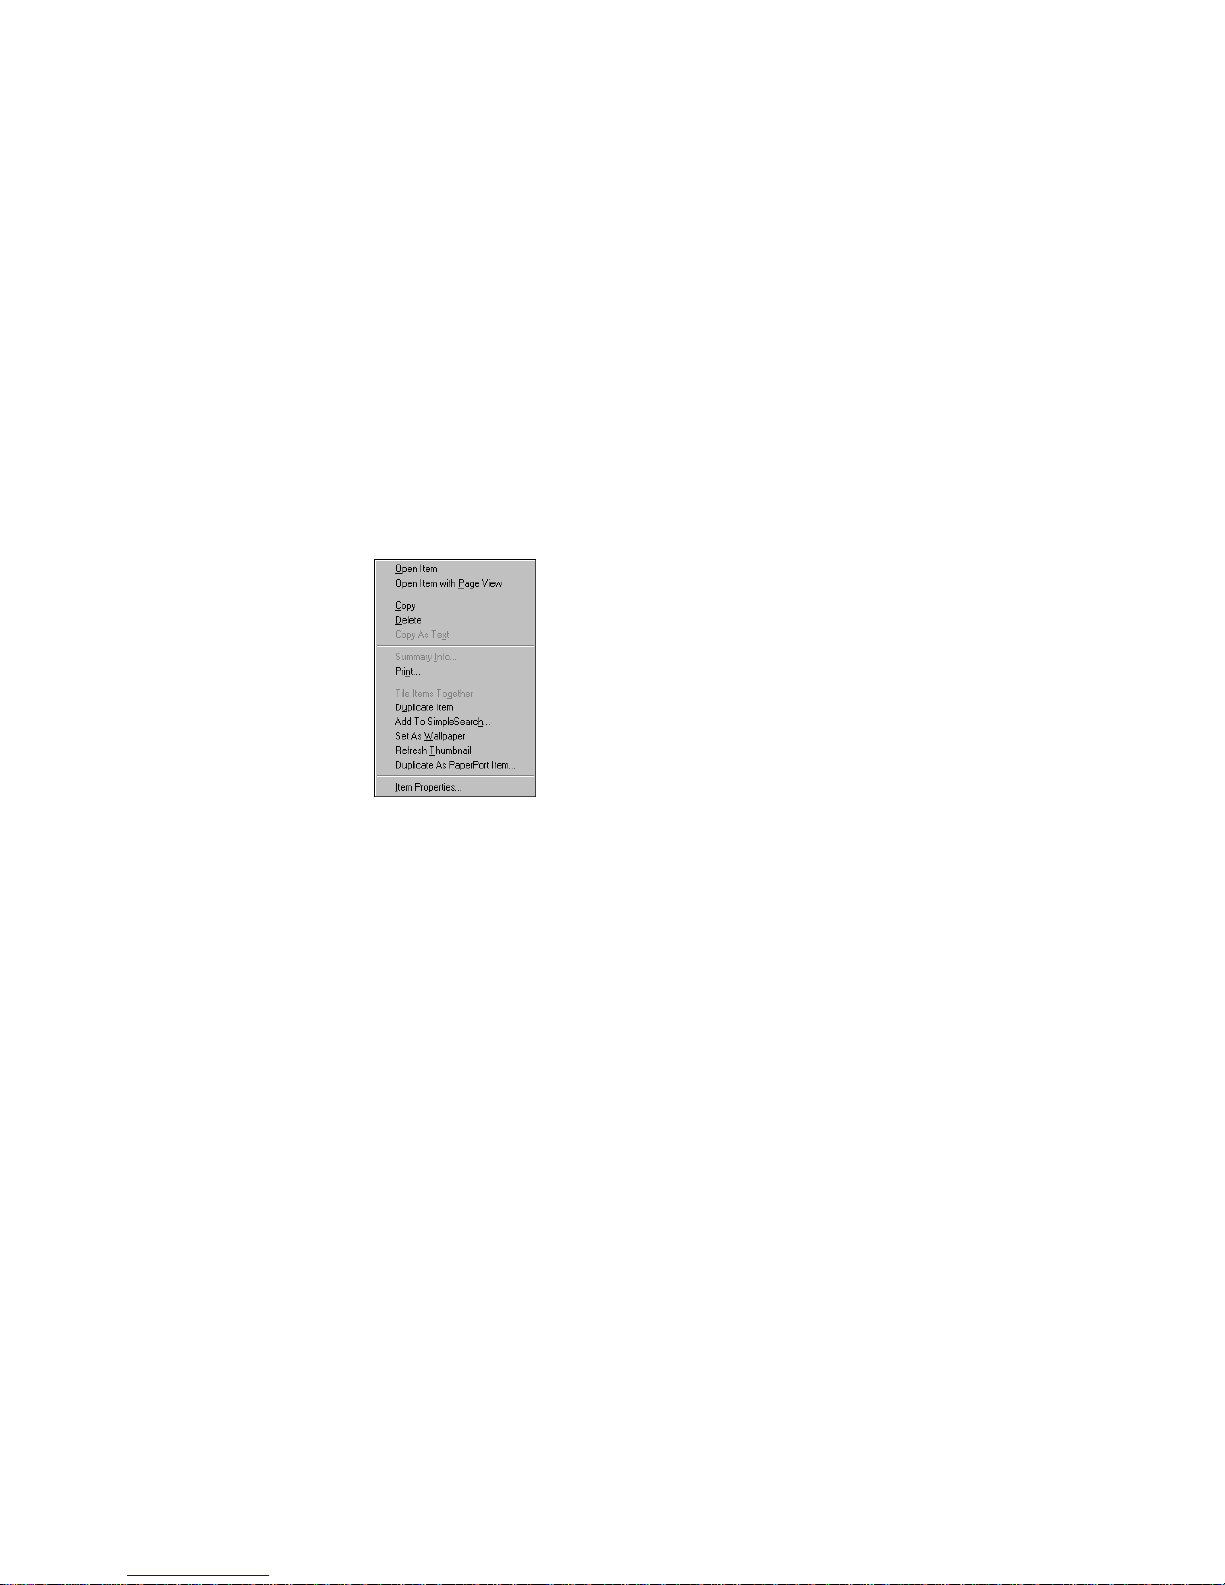
USE RIGHT MOUSE BUTTON SHORTCUTS
Many of the tools, buttons, and icons in PaperPort have right mouse
button shortcuts. For example, select an item in Desktop View and click
the right mouse button to display a menu for the item. You can choose
commands from that menu instead of the menus in the menu bar.
The following sample shows the shortcut menu for a single item
in Desktop View. Other shortcut menus appear when you click the right
mouse button in Desktop View instead of on an item, and when you’re
viewing an item in Page View.
VISIT VISIONEER’S WEB SITE
You can use the PaperPort software to connect to different areas on
Visioneer’s Web site (www.visioneer.com) on the Internet.
The PaperPort software starts your Internet browser software and
displays the selected area on Visioneer’s Web site. (If you do not have a
direct Internet connection, you might have to connect to your Internet
provider before choosing an Internet menu command.)
Page 21

CHAPTER 2
Viewing Items
PaperPort provides several ways to view items: Desktop View displays a
thumbnail, a small graphic that represents each item in a selected folder.
You can see PaperPort items (MAX files) and non-PaperPort items
(items created using other applications, such as Microsoft Word) located
anywhere on your computer.
Page View displays a close-up of a single page. You can view both
PaperPort items and non-PaperPort items in Page View. Desktop View
and Page View are separate applications that you can run independently
or at the same time.
You can also start and use other applications directly from Desktop
View to view non-PaperPort items created in those applications.
This chapter tells you about:
• Viewing items in Desktop View
• Viewing items in Page View
• Viewing items by using the application that created them
• Changing between Desktop View and Page View
• Setting the Double-Click Action preference
• Quitting Desktop View or Page View
13
Page 22

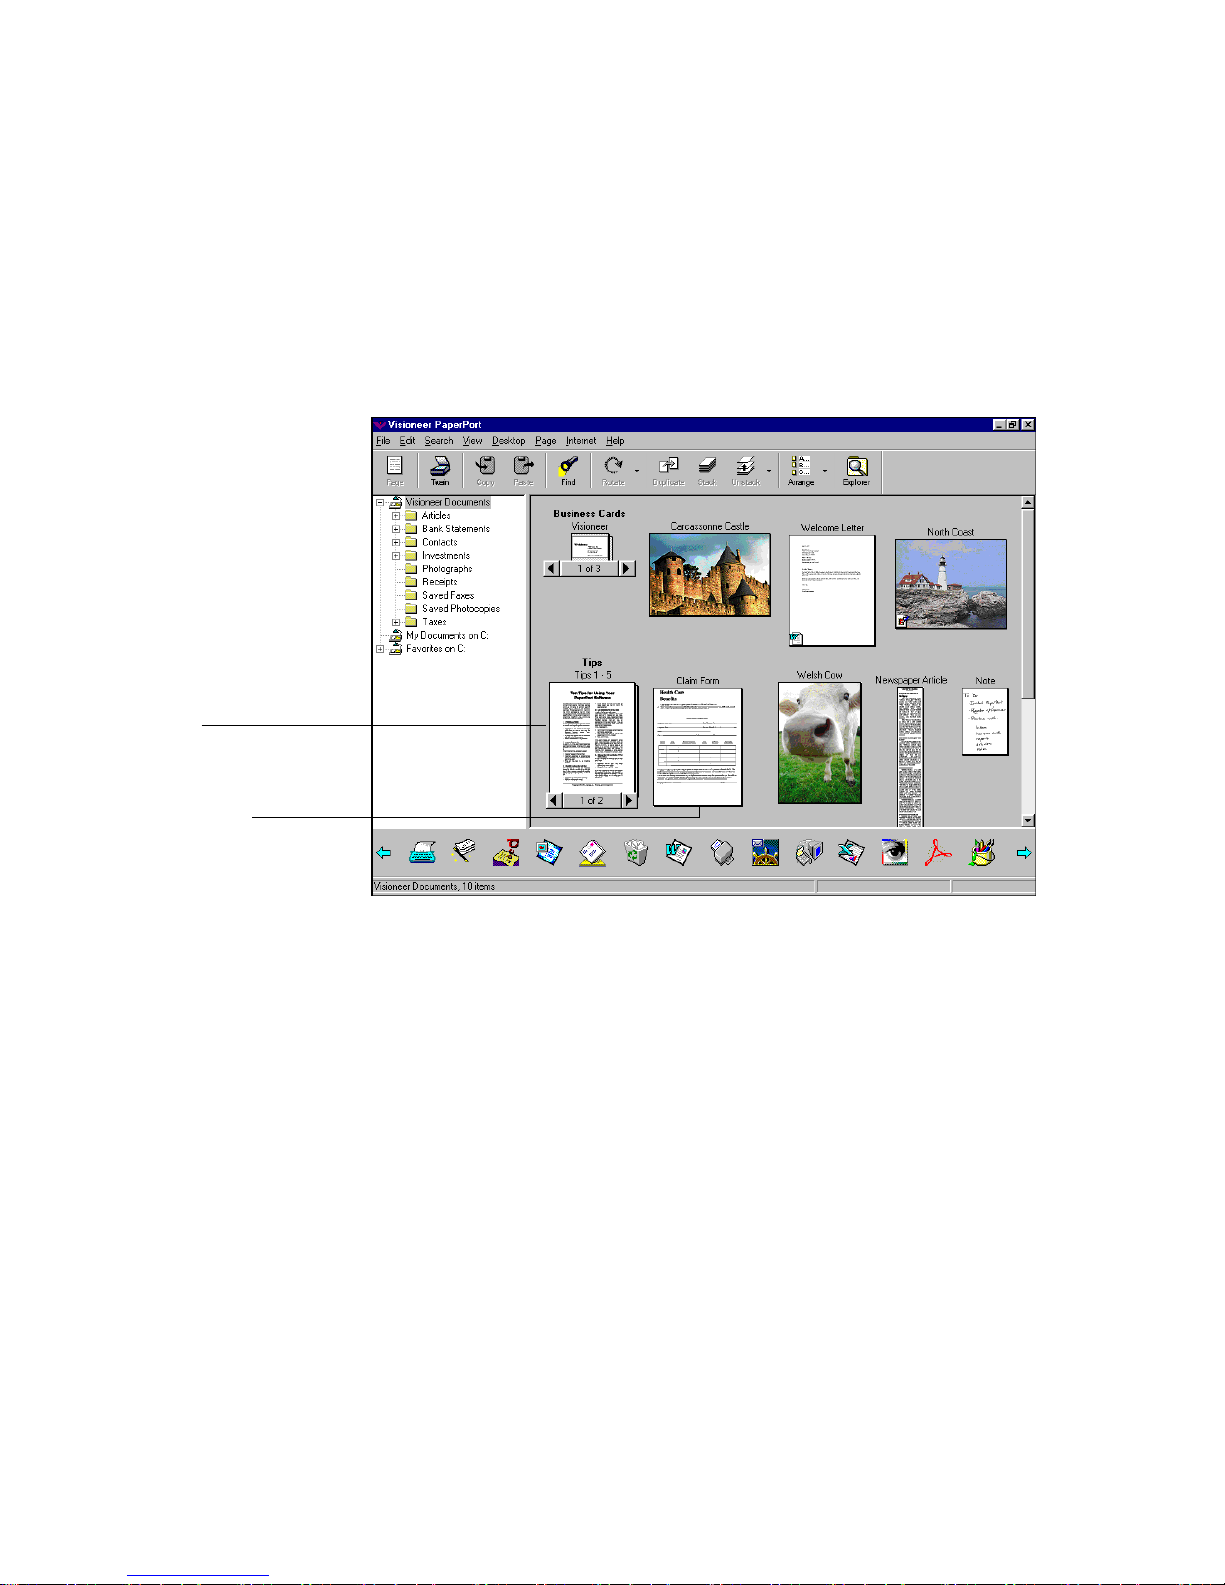
14 CHAPTER 2: VIEWING ITEMS
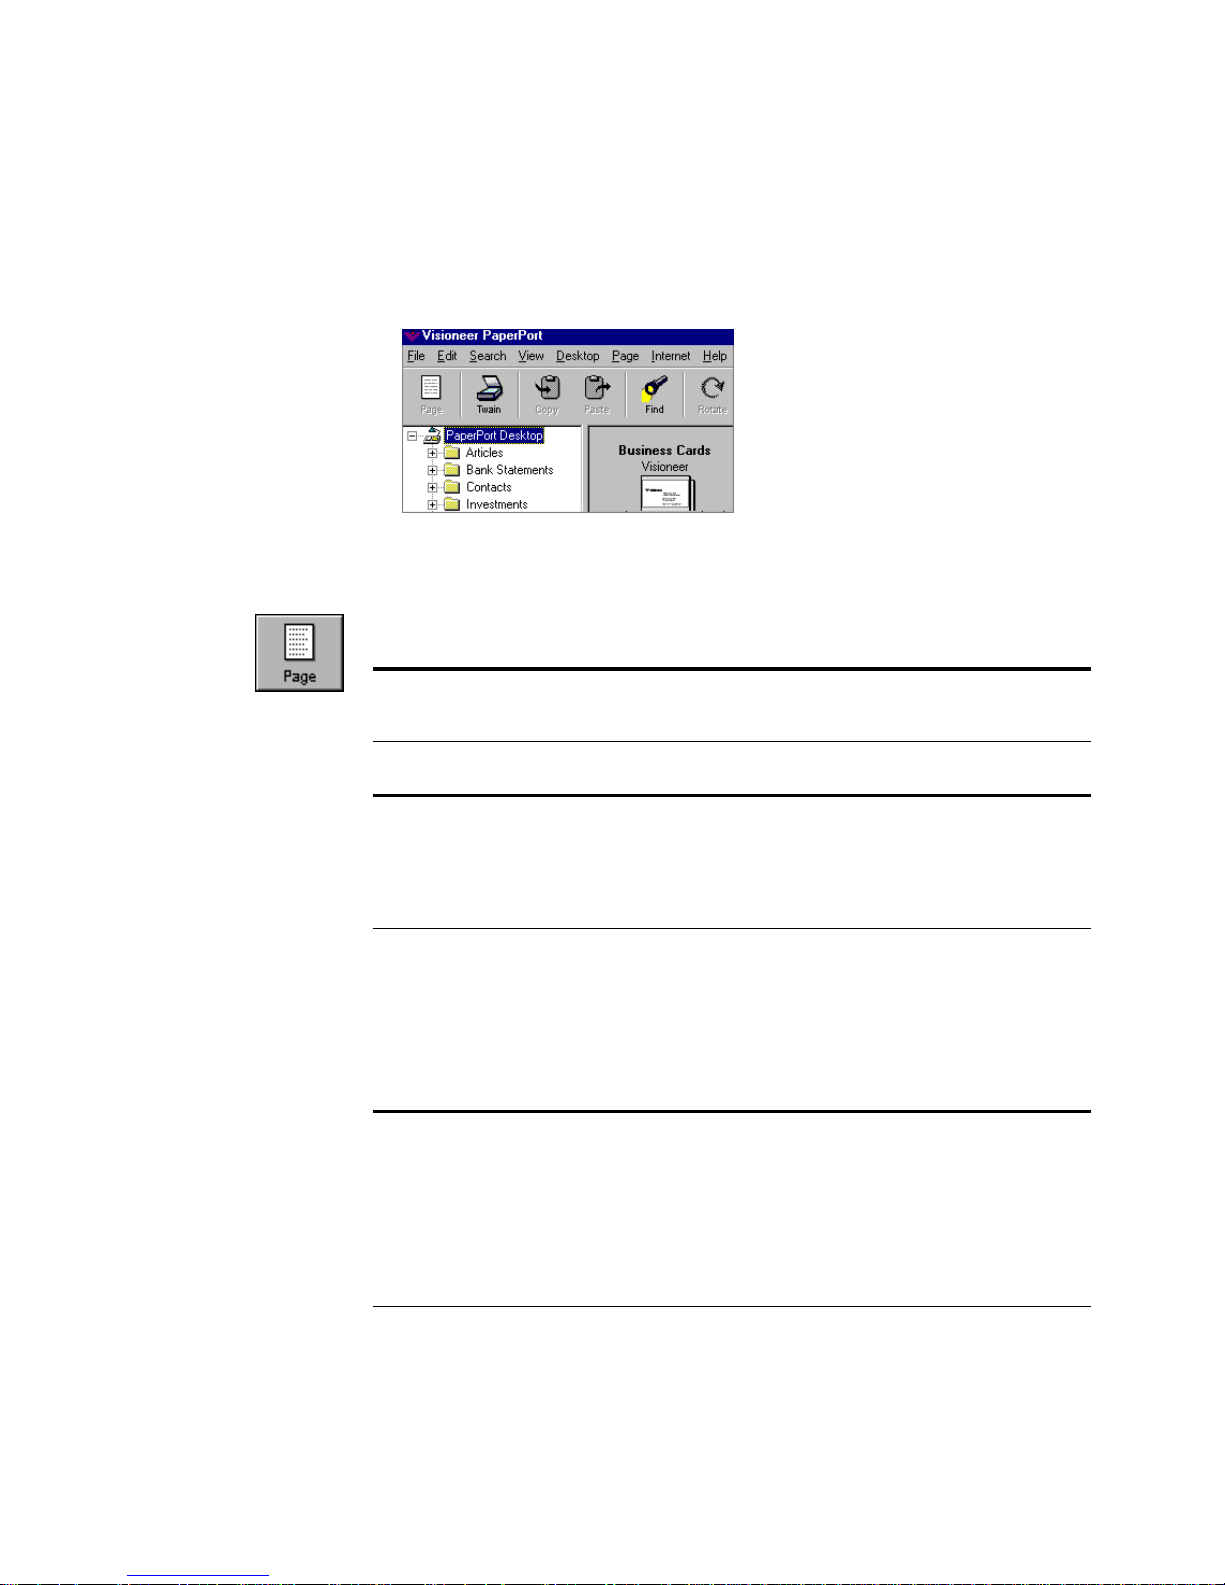
VIEWING ITEMS IN DESKTOP VIEW
Desktop View shows thumbnails of items and stacks of items. When
you first start Desktop View, the items in the default folder appear. You
can select a different folder to see its items.
To view items in Desktop View:
• Double-click the PaperPort icon on the Windows desktop.
or
• In Page View, click the Desktop button.
The Command Bar has
shortcuts for choosing
menu commands, such
as changing views.
Use the Folder View
to navigate between
different folders
and to file and
organize items.
Stacks are PaperPort
items that have been
combined. Stack
titles appear in bold
type above the
page titles.
Use the scroll arrow
to view other links on
the Link Bar.
Thumbnail of
a PaperPort item.
Thumbnail of non-PaperPort
item (for example, a Word file).
The status bar shows
information about the
selected item, link,
or button.
The Link Bar has icons that represent other applications and functions
that work with PaperPort. The icons vary, depending on the applications
installed on your computer.
Page 23

VIEWING ITEMS IN DESKTOP VIEW 15
Tip: By default, the Desktop background is gray. If you prefer to use
the system default background color, deselect the gray option in the
Desktop Preferences. To display the preferences, choose Preferences
from the Edit menu, and then click the Desktop tab.
USING DESKTOP VIEW
Desktop View contains many features that help you to easily navigate
between folders and display items to perform a variety of actions.
Command Bar. The buttons on the Command Bar are shortcuts for
commands on the menus. For example, clicking the Find button is the
same as choosing Find from the Search menu. The Command Bar
appears in both Desktop View and Page View, but most of the buttons
are different.
Folder View. The Folder View is the left pane shown in Desktop View.
It contains the default folder (Visioneer Documents, unless you chose a
different folder at installation) and any other folders that you add to it.
The folders that you add to the Folder View can be located anywhere on
your computer or located on any device connected to your computer,
such as folders on an external hard drive, Zip drive, or CD. After you
add a folder to the Folder View, you can see all of its subfolders and
items (both PaperPort and non-PaperPort) in Desktop View. You can
also work with the folders and items, such as moving, copying, and
renaming items in Desktop View. For more information about using the
Folder View to manage your items, see Chapter 3, “Filing Items.”
Thumbnails of PaperPort items. PaperPort thumbnails are small
representations of PaperPort items so that you can see the items at a
glance. To see an item at full size, use Page View.
Thumbnails of non-PaperPort items. If an item is a non-PaperPort
item, such as a Microsoft Word or Microsoft Excel file, the item also
appears as a thumbnail. In addition, a small icon representing the
application that was used to create the item appears at the corner of the
thumbnail.
Page 24
16 CHAPTER 2: VIEWING ITEMS
A stack. After scanning or importing multiple pages to Desktop View,
you can combine the thumbnails of those pages into a stack. For
example, if you scan a 10-page report, 10 individual pages appear on the
PaperPort Desktop. By combining the pages into a stack, you can work
with the report as a single item. Stack titles appear in bold type above
the page titles. You cannot stack non-PaperPort items; however, you can
change non-PaperPort items into a PaperPort items and then stack them
together. (For more information, see Chapter 13, “Importing,
Exporting, and Printing.”)
Link Bar. The icons on the Link Bar represent other applications and
functions that work with PaperPort. The icons include links for sending
a scanned item as a fax or an e-mail attachment, reading text from a
scanned item into a word-processing program, entering data into a
preprinted form, and so on. The icons that appear depend on the
applications installed on your computer. Use the scroll arrows on the
Link Bar to see the other icons.
Status Bar. The Status Bar shows information about the selected
items, the links, or the buttons on the Command Bar.
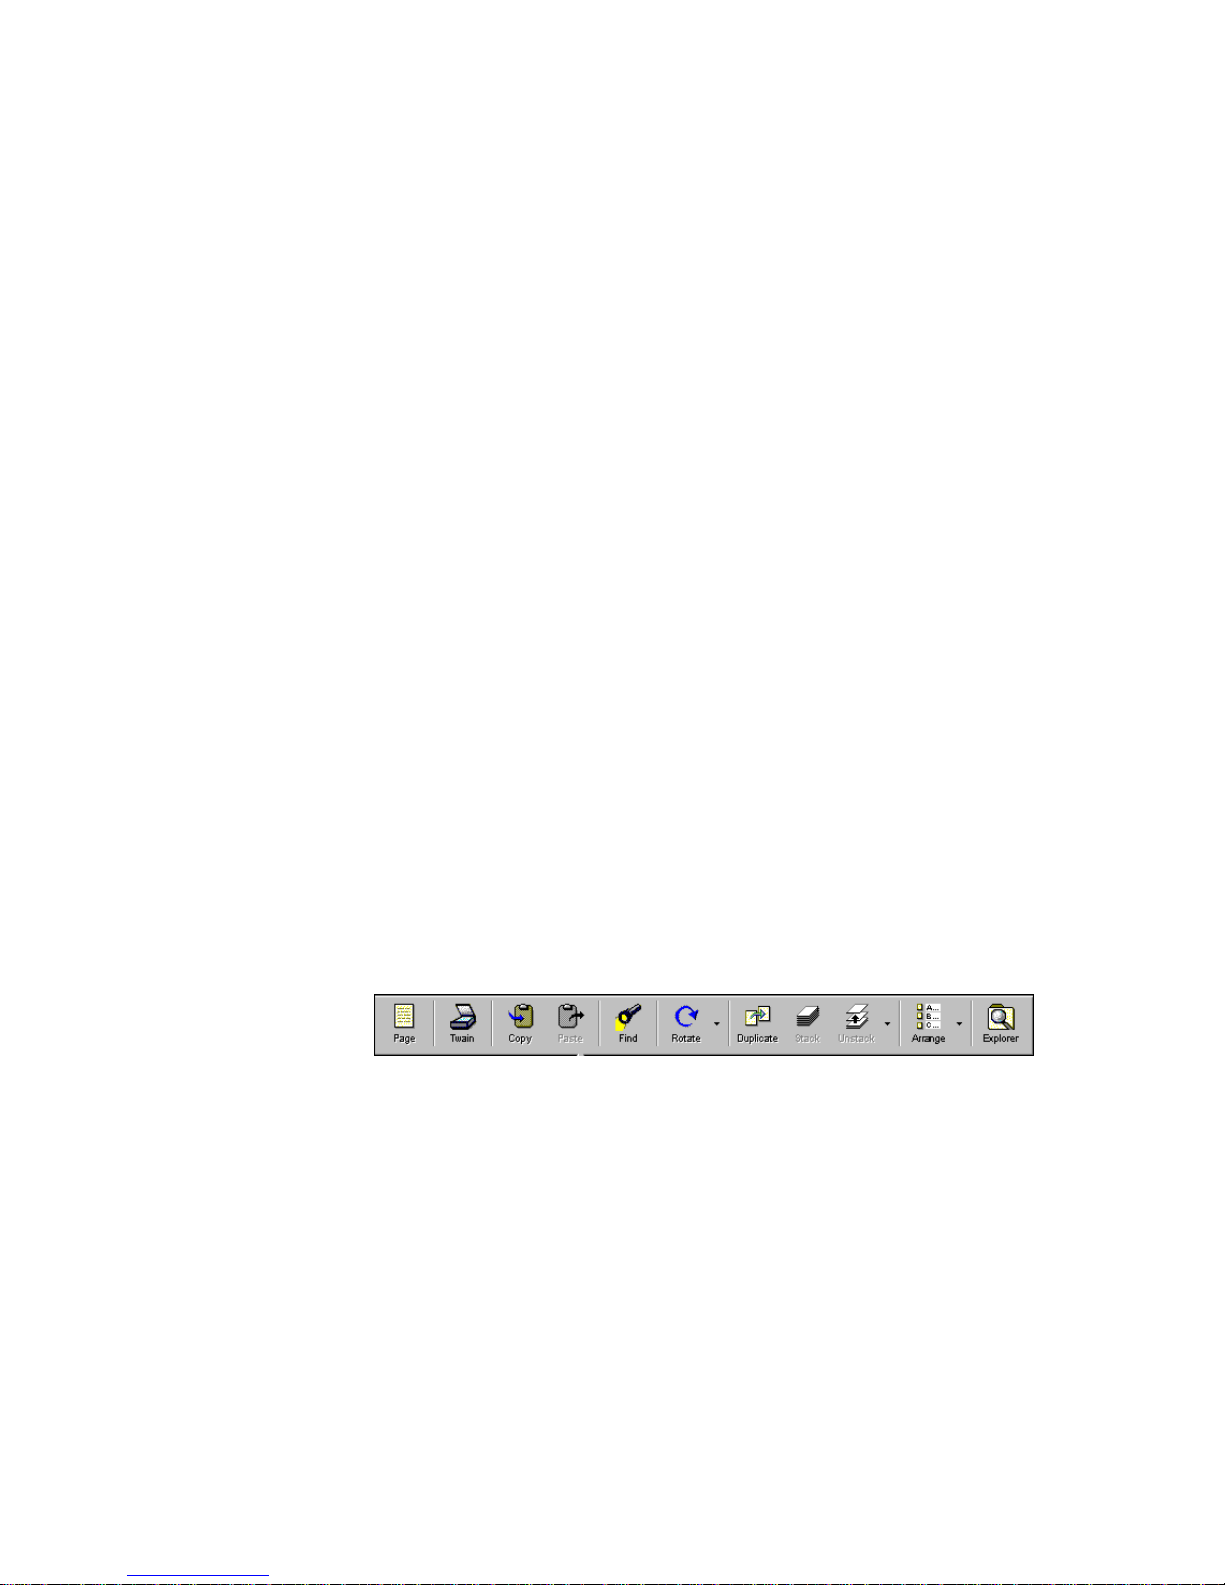
USING THE COMMAND BAR IN DESKTOP VIEW
To use a button on the Command Bar, click it. If a button does not
apply to a selected item, the button will be gray, and clicking it will not
have any effect.
Page. Change from Desktop View to Page View. To use this button,
you must first select an item.
Twain. Acquire an item using a Twain device, such as a scanner. For
example, if you have a flatbed scanner attached to your computer, click
this button to start scanning. (This button appears only if you have a
TWAIN device connected to your computer.)
Copy. Copy an item shown in Desktop View.
Paste. Paste an item into the currently selected folder in Desktop View.
Page 25

VIEWING ITEMS IN PAGE VIEW 17
Find. Find an item in Desktop View.
Rotate. Rotate the selected items or stacks. Rotating a stack rotates
every page in the stack. Click the arrow next to the button to see
different options for rotating items, such as to the right, left, or flipped.
Duplicate. Make a copy of the selected items.
Stack. Combine selected items into one stack.
Unstack. Unstack the pages of the selected stack. Click the arrow next
to the button to see different options for unstacking items, such as
unstacking all pages or unstacking only the current page in a stack.
Arrange. Arrange the items on the PaperPort Desktop. Click the arrow
next to the button to see different options for arranging items, such as
by position, name, date, size, or type.
Explorer. Change to Windows Explorer. You can drag and drop items
between Desktop View and a Windows Explorer folder or location.
Note: Two other buttons might appear on the Command Bar.
A Settings button appears if you are using the PaperPort software with
a PaperPort sheet-fed scanner. Click this button to display the
PaperPort Preferences dialog box where you can set scan settings and
options. The other button that can appear on the Command Bar is
labeled OLE Return. It appears when you are using Windows Object
Linking and Embedding (OLE).
VIEWING ITEMS IN PAGE VIEW
Page View displays a close-up view of one page so that it is readable on
the screen. In Page View, you can view PaperPort items and nonPaperPort items created using other applications. You can also adjust
and edit the quality, color, and other aspects of a PaperPort image using
the Image Editing toolbar. With PaperPort items and the annotation
tools, you can add comments, highlight or circle information, or add a
picture to a page. Any changes you make in Page View are automatically
saved when you close Page View or view a different item in Page View.
Page 26
18 CHAPTER 2: VIEWING ITEMS
To view a PaperPort item in Page View:
• In Desktop View, double-click the item that you want to see in
Page View, such as a scanned business card.
or
• Click an item in Desktop View, and then click the Page button.
Tip: You can also double-click a PaperPort item in Windows Explorer
to view it in Page View.
Note: If you start Page View from Desktop View, Page View replaces
the Desktop View window. If you prefer, you can open Page View in a
separate window. To set this option, select Launch Page View in a
Separate Window, in the Desktop preference.
To view a non-PaperPort item in Page View:
• In Desktop View, Shift-double-click a non-PaperPort item, or click
the non-PaperPort item, and then click the Page icon on the
Command Bar.
Note: If you double-click a non-PaperPort item, it appears in the
application used to create it. For more information about viewing a
non-PaperPort item in its application, see “Viewing items by using the
application that created them.” For information about changing the
preference that controls the double-click action, see “Setting the
Double-Click Action preference.”
Page 27
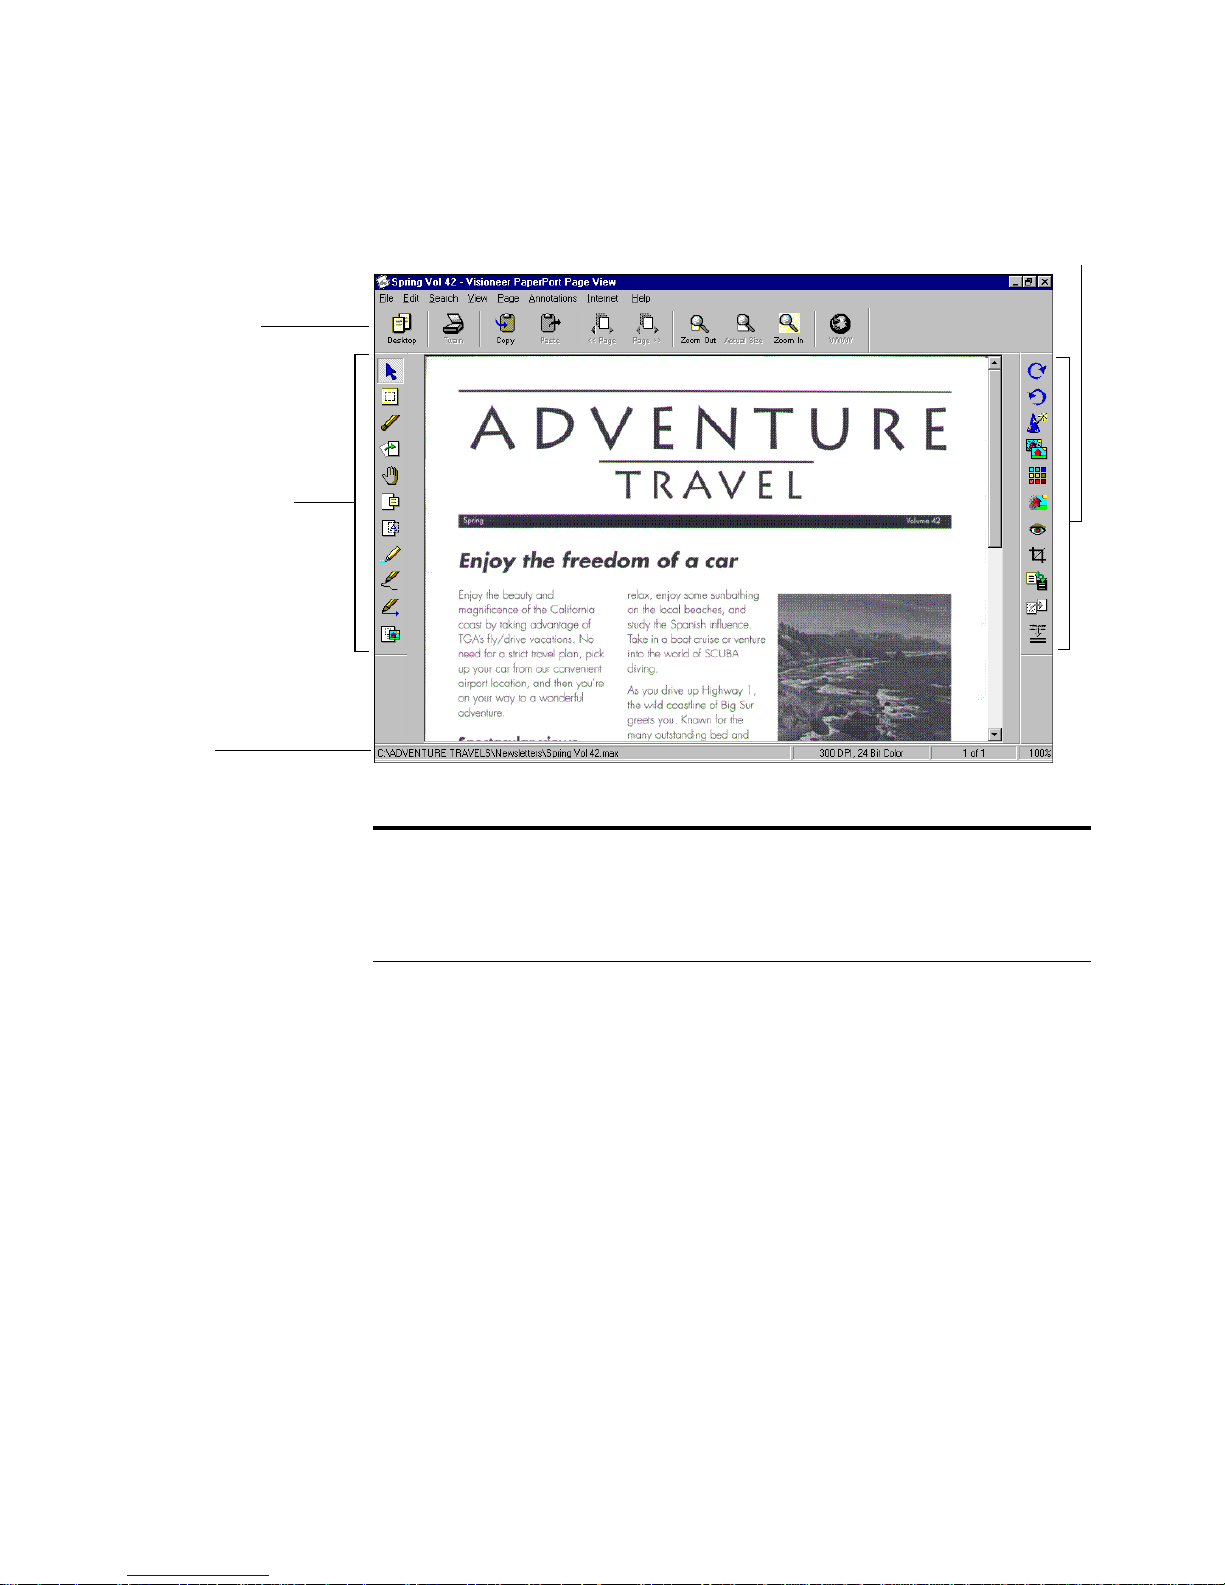
Command Bar
Annotation toolbar
VIEWING ITEMS IN PAGE VIEW 19
Image Editing toolbar
Status bar
-
Note: To open multiple Page View windows at the same time, choose
Open New Viewer for Each Document in Page View, Viewer
Preferences. To display Page View preferences, choose Preferences
from the Edit menu.
USING PAGE VIEW
Page View provides many useful features for viewing an item, adding
annotations, and editing an image.
Command Bar. The buttons on the Command Bar are shortcuts for
commands on the menus. Notice that most of the buttons in the Page
View Command Bar are different from those in Desktop View.
Annotation toolbar. These tools are for adding notes to a page,
highlighting areas on it, cutting and pasting sections, drawing on the
page, adding a picture to the page, and so forth. See Chapter 11,
“Annotating a Page,” for examples of annotations and how to use the
tools.
Page 28
20 CHAPTER 2: VIEWING ITEMS
Image Editing toolbar. These tools are for editing the scanned
images, including adjusting an image’s colors, rotating an image,
removing the “red eye” effect from a color snapshots, sharpening fuzzy
images, and so on. See Chapter 12, “Editing Images,” for more
information.
Status bar. The status bar shows information about the page being
displayed.
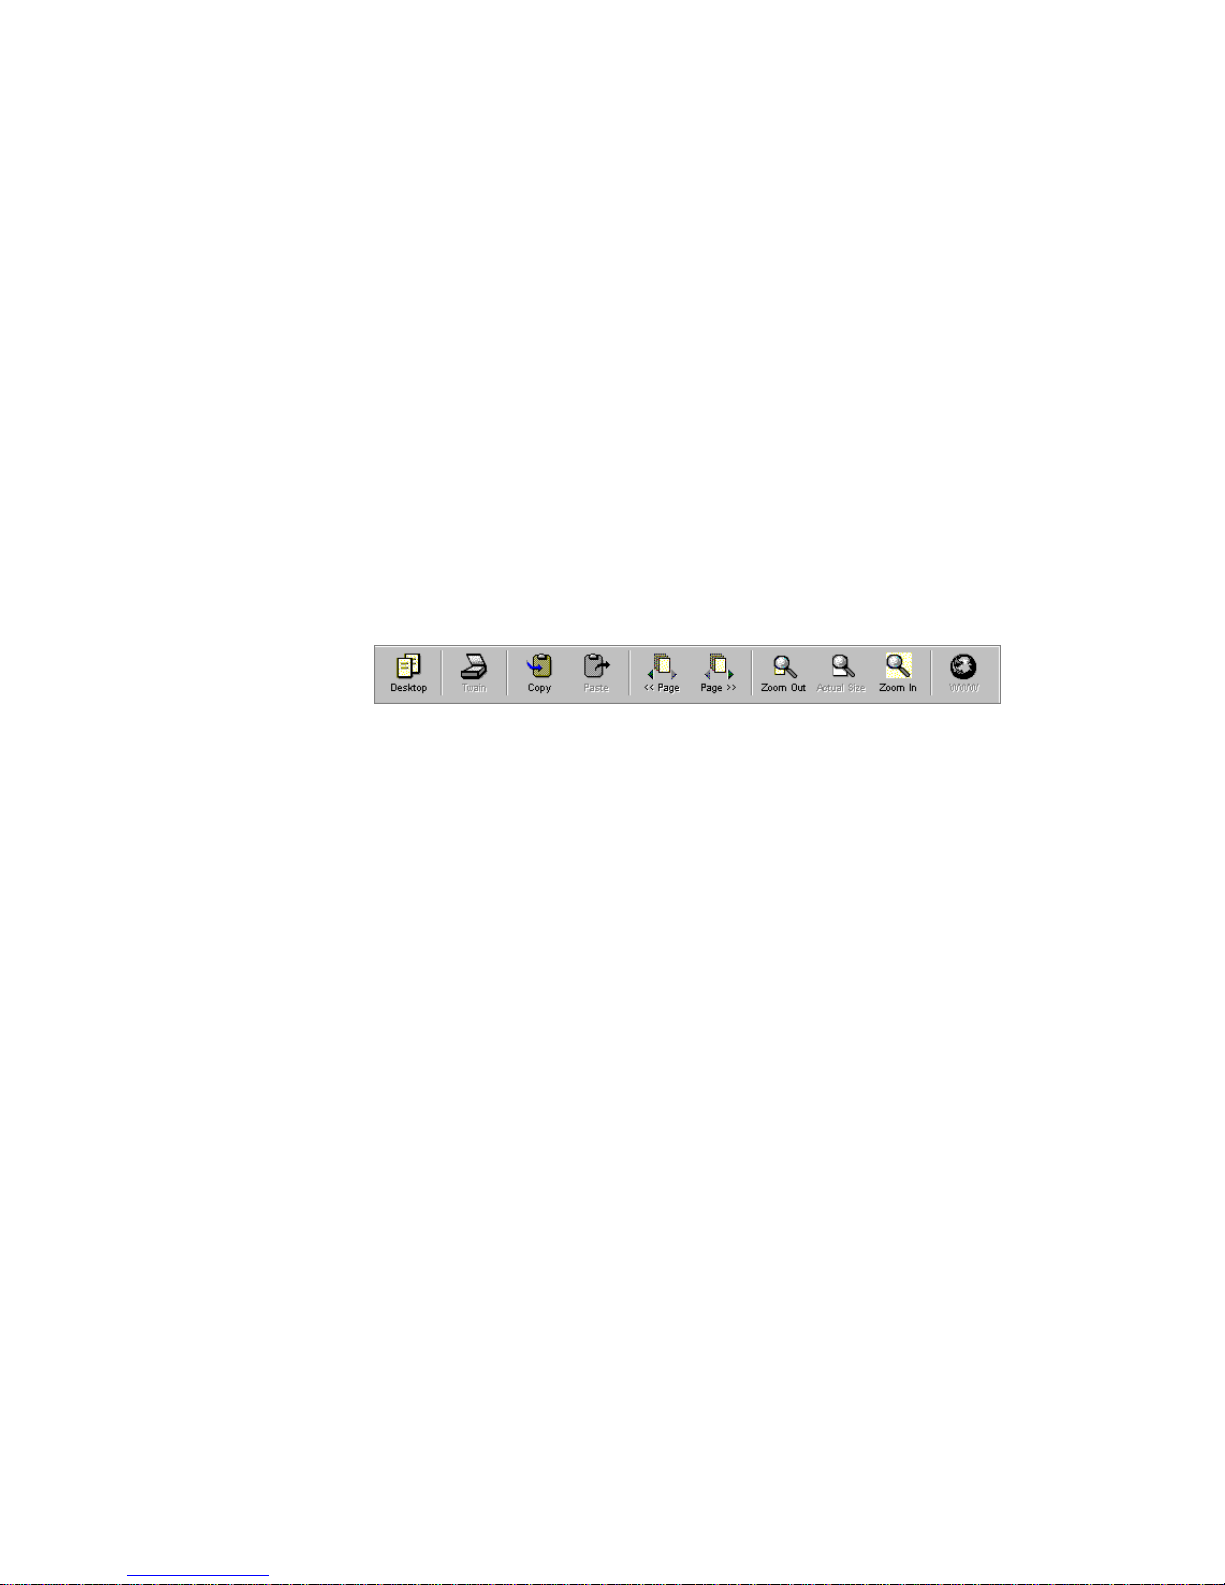
USING THE COMMAND BAR IN PAGE VIEW
The buttons on the Command Bar help you view a page. For example,
you can view different pages, zoom in and zoom out, and enhance an
image.
Desktop. Change from Page View to Desktop View.
Twain. Acquire an item using a TWAIN device, such as a scanner. For
example, if you have a flatbed scanner attached to your computer, click
this button to start scanning. (This button appears only if you have a
TWAIN device connected to your computer.)
Copy. Copy an item.
Paste. Paste a copied item.
<< Page. Displays the previous page in a stack.
Page >>. Displays the next page in a stack.
Zoom Out. Reduces the size of the page in Page View.
Actual Size. Returns the page to its original (100%) size.
Zoom In. Magnifies the size of the page in Page View.
WWW. Connects to the Internet Web page shown in Page View.
Page 29

VIEWING ITEMS IN PAGE VIEW 21
Note: Several other buttons might appear on the Command Bar.
A Settings button appears if you are using the PaperPort software with
a PaperPort sheet-fed scanner. Click this button to display the
PaperPort Preferences dialog box where you can set scan settings and
options. The OLE Return button appears when you are using
Windows Object Linking and Embedding (OLE). The << Item and
Item >> buttons appear if you replace the Desktop View window with
the Page View window when you view an item in Page View. Click
these buttons to see the previous and next item on the Desktop.
In addition to the Command Bar, you can use the keyboard to move
between pages in a stack or to the top or bottom of a page, as described
in the following table.
Key Action
Page Down Scrolls down several lines through the
document each time you press the key. If
you press the key at the end of a page in a
stack, the next page appears.
Page Up Scrolls up several lines through the
document each time you press the key.
Cursor Down Scrolls down one line at a time through the
document each time you press the key.
Cursor Up Scrolls up one line at a time through the
document each time you press the key. If
you press the key at the beginning of a page
in a stack, the previous page appears.
Home Positions the cursor at the upper left corner
of the current page.
End Positions the cursor at the lower right corner
of the current page.
Page 30
22 CHAPTER 2: VIEWING ITEMS
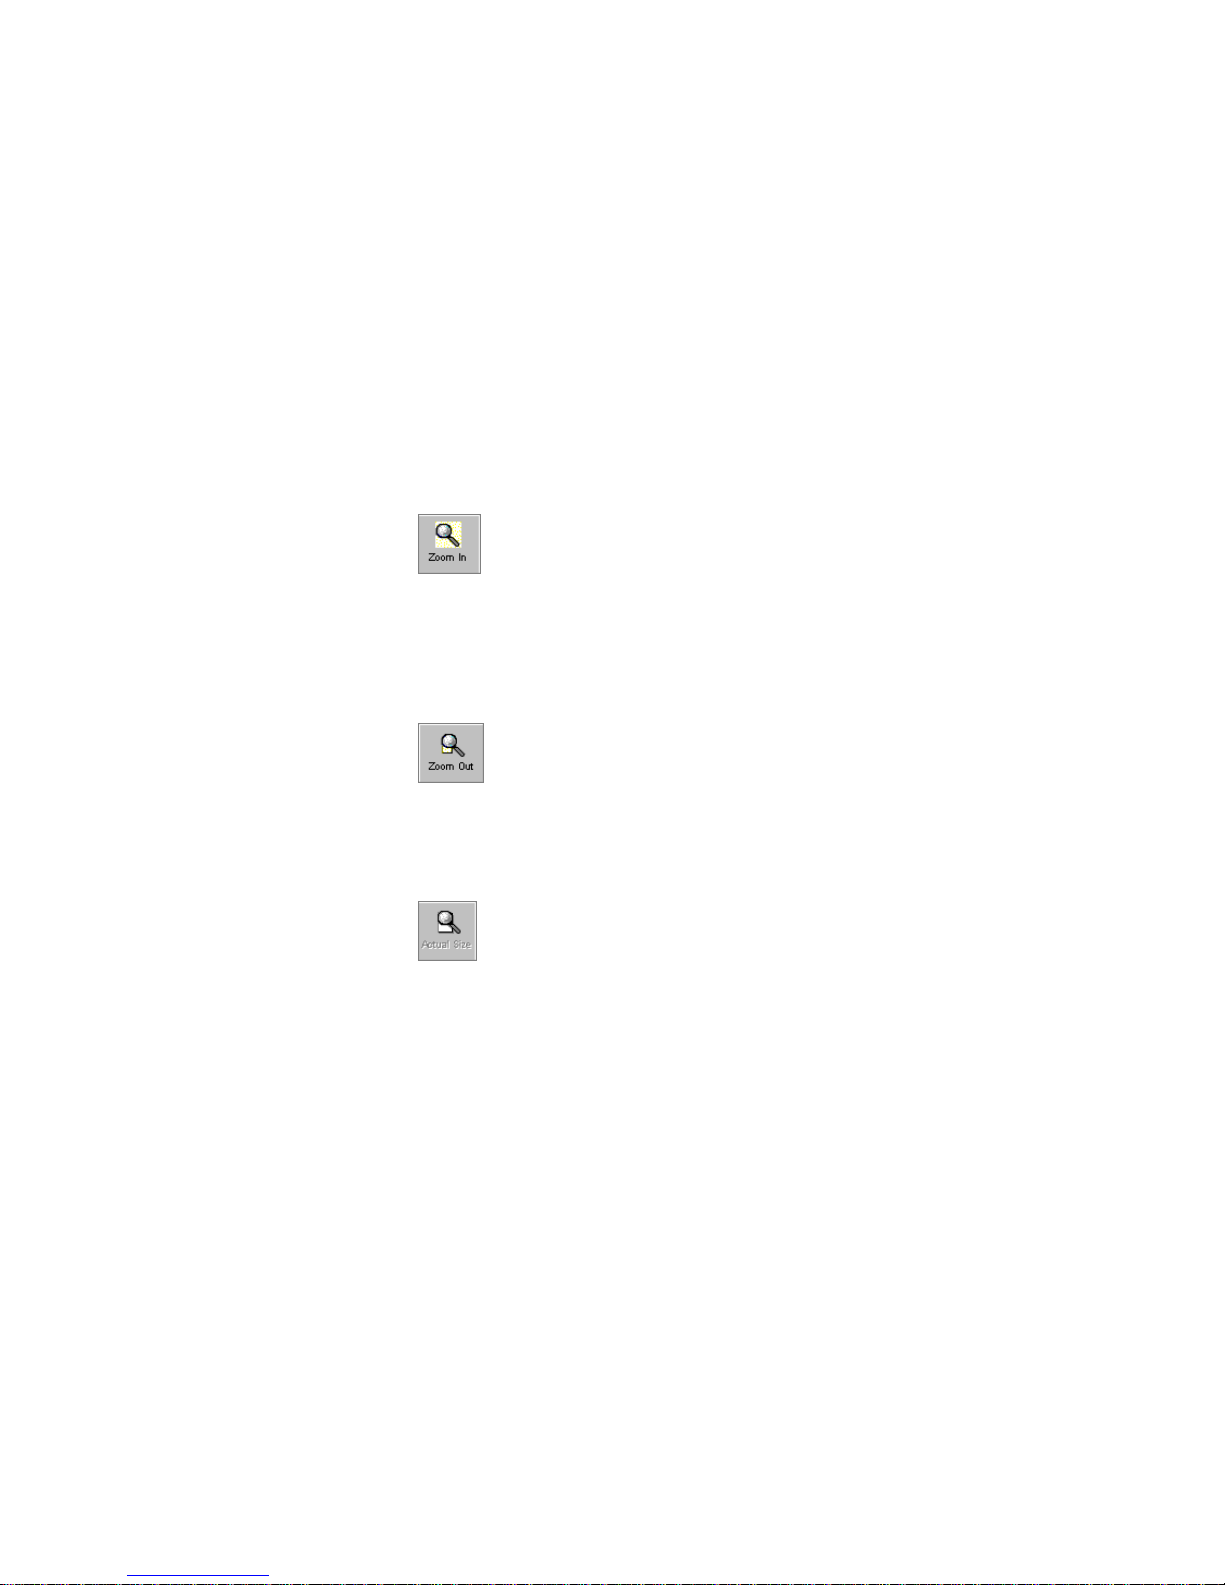
ZOOMING IN OR OUT
In Page View, you can zoom in to display the details of a page, or zoom
out to make the page smaller on the screen.
To zoom in or out on a page:
1. Display the page in Page View.
2. To zoom in, either choose Zoom In from the View menu, click the
3. To zoom out, either choose Zoom Out from the View menu, click
Zoom In button, or press the plus (+) key on the numeric keypad.
the Zoom Out button, or press the minus (-) key on the numeric
key pad.
4. To display the page at its actual size (100%), choose Actual Size
from the View menu or click the Actual Size button.
Page 31
Changes to Page View
CHANGING BETWEEN DESKTOP VIEW AND PAGE VIEW 23
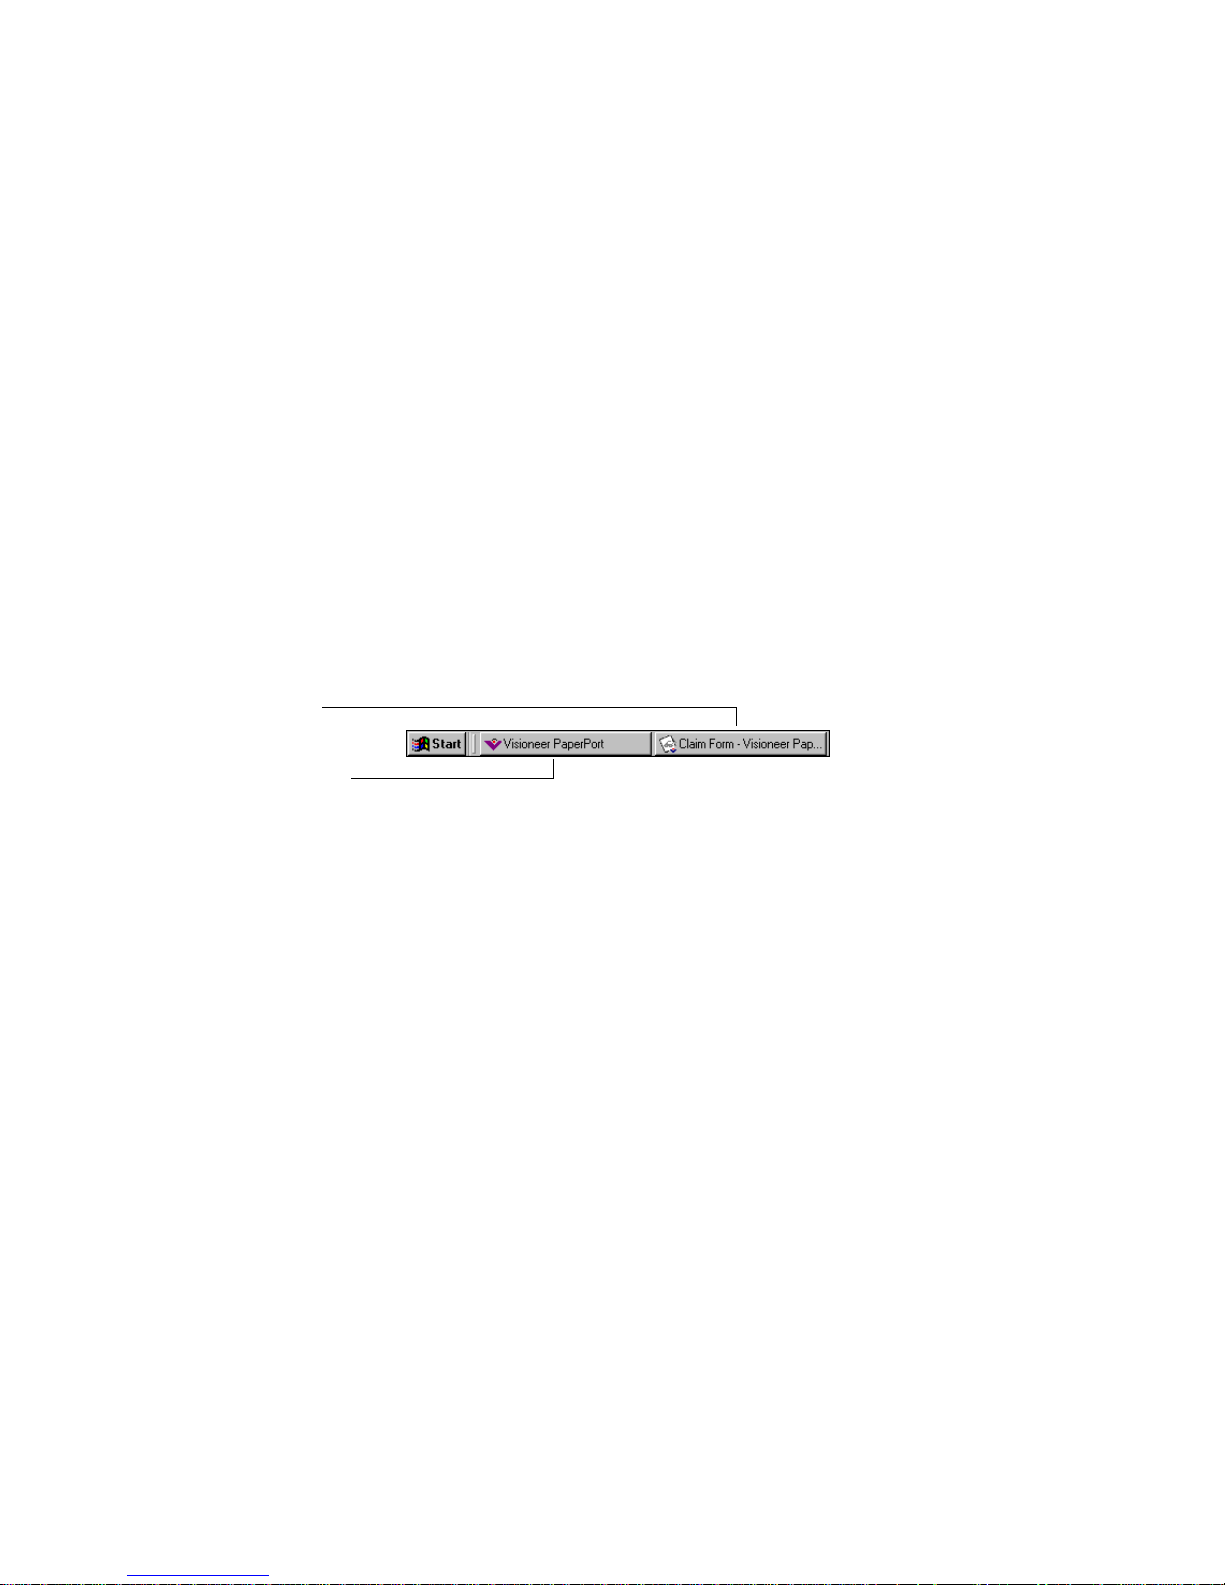
CHANGING BETWEEN DESKTOP VIEW AND PAGE VIEW
After starting Desktop View and Page View, you can use the Windows
taskbar or the Page and Desktop icons to quickly change between the
two applications.
To change between Desktop View and Page View:
1. In Desktop View, select the item you want.
2. Click the Page button.
3. To return to Desktop View, click the Desktop button.
or
• Click the Visioneer PaperPort button (Desktop View) or the button
representing the opened item (Page View) on the Windows taskbar
Changes to Desktop View
VIEWING ITEMS BY USING THE APPLICATION THAT
CREATED THEM
From Desktop View you can start a non-PaperPort item’s application
and use it to view the item.
To view a non-PaperPort item in its application:
• In Desktop View, double-click a non-PaperPort item. The application
that created the item starts and the item appears.
If you want, you can change the Double-Click Action preference so
that the item appears in Page View when you double-click it. For
more information, see the next section.
Page 32
24 CHAPTER 2: VIEWING ITEMS
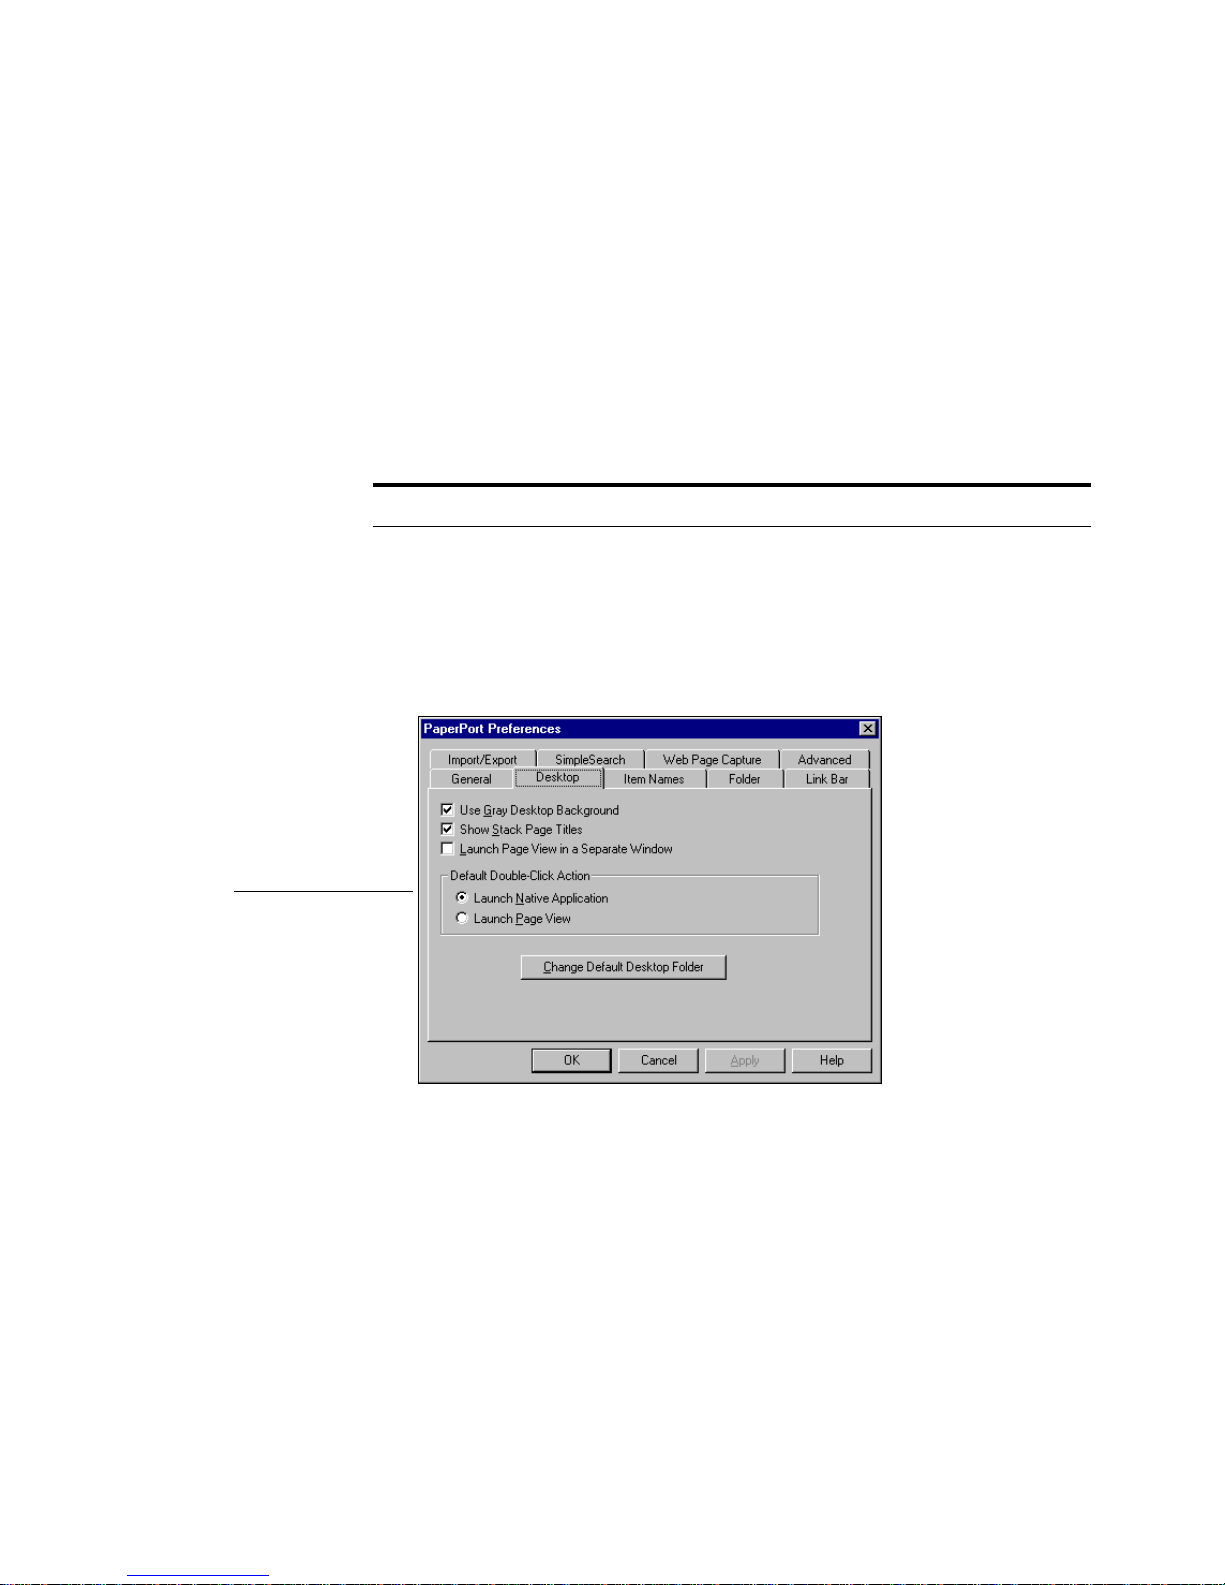
SETTING THE DOUBLE-CLICK ACTION PREFERENCE
Desktop View shows both PaperPort items and non-PaperPort items. By
default, when you double-click a non-PaperPort item in Desktop View,
it appears in the application used to create it. For example, a thumbnail
of an item with a small Microsoft Word icon in the lower left corner
would open in Word. If you prefer, you can change the Double-Click
Action preference so that a non-PaperPort item opens in Page View.
Tip: To override the preference setting, Shift-double-click an item.
To set the Double-Click Action preference:
1. From the Edit menu, choose Preference. The PaperPort Preference
2. Click the Desktop tab. The Desktop preferences appear.
dialog box appears.
Double-Click Action
preferences
3. To open and display the item in its application, select Launch
Native Application as the Default Double-Click Action.
To open and display the item in Page View, select Launch Page
View as the Default Double-Click Action.
4. Click OK.
Page 33

QUITTING DESKTOP VIEW OR PAGE VIEW 25
QUITTING DESKTOP VIEW OR PAGE VIEW
Quit Desktop View or Page View in the same way that you exit from
other Windows applications.
To quit:
• From the File menu, choose Exit.
Page 34

26 CHAPTER 2: VIEWING ITEMS
Page 35

CHAPTER 3
Filing Items
In PaperPort’s Desktop View, you can easily file and manage items. This
chapter tells you about:
• PaperPort’s filing system
• Displaying folders and items
• Adding and removing folders from Folder View
• Working with folders and items
• Using Windows Explorer to manage items
• Using SimpleSearch to find an item
PAPERPORT’S FILING SYSTEM
An efficient way to file and manage items in PaperPort is to use Desktop
View. This view includes Folder View (showing folders that you have
added to Folder View) and the Desktop (showing items contained in a
selected folder).
27
Page 36

28 CHAPTER 3: FILING ITEMS
Folder View.
This icon identifies
the folder as one that
was added to Folder
View.
Items in a selected
folder appear on the
Desktop.
A PaperPort item.
A non-PaperPort item.
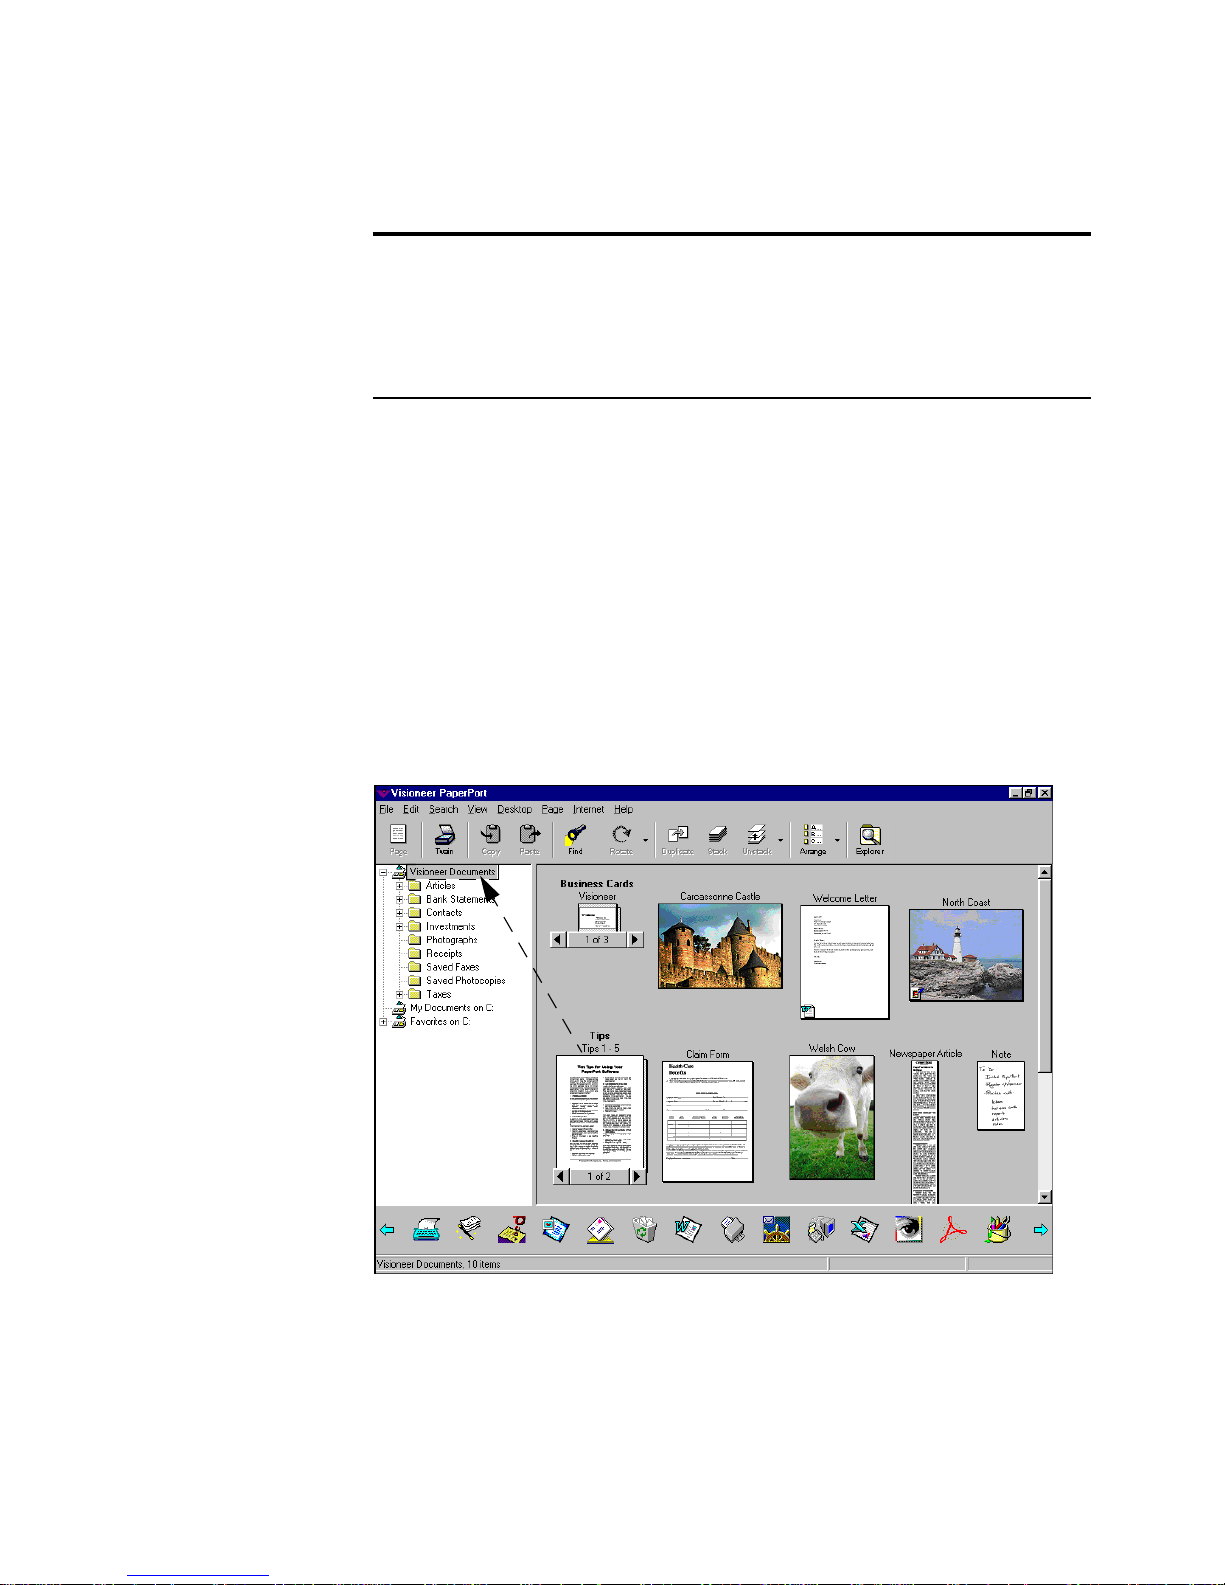
DISPLAYING FOLDERS AND ITEMS
When you start PaperPort, the Visioneer Documents folder (or the one
that you chose when you installed PaperPort) is selected in Folder View
and the items it contains appear on the Desktop. Its subfolders appear
below the folder in Folder View. PaperPort comes with a set of
predefined folders, but you can delete and move the folders, and change
the color and titles if you want.
You decide which additional folders to add to Folder View. A folder can
be located anywhere on your computer, or located on a device attached
to your computer, such as an Iomega Zip disk. An added folder is
identified with an icon, as shown in the previous figure.
Page 37

DISPLAYING FOLDERS AND ITEMS 29
After you add a folder to Folder View, you can see all of its subfolders
and its items in Desktop View. Items can include PaperPort items as well
as non-PaperPort items (files that were created using other applications,
such as Word). For more information about adding folders, see “Adding
a folder to Folder View,” later in this chapter.
Each item appears in Desktop View represented by a thumbnail.
Non-PaperPort items include a small icon representing the application
used to create the item. This makes it easy and convenient to quickly see
all different types of items.
To see the contents of a folder:
1. In Folder View, double-click the folder that you want to view or
click the plus sign (+) if one appears.
If the selected folder includes items not contained in a subfolder,
the items appear on the Desktop; any subfolders appear below the
added folder in Folder View.
2. Double-click a folder to display its contents. Any items in the folder
appear on the Desktop.
Note: If a folder contains other folders, a plus sign (+) appears to the
left of the Folder name. You can click the plus sign to display the list
of folders. A minus (-) sign indicates that all subfolders are displayed.
You can click the minus sign to collapse a folder.
Page 38
30 CHAPTER 3: FILING ITEMS
Items in the selected
folder appear on
the Desktop.
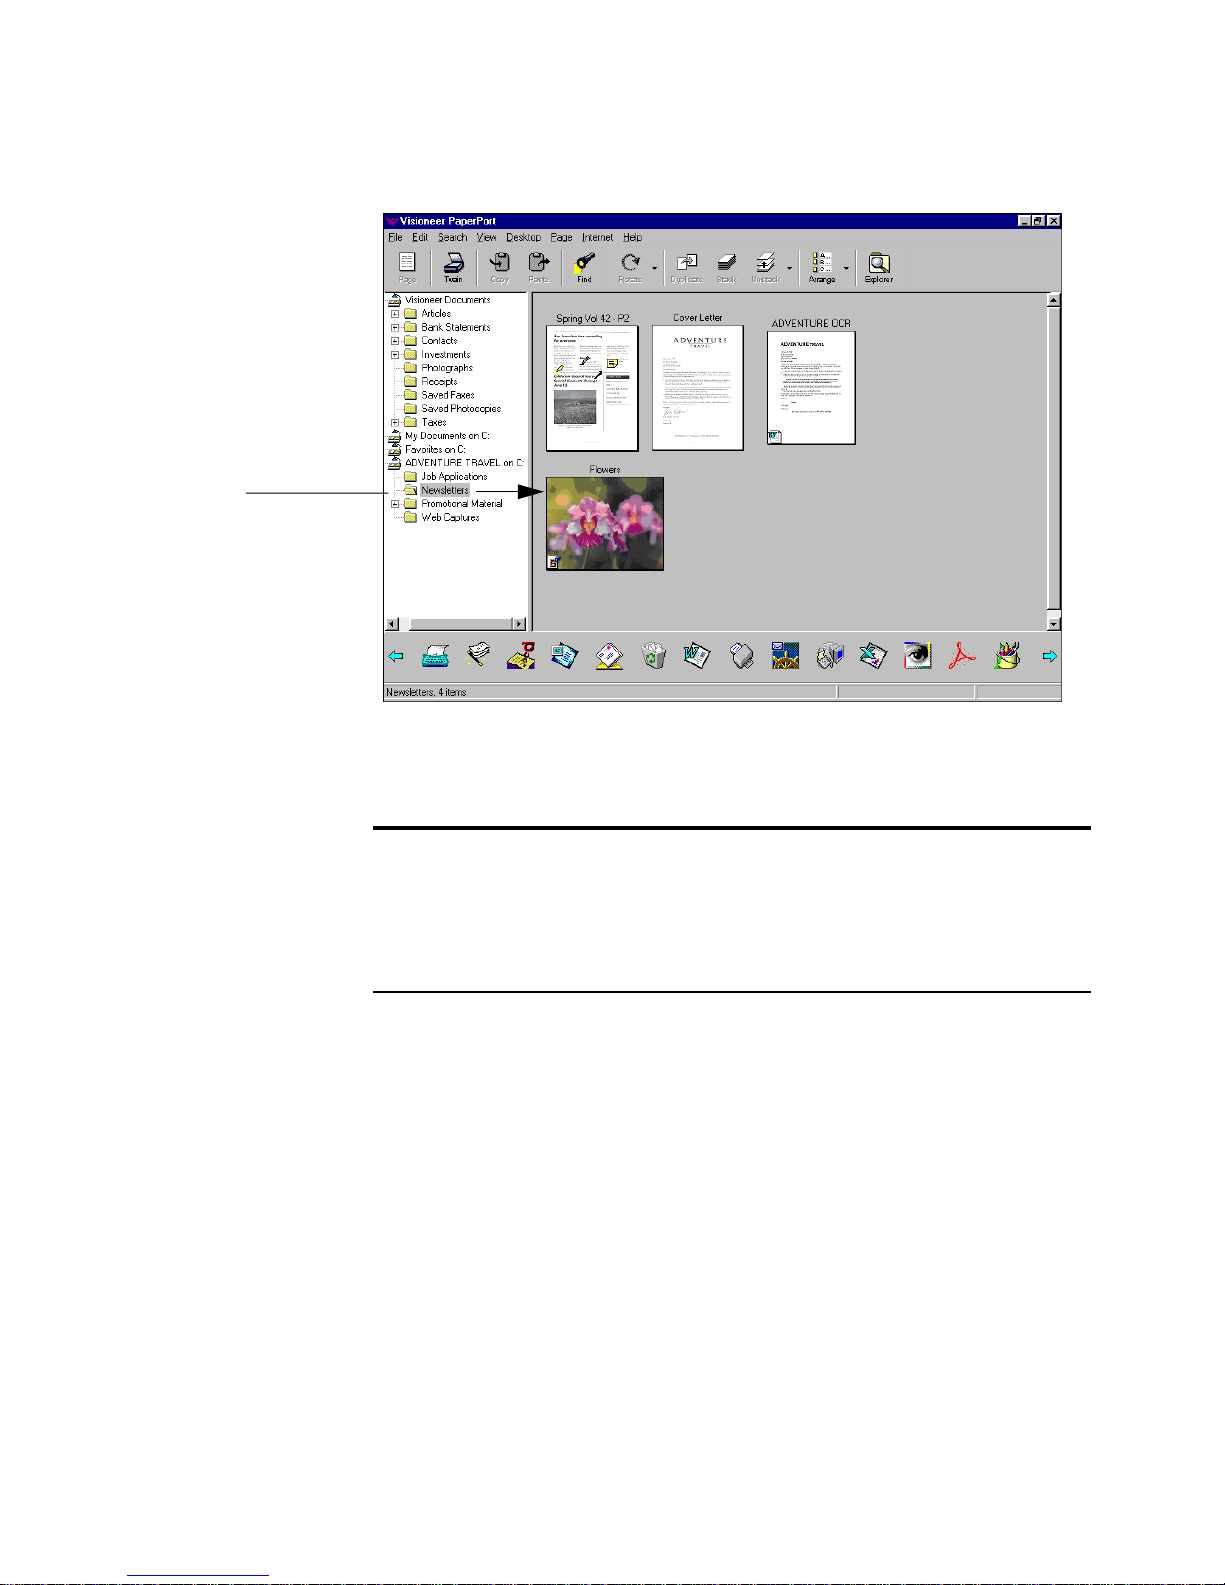
This example shows four items in the Newsletter folder, which is located
in the Adventure Travel folder.
Note: When you place items in Desktop View, such as by scanning,
capturing Web pages, and importing items, the items appear in the
location that is currently selected in Folder View. For example, if the
Newsletter folder is selected and its items appear on the Desktop, then
a scanned item is placed in the Newsletter folder.
Page 39

ADDING AND REMOVING FOLDERS FROM FOLDER VIEW 31
ADDING AND REMOVING FOLDERS FROM FOLDER VIEW
To see a folder already located on your computer or on an external
device, such as an external hard drive or Iomega Zip drive, you add the
folder to Folder View. The folder can contain many subfolders or can be
simply a single folder.
This section tells you about:
• Adding a folder to Folder View
• Removing folders from Folder View
• Arranging folders in Folder View
ADDING A FOLDER TO FOLDER VIEW
When you add a folder to Folder View, it is identified with an icon in
Folder View. After you add a folder, you can view any of its subfolders or
items in Desktop View.
To add a folder to Folder View:
1. In Desktop View, choose Add to Folder View from the File menu.
The Add to Folder View dialog box appears. It shows you the same
device and folder information that you see in Windows Explorer
(except for network devices).
Page 40

32 CHAPTER 3: FILING ITEMS
2. Select the folder that you want to add and click OK. The folder
appears in Folder View and its items appear on the Desktop. Any
subfolders are automatically included and shown in Folder View
below the added folder. The following example shows that the
Adventure Travel folder was added.
Added folder
located on the
C drive.
In addition to the icon that identifies a folder as an added folder, the
folder title indicates the actual location of the folder on your
computer. For example, in the previous figure, the folder Adventure
Travel is located on the C drive.
Note: You can also add folders by choosing Arrange Folder View
from the File menu, and then clicking the Add button.
REMOVING FOLDERS FROM FOLDER VIEW
If you no longer want a folder to appear in PaperPort, remove it from
Folder View. When you remove a folder it does not delete it from your
computer.
To remove a folder:
1. In Folder View, select the folder you want to remove.
2. From the File menu, choose Remove From Folder View. The
folder is removed from Folder View.
Page 41

ADDING AND REMOVING FOLDERS FROM FOLDER VIEW 33
Note: You can also remove a folder by choosing Arrange Folder View
from the File menu, selecting a folder in the dialog box that appears,
and then clicking the Close button.
ARRANGING FOLDERS IN FOLDER VIEW
Use the Arrange Folder View dialog box to change the order in which
added folders appear in Folder View. You can also use this dialog box as
another way to add and remove folders.
To arrange the folders:
1. From the File menu, choose Arrange Folder View. The Arrange
Folder View dialog box appears.
Page 42

34 CHAPTER 3: FILING ITEMS
2. To move a folder up in the list, select the folder and click the Move
3. Click OK.
Up button. To move a folder down in the list, select the folder and
click the Move Down button. The following example shows that
the My Documents folder was moved down.
Note: You cannot change the position of the top folder, in this
example Visioneer Documents, by using the Arrange Folder View
dialog box. To change the position of this folder, click the Change
Default Desktop Folder button in the Desktop Preferences.
WORKING WITH FOLDERS AND ITEMS
Often the folders you add contain subfolders to help organize your
items. This section tells you about:
• Dragging and dropping items into folders
• Filing items in multiple locations
• Duplicating items
• Creating new folders
• Giving folders new titles
• Dragging and dropping folders into folders
Page 43
WORKING WITH FOLDERS AND ITEMS 35
Note: The following procedures tell you how to work with folders
and items from Desktop View. You can also use Windows Explorer to
complete changes, such as retitling a folder and filing items in
different folders. For more information, see “Using Windows
Explorer to manage items,” later in this chapter.
DRAGGING AND DROPPING ITEMS INTO FOLDERS
The easiest way to move an item into a folder is by dragging and
dropping the item. You can file items one at a time, or you can file
multiple selected items all at the same time.
To drag and drop an item into a folder:
1. Click an item shown on the Desktop.
2. Drag the selected item into another a folder.
3. When the folder is highlighted, release the mouse button.
You can also put the selected item into a folder by using the Move to
Folder command in the Desktop menu.
Page 44

36 CHAPTER 3: FILING ITEMS
FILING ITEMS IN MULTIPLE LOCATIONS
To file the same item in multiple locations, such as in different folders,
you can either create a copy of the item or create a shortcut for the item.
(A shortcut is a great way to file an item in different places, without
taking up the extra disk space required by a copied item.)
To create a copy of the item:
1. On the Desktop, select the item.
2. From the Desktop menu, choose Copy to Folder. The Copy To
Folder dialog box appears.
3. Select the folder in which you want to place the copied item, and
To create a shortcut:
1. On the Desktop, right-click the item, and then while holding down
then click OK. The Copy to Folder command creates a copy of the
item and puts it into the new folder, but leaves the original item in
its original folder.
the right mouse button, drag the item to the folder in which you
want to file it. A short cut menu appears.
Page 45

WORKING WITH FOLDERS AND ITEMS 37
2. Choose Create Shortcut(s) Here. The item remains in the original
location, and a thumbnail representing the item appears in the
other location. (The new thumbnail is really just a shortcut; the file
has not been copied to the new location.)
Note: You can also create shortcuts for items by using
Windows Explorer.
DUPLICATING ITEMS
Another way to file an item in multiple locations is to create a duplicate
of the item in Desktop View. You can duplicate both PaperPort and
non-PaperPort items. You can also use the Duplicate As PaperPort Item
command to create a converted copy of a non-PaperPort item. For
example, you can duplicate a Word file to create a copy of the Word file,
or duplicate the Word file as a PaperPort item to convert the Word file to
the PaperPort format.
After you convert a non-PaperPort item to PaperPort, you can take
advantage of other features available only to PaperPort items, such as the
annotation tools and the ability to create stacks.
To create a duplicate of an item:
1. On the Desktop, select the item.
2. From the Desktop menu, choose Duplicate Item. The duplicated
item appears on the Desktop, with the title, Copy title.
To duplicate an item as a PaperPort item:
1. On the Desktop, right-click the non-PaperPort item, such as a
Word document. A short cut menu appears.
2. Choose Duplicate as PaperPort Item.
Page 46

38 CHAPTER 3: FILING ITEMS
3. The duplicated item appears as a PaperPort item with the title Copy
CREATING NEW FOLDERS
You can use PaperPort to create new subfolders for any of the folders you
add to Folder View. For example, you could create a folder named
Business and another one named Vacation as subfolders to your Travel
folder. Then you could keep all your business travel receipts in one, and
vacation travel receipts in the other. (You can also create folders using
Windows Explorer. For more information, see “Using Windows
Explorer to manage items,” later in this chapter.)
of title. For example, if you duplicate the Flowers item, the
duplicated item is titled Copy of Flowers.
To create a folder:
1. Open the folder in which you want to create a new folder. For
example, the following figure shows the Adventure Travel folder.
2. From the File menu, choose New, and then Folder. The New
Folder dialog box appears.
Page 47

WORKING WITH FOLDERS AND ITEMS 39
3. Type the new folder’s title, choose a folder color, and then click OK.
The following shows a new folder named Web Capture.
Tip: Use the Folder Preferences in the PaperPort Preferences dialog
box to set up your preferred folder title and color. For more
information about preferences, see the PaperPort Help.
GIVING FOLDERS NEW TITLES
It is a good idea to use descriptive titles to name each folder. You can retitle any folder, including the basic set of folders that you receive with
PaperPort.
To give a folder a new title:
1. Click a folder to select it.
2. Click the folder’s title to see the text box for editing the title.
3. Type the new title and press the Enter key or just click elsewhere on
the Desktop.
You can also select the folder and choose Change Title from the File
menu.
Page 48

40 CHAPTER 3: FILING ITEMS
DRAGGING AND DROPPING FOLDERS INTO FOLDERS
Folders can be stored in other folders by dragging and dropping one
folder into another.
Tip: Holding down the Ctrl key while dragging a folder into another
folder creates a duplicate of the one you’re dragging. This is a quick
way to create a new folder, and can save time when you’re creating a
batch of new folders. When you’re finished creating the folders, you
can give each new one its own title. If the folder being duplicated
already contains items, they are duplicated too.
To drag and drop one folder into another:
1. In Folder View, click a folder to select it.
2. Drag the selected folder onto another folder.
3. When the folder is highlighted, release the mouse button.
CREATING NEW ITEMS
In addition to creating new folders in Desktop View, you can create new
items including PaperPort items and non-PaperPort items, such as Word
or Excel files.
To create a new PaperPort item:
1. From the File menu, choose New, and then Item. The Create New
Item dialog box appears.
Page 49

USING WINDOWS EXPLORER TO MANAGE ITEMS 41
2. Type the width and height of the image that you want to create.
3. Select the image type and a resolution, and then click OK. The new
PaperPort item appears in Desktop View.
To create a non-PaperPort item:
1. From the File menu, choose New, and then the application of the
item that you want to create, such as Word.
PaperPort starts the application.
2. Create the file, such as by typing in a Word document, and then
save the file. The item appears in Desktop View.
USING WINDOWS EXPLORER TO MANAGE ITEMS
The previous procedures tell you how to work with folders and items
from Desktop View. You can also use Windows Explorer to complete
changes, such as retitling a folder and filing items in different folders.
The changes you make in Windows Explorer are directly reflected in
Desktop View. Likewise, any changes you make in Desktop View are
implemented in Windows Explorer.
To launch Windows Explorer and make changes:
1. In Desktop View, click the Explorer button on the Command Bar.
or
From the Windows Start menu, choose Programs, and then
Windows Explorer.
Page 50

42 CHAPTER 3: FILING ITEMS
2. Using Windows Explorer, make changes to folders or items that are
part of a folder added to Folder View. For example, you can create a
new folder, retitle a folder, and drag and drop items into different
folders.
You can also drag folders and items from Windows Explorer directly
to PaperPort.
Page 51

USING SIMPLESEARCH TO FIND AN ITEM 43
3. If Desktop View is currently active, switch to the PaperPort
Desktop View and refresh the information by choosing Refresh
from the View menu. The changes you make in Windows Explorer
are directly reflected in Desktop View. If you don’t choose Refresh
now, Desktop View is updated the next time SimpleSearch indexes
information.
USING SIMPLESEARCH TO FIND AN ITEM
PaperPort’s SimpleSearch features help you find items. SimpleSearch
searches all the items–both PaperPort items and items created using
other applications–that are in a folder listed in Folder View.
For example, if you recall the item’s title or keywords, PaperPort can find
the item based on that information. However, PaperPort also reads the
entire text content of each item and can find items based on any words
and phrases in the content. To use this powerful search feature, make
sure that the Content check box is selected in the Find Item dialog box.
To use SimpleSearch to find an item in a folder:
1. In Desktop View, choose Find Item from the Search menu.
2. Type the text to identify the item.
3. Select one or more check boxes to identify where to search for the
text.
Page 52

44 CHAPTER 3: FILING ITEMS
4. Select the buttons to find just the first, or all items that have that
In the SimpleSearch dialog box, you can:
• Click the Options tab to display several options for using
text. Click Find.
SimpleSearch, including whether you want PaperPort to match the
exact phrase you’re looking for or to find text that closely matches.
You can also indicate whether you want to search all folders, the
current folder, or the current folder and its subfolders.
• Click the Update SimpleSearch button to read any items that haven’t
been read yet. This adds the items’ text to the SimpleSearch database
(which is similar to the index of this guide).
You can add specific items to the SimpleSearch database. Right-click an
item, and then choose Add to SimpleSearch from the shortcut menu.
Page 53

USING SIMPLESEARCH TO FIND AN ITEM 45
This is particularly useful when you’ve scanned a number of items and
filed them in a new folder. Right-click the folder and PaperPort begins
adding the items’ content to the SimpleSearch database.
Note: SimpleSearch works in the background, which means that
PaperPort periodically indexes items’ textual content even while you’re
working on other tasks.
For more information about SimpleSearch and using Summary
Information in a search, see the PaperPort Help.
Page 54

46 CHAPTER 3: FILING ITEMS
Page 55

CHAPTER 4
Stacking PaperPort
Items
Like many other busy people, you might sometimes put items on your
desk without organizing them. When you finally do put them in order,
you might stack the items by project, contact, or department. You use a
method that helps you to quickly find the right stack.
With PaperPort you can electronically organize PaperPort items into
stacks in much the same way that you do with paper documents. A stack
is a PaperPort item with multiple pages. Expense reports, contracts,
memos, letters, presentations, and other business materials are often two
or more pages. You can stack and unstack these items electronically on
the PaperPort Desktop. You cannot stack non-PaperPort items, such as
Word or Excel thumbnails that appear in Desktop View.
This chapter tells you about:
• Combining items into stacks
• Giving titles to items and stacks
• Moving between stacked pages
• Unstacking items
• Tiling items
47
Page 56

48 CHAPTER 4: STACKING PAPERPORT ITEMS
COMBINING ITEMS INTO STACKS
To stack pages, you can:
• Drag one page on top of the other
• Click the Stack button on the Command Bar
• Use the stack commands in the Desktop menu
You can also add stacks to other stacks. You cannot stack non-PaperPort
items, such as Word or Excel thumbnail that appear in Desktop View.
USING DRAG AND DROP TO CREATE STACKS
1. In the Desktop View, select the item that you want to stack.
This example shows stacking a cover letter on a newsletter.
Cover Letter Spring Vol 42
2. Drag the selected item onto the item on which you want to stack it.
3. When the second item is highlighted, release the mouse button.
Cover Letter Spring Vol 42
Page 57

COMBINING ITEMS INTO STACKS 49
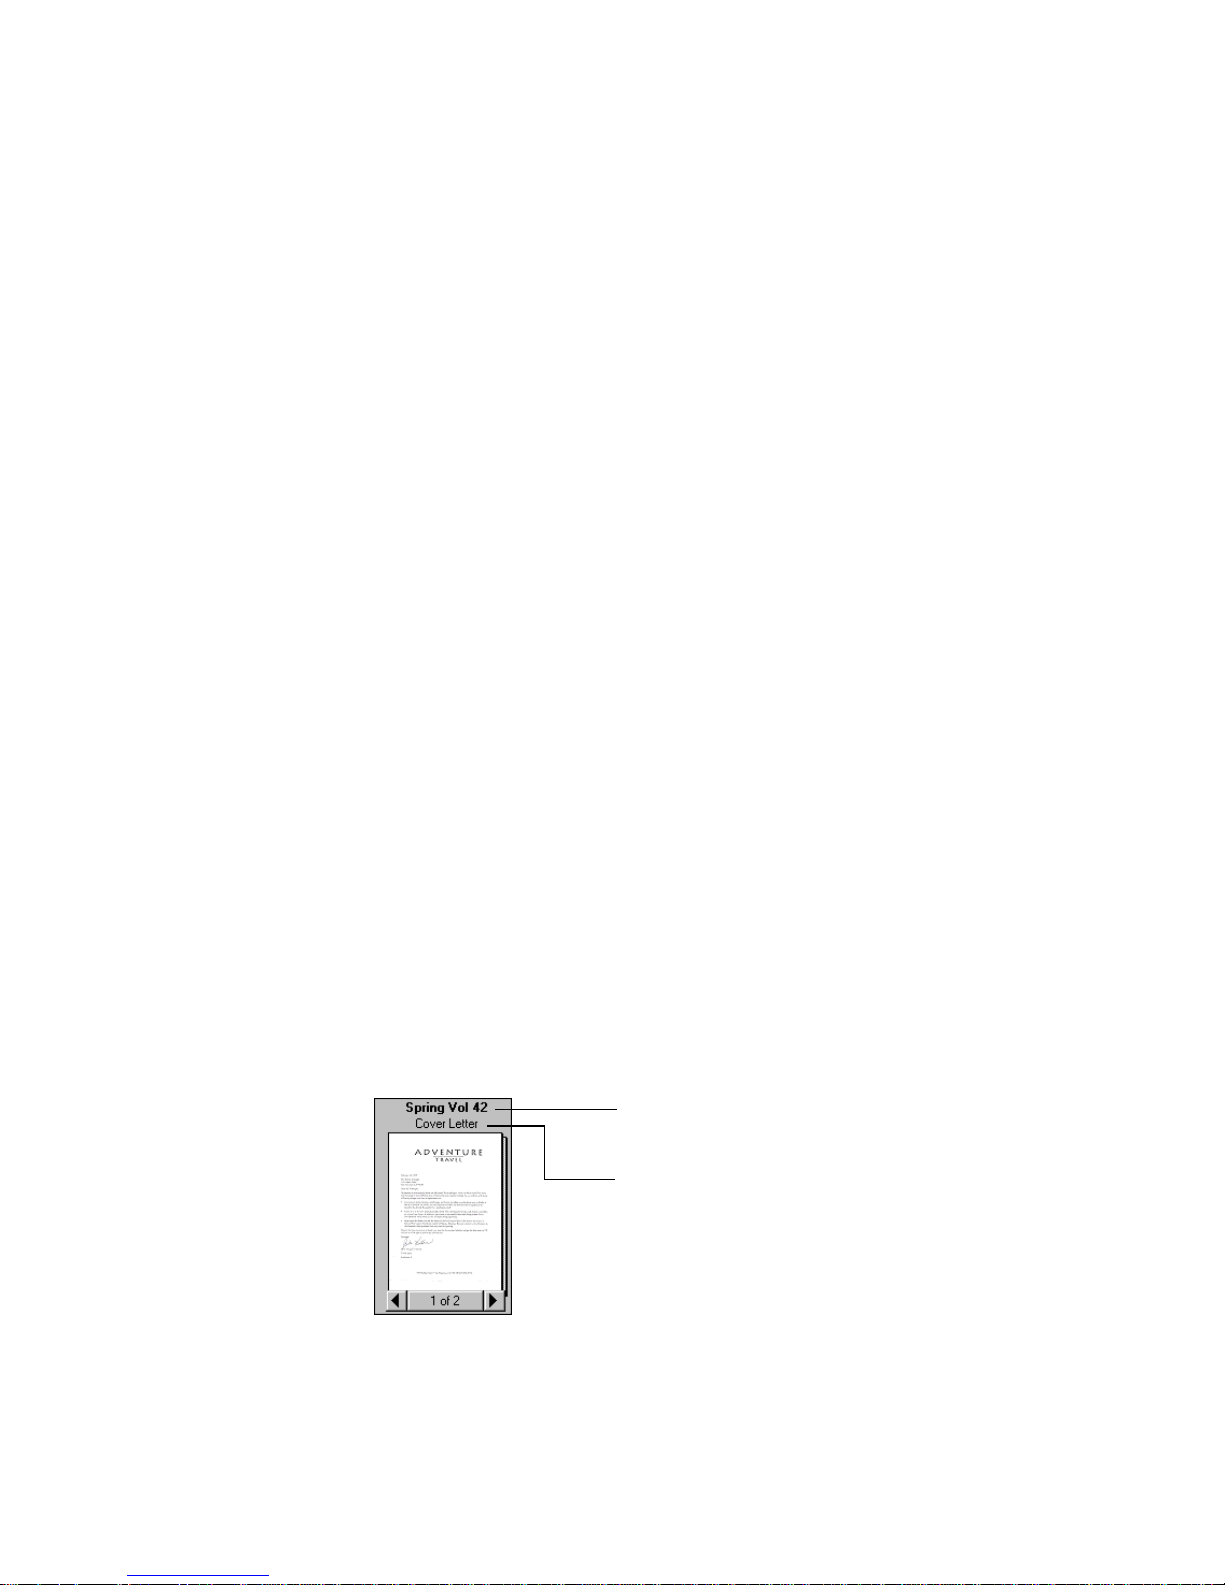
The stack is created.
Spring Vol 42
Cover Letter
4. Repeat Steps 1 through 3 until you finish creating the stack.
A new stack receives the title of the item on the bottom of the stack.
The stack title (“Spring Vol 42” in this case) is shown in boldface type.
Each page title is shown in normal typeface (“Cover Letter” in the
previous example).
Any PaperPort item on the PaperPort Desktop can be stacked onto any
other PaperPort item. You can use drag and drop to stack pages onto
other pages, stacks onto other stacks, pages onto stacks, and stacks onto
pages. You can also use the Stack button on the Command Bar to stack
items. Select them in the order that you want them stacked and click the
Stack button.
SELECTING AND DESELECTING ITEMS
When stacking items, you need to select them. You can select one item
at a time, or several items together.
To select or deselect a single item:
• To select the item, click its thumbnail in Desktop View. A red (or
dark) line around an item indicates that it is selected.
• To deselect the item, click another item, or click anywhere else in
Desktop View.
Page 58
50 CHAPTER 4: STACKING PAPERPORT ITEMS
To select multiple items:
• Click each thumbnail while holding down the Shift key or the
Ctrl key.
or
• Click an empty space on the PaperPort Desktop; then drag the mouse
around the items that you want to select. Any item that is partially
enclosed in the box, or that the box even touches, will be selected.
Release the mouse button when the items you want are selected.
GIVING TITLES TO ITEMS AND STACKS
When you first scan or create a new item on the PaperPort Desktop, its
title is the current date. If you prefer, you can change the format of the
predefined date title, or define a custom title to use for all new items.
You can also change an individual title to something more descriptive,
such as “Smithers Contract” or “Letter to Dr. Adams.” You can use as
many as 30 characters for a title. The more descriptive the title, the
easier it is to quickly find the item you want.
In addition to item titles, each page in a stack can have a title. You can
choose to display the title of only the stack or the title of the stack and
each page title in the stack.
The stack title and page titles both appear above the stack so that as you
flip through the pages of a stack you can see each page’s title as well as
the stack title.
The stack title is
in boldface type.
The page title is
in normal type.
As you flip through
the pages, each
page’s title appears.
Page 59

GIVING TITLES TO ITEMS AND STACKS 51
If you don’t want to see page titles with the stack titles, choose Per-Page
Titles from the View menu to remove the check mark from the
command. Or, from the Edit menu, choose Preferences, and then click
the Desktop tab; uncheck the Show Stack Page Titles option.
To change the default date title for new items:
1. Choose Preferences from the Edit menu, and click the Item
Names tab. The Item Names preferences appear. The Default title
drop-down list shows the choices for a predefined date title.
2. Select the one you want and click OK.
To use a custom title:
1. Choose Preferences from the Edit menu, and click the Item
Names tab.
2. Select the Custom option, type a title, and then click OK. You can
type as many as 256 characters for the title.
To change a title in Desktop View:
1. Select the item or stack.
2. Click its title, or choose Change Title from the File menu.
3. Type the new title and press Enter.
Page 60

52 CHAPTER 4: STACKING PAPERPORT ITEMS
To change a title in Page View:
• Choose Change Title from the File menu.
Duplicated items receive titles based on the original item. For example,
the duplicate of a single-page item named “Invoice” will be “Copy of
Invoice.” The duplicate of a page in a stack has the same name as the
original page and it will not be part of the stack. This is an easy way to
create a copy of a page while keeping the original stack intact. To create
duplicates, select the item(s) and then from the Desktop menu choose
Duplicate Item or Duplicate Current Page.
MOVING BETWEEN STACKED PAGES
Use the Page Navigators to move through the pages of a stack. You can
also use the commands on the Page menu to move from page to page in
a stack.
To move between pages in a stack in Desktop View:
1. Select the stack.
2. Click the left arrow of the Page Navigator to see the previous page
in the stack.
3. Click the right arrow of the Page Navigator to see the next page in
the stack.
Previous page Next page
You can also move between pages by choosing the Page menu
commands: First Page, Last Page, Previous Page, and Next Page. Or use
the Go To Page command from the Page menu to move directly to any
Page 61

UNSTACKING ITEMS 53
page in the stack. Clicking the middle of the Page Navigator (it says
1 of 2 in the example above) is a shortcut for choosing the Go To Page
command.
To move between pages in a stack in Page View:
1. Display the stack in Page View.
2. Click the Page >> or << Page button.
The menu commands to move between pages in Page View are also in
the Page menu.
UNSTACKING ITEMS
You can unstack pages in a stack if, for example, you want to move those
pages to another stack, replace those pages with new ones, or delete
them from the stack without disturbing the rest of the pages.
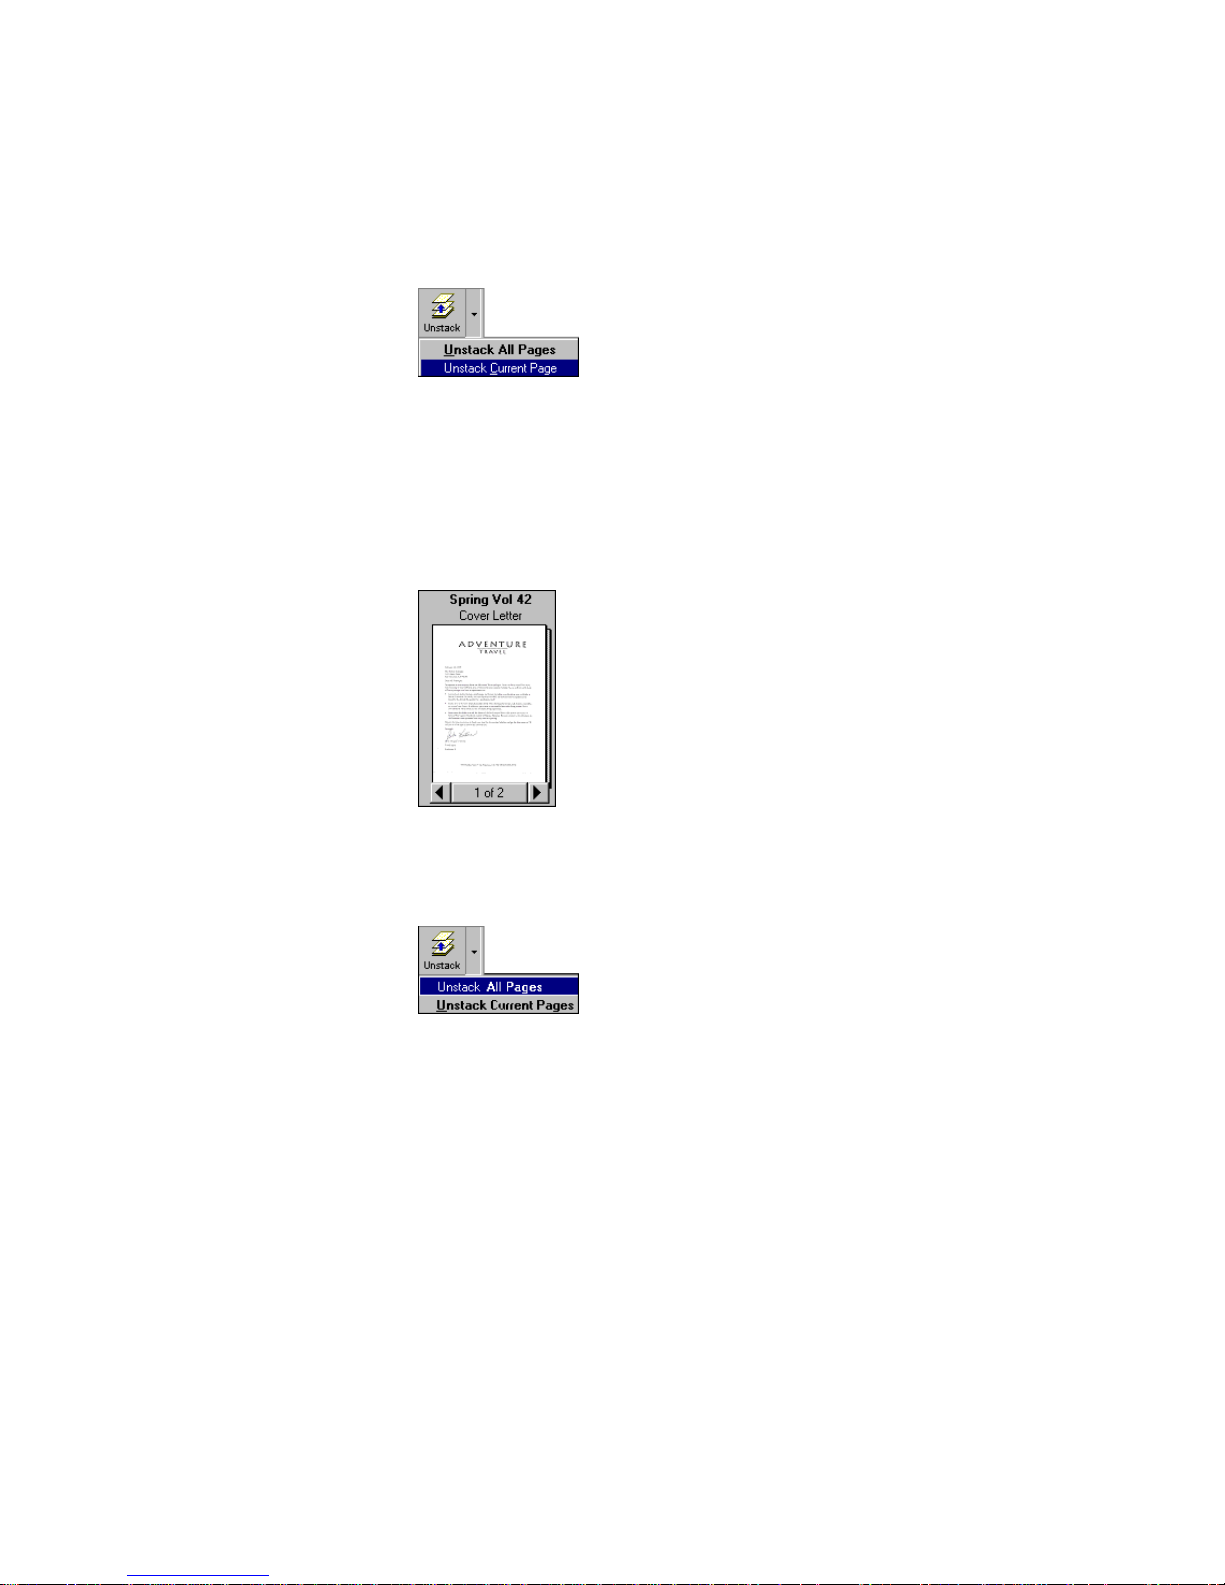
To unstack a single page:
1. Select the stack in Desktop View.
2. Click the Page Navigator to display the page you want to unstack.
Page 62
54 CHAPTER 4: STACKING PAPERPORT ITEMS
3. Click the arrow next to the Unstack button in the Command Bar,
and then choose Unstack Current Page.
You can also choose Unstack Current Page from the Desktop
menu.
To unstack all the pages in a stack:
1. Select the stack in Desktop View.
2. Click the arrow next to the Unstack button in the Command Bar,
and then choose Unstack All Pages.
You can also choose Unstack from the Desktop.
Each page of the stack becomes a separate item on the
PaperPort Desktop.
Page 63

TILING ITEMS 55
TILING ITEMS
For smaller items, such as business cards, articles, and receipts, you can
combine the items on the same page instead of stacking them as separate
pages. This is called tiling items because the images are arranged on the
page in a regular pattern like tiles on a floor.
For example, if you’ve scanned several small articles about a specific
subject, you can tile them onto a page to see all the articles at once.
Similarly, if you have several receipts from a business trip, you can tile
them onto one page for easier record keeping. Tiling is also useful if you
want to fax several smaller scanned items, because you can fax them all
on a single page. Pages that are tiled can include both color and
black-and-white items.
Another way to tile is by tiling thumbnails. This is similar to tiling items
except that PaperPort reduces the size of each item to ensure that the
items fit on one page. Tiling thumbnails is a great way to create a page
or index of images, such as a page of photographs, similar to a
photographer’s contact sheet. You can create a thumbnail tile that
includes both PaperPort and non-PaperPort items.
To tile items onto a single page:
1. Select the items in Desktop View.
Page 64

56 CHAPTER 4: STACKING PAPERPORT ITEMS
2. From the Desktop menu, choose Tile Items Together.
PaperPort places as many items as will fit onto a page. (The original
items still remain on the Desktop.) Images too big to fit on a single
page are placed on the next page, creating a stack of pages. The
default title used for creating stacks is applied to the page.
To tile thumbnails:
1. Select the items in Desktop View.
2. From the Desktop menu, choose Tile Thumbnails.
A new item appears with the selected items tiled together as small
thumbnails on a page, similar to a photographer’s contact sheet.
Items of different sizes are reduced relative to their original size.
(The original items still remain on the Desktop.) The default title
used for creating stacks is applied to the page.
Page 65

CHAPTER 5
Capturing Web Pages
With Web Capture, you can easily add Web pages as PaperPort items
directly to the Desktop View and update them the next time you
connect to the Internet. For example, you can capture information
about your favorite stocks and then update the information to reflect the
latest numbers. A Web Capture is saved as a PaperPort item and the
Web page text is included in SimpleSearch.
This chapter tells you how to take advantage of PaperPort’s Web
capturing features. You’ll learn about:
• Using a supported browser
• Capturing Web pages
• Updating captured Web pages
• Viewing captured Web pages
• Searching Web pages using SimpleSearch
USING A SUPPORTED BROWSER
To capture Web pages, you need access to the Internet, such as through
an Internet service provider. You also need one of the following browsers
installed on your computer:
• Microsoft Internet Explorer (Version 3.0 or later)
• Netscape Navigator (Version 3.0 or later)
57
Page 66

58 CHAPTER 5: CAPTURING WEB PAGES
CAPTURING WEB PAGES
Capture Web pages to save images of one or more Web pages to the
Desktop View as PaperPort items. You can save a portion of a Web page
or save an entire Web page that contains several screens of information.
For example, when researching the daily flights to Hawaii provided by
your favorite airline, you might want to capture just the portion of a
Web page that shows the flight time tables. However, when you want a
multi-page article or book summary for the current number one bestseller, you will want to capture the entire Web page.
Note: A captured Web page is a special PaperPort item that provides
different viewing and update options. To identify it as a special item,
your browser icon, such as Netscape Navigator or Internet Explorer,
appears on the captured Web page thumbnail in Desktop View.
Tip: You might find it convenient to create a new folder that you can
use to store all of your captured Web page.
To capture a Web page:
1. In the Folder View, select the folder in which you want to add a
Web page.
2. Connect to the Internet and then display the Web page that you
want to capture.
Page 67
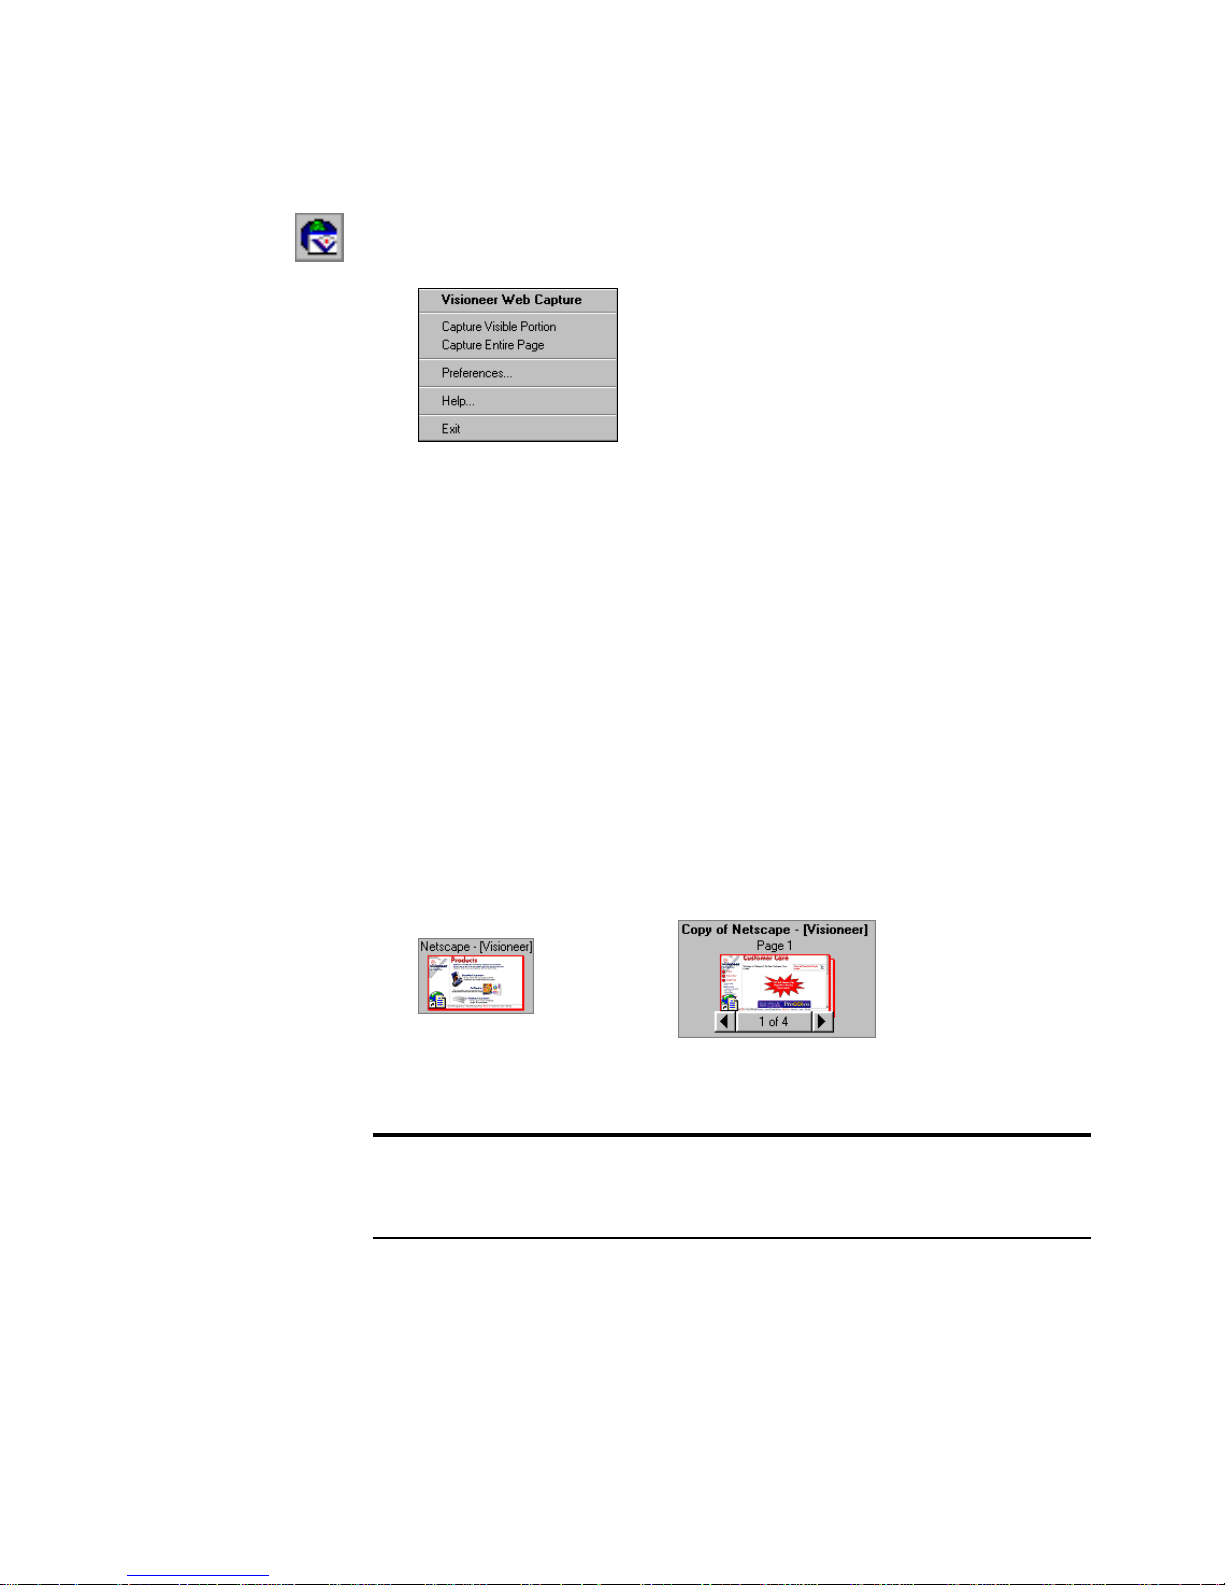
CAPTURING WEB PAGES 59
3. Right-click the Web Capture icon in the Windows taskbar. The
Web Capture menu appears.
4. To capture an entire web page or a portion of a Web page, use one
of the following:
• To capture only the visible portion of a Web page, choose
Capture Visible Portion.
• To capture a page from the visible portion to the end of the Web
page, choose Capture Entire Page.
• To capture a complete Web page, scroll to the beginning of the
Web page, and then choose Capture Entire Page.
The Web page is saved as a special PaperPort item identified by your
browser’s application icon. If you capture a portion of a Web page,
it appears as a single item. If you capture an entire page that
contains several screens of information, it appears as a stack.
A portion of a
Web page.
An entire Web page.
Tip: To set Web Capture preferences, right-click the Web Capture
icon in the taskbar, and then choose Preferences. For more
information about preferences, see the PaperPort Help.
Page 68
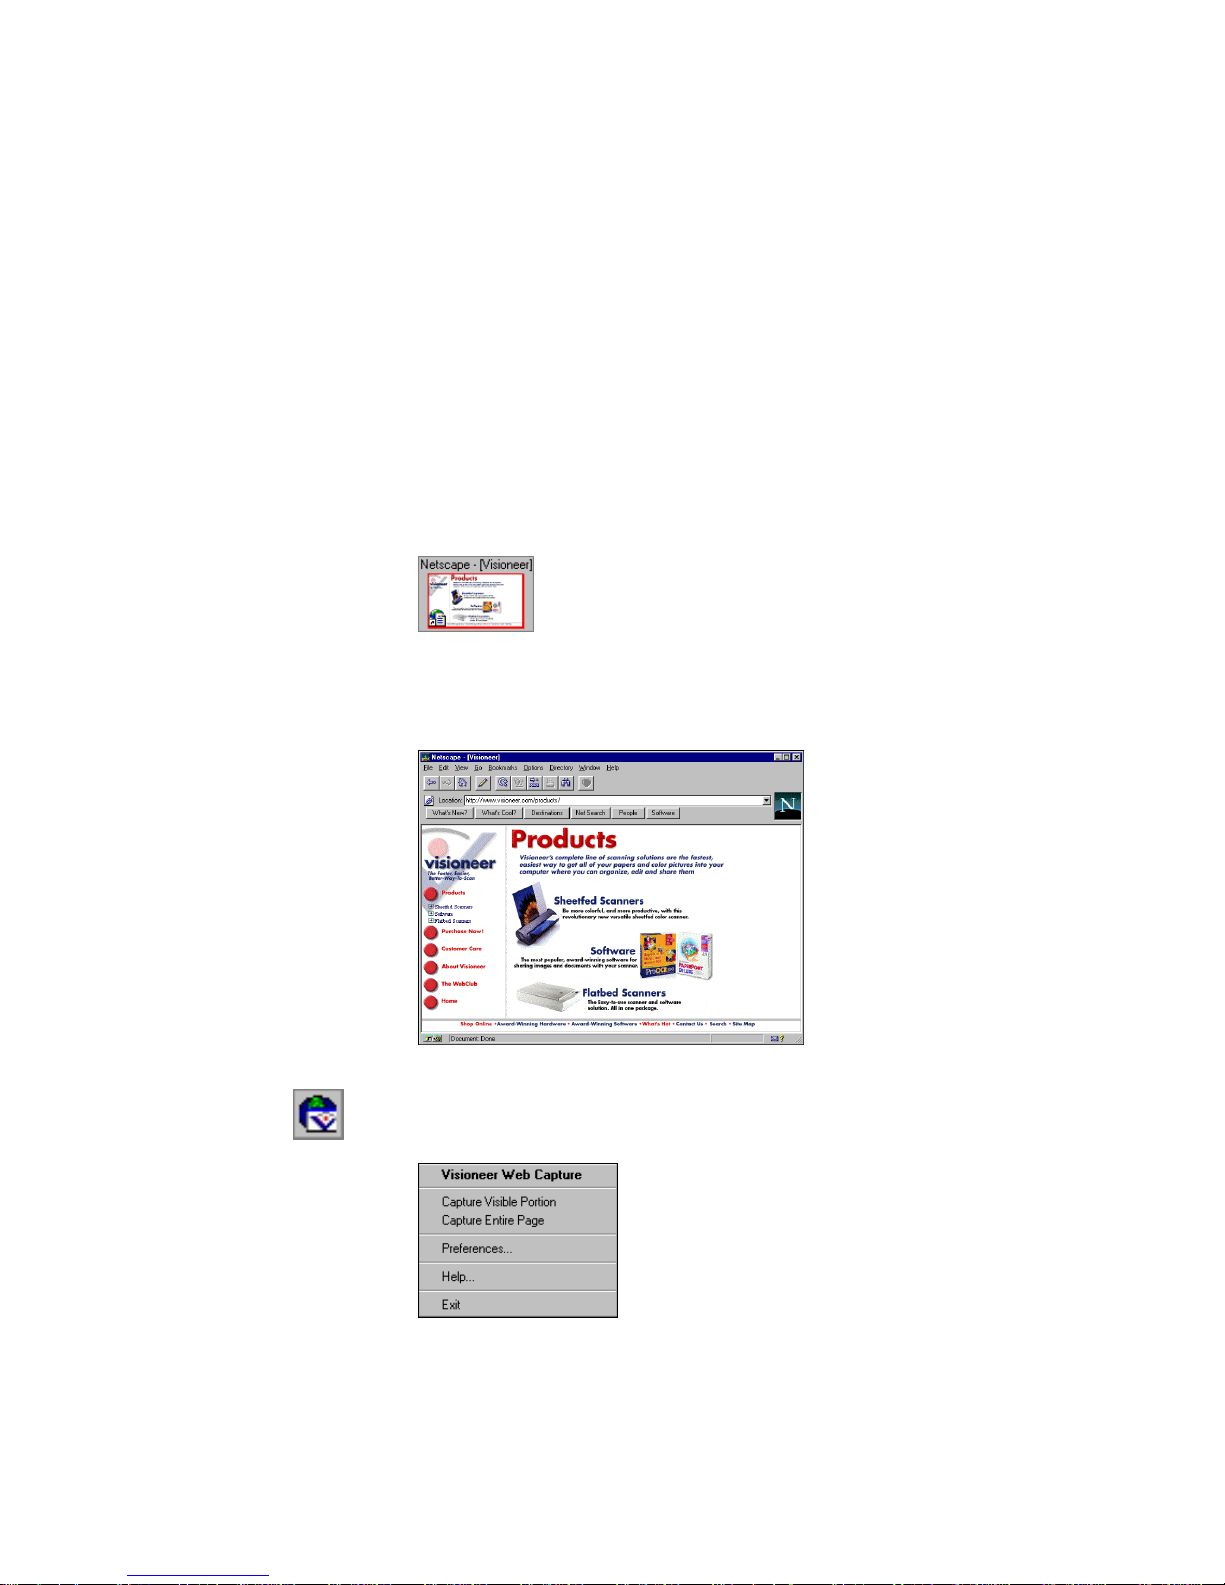
60 CHAPTER 5: CAPTURING WEB PAGES
UPDATING CAPTURED WEB PAGES
You can update a captured Web page or choose to save a copy of an
updated Web page. If you have changed the captured Web page, such as
by editing it in Page View, you cannot automatically update it.
To update a captured Web page:
1. Connect to the Internet.
2. In Desktop View, double-click the Web page item, such as the
following example.
A view of the Web page as it currently exists on the Internet appears
in your browser.
3. To update the page, right-click the Web Capture icon. The Web
Capture menu appears.
Page 69

VIEWING CAPTURED WEB PAGES 61
4. Choose Capture Visible Portion or Capture Entire Page,
depending on the currently captured Web page. For example, to
update a captured Web page stack, you choose Capture Entire Page.
A message appears asking if you want to update the page or create a
new one.
5. To update your current capture, click Update Existing. The page is
updated. To create another Web page capture (leaving the originally
captured Web page as is), click Create New. A copy of the captured
Web page appears in Desktop View.
Tip: To see the URL of a captured Web page, right-click the Web
Page in Desktop View, and then choose Summary Info.
VIEWING CAPTURED WEB PAGES
You can view a captured Web page either in Page View or by using your
browser.
To view a captured Web page in Page View:
• In Desktop View, Shift-double-click the captured Web page. The
Web page appears in Page View. You can add annotations to the Web
page or edit the image just like you would any other PaperPort item.
Note: If you make changes to the Web page, such as by adding
annotations, you cannot update the page as described in “Updating
captured Web pages,” earlier in this chapter.
To view a captured Web page in the browser:
• In Desktop View, double-click the Web page item, or view the item
in Page View, and then click the WWW icon on the Command Bar.
Your Web browser is launched and the Web page appears.
Tip: If you are viewing a captured Web page in Page View, you can
also choose Open Page in Browser from the Page menu to see the page
in your browser.
Page 70

62 CHAPTER 5: CAPTURING WEB PAGES
SEARCHING WEB PAGES USING SIMPLESEARCH
After you add a Web page to the Desktop View, you can include the
page in your searches by using the SimpleSearch feature. For more
information about SimpleSearch, see Chapter 3, “Filing Items.”
Page 71

CHAPTER 6
Using Links
You can send an item from PaperPort to another application by using a
PaperPort link. PaperPort automatically displays icons for linked
applications on the Link Bar. The Link Bar shows such applications as
word processing, spreadsheet, electronic fax, e-mail, graphics, OCR, and
online services on the Link Bar.
The following figure shows a sample Link Bar in PaperPort:
This chapter describes:
• The basic steps for using links
• Setting a link’s preferences
• Managing the Link Bar
THE BASIC STEPS FOR USING LINKS
When you send an item to a linked application, PaperPort processes the
item, the application starts, and the item appears in the application. For
example, if you send the item to the word-processing link, PaperPort’s
OCR software converts the item to text and displays the item as text in
the word-processing software.
63
Page 72

64 CHAPTER 6: USING LINKS
The links are available on the Link Bar and the Links menu.
Note: If you use a supported application and its link does not appear
on the Link Bar, you can create a new link and add the application to
the Link Bar. To do this, right-click the top of the Link Bar and
choose Create New Link. See the PaperPort Help for more
information.
To send a PaperPort item to a link in Desktop View:
1. Make sure all the item(s) to send appear in Desktop View.
2. Drag and drop the item onto the appropriate link on the Link Bar.
or
From the File menu, choose Links, and then select the appropriate
linked application from the Links submenu.
Tip: Because the Link Bar is not available in Page View, you must use
the Links submenu to send an item to a linked application.
The linked application starts.
3. Use the linked application as you usually do.
If you send an item to a link and the link is the item’s native
application, such as a Word thumbnail to the Word link, the native
application starts and loads the file.
With some links, you can update the item in the application, save the
file, and see the changes on the PaperPort Desktop. For example, if you
drag a JPEG item from the PaperPort Desktop to the Adobe Photoshop
link, you can make edit it Photoshop. Save the changes in Photoshop.
When you exit Photoshop, the original JPEG file on the PaperPort
Desktop is updated.
Page 73
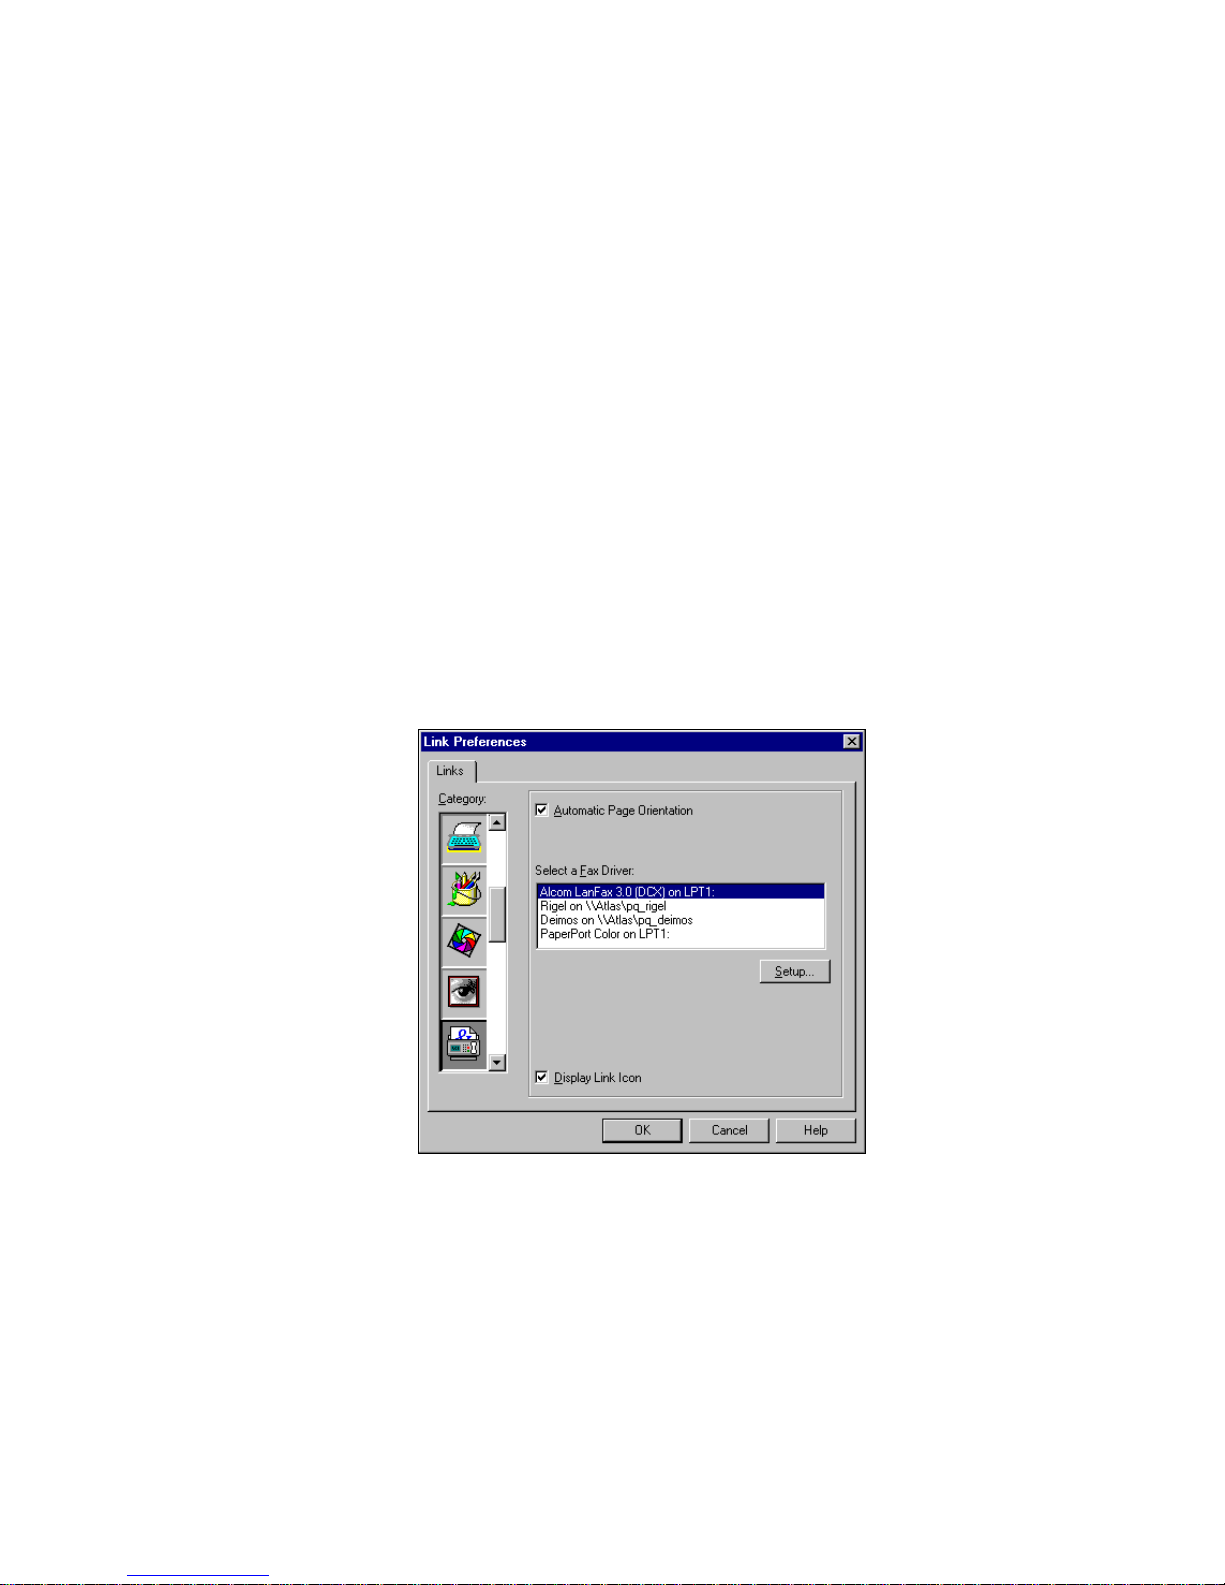
SETTING A LINK’S PREFERENCES 65
SETTING A LINK’S PREFERENCES
A link’s preferences determine how a link operates. For example, with
the word-processing link, the preferences determine in which file format
the PaperPort saves the converted file. For the Microsoft Word link, you
might create an rich text format (RTF) file rather than a DOC file.
Each link’s preferences are preset, but you can customize them for how
you want the link to work. While the preferences are different for each
link, how you display them is basically the same.
To set a link’s preferences:
1. Right-click the link icon on the Link Bar and choose Preferences.
The Link Preferences dialog box appears and displays the
preferences for the selected link. The following figure shows a
sample of the link preferences.
2. Select the options you want and click OK.
Some of the link preferences, such as the word-processing and
spreadsheet link, are described in other chapters in this guide.
Because PaperPort supports many links, the preferences for each
link are not described, but should be easy to select if you are familiar
with the linked application.
Page 74
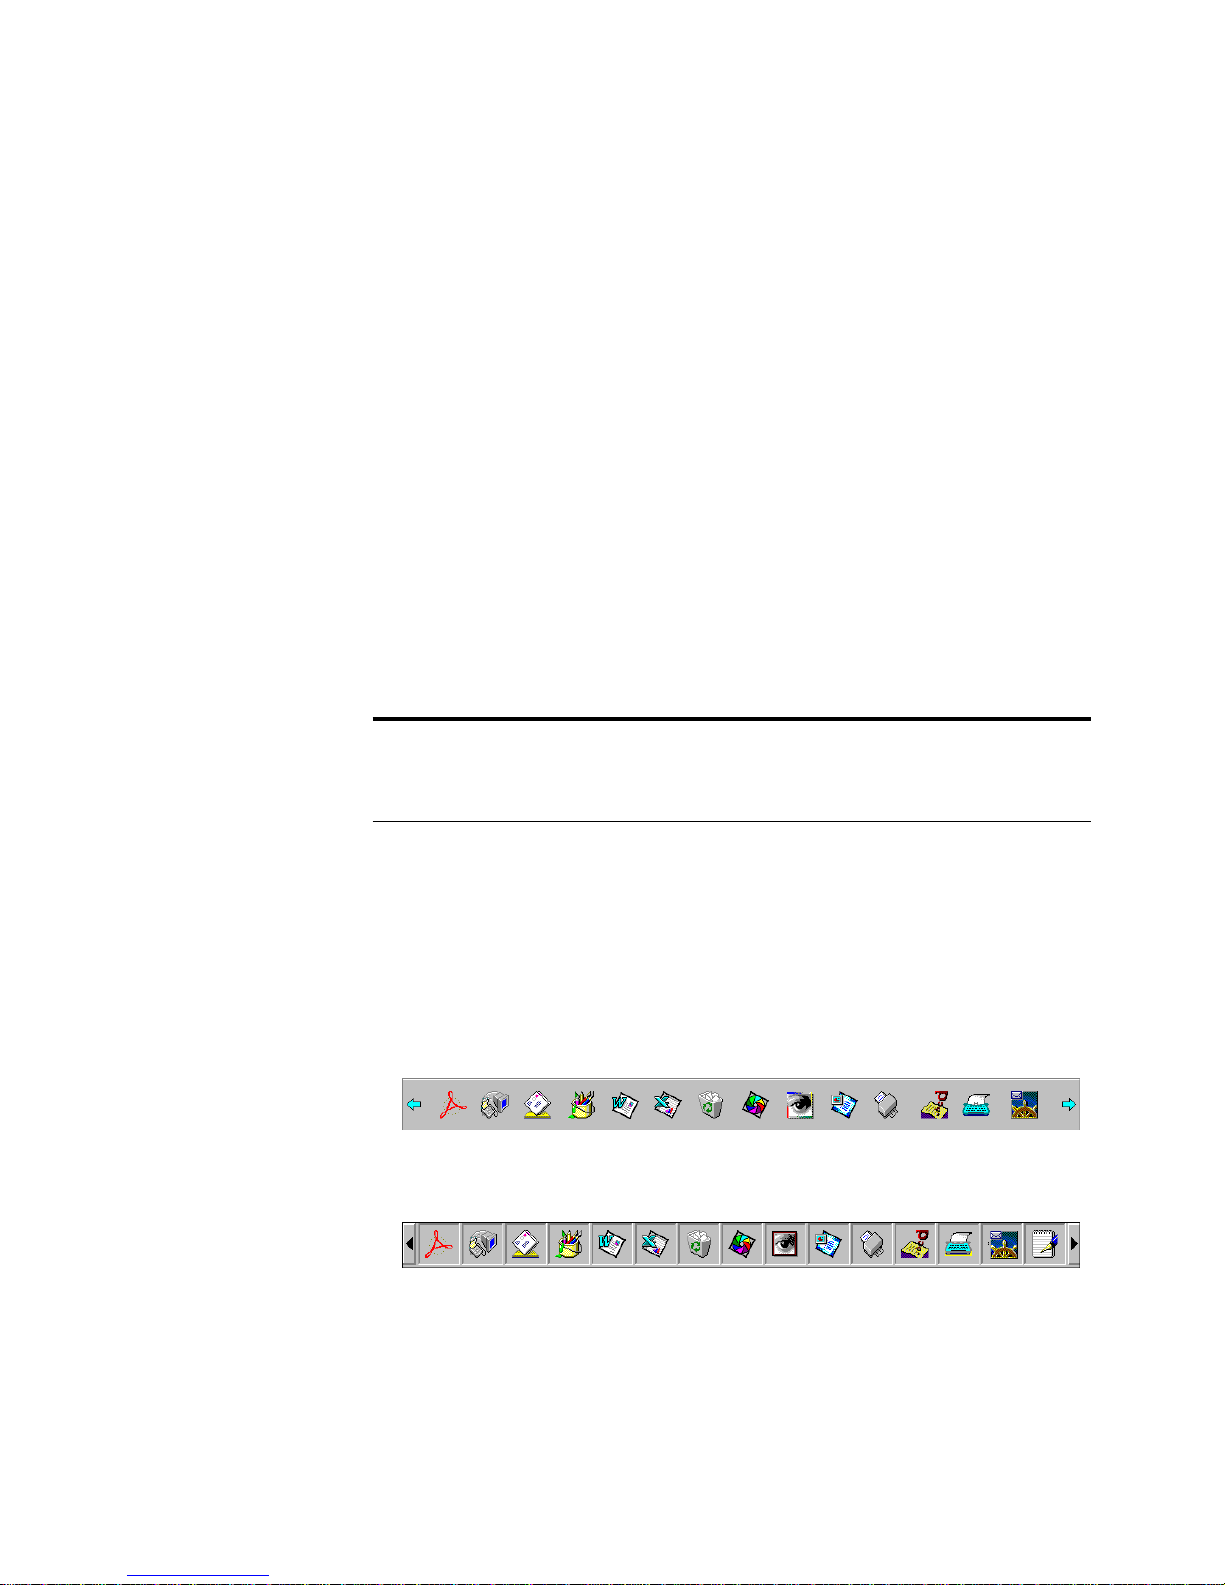
66 CHAPTER 6: USING LINKS
MANAGING THE LINK BAR
The Link Bar appears at the bottom of Desktop View and operates
much like a separate application. To make it easier to work with links,
you can manage the Link Bar including:
• Changing how links appear on the Link Bar
• Showing and hiding the Link Bar
• Removing a link from the Link Bar
• Reordering links on the Link Bar
Click the scroll buttons on each side of the Link Bar to see other icons
that are not displayed. In addition, you can rearrange the icons on the
Link Bar so that the links you use more frequently come first. For more
information, see the PaperPort Help.
Tip: Sometimes an application’s link does not appear on the
Link Bar. You can add the link to the Link Bar by right-clicking
the top of the Link Bar and choosing Create New Link.
CHANGING HOW LINKS APPEAR ON THE LINK BAR
The Link Bar properties determine how the link icons appear on the
Link Bar and other Link Bar features. The following figures show the
three ways of displaying the icons on the Link Bar:
• Hover
• Sunken
Page 75

MANAGING THE LINK BAR 67
• Raised
To set the Link Bar properties:
1. From the Edit menu, choose Preferences. The PaperPort
Preferences dialog box appears.
2. Click the Link Bar tab. The Link Bar preferences appear.
3. From the Links Icon Style drop-down list, choose the style you
want.
4. Select the other properties you want.
5. To see the results without closing the properties dialog box,
click Apply.
6. Click OK to close the dialog box.
SHOWING AND HIDING THE LINK BAR
You can hide the Link Bar when you want more room for viewing items
on the PaperPort Desktop.
Page 76

68 CHAPTER 6: USING LINKS
To show or hide the Link Bar:
1. From the View menu, choose Link Bar.
2. From the View menu, choose Link Bar again to redisplay the
REMOVING A LINK FROM THE LINK BAR
Sometimes you have a link you don’t use that you want to remove from
the Link Bar. You can use an option in the Link Preferences to hide the
link icon. Removing the link icon does not delete the linked application
from your computer.
To remove a link from the Link Bar:
1. Right-click the link icon on the Link Bar and choose Preferences.
When the Link Bar command is checked, the Link Bar appears. If
the check mark is gone, the Link Bar is hidden.
Link Bar.
The Link Preferences dialog box appears with the link selected.
2. Deselect Display Link Icon.
3. Click OK.
The link icon does not appear on the Link Bar.
REORDERING LINKS ON THE LINK BAR
You can rearrange the icons on the Link Bar so that the links are in the
order you prefer.
To rearrange the icons on the Link Bar:
1. Press and hold down the Alt key.
2. Drag the link icon you want to the new position on the Link Bar.
3. Release the mouse button to place the link at the new position.
The other links move to the right.
Page 77

CHAPTER 7
Sending a Fax or
E-Mail Message
If you have fax and e-mail software on your computer, you can send an
item directly from PaperPort. You do not need to print the item first.
If you want to add some notes to a fax, but don’t want to mark up the
original, you can annotate the item using PaperPort’s annotation tools.
The annotations can be hidden before the item is sent, in case you don’t
want someone to see your comments on it. See Chapter 11, “Annotating
a Page,” for the steps to create annotations and to display or hide them.
OVERVIEW
You can send any PaperPort or non-PaperPort item to the e-mail or fax
link. It doesn’t matter if that item is a .MAX file or an item displayed on
the PaperPort Desktop from another application, such as Word,
Photoshop, PowerPoint, or Excel.
To send a fax or e-mail message from Desktop View:
1. Select an item and drag it onto the fax or e-mail link icon.
or
From the File menu, choose Links, and then choose the fax or
e-mail application from the Links submenu.
The fax or e-mail application starts.
69
Page 78

70 CHAPTER 7: SENDING A FAX OR E-MAIL MESSAGE
2. Use the fax or e-mail application as you would usually do.
Note: You can also use the ScanDirect application to send an item
directly to the e-mail or fax application. See Chapter 9, “Using
ScanDirect,” to send items with ScanDirect.
SENDING AN ITEM AS A FAX
To send an item as a fax, your computer will need:
• A fax modem
• Fax software
To send an item as a fax from Desktop View:
1. Select the item to fax.
2. Drag the item onto the fax link icon on the Link Bar.
or
Click the fax link icon.
Page 79

SENDING AN ITEM AS A FAX 71
3. When the fax link icon is highlighted, release the mouse button.
4. When your fax software starts, use the fax software as you usually
do. The following shows the dialog box that appears for Symantec
WinFax.
Page 80
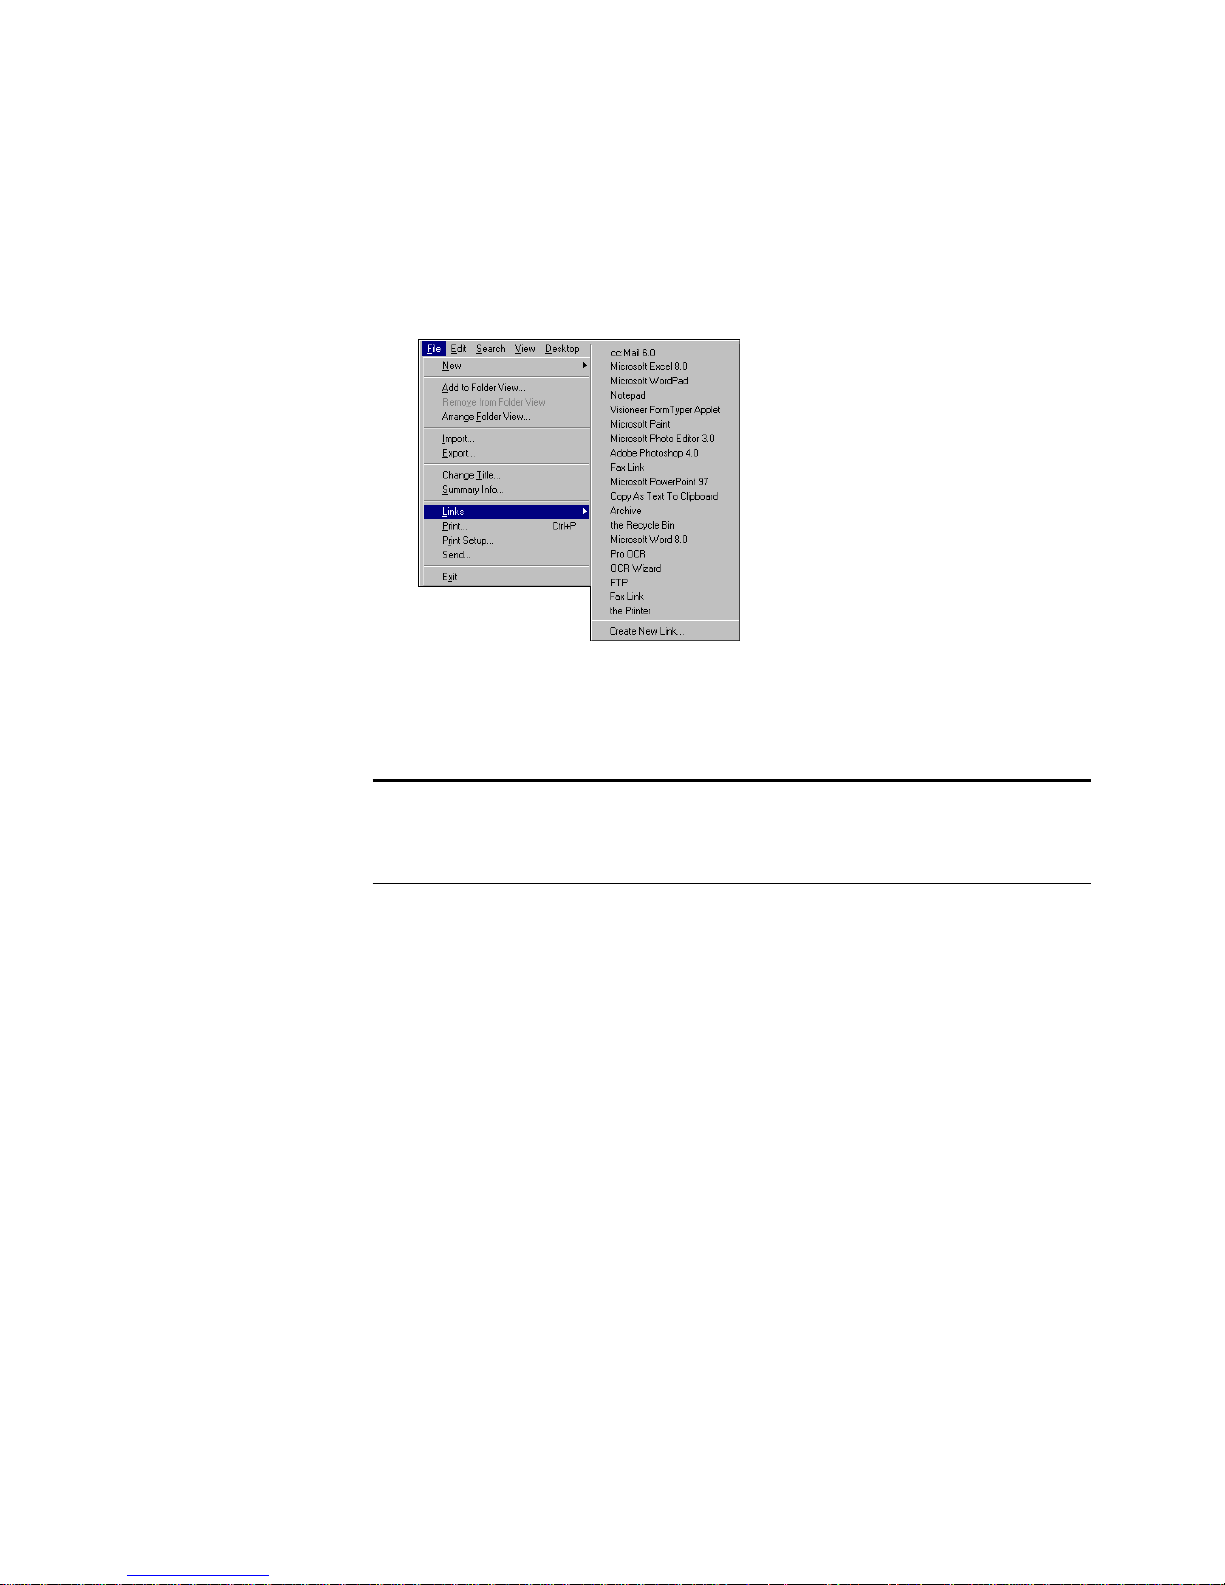
72 CHAPTER 7: SENDING A FAX OR E-MAIL MESSAGE
To send a scanned item as a fax from Page View:
1. Display the item in Page View that you want to fax.
2. From the File menu, choose Links.
3. Choose the name of your fax software.
The fax software starts, and you can send the item.
Note: In the menu, an option named Fax Link is listed. That option
is for fax software that isn’t listed by name on the menu, or for which
an icon does not appear on the Link Bar.
SENDING AN ITEM WITH AN E-MAIL MESSAGE
To send items as attachments to e-mail messages, your computer
will need:
• An e-mail account
• E-mail software
When you send an item to the e-mail link, PaperPort attaches it to the
e-mail message but in its original format. For example, a Word file is
attached as a .DOC file.
Page 81

SENDING AN ITEM WITH AN E-MAIL MESSAGE 73
To send an item as an e-mail attachment from Desktop View:
1. Select the item to send.
2. Drag the item onto the e-mail link icon on the Link Bar.
You can also click the e-mail link icon.
3. When the e-mail link icon is highlighted, release the mouse button.
4. The e-mail software opens. Log in and send the item as an
attachment to an e-mail message.
Page 82

74 CHAPTER 7: SENDING A FAX OR E-MAIL MESSAGE
This example shows the login window for Lotus cc:Mail. The login
window that appears on your computer will be for your e-mail software.
To send the item over the Internet, drag it onto your Internet e-mail link
icon, such as the Netscape Navigator e-mail icon (as shown to the left).
Note: Instead of using the link icons from Desktop View, you can
also choose Links from the File menu, and then choose the name of
your e-mail or Internet e-mail software. The software opens, and you
can send the item as an attachment to an e-mail message.
SENDING A SELF-VIEWING FILE USING AN E-MAIL LINK
Sometimes you want to send an item to another person who does not
own PaperPort or the application that created a non-PaperPort item. For
example, you might want a co-worker to review a memo you wrote
using Word or you might want to share the information in a captured
Web page with a friend. With the Save As Self Viewing format you can
easily attach an item (both PaperPort and non-PaperPort) to an e-mail
message as a self-viewing file. The recipient of the message simply
double-clicks the attachment to view the file.
You can create a self-viewing file from black-and-white, grayscale, and
color images. If the image contains any annotations, they also appear on
the image.
Tip: To automatically convert all e-mail attachments to self-viewing
files, select the Convert All Files When Possible option and the Self
Viewing Files format option from the Links preferences for your
e-mail link application.
To create an e-mail message and attach a self-viewing file:
1. In Desktop View, select the item you want to attach to the e-mail
message.
2. From the File menu, choose Export.
The Export As dialog box appears.
Page 83

SENDING A SELF-VIEWING FILE USING AN E-MAIL LINK 75
3. Select Self Viewing Files (*.EXE) from the Save as Type
drop-down list.
4. Type the name of the file in File Name.
5. Click Save As.
PaperPort saves the file with the extension .EXE.
6. Use the e-mail link to send the item as an attachment to an e-mail
message. For more information about sending an e-mail message,
see “Sending an item with an e-mail message.”
When the recipient receives the e-mail message, he or she doubleclicks the .EXE file to start the mini-viewer and see the attached file.
The mini-viewer has many navigation features similar to the ones in
Page View.
Tip: In Page View, choose the Save As command to save an item as a
self-viewing file.
Page 84

76 CHAPTER 7: SENDING A FAX OR E-MAIL MESSAGE
Page 85

CHAPTER 8
Converting Items to
Text With OCR
PaperPort items, such as scanned documents, are images. Even the text
on a scanned item is simply a picture of the text, which you can’t edit as
you would edit text in a word-processing document. Using PaperPort’s
built-in OCR (optical character recognition) application, you can
convert text “images” into real text that you can then edit using a wordprocessing application, such as Microsoft Word.
If you already own another OCR application, you can use either it or
PaperPort’s built-in OCR application to convert items to editable text.
This chapter tells you about:
• What is OCR
• Converting an item to text
• Converting part of a page to text
• Converting a scanned spreadsheet to text
• Converting an item using another OCR application
• Setting the Visioneer OCR preferences
77
Page 86

78 CHAPTER 8: CONVERTING ITEMS TO TEXT WITH OCR
WHAT IS OCR
OCR is the computer’s way of recognizing that a picture of an “S” is
really the letter S, that the picture of a “W” is really the letter W, and so
on for each letter’s picture in a scanned item.
The OCR application looks at each letter on a page, and if it recognizes
the letter’s shape converts it into the appropriate text character. When
the analysis of the page is complete, the OCR application puts the text
characters onto a page in about the same format as the pictures of text
on the original scanned item.
The page is now a document containing text that a word-processing
application can recognize. You can then edit the text as you normally
would when word-processing a document.
The process is not always perfect. If the item contains smudges or
handwritten notes, the OCR application tries to analyze them but, of
course, is not always able to make a suitable match. For that reason, you
should carefully check the converted document to correct any mistakes
that the OCR application makes. You should also start with as clean as
document as possible, such as by scanning at a higher resolution.
Page 87

WHAT IS OCR 79
Here’s an example of a scanned document: The scanned words on this
page are not text. The words are pictures of text, and can’t be edited in a
word-processing application. For example, if you tried to select a line of
text to reformat it, you would not be able to do it.
Page 88

80 CHAPTER 8: CONVERTING ITEMS TO TEXT WITH OCR
After being processed with the OCR application, the pictures of the text
are now “real” text that a word-processing application recognizes. You
can select text, as shown here, to edit it. This example shows how the
converted text would appear in Microsoft Word.
CONVERTING AN ITEM TO TEXT
To convert an item to text, you first place the item into PaperPort, such
as by scanning a document to PaperPort. Then you use a wordprocessing link and the built-in OCR application to convert the item to
text. You can convert an item to text from either Desktop View or Page
View.
To convert an item from Desktop View:
1. Select the item to convert. It can be a single page or a stack.
2. Drag the item onto a word-processing link, such as Microsoft
Word, on the Link Bar.
You can also click the link icon.
Page 89
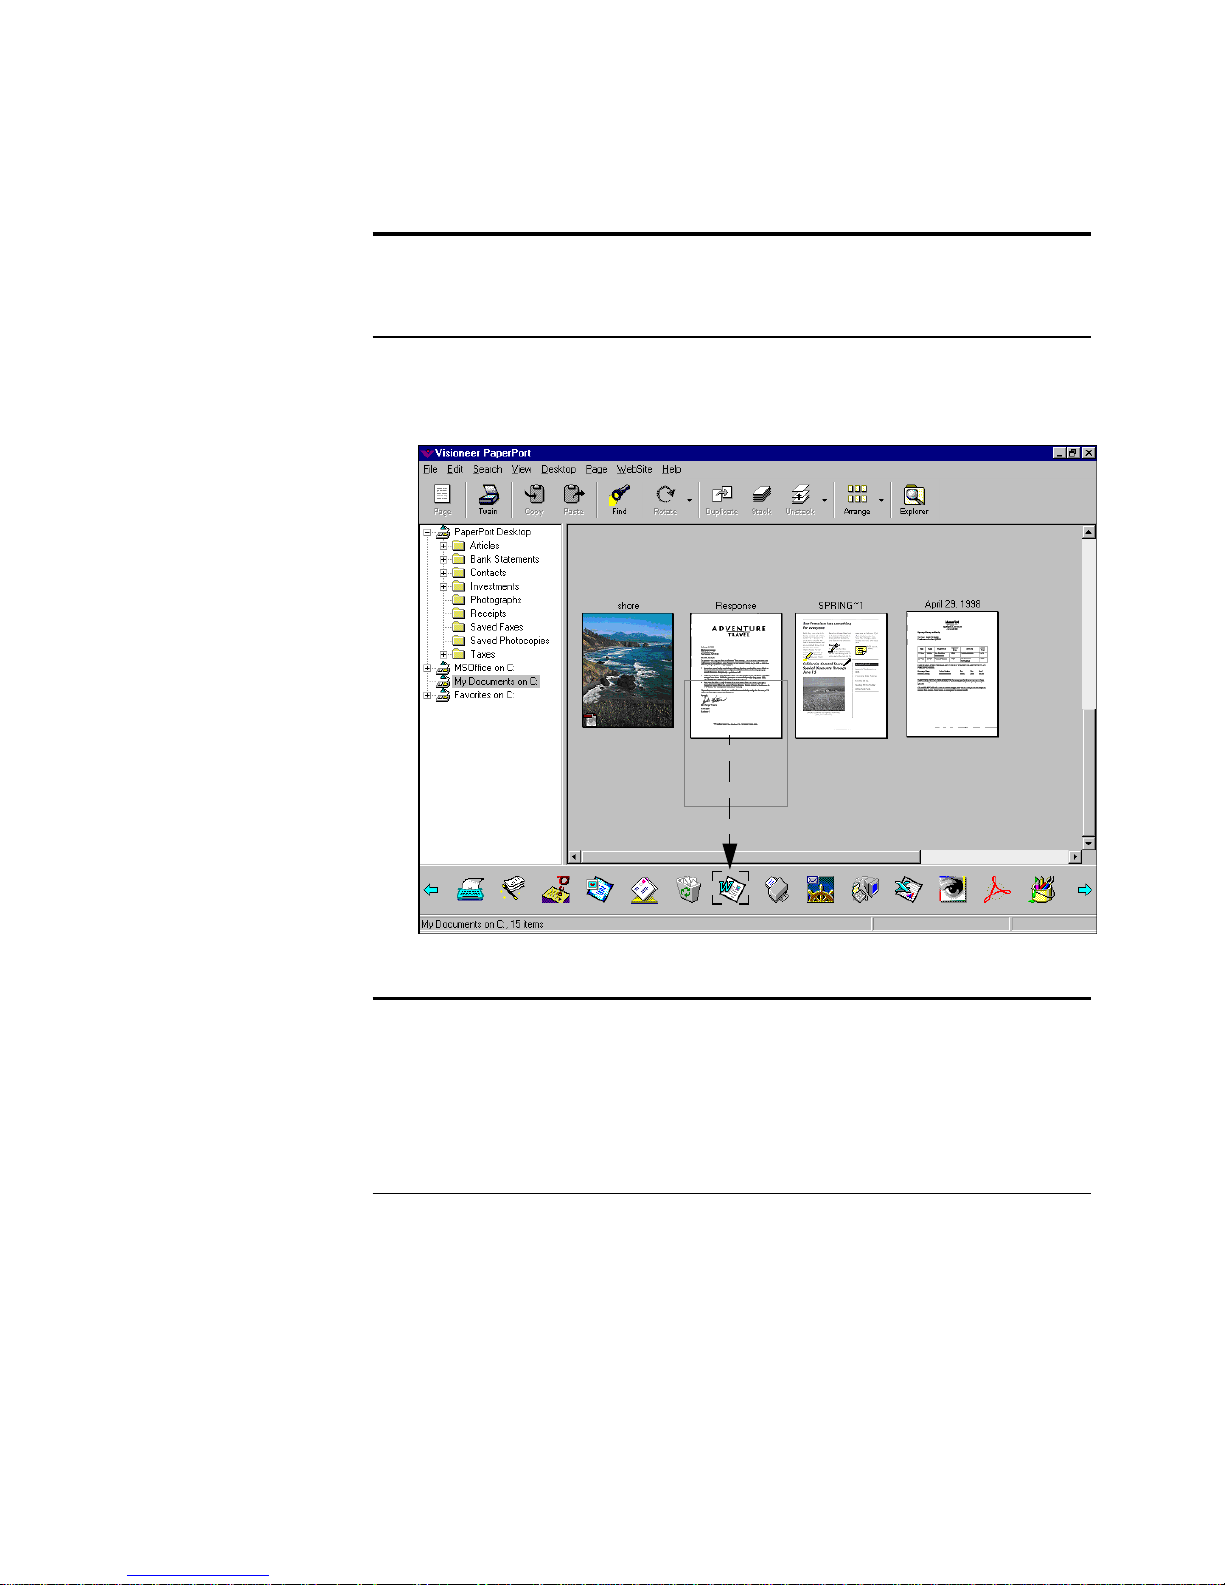
CONVERTING AN ITEM TO TEXT 81
Note: If you drag a Word item to the Word link, the built-in OCR
application is not used. Instead, PaperPort launches Word and opens
the item in it.
3. When the word-processing link icon is highlighted, release the
mouse button.
Note: This example shows the steps for using PaperPort’s built-in
OCR application and sending the converted text directly to a wordprocessing application, in this case Word. If you have another OCR
application on your computer, you can send the text to it instead. For
more information, see “Converting an item using another OCR
application,” later in this chapter.
Page 90
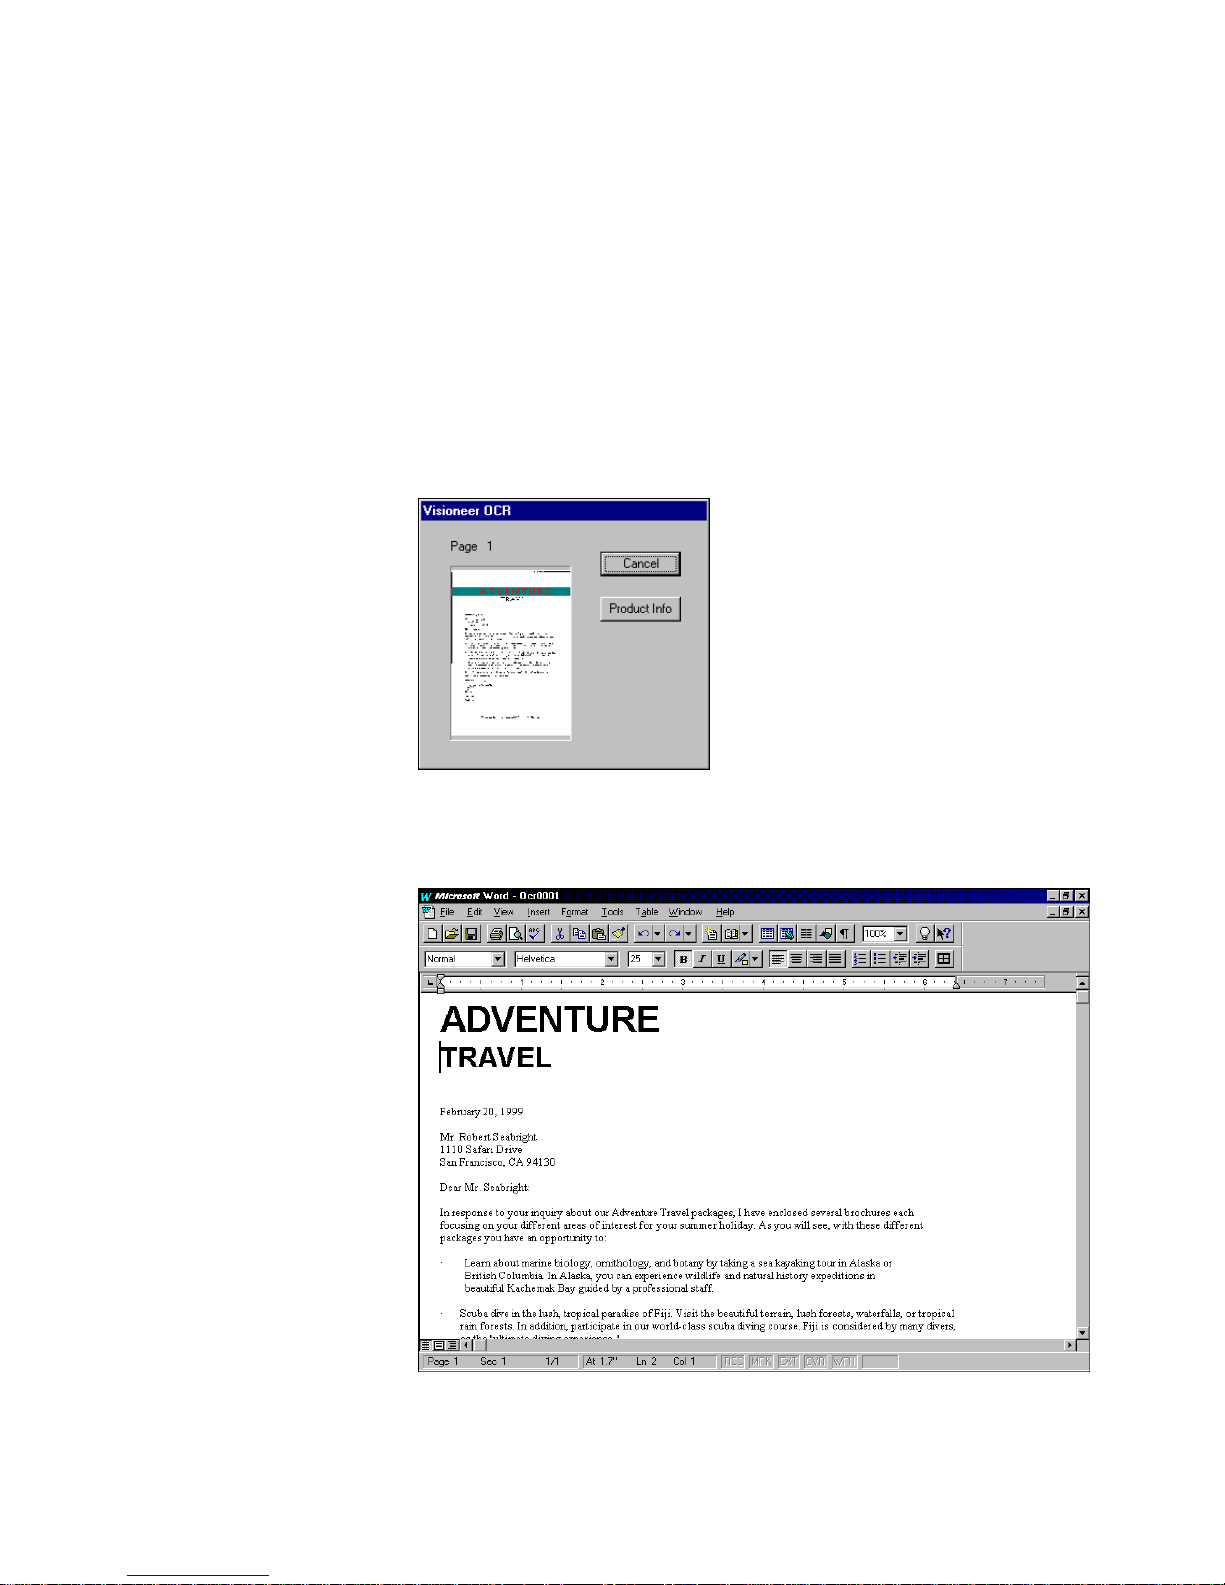
82 CHAPTER 8: CONVERTING ITEMS TO TEXT WITH OCR
If the item is a stack, all pages are converted. To convert a single
page of a stack, first use the Unstack Current Page command from
the Unstack button on the Command Bar, and then convert it.
Instead of using a word-processing link icon, you can also choose
Links from the File menu, and then choose the name of the link
that you want to use. The conversion process begins.
4. The OCR application shows a progress window while the
conversion is in process.
5. When the conversion is complete, the linked application opens and
you can begin editing the text.
Page 91

CONVERTING AN ITEM TO TEXT 83
Note: PaperPort’s built-in OCR application has an option to convert
text to an HTML format so that you can display the text on an
Internet Web page. To convert to HTML, choose HTML as the
document format in the Link Preferences for your word-processing
link.
To convert an item to text from Page View:
1. Display the item in Page View that you want to convert.
2. From the File menu, choose Links.
3. Choose the name of your word-processing application.
The OCR conversion begins. If the item is a stack, all of its pages are
converted. To convert a single page of a stack, unstack that page from
the stack first; then convert it.
Page 92

84 CHAPTER 8: CONVERTING ITEMS TO TEXT WITH OCR
CONVERTING PART OF A PAGE TO TEXT
If you want to convert only part of a page to text and copy it
automatically to the Clipboard, use the Copy As Text feature.
To convert a portion of a page to text:
1. Display the page in Page View.
2. Click the Selection tool on the Annotation tool bar.
3. Drag around the portion of text you want to convert.
4. From the Edit menu, choose Copy As Text.
The OCR progress window shows that the conversion is taking
place.
Page 93

CONVERTING A SCANNED SPREADSHEET TO TEXT 85
The selected text is copied to the Clipboard.
5. Open the application where you want to paste the text and choose
Paste from that application’s Edit menu.
CONVERTING A SCANNED SPREADSHEET TO TEXT
Converting a scanned spreadsheet is similar to converting a page of text.
By default, the OCR preferences are set to retain a multiple column
format, so you can ensure that the spreadsheet retains it columnar
format, and that the spreadsheet application recognizes number
characters as numbers if you want to update them.
Page 94

86 CHAPTER 8: CONVERTING ITEMS TO TEXT WITH OCR
To convert a spreadsheet from Desktop View:
1. Select the spreadsheet to convert. It can be a single spreadsheet or a
stack.
2. Drag it onto the spreadsheet link icon on the Link Bar. You can
also click the spreadsheet link icon.
Note: If you drag an Excel item to the Excel link, the built-in OCR
application is not used. Instead, PaperPort launches Excel and opens
the item in it.
3. When the spreadsheet link icon is highlighted, release the mouse
button.
This example shows Microsoft Excel as the spreadsheet application, but
you can drag the spreadsheet onto any spreadsheet icon on the Link Bar.
Instead of using the spreadsheet link icon, you can also choose Links
from the File menu, and choose the name of a spreadsheet application.
Page 95
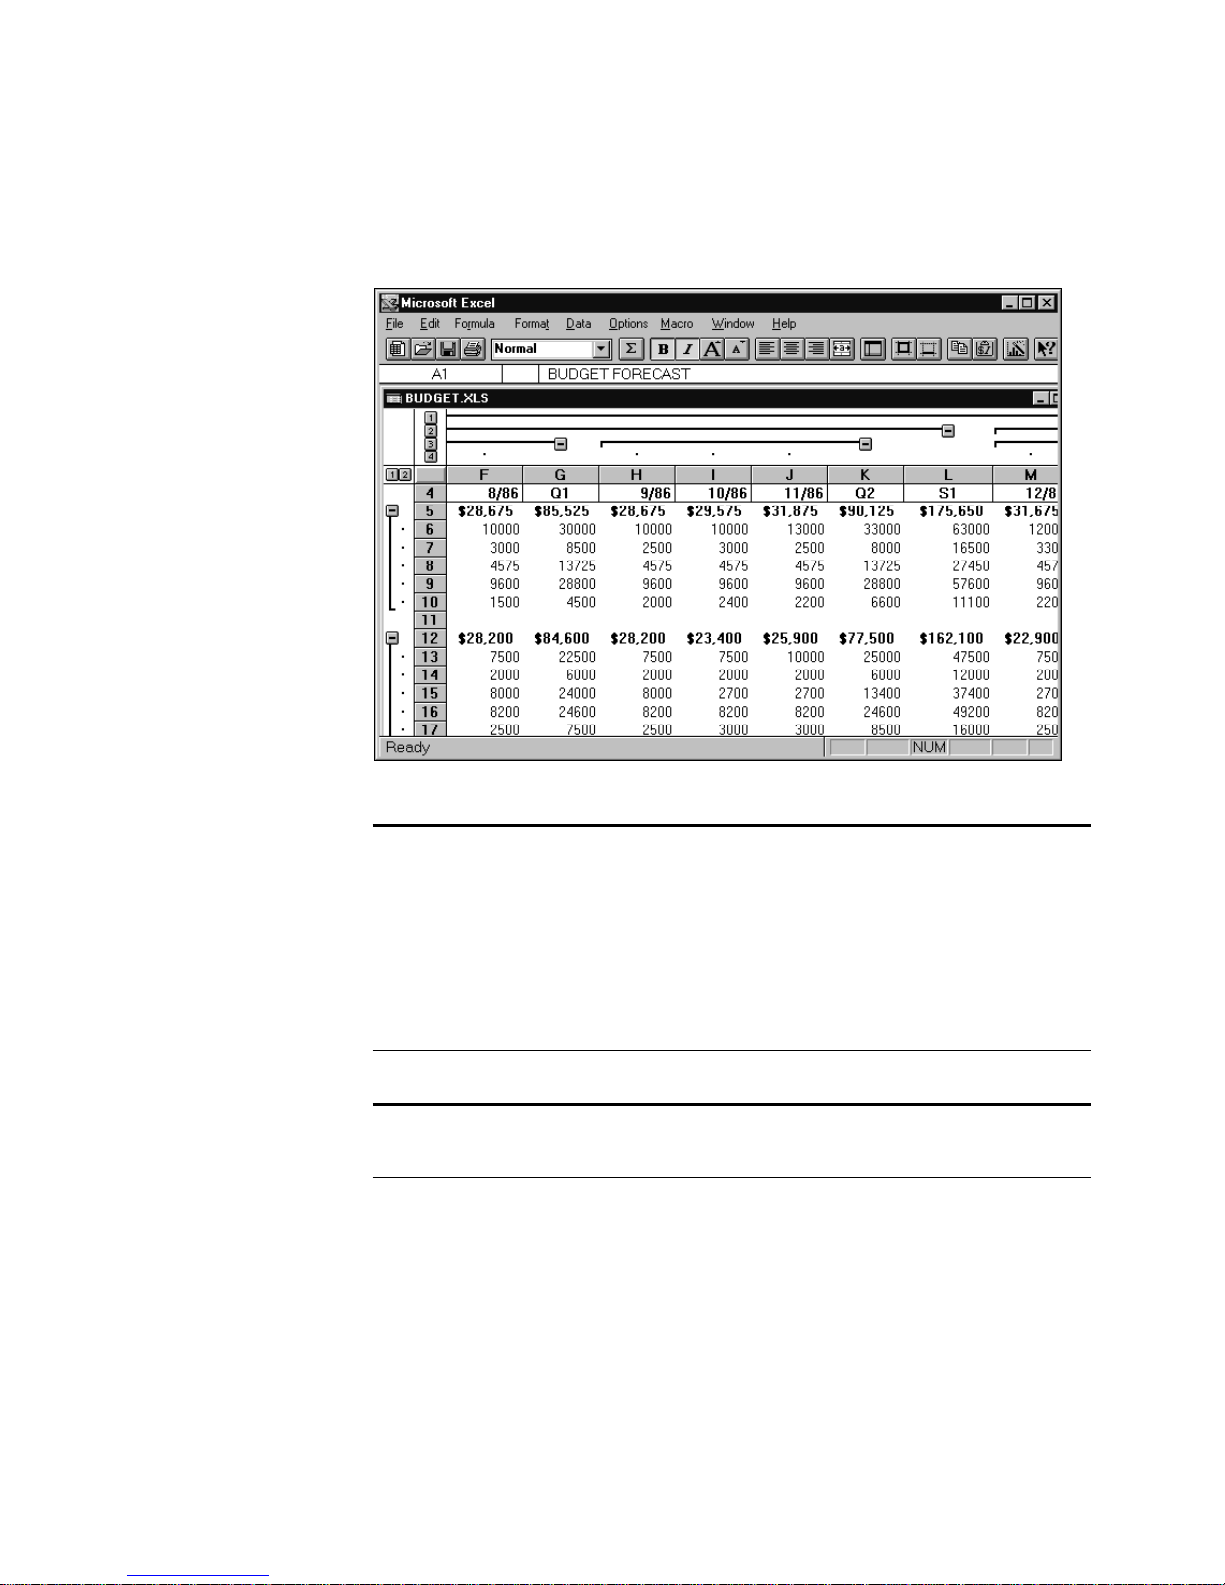
CONVERTING A SCANNED SPREADSHEET TO TEXT 87
4. When the conversion is complete, the spreadsheet application
opens and you can begin editing its text and numbers.
Note: To maintain the column format for a spreadsheet table, choose
Link Preferences from the Edit menu, click the icon for your
spreadsheet application, click OCR Setting, and select Multiple
Columns. This setting maintains the column format for tables in
word-processing applications. For more information about setting
OCR preferences, see “Setting the Visioneer OCR preferences,” later
in this chapter.
Note: Spreadsheets are often displayed horizontally.To rotate them
after scanning, select the spreadsheets and click the Rotate button.
Page 96

88 CHAPTER 8: CONVERTING ITEMS TO TEXT WITH OCR
CONVERTING AN ITEM USING ANOTHER OCR
APPLICATION
If you have another OCR application installed on your computer, such
as Pro OCR, an OCR link appears on the Link Bar. Instead of using
PaperPort’s built-in OCR application, you can convert an item to text
by using another OCR application.
To convert an item to text using another OCR application:
1. Set OCR preferences for the other OCR application as described in
the documentation that came with your OCR application.
2. Select the item to convert.
3. Drag it onto the OCR link icon on the Link Bar. You can also click
the OCR link icon.
4. When the OCR link icon is highlighted, release the mouse button.
5. Complete the conversion as described by your OCR
documentation.
SETTING THE VISIONEER OCR PREFERENCES
You can set the Visioneer OCR preferences for each link application that
you use to convert an image into text. For example, you can set
preferences for word-processing applications, such as Microsoft Word
and for spreadsheet applications, such as Microsoft Excel. You can
change the preferences at any time to accommodate the type of item you
are converting. You can set preferences from either Desktop View or
Page View.
Page 97

SETTING THE VISIONEER OCR PREFERENCES 89
To set OCR preferences for the Visioneer OCR:
1. From the Edit menu, choose Link Preferences. The Link
Preferences dialog box appears.
2. Select the word-processing or spreadsheet link, such as Microsoft
Word or Microsoft Excel, for which you want to set OCR
preferences. A drop-down list of OCR packages and the OCR
Settings button appear.
Note: If you want to use a different OCR application instead of
PaperPort’s built-in OCR application as the default for the selected
link, you can select the OCR application from the OCR Package list.
You can also drag an item directly to an OCR link as described in
“Converting an item using another OCR application,” earlier in this
chapter.
3. Select the document format in which you want to save the
converted text. For example, select MS Word for Windows to save
as a Word file, or Hypertext Markup Language to save as an HTML
file.
Page 98
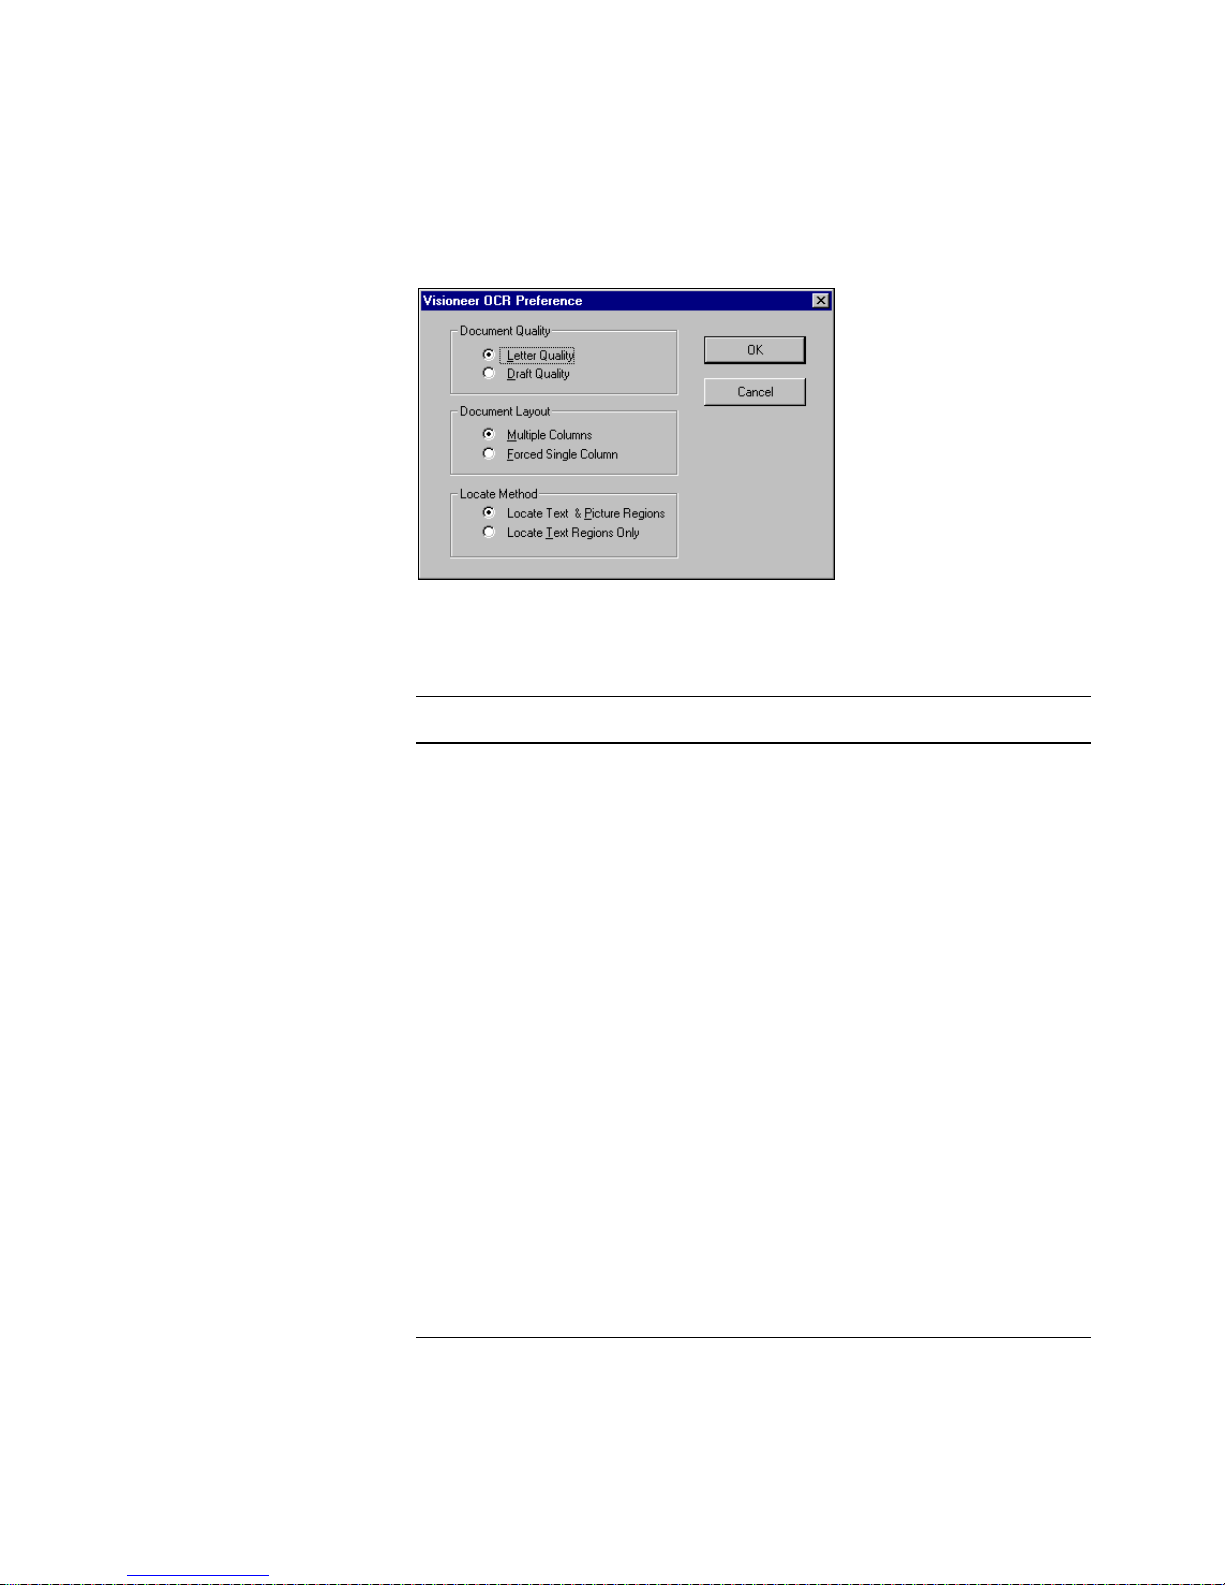
90 CHAPTER 8: CONVERTING ITEMS TO TEXT WITH OCR
4. Click the OCR Settings button. The Visioneer OCR Preference
dialog box appears.
5. Select preferences based on the following information, and then
click OK.
Preference Comment
Document Quality The document quality helps the OCR
application interpret the text. Select
Letter Quality for most items. Select
Draft Quality if the image quality is poor.
Document Layout If the document has multiple columns,
such as in a magazine article, select the
Multiple Columns option.
If you want to force all converted text
into a single-column format, select
Forced Single Column.
Locate Method The locate method tells the OCR
application whether it should recognize
text and pictures or only text regions. If
your item includes pictures and you want
to include those pictures in the
conversion, select Locate Text & Picture
Regions. If you want to convert only text,
select Locate Text Regions Only.
Page 99

CHAPTER 9
Using ScanDirect
ScanDirect is an application for scanning an item and sending it directly
to another application without opening PaperPort first. For example, to
scan an item and fax it right away, use ScanDirect. As soon as the item is
scanned, your fax software starts and the item is ready to send.
This chapter tells you about:
• Starting ScanDirect
• The ScanDirect control panel
• Running PaperPort and ScanDirect together
• Using ScanDirect
• Using a TWAIN scanner with ScanDirect
STARTING SCANDIRECT
The ScanDirect application is installed with your PaperPort software
and is available from the Windows desktop and the Windows Start
button.
To start ScanDirect:
• On the Windows desktop, double-click the ScanDirect shortcut.
91
Page 100

92 CHAPTER 9: USING SCANDIRECT
The ScanDirect control panel appears.
Note: If another open window hides the ScanDirect control panel,
click the ScanDirect icon on the taskbar to bring the control panel to
the front.
To close or minimize the ScanDirect control panel:
1. To minimize the ScanDirect control panel, click the ScanDirect
icon, and choose Minimize.
2. To close the control panel, choose Exit from the menu or click the
Close button.
3. To redisplay the minimized ScanDirect control panel, click the
ScanDirect icon on the taskbar.
 Loading...