

Visioneer PAPERPORT STROBE, PaperPort Strobe EP-10, PaperPort Strobe SA-10, SCANSOFT PAPERPORT STROBE SCANNER, PaperPort Strobe S-10 Getting Started Manual

PaperPort Strobe scanner
W
ELCOME
Congratulations on your purchase of PaperPort Strobe, a desktop scanner
with which you can quickly scan paper documents and color photos to get
their electronic images on your computer.
W
HAT’S IN THE BOX
Before you start the installation, check the contents of the box to make sure
that all parts are included. If any items are missing or you notice any
damage, contact the dealer where you purchased the scanner.
Software CD Installation Guide and
Power adapter
W
HAT YOU NEED
To use the scanner and software, you need the following:
IBM PC (or 100-percent compatible) 486 or higher.
■
■
Microsoft Windows 95.
16 megabytes (MB) or more of internal memory (RAM).
■
PaperPort Strobe cable
P
APERPORT STROBE FOR WINDOWS INSTALLATION GUIDE
Getting Started Guide
Calibration
page
1

2
P
APERPORT STROBE FOR WINDOWS INSTALLATION GUIDE
■
35 MB of free hard disk space.
A VGA or SVGA monitor. Recommended settings for your monitor are
■
as many colors as possible—High Color (16-bit), True Color (24-bit),
or 32-bit if your monitor has that capability. Set the resolution to at least
800 by 600 pixels (or higher). To set your monitor’s colors and
resolution, open the Windows Control Panel, double-click
click the
A CD-ROM drive to install the software; if your computer does not
■
Settings
tab.
Display
and
have a CD-ROM drive, please see the card included with your scanner
for ordering the software on disks from Visioneer.
G
ETTING HELP
The PaperPort software includes a complete help system that answers
questions about the scanner and its software. If you have questions or the
scanner doesn’t seem to work properly, please use the help system.
To get help while running the PaperPort software:
■
Press the F1 key, or from the
Topics
▼
TIP:
to display the Help Topics window.
For specific information and numbers to call, see the technical
Help
menu, choose
PaperPort Help
support card that you received with your scanner.
G
ETTING THE PAPERPORT USER’S GUIDE
The CD also includes your
printed
PaperPort Getting Started Guide
PaperPort User’s Guide
that you received with the scanner
. This supplements the
and provides more detailed descriptions about the scanner’s features. Please
see the CD to view the
PaperPort User’s Guide
. You can print the entire
guide, or just the parts that you would like to have handy for reference.

CANNER’S FEATURES
THE S
3
Front view
Scanner
1
button
Top view
THE S
CANNER’S FEATURES
Paper return
4
Page feed
2
Page markers
3
Rear view
Return to front
7
Paper return settings
5
Pass straight through
6
Cable jack

4
P
APERPORT STROBE FOR WINDOWS INSTALLATION GUIDE
THE S
Scanner button. Press to cancel a scan in progress. If the paper jams, press to back the paper
1
out. Press before scanning to select new scan settings.
Page feed. Insert an item to scan face up into the page feed. The feed mechanism will grab the
2
item and pull it through the rest of the way. The PaperPort application will automatically start.
Page markers. Insert items to scan between these two elevated tabs.
3
Paper return. Rotate forward or backward to set the paper output path (straight-through or
4
return-to-front). Use return-to-front for regular paper, use straight-through for items that
should not be bent, such as photographs and business cards.
Paper return settings. Rotate the paper return to align either setting with the arrow.
5
Cable jack. Plug the PaperPort Strobe cable into this jack.
6
▼ NOTE: The scanner does not have an on/off switch. Simply insert
CANNER’S FEATURES
(C
ONTINUED
)
the paper into the scanner to start it. The PaperPort software does not
need to be open either. It will automatically start when you scan.
C
ONNECTING THE SCANNER TO YOUR COMPUTER
The PaperPort Strobe scanner connects to any available parallel (LPT) port
on the back of your computer.
▼
NOTE:
Please follow the sequence of steps in this section. Do not
connect the power cable until all other connections are completed.
CONNECTING THE SCANNER TO YOUR COMPUTER 5
To connect the PaperPort scanner:
1. Turn off the power to your computer. (Remember to save any open
files before closing Windows.)
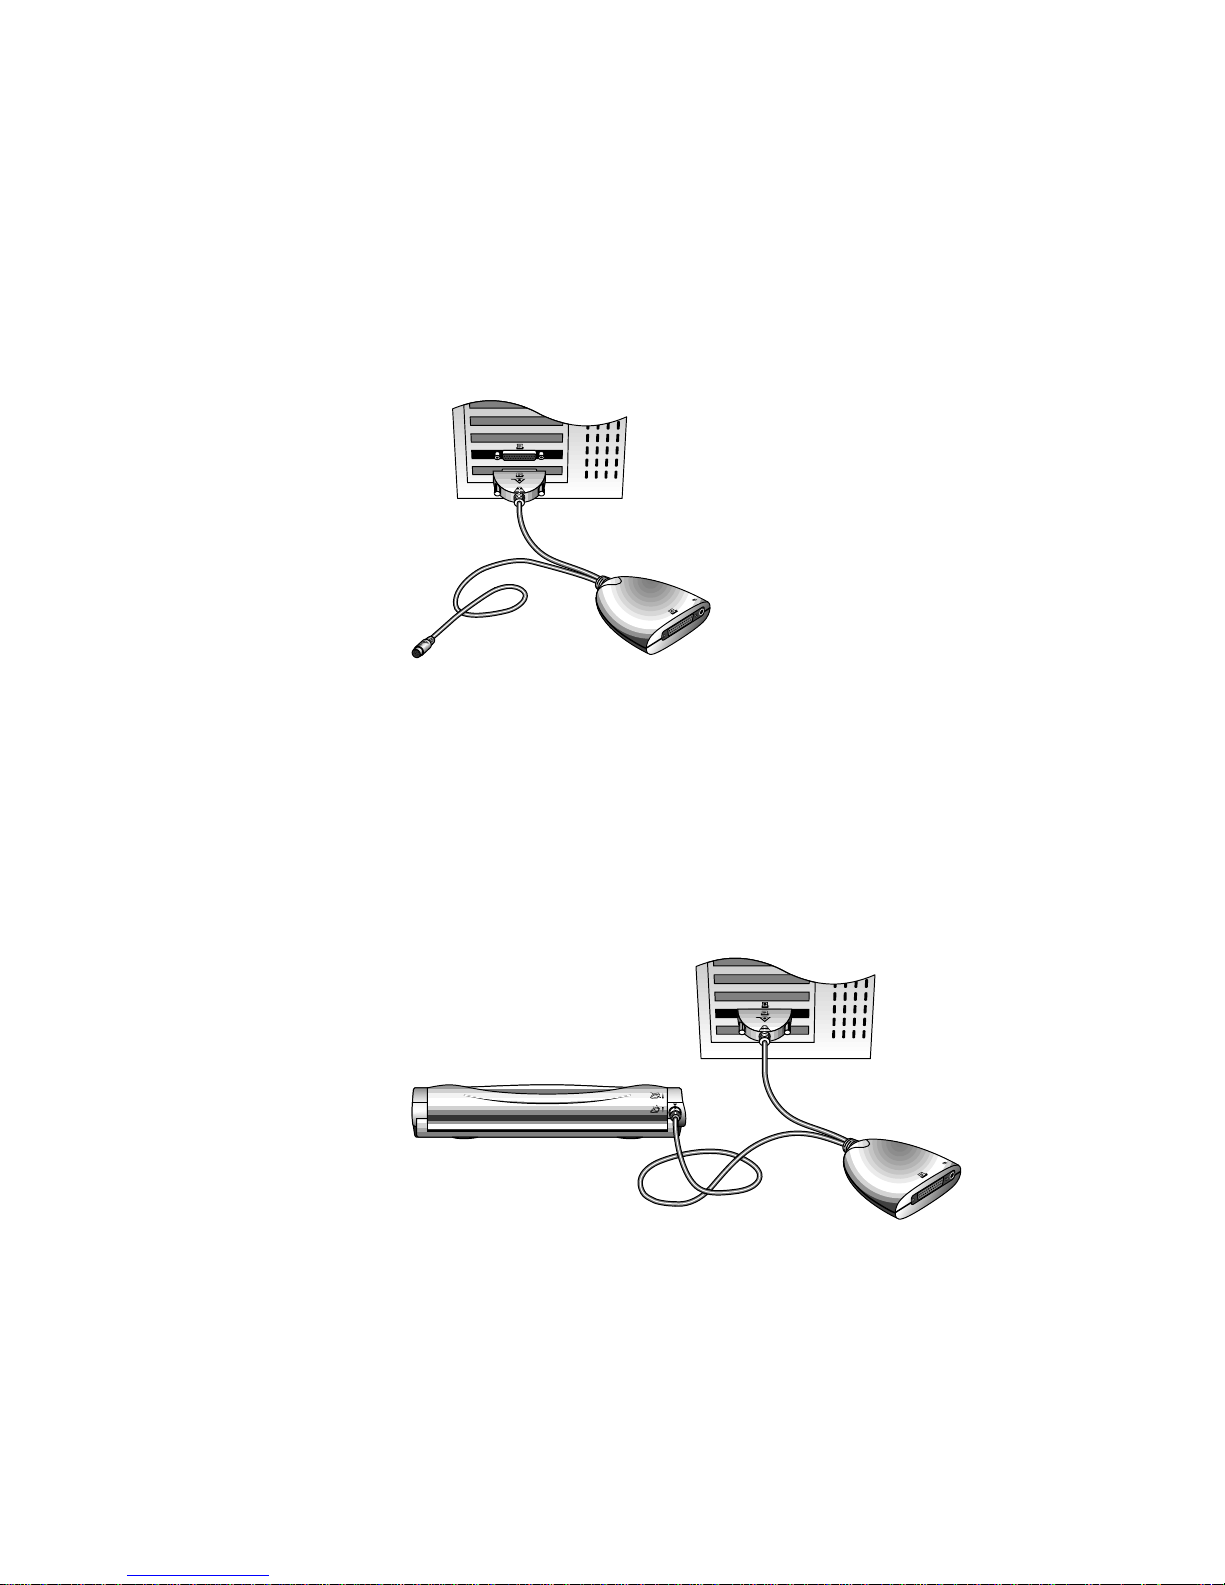
2. Plug the PC end of the PaperPort Strobe cable into any available
parallel (LPT) port on the back of your computer.
If all of the parallel ports on your computer are currently used by other
devices, see the section, “If All Parallel Ports Are in Use,” on page 7.
3. Plug the other end of the PaperPort Strobe cable into the round port
on the back of the scanner.
For the plug to fit correctly, the arrow symbol on the plug must be
facing upward. If the plug does not attach easily, make sure that you
are plugging it in correctly. Do not force the plug into the connection.
 Loading...