

Visioneer PaperPort Strobe 500, PaperPort Started Manual

PaperPort Getting
Started Guide
This guide shows you how to use some of PaperPort’s main features,
including viewing items, creating stacks, sending an item electronically
to a PaperPort Link, adding an annotation, filing items in folders, and
editing color images.
While this brief guide is enough to get you started, Visioneer provides
other information to help you use all of the PaperPort software’s
features. The following figure shows where to find information about
the PaperPort software.
EXPLORE PAPERPORT
One-Minute Guide
An online tour of PaperPort
features.
User’s Guide
This online task-oriented
guide describes many
PaperPort features.
This guide is on the
PaperPort CD.
PaperPort Help
Everything you want to know about
PaperPort—how-to procedures,
dialog box reference, and
troubleshooting advice.
PaperPort CD
Your source for installing additional
software that works with the PaperPort
software and for viewing the online
documentation.
1

2
APERPORT GETTING STARTED GUIDE
P
V
IEWING ITEMS ON THE PAPERPORT DESKTOP
With the PaperPort software, you can view an item in two ways: on the
PaperPort Desktop (also called Desktop View) or in Page View. The
PaperPort Desktop displays thumbnails of items after you scan or
display them on the PaperPort Desktop. Items can stay on the PaperPort
Desktop, or you can file items in different folders.
To view items on the PaperPort Desktop:
■
Double-click the PaperPort icon on the Windows desktop. When you
scan an item, the PaperPort Desktop automatically appears.
The Command Bar has
shortcuts for choosing
menu commands, such
as switching views.
Folders are your
personal filing system
for organizing
PaperPort items.
Stacks are items that
have been combined.
Stack titles appear in
bold type above the
page titles.
Use the scroll arrow to
view other links on the
Link Bar.
The status bar shows
information about the
selected item, link, or
button.
Thumbnail of
scanned items
The Link Bar has icons that represent other applications
and functions that work with PaperPort. The icons vary,
depending on the applications installed on your computer.
A stack of
items that were
combined.
The current date
appears as the title for
a new item or stack.
▼
TIP:
JPEG, onto the PaperPort Desktop by using the Import command.
You can get items saved in other formats, such as BMP, TIFF, or
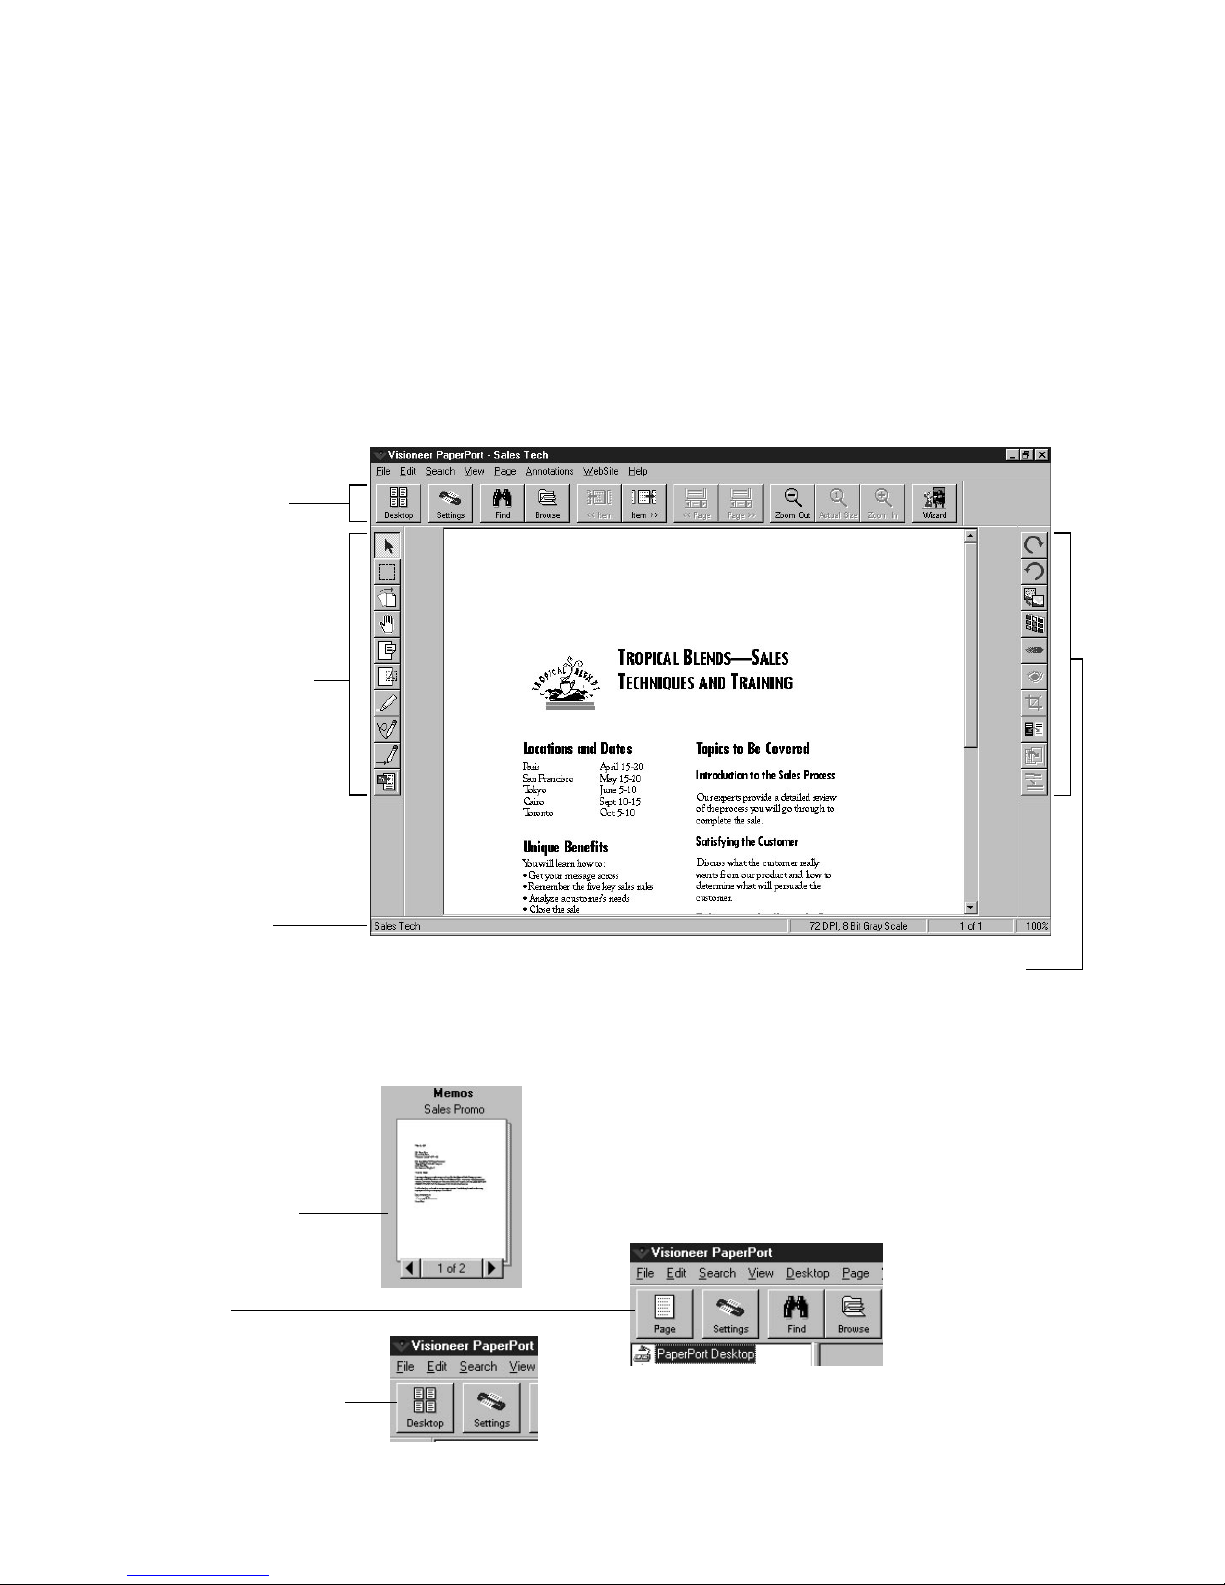
The Command Bar
has shortcuts for menu
commands. Many
buttons in Page View
are different from those
in Desktop View.
The Annotation Tool
Bar has tools for adding
notes, highlighting
areas, cutting and
pasting a selection,
adding a picture, and
so on.
IEWING AN ITEM IN PAGE VIEW
V
V
IEWING AN ITEM IN PAGE VIEW
Page View displays a close-up view of one page so that it is readable on
the screen. With PaperPort annotations, you can add comments,
highlight or circle information, or add a picture to a page. You can also
adjust and edit the quality, color, and other aspects of an image using the
Image Tool Bar.
3
The status bar shows
information about
the current page.
1. In Desktop View,
select (click) the
item you want.
2. Click the Page
button.
3. To return to
Desktop View, click
the Desktop button.
The Image Tool Bar has tools for editing an image,
improving the quality, or adjusting the color.
To switch between Desktop View and Page View:

4
APERPORT GETTING STARTED GUIDE
P
C
REATING STACKS
With PaperPort, you can electronically organize items into stacks in
much the same way that you do with paper documents. A stack is a
PaperPort item with multiple pages.
To create a stack:
1. In the Desktop
View, select the
item that you
want to stack.
This example
shows stacking a
Cover Letter on
an Invoice.
2. Drag the selected
item onto the
item on which
you want to
stack it.
3. When the
second item is
highlighted,
release the
mouse button.
The stack is
created.
Cover Letter Invoice
Cover Letter Invoice
Invoice
Cover Letter
4. Repeat Steps 1
through 3 until
you finish creating
the stack.
A new stack receives the title of the item on the bottom of the stack. The
stack title (Invoice in this case) is shown in boldface type. Each page title
is shown in normal typeface (Cover Letter in the sample).
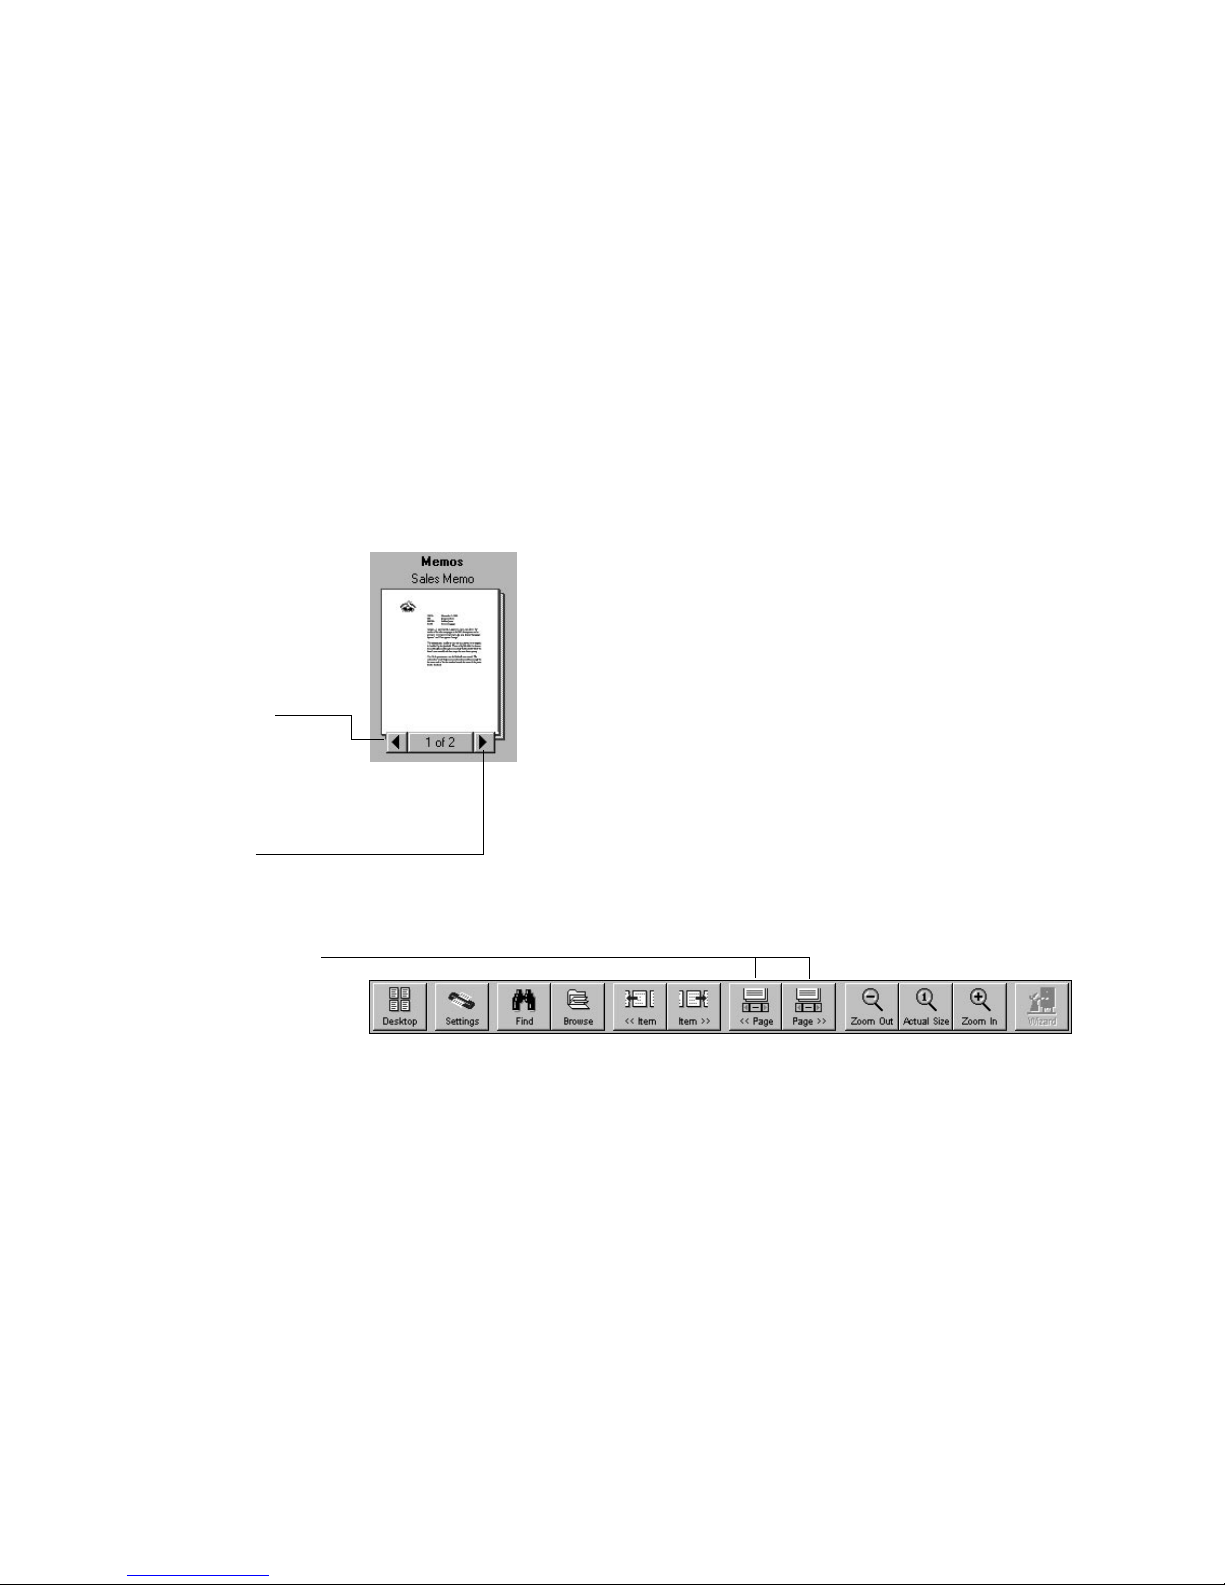
1. Select the stack.
2. Click the left
arrow of the Page
Navigator to see
the previous page
in the stack.
OVING BETWEEN STACKED PAGES
M
▼
NOTE:
When you select multiple items to stack, PaperPort stacks
them in the order in which they were selected.
M
OVING BETWEEN STACKED PAGES
In Desktop View, the Page Navigator on a stack is for flipping through a
stack’s pages. You can also use the First Page, Last Page, Previous Page,
and Next Page commands on the Page menu to move from page to page.
To move between pages in a stack in Desktop View:
5
3. Click the right
arrow of the Page
Navigator to see
the next page in
the stack.
1. Display the stack.
2. Click the << Page
or Page >>
button.
To move between pages in a stack in Page View:
F
AXING OR
E-M
AILING A PAPERPORT ITEM
The PaperPort software is designed to work with—or link to—other
types of applications. To send PaperPort items to other applications, you
use the Link Bar. The Link Bar automatically displays link icons for
applications installed on your computer and supported by the PaperPort
software, such as electronic fax, e-mail, image editing, and word
processing applications.
 Loading...