

Visioneer PaperPort 6100 Series, PaperPort 3100, PaperPort 6000, PARFB, PaperPort 3100 Series Installation Manual
...
Flat219.fm Page 1 Sunday, February 22, 1998 3:43 PM
W
Congratulations on purchasing your Visioneer PaperPort flatbed
scanner. With your scanner, you can quickly scan paper documents and
color photos to place their electronic images on your computer.
Please note that this guide covers installation steps for a family of
PaperPort flatbed scanners—the PaperPort 3100, 6000, and 6100 series
of scanners.
W
ELCOME
HAT’S IN THE BOX
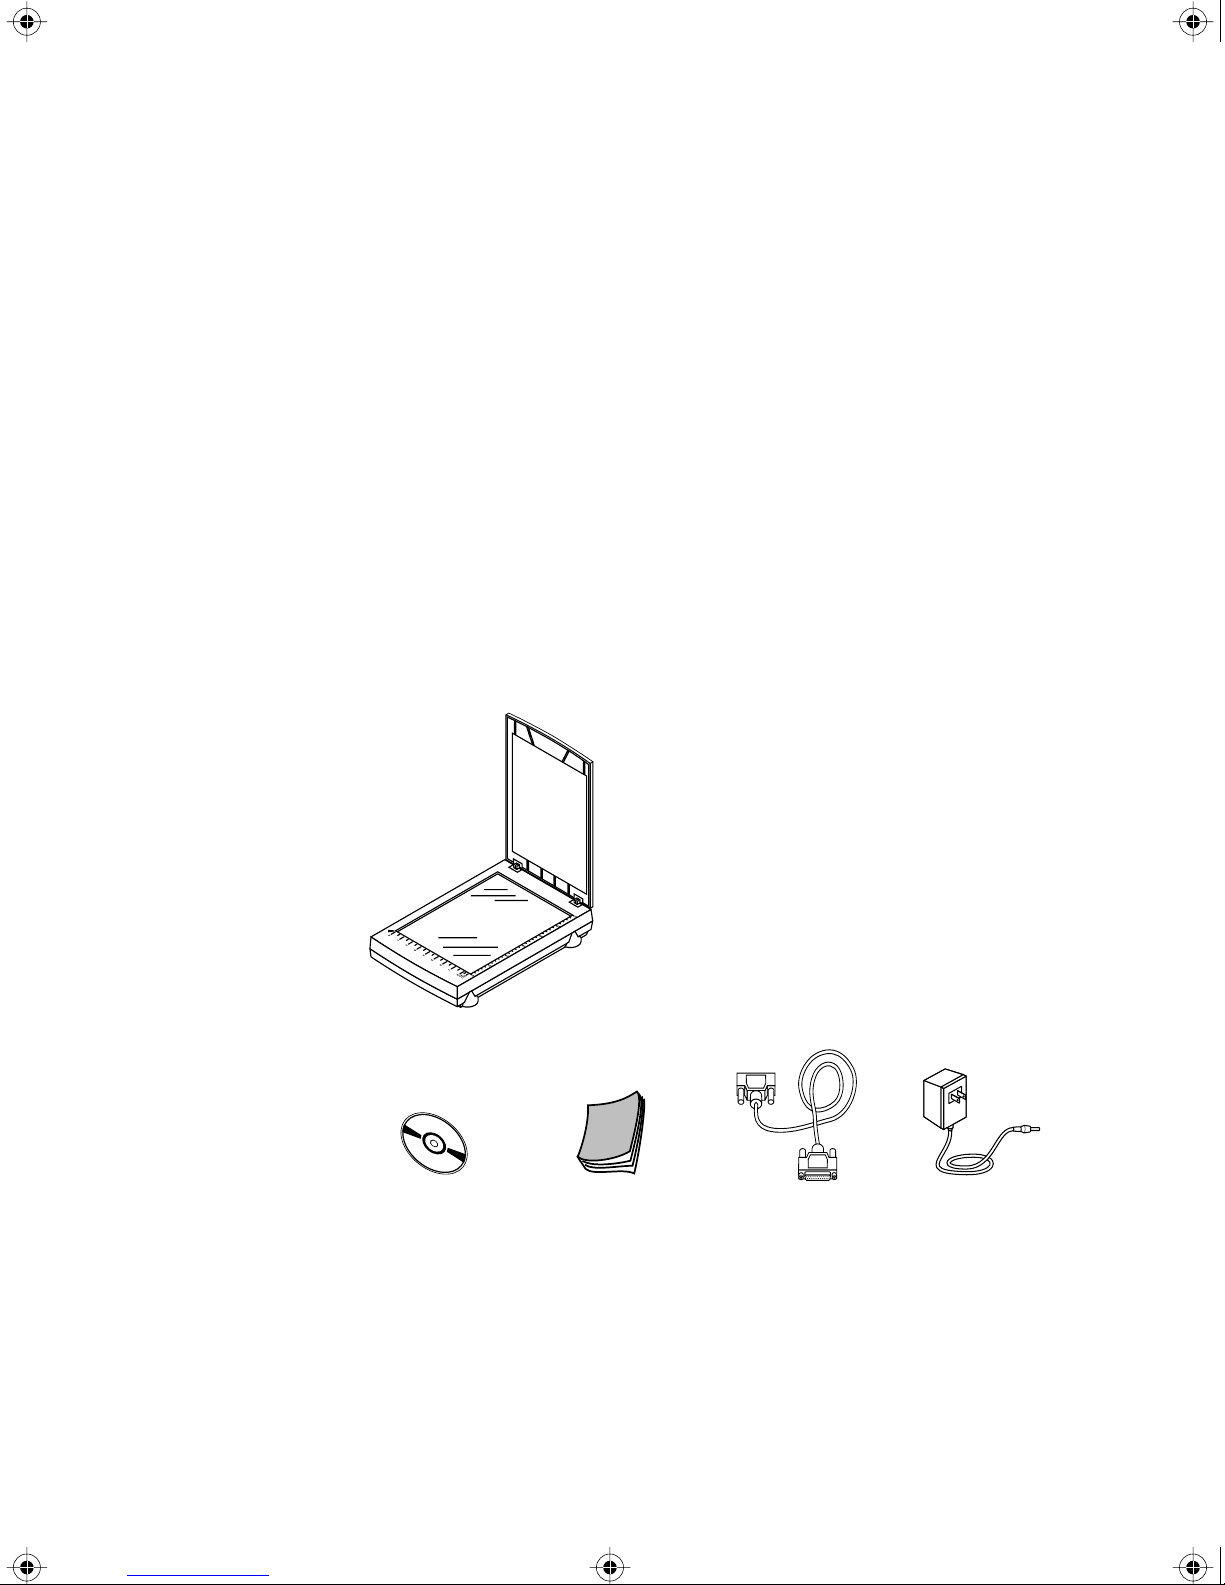
Before starting the installation, check the contents of the box to make
sure that all parts are included. If any items are missing or damaged,
contact the dealer where you purchased the scanner.
Software CD Installation Guide Power cord Scanner cable
▼
NOTE:
for the PaperPort software. You can print a copy from the CD to
your printer.
The CD also includes the
APERPORT FLATBED SCANNER INSTALLATION GUIDE
P
P aperP ort U ser’ s G uide
, the manual
1

Flat219.fm Page 2 Sunday, February 22, 1998 3:43 PM
2
APERPORT FLATBED SCANNER INSTALLATION GUIDE
P
HAT YOU NEED
W
To use the scanner and software, you need the following:
IBM PC (or 100-percent compatible) 486 or higher
■
Microsoft W indows 95 or Microsoft NT 4.0
■
16 megabytes (MB) or more of available internal memory (RAM)
■
35 MB of free hard disk space
■
A VGA or SVGA monitor. Recommended settings for your monitor
■
are as many colors as possible—High Color (16-bit), True Color
(24-bit), or 32-bit if your monitor has that capability. Set the
resolution to at least 800 by 600 pixels. To set your monitor’s colors
and resolution, open the Windows Control Panel, double-click
Display, and then click the Settings tab.
■
A CD-ROM drive
ETTING THE PAPERPORT USER’S GUIDE
G
The CD also includes your
PaperPort User’s Guide
PaperPort Getting Started Guide
and
. These guides provide more detailed information
about PaperPort’s features. Please see the CD to view these guides.
You can also print these guides from the CD.
Flat219.fm Page 3 Sunday, February 22, 1998 3:43 PM
THE S
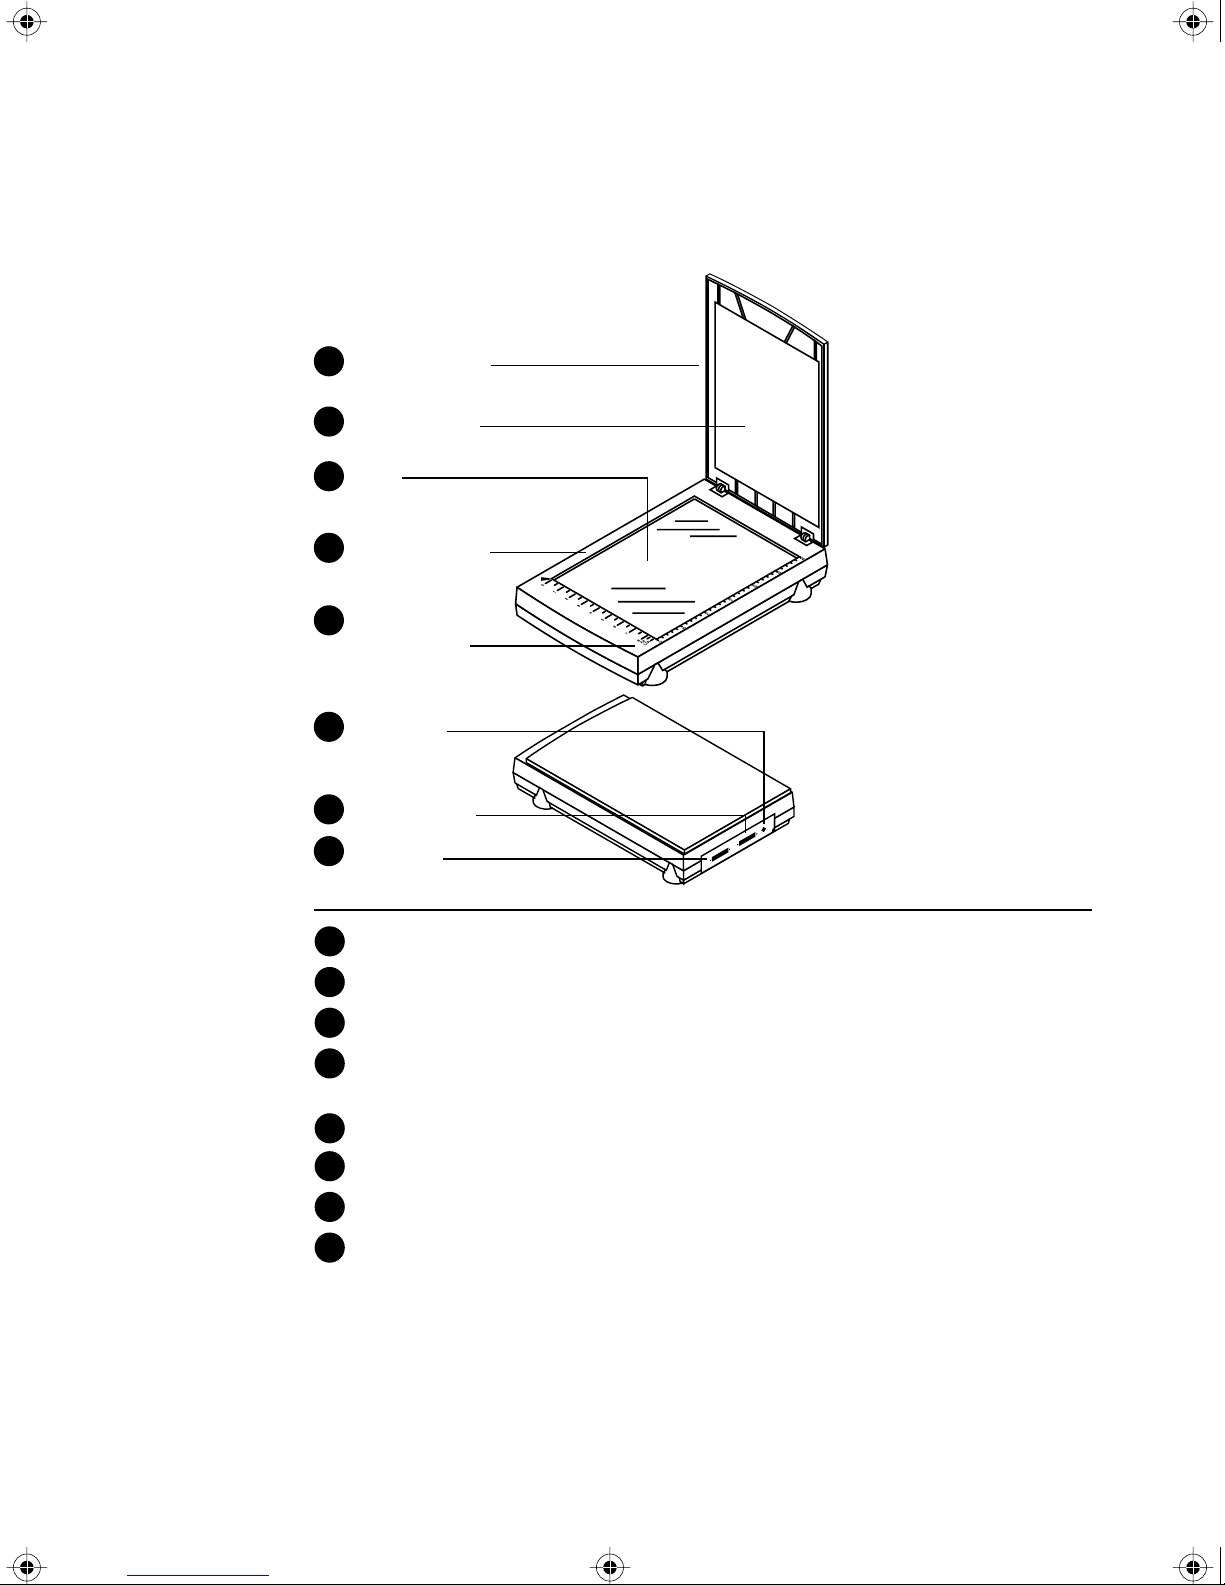
Document cover
1
Document pad
2
Glass
3
Reference frame
4
Button (Some
5
Models Only)
CANNER
THE S
CANNER
3
Power jack
6
To PC parallel
7
8
To printer
Document cover. Close the document cover after placing items on the scanner glass.
1
Document pad. Helps to secure the document in place on the scanner glass.
2
Glass. Place items face down on top of the glass, in the upper left corner.
3
Reference frame. Place items face down within this frame. Both inches and centimeter
4
markings appear along the border of the frame.
Button (Some Models Only). Previews scan or starts PaperPort software if it is not running.
5
Power jack. Plug the scanner power cord into this jack.
6
To PC parallel. Plug the cable that connects the scanner to the computer into this port.
7
To printer. Plug your printer cable into this port.
8
▼ NOTE: The scanner does not have an on/off switch. Simply start
the PaperPort software and click the Twain button. For more
information, see “Setting Up the Scanner” on page 8.

Flat219.fm Page 4 Sunday, February 22, 1998 3:43 PM
4
APERPORT FLATBED SCANNER INSTALLATION GUIDE
P
CANNER FEATURES
S
The following table lists some of the important features of the scanners:
Feature PaperPort 3100 Series PaperPort 6000 Series PaperPort 6100 Series
Optical
300 x 600 dpi 600 x 1200 dpi 600 x 1200 dpi
Resolution
Maximum
2400 x 2400 dpi 2400 x 2400 dpi 2400 x 2400 dpi
Resolution
Scanning
Modes
30 bit color (24-bit
output)
10 bit grayscale
1 bit line art
30 bit color (24-bit
output)
10 bit grayscale
1 bit line art
36 bit color (24-bit
output)
12 bit grayscale
1 bit line art
Maximum
Document Size
Operating
Systems
8.5 inches x 11 inches 8.5 inches x 11 inches 8.5 inches x 11 inches
Windows 95
Windows NT 4.0*
* Use with Windows NT 4.0 depends on your hardware configuration.
See the README file on the PaperPort CD for more information.
G
ETTING HELP
Windows 95
Windows NT 4.0*
Windows 95
Windows NT 4.0*
The PaperPort software includes a complete help system that answers
questions about the scanner and its software. If you have questions or
the scanner doesn’t seem to work correctly, please use the help.
To get help while using the PaperPort software:
Press the F1 key, or from the
■
Topics
to display the Help Topics window.
Help
menu, choose
PaperPort Help
▼
TIP:
support card that you received with your scanner.
For specific information and numbers to call, see the technical
Flat219.fm Page 5 Sunday, February 22, 1998 3:43 PM
ONNECTING THE SCANNER TO YOUR COMPUTER
C
ONNECTING THE SCANNER TO YOUR COMPUTER
C
The PaperPort scanner connects to any available parallel (LPT) port on
the back of your computer.
▼
NOTE:
Please follow the sequence of steps in this section. Do not
connect the power cable until all other connections are complete.
To connect the PaperPort scanner:
1. Save any open files then shut down Windows.
2. Turn off the power to your computer.
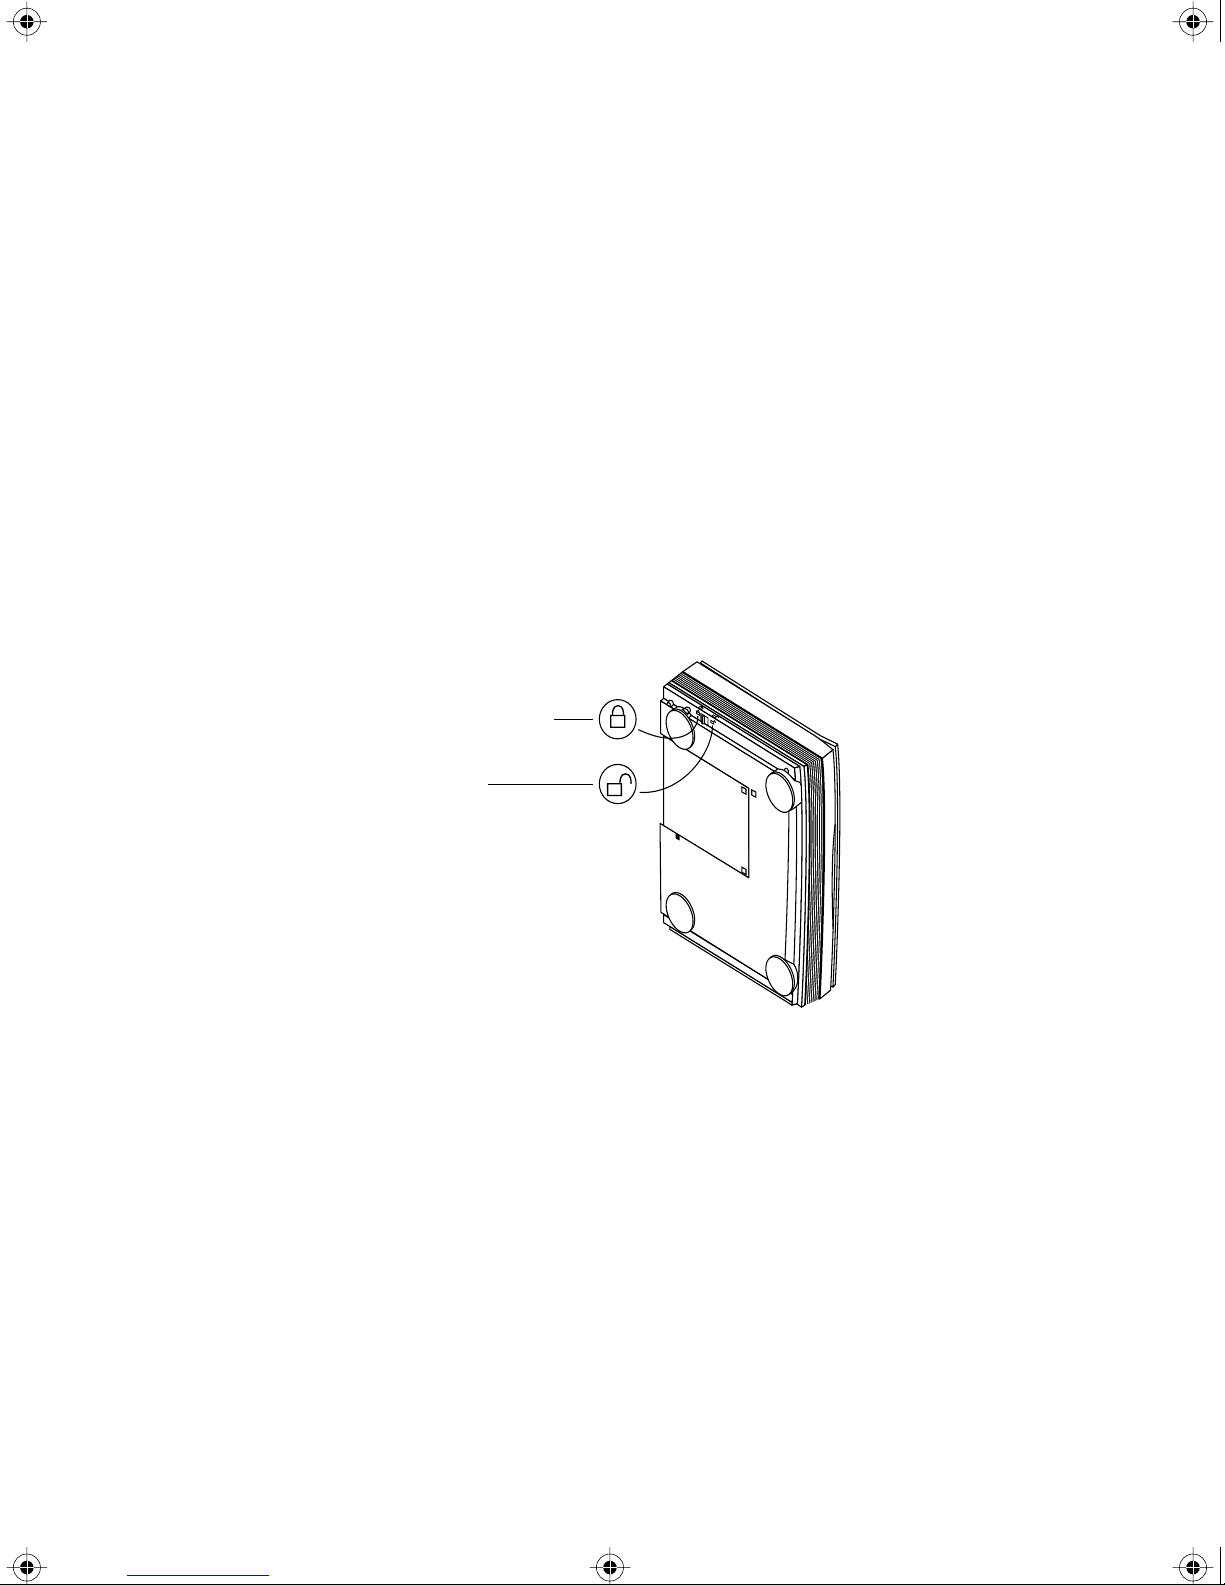
3. Not all models have locks, but if your scanner has a lock button,
slide the lock button to the unlocked position.
5
Locked position
Unlocked
position
NOTE: On the PaperPort 3100, the lock is on the right hand side.
▼
4. If a printer cable is attached to your computer’s parallel port,
unplug it and plug it into the port marked “To printer” on the back
of the scanner.
5. Plug the PC end of the scanner cable into an available parallel port
on the back of your computer.
6. Plug the other end of the scanner cable into the port on the back of
the scanner marked “To PC parallel port.”
If the plug does not attach easily, make sure that you are plugging it
in correctly. Do not force the plug into the connection.
Flat219.fm Page 6 Sunday, February 22, 1998 3:43 PM
6 PAPERPORT FLATBED SCANNER INSTALLATION GUIDE
▼ NOTE: If you want to “daisy-chain” the scanner and a Zip drive so
7. Plug the power adapter cable into the jack on the PaperPort scanner.
8. Plug the power adapter into an AC (wall) outlet.
they share the port, first connect the Z ip driv e to the computer, then
connect the scanner to the Zip drive.
The power-on light on the fr ont of the scanner comes on indicating
the scanner is receiving power.
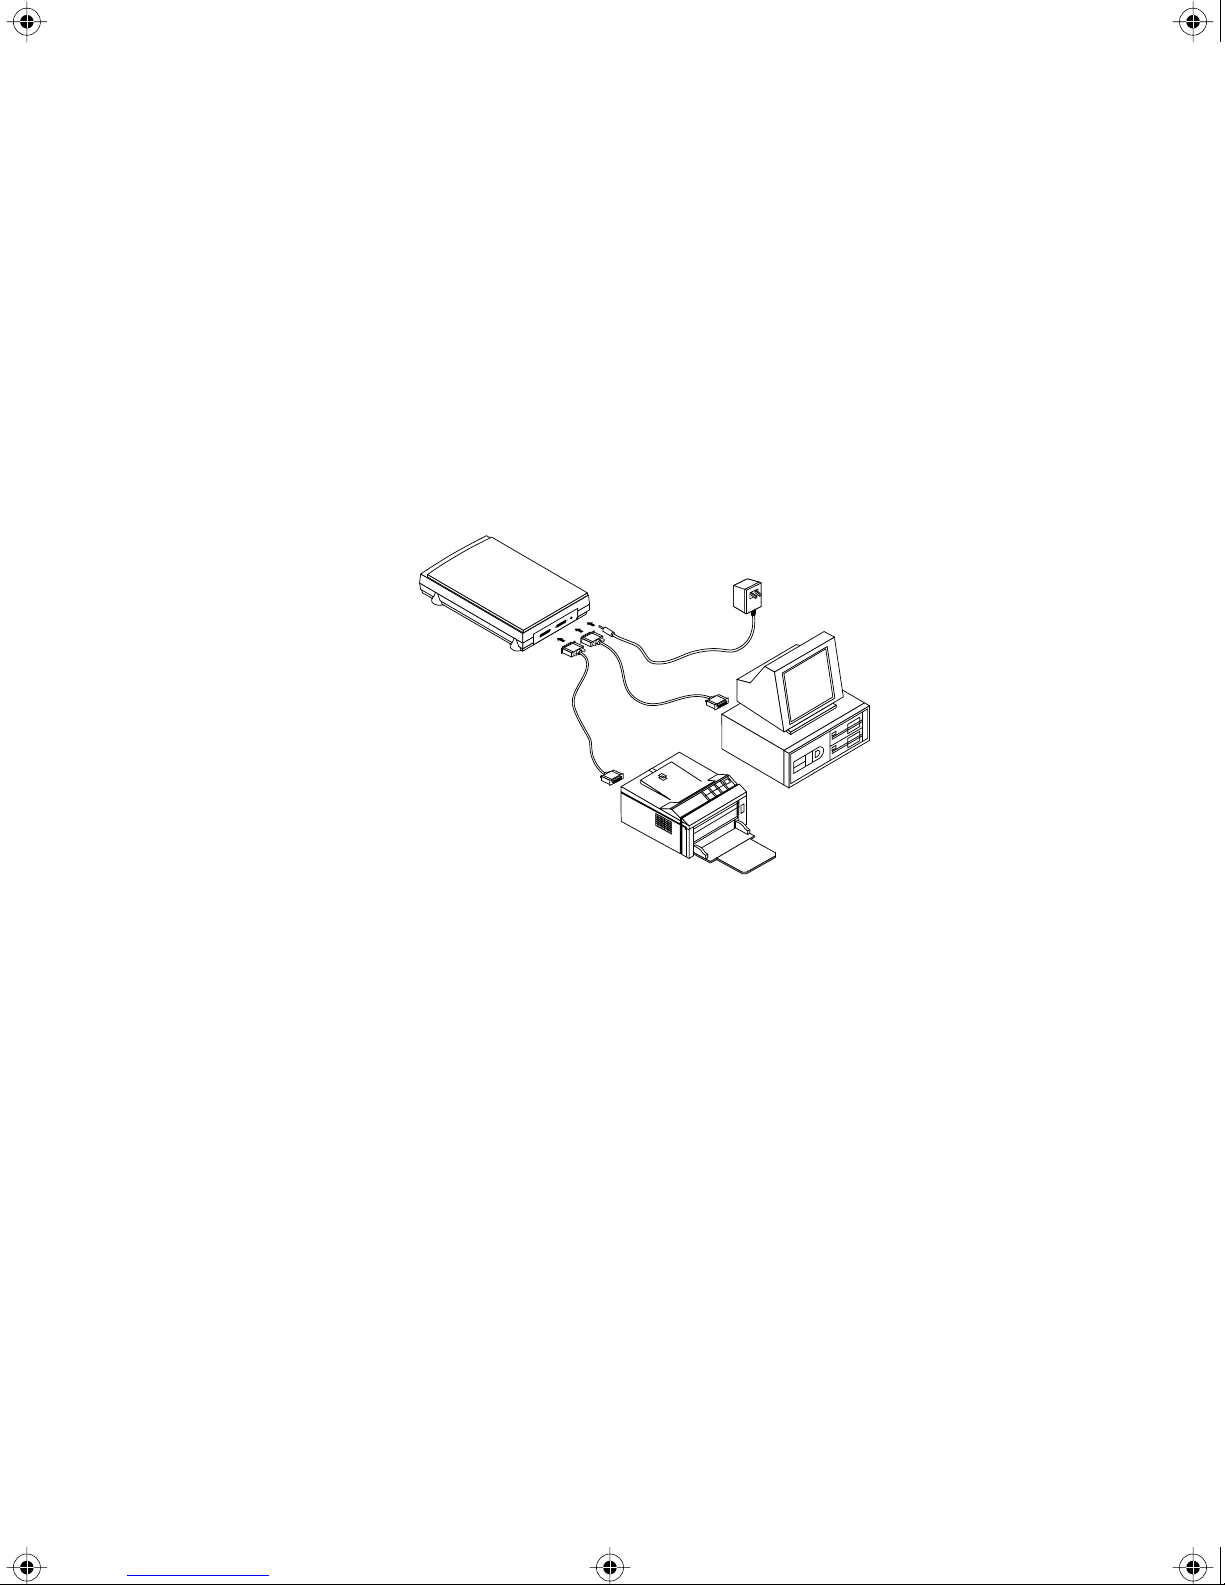
The following diagram show the cable connections.
Power cord
Scanner
cable
Printer cable
9. Turn on your computer. You’re ready to begin installing the
PaperPort software.
▼ NOTE: On some PaperPort scanners the power-on light remains lit
when the computer is turned off. This is normal even though the
computer is turned off.

Flat219.fm Page 7 Sunday, February 22, 1998 3:43 PM
INSTALLING THE PAPERPORT SOFTWARE
The PaperPort CD includes all the PaperPort software files.
▼ NOTE: The CD also includes the PaperPort U ser ’ s Guide, the manual
To install the PaperPort software:
1. Start Microsoft Windows and make sure that no other applications
2. Insert the PaperPort CD into your computer’s CD-ROM drive.
INSTALLING THE PAPERPORT SOFTWARE 7
for the PaperPort software. You can read the guide while the CD is
running, or print a copy directly from the CD to your printer.
are running.
The CD automatically starts.
3. Follow the instructions on the screen to install the PaperPort
software on your computer. Later, after the scanner is working,
you can install the other applications provided on the CD.
▼ NOTE: If the PaperPort CD does not automatically start, make sure
the CD drive’s door is completely shut. If the CD still doesn’t start,
click the Windows 95 icon that shows the drives on your computer.
(Usually, the icon is named My Computer.) The window shows the
drives available on your computer. Double-click the icon for your
CD-ROM drive to see the list of files on the CD. Double-click the
file named START.EXE. The CD starts.
▼ TIP: For a quick look at how to use the PaperPort features, choose
One-Minute Guide from the PaperPort Help menu.
 Loading...