

Visioneer OneTouch 8900 Installation Manual

Visioneer® OneTouch®
8900 Scanner
USB C
FOR
ONNECTION
Installation Guide

COPYRIGHT INFORMATION
Copyright © 2001 Visioneer, Inc., a wholly owned subsidiary of Primax Electronics LTD.
Reproduction, adaptation, or translation without prior written permission is prohibited, except as allowed under the copyright laws.
The Visioneer brand name and logo are registered trademarks of Primax Electronics LTD. OneTouch is a trademark of Primax Electronics LTD. The
PaperPort brand name and logo are registered trademarks of ScanSoft, Inc.
Microsoft is a U.S. registered trademark of Microsoft Corporation. W indows is a trademark of Microsoft Corporation. TextBridge is a registered trademark of
ScanSoft, Inc. ZyINDEX is a registered trademark of ZyLAB International, Inc. ZyINDEX toolkit portions, Copyright © 1990-1998, ZyLAB International,
Inc. All Rights Reserved. All other products mentioned herein may be trademarks of their respective companies.
Information is subject to change without notice and does not represent a commitment on the part of Visioneer. The software described is furnished under a
licensing agreement. The software may be used or copied only in accordance with the terms of such an agr eement. It is against the law to copy the software on
any medium except as specifically allowed in the licensing agreement. No part of this document may be reproduced or transmitted in any form or by any
means, electronic or mechanical, including photocopying, recording, or information storage and retrieval systems, or translated to another language, for any
purpose other than the licensee's personal use and as specifically allowed in the licensing agreement, without the express written permission of Visioneer.
Part Number: 05-0452-000
Restricted Rights Legend
Use, duplication, or disclosure is subject to restrictions as set forth in contract subdivision (c)(1)(ii) of the Rights in Technical Data and Computer Software
Clause 52.227-FAR14. Material scanned by this product may be protected by governmental laws and other regulations, such as copyright laws. The customer
is solely responsible for complying with all such laws and regulations.
Visioneer's Limited Product Warranty
If you find physical defects in the materials or the workmanship used in making the product described in this document, Visioneer will repair, or at its option,
replace, the product at no charge to you, provided you return it (postage prepaid, with proof of your pur chase fr om the original reseller) during the 12-month
period after the date of your original purchase of the product.
THIS IS VISIONEER'S ONLY WARRANTY AND YOUR EXCLUSIVE REMEDY CONCERNING THE PRODUCT, ALL OTHER
REPRESENTATIONS, WARRANTIES OR CONDITIONS, EXPRESS OR IMPLIED, WRITTEN OR ORAL, INCLUDING ANY WARRANTY OF
MERCHANTABILITY, FITNESS FOR A PARTICULAR PURPOSE OR NON-INFRINGEMENT, ARE EXPRESSLY EXCLUDED. AS A RESULT,
EXCEPT AS SET OUT ABOVE, THE PRODUCT IS SOLD “AS IS” AND YOU ARE ASSUMING THE ENTIRE RISK AS TO THE PRODUCT'S
SUITABILITY TO YOUR NEEDS, ITS QUALITY AND ITS PERFORMANCE.
IN NO EVENT WILL VISIONEER BE LIABLE FOR DIRECT, INDIRECT, SPECIAL, INCIDENTAL OR CONSEQUENTIAL DAMAGES
RESULTING FROM ANY DEFECT IN THE PRODUCT OR FROM ITS USE, EVEN IF ADVISED OF THE POSSIBILITY OF SUCH DAMAGES.
All exclusions and limitations in this warranty are made only to the extent permitted by applicable law and shall be of no effect to the extent in conflict with the
express requirements of applicable law.
FCC Radio Frequency Interference Statement
This equipment has been tested and found to comply with the limits for the class B digital device, pursuant to part 15 of the FCC Rules. These limits are
designed to provide reasonable protection against interference in a residential installation. This equipment generates, uses and can radiate radio frequency
energy and if not installed, and used in accordance with the instructions, may cause harmful interference to radio communications. However, there is no
guarantee that interference will not occur in a particular installation. If this equipment does cause harmful interference to radio or television reception, which
can be determined by turning the equipment off and on, the user is encouraged to try and correct the interference by one or more of the following measures:
• Reorient or relocate the receiving antenna.
• Increase the separation between the equipment and receiver.
• Connect the equipment into an outlet on a circuit different from that to which the receiver is connected.
• Consult the dealer or an experienced radio/TV technician for help.
This equipment has been certified to comply with the limits for a class B computing device, pursuant to FCC Rules. In order to maintain compliance with
FCC regulations, shielded cables must be used with this equipment. Operation with non-approved equipment or unshielded cables is likely to result in
interference to radio and TV reception. The user is cautioned that changes and modifications made to the equipment without the approval of manufacturer
could void the user's authority to operate this equipment.
This device complies with part 15 of the FCC Rules. Operation is subject to the following two conditions: (1) This device may not cause harmful interference,
and (2) this device must accept any interference received, including interference that may cause undesired operation

T
ABLE OF CONTENTS
TABLE OF CONTENTS
Welcome . . . . . . . . . . . . . . . . . . . . . . . . . . . . . . . . . . . . . . . . . . . . . . 1
What’s in the Box . . . . . . . . . . . . . . . . . . . . . . . . . . . . . . . . . . . . . . . 1
The Visioneer OneTouch 8900 Scanner . . . . . . . . . . . . . . . . . . . . . . 2
What You Need . . . . . . . . . . . . . . . . . . . . . . . . . . . . . . . . . . . . . . . . . 4
Getting the PaperPort Software User’s Guide . . . . . . . . . . . . . . . . . . 4
i
Chapter 1: Installing
. . . . . . . . . . . . . . . . . . . . . . . . . . . . . . . . . . . . 5
STEP 1: Installing the PaperPort Software . . . . . . . . . . . . . . . . . . . . . 5
STEP 2: Connecting the Scanner . . . . . . . . . . . . . . . . . . . . . . . . . . . . 6
STEP 3: Checking Out Your Scanner . . . . . . . . . . . . . . . . . . . . . . . 10
If the Scanner Is Not Properly Connected . . . . . . . . . . . . . . . . . 11
Chapter 2: Scanning
. . . . . . . . . . . . . . . . . . . . . . . . . . . . . . . . . . . 13
Three Ways to Scan . . . . . . . . . . . . . . . . . . . . . . . . . . . . . . . . . . . . . 13
Scanning by Pressing the OneTouch Buttons . . . . . . . . . . . . . . . . . 14
Scanning from the Button Panel on the Screen . . . . . . . . . . . . . . . . 15
About the OneTouch Buttons . . . . . . . . . . . . . . . . . . . . . . . . . . . . . 16
Configuring the Scanner . . . . . . . . . . . . . . . . . . . . . . . . . . . . . . . . . 17
About the Configuration Dialog Box . . . . . . . . . . . . . . . . . . . . . 18
Getting Help . . . . . . . . . . . . . . . . . . . . . . . . . . . . . . . . . . . . . . . 20
Selecting New Options for the Buttons . . . . . . . . . . . . . . . . . . . 20
Creating New Configurations . . . . . . . . . . . . . . . . . . . . . . . . . . 21
Scanning from the PaperPort Software . . . . . . . . . . . . . . . . . . . . . . 29
Adjusting the Settings on the Scan Manager . . . . . . . . . . . . . . . . . . 35
Adjusting Scan Settings and Page Settings . . . . . . . . . . . . . . . . . 22
Setting Preferences . . . . . . . . . . . . . . . . . . . . . . . . . . . . . . . . . . . 25
Scanning an Item with the Twain Button . . . . . . . . . . . . . . . . . 30
Getting Help with the PaperPort Software . . . . . . . . . . . . . . . . 34
Saving a New Profile . . . . . . . . . . . . . . . . . . . . . . . . . . . . . . . . . 36
Adjusting the Resolution and Sharpness . . . . . . . . . . . . . . . . . . 37

ii
T
ABLE OF CONTENTS
Adjusting the Brightness and Contrast . . . . . . . . . . . . . . . . . . . 39
Adjusting Gamma, Saturation, and Color Hue . . . . . . . . . . . . . 41
Adjusting Output Size . . . . . . . . . . . . . . . . . . . . . . . . . . . . . . . . 43
Saving a Custom Size . . . . . . . . . . . . . . . . . . . . . . . . . . . . . . . . 47
The Scan Info Box . . . . . . . . . . . . . . . . . . . . . . . . . . . . . . . . . . . 48
Zooming In and Out . . . . . . . . . . . . . . . . . . . . . . . . . . . . . . . . . 48
Setting Preferences . . . . . . . . . . . . . . . . . . . . . . . . . . . . . . . . . . . 48
Getting Help with the Scan Manager . . . . . . . . . . . . . . . . . . . . 50
Cleaning the Scanner Glass . . . . . . . . . . . . . . . . . . . . . . . . . . . . . . . 51
Installation Troubleshooting . . . . . . . . . . . . . . . . . . . . . . . . . . . . . . 52
Visioneer OneTouch 8900 Scanner Specifications . . . . . . . . . . . . . . 53
ELCOME
W
Congratulations on purchasing your Visioneer OneTouch 8900
scanner. With your scanner, you can quickly scan paper documents and
color photos to place their electronic images on your computer.
HAT’S IN THE BOX
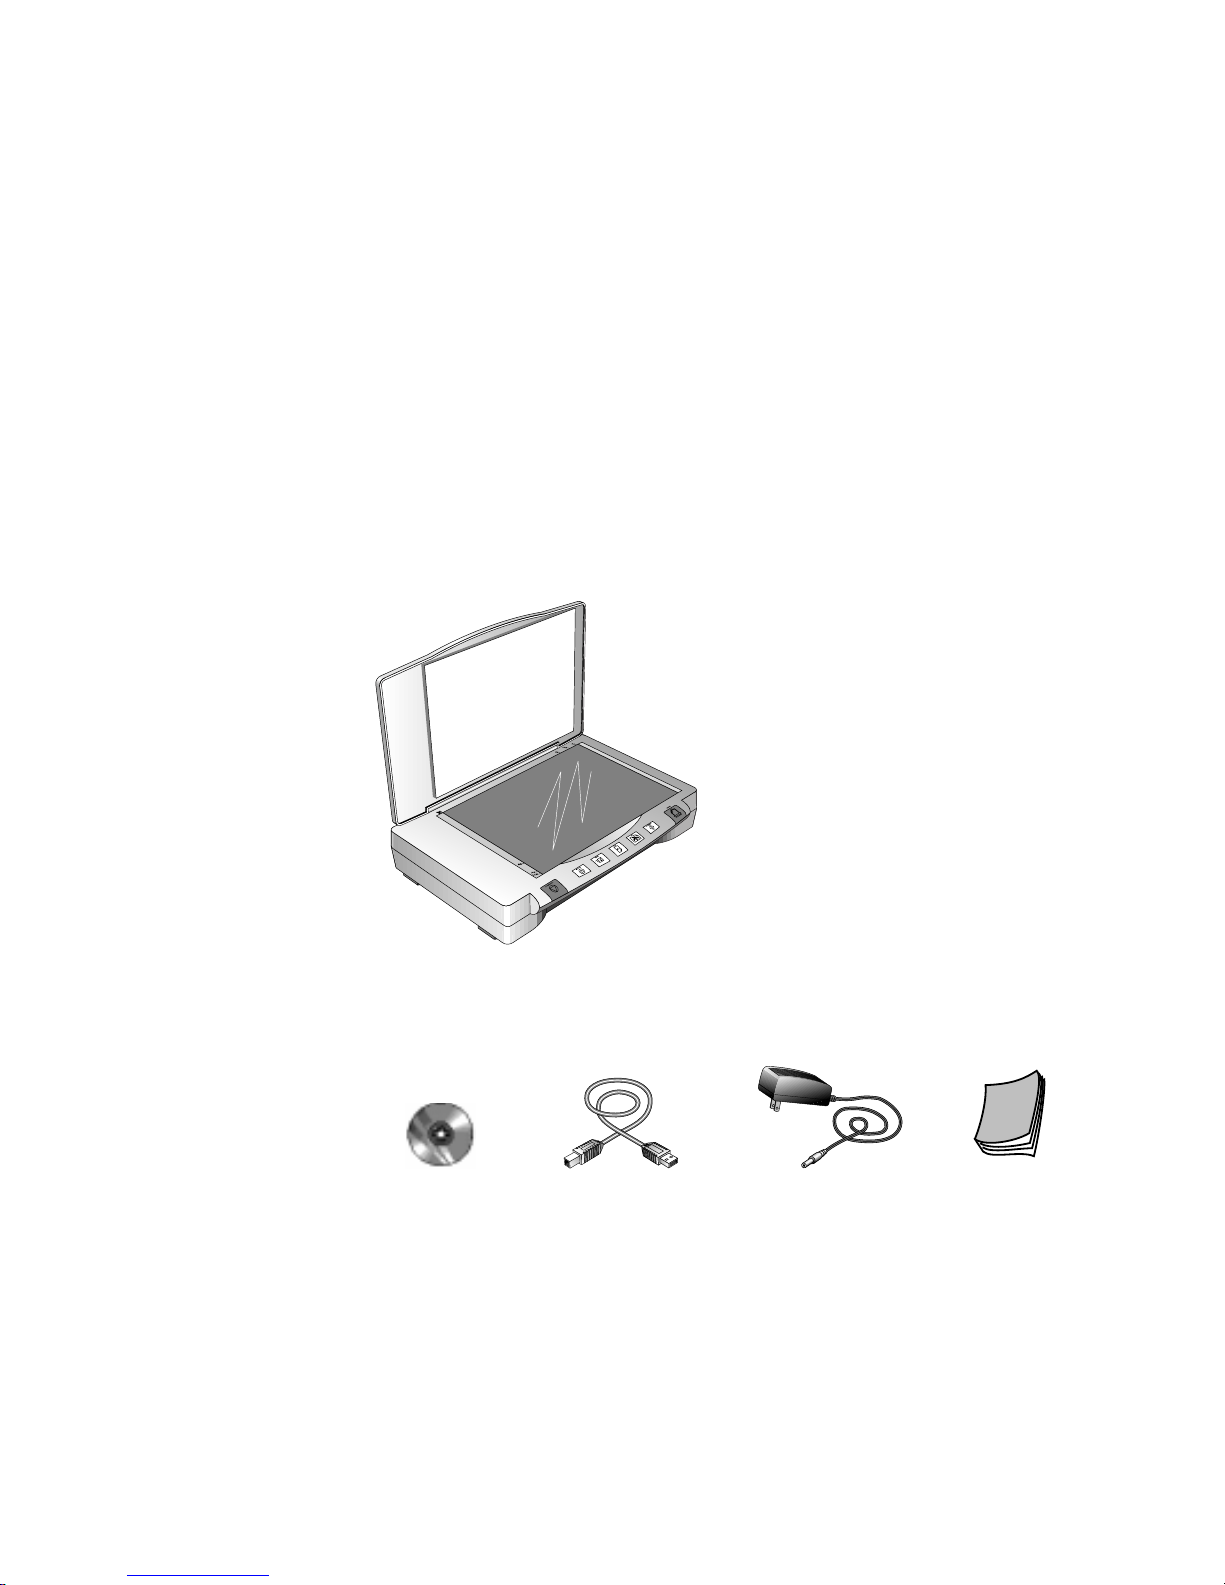
W
Before starting the installation, check the contents of the box to make
sure that all parts are included. If any items are missing or damaged,
contact the dealer where you purchased the scanner.
Visioneer OneTouch 8900 Scanner
Software CD Power supply
USB Cable Installation Guide
V
ISIONEER ONETOUCH
8900 S
CANNER INSTALLATION GUIDE
1
THE V
ISIONEER ONETOUCH
8900 S
CANNER
2
THE V
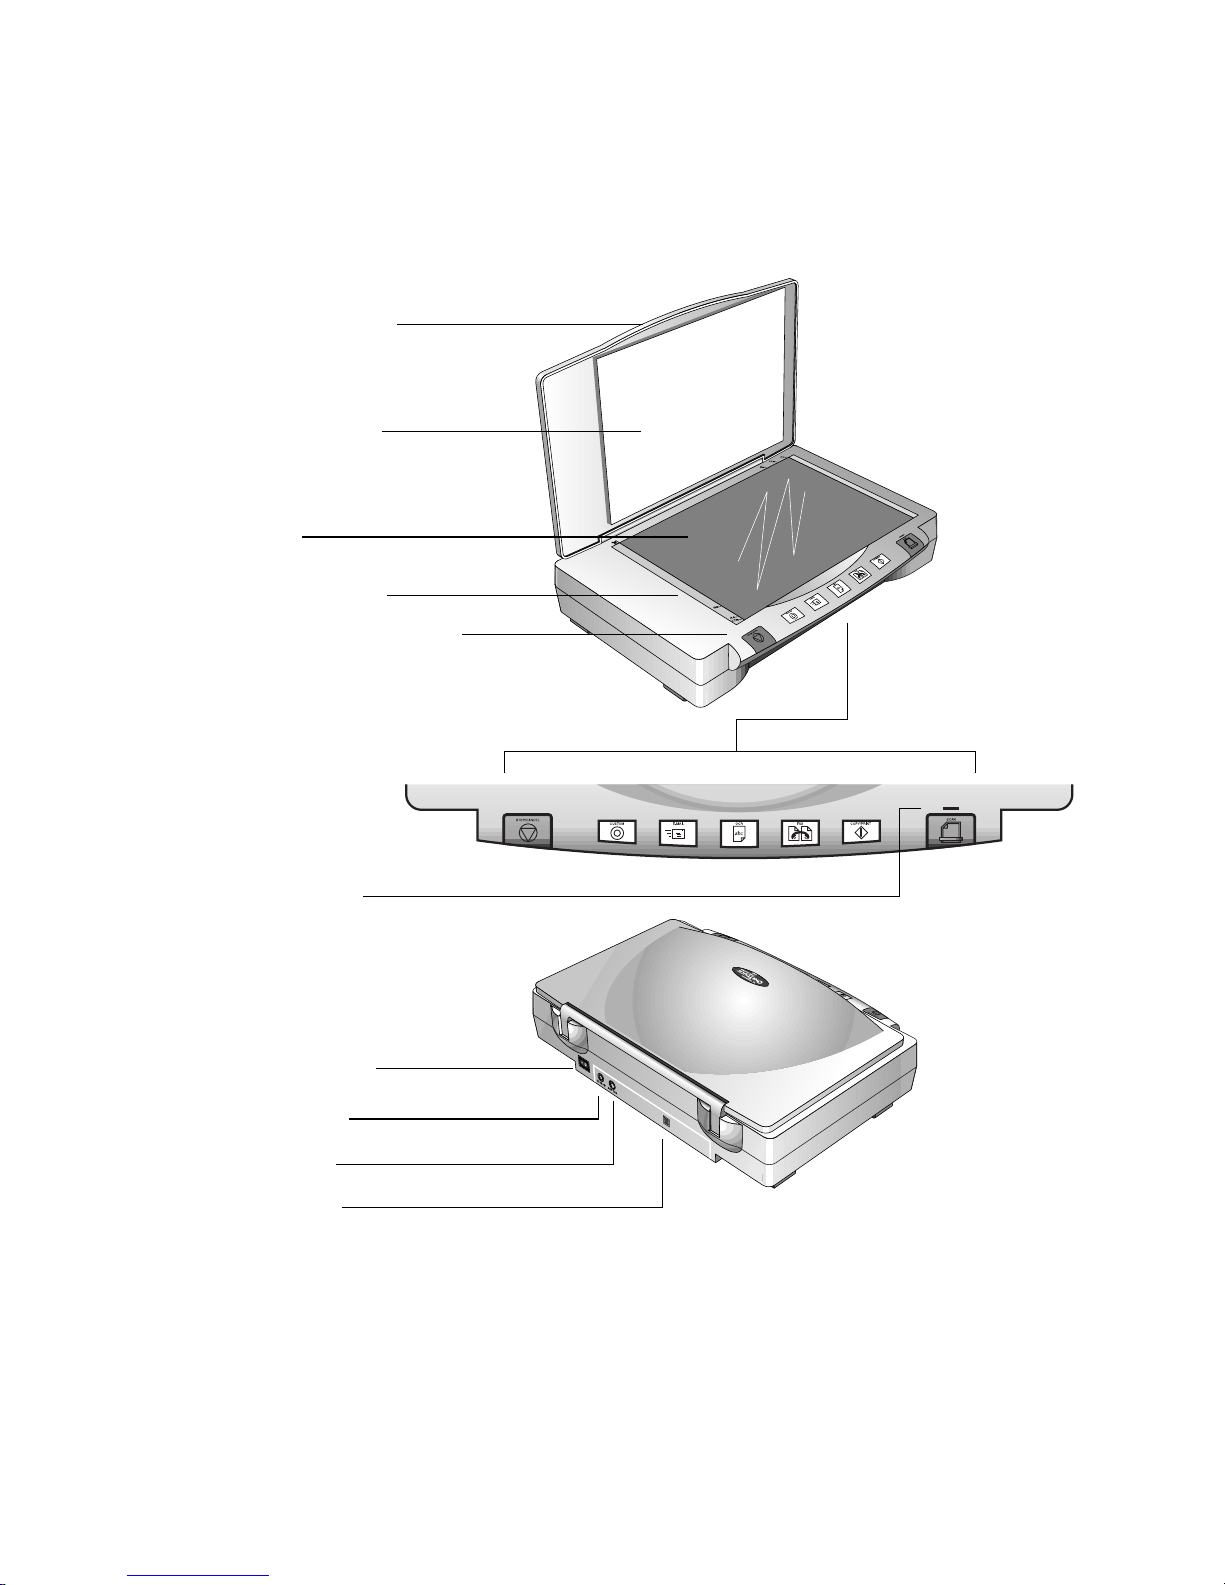
Document cover
Document pad
Glass
Reference frame
OneTouch button panel
ISIONEER ONETOUCH
8900 S
CANNER
On/Off light
On/Off switch
Power jack
TPA port
USB port

3
V
ISIONEER ONETOUCH
8900 S
CANNER INSTALLATION GUIDE
Document cover. Close the document cover after placing items on the scanner glass.
Document pad. Helps to secure the document in place on the scanner glass.
Glass. Place items face down on top of the glass in the upper left corner.
Reference frame. Place items face down within this frame. Markings on the border of the
frame show where to align various paper sizes.
OneTouch buttons panel. Press a OneTouch button to scan, copy/print, email, fax, OCR
(convert items to text), or scan with custom settings.
On/Off light. Shows that the scanner is receiving power.
On/Off switch. Turns the scanner’s power on and off.
Power jack. Plug the scanner power cord into this jack.
TPA port. A port for an optional Transparency Adapter (TPA) for scanning transparencies.
Please visit our web site at www.visioneer.com for more information about acquiring a
transparency adapter for your scanner.
USB port. Plug one end of the USB cable into this port; plug the other end into a USB port
on the computer or keyboard.

W
HAT YOU NEED
HAT YOU NEED
W
To use the OneTouch scanner and software, you need the following:
IBM PC (or 100-percent compatible) Pentium or equivalent
■
Microsoft Windows 98, Windows 2000, or Windows Me
■
One available U niv ersal S erial Bus (USB) port
■
Available internal memory (RAM):
■
Windows 98—32 megabytes (MB) or more
■
Windows 2000 or Windows Me—64 megabytes (MB) or more
■
70 MB of free hard disk space
■
A VGA or SVGA monitor. Recommended settings for your monitor
■
are as many colors as possible—High Color (16-bit), True Color
(24-bit or 32-bit). Set the resolution to at least 800 by 600 pixels.
To set your monitor’s colors and resolution, open the Windows
Control Panel, double-click Display, and then click the Settings tab.
4
■
A CD-ROM drive
G
ETTING THE PAPERPORT SOFTWARE USER’S GUIDE
The CD also includes your
PaperPort User’s Guide
. This guide provides
more detailed information about the PaperPort software’s features.
Please see the CD to view or print the guide.

5
V
ISIONEER ONETOUCH
8900 S
CANNER INSTALLATION GUIDE
Installing
This section of the guide contains instructions for connecting your
OneTouch 8900 scanner to a USB port.
The PaperPort CD includes all the necessary installation files, as well as
PaperPort software files and other software files. The CD also includes
the PaperPort User’s Guide. You can read the guide from the CD, or
print a copy directly from the CD.
STEP 1: INSTALLING THE PAPERPORT SOFTWARE
Note: You must install the PaperPort software before connecting the
scanner to the computer. Otherwise the correct software to run your
scanner will not be installed and it may not scan properly.
To install the PaperPort software:
1. Start your computer and make sure that no other applications are
running.
2. Insert the PaperPort CD into your computer’s CD-ROM drive.
The CD automatically starts.
Note: If the PaperPort CD does not automatically start, make sure
the CD drive’s door is completely shut. If the CD still doesn’t start,
the Autorun option on your computer is turned off. Click the
Windows icon named My Computer. The window shows the drives
available on your computer. Double-click the icon for your
CD-ROM drive to see the list of files on the CD. Double-click the
file named START32.EXE. The CD starts.
STEP 2: CONNECTING THE SCANNER 6
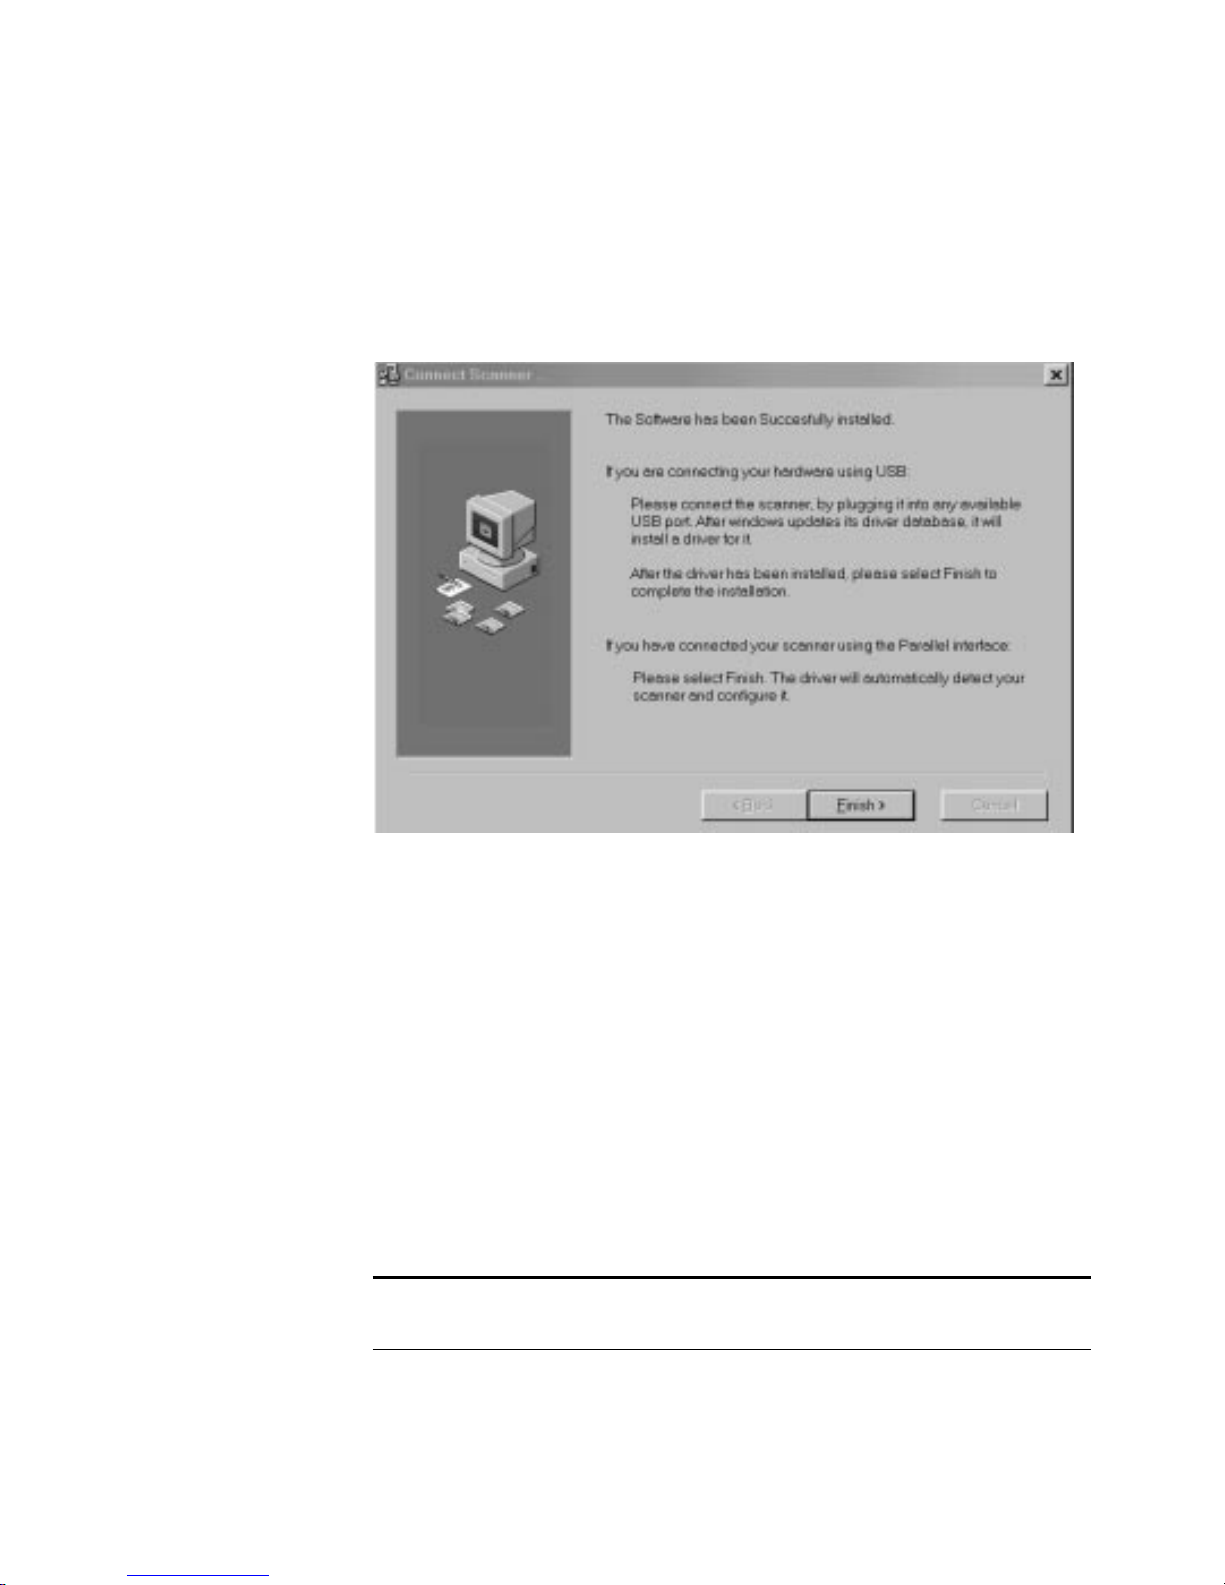
3. Follow the instructions on the screen to install the PaperPort
software on your computer.
During installation, a message tells you to connect the scanner to
the computer.
4. Follow the steps in the next section to connect the scanner. When
you’re finished, click Finish in the dialog box above.
5. When a message asks if you want to restart your computer before
using your scanner, select restart your computer and click OK.
Restarting your computer sets up the files that your scanner needs
to work correctly.
STEP 2: CONNECTING THE SCANNER
The OneTouch 8900 scanner connects to any available USB port.
Check your computer’s user’s guide for its USB port locations.
Note: You do not have to shut off the power to your computer when
connecting the scanner to a USB port.

7 VISIONEER ONETOUCH 8900 SCANNER INSTALLATION GUIDE
To connect the OneTouch 8900 scanner to a USB port:
1. Plug one end of the USB cable into an available USB port.
Some newer computers also have keyboards with USB ports. You
can plug the scanner into the keyboard instead of the USB port on
the computer.
2. Turn the scanner over to see the locking tab on the bottom. Slide
the locking tab to the unlocked position.
Unlocked position
STEP 2: CONNECTING THE SCANNER 8
3. Plug the other end of the USB cable into the scanner’s USB port.
If the plug does not attach easily, make sure that you are plugging it
in correctly. Do not force the plug into the connection.
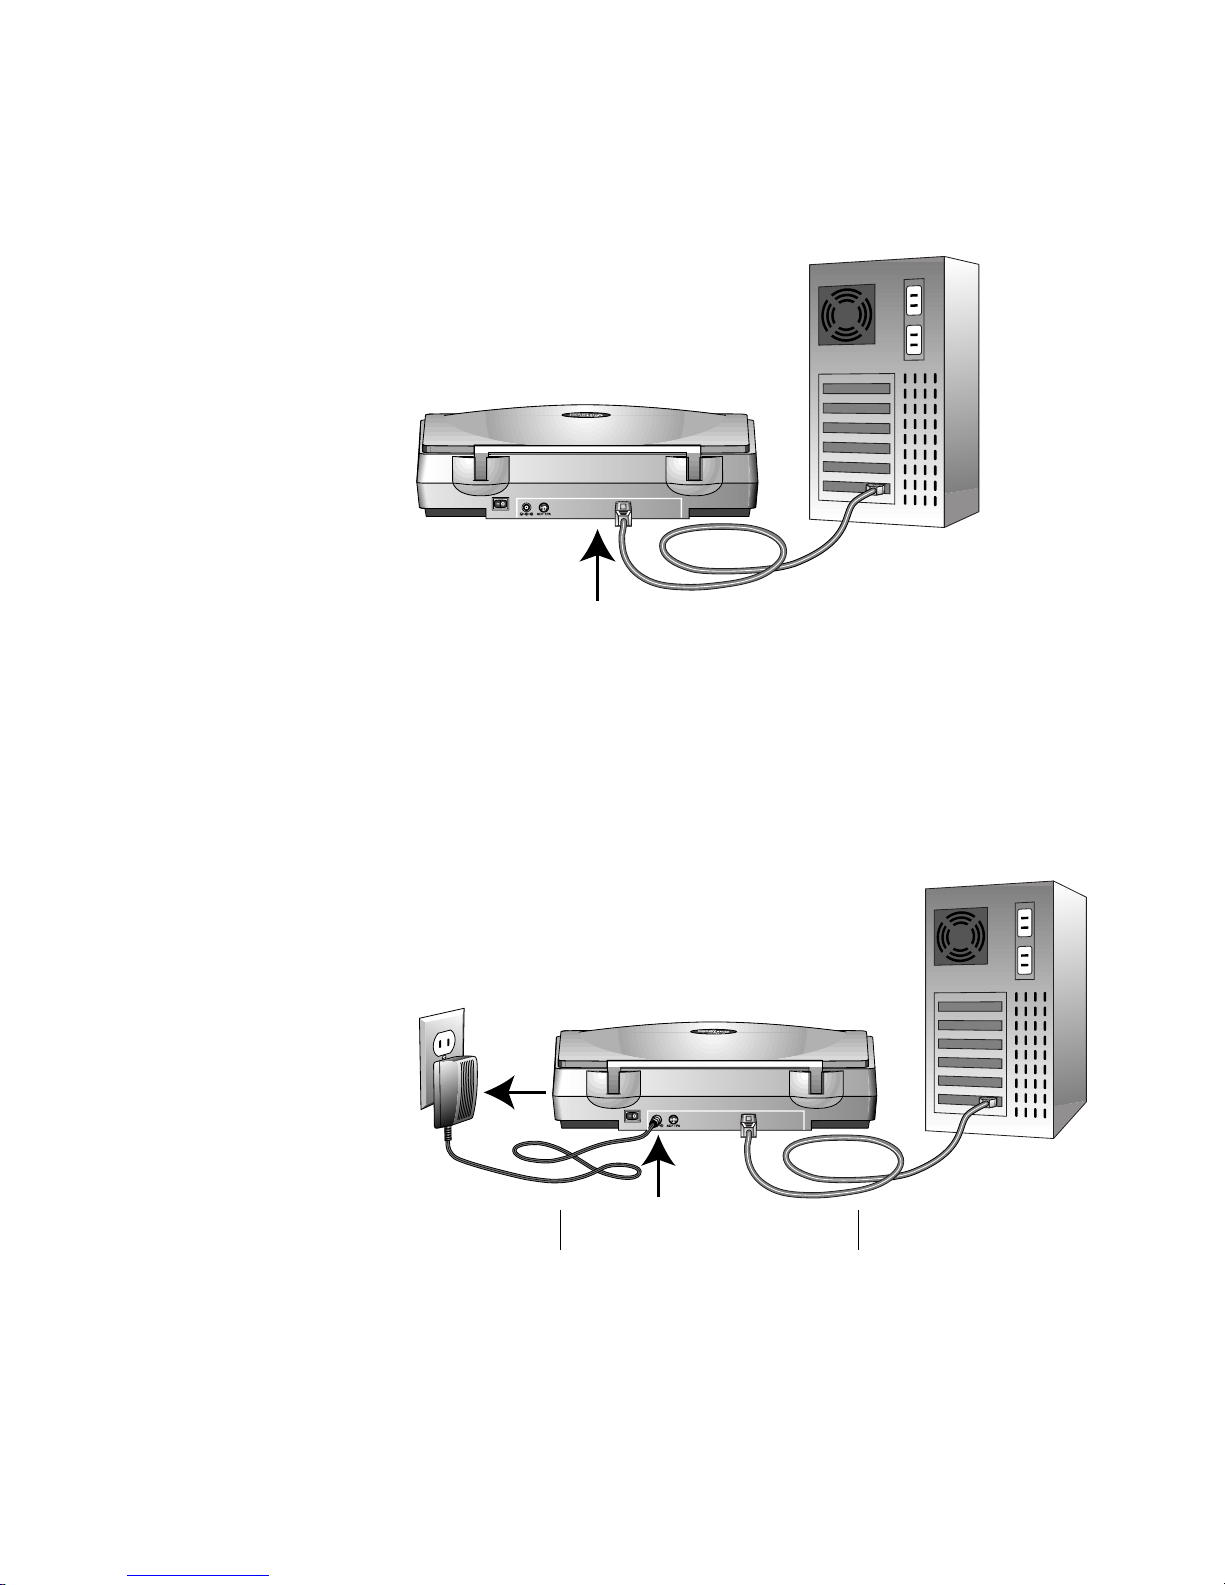
4. Plug the power adapter cable into the po wer jack on the back of the
scanner .
5. Plug the power adapter into an AC (wall) outlet.
The following diagram shows the scanner connected to a computer.
Power cord USB cable
9 VISIONEER ONETOUCH 8900 SCANNER INSTALLATION GUIDE
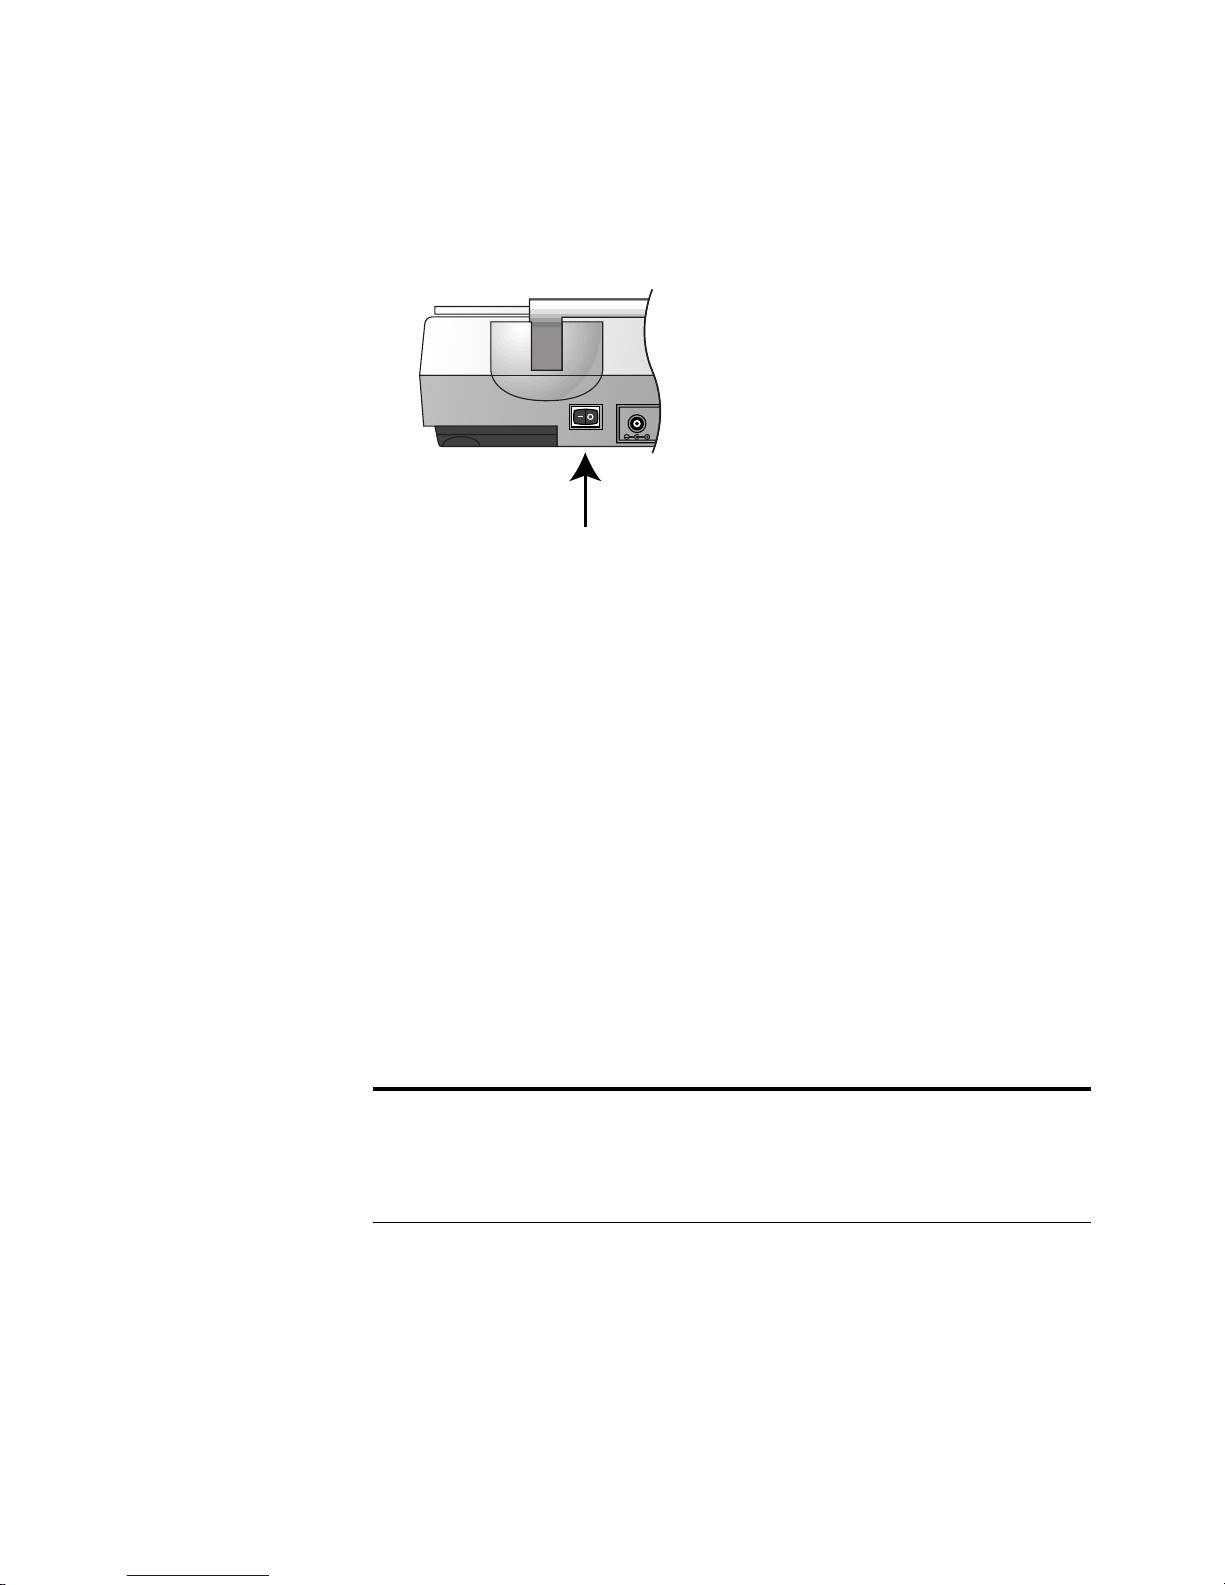
6. Turn on power to the scanner. The amber light comes on indicating
the scanner is receiving power.
Power On/Off switch
Your computer recognizes that a scanner has been plugged into the
USB port and automatically loads the appropriate software from
the CD to run the scanner.
When the software is finished loading, the Finish button on the
dialog box on the computer screen becomes active.
7. Click the Finish button.
The scanner’s on/off light turns from amber to green when the
scanner and computer are communicating properly.
That completes the steps to connect your scanner to the computer.
8. Remove the CD from the computer and store it in a safe place.
9. Select restart your computer and click OK.
Note: The locking tab protects the scanner’s scan head by holding it
securely in position. Lock the scanner when transporting it from one
location to another, but always remember to unlock it before
scanning. The scanner will not scan when locked.
STEP 3: CHECKING OUT YOUR SCANNER 10
STEP 3: CHECKING OUT YOUR SCANNER
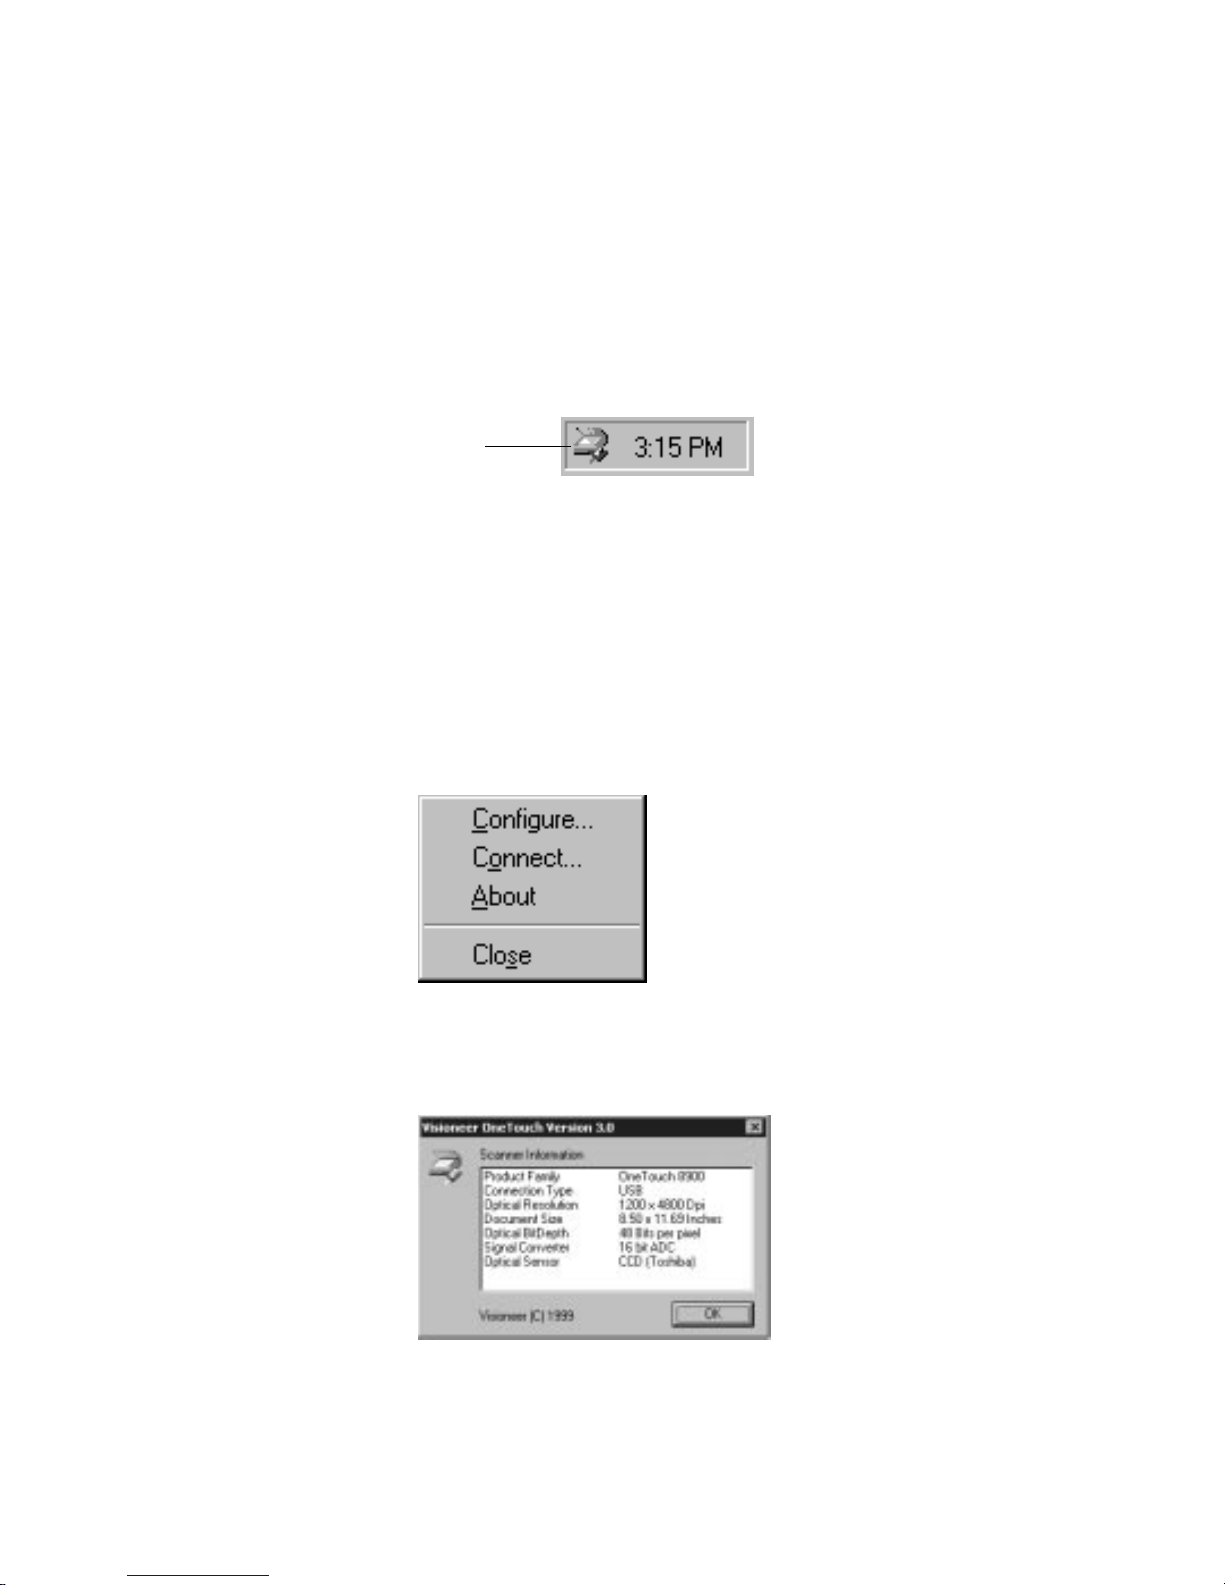
The OneTouch scanner software adds the scanner icon to the W indows
taskbar (at the bottom right corner of the computer screen). If the
scanner is properly connected, the scanner icon looks like the one in this
figure.
Scanner Icon
If the icon has a red X through it, the scanner is not pr operly connected.
See the next section, “If the Scanner Is Not Properly Connected,” for
the steps to fix the problem.
To check the status of the scanner:
1. Place the mouse pointer on the scanner icon in the Windows
taskbar.
2. Right-click the icon. The shortcut menu appears.
3. Choose About from the shortcut menu.
A dialog box confirms that the scanner is properly connected.

11 VISIONEER ONETOUCH 8900 SCANNER INSTALLATION GUIDE
4. Click OK to close the dialog box.
That’s it. Your scanner is ready to scan.
See “Scanning by Pressing the OneTouch Buttons” on page 14.
Note: The scanning lamp under the scanner’s glass needs to warm up
before you can scan. A status message lets you kno w when the lamp is
ready. The lamp then remains r eady so you don’t have to wait for it to
warm up each time you want to scan. To conserve electricity and
prolong the life of the scanner, you can set the length of time for the
lamp to remain lit before powering down. See “Setting Preferences”
on page 25.
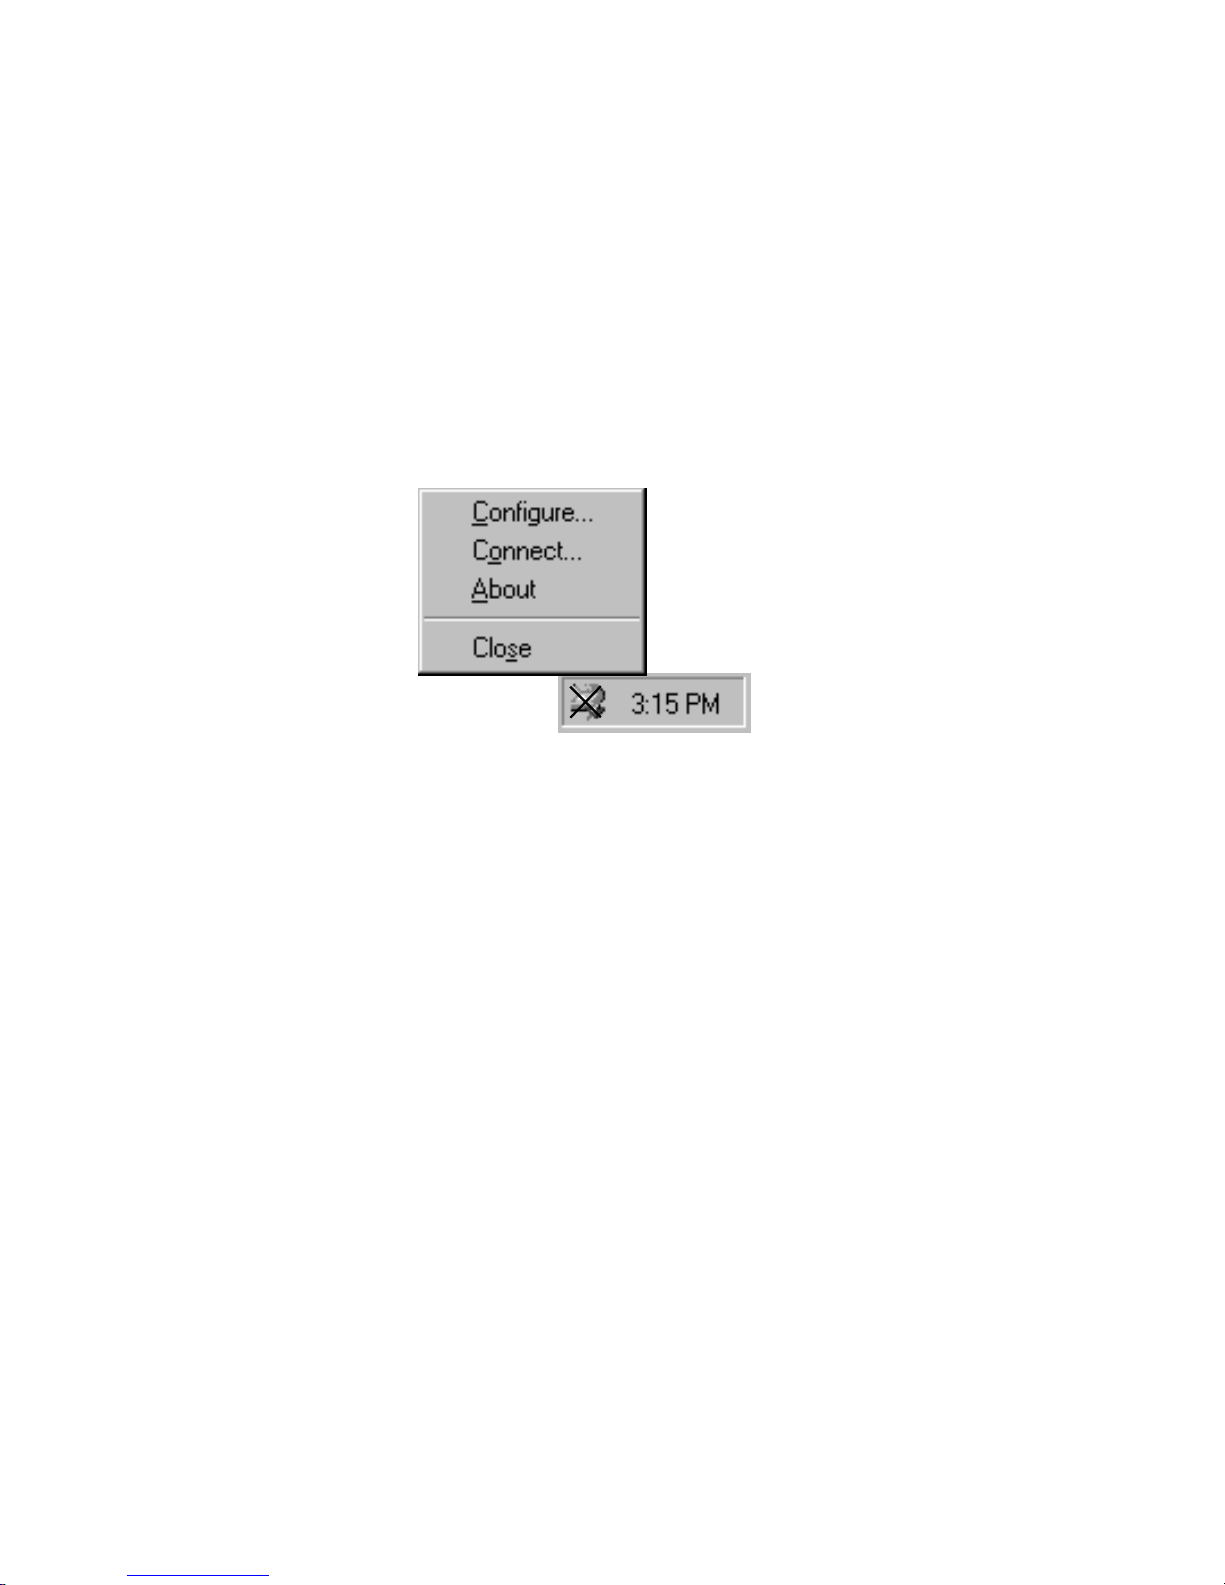
IF THE SCANNER IS NOT PROPERLY CONNECTED
If the scanner icon on the Windo ws taskbar has a red “X” through it, the
scanner is not properly connected.
Check for one of these possible problems:
• Is a cable loose or not plugged in securely? Inspect all cable
connections. Make sure all the cables are plugged in securely.
• Is the scanner’s power light on? Turn on the scanner’s power. If the
light still doesn’t come on, plug the power adapter into another
electrical outlet.
• Is the scanner’s locking tab in the locked position? Slide the
locking tab to the unlocked position. If you tried to scan with the
scanner locked, you must restart your computer after unlocking the
scanner.
• Did you restart the computer after installing the software? If you
didn’t restart the computer, it may not have loaded all of the software
files. Try restarting your computer.
STEP 3: CHECKING OUT YOUR SCANNER 12
Please see the Readme file in the P aperPort directory on your computer’ s
hard drive. The Readme file contains additional information that may
help you diagnose problems connecting the scanner.
To connect the scanner:
1. After checking for all the above problems, right-click the scanner
icon with the red X over it.
The shortcut menu appears.
2. Choose Connect from the shortcut menu.
The software finds the scanner and makes the connection. The
scanner icon will no longer have a red X through it, and you’re
ready to begin scanning.
If you try all the troubleshooting procedures described abo v e and in the
Readme file, and the scanner icon still has a red X through it, you may
have a malfunctioning scanner. Please see the back of this Installation
Guide or the technical support card that you r eceiv ed with your scanner
for technical assistance telephone numbers. Also visit our web site at
www.visioneer.com for additional technical information. You can also
receive software updates from the Windows Start menu by choosing
Programs, then PaperPort, then Check for OneTouch Updates.
13 VISIONEER ONETOUCH 8900 SCANNER INSTALLATION GUIDE
Scanning
THREE WAYS TO SCAN
You can scan items by pressing a OneTouch button, by clicking a
button on the screen, or from the PaperPort software (or other Twain
software).
• Scan with the Scanner Buttons
Press a button on the scanner’s front panel.
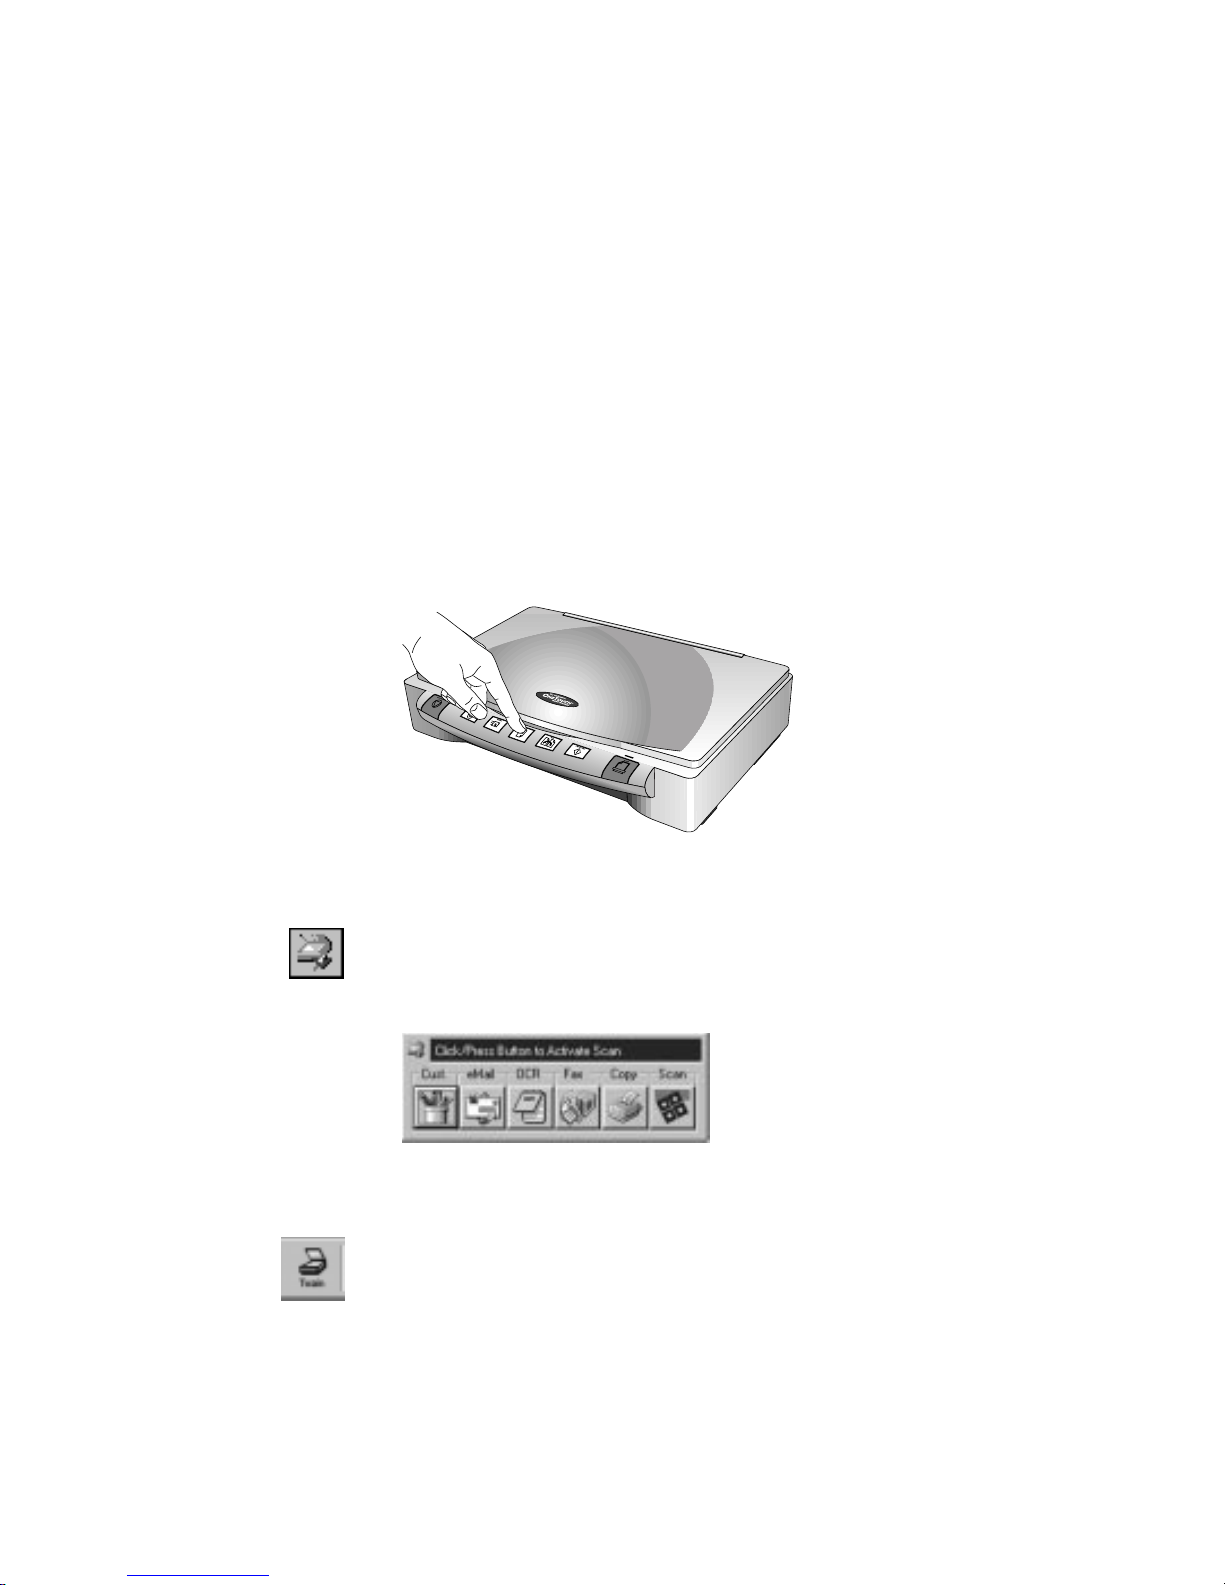
• Scan from the Screen
Click the scanner icon on the Windo ws taskbar. A panel representing
the scanner buttons appears. Click a button on the panel on the
screen.
• Scan from the PaperPort Software (or Other Twain Software)
To scan from the PaperPort software, start the software, and then
click the Twain icon on the PaperPort Command Bar. You can also
scan from other Twain software. See “Scanning an Item with the
Twain Button” on page 30 for details.

SCANNING BY PRESSING THE ONETOUCH BUTTONS 14
SCANNING BY PRESSING THE ONETOUCH BUTTONS
Pressing a scanner button scans the item, and then sends the image
either to the printer, or to a software application on your computer.
To scan by pressing a button on the scanner:
• Place an item to scan on the glass, face down, and press one of the
scanner buttons.
The scanner starts scanning the item. A message just above the
Windows taskbar shows the status of the scanning.
When scanning is complete, the status message also shows the
destination application. In the sample below, the scanned image
appears on the PaperPort Desktop.
During scanning, the scan progress windo w shows a small copy of the
image, as illustrated by this example:
When the scan is complete, the scanned image appears in the
destination software.
 Loading...