


Cam SS
Digital Video Recorder (DVR) Workstation
(Version 5.01)
User Manual
Rev4-30-2002
Information contained in this document is subject to change without notice.
All rights reserved. © 2002
1
Forward: CAM SS Workstation
CAM SS Workstation is a complete digital video surveillance solution that may be used both for
video recording of quality video scenes onto reliable hard disk or as a
remote LAN access as well as remote alarm video transmission to a previously assigned remote video operator work
stations.
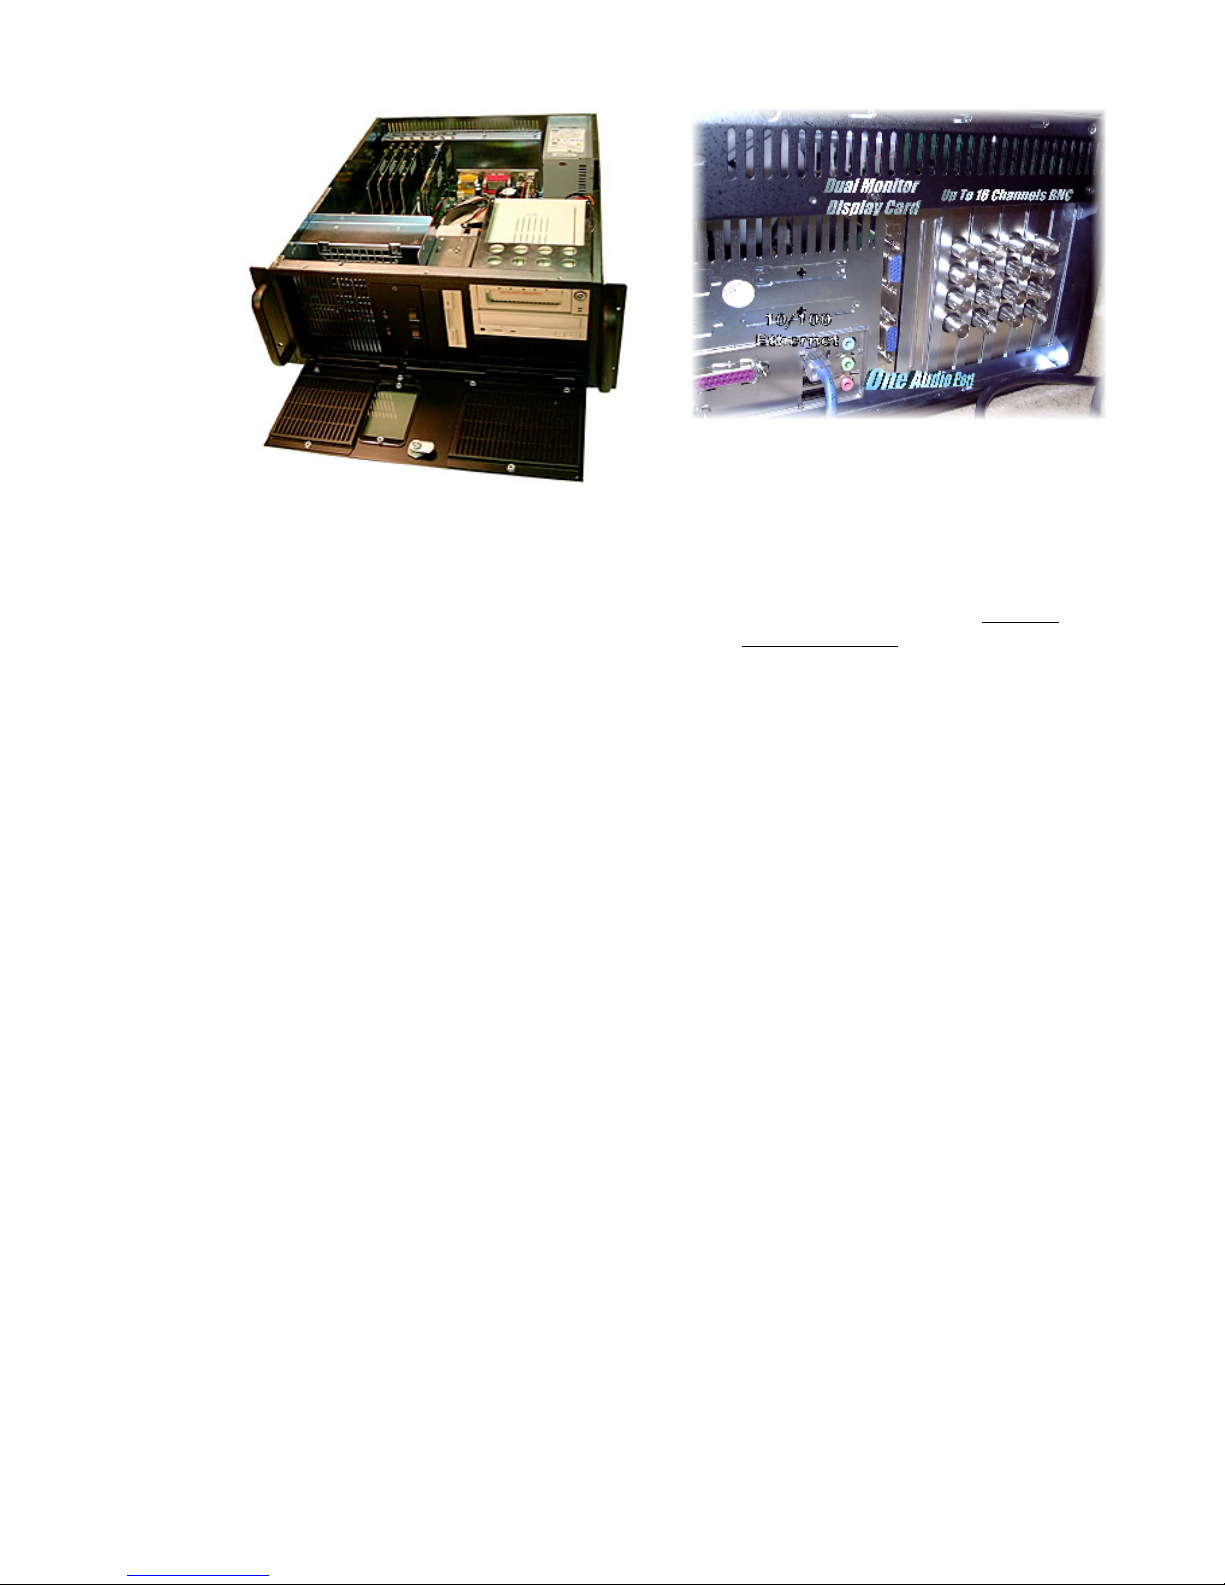
Conceived in a 4U, 19” rack mount format and secure enclosure, CAM SS Workstation
may accept up to 16 camera inputs depending on the number of 4 channel capture cards
(Optional 1 channel High FPS cards are also available for configuration)
The system may be used as a stand-alone recording device with a SVGA monitor and keyboard connected to the recorder,
or, be connected to either a 10BaseT or 100BaseT Network, allowing up to 32 remote operator review stations to
simultaneously communicate with a single recorder, offering both live view, playback as well as remote file transfer. (The
greater the number of recorders, the greater the number of simultaneous remote operator review stations…32 X # DVR's
on the Network…).
In addition to this feature and unlike other systems, the CAM SS Workstation recorder itself may be set up as a client to
view video from other remotely or LAN connected CAM SS DVR recorders without the required use of a dedicated
server or dedicated review station/PC as with other competitive technologies.
Behind a key locked swinging combination door are the following:
•
One removable 80 GB Fast Swap disk drive array with built-in cooling system
•
3.5" 1.44 Floppy Drive
•
Optional 24X CD-R CD-RW CDROM for both export of recorded video files as well as for system upgrade
purposes
•
Soft reset switch
•
Main Power Switch
remote surveillance
system allowing for “dial in” or
DVR's (digital video recorders)
preconfigured within the recorder.
long term
digital
• Individual power and record indicators for hard-drive status
•
Centrally mounted lock
•
AC Power indicator
•
CPU run indicator
•
Main Hard-disk status light
•
Rack installation handles
2

Table of Contents
CHAPTER 1: INSTALLATION
1.1 System Requirements
1.2 Installing
CamSS Application Software
5
6
6
CHAPTER 2: SYSTEM OVERVIEW
2.1 Starting
CamSS
2.2 Main Screen
2.2.1 Image Section
2.2.2 System Operation Section
2.2.3 Status Section
2.2.4 Camera Setup Section
CHAPTER 3: SYSTEM SETUP
3.1 Host Setup
3.2 I/O Devices
3.3 Users
3.3.1 New User Setup
3.3.2 New User Group Setup
3.3.3 User Log
3.4 Sound Bank
3.5 Address Book
3.6 Database Setup
3.7 Board Setup
3.8 E-map
3.8.1 E-map Setup
3.8.2 E-map Operations
3.8.3 E-map and Alarm
3.9 Misc. Setup
9
9
10
11
12
14
14
15
16
17
18
19
21
23
24
27
30
33
34
34
37
39
40
CHAPTER 4: RECORDING
4.1 Recording Windows
4.2 Recording Setup
4.3 Camera Views
CHAPTER 5: PLAYBACK
5.1 Explore Window
5.2 Video File Playback
5.3 Load Video
5.4 Load picture
CHAPTER 6: ALARMS
6.1 Alarm Setup
6.2 Alarm Log
CHAPTER 7: I/O DEVICE
7.1 I/O Device Setup
7.2 PTZ Control Panel
7.3 Output Port Control
41
41
46
57
62
62
64
72
73
75
75
83
85
85
92
95
3

CHAPTER 8: CamSS Server
8.1 Starting
8.2
CamSS Server Window
CamSS Server
96
96
97
CHAPTER 9: REMOTE ACCESS
9.1 Remote Access Via TCP/IP
9.2 Remote Access Via Modems
9.3 Remote PTZ and Output Port Control Functions
9.4 Other Remote Access Functions
102
102
105
107
108
FCC (Federal Communication Commission) Notice
This equipment has been tested and found to be in compliance with the criteria for Class B digital devices as referred to in
Part 15 of the FCC Rules. The FCC Rules are designed to provide reasonable protection so that equipment complying
with those criteria will not cause harmful interference when installed indoors. This equipment may generate radio
frequency energy and if not installed in accordance with instructions may cause harmful interference to wireless
communications. However, certain installations may also create interference. If there is interference to the reception of
radio and/or television devices, users shall eliminate the interference by using any or several of the following measures:
Reorient and relocate the receiving antenna.
Increase the distance between the equipment and receiver.
Connect the equipment to an outlet on a different branch circuit from the receiver
Seek help from a dealer or an experienced radio/TV technician.
All Rights Reserved © 2002
Windows98, Windows98 SE, Windows ME, Windows 2000, and Windows XP, are the trademarks of Microsoft
Corporation; IBM is the registered trademark of International Business Machines Corporation; Intel is the registered
trademark of Intel; Creative is the registered trademark of Creative Technology
Philips. Other trademarks and trade names may be used in this document to refer to either the entity claiming the logos
and names or their products. Cam SS2000
Controls Corp. disclaims any proprietary interest in trademarks and trade names other than its own.
and Cam SS Server are trademarks of Cam SS Technologies Inc. Vision
Ltd; Philips is the registered trademark of
4

Chapter 1: Installation
The
CamSS
including monitoring, video recording and playing, alarming, controlling and remote monitoring.
transfers recorded image signals into digital signals then compresses and saves them in your computer.
SDMCT (Super Dynamic Motion Compression Technology) has been applied to this system. The super data
compression ratio makes it possible to save image data in the hard drive of a computer for weeks and/or even
months.
Although the SDMCT (Super Dynamic Motion Compression Technology) provides an extremely high image
compression ratio, the image quality is not affected. Small volumes of data enable it to transmit images
through limited bandwidth (narrow band) transmission media (e.g. MODEM) at a higher performance level.
SDMCT was specifically developed for the security market.
CamSS has the following features:
Simultaneously supports three types of
CamSS 4 Channel, and Cam SS 2 Channel Audio/Video.
-
-
Multi-card design architecture: One PC supports up to 4 cards, 1~16 video inputs, and
up to 8 audio inputs. The installation can be a mix of three types of Cam SS
SDMCT with
Adjustable image size, quality and recording speed.
Image data can be stored onto all of the hard disk drives that are installed in a computer.
Provides up to 8 audio channels to work with cameras for audio recording or playback.
Intelligent real-time
Individual alarm settings for each camera
Programmable alarm schedules for each camera.
Alarm logs.
Scheduled recording.
Recycleable
Quick search for the stored video files.
Full playback functions.
Remote monitoring, video recording, PTZ control, output port control, and searching and
down loading video files can all be performed through PSTN, LAN, Internet or Intranet.
Snapshot at recording, playback or remote monitoring.
Output port (Device) control and input port (Sensor) detecting.
Control of the traditional PTZ and high speed dome camera.
Dome Camera: preset control.
Dome Camera: auto-pan control.
Dome Camera: cruise of preset positions with programmable stay time at each preset
position.
Input sensor triggering the preset position of the dome camera.
Video Lost Alarm
Superb multi-functions:
Digital Video Surveillance System is an all-in-one system that integrates various functions
CamSS
CamSS capture cards: Cam SS 1 Channel,
CamSS 1 Channel card supports
CamSS 4 Channel card supports four video inputs
CamSS 2 Channel Audio/Video card supports two video and two audio inputs.
high video compression
motion detection and alarm functions.
-
Adjustable sensitivity of motion detection
-
Motion detection triggering local alarm
-
Motion detection triggering a remote alarm either by dialing out to a telephone, a pager or a remote
CamSS
-
Simultaneous remote monitoring and control on a remote site
-
Simultaneous remote monitoring and control by a different remote site
-
Simultaneous retrieval from different cameras triggering alarms
-
Simultaneous playing of separate image files
-
Simultaneous viewing of several pictures
-
Simultaneous performance of all the foregoing functions
system
recording.
.
one video input
ratioprovides
cards.
superior image quality and extended recording time.
• Clipping of video files.
5

•
Hides recording screen.
•
Password protection.
• Auto-start video recording as soon as the computer is turned on.
1.1 System Requirements
To ensure the performance efficiency of the
•
An IBM compatible PC with an 800MHz Pentium III CPU.
•
256MB RAM and/or above.
•
Windows98, 98SE, Windows ME, Windows 2000, or Windows XP operating system.
•
16MB RAM or above on VGA card with AGP interface.
•
Ethernet card.
•
56Kbps modem with voice features.
CamSS
system, we recommend:
• Full-duplex sound card.
1.2 Installing the Cam SS Application Software
Before installing the
been successfully installed.
1. Log into your operating system.
2. Load the included
3. Click the
4. Select or key in the setup program path:
E:\CamSS Software\setup.exe
dialogue box.
5.
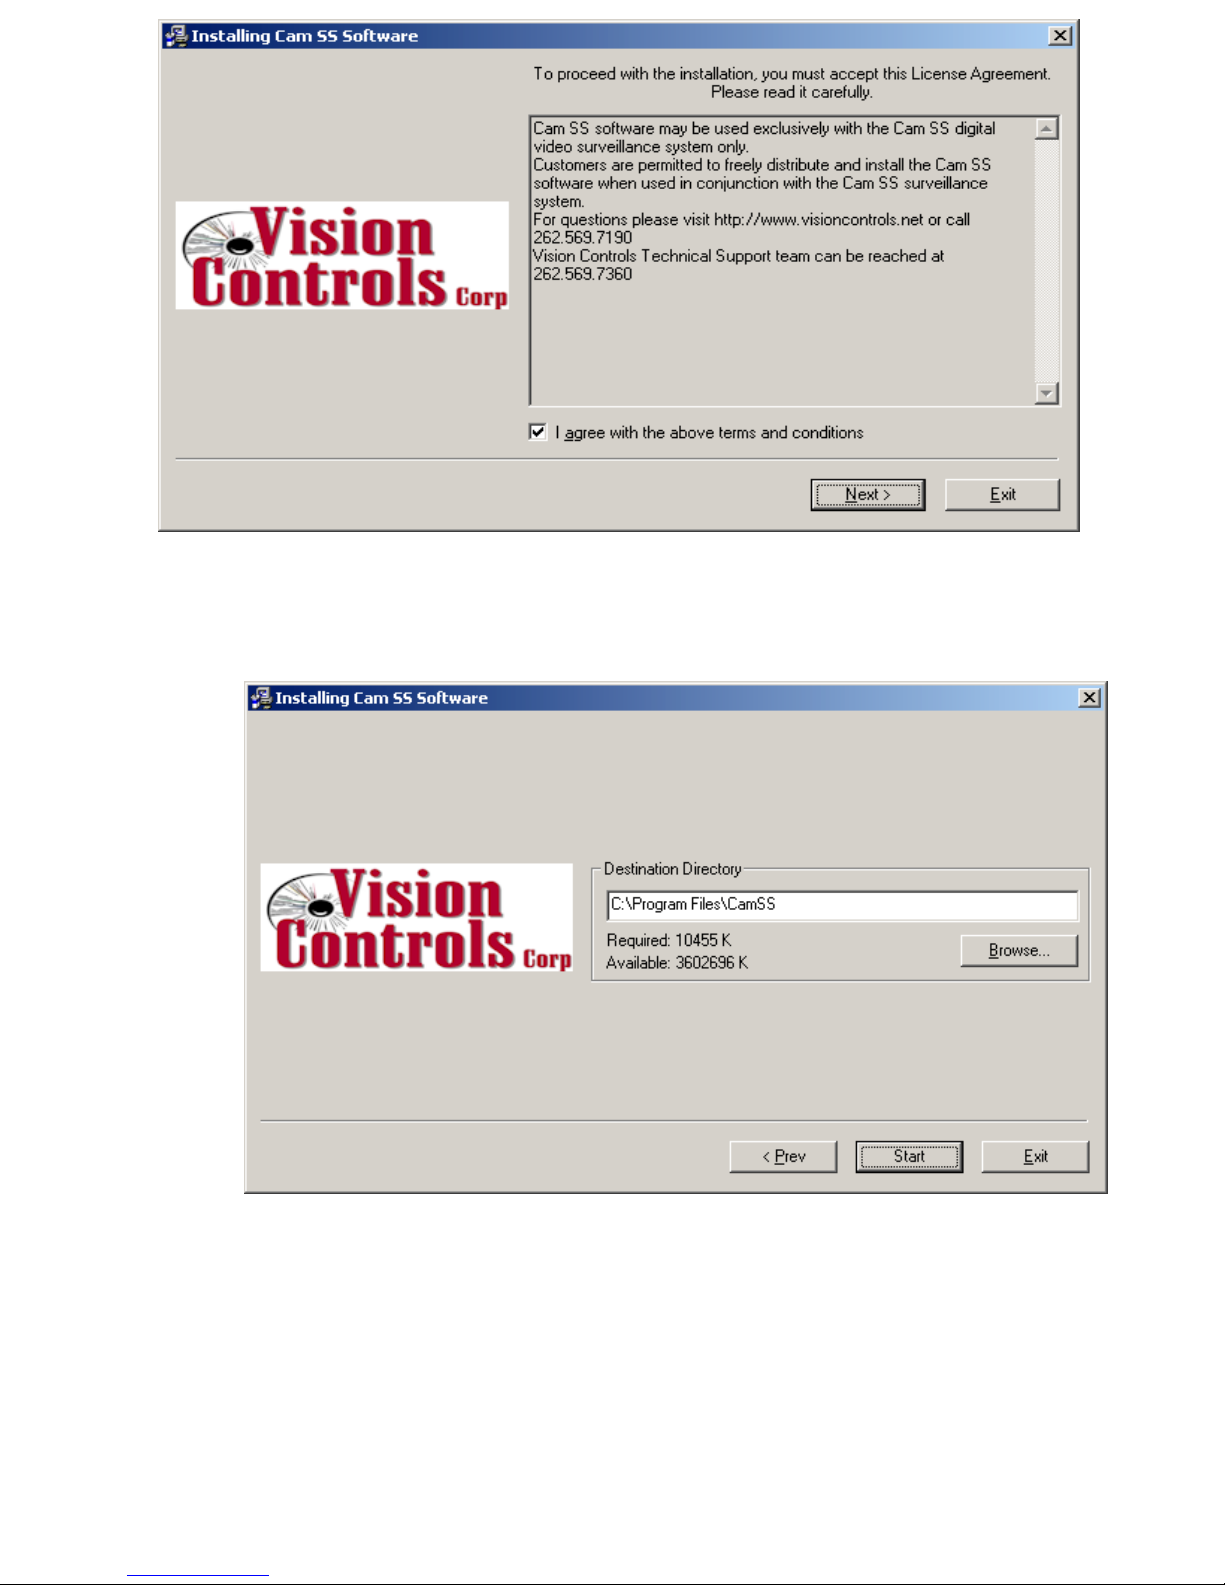
Follow these instructions on the screen to complete the installation as demonstrated below:
Start
-
The installation screen will appear. Click the “I agree with the above terms and conditions” box
then select the
CamSS
button on the left bottom corner of Windows screen and select
application software, please ensure that the
CamSS
system CD into your CD drive.
D:\CamSS Software\setup.exe
(D: or E: is the ID for your CD drive) from or into the “Run”
Next
Button to continue the installation.
CamSS card hardware drivers have
or
Run
.
Note:
The
CamSS Server
option is not available for the single-user version.
6
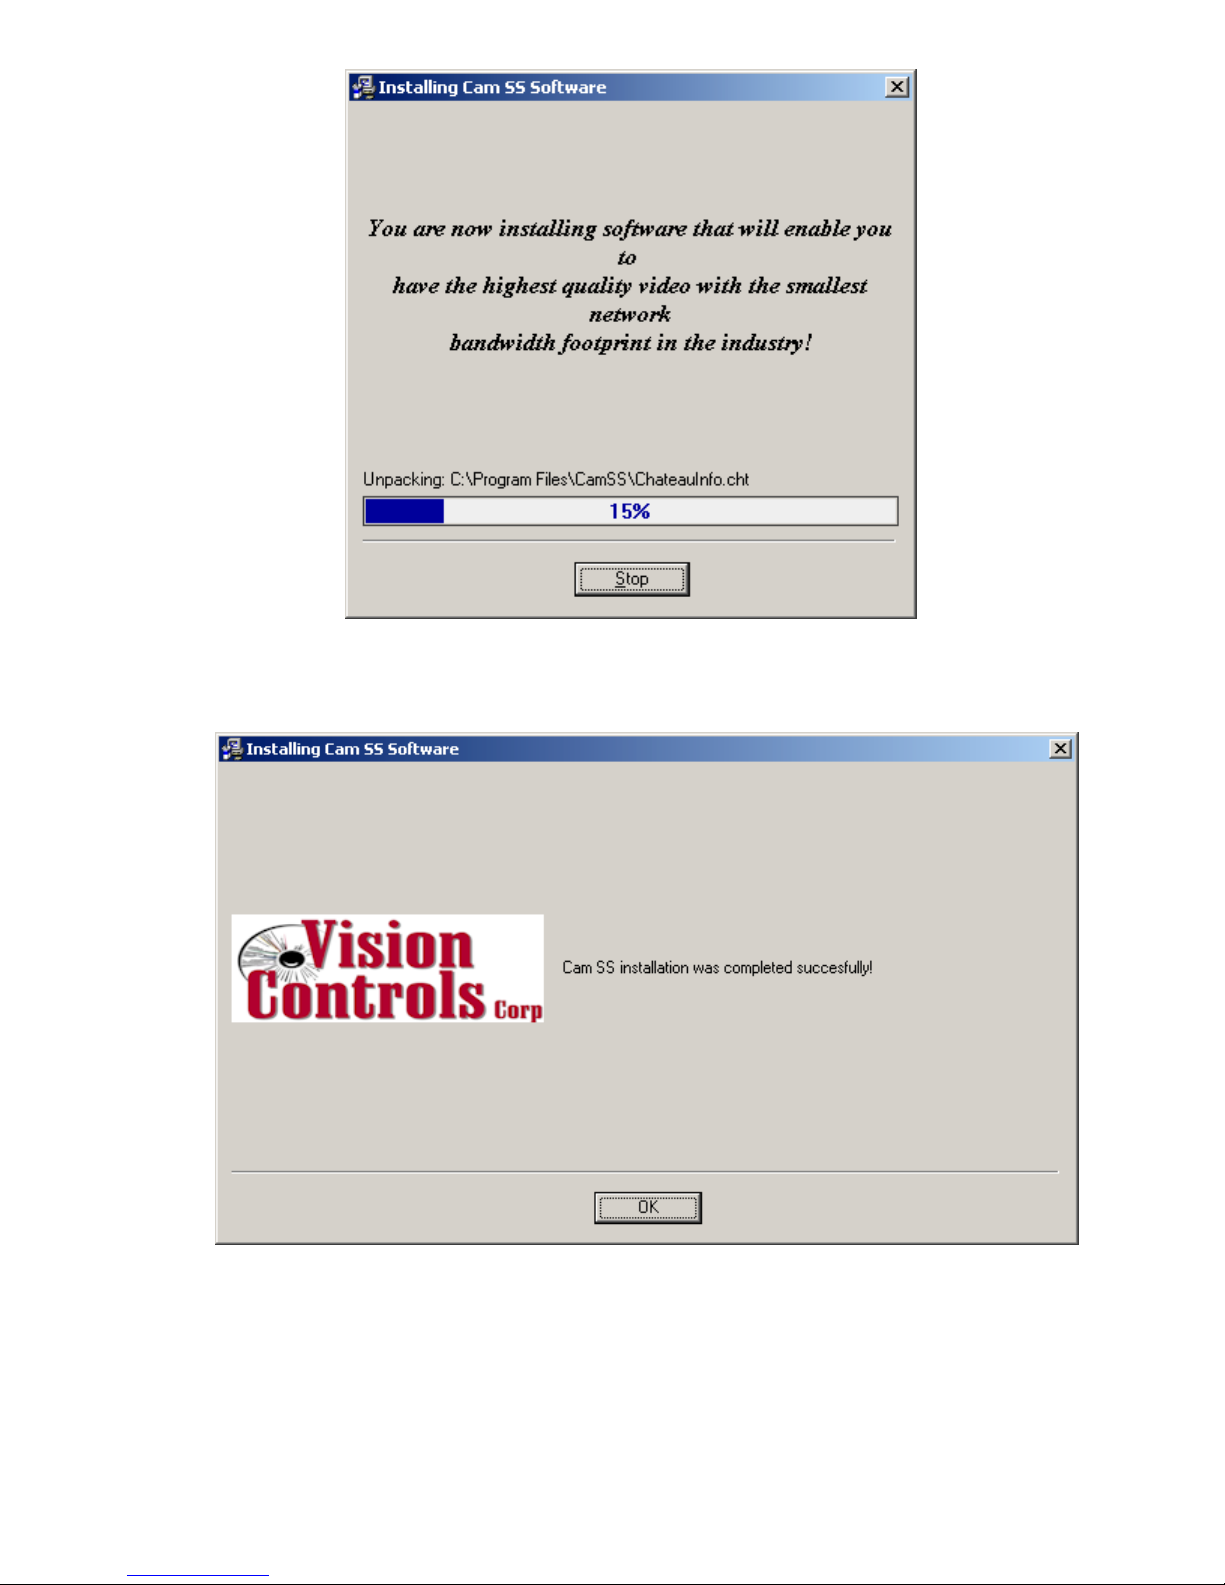
- The following screen will then appear. Select the directory that you
want to install to and click
Start
to continue the installation.
-
The
Installing
CamSS Software
screen will appear as illustrated below.
7
-
Once the installation is completed, the screen stating that the program was installed
successfully will appear as illustrated below.
8
Chapter 2: System Overview
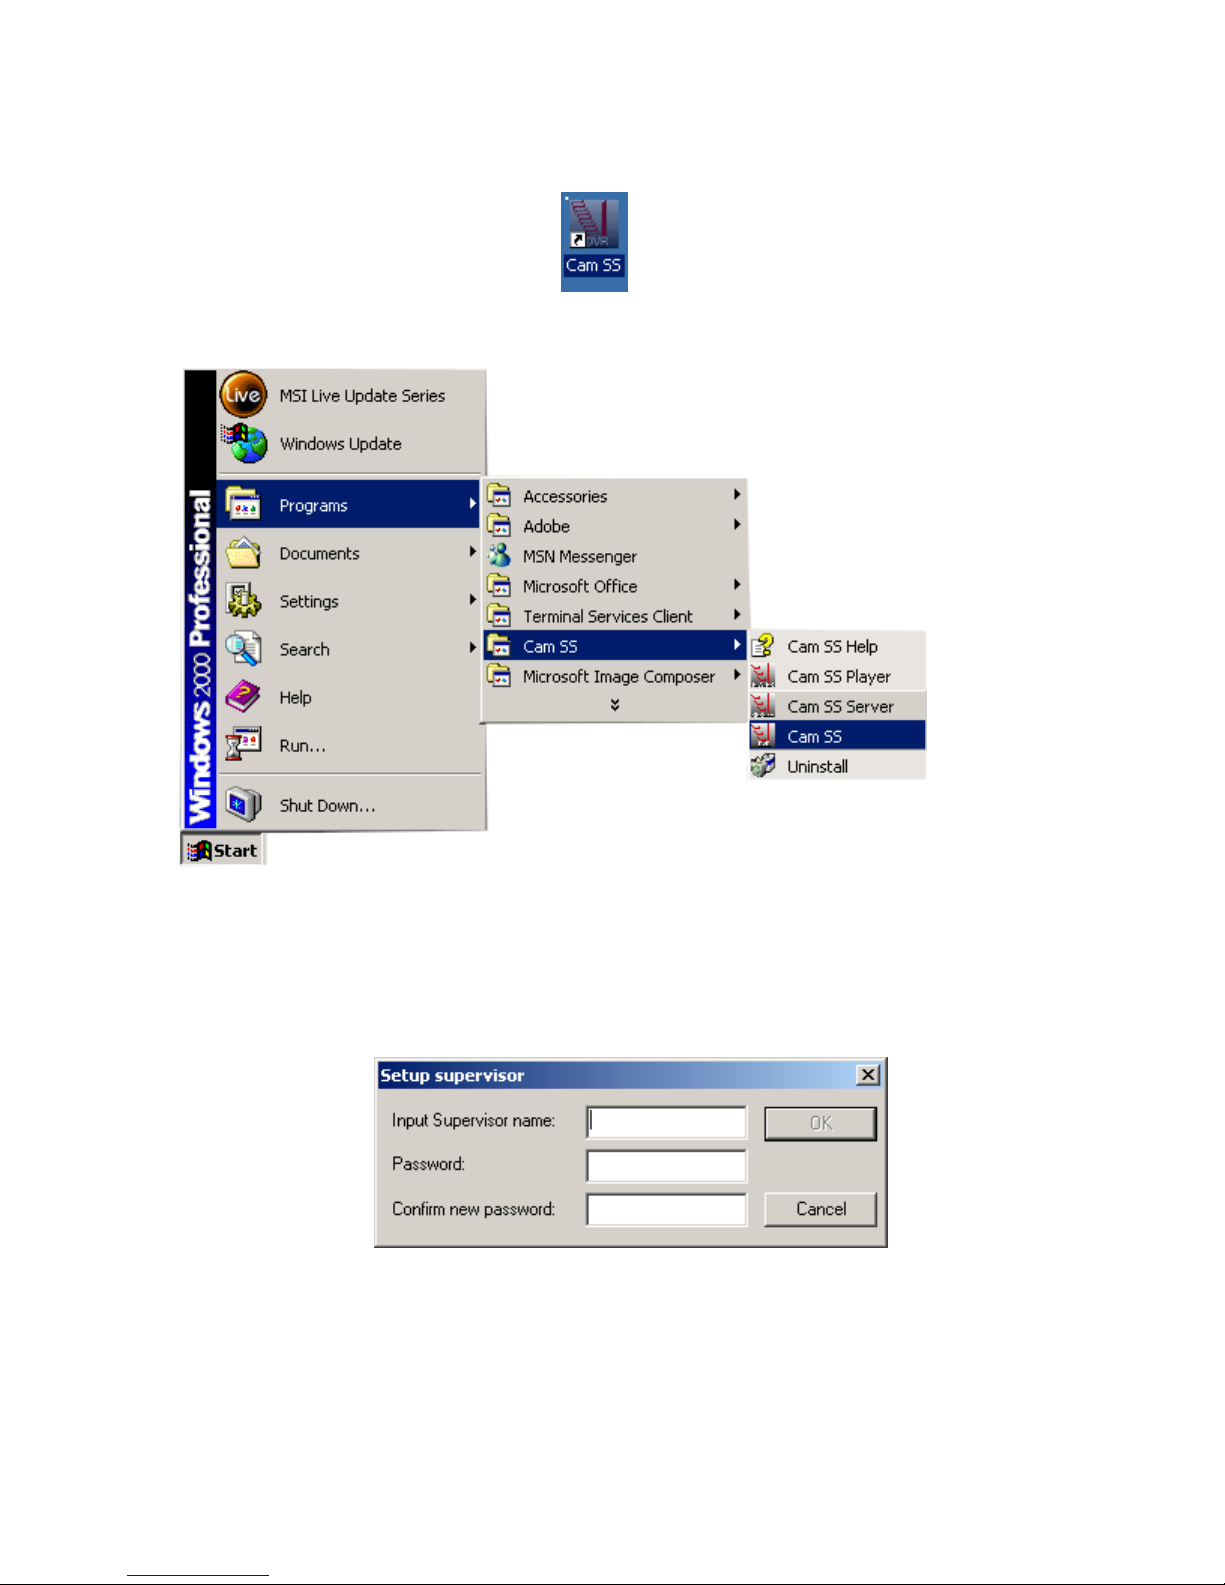
To execute the CamSS
below. (We recommend that you set the monitor resolution to 1024x768 16bit true color or above for better
screen display.)
program, double-click on the shortcut icon on the Windows Desktop as illustrated
You may also, as illustrated below, select
the program execution.
Start
on Windows, then the
Program
folder and finally
CamSS
for
Click
CamSS
2.1 Starting
At the very first run of CamSS
password for the System Administrator.
Note:
System Administrator
privileges).
At the second and subsequent runs of the
in the
CamSS
Menu to execute the
CamSS
after installation,
The
CamSS
The System Administrator will need to remember their user ID and password
system cannot be started, and the System Setup
is set up. (The System Administrator is the user with the highest
CamSS
CamSS
CamSS
program,
programs.
will request the user to define the user ID and
cannot be performed until the
.
CamSS
will request the users to
9

login with a user ID and password.
The User ID will limit scope and access for operations on the system dependent on the predefined access
auditing. This limitation does not apply to the System Administrator. Please refer to section 3.3 for the setting
of the user ID/password and auditing.
Note:
CamSS
will automatically start if no password is entered within 15 seconds after logging in. However,
the user will not be able to modify the system setup unless the user re-enters the user’s ID.
2.2 Main Screen
After entering the
CamSS
system, the Main Screen will appear as follows:
10
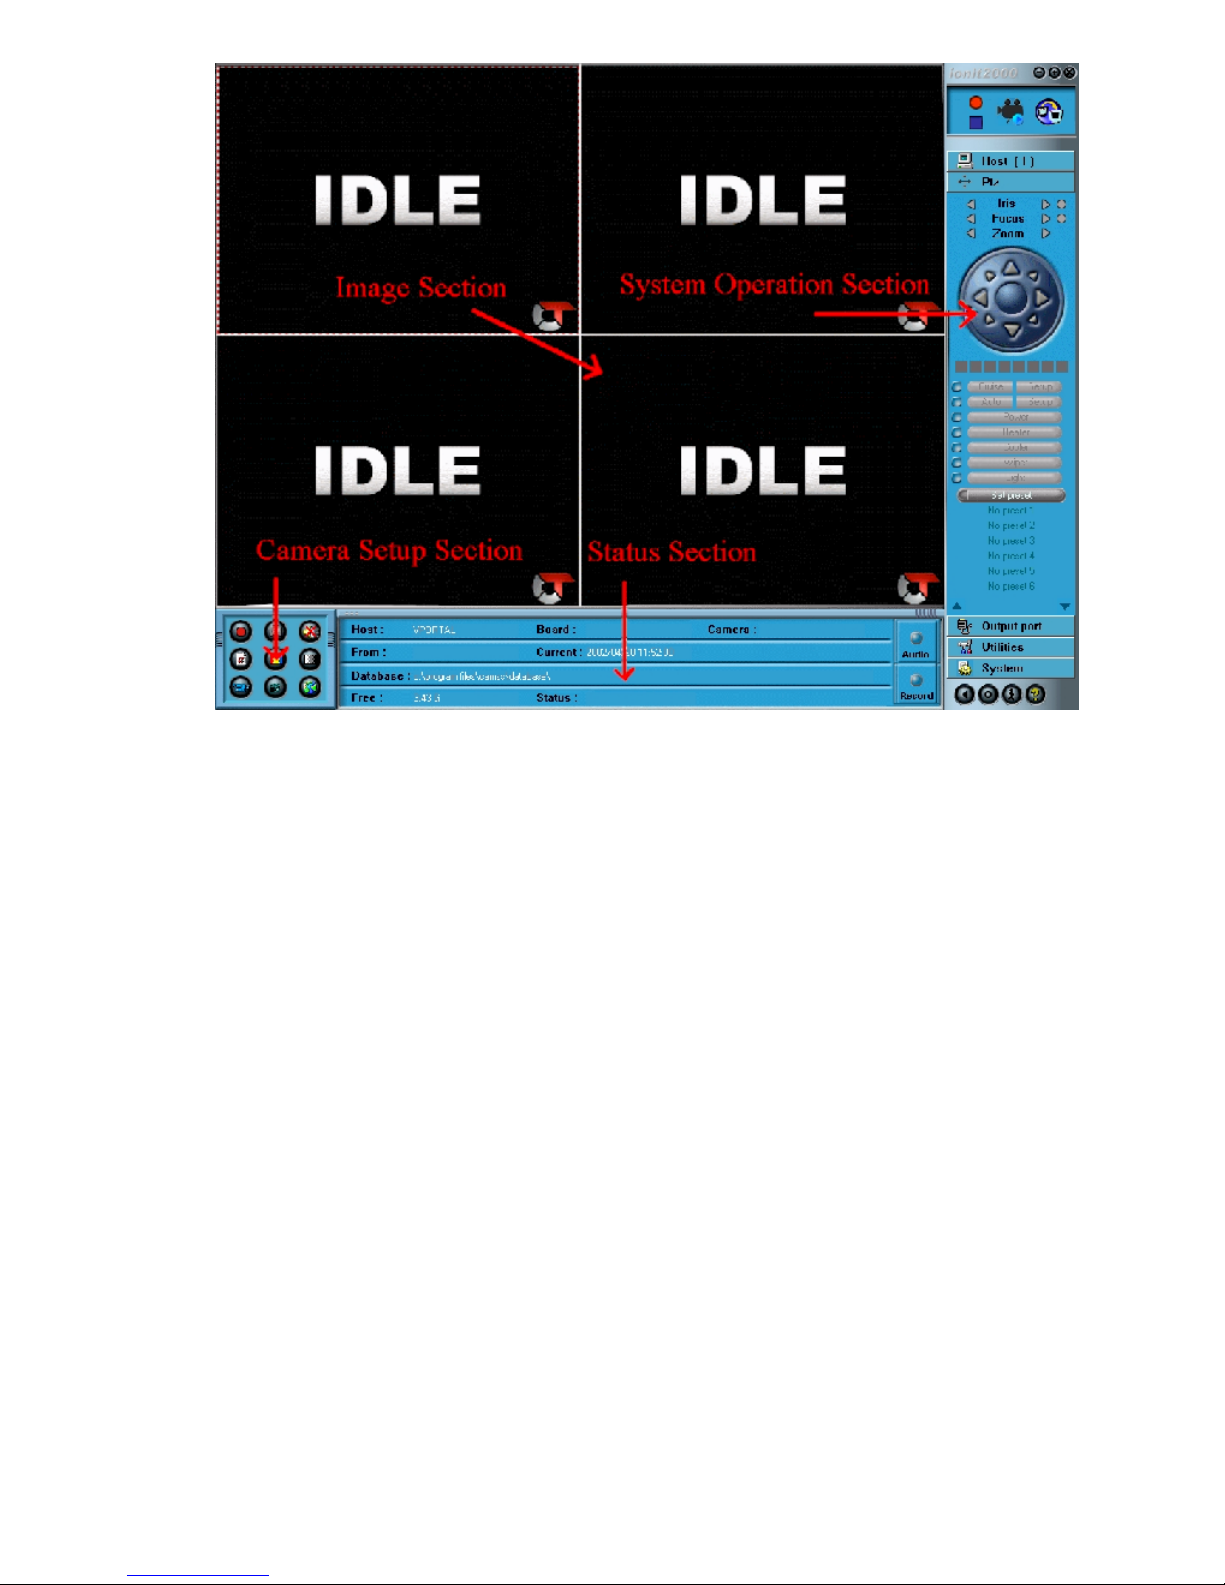
The Main Screen consists of the following 4 major sections:
1.
Image Section:
located on the central and largest part of the main screen is the Image section.
This section displays images from local and remote sites.
2.
System Operation Section:
the control panel for Host, PTZ control, Output port, Utilities and System Setup.
3.
Camera Setup Section:
contains the primary functions as follows:
protection area,
setup, Snapshot
4.
Status Section:
display the system status, including host name,
of recording, current time, database location, free space and encoding status.
Audio
, and
E-Map
located on the right bottom part of the main screen. This section is used to
located on the right side of the main screen. This section contains
located on the left bottom part of the main screen. This section
Start
and
Stop
recording of each camera,
recording,
Caption, Caption color , Video configuration, Camera
.
CamSS card name, camera name, starting time
UnMask
Descriptions of Each of the Four Sections are as follows:
2.2.1 Image Section
This section is primarily to display the images from cameras.
installations of up to 4
will vary from one system to another.
CamSS cards in one system. Therefore, the screen pattern (number of camera views)
CamSS
automatically detects the types and the number of
installed, and will automatically arrange the screen pattern in this section based on the total number of
cameras. This section also displays the
CamSS
supports three types of
CamSS cards and
CamSS cards
images from the local cameras when the system is not on-line with other systems.
other
CamSS
the cameras of other
systems through a LAN, Internet, Intranet or Modem. This section may also display images from
CamSS
CamSS can be on-line with
hosts selected from the “Host” option in the System Operation Section
.
11
To set up or to control any of the cameras on this section, move the mouse to the desired camera view and
click the left button once to select the camera. Then, perform the desired control or setup.
Screen Enlargement:
All of the images displayed in this section can be enlarged or reduced. First, move the
mouse to the desired image and double click on the image to enlarge it. The images may be re-arranged at this
time so as to accommodate the displays of all images.
Motion Detection Area Setup:
To select the motion detection area, simply click and hold on the image then
move the mouse to select the desired area. Finally, release the mouse button, and the setup will be complete.
There is no upper limit to the number of motion detection areas for each camera.
2.2.2 System Operation Section
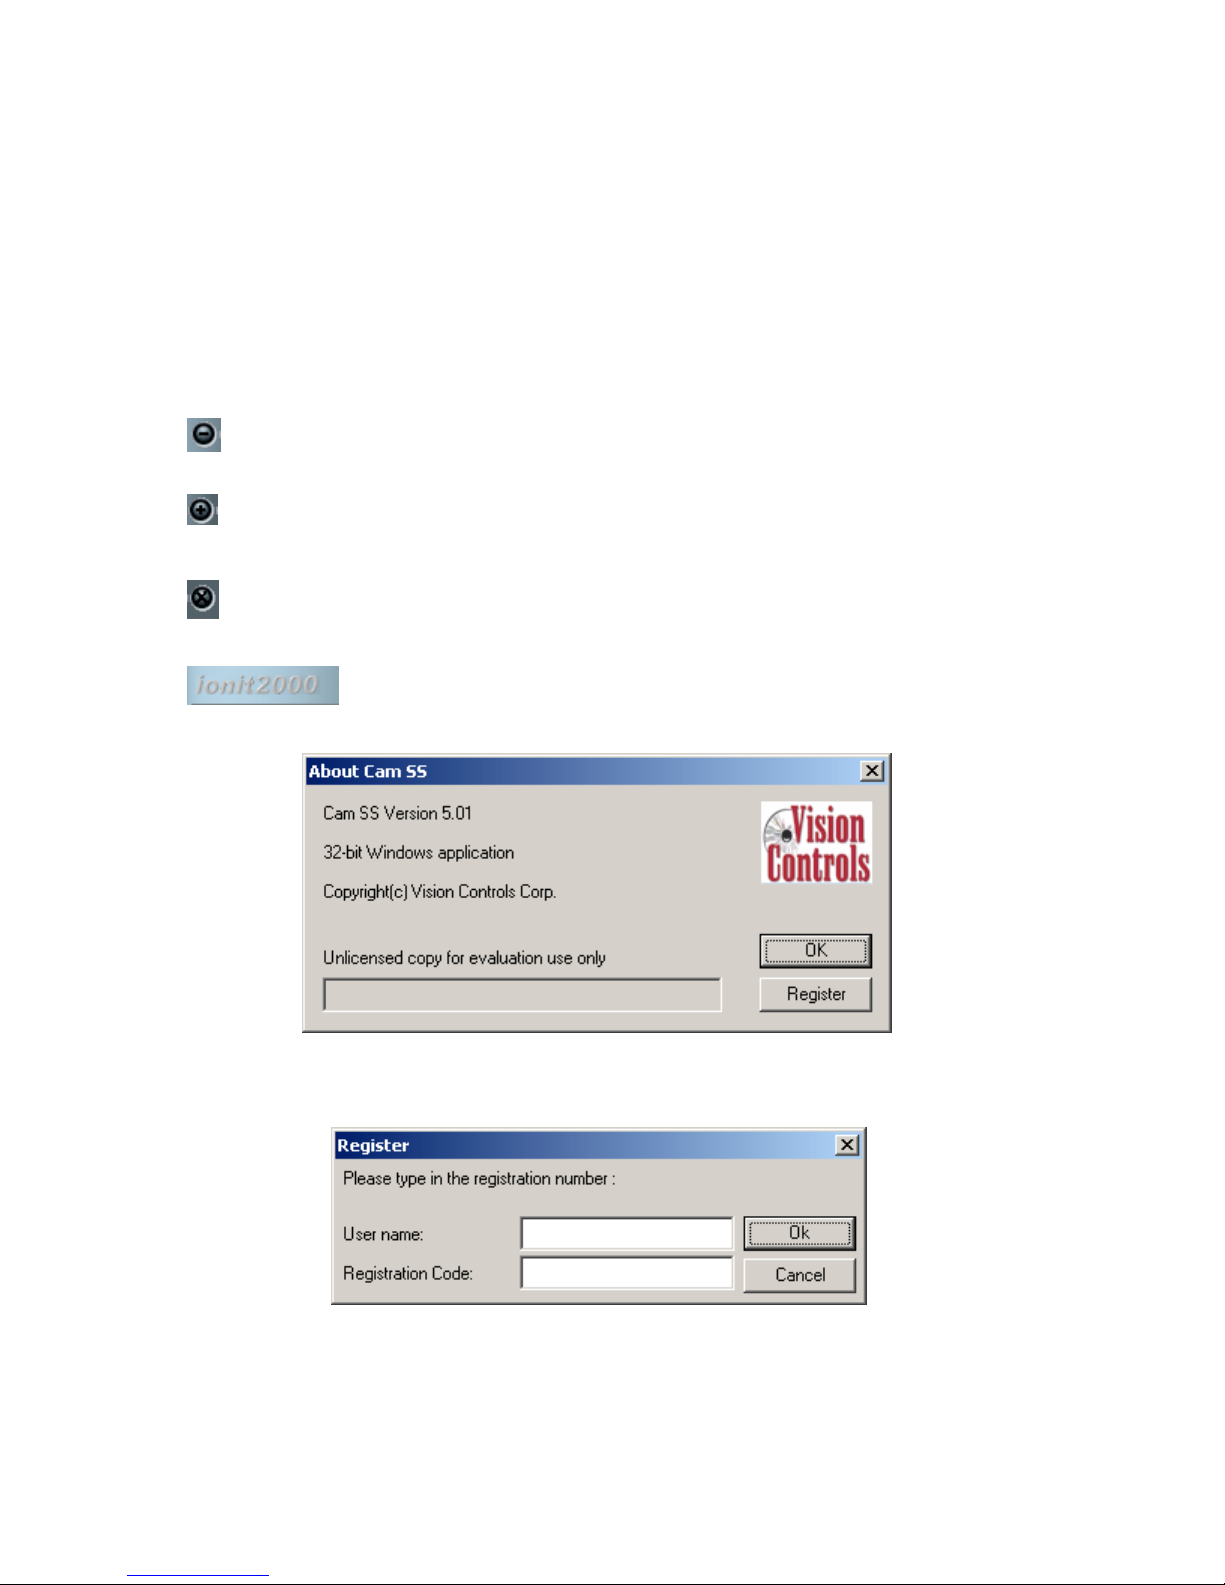
The three buttons on the most upper right portion of the System Section are as follows:
Minimize:
Full Screen:
Exit:
Minimizes the main screen.
Enlarges the whole image area to a full screen display mode.
Exits the program.
About
contains the copyrights and registration information of the product and info about
Cam SS 2000
(Press the
technolgy.
ESC
key to return to original screen size.)
Please follow the procedures below to complete the registration:
1. Click the
Register
button. The following dialogue box will appear:
2. Enter the user name and registration number then click the
a. Type the user name into the “user name” box.
b. Enter the registration number from the package box or the
Note: The registration number is case sensitive. Please enter the correct number. Also note the difference of
the alphabetic letter “O” and the numeric letter “0” (zero).
OK
button.
CamSS card.
12
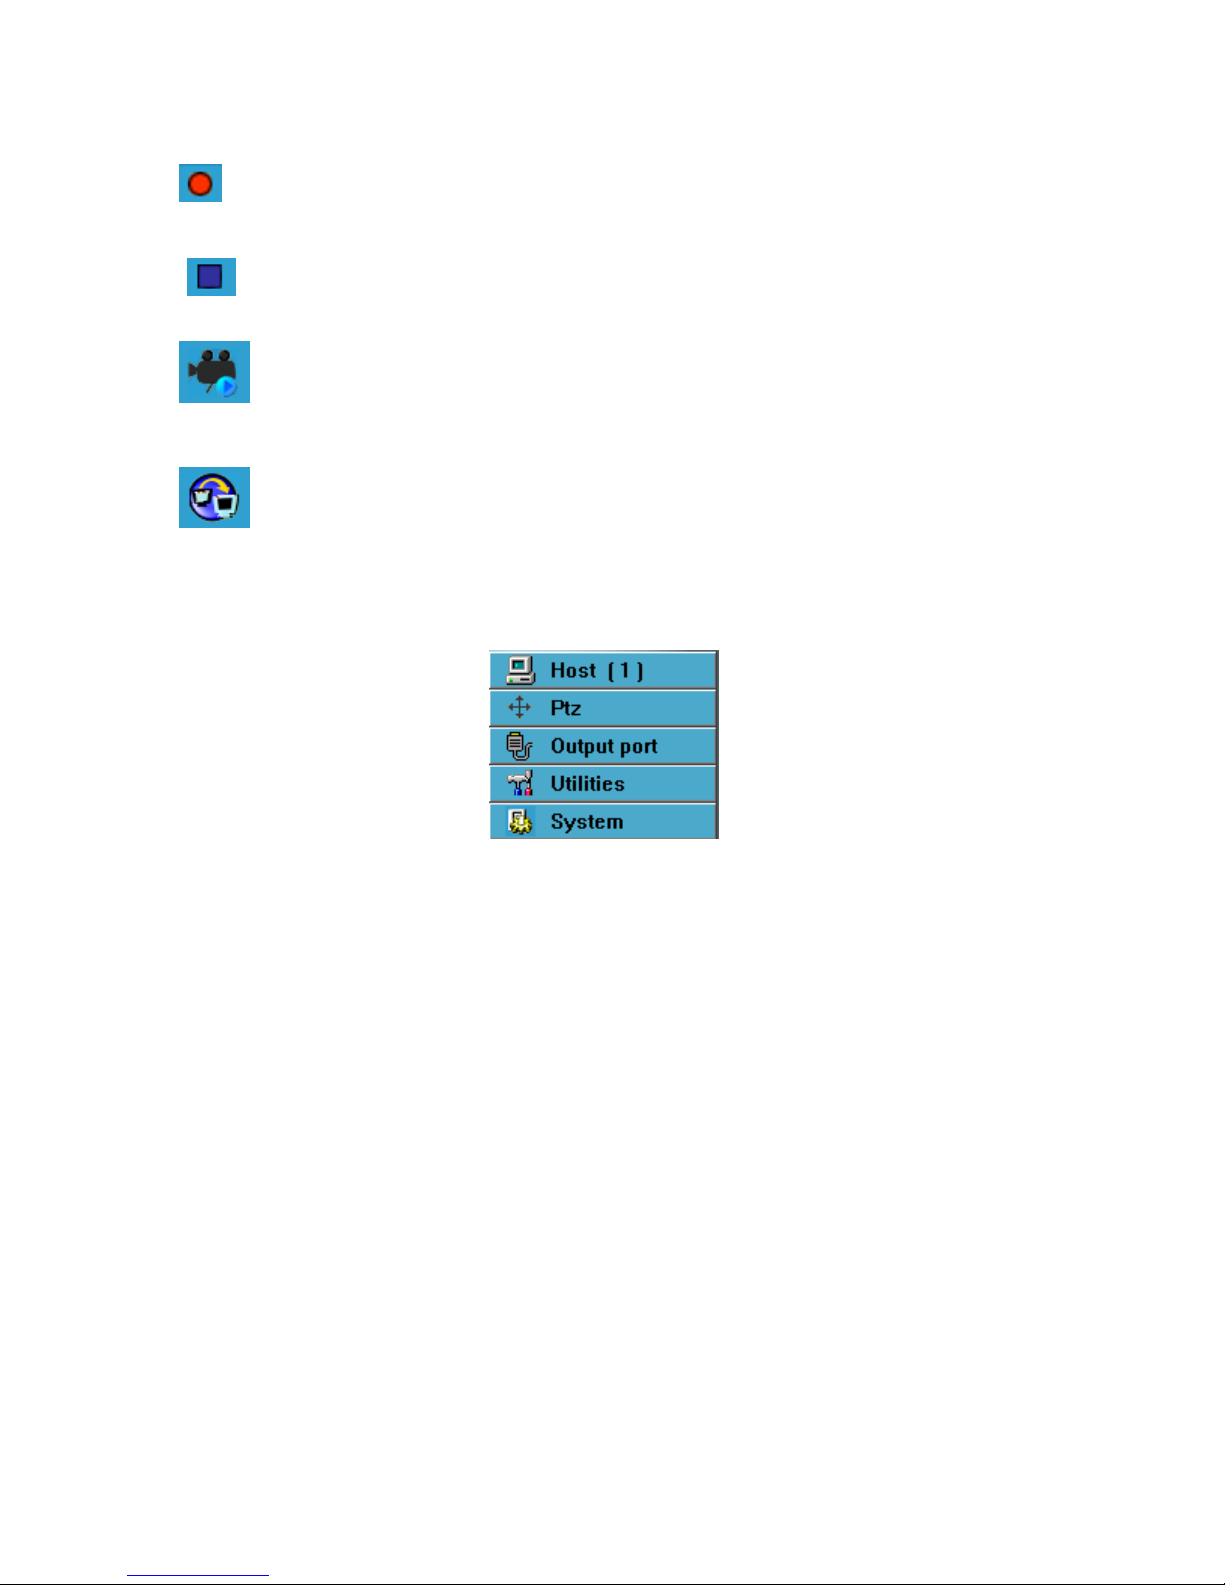
Next, there are four buttons on the upper part of the System Sections; their functions are as follows:
Start:
Local – Activates the recording of images from all local cameras.
Remote – Activates the recording of images from all remote cameras.
Stop:
Local – Stops the recording of all local cameras.
Remote – Stops the recording of all remote cameras.
Explore:
Remote access:
In the middle of the
Performs a local or a remote video file search. The remote connection
must be up. (Please refer to Chapter 5 for detail descriptions and
playback information).
Allows the local
CamSS
CamSS system through Modems, LANs, an Intranet, or the Internet.
System Operation Section
there are five control functions. As illustrated below they are
Host, PTZ control, Output Port, Utilities and System.
system to be on-line with a remote
Host:
Selects and controls a remote host when the
LANs, Intranet or Internet. (Please
PTZ Control:
dome cameras, with such functions as adjusting IRIS, focus, zoom, up/down, right/left
movement, cruise of preset positions and auto pan of cameras. (Please refer to Chapter 7
for further details).
Output port:
for further details).
Utilities:
to Section 3.3.3), Load Picture
Section 5.3.) and
System:
Address Book, Database, Board Setup,
Chapter 3 for
This is used primarily to control the local and remote PTZ cameras and speed
This controls either the local or remote output ports. (Please refer to Chapter 7
Includes functions of the
E-map
(Please refer to Section 3.8.).
This part of the control panel includes the
further details).
refer to Chapter 9 for further details).
Alarm log
(Please refer to Section 5.3.),
CamSS
system is online through Modems,
(Please refer to Chapter 6), User log
Load Video
Host Setup, I/O Device, User, Sound Bank
and
E-Map Setup
. (Please refer to
In the lowest part of this section, there are four buttons as seen below:
(Please refer
(Please refer to
,
13

Mute:
Turns off the output of the sound card.
Auto Scan:
Log-in/Log-out:
On-line Help:
Enlarge the images being recorded in the Image Section in a preset
order. (Does not affect the operation of recording).
During the execution of the system, the user password is required
before system programs can be performed. If a user is away for a while and
wishes to deny others’ access to the system, he/she may log out of the
system. All system operations (functions) will then be shut down. Exiting
the system programs is not an option at this point. The system will not
work until the user logs back in with his/her password.
Provides on-line help for system operations.
2.2.3 Status Section
This section displays the status of the current system including:
-
Host: Displays the name of the Host computer.
-
Board name:
-
Camera name:
-
From:
Displays the start time of recording while in the recording mode. If no image is available
from the selected camera, it will be marked as “IDLE”. If an image is available but displays
“Monitoring” (No Rec.), it means that the selected camera is not in the recording mode.
-
Current:
-
Database:
-
Free:
Displays the hard disk spaces available in the database.
-
Status:
Displays the name of the
CamSS card selected in the Image Section.
Displays the name of the camera selected in the Image Section.
Displays the current time.
Displays the current database for recording.
Displays the recording speed and image bit rate per second of the selected camera.
2.2.4 Camera Setup Section
The detail descriptions are contained in Chapter 4 (Recording).
14
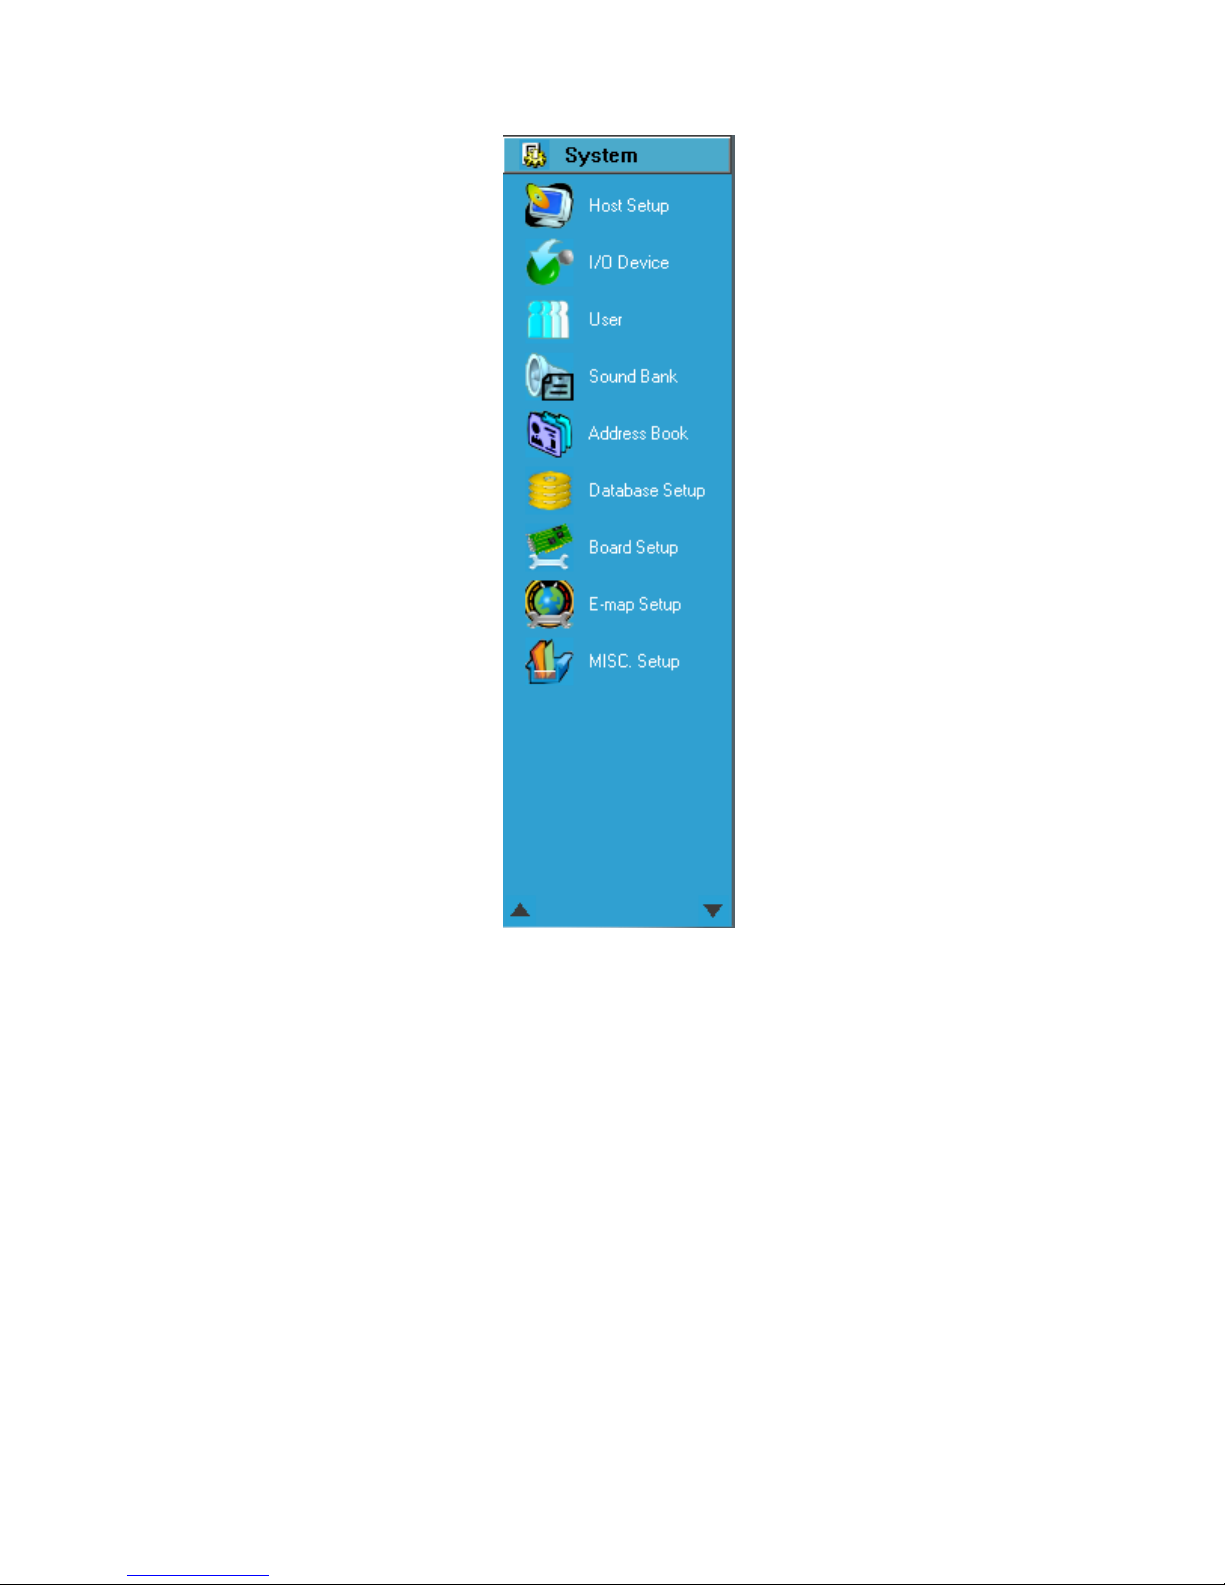
Chapter 3: System Setup
Select
System
from the
System Operation Section
, as illustrated below, to set up the system.
There are nine types of setting functions in the
-
Host Setup
-
I/O Device
-
User
-
Sound Bank
-
Address Book
-
Database Setup
-
Board Setup
-
E-map Setup
- Misc. Setup
The descriptions of these functions are given in the following sections.
System
section as follows:
15
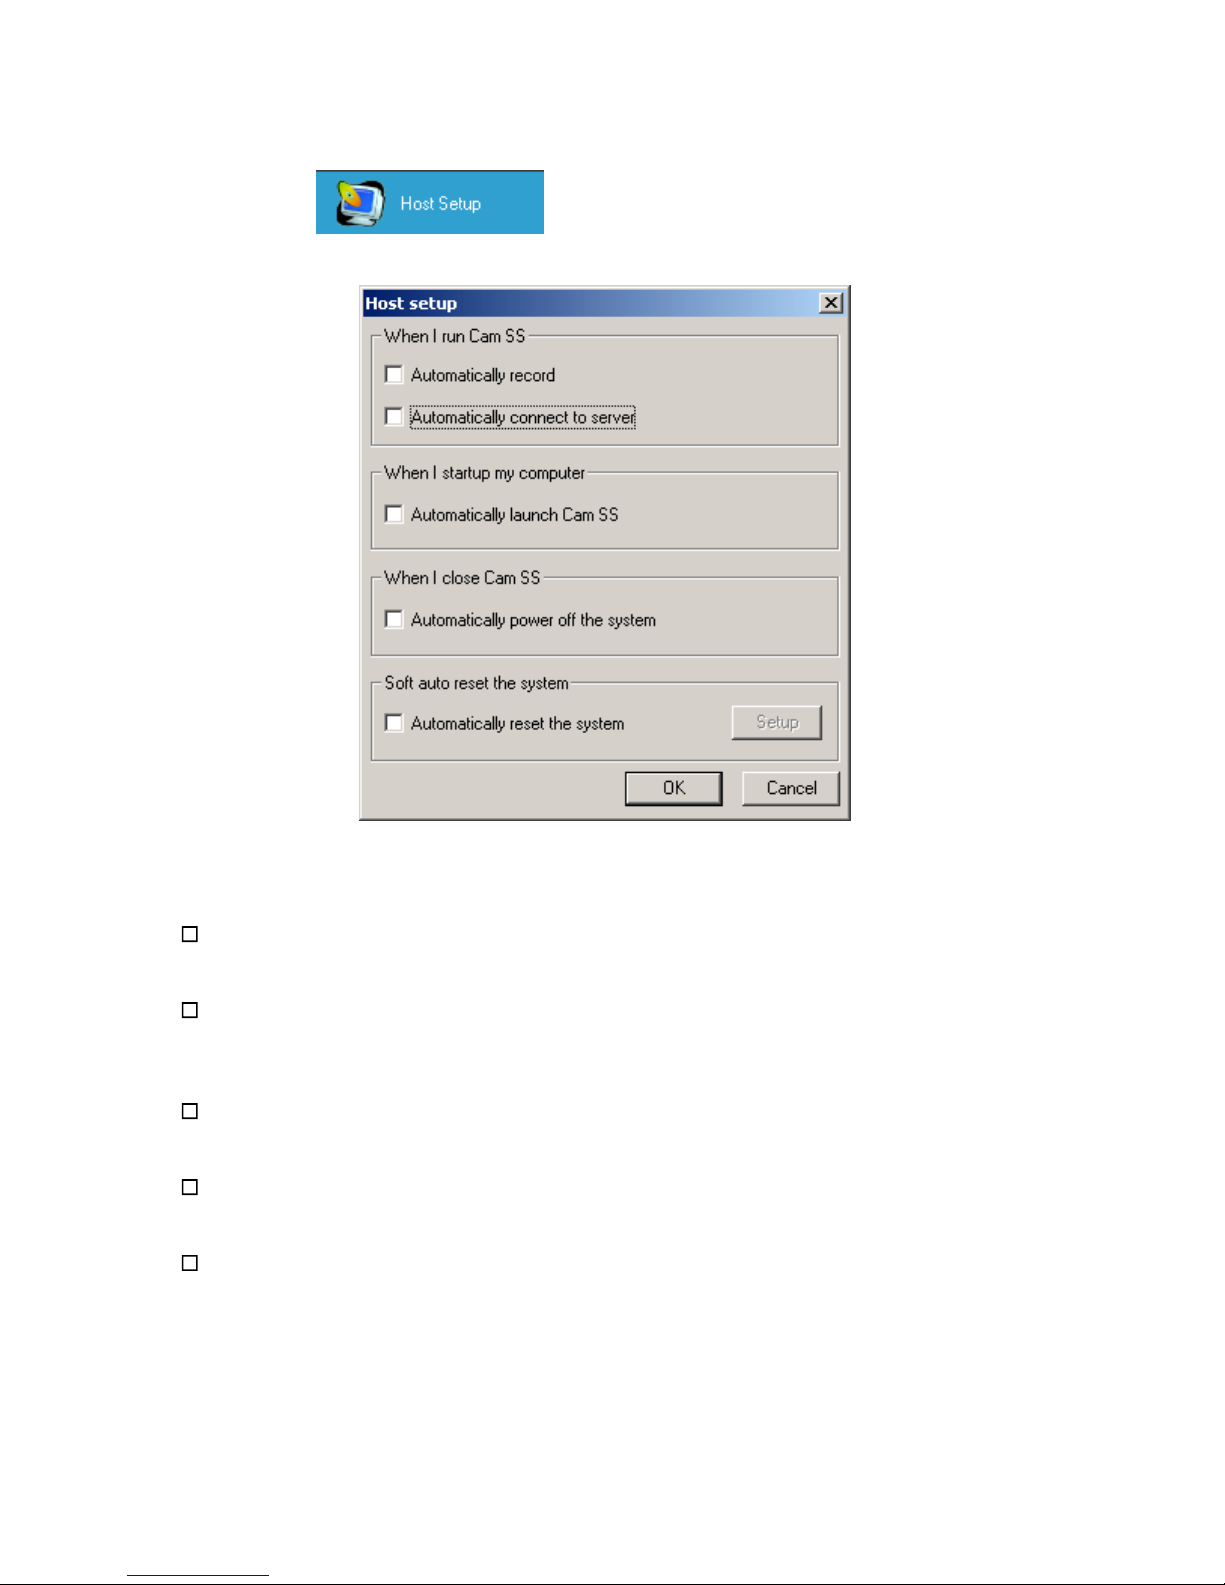
3.1 Host Setup
Clicking the
button will bring up the following dialogue box:
The data fields of
Host Setup
are described as follows:
Automatically Record
Allows
CamSS
to start recording at start up.
Automatically connect to server
Allows automatic connection to the
automatically connect to the same
Automatically launch
Allows the
CamSS
application program to launch immediately upon PC start-up.
CamSS
CamSS Server
CamSS Server
application program upon start-up. The system will
it was connected to previously.
Automatically power off the system
Allows for the system to automatically power down when
CamSS is closed.
Soft Auto Reset the System
Allows for automatic resetting of the system. It can be set for every day, every week, or every month.
16
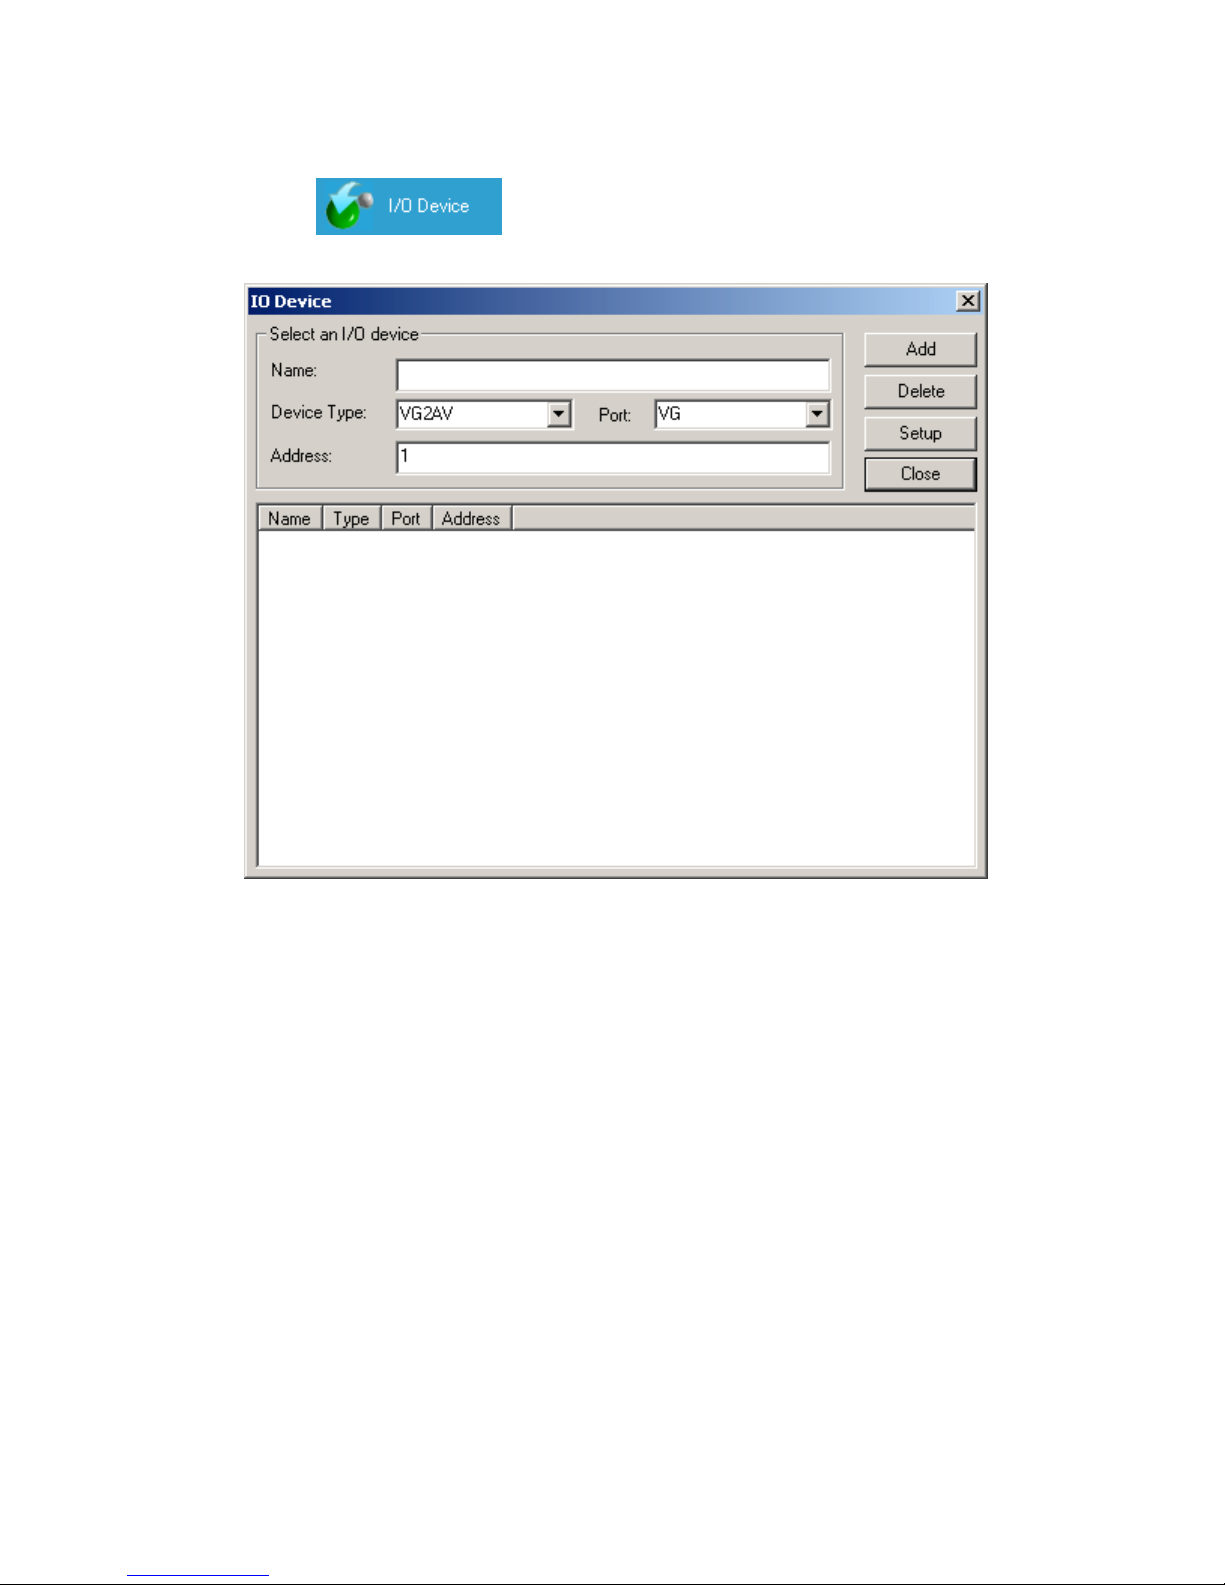
3.2 I/O Devices
Clicking
the
button to select the
I/O Device
will bring up the following dialogue box.
Please refer to Chapter 7 (I/O Device) for descriptions of the settings.
17
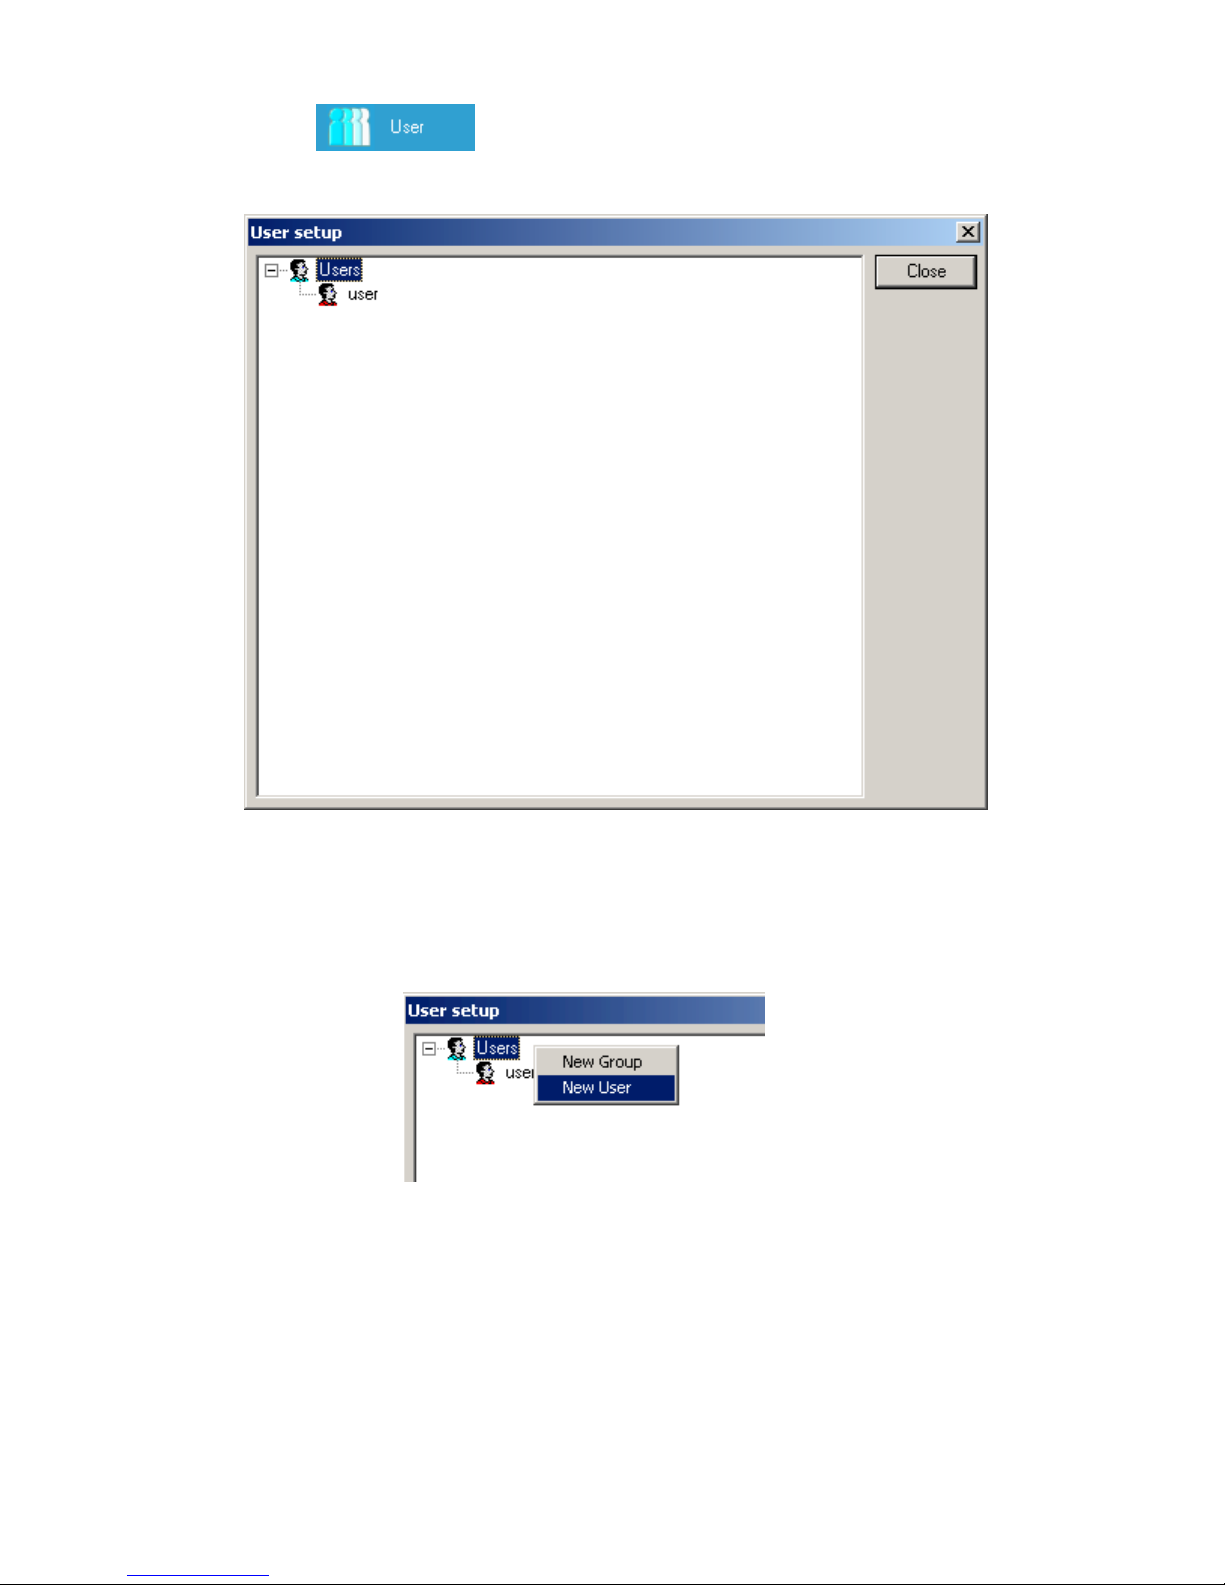
3.3 Users
Clicking the
following dialogue box.
button to select the
User
(to set up a user profile) will bring up the
At the very first run of
CamSS
, the System Administrator (the user with the highest access auditing) will be
required to enter in a password. The very first user to appear (in a red head) in the display is the System
Administrator. If a new user needs to be set, click the right button of the mouse on the icon and the screen will
display as follows:
18

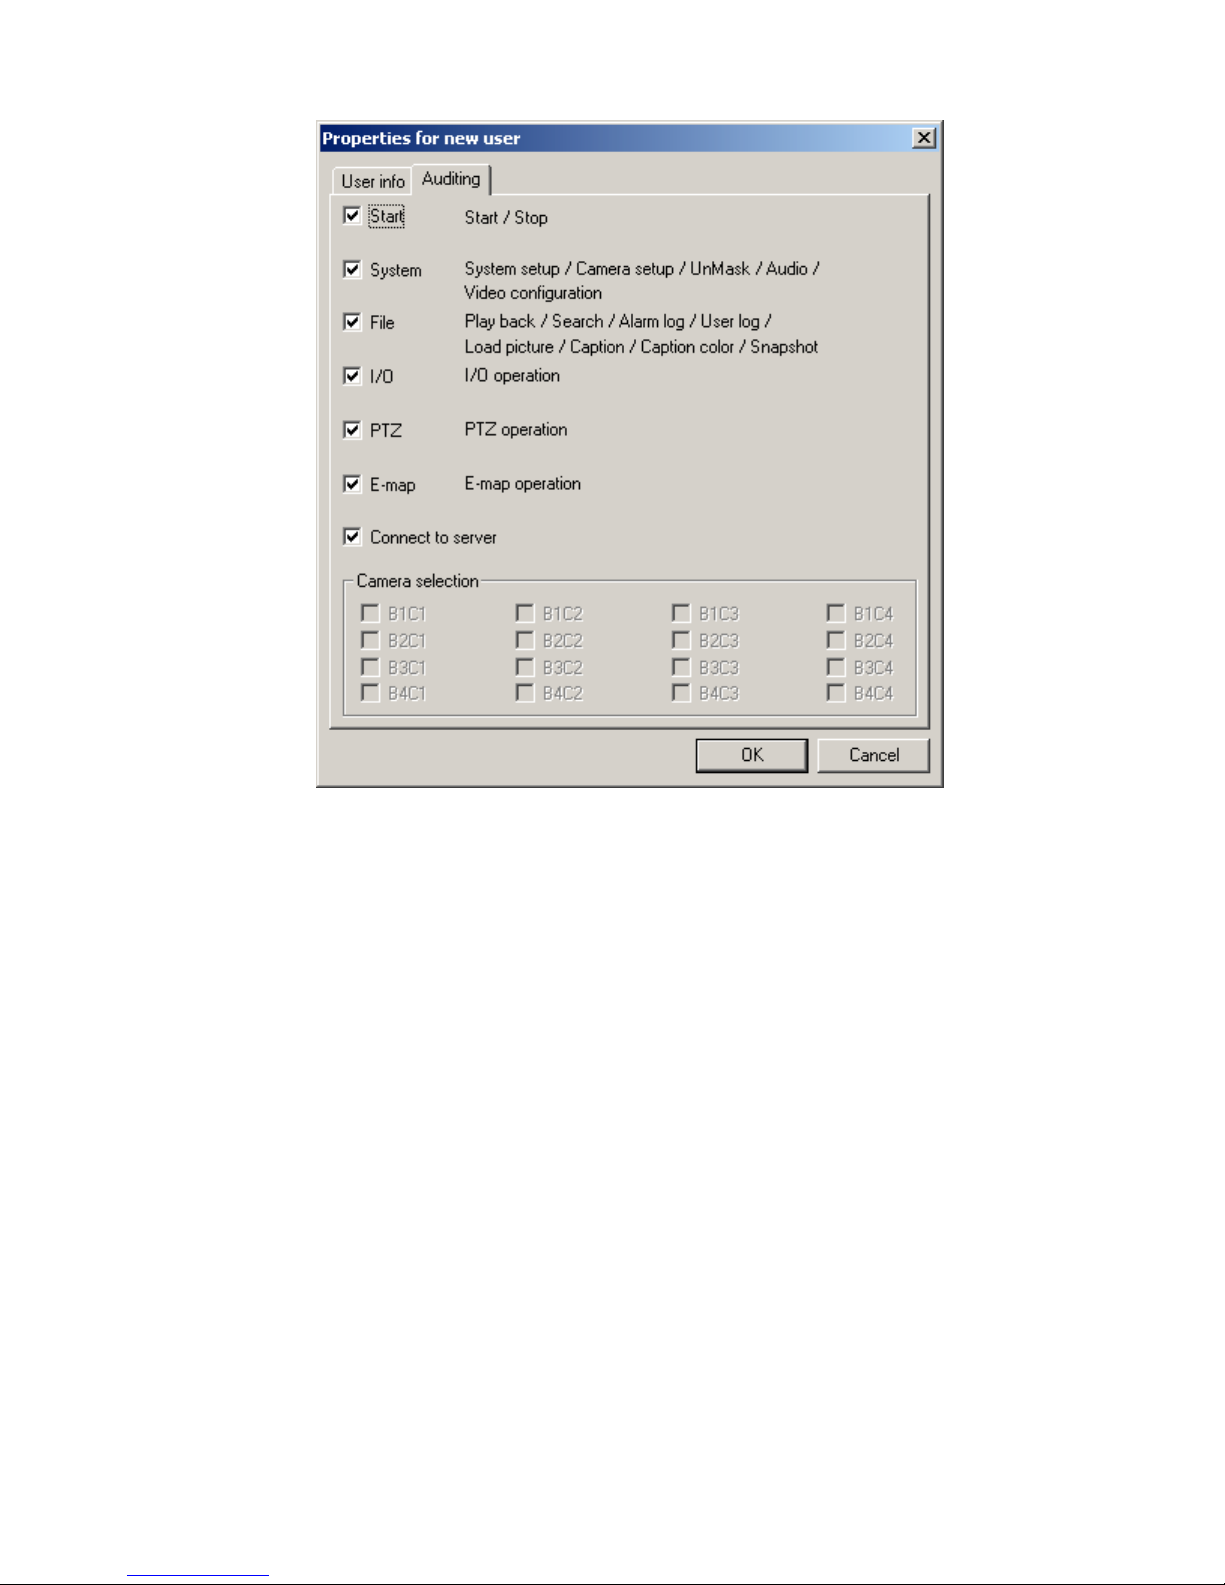
3.3.1 New User Setup
Simply select
New User
. Enter the properties of the new user into the screen (as seen below):
Note: Only the System Administrator can add, delete, or modify a user profile.
The setting for
1. User Name:
2. Password:
3.
Confirm:
4.
User Type:
“User Info”
is as follows:
type a user name into the box
type the password into the box.
enter the password again for confirmation
This enables the user to be defined as either a
Local
or a
Remote
user. (A remote user is one
who accesses the system with limited auditing through modems, LAN, Intranet or Internet.)
Auditing
audits may be granted by checking the
1. Start/Stop
2.
3. File:
4.
5.
6.
7.
8.
is used to set up the user’s access auditing as described below. One or more of the following access
: Enables a user to access the
System:
Enables a user to access
Enables a user to access
boxes (
System Setup
Playback, Search, Alarm Log, User Log
•)
in front of them. The access auditing is set as follows:
Start Recording, Stop Recording
and
Camera Setup
functions.
function.
and
Load Picture
functions.
I/O:
Enables a user to access the
PTZ:
Enables a user to access PTZ control and Speed Dome Camera control functions.
E-map:
Enables a user to access
Remote Access: Enables a user to access the
Camera selection:
This function is not available.
I/O Device
E-map
functions.
Setup function.
Remote access
function.
19
The screen will be as follows:
After the settings are finished, click
OK
to complete the process. When the specified user logs in with this
user name and password, he/she will have access to the granted functions only.
20
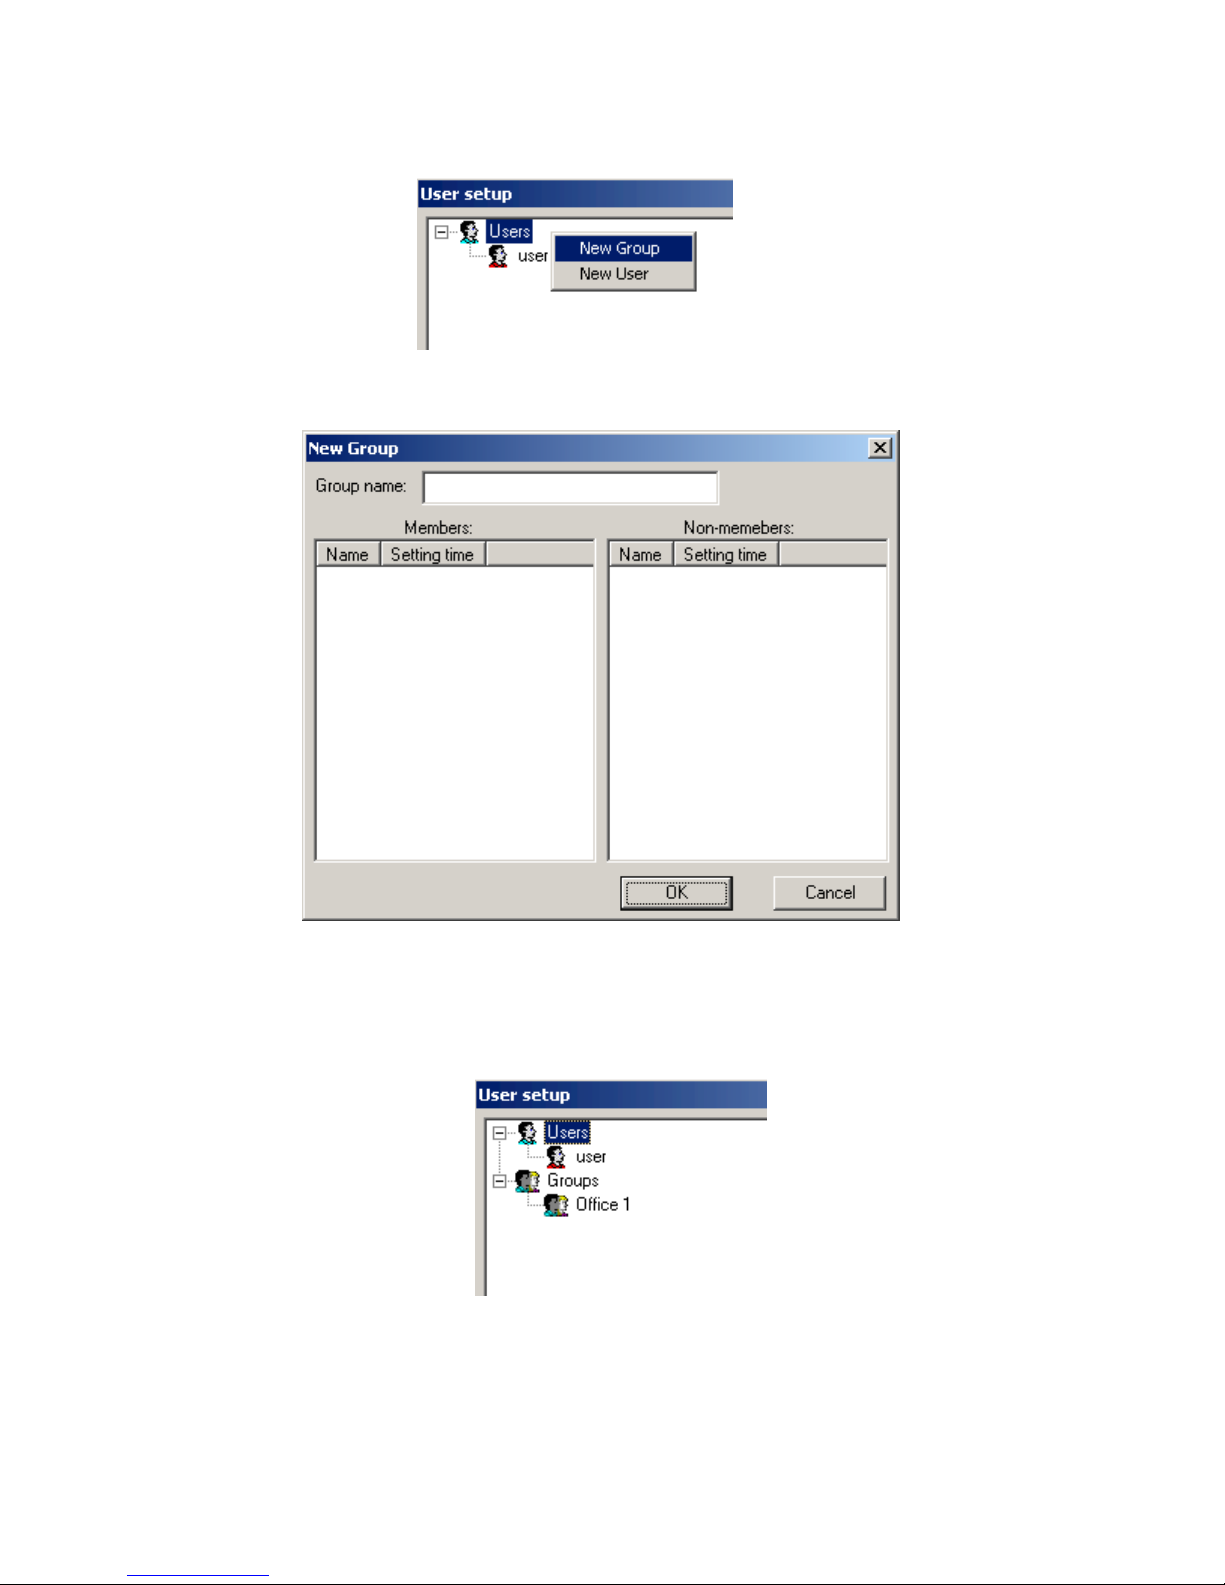
3.3.2 New User Group Setup
Click the right button of the mouse on the desired
dialogue box will appear:
Select
New Group
to enter the
New Group
screen as seen below:
User
entry to set up a new user group. The following
Type the name of the group into the
following screen will appear.
Double click on the desired group name to enter into
under
Non-member
to
Member
Group Name
field and then click the
Edit Group
as illustrated below. You may move a user
OK
by double clicking on the desired entry under
button. The
Non members.
21
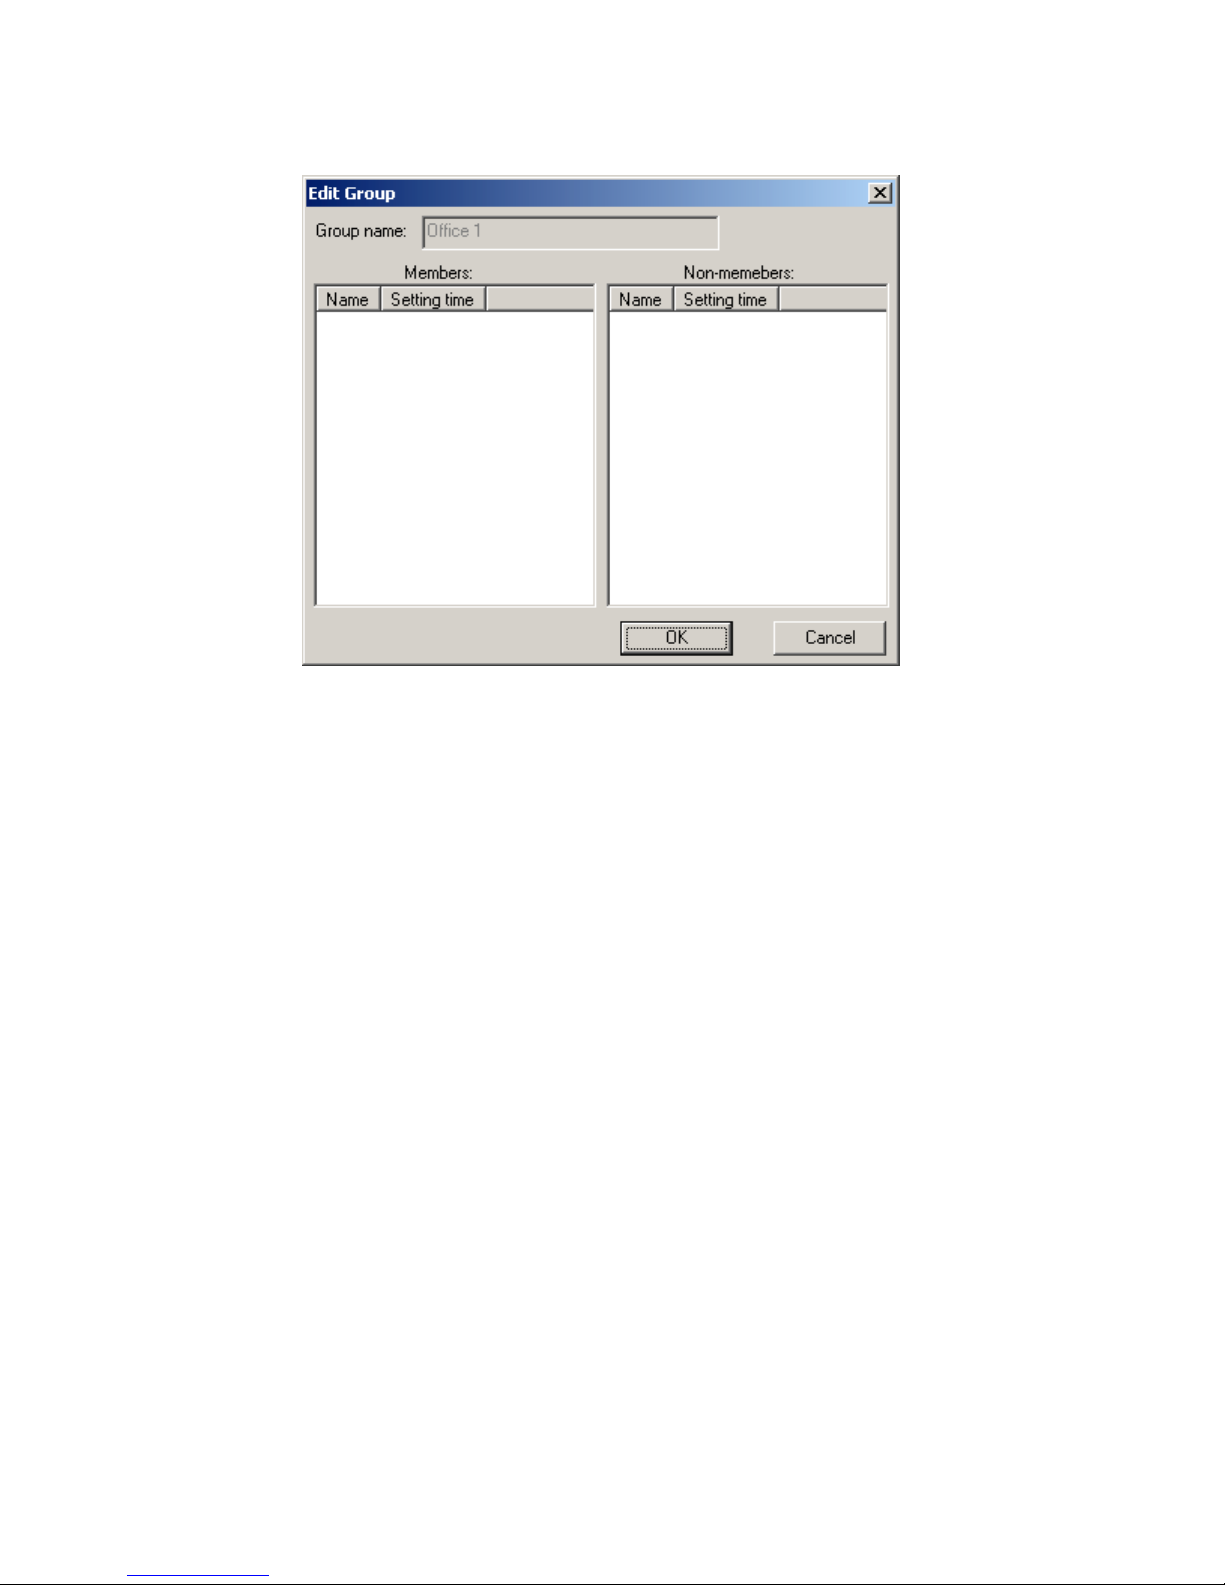
Note:
The Group function is solely for the purpose of managing all of the users.
22

3.3.3 User Log
You may find the
middle of the
System Operation Section
button from the
. Click the User Log
pull-down menu in the
button and enter into the User Log screen. The
User Log screen lists the time that both the local and remote access users log in or out from the
system.
CamSS
23
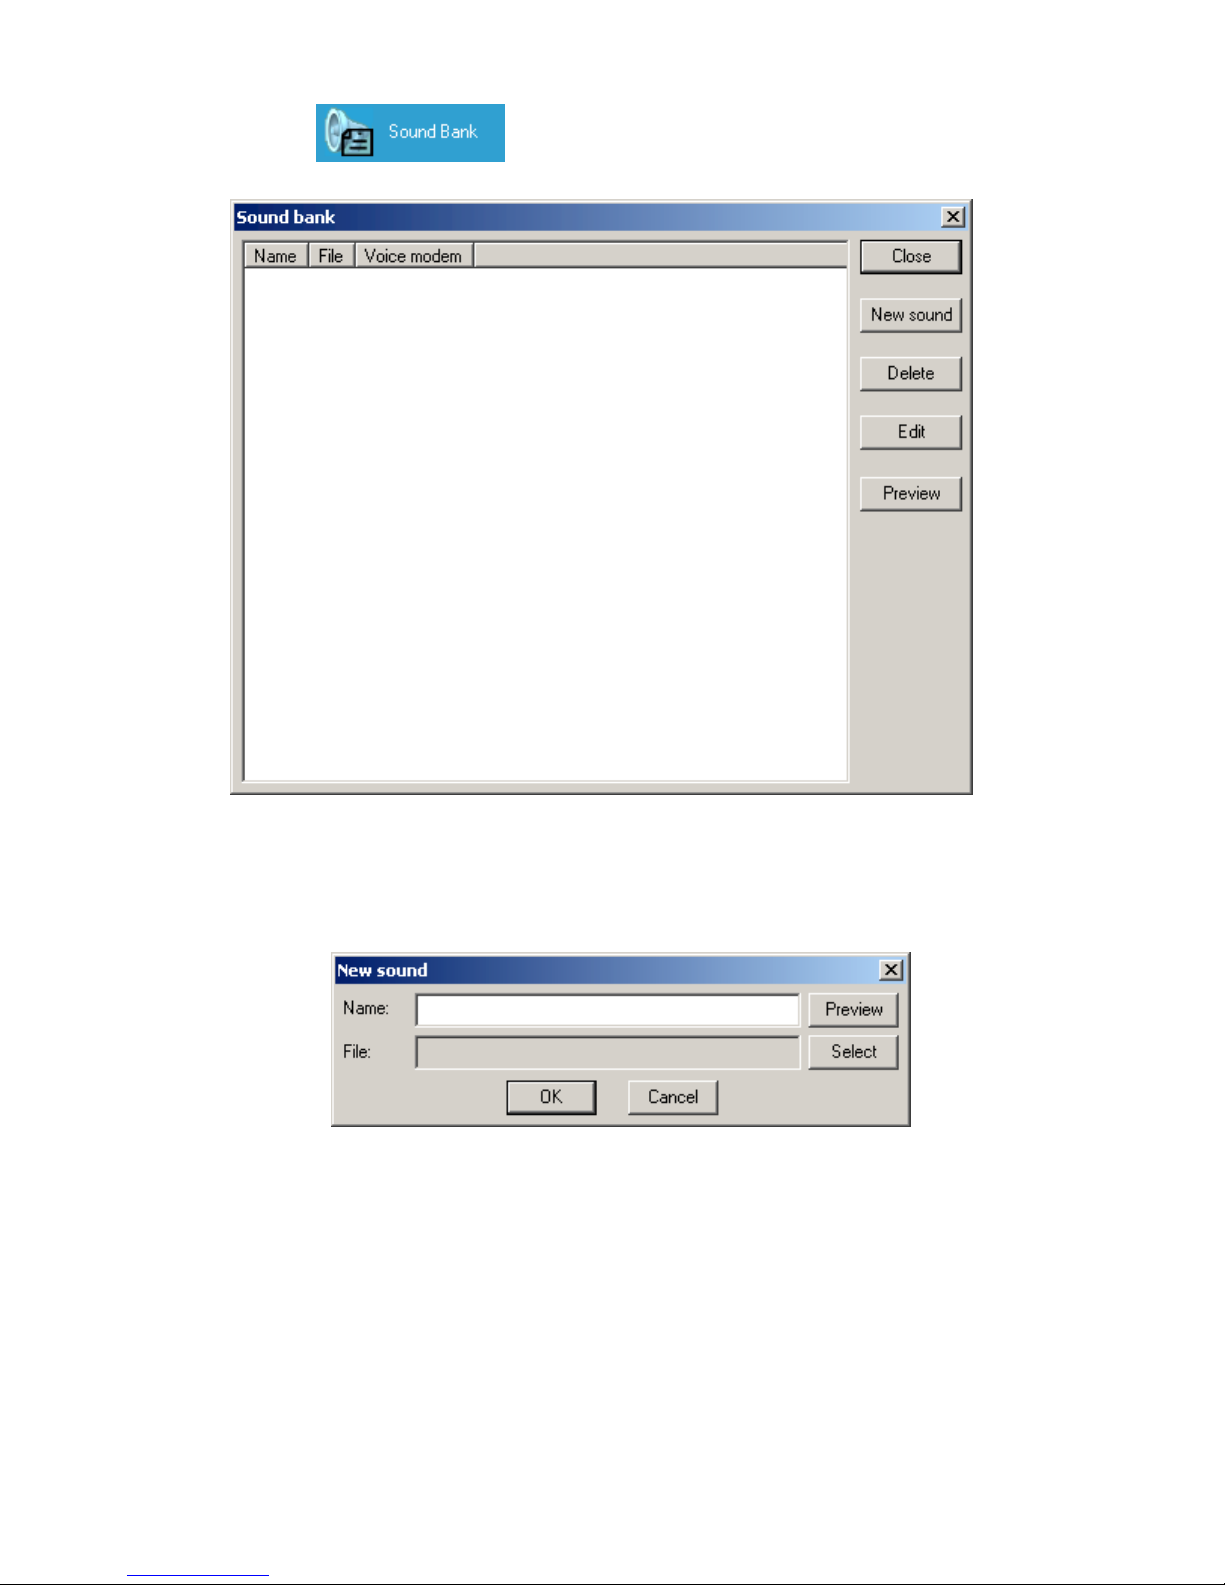
3.4 Sound Bank
Clicking the
option button will bring up the following screen:
-
Close:
-
New Sound:
exits the Sound Bank setup function.
To add a new sound file, click
appear.
First give a name to the sound file then click
Select
New Sound
and the following dialogue box will
to choose a sound file.
24

After a sound file is selected, it returns to the following screen:
Click
Preview
to ensure the selected file is the right one. Then, click
OK
to complete the setup.
25
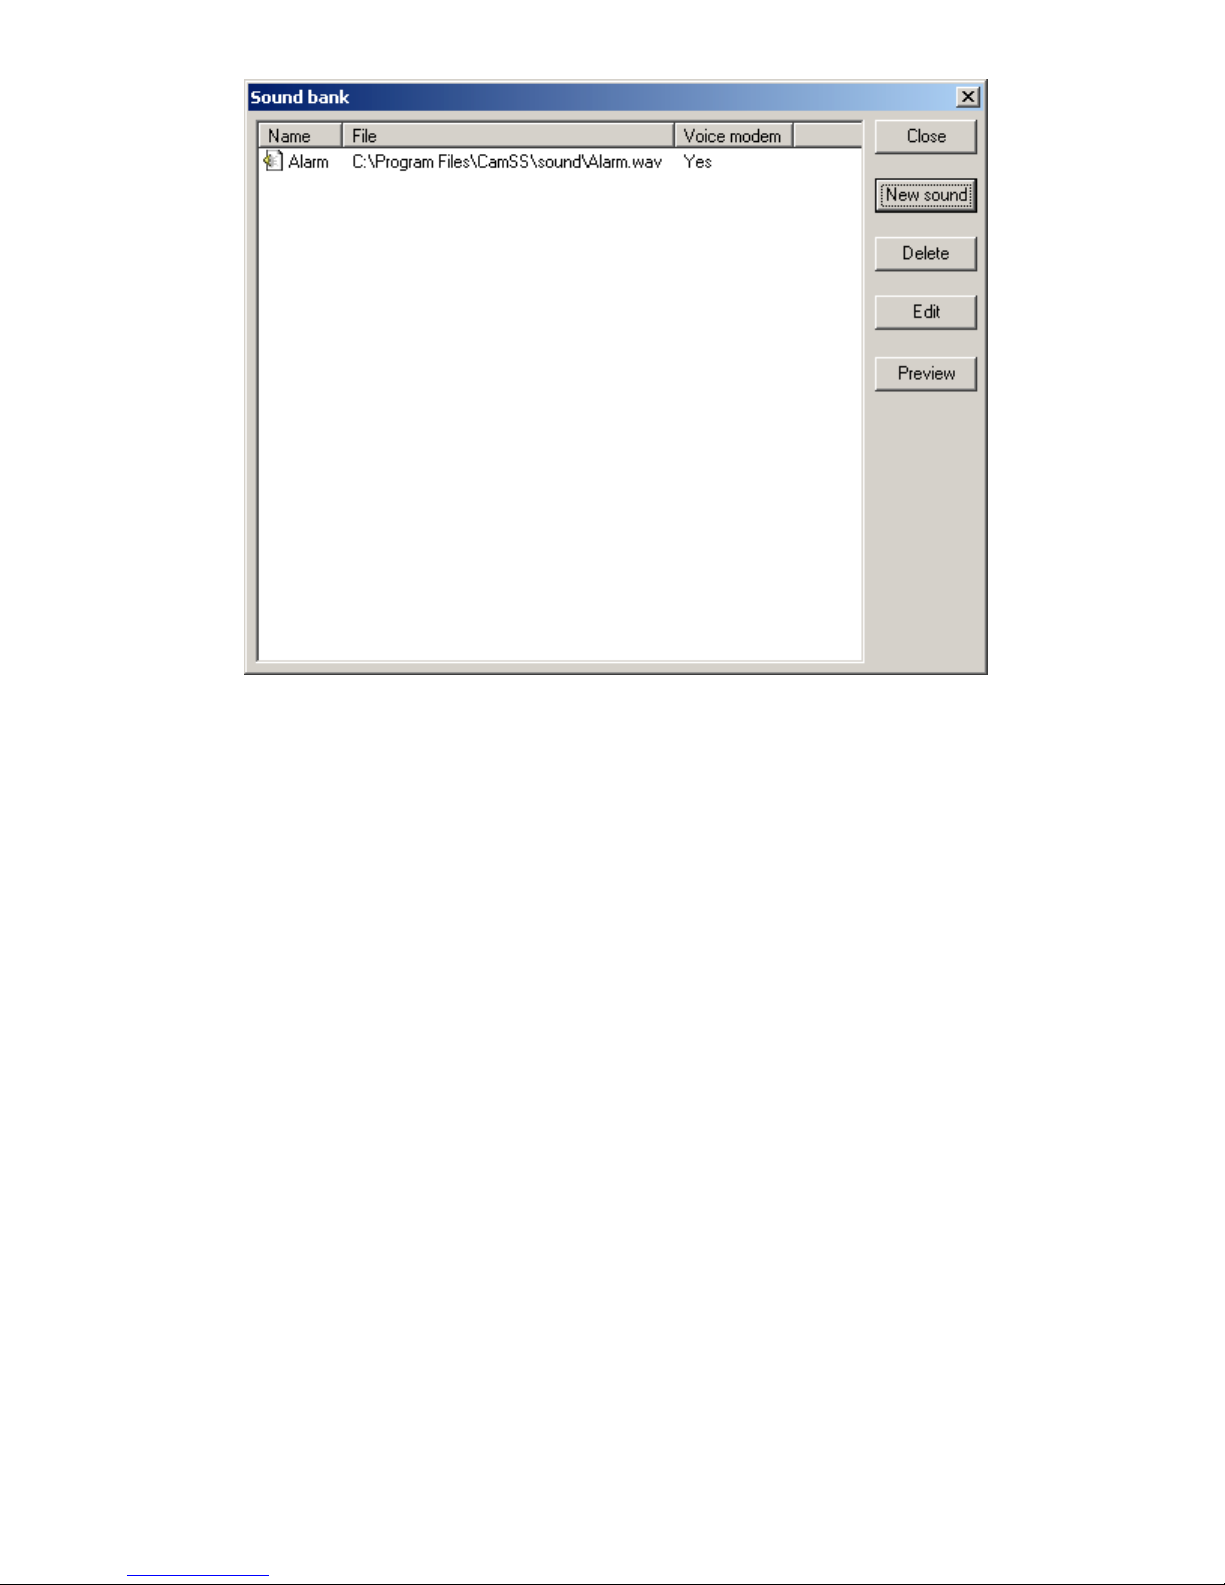
-
Delete:
-
Edit:
-
Preview:
Notes
:
1. The field,
To delete a sound file select that file entry and click the
To edit a sound file select that file entry and click the
To preview a sound file select that file entry and click the
Voice Modem
with two valid values
Yes
and No, shows whether the sound file can be
transmitted to a telephone through a modem.
2. The file to be transmitted to a telephone must be in the format of
Delete
Edit
button.
Preview
button.
button.
PCM 8000Hz, 16-bit, mono.
26
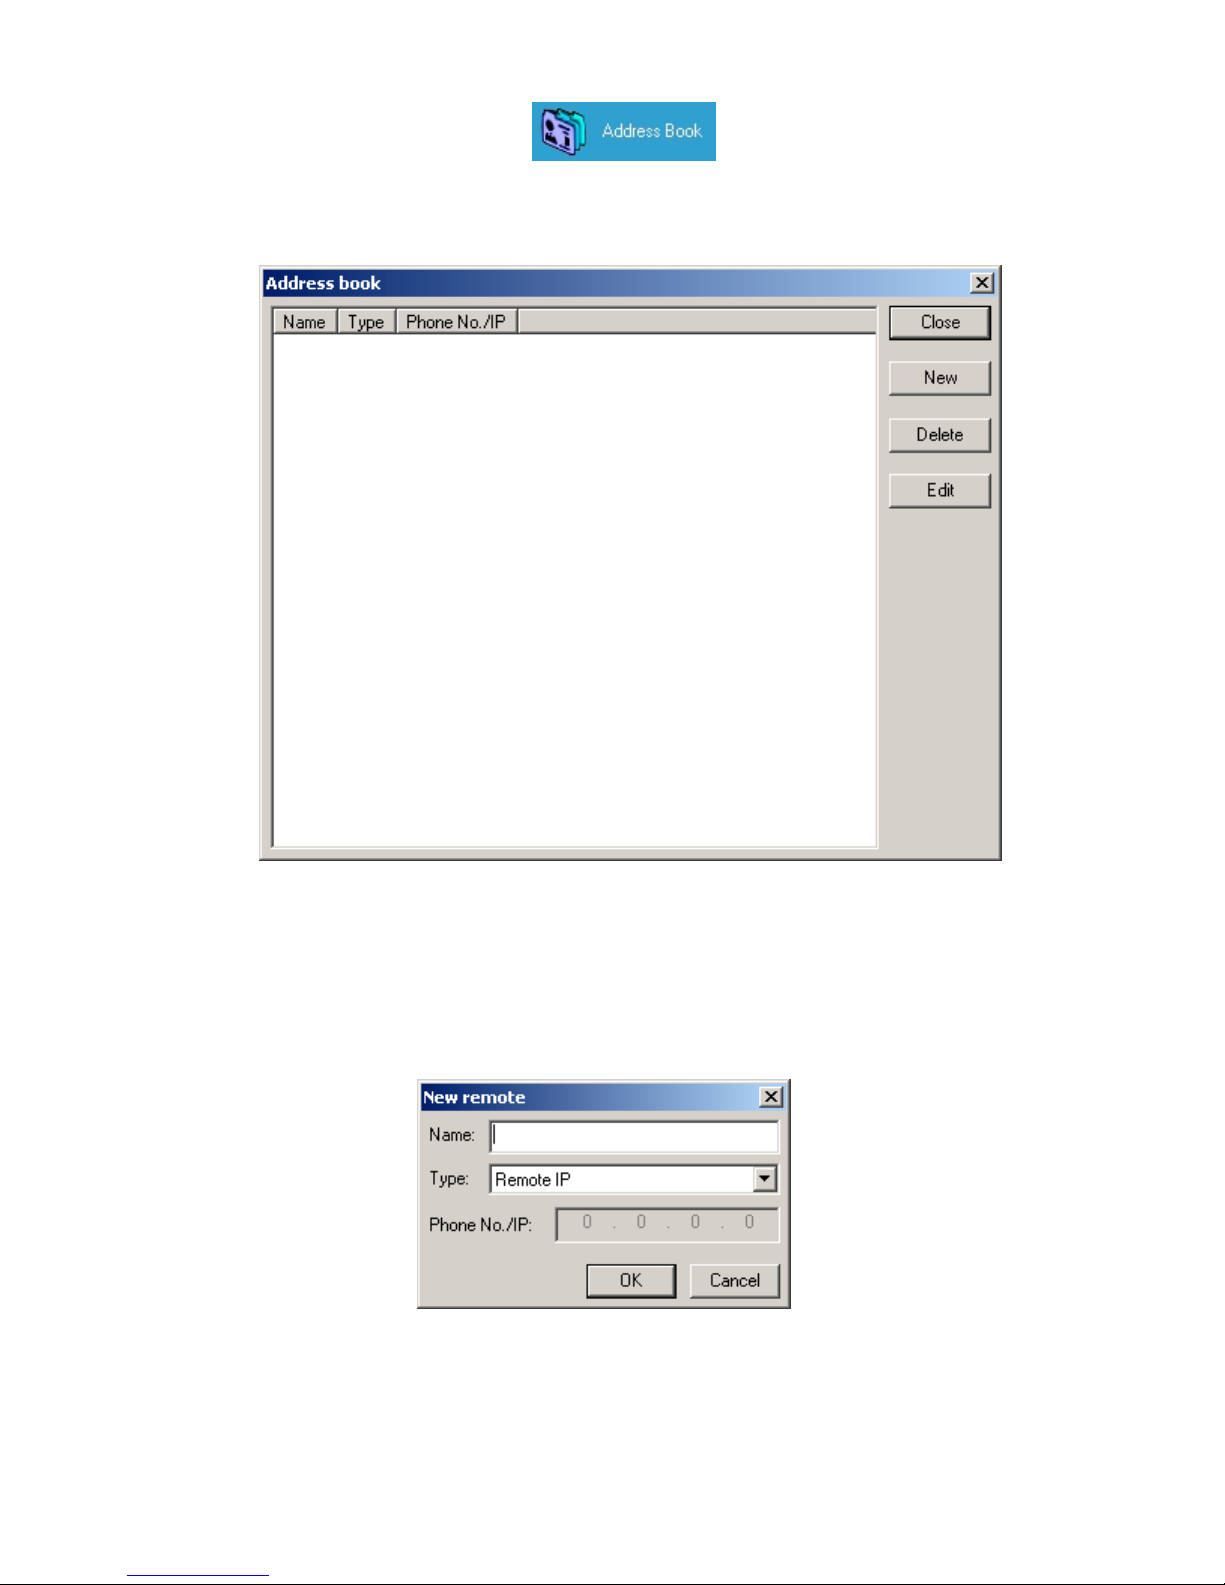
3.5 Address Book
To enter the
Address Book
, click the
button. The Address Book can store a remote
telephone number or IP address that is frequently used to facilitate the remote access and remote alarms.
a. Adding a New Entry
To the Address Book
To add a new entry to the address book, click
necessary information.
New
. The following dialogue box will appear. Enter the
27
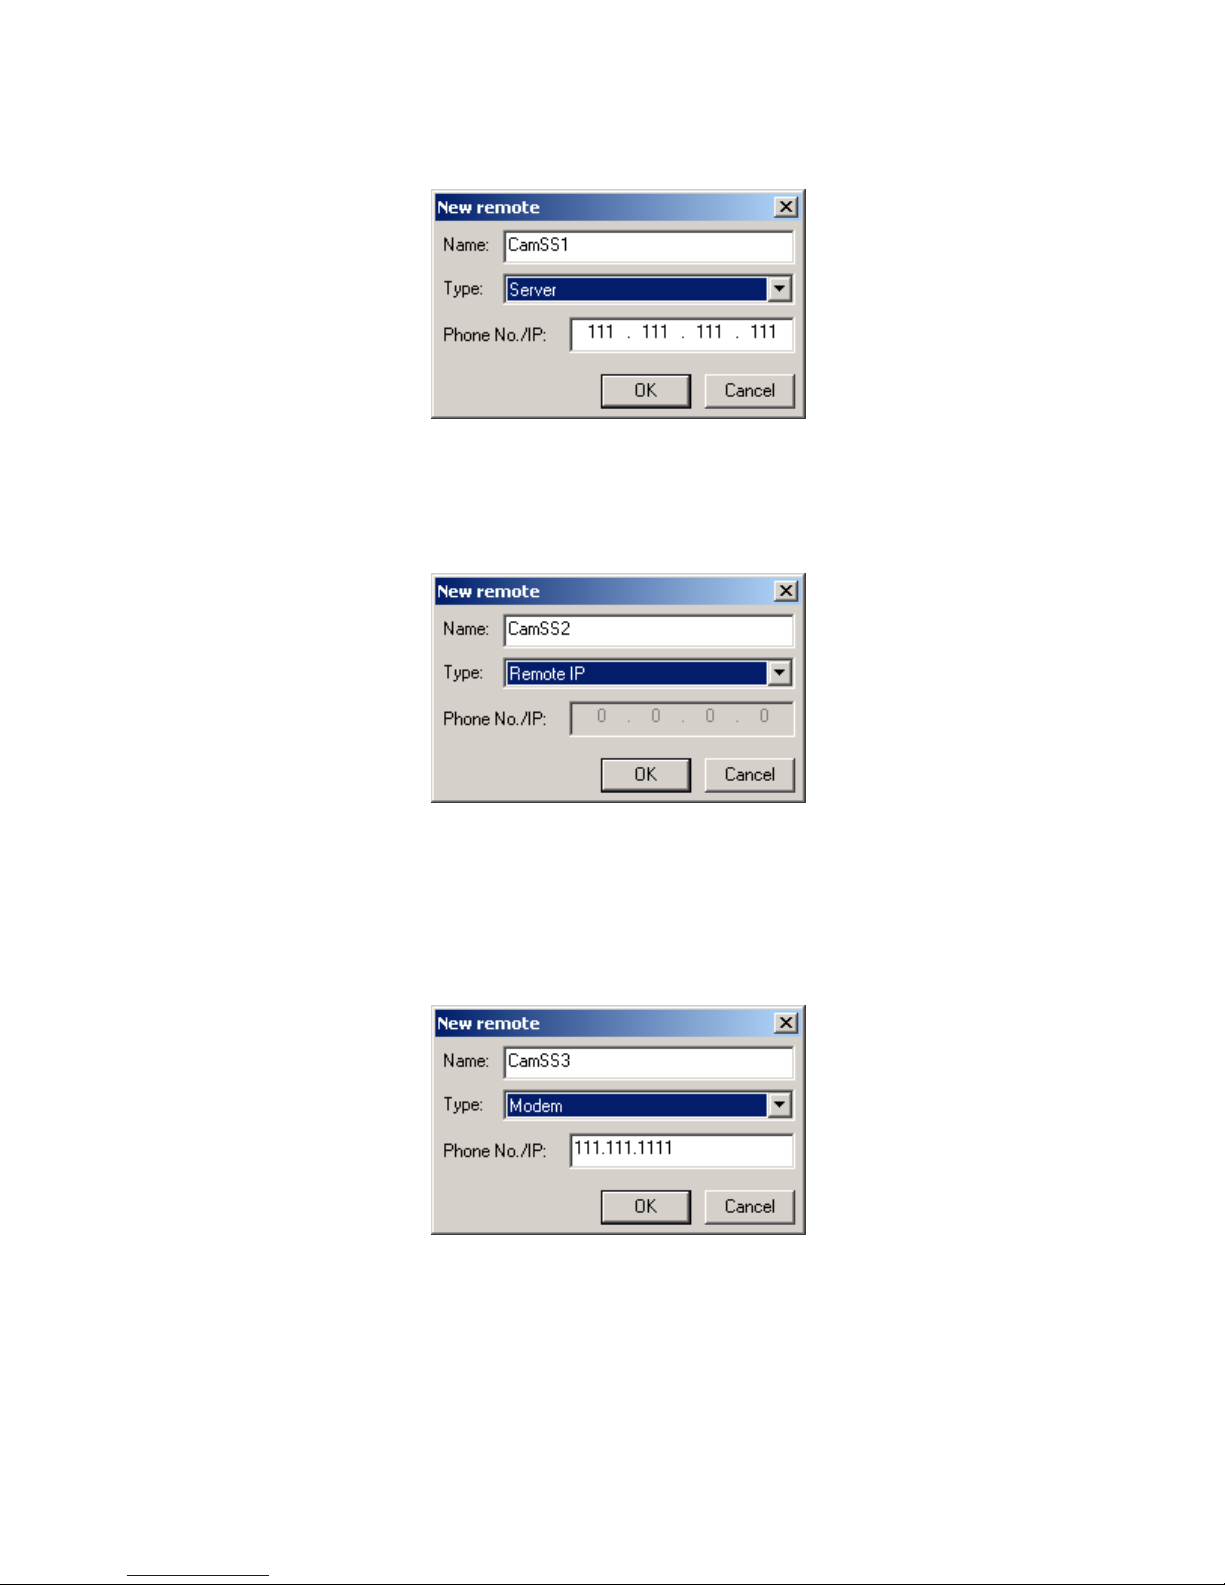
Adding A New Server:
choose
Server
from
This is primarily to connect to a remote server. First, give a name to the server. Next,
Type
field. Then type the IP address into the
button to finish the setup. (As seen below):
Phone No./IP
field. Finally, click the
OK
Adding a Remote IP
: The address book is used to transmit an alarm message to the remote
via LAN or Internet when an alarm is triggered. First, enter the name of the remote
Remote IP
Adding A Modem:
the name of the modem then select
phone number. Click
on the
Type
pull-down list. Click
OK
to finish the setup.
This is used for modem communication including remote access and remote alarm. Enter
OK
to finish the setup.
Modem
on the
Type
pull-down list. Input the remote
CamSS
CamSS
CamSS
system
. Then select
system’s
28

After the setup is finished, the following screen will appear:
b. Delete:
To delete an entry from the address book, click on the desired entry then click the
Delete
button. The entry is
deleted.
c. Edit:
To edit an entry in the address book, click on the desired entry then click the
Edit
button. An entry may also
be edited by double clicking on the desired item. Enter the Edit screen to perform the desired editing.
d. Close:
Click
Close
to close the address book function.
29
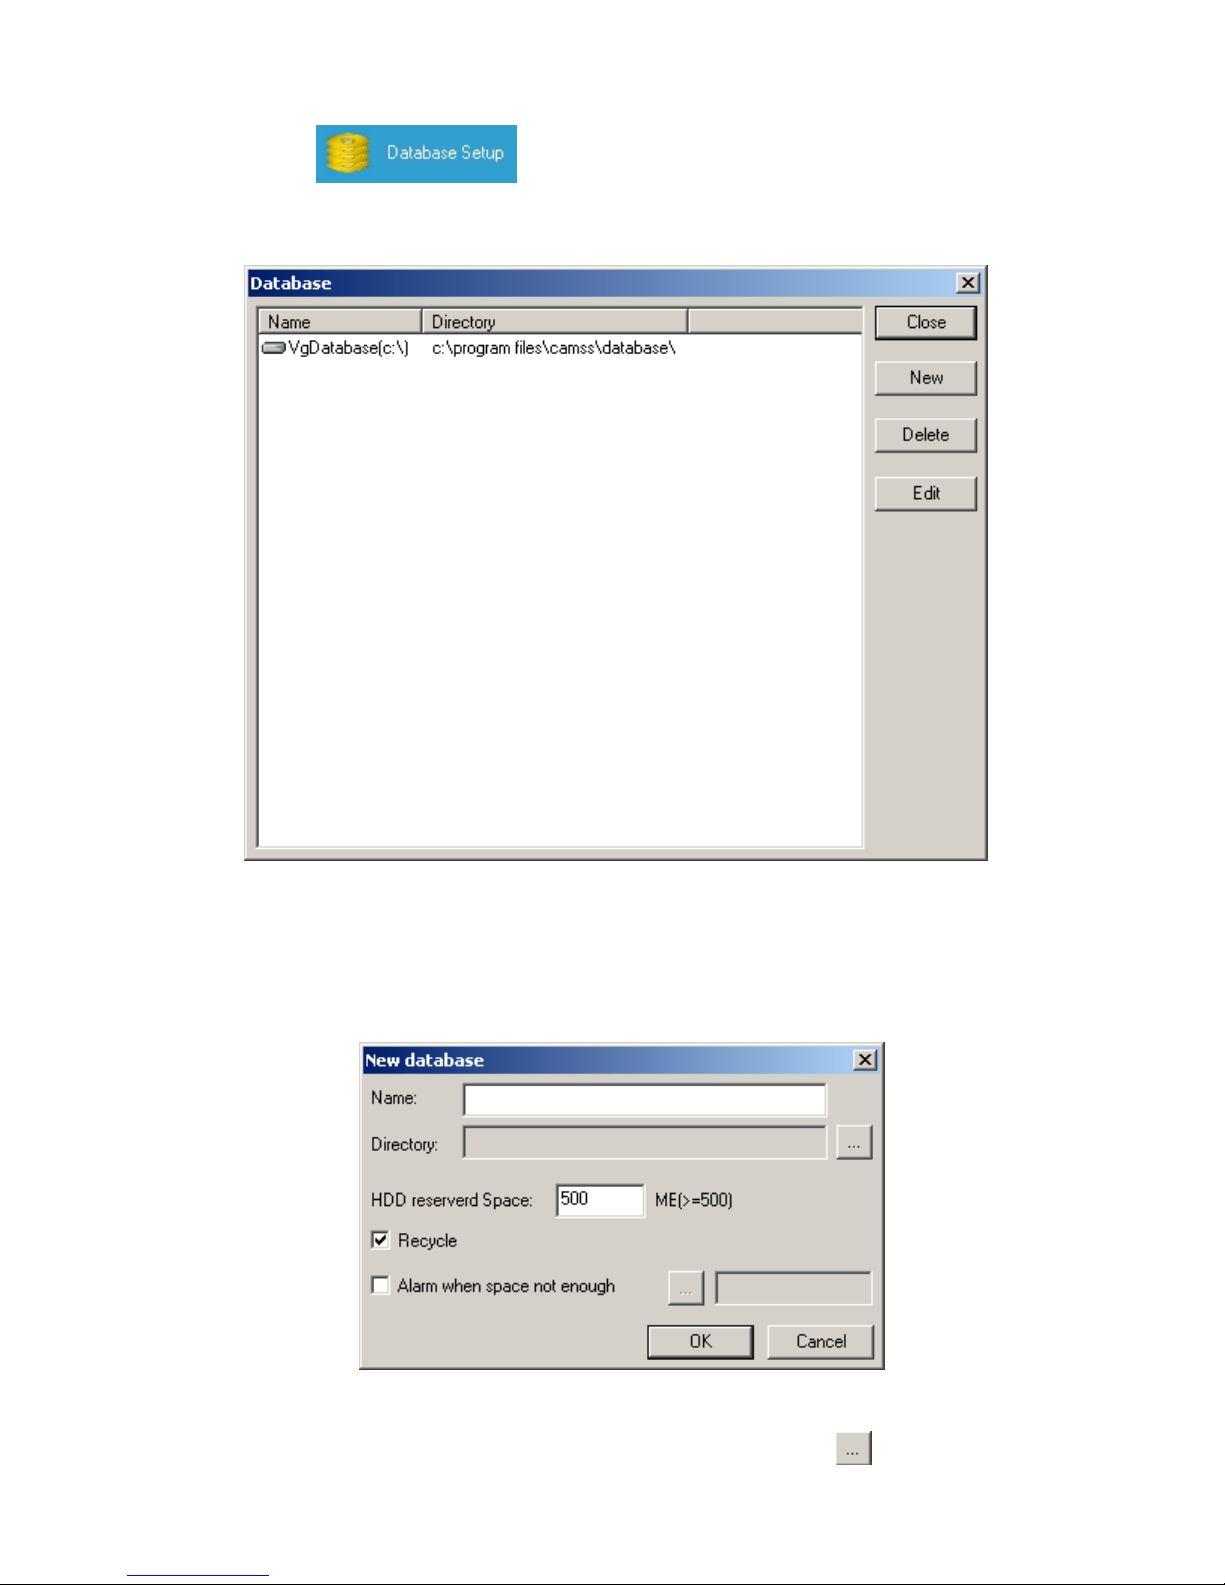
3.6 Database Setup
Clicking the
button will bring up the Database screen. This option is used to
specify the directory and hard disk in which video files are stored. The screen will appear as follows.
The default directory is
C:\Program
a. Adding A New Database
Select the
New
button to add a new hard disk drive. The following screen will appear:
-
First, give a name to the new hard disk drive and then
files\CamSS\Database
\ .
click
to set up the hard disk drive
30

and
directory.
-
Select
the desired drive and directory, and then click
Note:
Setup can be performed only once against each hard disk drive. Duplicate setup is not allowed.
OK
to finish the setup.
-
The default-reserved space on a single hard disk drive is 500MB. We recommend that you increase
it to 700MB or more if the capacity of the hard disk is 20GB or above.
- You may choose to recycle a hard disk; however, you need to cancel the
recorded image is to be kept.
-
Click
OK
to finish the setup
Recycle
option if a
31

b. Deleting a Database Entry
To delete a database entry from the list, click on the desired entry then click the
confirmation will appear. Click
OK
and the database entry will be deleted.
c. Editing a Database Entry
To edit a database entry in the list, select the desired entry and click the
Edit
button to edit the hard disk drive
and directory. Modification is same as that of adding a new database.
d. Close
Click
Close
to exit the database setup function.
Delete
button. A request for
32

3.7 Board Setup
As this version of the
channel; and Cam SS 2 channel Audio/Visual, and installations of up to 4
CamSS
program supports three types of
CamSS cards:
CamSS cards on a PC, there are up
to 4 setup areas for setting up each individual card. After the installation of the
programs are finished,
CamSS
, at its startup automatically detects the current types and quantity of
cards installed. This information can be seen in the following screen:
i.e.CamSS 1 channel;
CamSS 4
CamSS driver and application
CamSS
Name
The default value is the corresponding
to identify for purposes of managing the whole security network.
Recording Speed
This is to specify the recording speed, either in fps (frame per second) or
(Clicking this will toggle the switch between
down to the maximum speed of the CPU if the specified speed exceeds the PC maximum speed for image
processing. (The default value is 30 fps in NTSC system and 25fps in PAL system)
Frame Size.
This is used to specify the frame size for image displaying, processing and storing. You may chose either
NTSC or PAL depending on the video distribution system.
CamSS card number ranging from 1 to 4. You may choose a name easy
spf (second per frame).
fps
and
spf ).
CamSS
automatically adjusts the recording speed
33

Listed below are the frame sizes supporting NTSC system:
1. 640x480: 640 pixels by 480 pixels.
2. 320x240: 320 pixels by 240 pixels.
3. 240x180: 240 pixels by 180 pixels.
4. 160x120: 160 pixels by 120 pixels.
Listed below are the frame sizes supporting PAL system:
1. 640x480: 640 pixels by 480 pixels.
2. 352x288: 352 pixels by 288 pixels.
3. 256x192: 256 pixels by 192 pixels.
4. 176x144: 176 pixels by 144 pixels.
OK
Click the
OK
button to finish the board setup.
3.8 E-map
This version of
management.
CamSS
supports the
E-map
function and provides better security network system
3.8.1 E-map Setup
To set up the E-map, click the
button. The following dialogue box will appear:
34

New:
- First, click the
-
Second, enter a name for the map for easy map search. (
New
button to create a new map.
e.g. Floor 1, Court Yard, etc.). Next,
select the map file. The map file must be in .BMP format, and preferably with a resolution of
640x480. If the resolution is less than 640x480, the map will be displayed in the original size.
However, if the resolution is more than 640x480, the map will be reduced in an equal proportion to
the size of 640x480.
-
Finally, click
OK
after your selection is done. An E-map screen will come up:
35

To add a camera to the map, click the
button
on the left upper corner. The cursor will turn into “+
”.
Move the cursor to the desired position then click the left button of your mouse to finish the camera location
setup.
As illustrated above, the red arrow points to the newly added camera. Double click the camera icon. The
camera is now ready to be assigned a Host name, camera, and board number. This is how the E-map is
connected with the video images.
36

Note:
If an error occurs in camera properties, the camera icon on the e-map will turn
that the Host name or Board ID or Camera ID is missing.
If the host name is a remote host name, the remote
CamSS
system must enable the auditing of the remote
E-map access.
Delete:
To delete a camera entry from the list,
click on the desired entry then click the
camera entry will be deleted.
Edit:
To edit a camera entry in the list,
click on the desired entry then click the
to edit the location or ID of the camera on the e-map.
Close:
Click
Close
to exit the E-map Setup function.
3.8.2 E-map Operations
If you select
appear:
E-map from the
Utilities
options in the
System Operation Section,
to indicating
Delete
Edit
button. It is now possible
button. The
the following screen will
If a camera is shown as it indicates that the camera is recording. If it is shown as
37

it indicates that the camera is idle.
On the two ends of the upper part of the display, there are two buttons,
and
. These
are for scrolling the map display to either a previous or following map if there is more than one map.
Double-clicking a recording camera will return that camera to its corresponding view (i.e. the view framed in
red dashed lines).
To display the camera
in the
Camera Setup Section
The
location on the E-map move the cursor to the recording view then click
icon denotes that a designated camera is recording while an
denotes that it is idle. Other cameras are shown as
It is easy to get the view and the location of a camera.
. The corresponding map will be displayed.
(Recording) or
icon
(Idle)
38

3.8.3 E-map and Alarm
In addition to the preset alarm functions (refer to Chapter 6 for details), as a recording camera
activates the alarm function and an alarm is triggered, clicking the
following screen:
button will bring up the
As illustrated above, the
triggering an alarm on the e-map, and thus can be taken care of speedily.
icon denotes a camera triggering an alarm. It is easy to locate the camera
39

3.9 Misc. Setup
This allows for miscellaneous system functions to be programmed into the
such as Auto scan, Optional warnings, and changes in file length can be set up here. See the illustration below:
CamSS System operations. Items
40

Chapter 4: Recording
4.1 Recording Windows
The
CamSS
continuous images. Even with alterations between these two images
the functions of recording and triggering of related alarms. If there is no change in these two images,
can record on a fixed schedule that will enable the compression of the image files to be done at an even higher
compression ratio. This will reduce the needed hard disk space and extend recording time. The camera
recording windows may be activated at any time by clicking the
in either of the following two ways:
Activate Recording of All Cameras
Clicking on the red round button on the upper right corner of the screen (as illustrated above) will open all of
the windows and will begin the recording process of all of the cameras.
system applies Super Motion Image Compression Technology (
CamSS
Recording
SDMCT
will, to a certain extent, perform
button in the
) to compare two
CamSS
Main Screen
CamSS
Inactivate Recording of All Cameras
All of the windows may be closed and the recording of all cameras may be stopped by clicking the blue square
button on the upper right corner of the screen (as illustrated above).
Camera States.
The camera is not recording yet and is idle:
41

The camera has failed or the camera is not connected:
The camera is recording but the view is not displayed:
42

Below are two examples: one with one
cards. All cameras are activated.
One
CamSS
4 channel card (with 4 camera views):
CamSS
4 channel card installed, another with two
CamSS
4channel
Two CamSS
4 channel cards (with 8 camera views):
43

Start:
Click on the view to be activated. That window then becomes the active window and will be framed with red
dashed line.
44

Click the
button in the
Camera Setup Section
(as illustrated above) to activate the camera. Repeat
the foregoing steps to activate the rest of the cameras as required.
Note that the icon is shown in red for the windows that are not activated yet.
Stop:
Click on the view that is to be inactivated. The
Start
button in the
Camera Setup Section
becomes the
Stop
button and will be seen as illustrated above.
Note that clicking this button will cause the corresponding camera to become inactive. Repeat the foregoing
steps to inactivate the rest of the cameras as required.
Note: In spite of deactivating some of the cameras, cameras that are activated and have scheduled recording
programs will continue to work. Scheduled recordings will continue. (For scheduled recording, please refer to
the descriptions of “Program Setup” in this chapter).
45

4.2 Recording Setup
Camera Setup:
Click on the camera to be set up. Then click the
Camera Setup window.
Camera Setup
button
to enter the
Camera Name:
The system automatically sets the default names as Camera11, Camera12, Camera13, and Camera14 for a
CamSS
4 channel card or Camera11 and Camera12 for a
CamSS
2 channel Audio/Video card. The name may
be changed if so desired.
Check video lost:
Every camera has an independent check function of video lost. When the option is selected, any reason that the
camera loses signal may trigger the alarm function. However, the
Enable alarm
option must be selected. (As
illustrated below).
Image quality:
This function lets you adjust the image quality by clicking and holding the left mouse button and dragging the
mouse down to the left or the right to the desired quality. High image quality means low compression ratio (i.e.
a larger amount of data). By contrast, low image quality means high compression ratio (i.e. a smaller amount
of data).
46

Mode:
Camera mode setup works only when the camera is turned on.
1. When the camera is in both “recording” and “monitoring” mode it displays camera views.
2. When the camera is in “monitoring” mode but not in “recording” mode it displays camera views.
3. When the camera is in “recording” mode but not in “monitoring” mode it displays “WORKING” view.
4. When the camera is neither in “monitoring” mode nor in “recording” mode. The camera is disabled and it
displays “WORKING” view.
When the “Recording” mode is turned on,
green.
light in the
Status Section
When the recording mode is turned off, the recording indicator
is turned off.
the recording indicator light in the
Status Section
is
Motion Detection Setup
During recording, if a motion detection area is selected (by clicking on the original point, holding the left
button of the mouse, dragging it to the desired
point, and then releasing the button.) the system then begins
motion detection in the selected area. There is no limit to the number of motion detection areas that can be
selected.
1. Sensitivity
The sensitivity of the alarm triggering can be adjusted depending on different operating environments, e.g. the
quality of the camera, distance, light, background light, and object size.
Note:
High sensitivity may cause false alarms as well as increase the amount of data generated by recording.
In adjusting the sensitivity, it is recommended that the camera quality and the surrounding environmental
conditions be taken into account in order to avoid false alarms.
2. Number of changed pictures
The alarm will be triggered only if the number of variations occurring to continuous images exceeds this limit.
You may adjust this limit to avoid false alarms.
The mask area in the diagram below is the motion detection area. The green color frame means that no alarm is
triggered.
47

The detection area is shown in red to mean that an alarm is triggered. (
option on the
Camera Setup
screen must be enabled before alarm triggering can work for the motion detection
area). This is illustrated below:
Enable Alarms
of the
Alarm Setup
48

The detection area in the diagram below is shown in blue to mean that alarms are triggered but
of the
Alarm Setup
option in the
Camera Setup
screen is not enabled.
Enable Alarms
Sound
device select
This function is not available.
By selecting
Enable Audio
you activate the
Audio recording
.
49

Please refer to
Audio Recording
in the subsequent section.
Modem select
This option is not supported yet.
PTZ control select
This option lets you select the PTZ control device. Clicking the
Select
button will bring up the following PTZ
control setup window. (The camera name, type, and address in the I/O Device window on the System
Operation Section must be set up in advance). Click the desired PTZ control device entry.
Note:
The corresponding camera in the
Image Section
needs to be selected before entering into this function.
The camera addresses must also be consistent otherwise two or more PTZ control devices that exist at the same
time may cause false control actions.
Alarm setup
Clicking
Enable Alarm
then
Setup
under the
Alarm Setup
frame will bring up the following Alarm Setup
window. (Refer to Chapter 6 for the details on setting up alarms).
50

Scheduled Recording (Program setup)
The
CamSS
system automatically performs video recording, audio recording, and snapshots based on the
scheduled recording program. By clicking
button, the following
Schedule
window will appear as a prompt to set up the schedule:
Enable Program
of the
Program Setup
frame and the
Schedule
51

Programming
1. Enter the start date/time and end date/time into the
The Recording Schedule
From
and
To
fields respectively. They may be typed
directly into the fields or click the up/down arrows to the right of each one.
2. Select “Repeat Mode”. The repeating frequency may be chosen: “Once only”, “Once a day (Everyday)”,
“Once a week (Every week)” or “Once a month (Every month).”
-
Once Only (Only Once):
-
Once a day (Every Day):
Enter the start and end dates/time.
The date fields are disabled because the option is “daily execution”.
Enter the start and end time.
-
Once a week (Every Week):
Entering the start and end days of the week/time is required. The
“date” field automatically changes to “Day of the Week” when it is clicked.
-
Once a month (Every Month):
The start and end days of the day/time are required. The “date”
field shows the day only but no year and month.
Note: If the desired schedule time crosses 12:00 midnight, it is recommended that the schedule be split into
two, e.g. Split PM6
:00:00~AM9:00:00 into PM6:00:00~PM11: 59:59 and AM12:00:00~AM9:00:00.
3. Recording Mode
-
Continue:
-
Audio Recording:
:
i.e. normal recording mode.
others, i.e. other schedules’ recording and audio recording are all cancelled. Please refer to “Audio
Recording” in the subsequent part of this chapter.
Note:
In the case of a
CamSS
card/camera of the smallest numbers can activate audio recording.
In case of a schedule conflict, the first programmed schedule prevails over
4 channel card with multiple cameras that activate audio recording, only the
52

-
Snapshot:
This makes the system take snapshots at a predetermined time interval.
CamSS
the image files in a default folder named as “dyyyymmdd” (“d20010726” in the diagram below),
while the default file name is formatted as “
pp10
hhmmss”. (In 10
the first digit stands for the
CamSS card number while the second digit is the camera number. For example, “10” stands for
camera No.1 of the card number 1 while “11” stands for camera. No.2 of the card No.2, and so on).
saves
Snapshot files may be opened through the
System Operation Section.
displays.
Clicking the button will open the “Open file” window
option of the
(The last two digits of the file names in the window stand for the second that the snapshot was taken.
As the preset time interval is 10 seconds, the difference of these seconds is also 10). Alternatively, a
new file path and file name may be entered as desired. Please refer to Chapter 3 for the detail
descriptions.
4. When all of the schedules are set, click the
Add
button to add it to the schedule list.
Recording Schedule List:
-
From:
-
To:
-
Repeat Mode:
Displays the start date/time.
Displays the end date/time.
Displays the repeating mode (i.e. “Only once”, “Every day”, “Every Week” and
“Every month”).
-
Record mode:
V
A
S
= Normal Recording
= Synchronized Audio Recording
= Snapshot
Displays the “recording mode”.
n = Snapshot time interval, i.e. takes a snapshot every n seconds
Note:
Choosing at least one option between “normal recording” and “snapshot” is required. Normal recording
mode must be selected before audio recording can be. You cannot enable audio recording in snapshot mode.
Deleting a recording schedule
To delete a schedule, click on the desired schedule entry and then click the
Delete
button.
Deleting all of the recording schedules.
Click the
Clear all
button to delete all of the schedules.
53

Exiting the window
Click the
Close
button or
Caption:
to exit the program setup.
The name of the camera view may be displayed by clicking
corner below). The caption contains the board name and camera name. The board name may be set up in the
Board Setup
in the “Camera Setup” window (described in this chapter).
of the
System Operation Section (
described in Chapter 3), and the camera name may be set up
the
button (as illustrated in the upper left
The caption display may be cancelled by clicking the
Caption color:
The caption color of the selected camera may be changed by clicking the
window will appear:
Caption
button again.
button. The following
54

Select the desired
color then click the
OK
button. That finalizes the setting.
Canceling Motion Detection Area:
This button cancels all of the motion detection areas of a designated camera (otherwise known as unmasking).
Snapshot:
This button allows the capture of still images during recording. (This function works only when the cameras
are turned on.) The images are stored in BMP format. Editing or processing these
images may be done by using common image processing software, printing them out through a printer, and/or
emailing them to people. Clicking the
Snapshot bu
tton will bring up the following screen:
55

Enter the file name and click the
Audio:
Save
button to save the picture file.
This button activates and deactivates the audio recording function. The button shown as
indicates that
audio recording is in progress while the recording indicator light in the System
Status Section is green.
If the button is clicked again, it will turn to
indicating that the audio function has been deactivated.
The recording indicator light of System Status Section will also turn off, showing that the audio recording has
stopped, and vice versa. A soundcard installed in the PC is a prerequisite to using this function. (Plug
CamSS
2 channel Audio/Video directly into the audio input). It is recommended that a full-duplex soundcard be used,
as the playing of alarm sounds may be required while recording and audio
recording are in progress. Be sure
that both the recording and playing functions on the soundcard work.
Note:
For a system including a
CamSS
4 channel card or a
Cam SS
1 channel card, the audio recording will
work for only one of those cameras at any given time. To change cameras, the audio recording in progress
must be closed, and the new camera selected. This limitation does not apply to
CamSS
2 channel
Audio/Video card.
Video Configuration:
Clicking this button will bring up a screen that allows changes to the video configuration of a camera. Simply
drag the respective buttons to adjust the image’s brightness, contrast, saturation and hue. Click the
Colors
button to return to the system default settings.
Default
56

Location:
Select a camera in the
will show the camera location on the E-map.
4.3 Camera Views
Full screen display
This displays the
symbol) as shown in the illustration below:
To return to the original display, press the
Enlarging part of the camera display
Part of the camera view may be enlarged (zoom in) by double clicking the left button of the mouse on it. It can
be enlarged further by double clicking it again and again until the camera view takes the whole Image Section.
At this point, if it is double clicked again, it will return to the initial view before the first enlargement. Below is
an example of the partial enlargement of a view.
Before enlargement:
Image Section.
CamSS
screens in the full screen display mode. Click the central button (the one with “+”
Click
ESC
the
Please r
key on the keyboard.
button in the
efer to section 3.8 for details.
Camera Setup section
. The system
57

After the first enlargement (clicking once with the left mouse button):
58

After the second enlargement (double clicking it yet again): you may find that the camera view takes the whole
display area. If that is the case, double clicking the mouse button again will return it to the initial i.e. standard
view.
59

Quick camera setup
On the window of the camera, click the right mouse button. A control menu will appear.
For Record and Display please refer to section 4.2.
60

Four display models can be selected alternately. The window (normal, real, zoom and biggest) will follow the
change.
Camera setup has the same function as
Please
refer to section 4.2.
61

Chapter 5: Playback
The function of playback is primarily to search for files. The
according to the parameters entered, e.g. host ID, time,
is also applicable to other on-line
and the video needed for searching.
CamSS
systems. The
5.1 Explore Window
CamSS card ID, camera ID and so forth. File searching
CamSS
CamSS
system can proceed with the file search
system also provides full playback functions
Click the
video file as seen on the screen below:
button, and the following
Explore
window will appear. You may search for the desired
Search Button: Input host ID and the related search parameters, then click the
begin searching.
Search
button to
62

Search By Host:
1. Enter the host ID, which is case sensitive.
2. Or, clicking on
will display the hosts with their ID. Click on the
desired host to select.
Search Options
:
There are a total of 8 input parameters including time, date, host, board, camera, database, resolution, and type
(local or remote). Those parameters are required for more accurate file searching.
Search By Time:
Searches for video files by the start/end date and time (including year, month, day,
AM/PM, hour, minute and seconds).
Search
Note: The search parameters including host ID,
By Date:
Searches for video files by date (including year, month
CamSS card ID, camera ID, and database are all case
and day).
sensitive.
Search by size
Search by Type:
: Searches for video files by various NTSC or PAL resolutions.
Searches for a video file by its type, either a local video file or a video file that is
transmitted from a remote site during remote monitoring.
Note:
No matter what search option you select, you must check either “Search By Time” or
“Search By Date” and click the
After selecting the search option and entering the parameters, click the
button to begin the actual searching process.
button. The desired files
will be displayed.
Delete (Deleting A Video File):
Simply click on the file to be deleted and click the
button. The file will be deleted.
Close:
Click this button to exit the search window.
Export (Exporting a video file):
Select the file to be exported. Click the button. The file will be exported to the specified file
path.
Direct Selection:
Click on the subdirectory named with the date. The screen will display all the files of the day.
63

5.2 Video File Playback
By double clicking on the desired file in the video file area, the video file can be played back as illustrated
below:
The playback window consists of five parts:
-
Message area
-
Time area
-
Time scroll bar
-
Control Panel
-
The Video View
64

Message Area:
This area contains relevant information such
-
Host ID: “(DVR929283)” in this case
-
Operating State: the operating state of the window, i.e. “Playing” or “Pause”.
-
Playback Speed: Currently play back occurs at six times the normal speed.
as host ID, operating state and playback speed.
Playback Time Area:
From:
This displays the start date/time of the file. (Year, Month, day, hour, minute, second).
To:
This displays the end date/time of the file. (Year, Month, day, hour, minute, second).
Current:
This displays the recording date/time of the current display. (Year, Month, day, hour, minute, second).
Video Standard:
NTSC or PAL
.
Video Size:
This displays the current video resolution, e.g. 640 x 480 in this example.
Current Scale:
This displays the current image enlargement ratio (50%, 75%, 100%, etc.).
Playback Time Scroll Bar:
This displays the relative time position of the current display in the video file.
You may speed up the playback by dragging the time pointer or by these function buttons in the control panel
below:
Playback Control Panel:
There are 14 total function buttons on the panel in two functional categories, i.e. Playback and Editing.
These functional buttons are described as follows:
Stop:
This is to stop the current playback window.
65

Playback:
This button’s function is the same as the
Play
button of a traditional video player. Clicking this button during
fast or slow playback will return the playback speed to normal.
Pause:
This button’s function is the same as the
Pause
button of a traditional video player. Clicking this button
during playback will cause the playback to pause. To continue the playback, re-click this button or the
playback button.
Fast Playback:
The video playback speed will increase each time this button is clicked. Its order of speed increase is as
follows:
One click: ×2= two times the normal speed.
Two clicks: ×4= four times the normal speed.
Three clicks: ×6= six times the normal speed.
Four clicks: ×8= eight times the normal speed.
Five clicks and up: ×10= ten times the normal speed.
The current playback speed is displayed in the Message Area.
Slow Playback:
The video playback speed will decrease each time this button is clicked. Its decreasing speed order is as
follows:
One click: 1/2= one-second time of the normal speed.
Two clicks: 1/4= one-fourth time of the normal speed.
Three clicks: 1/6= one-six time of the normal speed.
Four clicks: 1/8= one-eight time of the normal speed.
Five clicks and up: 1/10= one-ten time of the normal speed.
The current playback speed is displayed in the Message Area.
Play Preview (Backward Search):
This button’s function is the same as the
Rewind
button of a traditional video player. Clicking this button will
move the video backward for a number of frames (160 frames). It will have the same effect as moving the
Time Pointer
Play Next (
This button’s function is the same as the
move the video forward for a number of frames (160 frames). It will have the same effect as moving the
Pointer
on the Time Scroll Bar to the left.
Forward Search):
Forward
on the Time Scroll Bar to the right.
button of a traditional video player. Clicking this button will
Time
Snapshot:
Capturing still images during video playback can be accomplished by clicking this button. The captured image
is stored in BMP format. The snapshot can be edited or processed by using a common image processing
software. It can also be printed through a printer, or emailed.
Clicking the
button will bring up the following screen:
66

Enter the file name and click the
Save
button to save the captured image. During the video playback process, a
certain part of the video may be cut and saved as a new file for the purpose of convenient storage, carrying, or
transmittal. The “video cut” button is described as follows:
Start Clip (
Start Video Cut):
Clicking this button during video playback will begin cutting the video. (As illustrated):
67

End Clip (End Video Cut):
Clicking this button during video playback will end the video cutting. (As illustrated):
68

Save Clip (Save the Video Cut):
Clicking this button will bring up the following dialogue window (allowing the destination directory to be
selected):
After selecting the directory, enter the file name and click the
recommended that the file be saved in the directory of the same date.
Play Clip (Playback clip):
After the video is cut it can be played back by clicking this button.
Save
button to save it as a new file. It is
69

Caption:
Clicking this button will add a caption to the video as illustrated below:
Clicking the button again will remove the caption.
Caption Color:
Clicking this button will bring up a color palette so that the caption color can be changed as desired.
There are three function buttons on the Time Scroll bar. They are described as follows:
Z
oom In:
An image may be enlarged from its current size by 25% by clicking this button once. Clicking the button
again will enlarge it another 25%. This can continue until the image fills the window.
70

Zoom Out:
This button may be clicked to reduce an image from its current size by 25%. Clicking it again will further
reduce it by another 25%. This process can continue until it is down to its smallest ratio (50%). (Illustrated
below):
71

Play Next Video File:
Clicking this button will play the next video clip for the selected camera.
5.3 Load Video
The foregoing ways for video playback will only work if the files are located in a host database (i.e. the on-line
video files). For a file not in a database (off-line video files), it can be imported
and played back by clicking the
Open
button.
After clicking the
button. Select the directory and file then click on the
button, the following dialogue box will appear:
72

Select the directory where the imported and desired video file is located. Then, click the
back.
5.4 Load picture
To display the picture file recorded at the alarm time (or otherwise) click
Then select the picture file from the list and click the
The following screen will appear with the designated picture inside:
Open
button.
Open
button to play it
the button.
If the picture needs to be printed, click on
:
The
following dialogue box will appear:
73

There are two options available while printing the picture:
1. Information in the picture or
2.
i
nformation outside of the picture
74

Chapter 6: Alarms
The
CamSS system’s
1. Triggered by image alteration in the motion detection area.
2. Triggered by “Video lost”.
3.
Triggered by (sensor) signal from the input port (please refer to Chapter
6.1 Alarm Setup
Each camera has its own independent alarm setting. The related activation options and setting buttons can be
found in the Camera Setup dialogue window on the
alarm functions are categorized by way of triggering, into three types as follows:
7, IO Device.)
Camera Setup Section
.
Check enable alarm, then click the
Setup
button to enter into the alarm setup window:
75

Alarm Event Period
This is to set the length of time that an alarm will last. No new alarm will be triggered during this duration. The
default value is 180 seconds. The
minimum is 10 seconds.
Activate condition
The alarm functions may be activated though a predefined schedules table. After
is selected and the
Schedule
button to its right is clicked, the following Schedule window will be displayed:
Activate by scheduled table
76

There are four repeat modes with the alarm schedule:
month
1.
.
Adding a new alarm schedule
Only Once, Every day, Every Week,
and
Every
First, select the desired repeat mode. Then, enter the start/end day (week) and time into the boxes to the right
of the
From
and
To
fields. It can be entered directly, or click the arrows to the right of the fields, then click
the Add
button to add a schedule to the list.
Note: If the time to be set crosses 12:00 midnight, it is recommended that the schedule be split into two, e.g.
Split PM6
2.
Click the desired schedule then click the
3.
Click
4.
Click the
:00:00~AM9:00:00 into “PM6:00:00~PM11: 59:59” and “AM12:00:00~AM9:00:00”.
Deleting a schedule
Delete
button to delete a schedule.
Deleting all of the schedules
Clear all
to delete all of the schedules.
Closing the schedule window
Close
button or
to exit the window.
Enable video recording after Mask areas are touched
An object intruding into the motion detection area where its alarm function is active will cause the recording to
begin. The detection area setup can be found on “recording windows” or “monitoring window”. The relations
of the alarm functions and recording functions are listed in the table below:
77

Record and display options can be found in the
Camera Setup
dialogue box in the
Camera Setup Section
Alarm Actions
There are two types of alarm actions, i.e. local and remote alarm actions.
Listed below are four items:
-
Playing warning sound … … ……Local alarm
-
Snapshot… … … … … … …
- Activating the output port…
-
Remote alarm… … … … … … …Remote alarm.
… .Local alarm
……..Local alarm.
1. Playing Warning Sound
When this option is activated and an alarm occurs, the
CamSS
system plays the designated sound file. A
sound file must be specified (cannot be a blank field) to play the alarm sound when an
alarm occurs. Click the
Select
button. The
Sound bank
screen appears as follows:
.
78

Click on the desired sound file
sound” field of options. Click the
Sound Bank Setup
in Chapter 3 for the alarm sound bank setup.
, then click the
Preview
button to check the selected sound file. Please refer to the
Select
button. The sound name will appear in the “playing alarm
2. Take picture (Snapshot)
When this option is activated and an alarm is triggered, the
(in BMP format), which will be stored in the
Picture
picture/s.
from the
Utilities
Menu on the
Number of Snapshots
is used to set the number of snapshots.
CamSS\Database\Picture
System Operation Section
CamSS
Note: Activating this option may over-consume hard disk space.
3. Output Alarm (activating output port)
When an alarm is triggered, it can activate the output port of a local
external devices, e.g. alarm bell, and control them. (Please
refer to Chapter 7
Alarm
system immediately captures the images
directory of the capture date.
Load
may be used to display or print the
CamSS
system to send signals to other
I/O devices
for I/O devices).
79

4. Remote Alarms
This option must be activated so that
occurs. The remote alarm actions need to be set up. Each time an alarm occurs, the
CamSS
system can perform the remote alarm functions when an alarm
CamSS system will
execute these actions in sequence (by order of how they appear on the list). Clicking the
bring up the Remote Alarm Setup screen:
Setup
button will
80

Adding a new alarm action
Click the New button to bring up the
New Remote Alarm
window.
1. Remote Type
Clicking the arrow under Remote Type will bring up three remote types on the display. Select one as desired.
81

-
Telephone: Dials out to a number of normal or mobile phones. Action options available: phone
speech.
-
Pager: Dials out to pagers. Action options available: paging messages.
-
Computer: Notifies remote
CamSS systems. If a modem is used to dial out, it will only be able to
dial once and all the phone and pager schedules must be cancelled. Action options available: Live
video, remote alarm sound.
Click
to open the Address Book as seen below:
Only the corresponding type of remote device(s) will be displayed. Select the desired remote device.
2. Select the action options available
-
Telephone sound: Click
Delay time
recipient enough time for the recipient to pick the phone.
-
Paging Messages: Sends a paging message to a remote pager.
-
Live video: Sends the live video to the designated remote
alarm duration.
:
the
button to open the alarm sound bank. Select the desired sound.
seconds: set the delay lead-time to alarm playing, giving the
CamSS System continuing through the
82

-
Remote Sound: The name of the remote alarm sound file commands a remote
play the alarm sound. The name of the sound file must be entered into the Alarm Sound Bank
created by the remote
Note:
This sound file is the one in the remote
from the
CamSS System where the alarm occurs.
CamSS System for this to happen.
CamSS System rather than the one created by and transmitted
3. Set up the remote alarm action:
Click the OK button to set up the remote alarm action.
CamSS System to
The finished remote alarm settings can be seen in the
Remote Alarm Setup
box.
Note: The duration of the local alarm should match the time required by the remote alarm actions. If they do
not, the local alarm may turn off before communication between the local alarm and the remote site is
established. The recommended value should be a minimum of 60 seconds.
Remote Alarm Actions Setup
There are three items:
1. Remote Type: Displays the type of the remote device.
2. Name: Displays the name of the remote end.
3. Action: Sets the actions.
-
TS =
Telephone Speech
-
P =
Paging Message
-
V =
Live video
-
RS =
The name of the remote alarm sound file
Editing the remote alarm setup
Click the desired alarm setup entry then click the
Edit
button. The alarm settings can now be changed.
Exiting the remote alarm setup window
Click the
When an alarm is triggered on a local or remote
will change to red. (As illustrated below). The
System Operation Section
Close
button or
to exit this setup window.
CamSS
Host
system, the
Host
in the
icon will change as well. Clicking the
then the host icon will bring the icon back to normal.
System Operation Section
Host
of the
6.2 Alarm Log
The
Alarm Log
Click the
button may be found in the
Utilities
pull-down menu on the System Operation Section.
button to enter into the alarm log screen:
83

When the local
alarms will be logged into the alarm log by order of occurrence.
CamSS
System’s alarm is triggered or an alarm is received from a remote System, these
The log sheet (table) will display the alarm
time (occurrence time), the name of the host that triggered the alarm, board name and camera name, alarm type
(i.e. local or remote), and the reason that the alarm was triggered (i.e. by intrusion into the motion detection
area, by video lost, or by the signal received from the input port).
Click the
Open
button to play the alarm video of the selected alarm log entry. To play the recorded alarm
video, double click on the desired alarm log entry. Nothing will happen if no video file exists. Click
Clear all
to delete one or all of the alarm log entries.
Delete
or
84

Chapter 7: I/O Device
The
CamSS
categories as follows:
1. Computer ISA Interface I/O card. This is used to detect the On/Off
ON/OFF state of the output point. It also can be used to control the traditional PTZ.
2. RS232-to-RS485 interface I/O control device. It functions the same as the above.
3. RS232-to-RS485 interface (high speed) dome camera control. Its operation is divided into two parts,
namely I/O Control and Camera PTZ control.
7.1 I/O Device Setup
The
I/O Device Setup
System Operation Section
system can control an external I/O device. The I/O devices can generally be divided into three
state of the input point, or control the
button
.
may be found on the
System
pull-down menu in the
Click the button and enter into the
I/O Device Setup
screen:
Selecting the desired I/O device:
First, decide which I/O device type is needed. I/O devices are categorized by connection ports into two types,
i.e. ISA interface and RS232 (COM Port)-to-RS485 interfaces.
Devices supporting ISA Interface
CH-8I8O:
(8 voltage inputs and 8 relay outputs)
To set the address of the I/O devices, follow the operations guide regarding adjusting the DIP switches
on the I/O cards. The system default value is I/O port 0x300 (in hexadecimal address). The default
address is “OFF
OFF ON
ON ON ON ON
ON”.
85

Note:
You may install all types of ISA interface I/O cards at the same time. However, they must have
different addresses.
RS232/RS485 interface:
(Allowing connections of 32 external I/O modules within a distance of 1.2
kilometers).
PT811 I/O device:
(8 ON/OFF inputs, and 8 digital output modules)
Address range: 0x01-0xFF. PT811’s address needs to be set before the delivery of goods is made.
Otherwise it will be necessary to seek required hardware and software support from the manufacturer.
Each PT-811’s address must be different from that of any other PT-811 on
the same COM port to avoid
any control errors.
Dome Camera
This system can simultaneously control up to 16 dome cameras. Since a control command is sent out by RS485 interface signals to all cameras, a camera will adjust its address in order to identify whether or not it can
receive the command. It is important that the camera’s address and setup location are remembered so that a
correct setting is made and any control error avoided. There are many brands of cameras and each brand has
different internal control commands, thus this system allows for more flexibility in users’ choices.
1. Lilin PIH717X dome camera
The valid address range is 0x1-0x40 (in hexadecimal address). For the address setting, please refer to the
PIX 717 operating guide.
2.
DynaColor CA720 dome camera
The valid address range is 0x1-0xDF (in hexadecimal address). For the address setting, please refer to the
CA720 operating guide.
3. Mikami PTC103A dome camera
The valid address range is 0x1-0x40(in hexadecimal address). For the address setting, please refer to the
PTC103A operating guide.
4. Sensormatic dome camera (RS422 Interface)
The valid address range is 0x1-0x63(in hexadecimal address). For the address setting, please refer to the
Sensormatic operating guide.
The control code of each manufacturer is different to and incompatible with those of others’. Do not mix or
use different vendors’ devices on the same COM port. The address of each device on the same COM port
must be unique (different from each other). To avoid any control error, the address will need to be entered in a
hexadecimal format.
Adding an I/O device
Select and name the device, then click
Add
to add it to the list. If there is an address conflict or a mixed use of
differing brands of devices on the same COM port, the device will not be able to be added to the list. Below is
an example:
86

Deleting an I/O Device
Click the device to be removed, then click the
Setting up I/O Device
Click the desired the device then the
Setup
button to enter into the I/O Device Setup screen:
Delete
button. It will be removed from the list.
87

To be used as PTZ control
Enabling this function will transfer the output ports to PTZ control ports that will be used to control the
traditional PTZ and cannot be used as common output ports. For example, if it is a PT-811, all of the 8 output
points will be used as PTZ control ports, and can be operated with PT-908 relay output or PTZ control panel to
control traditional PTZ. Wiring of the PT-811 output ports is defined by the On/Off switches in the sequence
of up, down, left, right, zoom-in, zoom-out, Focus Near, and Focus Far.
Output Port Signal Type Setup
Individual names and signal formats can be assigned to output ports when they are used as common output
ports. Click on an output port in the
Select
area then set its name and the output signal type. There are four
signal types: OFF-to-On, On-to-off, positive pulse, and negative pulse. The default value is On-to-off. The
frequency and number of pulses may also be set. The default frequency is 1 second while the upper limit is
999 seconds. After the settings are complete, click
Save
to save the settings.
Input Port Mode Setup
Input ports can be given specific names and modes. Click on an input point in the
Select
area, then set up the
name and actions to respond to an input signal. The mode setup can function to trigger an action and turn the
alarm on or off.
88

Input Port Alarm Setup
1. Play Alarm sound
When this option is enabled and the input port triggers an alarm, the
CamSS
system plays the designated
sound file. A sound file must be specified (no blank field) to play the alarm sound when an alarm occurs.
Clicking the
button will bring up the
Sound bank
screen as seen below:
89

Click on the desired sound file. Then click the
alarm sound” field of options. Click the
bank setup, please refer to the
Sound Bank
Select
button. The sound name will appear in the “playing
Preview
button to check the selected sound file. For the alarm sound
setup in Chapter 3.
2. Start recording
Select the camera and activate the recording window. The remote alarm that is set up and activated for the
camera will begin recording and execute the remote alarm. The duration of the recording will be the time
defined in the alarm duration of
Alarm Setup
.
3. Enable output port
This drives the output devices to put out signals. Click the
Setup
button to select the desired output device’s
group and output points.
90

Turn On/Off Alarm
This lets the alarm functions be turned on /off as set in the
CamSS
System. At the triggering of each alarm, an
“Off (inactive)” alarm will turn “On (active)” and vice versa.
Trigger the camera to turn to a preset position
In addition to triggering an alarm, upon being triggered by an input signal, the
function works in conjunction with the
Preset
position function of a dome camera to immediately turn the
camera to a preset point.
CamSS
input port triggering
Click on the box to select the preset point function, then click the
Setup
window. Make sure that the respective settings of PTZ device were made during the camera setup.
(Refer to the Section 4.2). Otherwise, it can’t be clicked to hilight the camera to trigger or set the desired preset point and stay-time for the camera if the camera needs to
return to its preset position. Don’t click
Delay time
Setup
button to enter the
Trigger to preset
, if the camera is not to turn away from its preset point.
91

7.2 PTZ Control Panel
Click
PTZ
pull-down menu in the
appear:
System Operation Section
and the following PTZ control panel screen will
To control the respective cameras correctly, please refer to the
respective PTZ device from the designated camera setup.
Direction Control
Camera Setup (
Chapter 4) and click the
92

PTZ control panel provides 8-direction control. Move the cursor to the button of the desired direction then
click and hold the left mouse button to perform the desired turn. When the button is released, the turn will
stop. Some dome cameras may support only 4 directions, i.e. up/down, right/left. Check with the vendor in
advance to make sure that the desired functions are operable.
Iris, Focus, Zoom Control
Move the cursor to the desired control button and hold the left mouse button to perform the desired operation.
When the button is released, the action will stop. The circles to the right of Iris and Focus are used to activate
the “auto-iris” and “auto-focus” control. Some dome cameras may not support these functions. Users need to
check with vendors in advance.
Preset point function and its setup.
Only dome cameras support the
Preset
function. Click the
Preset point button on the PTZ control panel. The
camera will immediately move to the preset point. Depending on the type of dome camera, there are two
different numbers of preset points, i.e. 8 and 16. To set the preset points, move the camera to the desired
position then click the
Set preset
button on the PTZ control panel. Enter the
Set Preset of Dome Control
screen.
Click to hi-light the respective preset point. As in the example illustrated above, select a preset point. Enter
the name and click the
Save preset
button. This will finish the setup.
Note: The way to set PIH717X is slightly different. For example, to set the third preset point, first click the
button of the third preset point on the PTZ control panel then move the camera to the original third preset
point. (Use the direction, focus, and Zoom buttons to move the camera to the new preset point). Finally, click
the
Set preset
The Cruise Function
The
CamSS
button on the PTZ control panel and enter into the Set Preset of Dome Control screen.
And Setup
Programs supplemental function, i.e. “Cruise”, will be available after finishing the preset point
setup. Cruise allows the cameras to immediately move in a user-defined sequence and to define the camera
stay-time at each point. Click the
enter into the
Cruise Setup
Setup button to the right of the
screen:
Cruise
button on the PTZ control panel to
93

First select the
arrange the sequence of the
Note:
Cruise is the fastest speed for cameras to move to each preset point.
Preset point
then enter the
Preset point
Dwell time
and the
Dwell time
. Click the
at each point as desired.
Add
button to complete the setup. Users may
Auto Pan function and its setup
Only dome cameras support the auto-pan function. Auto Pan allows cameras to quickly move horizontally
between two points. Click the
into
Auto setup
screen:
Setup
button to the right of the
Auto
button on the PTZ control panel to enter
Specify the preset start/stop points and the camera pan speed. Click the
Auto-pan moves cameras horizontally between the preset start point and the preset stop point rather than
simply from the preset start point to the preset stop point. Some dome cameras may not support this
function. Users need to check with vendors in advance.
OK
button to complete the setup.
Auto-pan
94

7.3 Output Port Control
Click the
illustrated below. You may click the right/left arrows to select the desired device. Click the
the menu to control their
Output Port
pull-down menu in the System Operation Section to open the
On/Off
states.
Output Port
Output
panel as
buttons on
If it is on-line with a remote
he/she can also control these remote output devices through this control panel.
CamSS
system and a user has the granted privilege to control the remote devices,
95

Chapter 8:
To monitor a remote recording display or to transmit an alarm video through LAN, Internet or Intranet, a
CamSS Server
CamSS Server
program must be set in order for the data of the whole
CamSS
System to work.
8.1 Starting
Double click on the shortcut icon of
program.
Or, click the
enter into the
CamSS Server
Start
button of Windows. Select the
CamSS Server
program. This is illustrated as follows:
CamSS Server.exe
Programs Folder, then
as illustrated below to start the
CamSS
, and then
CamSS Server
CamSS Server
to
Click on
At the very first start up of
CamSS Server
to start the
CamSS Server
CamSS Server 3.0,
program.
the
System Administrator Setup
will appear as seen below:
96

If a
System Administrator
the
System Administrator
forgets his/her own password, the
set up again. After the
System Administrator
CamSS Server
is set up, the
program must be reinstalled and
Input password
dialogue box will appear so that the System Administrator’s password can be re entered as a confirmation to
enter the programs.
8.2
CamSS Server Window
Adding a new user
Click the
File command. A pull-down menu will appear as follows:
97

Click
User Information
to open the
User Information
window.
There are three types of
CamSS Server
1. Local Users:
CamSS Server
Server
users. A
users are categorized into two types, i.e. System Administrator and Common
System Administrator
three types of users as well as set up
CamSS Server
program. A common
may not add or delete any kind of users.
2. Remote
CamSS Server Users:
These users are the other
passwords are used by other
the local
3. Remote
CamSS Server
CamSS Users:
These users are all of the
Program.
CamSS system to login. Since the
CamSS
users’ names and passwords must be consistent with the setup on the
access auditing must be set up. When the
the connected
CamSS Server
Program users.
has the highest access privileges and can add or delete all of the
CamSS
CamSS Server
CamSS Server
user on the network. Their user names and
CamSS Server
program.
CamSS
system users that connect directly onto this
CamSS
CamSS
programs and the remote
users’ audits. Only the
user can only start the
System Administrator
CamSS Server
programs on the network to connect to (login to)
CamSS Server
system needs to perform remote monitoring
system performs the remote access,
CamSS
system both limit the access
CamSS
can close the
programs and
98

auditing.
After the System Administrator selects one of the three types of users in the tree structure, they must click the
right mouse button to add a new user. The
Add user
dialogue box will appear as follows:
If a user to be added is a local or a remote
user to be added is a
Remote
CamSS
CamSS Server
user, setting the access audit is not required. If a
user, the system administrator must set the remote access audit for the
user. For details on access auditing, please refer to Section 3.3.1. Below is an example:
99

Editing and deleting a user
The
System Administrator
user
and
Delete user
menus will appear. The system administrator can then re-set the user’s password or
delete the user directly.
The Connection Contents
Click on
can click the right mouse button on the desired user in the tree structure. The
This will bring up all the
on-line
CamSS Servers
.
Edit
Click on the
This will show all of the
Connecting to other
CamSS Server 3.0’s Connect Other
CamSS
system users connected to this
CamSS Servers
.
CamSS Server
function provides an
system structure. Under this structure, through two connected
connecting to those two
CamSS Servers
Click on the
through LAN or Internet.
Connect Other
CamSS Servers
CamSS Server
are also connected. CamSS Server can connect to one or more
under the
File
command to open the dialogue box:
CamSS Server
Internet+LAN
CamSS Servers
.
, all of the
(TCP/IP)
CamSS
security
systems
100
 Loading...