

VISICAM TC 20 plus Installation Quick Manual
VWR_Quick_Guide_VisicamTC20plus_Jan16_rev0.docx
1 / 4
Tablet Camera VisiCam TC 20 plus
ECN# 630-2661
INSTALLATION QUICK GUIDE
Box contains:
1 Tablet 10’’ display
1 WiFi Camera
1 Power supply (5Volt) with USB cable for WiFi camera
1 Power supply (5Volt) with USB cable for Tablet
1 Tiltable support for Tablet
1 User manual (CD)
1 Quick Guide
Remove all the parts from the package and check if any visible damage has occured
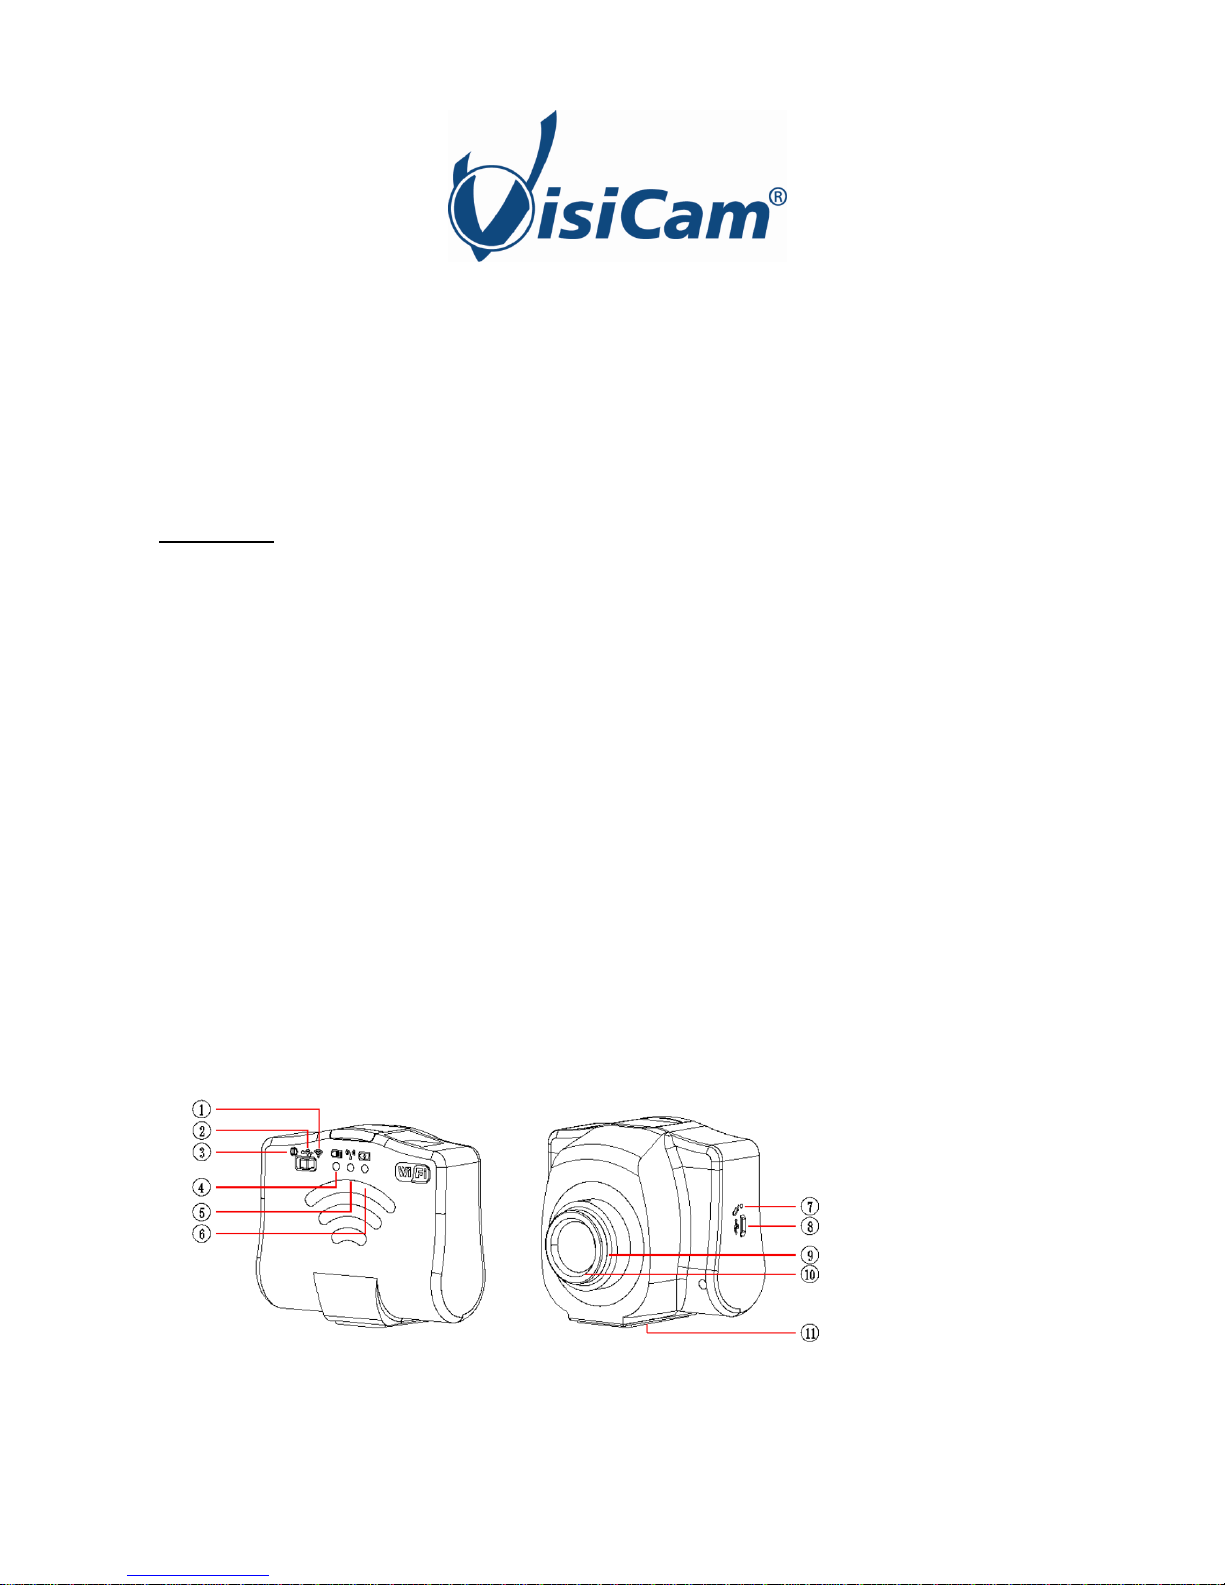
1. CAMERA OVERVIEW
1. Button position to turn on Wifi working mode
(button switch is on the right)
2. Button position to turn on USB working mode
(button switch is on the middle)
3. Button position to turn off the camera
(button switch is on the left)
4. Power LED
5. WiFi signal LED
6. Charge LED
7. Reset hole
8. USB port for charge / wired connection
9. Standard C-mount port
10. Protection cap
11. Quick release plate for tripod use
VWR_Quick_Guide_VisicamTC20plus_Jan16_rev0.docx
2 / 4
2. SWITCH-ON TC20 PLUS
Follow the instructions in the order as described below. ATTENTION: before doing the connections, be sure
that the Tablet is switched off
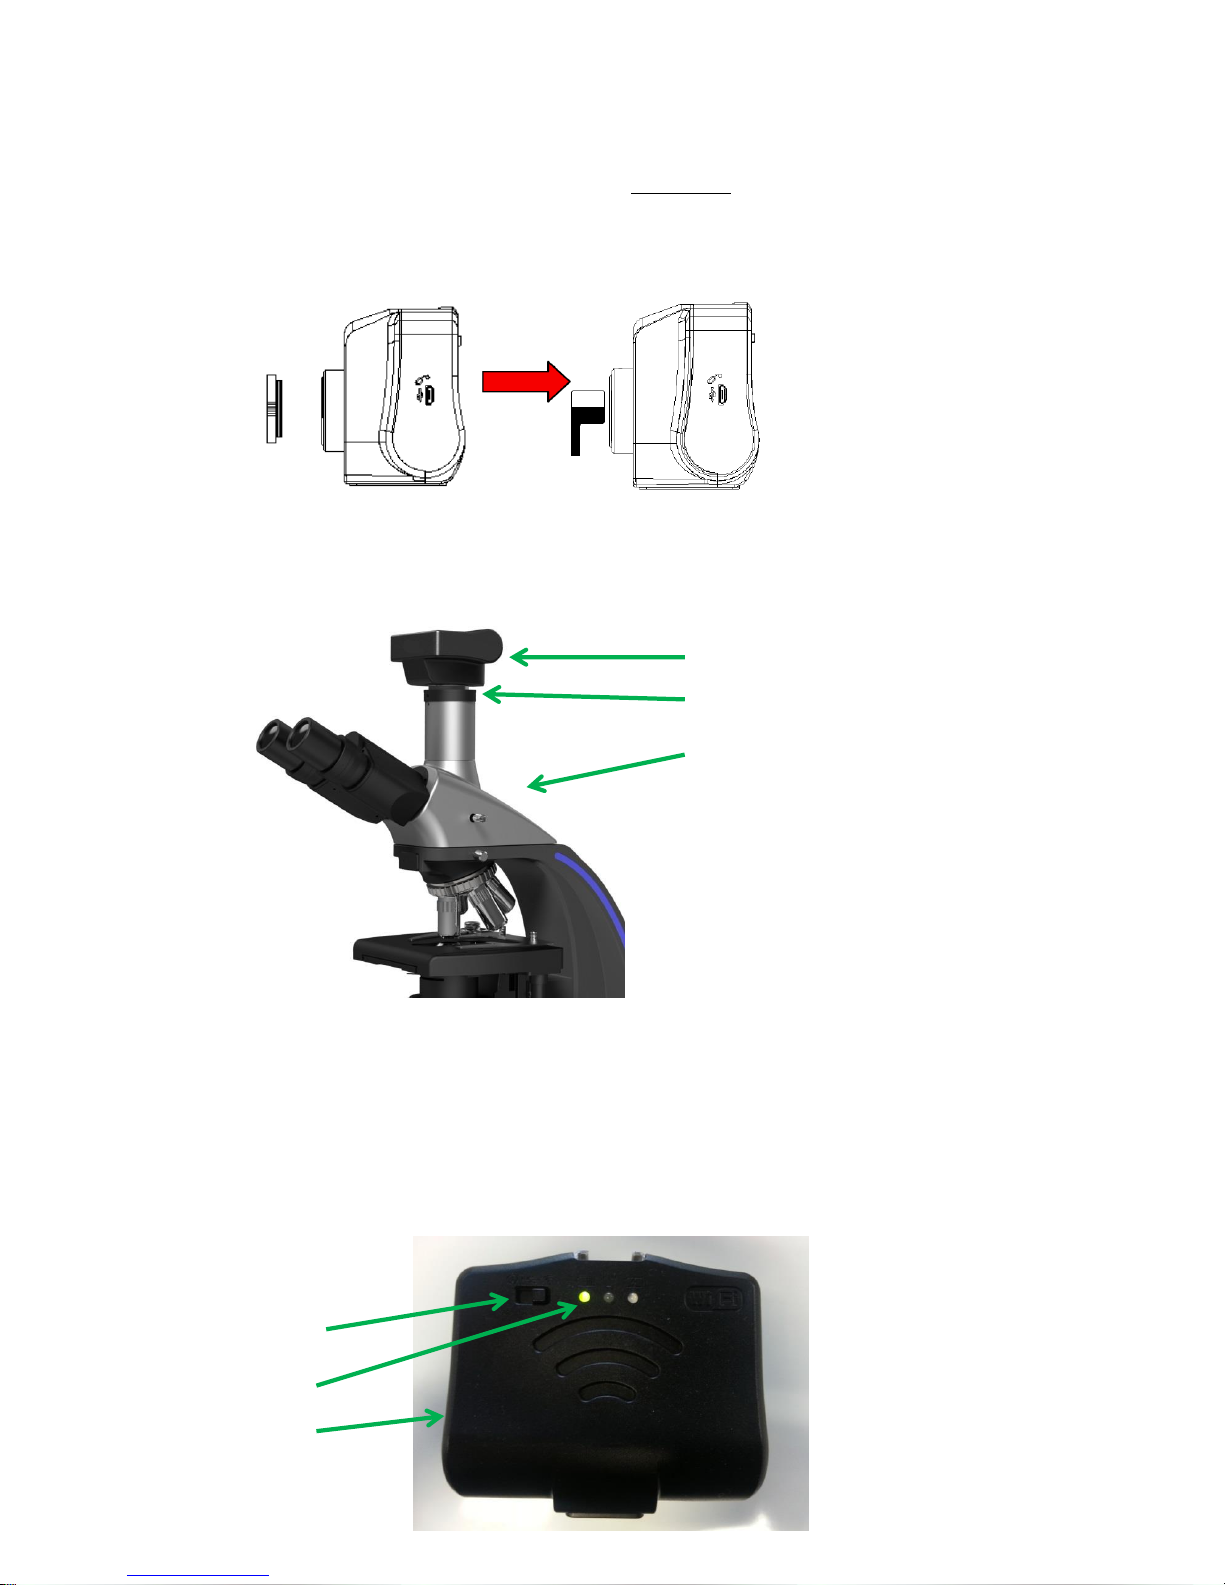
1. Open the plastic cap that protects the sensor of the camera (left image below) and remove the
dust-protective film (right image below)
2. Connect the 5 Volt power supply to the WiFi camera
3. Put the camera on your microscope trinocular port* or into one of the two eyepieces**
* A 0,5x c-mount adapter is necessary and it can be ordered as accessory depending on the Microscope
model
** A 0,5x eyepiece adapter is necessary and it can be ordered as accessory
4. Now connect the 5 Volt power supply of WiFi camera to the electrical mains, and move the button
on the WiFi working mode position (button to the right); you should see the green light on the
camera switch on. See image below:
WiFi camera
C-mount adapter
Microscope
Switch on button
Power LED
Camera
 Loading...