

Page 1
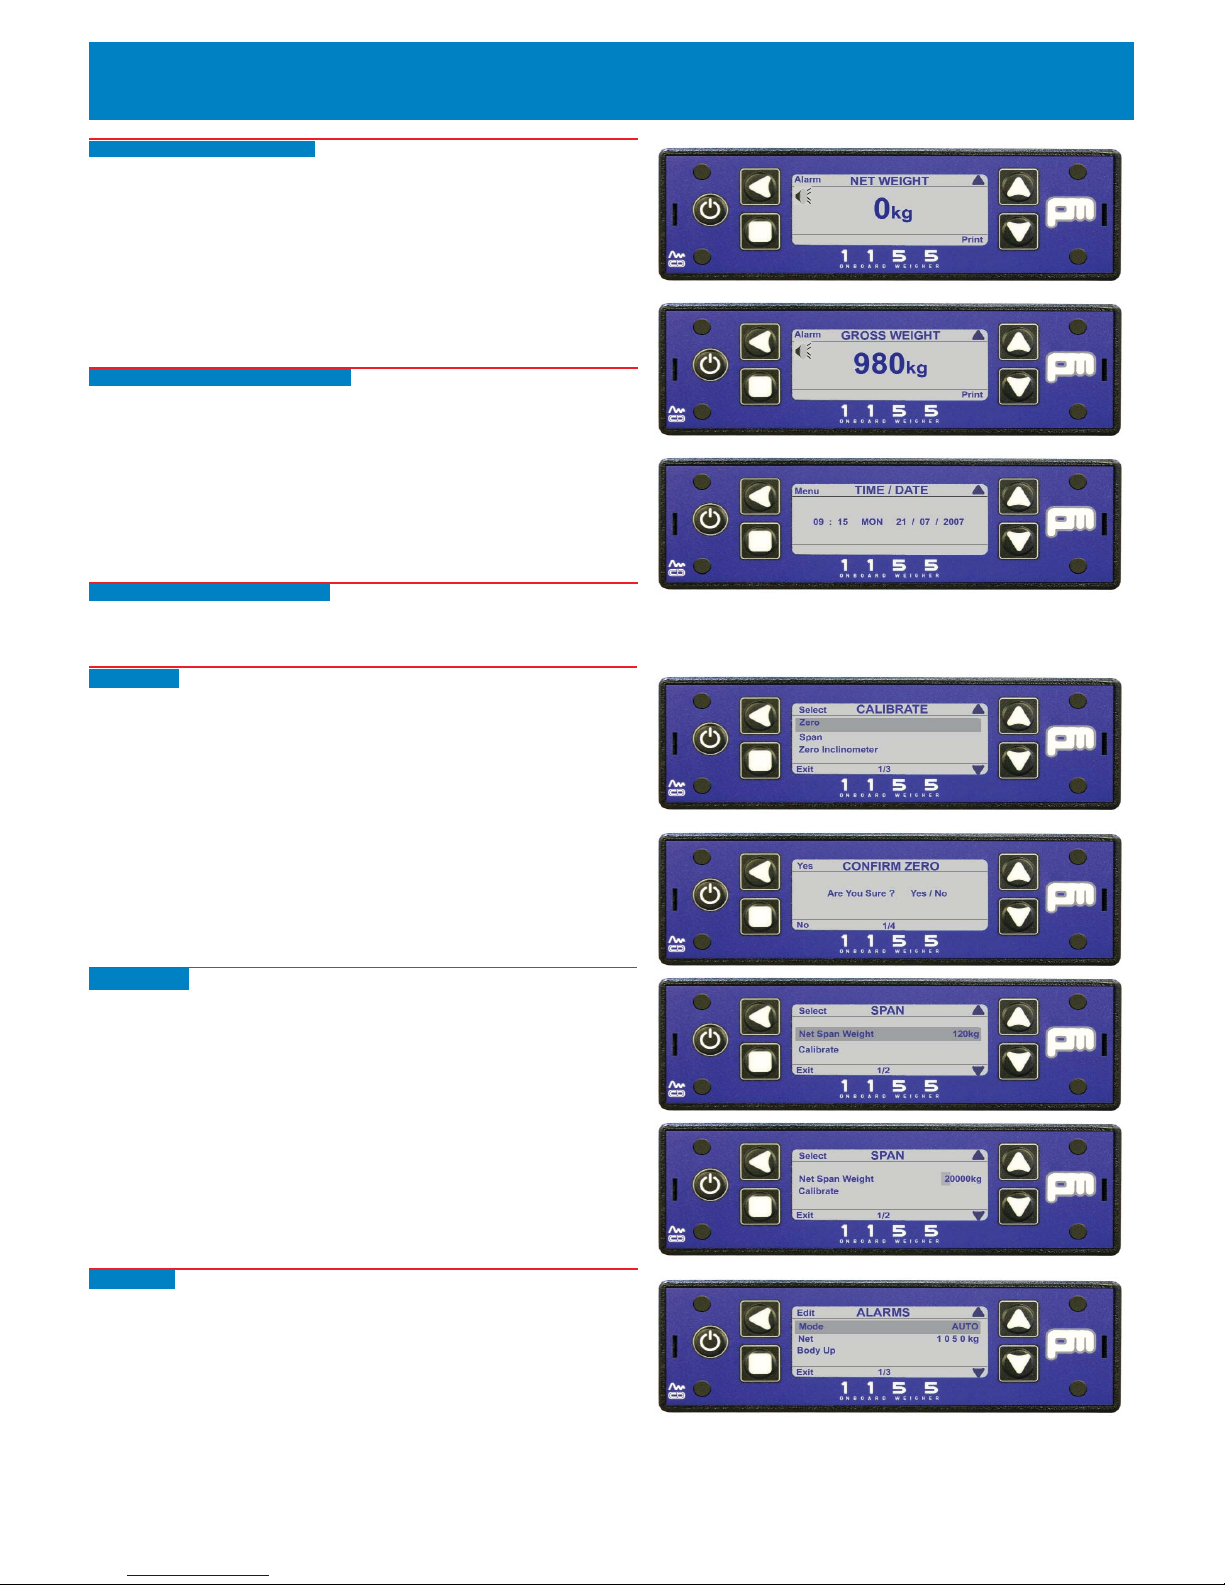
Standard Screens (CAN mode)
Standard screens appear when the display is powered on depending on what is
setup:
Net Weight - set this in Display - Power On Screen (1).
Gross Weight - set this in Display - Power On Screen (2).
Time / Date - set up in Outputs - Set Time / Date. (3).
Axles (No. of and weight on each) - set in Setup - Vehicle Config - Weigh Mode Axles.
Twin (No. of and weight on each) - set in Setup - Vehicle Config - Weigh Mode twin/5+air.
Load / Deliver - set in Setup - Settings - Load / deliver.
Standard Screens (Analogue mode)
The standard screens available in Analogue mode are:
Net Weight - set this in Display - Power On Screen (1).
Gross Weight - set this in Display - Power On Screen 2).
Time / Date - set up in Outputs - Set Time / Date (3).
Load / Deliver - set in Setup - Settings - Load / deliver
NOTES:
If no gross weight to be shown set the Tare to zero.
Ensure that Load Cells (Vehicle Config) is set to Auto mode, either CAN or
Analogue
will also be shown on the same line depending on which mode you are using.
Setting up display - (CAN mode)
Obtain Tare weight, maximum load and (if using axle weighing) the maximum load
on each axle, using weighbridge / weighpads.
Zero Tare
With vehicle empty go to: Menu - Setup - Calibrate. (4) by pressing the UP arrow
button until the Time / Date screen can be seen, then pressing the LEFT arrow button to get the Menu screen. Press the DOWN arrow button to get Setup
followed by the LEFT arrow button to open the Setup screen. Press the DOWN
arrow button to go to Calibrate
followed by the LEFT arrow button to open the screen.
Zero will be highlighted. Press the LEFT arrow button The screen shows “Are you
sure ? Yes / No”. Press Yes, (LEFT arrow button). screen shows “Zero OK”(5) then
returns to the previous screen.
Press Exit 3 times to go to the main screen.
Span Vehicle
Load vehicle to as near full load as possible (for instance 20000kg).
Go to Menu - Setup - Calibrate. (see Zero Tare for how to do this).
Go to Span with the DOWN arrow button and then press the LEFT arrow button.
Screen shows “Net Span Weight” and “Calibrate”. Net Span Weight should be
selected (6).
To alter weight press LEFT arrow button, first figure will be highlighted. Alter figure
using Up / Down arrow buttons to alter values and LEFT arrow button to move
along figure until correct value is reached (in this instance 20000kg) (7).
Press Exit to go to the previous screen.
Press the DOWN arrow button to go to the “Calibrate” option followed by the LEFT
arrow button. The screen will say “Are you sure ? Yes / No”. Press Yes (LEFT
arrow button), screen shows “Zero OK”
Press Exit 3 times to go to the main screen.
Net Alarm
Go to Menu - Setup - Alarms by pressing the UP arrow button until the Time / Date
screen can be seen, then pressing the LEFT arrow button to get the Menu screen.
Press the DOWN arrow button to get Setup followed by the LEFT arrow button to
open the Setup screen. Alarms should be highlighted. Press the LEFT arrow button
to open the screen. Ensure that the Alarm Mode is set to Auto (8). If not press the
LEFT arrow button.
Press the DOWN arrow button and set the Net alarm weight to whatever is
required.
To alter weight press Select button, first figure will be highlighted. Alter figure using
Up / Down buttons to alter values and Select button to move along figure until correct value is reached. The Body Up alarm can be left unchanged.
Vishay PM 1155 Quick Setup Guide
pm1155quickguide/v1/231007
1
2
3
Shown above are the three main standard screens
4
5
6
7
8
Page 2
Default Settings
Can be accessed from Menu - Setup - Reset Defaults
Display
Contrast: 5
Power On screen: Net weight
Key bleep: off
Alarms
Mode: manual
Net weight: 50 000kg
Gross weight: 50 000kg
Body up threshold: -500kg
Vehicle Config
Load cells: CAN
Weigh mode: standard
Tare weight: 5000kg
Cell P.I. value: 16384
Settings
Count by: 20kg
Filter: low
Zero Limit: 500kg
Front panel zero: On
Load deliver: Off
Language: English
Outputs
Printer
Baud rate: 9600
Handshaking: Off
Print header: On
Remote channel: A
Auxillary output 1: Off
Auxillary output 2: Off
Set time / date
Daylight saving: On
Pin access
Pin control: Off
User alarms: No
Password
0000 (four zeros)
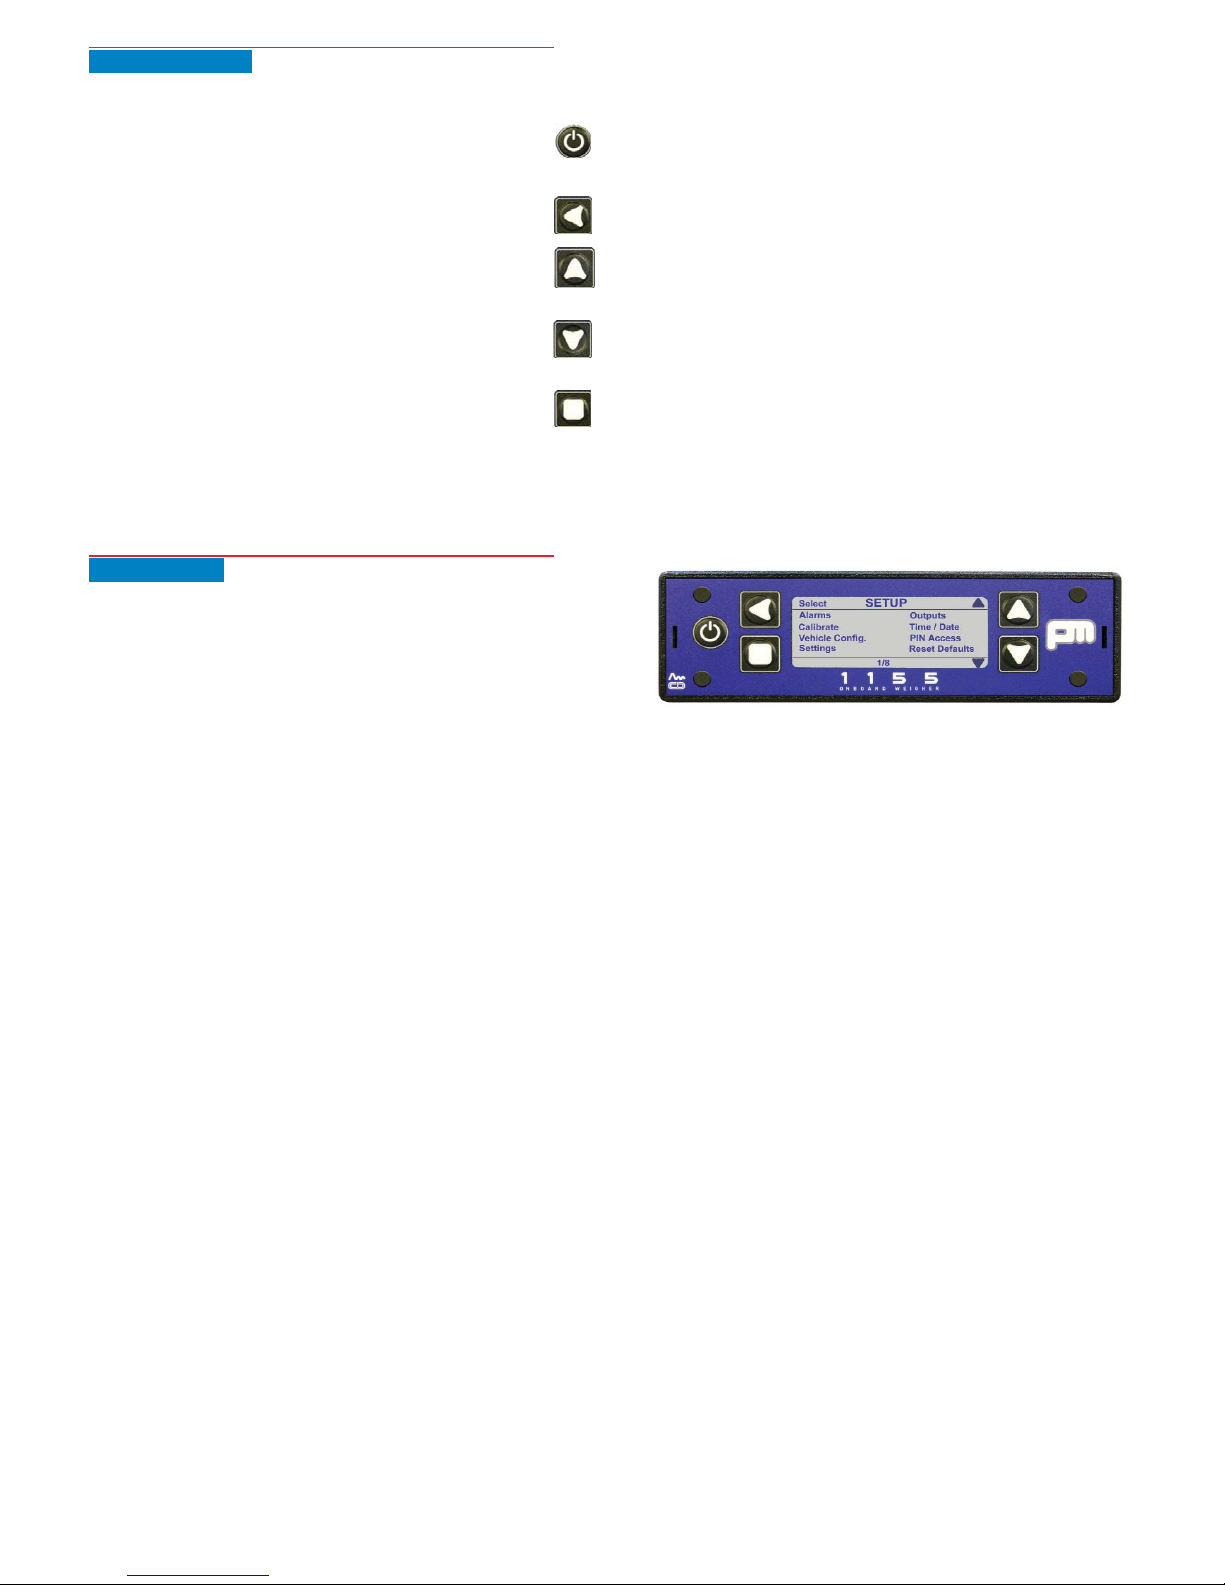
Front Panel Buttons
The various screens are accessed by using the display buttons:
The ON / OFF button
This is on the left of the display and is used to power up or power
down the display.
The Left Arrow button
This button is used to return to a previous screen or to edit a number.
The Up Arrow button
This button is used to scroll up an on-screen list, or increment a
number.
The Down Arrow button
This button is used to scroll down an on-screen list, or decrement a
number.
The Accept / Exit button
This square button is used to accept changes to screens or
parameters and exit the screen. Can also be used as the NO button.
pm1155quickguide/v2/231007
For any service requirements contact:
Vishay PM Onboard
+44 (0) 1274 822999
or
service@pmonboard.com
 Loading...