


System 7000 Scanner
Programmer’s Reference Manual
Version 1.01
130-000197
P. O. Box 27777, Raleigh, North Carolina, 27611, USA Phone (919) 365-3800 Fax (919) 365-3945 www.vishay.com
Vishay Micro-Measurements

TABLE OF CONTENTS
1 INTRODUCTION __________________________________________________________________________7
1.1 O
VERVIEW
1.2 P
ROGRAMMING OPTIONS
1.2.1 StrainSmart and DCOM_______________________________________________________________7
1.3 D
EFINITION OF TERMS
1.4 D
OCUMENT NOTATION AND CONVENTIONS
1.4.1 Numbering Notation __________________________________________________________________8
1.4.2 Referenced VIs, Methods, and Commands _________________________________________________8
1.5 R
EGISTERED TRADEMARK NOTICES
2 PROGRAMMING OVERVIEW _____________________________________________________________10
2.1 C
OMMUNICATING WITH THE SYSTEM
2.2 A
CCESSING MULTIPLE SCANNERS (SYNCHRONIZATION
2.3 S
YSTEM STATES
2.4 C
OMMAND OVERVIEW
2.5 D
EBUGGING TIPS
3 PROGRAM LAYOUT _____________________________________________________________________14
3.1 O
VERVIEW OF PROGRAM LAYOUT - SCANNING
3.2 O
VERVIEW OF PROGRAM LAYOUT – SINGLE CHANNEL READS
3.3 E
STABLISHING A CONNECTION TO THE SCANNER
3.4 S
YSTEM VALIDATION
3.5 C
ONFIGURATION
3.5.1 System Level Configuration ___________________________________________________________18
3.6 C
ARD-LEVEL CONFIGURATION
3.7 C
HANNEL-LEVEL CONFIGURATION
3.8 C
ONFIGURING SCAN INFORMATION
3.9 R
ECORDING
3.9.1 Setting up Simple Recording __________________________________________________________22
3.9.2 Advanced Recording Options__________________________________________________________23
3.9.2.1 Recording Groups _______________________________________________________________________ 23
3.9.2.2 Configuring Time Based Recording__________________________________________________________ 24
3.9.2.3 Configuring Manual Recording _____________________________________________________________ 26
3.9.2.4 Configuring Limits Recording ______________________________________________________________ 27
3.10 A
CQUIRING A SINGLE-POINT CHANNEL READING
3.11 A
RMING, START SCANNING, AND STOP SCANNING
3.12 S
YNCHRONIZED (NETWORKED) SCANNERS
3.13 S
TARTING AND STOPPING MANUAL RECORDING
3.14 A
CQUIRING AND DECODING RECORDED DATA
3.14.1 Identifying and Reading the Data File __________________________________________________38
3.14.2 Decoding the Data File _____________________________________________________________41
3.14.2.1 Scan ID_______________________________________________________________________________ 41
3.14.2.2 Multiple Record Rates ___________________________________________________________________ 42
3.14.2.3 Varying Data Width _____________________________________________________________________ 42
3.14.2.4 Status Information ______________________________________________________________________ 43
3.14.2.5 Status Byte ____________________________________________________________________________ 43
3.14.2.6 Examples _____________________________________________________________________________ 44
3.14.2.7 Sample Code __________________________________________________________________________ 45
3.14.3 How Data Files are Named __________________________________________________________48
3.14.4 What is a Header File? _____________________________________________________________48
3.15 A
CQUIRING REAL-TIME (ONLINE) DATA
3.15.1 Configuring the Real-time (Online) Data Transmission ____________________________________49
3.15.2 Controlling the Real-time (Online) Data Transmission _____________________________________49
3.15.3 Parsing the Real-time (Online) Data ___________________________________________________50
3.16 Z
EROING AND SHUNT CALIBRATION
3.17 S
CALING THE ANALOG-TO-DIGITAL CONVERTER COUNTS
_____________________________________________________________________________7
__________________________________________________________________7
____________________________________________________________________8
____________________________________________________8
__________________________________________________________9
7000____________________________________________________10
) _________________________________________10
________________________________________________________________________11
___________________________________________________________________11
_______________________________________________________________________13
________________________________________________15
____________________________________16
_______________________________________________17
____________________________________________________________________18
________________________________________________________________________18
_____________________________________________________________19
__________________________________________________________20
_________________________________________________________21
___________________________________________________________________________22
_____________________________________________35
_____________________________________________35
__________________________________________________35
______________________________________________37
________________________________________________38
____________________________________________________49
________________________________________________________50
_______________________________________52
Vishay Micro-Measurements System 7000 Programmer’s Reference Manual
Page 2 of 142

4 SYSTEM STATUS AND ERROR HANDLING ________________________________________________53
4.1 E
RROR HANDLING
4.2 D
ECODING THE ERROR NUMBER
4.3 Q
UERYING SYSTEM STATUS
4.4 M
ONITORING THE EVENT/STATUS
4.4.1 Message Format____________________________________________________________________55
4.4.2 Card Status Message ________________________________________________________________55
4.4.3 Card Error Message ________________________________________________________________56
4.4.4 Control Module Error Messages _______________________________________________________56
______________________________________________________________________53
____________________________________________________________54
_______________________________________________________________54
UDP P
ORT
_________________________________________________54
5 LABVIEW INSTRUMENT DRIVER _________________________________________________________57
5.1 O
VERVIEW
5.2 S
YSTEM
5.2.1 System 7000 Instrument Driver Layout __________________________________________________57
5.2.2 System 7000 Instrument Driver Examples ________________________________________________58
5.2.3 System 7000 Instrument “Readme.html” _________________________________________________58
5.2.4 Supported LabVIEW Versions _________________________________________________________58
6 ACTIVEX INTERFACE ___________________________________________________________________59
6.1 A
CTIVE X INTERFACES
6.2 E
RROR CODES
6.3 C
ARD MASK, CHANNEL MASK, AND RECORDING GROUP MASK NOTATION
6.4 S
AMPLE PROGRAMS
6.4.1 Delphi Sample Program______________________________________________________________61
6.4.2 Visual C# Sample Program ___________________________________________________________61
6.4.3 LabWindows/CVI Sample Program _____________________________________________________61
6.5 IVMM7000C
6.5.1 Properties_________________________________________________________________________62
6.5.1.1 IPAddress Property (Read/Write) ___________________________________________________________ 62
6.5.1.2 CommandPort Property (Read/Write) ________________________________________________________ 62
6.5.1.3 DataPort Property (Read/Write) _____________________________________________________________ 62
6.5.1.4 LastErrorCode Property (Read/Write) ________________________________________________________ 63
6.5.1.5 CommandPortTimeout Property (Read/Write)__________________________________________________ 63
6.5.1.6 DataPortTimeout Property (Read/Write) ______________________________________________________ 64
6.5.2 Connection Methods_________________________________________________________________65
6.5.2.1 Open Method ___________________________________________________________________________ 65
6.5.2.2 Close Method ___________________________________________________________________________ 65
6.5.3 Action - Status Group________________________________________________________________66
6.5.3.1 Arm Method____________________________________________________________________________ 66
6.5.3.2 Disarm Method _________________________________________________________________________ 66
6.5.3.3 StartScanning Method ____________________________________________________________________ 67
6.5.3.4 StopScanning Method ____________________________________________________________________ 67
6.5.3.5 ControlManualRecording Method ___________________________________________________________ 68
6.5.3.6 ControlOnlineDataTransfer Method _________________________________________________________ 68
6.5.3.7 GetSystemState Method___________________________________________________________________ 69
6.5.3.8 GetSyncStatus Method____________________________________________________________________ 69
6.5.3.9 SynchronizeNetworkedScanners Method______________________________________________________ 70
6.5.3.10 StartSynchronizedScanning Method ________________________________________________________ 71
6.5.4 Configuration Group ________________________________________________________________72
6.5.4.1 ConfigureTimeBasedRecording Method ______________________________________________________ 72
6.5.4.2 ConfigureTimeBasedRecordingStartandStop Method ____________________________________________ 72
6.5.4.3 ConfigureManualRecording Method _________________________________________________________ 73
6.5.4.4 SetChannelRecordingGroup Method _________________________________________________________ 74
6.5.4.5 SetLimitType Method ____________________________________________________________________ 74
6.5.4.6 SetLimitsBasedRecordingType Method_______________________________________________________ 75
6.5.4.7 ConfigureLimitsBasedRecording ____________________________________________________________ 75
6.5.4.8 ConfigureLimitCondition method ___________________________________________________________ 76
6.5.4.9 SetLimitConditionCount Method____________________________________________________________ 77
6.5.4.10 AssignLimitToChannel Method____________________________________________________________ 78
6.5.4.11 ConfigureGlobalLimit Method_____________________________________________________________ 78
6.5.4.12 ConfigureScan Method __________________________________________________________________ 80
6.5.4.13 ConfigureStrainGageCardExcitation Method _________________________________________________ 81
Vishay Micro-Measurements System 7000 Programmer’s Reference Manual
____________________________________________________________________________57
7000 I
NSTRUMENT DRIVER
___________________________________________________________________59
__________________________________________________________________________59
_____________________________________________________________________61
ONTROL INTERFACE DESCRIPTION
_________________________________________________________57
__________________________60
_______________________________________________62
Page 3 of 142

6.5.4.14 ConfigureStrainGageChannelBridgeSettings Method ___________________________________________ 81
6.5.4.15 ConfigureHighLevelCardExcitation Method __________________________________________________ 82
6.5.4.16 ConfigureThermocoupleChannel Method ____________________________________________________ 82
6.5.4.17 ConfigureLVDTCardExcitation Method _____________________________________________________ 83
6.5.4.18 ConfigureLVDTChannelInputConnections Method ____________________________________________ 84
6.5.4.19 SetDefaultFilter Method__________________________________________________________________ 84
6.5.4.20 SetFIRFilterCoefficients Method ___________________________________________________________ 85
6.5.4.21 SetDateTimeMethod ____________________________________________________________________ 86
6.5.4.22 ConfigureOnlineDataTransfer Method_______________________________________________________ 86
6.5.4.23 SetScannerNetworkConfiguration Method ___________________________________________________ 87
6.5.4.24 SetBoxID Method ______________________________________________________________________ 88
6.5.5 Data _____________________________________________________________________________89
6.5.5.1 GetStaticADCReading Method _____________________________________________________________ 89
6.5.5.2 GetLastDataFileInformation Method _________________________________________________________ 89
6.5.6 Utilities___________________________________________________________________________91
6.5.6.1 GetControlModuleInformation Method _______________________________________________________ 91
6.5.6.2 GetFreeSpace Method ____________________________________________________________________ 92
6.5.6.3 GetCardStatusMethod ____________________________________________________________________ 92
6.5.6.4 DetectCards Method______________________________________________________________________ 93
6.5.6.5 GetCardInformation Method _______________________________________________________________ 94
6.5.6.6 Flash System LEDs Method________________________________________________________________ 95
6.5.6.7 ResetCard Method _______________________________________________________________________ 95
6.5.6.8 ShuntCalEnable Method __________________________________________________________________ 96
6.5.6.9 RemoteCalEnable Method _________________________________________________________________ 96
6.5.6.10 ClearErrors Method _____________________________________________________________________ 97
6.5.6.11 GetErrorMessage Method ________________________________________________________________ 97
6.5.6.12 RetrieveFile Method_____________________________________________________________________ 98
6.5.6.13 RetrieveLastDataFile Method _____________________________________________________________ 98
6.5.6.14 ListFiles Method _______________________________________________________________________ 99
6.5.6.15 DeleteFile Method ______________________________________________________________________ 99
6.5.6.16 DeleteLastDataFile Method ______________________________________________________________ 100
6.5.6.17 CancelFileTransferMethod_______________________________________________________________ 100
6.6 IVMM7000D
6.6.1 Properties________________________________________________________________________101
6.6.1.1 BytesTransferred Property (Read/Write) _____________________________________________________ 101
6.6.1.2 PercentComplete Property (Read/Write) _____________________________________________________ 101
6.6.1.3 TotalBytes Property (Read/Write) __________________________________________________________ 102
6.6.1.4 ErrorStatus Property (Read/Write) __________________________________________________________ 102
6.6.1.5 TransferComplete Property (Read/Write) ____________________________________________________ 102
ATATRANSFERSTATUS INTERFACE DESCRIPTION
___________________________________101
7 LOW-LEVEL COMMAND SET ____________________________________________________________103
7.1 C
ARD AND CHANNEL MASK NOTATION
7.2 C
OMMAND/QUERY SYNTAX
7.3 R
ESPONSE SYNTAX
7.3.1 Example Responses ________________________________________________________________105
7.4 C
OMMAND DESCRIPTIONS
7.4.1 Action Group _____________________________________________________________________106
7.4.1.1 Start Scanning Command_________________________________________________________________ 106
7.4.1.2 Stop Scanning Command _________________________________________________________________ 106
7.4.1.3 Start Manual Recording Command _________________________________________________________ 106
7.4.1.4 Stop Manual Recording Command _________________________________________________________ 106
7.4.1.5 Arm Command_________________________________________________________________________ 107
7.4.1.6 Disarm Command ______________________________________________________________________ 107
7.4.1.7 Start Online Data Transfer ________________________________________________________________ 107
7.4.1.8 Stop Online Data Transfer ________________________________________________________________ 107
7.4.1.9 Synchronize Networked Scanners __________________________________________________________ 108
7.4.1.10 Start Scanning on Networked Scanners _____________________________________________________ 108
7.4.2 Recording Group __________________________________________________________________109
7.4.2.1 Manual Recording Mode _________________________________________________________________ 109
7.4.2.2 Set Pre-trigger Buffer Size for Manual Recording Command _____________________________________ 109
7.4.2.3 Set Time-Based Recording Mode Command __________________________________________________ 110
7.4.2.4 Set Time-Based Recording Count Command _________________________________________________ 110
7.4.2.5 Set Time-Based Recording Delay Command__________________________________________________ 111
7.4.2.6 Set Time-Based Recording Skip Count Command _____________________________________________ 111
Vishay Micro-Measurements System 7000 Programmer’s Reference Manual
_____________________________________________________________________104
______________________________________________________________104
_______________________________________________________________106
_____________________________________________________103
Page 4 of 142

7.4.2.7 Set Time-Based Recording Burst Count Command _____________________________________________ 112
7.4.2.8 Set Time-Based Recording Burst Skip Count Command_________________________________________ 112
7.4.2.9 Set Limits-Based Recording Setting ________________________________________________________ 113
7.4.2.10 Set Limits-Based Recording Mode Command ________________________________________________ 113
7.4.2.11 Set Limits-Based Recording Skip Count Command ___________________________________________ 114
7.4.2.12 Set Limits-Based Recording Burst Count Command ___________________________________________ 114
7.4.2.13 Set Limits-Based Recording Burst Skip Count Command_______________________________________ 115
7.4.3 Scan Group ______________________________________________________________________116
7.4.3.1 Set Scan Rate Command _________________________________________________________________ 116
7.4.3.2 Create Scan List Command _______________________________________________________________ 116
7.4.3.3 AutoStop Command_____________________________________________________________________ 117
7.4.3.4 Get Last Data File Info___________________________________________________________________ 117
7.4.3.5 Set Box ID from Scan Header Command ____________________________________________________ 118
7.4.3.6 Set Project Name to Scan Header File Command ______________________________________________ 118
7.4.3.7 Set Scan Session Descriptor to Scan Header File Command ______________________________________ 118
7.4.3.8 Set Scan Session GUID to Scan Header File Command _________________________________________ 119
7.4.3.9 Set Scan Session IP Address to Scan Header File Command _____________________________________ 119
7.4.3.10 Set the Size of the Scan Buffer____________________________________________________________ 119
7.4.4 Limits Group _____________________________________________________________________120
7.4.4.1 Set Limit Type Command ________________________________________________________________ 120
7.4.4.2 Set Number of Limit Event Conditions Command _____________________________________________ 120
7.4.4.3 Set Limit Event Condition Command _______________________________________________________ 121
7.4.4.4 Set Lower Limit Value Command __________________________________________________________ 121
7.4.4.5 Set Upper Limit Value Command __________________________________________________________ 122
7.4.4.6 Set Pre-trigger Buffer Size Command _______________________________________________________ 122
7.4.4.7 Set Post-trigger Buffer Size Command ______________________________________________________ 122
7.4.4.8 Ignore or Accept Sync (Global) Limits ______________________________________________________ 123
7.4.4.9 Set Pre-trigger Buffer Size Command for Sync (Global) Limits ___________________________________ 123
7.4.4.10 Set Post-trigger Buffer Size Command for Sync (Global) Limits _________________________________ 123
7.4.5 Card Group ______________________________________________________________________124
7.4.5.1 Get Card Information Command (AIM/Interface Card)__________________________________________ 124
7.4.5.2 Set Excitation Command _________________________________________________________________ 125
7.4.5.3 Get Free Space Command ________________________________________________________________ 125
7.4.5.4 Card Status ____________________________________________________________________________ 126
7.4.5.5 Card Reset ____________________________________________________________________________ 126
7.4.5.6 Excitation Output Enable/Disable __________________________________________________________ 127
7.4.5.7 Aim Temperature Sensor Query____________________________________________________________ 127
7.4.5.8 Set LVDT Excitation Frequency ___________________________________________________________ 127
7.4.6 Channel Group____________________________________________________________________128
7.4.6.1 Asynchronous Read A/D Converter Command ________________________________________________ 128
7.4.6.2 Set Channel Recording Group Command ____________________________________________________ 128
7.4.6.3 Set FIR Filter Command _________________________________________________________________ 128
7.4.6.4 Shunt Calibration Resistor Enable / Disable __________________________________________________ 129
7.4.6.5 Dummy Resistor Selection________________________________________________________________ 129
7.4.6.6 Enable Half-Bridge _____________________________________________________________________ 129
7.4.6.7 Remote Calibration Resistor Enable Disable __________________________________________________ 130
7.4.6.8 Set / Query Thermocouple Type ___________________________________________________________ 130
7.4.6.9 Assign a Limit Event Condition to a Channel(s) _______________________________________________ 131
7.4.6.10 Set Default Filter Command______________________________________________________________ 131
7.4.6.11 Set LVDT Demodulator Source ___________________________________________________________ 132
7.4.7 File Group _______________________________________________________________________133
7.4.7.1 Retrieve File___________________________________________________________________________ 133
7.4.7.2 List Files______________________________________________________________________________ 134
7.4.7.3 Delete File ____________________________________________________________________________ 134
7.4.7.4 Cancel File Transfer_____________________________________________________________________ 135
7.4.7.5 List Files in Control Module ______________________________________________________________ 135
7.4.7.6 Retrieve File from Control Module _________________________________________________________ 135
7.4.7.7 Delete File from Control Module ___________________________________________________________ 136
7.4.7.8 Verify the Checksum of a Control Module File ________________________________________________ 136
7.4.8 System Group _____________________________________________________________________137
7.4.8.1 Set Date/Time _________________________________________________________________________ 137
7.4.8.2 Set IP Configuration Information___________________________________________________________ 138
7.4.8.3 Get Free Space Command ________________________________________________________________ 138
7.4.8.4 Configure Online Data ___________________________________________________________________ 139
7.4.8.5 Define Scanner’s Network Configuration ____________________________________________________ 139
Vishay Micro-Measurements System 7000 Programmer’s Reference Manual
Page 5 of 142

7.4.8.6 Verify Sync Cable Status _________________________________________________________________ 140
7.4.8.7 Card Detect ___________________________________________________________________________ 140
7.4.8.8 Clear Errors ___________________________________________________________________________ 140
7.4.8.9 Get Control Module Information Command (Control Module) ____________________________________ 141
7.4.8.10 Display Flashing LED Sequence __________________________________________________________ 141
7.4.8.11 Clear Errors __________________________________________________________________________ 142
7.4.8.12 System Status Query ___________________________________________________________________ 142
7.4.8.13 Get Error Message from Error Code _______________________________________________________ 142
8 WARRANTY ____________________________________________________________________________143
Vishay Micro-Measurements System 7000 Programmer’s Reference Manual
Page 6 of 142

1 INTRODUCTION
1.1 Overview
The System 7000 data acquisition instrument (scanner) may be remotely programmed via an Ethernet
(TCP/IP) interface. Any high-speed, modern personal computer supporting this interface may be used to
program the System 7000 and, as a result, the scanner can be a part of an automated instrumentation
system.
This manual assumes that you are familiar with the operation of the System 7000 scanner. Please refer to
the “System 7000 Instruction Manual” for information on specifications and operation. The instruction
manual also contains information on setting up the network connections and configuring TCP/IP and
UDP.
1.2 Programming Options
This manual describes three different methods of programming the System 7000 scanner.
National Instruments LabVIEW instrument driver
ActiveX automation interface
Low-level TCP commands
How do I choose which method is best for my application?
The LabVIEW instrument driver should be used if you are writing software using the NI
LabVIEW graphical programming language. The driver is compliant with the National
Instruments instrument driver standards.
The ActiveX automation interface is recommended for use in most applications developed in the
Microsoft Windows environment. This includes programming environments such as Microsoft
Visual Basic, Microsoft Visual C++ and C#, National Instruments LabWindows/CVI, and
Embarcadero Delphi. The ActiveX application program interface (API) simplifies your
programming by bundling related commands into a single method, managing critical timing, and
handling low-level requirements (such as building and parsing) of the TCP commands.
The low-level TCP commands should be used if your programming environment does not support
the ActiveX automation interface or if your application requires more flexibility. It is highly
recommended that you use either the LabVIEW instrument driver or the ActiveX automation
interface. Though documented here, use of the low-level commands is not supported.
1.2.1 StrainSmart and DCOM
StrainSmart is a software application, provided by Vishay Micro-Measurements, that provides a
comprehensive user interface for configuring the System 7000 and managing data collection. StrainSmart
shares fully-scaled data with other applications via DCOM. If you wish to use StrainSmart and have a
separate, custom application for monitoring data, it is recommended that you use the DCOM interface.
Please refer to the document “Overview of StrainSmart Automation Server” for more information on
using the DCOM interface. This document is found on the “Programmer’s Reference Kit” CD.
Vishay Micro-Measurements System 7000 Programmer’s Reference Manual
Page 7 of 142

1.3 Definition of Terms
Scanning
The System 7000 is said to be scanning after it has completed an “arm/start”
sequence and it is actively acquiring data.
Scan
Scan ID
Scan Rate
I/O Card or AIM
Card
StrainSmart
A scan in the System 7000 refers to a single group of data that is acquired
simultaneously. For example, if you have 2 cards in your scanner (with 8 active
channels per card), a single scan consists of all 16 readings made at the same point
in time.
Note: Many instruments refer to a single group of simultaneously acquired data as
a “sample”, whereas, a “scan” is a collection of N samples. Notice the difference
in terminology.
The scan identifier is effectively a sequence number for each scan. The first scan
read is given a Scan ID of 1, the second scan has an ID of 2, and so forth. If you
know the scan rate, you then know the elapsed time at which the scan occurred.
(e.g. with a scan rate of 1000 scans/sec, scan 1 occurs at 0 mSec, scan 2 at 1mSec,
scan 3 at 2mSec, etc…)
The rate at which scans are acquired. This can also be thought of as the sampling
rate.
This refers to a Model 7003-8-A-I Analog Input Cards coupled with either a Model
7003-8-SG Strain Gage Input Card, Model 7003-8-HL High Level Input Card,
Model 7003-8-TC Thermocouple Input Card, or a Model 7003-8-LVDT Input
Card.
StrainSmart is a software application, provided by Vishay Micro-Measurements,
that provides a comprehensive user interface for configuring the System 7000 and
managing data collection.
1.4 Document Notation and Conventions
1.4.1 Numbering Notation
Hexadecimal values are indicated by the prefix 0x, binary values by the prefix 0b, and decimal values
have no prefix.
For example,
Decimal Hexadecimal Binary
10 0x0A 0b00001010
Table 1 – Numbering Notation
1.4.2 Referenced VIs, Methods, and Commands
Most sections in the Programming Overview section include a table similar to the one shown below. This
table shows the commands (or VIs or methods) that are relevant to the section.
LabVIEW Control Manual Recording VI
Active X ControlManualRecording method
Low-level Start Manual Recording command
Vishay Micro-Measurements System 7000 Programmer’s Reference Manual
Stop Manual Recording command
Page 8 of 142

1.5 Registered Trademark Notices
Windows, Windows Visual Basic, Windows Visual C++, and Windows Visual C# are registered
trademarks of Microsoft Corporation in the United States and other countries. LabVIEW and
LabWindows/CVI are registered trademarks of National Instruments, Inc (NI) in the United States and
other countries. Delphi is a registered trademark of Embarcadero Technologies, Inc.
Vishay Micro-Measurements System 7000 Programmer’s Reference Manual
Page 9 of 142

2 PROGRAMMING OVERVIEW
2.1 Communicating with the System 7000
Detailed instructions on setting up the network connections and the TCP/IP and UDP settings are found in
the “System 7000 Instruction Manual”. This document describes the network communications from a
programming standpoint.
The System 7000 uses four communication ports; two for TCP communication and two for UDP
broadcasts. The host PC (via your program) must establish a connection to one or more of these ports.
Port Description
Command Port The TCP port used to transmit commands to the scanner and
receive command responses from the scanner.
File Data Port The TCP port used by the scanner to download files.
Real-time Data Port The UDP port number used to broadcast real-time data.
Event/Status Port The UDP port number used to broadcast messages containing
status or error information.
Table 2 – Communication Ports
For additional information on the TCP/IP and UDP protocols, the Internet Engineering Task Force (IETF)
is the definitive source of information. They are located at http://www.ietf.org. Some documents of
particular interest are:
IETF RFC 791: Internet Protocol (http://www.ietf.org/rfc/rfc791.txt)
IETF RFC 768: User Datagram Protocol (http://www.ietf.org/rfc/rfc768.txt)
Note: A System 7000 scanner is capable of generating a significant amount of network traffic when
broadcasting real-time data; therefore, it is important to carefully consider the network architectural
design.
2.2 Accessing Multiple Scanners (Synchronization)
It is possible to access multiple scanners with a single application. However you must establish a unique
network connection to each scanner. Individual scanners may operate independently or be synchronized
with each other (i.e. they perform simultaneous sampling because their analog-to-digital converter clock
signal is shared via synchronization cables). Synchronization is discussed in detail in the “System 7000
Instruction Manual”.
If your application does not require simultaneous sampling, it will simplify your programming (and
physical setup), if you leave your scanners unsynchronized. If you choose to synchronize your scanners,
they are referred to as being “networked” together. This should not be confused with the Ethernet
network. One scanner in the “network” must be designated as the master scanner. There is a special
command set that deals with configuring and starting data collection on synchronized scanners.
Vishay Micro-Measurements System 7000 Programmer’s Reference Manual
Page 10 of 142

2.3 System States
The System 7000 scanner has eight states.
State Description
Idle The system is waiting for commands.
Armed The system is armed and waiting for a signal to begin scanning.
Scanning The system is collecting data
Calibrating The system is calibrating.
Uploading The system is uploading data to the host.
Downloading The system is downloading data from the host PC. (internal use only)
Updating Flag The system is updating firmware. (internal use only)
Maintenance Mode The system is performing a maintenance-level command.
Table 3 – System States
2.4 Command Overview
The following chart shows the System 7000 command list broken down by functional group. It lists the
required state for each command.
If you are using the LabVIEW instrument driver or the ActiveX interface you will find that many of these
commands have been bundled into a single “vi” or method,
Command
Group
Card
Get Card Information Idle, Armed, Scanning
Set Excitation (Strain Gage, High Level, LVDT) Idle
Excitation Output Enable/Disable (Strain Gage, High Level,
Get Free Space on Compact Flash Idle, Armed, Scanning
Get Card Status Idle, Armed, Scanning,
Card Reset Idle
Set/Query LVDT Excitation Frequency (LVDT) Idle
Query Temperature Sensor Idle
Channel
Read the A/D Converter Idle
Set Channel Recording Group Idle
Set FIR Filter Idle
Set Filter to Default Idle
Shunt Calibration Resistor Enable/Disable (Strain Gage) Idle
Remote Calibration Resistor Enable/Disable (Strain Gage) Idle
Half Bridge Enable/Disable (Strain Gage, LVDT) Idle
Select Half Bridge Dummy Resistor (Strain Gage) Idle
Set/Query Thermocouple Type Idle
Assign a Limit Event Condition to a Channel Idle
Set LVDT Demodulator Source (LVDT) Idle
Recording
Manual Recording Mode Idle
Set Pre-Trigger Buffer Size for Manual Recording Idle
Set Time-Based Recording Mode Idle
Set Time-Based Recording Count Idle
Set Time-Based Recording Delay Idle
Set Time-Based Recording Skip Count Idle
Set Time-Based Recording Burst Count Idle
Vishay Micro-Measurements System 7000 Programmer’s Reference Manual
Command Valid State
Idle
LVDT)
Calibrating
Idle
Page 11 of 142

Limits-Based Recording Setting Idle
Set Limits-Based Recording Mode Idle
Set Limits-Based Recording Skip Count Idle
Set Limits-Based Recording Burst Count Idle
Set Limits-Based Recording Burst Skip Count Idle
Scan
Set Scan Rate Idle
Create Scan List Idle
Set AutoStop Idle
Get Last Data File Information Idle
Set Scanner ID in Scan Header File Idle
Set Project Name in Scan Header File Idle
Set a Descriptor in Scan Header File Idle
Set a GUID in Scan Header File Idle
Set a IP Address in Scan Header File Idle
Set the Size of the Scan Buffer Idle
Limits
(Recording)
Set Limit Type Idle
Set Number of Limit Event Conditions Idle
Set Limit Event Condition Idle
Set Lower Limit Value Idle
Set Upper Limit Value Idle
Set Pre-Limit Buffer Size Idle
Set Post-Limit Buffer Size Idle
Ignore/Accept Sync (Global) Limits Idle
Set Pre-Limit Buffer Size for Sync (Global) Limits Idle
Set Post-Limit Buffer Size for Sync (Global) Limits Idle
System
Set Date/Time Idle
Get Free Space on Compact Flash on Control Module Idle
Configure Online Data Idle, Scanning
Define Scanner’s Network Configuration Idle
Verify Sync Cable Status Idle
Card Detect Idle
Clear Errors Idle
Get Control Module Information Command Idle
Display Flashing LED Sequence Idle
System Status Query ALL
Convert System Error Code to Text Idle, Armed, Scanning
Action
Arm Idle
Disarm Armed
Start Scaning Armed
Stop Scanning Scanning
Start Manual Recording Scanning
Stop Manual Recording Scanning
Start Online Data Transfer Scanning
Stop Online Data Transfer Scanning
Synchronize Network Scanners Armed
Start Scanning on Networked Scanners Scanning
File
Retrieve File from AIM Card Idle
List Files on AIM Card Idle
Delete File on AIM Card Idle
Cancel File Transfer Uploading
List Files on Control Module Idle
Retrieve File from Control Module Idle
Delete File from Control Module Idle
Table 4 – Command List
Vishay Micro-Measurements System 7000 Programmer’s Reference Manual
Page 12 of 142

2.5 Debugging Tips
A packet sniffer (or analyzer) program is useful for monitoring the TCP and UDP traffic to and
from your System 7000(s).
Vishay Micro-Measurements System 7000 Programmer’s Reference Manual
Page 13 of 142

3 PROGRAM LAYOUT
This section describes common commands and techniques for programming the scanner. It does not
include all possible commands or scenarios. Refer to the documentation for your selected programming
methodology for a complete listing of capabilities.
There are two standard methods of acquiring data from channels on the scanner. You can use both
methods of data acquisition in a single application.
1 – Scanning
Scanning is the process of arming the system and starting the acquisition of multiple channels at
the same scan rate.
Why choose scanning?
You wish to sample from multiple channels simultaneously
To record the data directly onto the System 7000 scanner
Your application requires high scan rates
You wish to monitor real-time data broadcast from the scanner
2 – Single-Point Reads
Single-point reads are a direct read of the analog-to-digital converter for a single channel.
Why choose single point reads?
You have a static system (low scan rate)
There is no need to read from more than one channel simultaneously.
Simplifies programming
Vishay Micro-Measurements System 7000 Programmer’s Reference Manual
Page 14 of 142

3.1 Overview of Program Layout - Scanning
Figure 1 shows the flow of a typical program accessing the System 7000 scanner and performing
scanning.
Idle State
Idle State
Idle State
Armed State
Connect to System and
Validate
Perform Configuration
Arm
Start Scanning
Yes
Scanning State
Idle State
(Uploading State when
No
Data is transferred)
Idle State
Scanning
(Acquiring Data)
Stop Scanning
Download Recorded Data
(optional)
Decode and Scale
Recorded Data
(optional)
Acquire More
Data?
No
UDP Data
Disconnect from
Scanner
Monitor Real-Time Data
(optional)
Vishay Micro-Measurements System 7000 Programmer’s Reference Manual
Yes
Change
Configuration?
Figure 1 – Program Layout (Scanning)
Page 15 of 142

3.2 Overview of Program Layout – Single Channel Reads
Figure 2 shows the flow of a typical program accessing the System 7000 scanner and performing single
channel readings (no scanning is performed).
Idle State
Connect to System and
Validate
Idle State
Perform Configuration
Idle State
Perform a Single Reading
on One or More Channels
Yes
NO
Scale Reading (optional)
Acquire More
Data?
Yes
Change
Configuration?
Figure 2 – Program Layout (Single Channel Reads)
No
Disconnect from
Scanner
Vishay Micro-Measurements System 7000 Programmer’s Reference Manual
Page 16 of 142

3.3 Establishing a Connection to the Scanner
The first step in programming the System 7000 scanner is connecting to one or more of its TCP and UDP
ports.
TCP Command Port
You must connect to the command port in order to send commands to and receive responses
from the scanner.
You do not need to connect to this port if you are planning on using StrainSmart to control
the scanner and you only wish to perform monitoring of the UDP data.
TCP Data Port
Connection to this port is required if you wish to download file data or directory listings from
the scanner.
If you are not recording data on the scanner (i.e. you are only monitoring real-time data) or if
you do not wish to download files you do not have to connect to this port.
UDP Real-time (Online) Data Port
You must set your program up as a listener on the multicast broadcast from the System 7000
if you wish to monitor real-time data.
If you are not monitoring real-time data, you can ignore this data port.
UDP Event Port
You must set your program up as a listener on the multicast broadcast from the System 7000
if you wish to receive event, status, and error messages from the Scanner.
If you don’t wish to receive these messages, ignore this port. It is not required to receive
status and error messages via broadcast as you may query the system for status information
via a TCP command.
Information on configuring the system network connections is contained in the “System 7000 Instruction
Manual”. You may connect to more than System 7000 scanner in a single application.
Programming tips:
1) If you cannot establish TCP connection with a scanner, verify that you can successfully “Ping”
the IP address. If you cannot communicate with the scanner with the “Ping” command, your
program will be unable to communicate as well.
2) If you still cannot establish communication, verify that no other application is currently
connected to the scanner (such as StrainSmart or the System Calibration utility).
LabVIEW Connection to the scanner is done when you pass the VISA
Active X Connection to the scanner is done by setting the, IPAddress
Low-level Varies by language and environment
resource name of the command and data ports to the
Initialize VI.
CommandPort and DataPort properties then calling the
Open() method.
Vishay Micro-Measurements System 7000 Programmer’s Reference Manual
Page 17 of 142

3.4 System Validation
After you have successfully connected with the System 7000 you may wish to confirm the connection by
validating that you are, in fact, connected to a System 7000.
LabVIEW Use the ID Query parameter to the Initialize VI to
Active X The Open() method will automatically verify the connection
Low-level Verify the identifier string in the Get Control Module
automatically perform a check. Or you may call the Query
System Information VI.
or you may call the GetSystemInformation() method.
Information command.
3.5 Configuration
3.5.1 System Level Configuration
Certain system-level commands are useful (but not required) as part of configuration.
Set the System 7000 date and time:
This should be done as part of the system startup. For closest correlation with the personal
computer clock this can also be done as part of configuration before the system is armed.
LabVIEW Use the SetDateandTime parameter to the Initialize vi to
Active X SetDateTime method
Low-level Set Date/Time command.
Clear Errors:
Clears active card and system errors. It does not delete or clear the error log files.
LabVIEW Use the ClearErrors parameter to the Initialize vi to
Active X ClearErrors method
Low-level Clear Errors command.
Detect Cards:
Provides a listing of the slot locations where an I/O card is detected.
LabVIEW Detect Cards VI
Active X DetectCards method
Low-level Card Detect command
automatically set the date and time. You may also call the
Set Data and Time VI.
automatically clear errors. You may also call the Clear All
Errors VI.
Vishay Micro-Measurements System 7000 Programmer’s Reference Manual
Page 18 of 142

3.6 Card-level Configuration
Card-level configuration commands are performed on an individual I/O card. Any settings are applied to
all channels on the card. Instructions on how to determine the appropriate values for the settings is
beyond the scope of this manual, see the “System 7000 Instruction Manual”, the StrainSmart help system,
or contact the Vishay Micro-Measurements application engineering department for assistance.
All Cards
Query Card Type: If you have a scanner with a variety of cards, you may wish to query the
system to determine which card type (strain gage, high level, thermocouple, or LVDT) is in
each slot.
LabVIEW Query Card Information VI
Active X GetCardInformation method
Low-level Get Card Information command
Reset the Card: Resets the configuration values to the default state.
LabVIEW Use the ResetAimCards parameter to the Initialize vi to
Active X ResetCard method.
Low-level Reset Card command
Programming tip: This command should be used to set a card (and its channels) back to
the default states. This can be a useful shortcut in your program.
Strain Gage Cards
Configure the excitation settings.
LabVIEW Configure Strain Gage Card Excitation VI
Active X ConfigureStrainGageCardExcitation method
Low-level Set Excitation command
High Level Cards
Configure the excitation settings.
LabVIEW Configure High Level Card VI
Active X ConfigureHighLevelCardExcitation method
Low-level Set Excitation command
Thermocouple Cards
No card-level configuration
reset all cards. You may also call the Reset VI.
Excitation Output Enable/Disable command
(The excitation level should be set before the excitation
output is enabled.)
Excitation Output Enable/Disable command
(The excitation level should be set before the excitation
output is enabled.)
Vishay Micro-Measurements System 7000 Programmer’s Reference Manual
Page 19 of 142

LVDT Cards
Set the frequency and enable the excitation voltage.
Note: There is interdependence between the excitation state and the demodulator source input
configuration. The System 7000 automatically sets the demodulator source to Positive Reference
when the excitation is disabled.
LabVIEW Configure LVDT Card Excitation VI
Active X ConfigureLVDTCardExcitation method
Low-level Set Excitation Frequency command
Set Excitation command
Excitation Output Enable/Disable command
(The excitation frequency and level commands should be
set before the excitation output is enabled.)
Programming tip: It is common to loop through all 16 (or 4) slots in the scanner. If the slot has a card
inserted, query the type of card, and perform the appropriate card-level configuration.
3.7 Channel-level Configuration
Channel-level commands are performed on an individual channel on the card. Remember there are
typically eight channels on a card and each must be set independently. Instructions on how to determine
the appropriate configuration settings is beyond the scope of this manual, see the “System 7000
Instruction Manual”, the StrainSmart help system, or contact the Vishay Micro-Measurements application
engineering department for assistance.
All Cards
You must assign a filter to each channel. The filter is based on the scan rate (sampling rate) of
the system. It is recommended that you use the default filter for the scan rate, though it is also
possible to enter your own 252 tap filter.
LabVIEW Configure Default Filter VI
Active X SetDefaultFilter method
Low-level Set Default Filter command
Strain Gage Cards
For strain gage cards you must configure the bridge settings.
LabVIEW Configure Strain Gage Channel Bridge Settings VI
Active X ConfigureStrainGageChannelBridgeSettings method
Low-level Enable/Disable Half Bridge command
Dummy Resistor Selection command
High Level Cards
No channel-level configuration
Thermocouple Cards
Define the thermocouple type
LabVIEW Configure Thermocouple Channel VI
Active X ConfigureThermocoupleChannel method
Low-level Set Thermocouple Type command
Vishay Micro-Measurements System 7000 Programmer’s Reference Manual
Page 20 of 142

LVDT Cards
Select the demodulator input source.
LabVIEW Configure LVDT Channel Input Connections VI
Active X ConfigureLVDTChannelInputConnections method
Low-level Enable/Disable Half Bridge command
Set LVDT Demodulator Source command
Programming tip: As you are looping through each card in the system, you may embed a loop that
indexes through each channel on the card and perform the channel-level configuration.
3.8 Configuring Scan Information
You must also program the scan rate and the scan list for each scanner. Please refer to the definition of
scan and scan rate.
Scan Rate
Static systems (those whose inputs change slowly) generally use a much lower scan rate than
dynamic systems (those whose inputs change rapidly). You should always attempt to match your
scan rate with the highest rate of change of your inputs.
The System 7000 has a base-10 and a base-2 master clock and you are provided with a selection
of scan rates for both clocks.
The scan rate must be the same for every card and scanner in the network.
Scan List
The scan list defines which channels will be read during scanning. For example if you have 2
cards in your system, you may only wish to take readings from the first channel on each card.
Therefore your scan list will include card 1:channel 1 and card 2:channel 1.
Scan Buffer Size
The scan buffer size defines the number of scans that may be stored in the scan buffer before the
data is written to the card’s compact flash. This effects how many scans may be specified for
pre-triggering.
There is a tradeoff when considering how to size your scan buffer. A larger scan buffer size
allows you to have a larger pre-trigger buffer for use in recording. However, having a smaller
scan buffer reduces the amount of data that may potentially be lost in the event of a catastrophic
power outage (as more data has been offloaded to secure memory). It is recommended to always
use the smallest scan buffer size possible for your application
LabVIEW Configure Scan VI
Active X ConfigureScan method
Low-level Set Scan Rate command
Create Scan List command
Set the Size of the Scan Buffer command
Vishay Micro-Measurements System 7000 Programmer’s Reference Manual
Page 21 of 142

3.9 Recording
Each card in the system has its own compact flash card and the card may be configured to store the
sampled data on the compact flash card. This data may be retrieved at the end of the scanning session.
There are three different methods for recording data. You may choose not to record data or combine one
or more of the methods.
3.9.1 Setting up Simple Recording
The most common types of recording are
1. Continuous Time-based Recording: Record all selected channels continuously at the scan rate.
Recording starts automatically when scanning starts and ends when scanning is stopped.
2. Continuous Manual Recording: Record all channels continuously at the scan rate. Recording
starts when a “Start Recording” command is received and stops when the “Stop Recording”
command is received.
Continuous Time-based Recording
To set up the System 7000 scanner for continuous time-based recording perform the following steps.
1. Assign all channels to a single recording group (group A).
2. Configure the time-based recording mode to be “Continuous”.
3. Set the time-based skip count, burst count, and burst skip count to 0.
4. Set the time-based delay and recording count to 0.
LabVIEW Configure Channel Recording Group VI
Active X SetChannelRecordingGroup method
Low-level Set Channel Recording Group command
Continuous Manual Recording
To set up the System 7000 scanner for continuous manual recording perform the following steps.
1. Assign all channels to recording group A.
2. Configure the manual recording mode to be “Continuous”.
3. Set the manual recording “pre-trigger” buffer size to 0.
LabVIEW Configure Channel Recording Group VI
Active X SetChannelRecordingGroup() method
Low-level Set Channel Recording Group command
Configure Time Based Recording VI
Configure Time Based Recording Start and Stop VI
ConfigureTimeBasedRecording method
ConfigureTimeBasedRecordingStartStop method
Set Time-Based Recording Mode command
Set Time-Based Recording Count command
Set Time-Based Recording Delay command
Set Time-Based Recording Skip Count command
Set Time-Based Recording Burst Count command
Set Time-Based Recording Burst Skip Count command
Configure Manual Recording VI
ConfigureManualRecording() method
Set Manual Recording Mode command
Set Pre-trigger Buffer Size for Manual Recording command
Vishay Micro-Measurements System 7000 Programmer’s Reference Manual
Page 22 of 142

3.9.2 Advanced Recording Options
3.9.2.1Recording Groups
The System 7000 is capable of assigning every channel on a card to one of four recording groups (A-D).
This may be used as a means to assign different recording rates and configurations to channels. In other
words, even though all channel data is being acquired at the same rate you are capable of storing the data
with a variety of different rates and methods. The default for all channels is an assignment to group A.
Card Channel Group
1
1 A
2 A
3 A
4 A
5 B
6 B
7 B
8 B
2
1 A
2 B
3 C
4 D
5 A
6 B
7 C
8 D
3
1 C
2 C
3 C
4 C
5 D
6 D
7 D
8 D
Table 5
Because your scan rate is selected based upon the inputs with the highest rate of change, you may wish to
use multiple recording groups if you have some inputs that change more slowly. This reduces the amount
of data that is stored and improves system performance. A common scenario is when a system has
thermocouple inputs used to monitor the ambient temperature in addition to strain gage inputs. Because
temperatures may only change 2-3 degrees per hour the thermocouple inputs may be recorded at a slower
rate than the strain gage inputs.
In the figure below four traces are shown, each representing a unique record rate. For simplicity,
assume that only time-based recording is selected. Each point represents a recorded scan.
As an example, a scanner has three cards with the channels assigned
to groups as shown. Each channels assigned to group A is recording
at the scan rate (for example 1000 samples/sec). You may define all
the Group B channels to have a recording rate 0f 500 samples/sec,
Group C of 100 samples/sec, and Group D of 10 samples/sec.
It is recommended that you send the recording configuration for all
groups to all cards; if a card doesn’t have any channels in that group
then the configuration information isn’t used. In this way, all
channels in Group A share the same recording rate, all channels in
Group B share a rate, and so forth, regardless of card.
It is possible, but not recommended, to have the groups configured
differently on each card. This manual assumes that each recording
group is configured identically across all cards. All examples and
discussion are based on this assumption.
Vishay Micro-Measurements System 7000 Programmer’s Reference Manual
Page 23 of 142

Figure 3 – Example of Recording Groups
LabVIEW Configure Channel Recording Group VI
Active X SetChannelRecordingGroup method
Low-level Set Channel Recording Group command
3.9.2.2 Configuring Time Based Recording
Time-based recording is the type of data recording that is performed based on a time interval.
Group-level Recoding Options
The following recording options are configured based on a recording group (A-D).
Recording Mode
Time-based recording may be disabled (off) or set up to record continuously or intermittently (i.e.
in "bursts").
Off: Time-based recording is disabled
Continuous: When recording continuously, scans are recorded at a fixed rate for the
entire duration of the scan session.
Burst: In burst mode, recording may be scheduled to occur at certain intervals
throughout the scan. For example, you may specify to record a "burst" of 100 scans
every 2 minutes.
Skip Count
The skip count is used when the recording mode is “continuous” or “burst”. The skip count
allows you to specify how many scans to skip between each recorded scan. A value of 0 means
skip none (i.e. record each scan). A value of 1 means record every other scan, a value of 9 means
record every 10th scan, etc… This value is used in both continuous and burst recording modes.
If you would like to think in terms of a recording rate (i.e. record 1 scan every N secs), you can
calculate the number of scans to skip by:
Skip_Count = (Scan_Rate * Desired_Recording_Interval) - 1
For example if your scan rate is 10 scans/sec and you would like to record a scan every 5 seconds:
Skip_Count = (10 * 5) - 1 = 49 scans
Vishay Micro-Measurements System 7000 Programmer’s Reference Manual
Page 24 of 142

And an example in different wording, if your scan rate is 2000 scans/sec (2kHz) and you would
like to record at a rate of 10 scans/sec (10Hz):
Skip_Count = (2000 /10) - 1 = 199 scans
Burst Count
The burst count is used when recording in burst mode and allows you to specify how many
recordings to store during each recording burst. It is used in conjunction with the burst skip count.
The burst count can be considered the “number of scans to record during each burst”.
For example, if your scan rate is 100 scans/sec and you would like to record 400 scans during
each burst, the burst count is simply 400.
You may also consider the burst from the perspective of “interval of time” and calculate the
number of scans to record as follows:
Burst_Count = (Recording_Rate * Record_Time)
For example if you have a scan rate of 100 scans/sec and you would like to record data for 5
seconds
Burst_Count = 100 * 5 = 500 scans
Burst Skip Count
This value is used when recording in Burst mode. It allows you to configure the interval between
each burst.
If you would like to schedule recording to occur at a recurring rate, calculate
Burst_Skip_Count = (Scan_Rate * Recording_Interval) –
Burst_Count - 1
For example if your scan rate is 10 scans/sec and you would like to have 2 scans recorded every 5
seconds
Burst_Skip_Count = (10 * 5) – 2 - 1 = 47 scans
LabVIEW Configure Time Based Recording VI
Active X ConfigureTimeBasedRecording method
Low-level Set Time-Based Recording Mode command
Set Time-Based Recording Skip Count command
Set Time-Based Recording Burst Count command
Set Time-Based Recording Burst Skip Count command
How to set up intermittent recording
You may combine the skip count, burst count, and burst skip count to set up intermittent
recording. For example, you have a scan rate of 2 kHz and wish to record at a rate of 1 kHz.
Further you wish to only perform recording for 30 seconds every 5 minutes. In other words, you
will record a 30 second “burst” of data every 5 minutes (300 seconds). That 30 second burst will
have a recording rate of 1000 samples/second. Calculate as follows:
Skip_Count = (2000 / 1000) - 1 = 1 scan
Burst_Count = 2000 * 30 = 60000 scans
Burst_Skip_Count = (2000 * 300) –60000- 1 = 539999 scans
Vishay Micro-Measurements System 7000 Programmer’s Reference Manual
Page 25 of 142

Card-Level Recoding Options
The following time-based recording options are configured on a per card basis.
Recording Delay before Start
The number of scans to delay before recording of the data starts. A value of 0 means that the
scanner will start recording at the first scan, likewise, a value of 100 means that the scanner will
start recording at the 100th scan.
If you would like to delay a certain amount of time before recording starts you can calculate the
number of scans required to reach the time by:
Number of Scans to Delay = Scan_Rate * Time_Delay
For example if your scan rate is 10 scans/sec and you would like to delay 5 seconds before
recording starts
Number of Scans to Delay = 10scans/sec * 5 secs = 50 scans
Number of Scans to Record
Specifies the total number of scans to record. A value of 0 indicates that recording will not stop
until scanning stops! A value of 1000 means that you will stop recording after 1000 scans have
occurred. (To clarify, recording stops after the 1000th scan, not after 1000 scans have been
recorded.)
If you would like to record for a certain amount of time, you can calculate the number of scans
required to reach the time by:
Number of Scans to Record = Scan_Rate * Amount_of_Time
For example if your scan rate is 10 scans/sec and you would like to record for 30 seconds
Number of Scans to Record = 10 * 30 = 300 scans
LabVIEW Configure Time Based Recording Start and Stop VI
Active X ConfigureTimeBasedRecordingStartStop() method
Low-level Set Time-Based Recording Delay command
Set Time-Based Recording Count command
3.9.2.3 Configuring Manual Recording
Unlike time-based recording, manual recording does not start automatically. Manual recording on the
scanner starts when a “Start Manual Recording” command is received and ends when a “Stop Manual
Recording” command is received. Your program can tie these commands to a user input, a signal read
from another device, or similar.
Vishay Micro-Measurements System 7000 Programmer’s Reference Manual
Page 26 of 142

Manual Recording Mode
You have several manual recording mode options. Notice these are performed on a card level
(not a group level).
Off- Disables manual recording on the card
SingleShot- Configures the card to record one reading when a start manual recording
command is received. (There is no need to send a Stop Manual recording command.)
Continuous - Configures the card to record continuously after the manual recording is
started until manual recording is stopped
Manual Recording “Pre-Record” Buffer Size
The System 7000 buffers a defined number of scans. You may specify that when you send
the “Start Manual Recording” command to the scanner you would also like to record some
number of scans that occurred just previously. You must specify the number of “pre-record”
scans that you would like have recorded. For example, you send the “Start Recording”
command based on some external signal. The scanner receives the command when scan N is
being processed. But you want to allow for some amount of lag time between the event that
generated the signal and the “Start Recording” command being sent, so you specify that you
would also like to record the 5 most previous scans. In this case you would also be recording
scans N-5, N-4, N-3, N-2, N-1, as well as N and so on.
If you'd like to think of acquiring XX number of seconds of "pre-trigger" data, use the
following formula to convert time into scans.
NumScans = ScanRate * Time
LabVIEW Configure Manual Recording VI
Active X ConfigureManualRecording method
Low-level Manual Recording Mode command
Set Pre-trigger Buffer Size for Manual Recording command
3.9.2.4 Configuring Limits Recording
Because of the flexibility of our limits recording, this section contains a lot of inter-dependent information.
There are examples at the end of the section that tie much of the material together.
How Limits Work
In the following two figures we will use two channels shown below as green and red traces on a
chart. A purple line through the middle of the chart will represent the threshold above which a
limit condition will satisfied for each channel. Anytime the channel’s trace is above the line that
channel can be said to have satisfied (or tripped) a limit condition.
Figure 4 – Limits
Figure 4 shows when limits are satisfied in yellow.
Vishay Micro-Measurements System 7000 Programmer’s Reference Manual
Page 27 of 142

Trip Scan
A trip scan is the scan that satisfies a limit when no other limit is active. When a trip scan occurs
it is recorded on all channels regardless of the recording rate. Trip scans are always recorded
because they indicate which scan initiated limits-based recording. Notice how when the channel
represented as a red line crossed the threshold, it satisfied a limit but it did not cause a trip scan.
This is because limits-based recording is already active.
Figure 5 – Limit Trip Scans
Figure 5 shows 'trip scans' as yellow dots.
Defining Limits
In the System 7000 scanner defining limits is a four-step process. First define the limit conditions, next
define how you want the card to respond to a limits condition, then assign a limit condition to a channel,
and, lastly, configure how you want recording to occur based on that limit.
Defining Limit Conditions
The first step is defining a limit conditions table that is sent to each card in the system. The table
can hold up to 50 defined conditions. (Though only incremental limits type use more than 1
condition.) The following parameters are used to define this limit condition table.
Index
Index of a limit condition in the limit condition table
Test Condition
The test condition defines the test that will activate a limit.
None - This condition does not have a limit assigned.
Greater Than - Trip when the input reading is greater than the upper limit value.
Less Than - Trip when the input reading is less than the lower limit value.
Equal - Trip when the input reading is equal to the upper limit value.
Between - Trip when the input reading is between the two limit values specified.
Outside - Trip when the input reading is outside the range specified by the two limit
values.
Range -This condition is valid only when the Limits Type is set to Range mode. The
limit will be tripped when the input reading is within the specified range as defined
by the increment/decrement values.
Lower Limit
The lower limit value is used in checking the test condition. The lower limit is used by the
Less Than, Between, Outside, and Range conditions. This value is entered in analog-todigital converter counts.
Vishay Micro-Measurements System 7000 Programmer’s Reference Manual
Page 28 of 142

Upper Limit
The upper limit value is used in checking the test condition. The upper limit is used by the
Greater Than, Equal, Between, Outside, and Range conditions. This value is entered in
analog-to-digital converter counts.
Strain Gage 1 count = 0.5µε, or 0.25µV/V
High-Level 1 count = 100µV
Thermocouple 1 count = 1µV
LVDT 1 count = 50 µV
Table 6
rms
Number of “Pre-Limit” Scans
The System 7000 buffers a defined number of scans. You may specify that when a limit is
tripped you would also like to record some number of scans that occurred just previously.
You must specify the number of “pre-limit” scans that you would like to have recorded. If
you'd like to think of acquiring N number of seconds of "pre-limit" data, use the following
formula to convert time into scans.
NumScans = ScanRate * Time
Number of “Post-Limit” Scans
You may also specify some number of scans that should be recorded after the limit goes
inactive. If you'd like to think of acquiring N number of seconds of "post-limit" data, use the
following formula to convert time into scans.
NumScans = ScanRate * Time
Table 7 shows that
three limits are
defined.
This table should be
passed to each card
in the scanner. Note:
the indexes must be
assigned sequentially
(i.e. do not skip an index).
Index Condition Lower
Limit
Upper
Limit
Pre-Limit
Scans
Post-Limit
Scans
0 Greater Than not used 1000 100 0
1 Less Than 50 not used 0 0
2 Outside 700 800 0 0
:
:
None not used not used 0 0
None not used not used 0 0
49 None not used not used 0 0
Table 7
LabVIEW Configure Limit Condition VI
Active X ConfigureLimitCondition method
Low-level Set Limit Event Condition command
Set Lower Limit Value command
Set Upper Limit Value command
Set Pre-trigger Buffer Size command
Set Post-trigger Buffer Size command
Vishay Micro-Measurements System 7000 Programmer’s Reference Manual
Page 29 of 142

e. This limit type
trigger buffers are valid and are
Defining the Type of Limit (how limit’s are handled by a card)
The Limit Type defines the style of limit handling performed by a card. (The limit type is the
same for all channels on a card.)
None:
Normal:
Limit conditions will not be checked.
Normal limits type allows varying methods of recording.
Examples: Record continuously when my temperature sensor indicates
greater than 100° or record while my strain gage sensor indicates a value
between 800 and 900 µStrain.
Incremental:
Allows limits to be defined with multiple sets of conditions that are
evaluated in a defined sequence. As a limit condition is met, the card
begins checking for the next limit condition in the sequenc
is often used for load or hysteresis testing. The recording type is ignored as
it is assumed to be singleshot. Pre-and postuseful in defining a fixed number of scans to be recorded at each limit.
Examples: Record 1 scan when my load cell indicates a value greater than
100 kilograms, then record 1 scan when my load cell indicates greater than
250 kgs, and finally when greater than 500 kgs.
Range:
In this mode, the card considers the first scan to trip the first limit. When
the input values shift upward or downward by the specified range, the next
limit condition is tripped. This occurs throughout the duration of scanning.
The recording type is ignored as it is assumed to be singleshot. Pre-and
post-trigger buffers are valid and are useful in defining a fixed number of
scans to be recorded at each limit.
Example: Record the first scan, then record 1 scan every time my
transducer sees another 100 kilograms added or removed.
LabVIEW Configure Limits Type VI
Active X SetLimitType method
Low-level Set Limit Type command
Assigning Limit Conditions to a Channel
Assigning the Number of Limit Conditions to a Channel
After you have defined your table of limit conditions, you should assign each limit condition to
one or more channels. The channel that is assigned the condition is the channel whose value is
monitored and compared. You may assign a single limit condition to multiple channels.
If a Normal or Range type limit is active, a channel may only have one limit condition assigned.
So the channel's limit index of 0 may be assigned to any of the 50 definable limit conditions
For Incremental limits, a channel may be associated with up to 50 limit conditions.
(i.e. channel limit indexes 0 through 49 may be assigned to any of the 50 definable limit
conditions). Note: these limits must be assigned sequentially (i.e. no channel limit indexes may
be skipped)
You must also separately define how many limit conditions are assigned to this channel ( 0
through 49).
LabVIEW Assign Limit Condition to Channel VI
Active X AssignLimitToChannel method
Low-level Assign a Limit Event Condition to a Channel command
Configure Number of Limit Conditions VI
SetLimitConditionCount method
Set Number of Limit Event Conditions command
Vishay Micro-Measurements System 7000 Programmer’s Reference Manual
Page 30 of 142

Configuring Limits-based Recording
Configuring the Limits Recording Type
The recording type determines the recording action of a card when a limit condition is
detected and the limits type is set to Normal mode
Off: No recording when limit detected
Record while limit active: Record scans while the limit condition is active.
Recording stops when the limit condition goes inactive. You may use the preand post-limit periods to extend the recording time. (Used with “normal” limit
type.)
Singleshot: Records a single scan when a limit condition goes active. You may
use the pre- and post-limit recording periods to extend the recording time. This
is a convenient way to record a fixed number of scans each time a limit
condition goes active.
Continuous: Recording starts when a limit condition is detected and continues
until scanning stops. You may define a pre-limit recording buffer size, but postlimit recording does not apply. (Used with “normal” limit type.)
LabVIEW Configure Limits Based Recording Type VI
Active X SetLimitsBasedRecordingType method
Low-level Set Limits Based Recording Settings command
Recording Groups
Recording groups are set up similarly to the time-based recording groups, please see that
section for more information.
Group-level Recoding Options
Group-level recording options are set up similarly to the time-based recording groups, please
see that section for more information.
LabVIEW Configure Limits Based Recording for Group VI
Active X ConfigureLimitsBasedRecording method
Low-level Set Limits -Based Recording Mode command
Set Limits -Based Recording Skip Count command
Set Limits -Based Recording Burst Count command
Set Limits -Based Recording Burst Skip Count command
Configuring Global Limits-based Recording
When a limit condition is activated on a channel, the card broadcasts a "limit active" signal to all
other cards in the scanner. If the scanner is part of a synchronized network, this signal is sent to
all scanners in the network (via the synch cable). You may choose to ignore the signal or you
may choose to start limits-based recoding when the signal is detected. You may have pre- and
post- limit buffers setup for global limits.
LabVIEW Configure Global Limits VI
Active X ConfigureGlobalLimits method
Low-level Ignore or Accept Sync (Global) Limits command
Set Pre-trigger Buffer Size Command for Sync (Global) Limits command
Set Post-trigger Buffer Size Command for Sync (Global) Limits command
Vishay Micro-Measurements System 7000 Programmer’s Reference Manual
Page 31 of 142
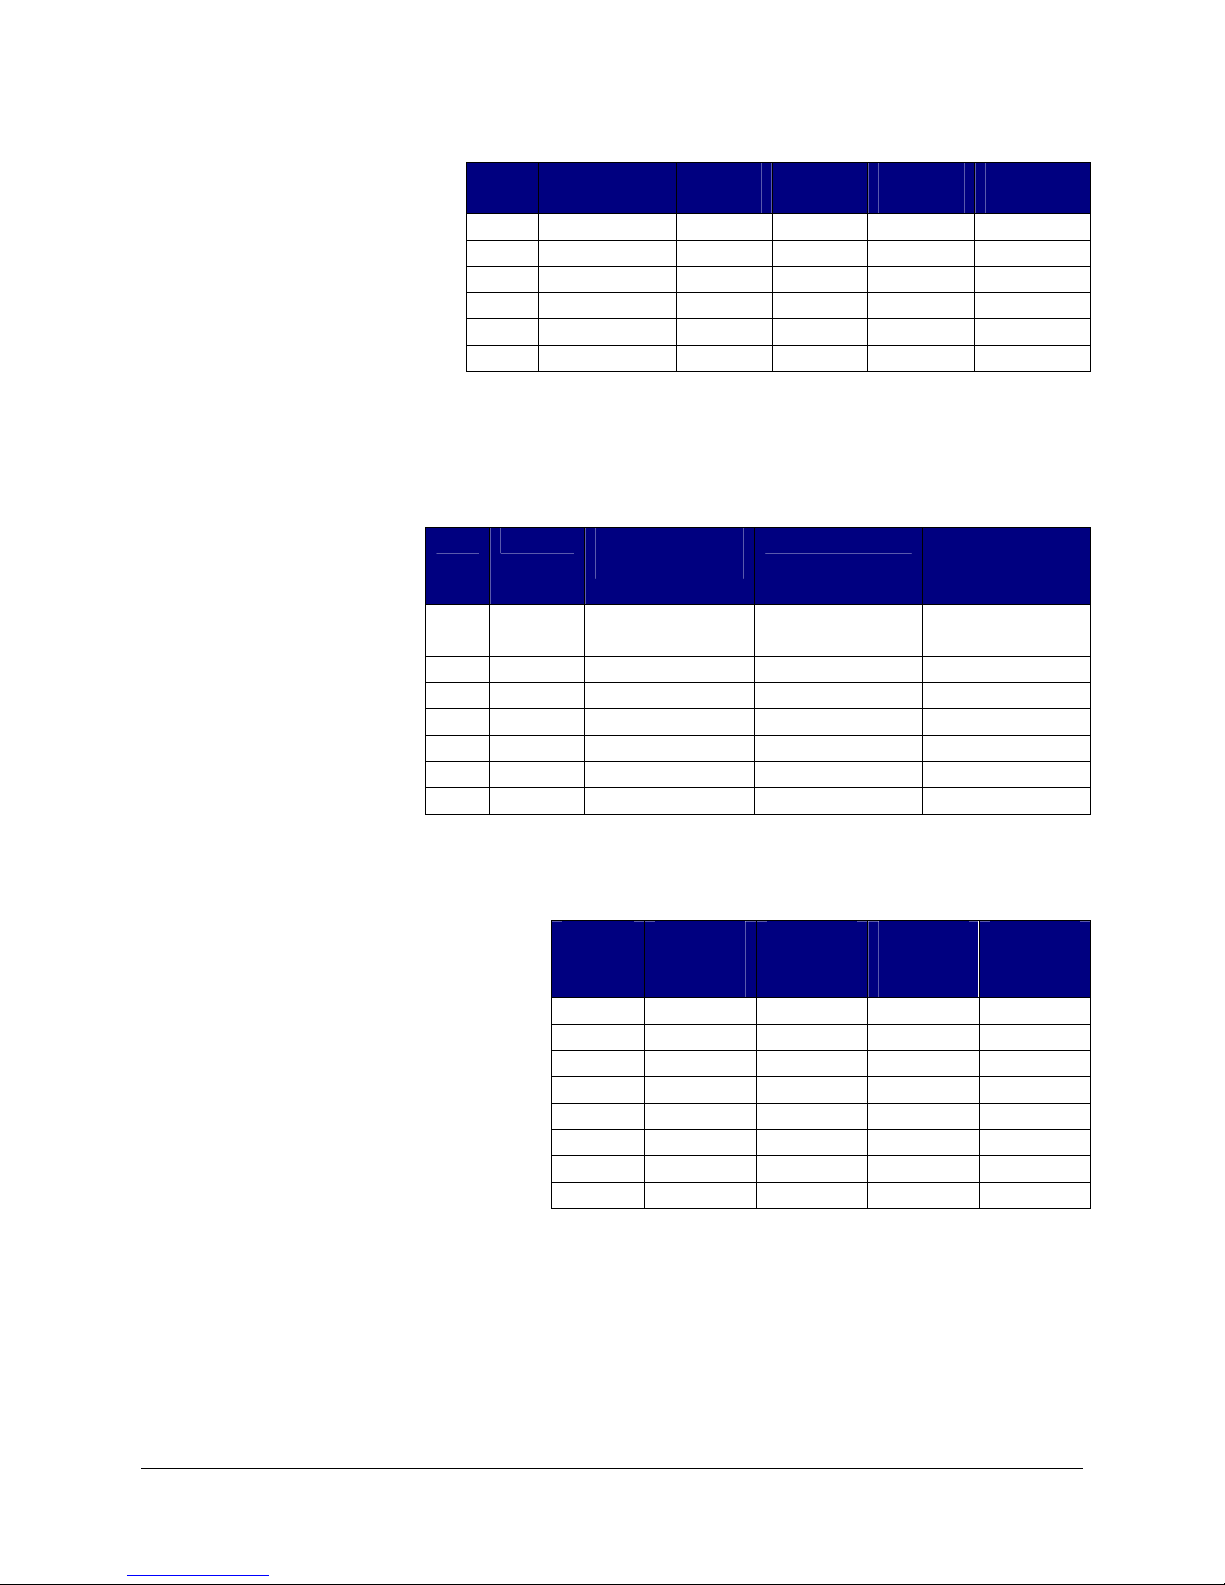
Examples of Limits-based Recording
Example 1 – Normal
Limits
Table 8 represents a limit
conditions table with 3 limits
defined.
We have 3 cards in our
system, each has a limits type
of normal. Remember when
Index Condition Lower
Limit
Upper
Limit
Pre-Limit
Scans
Post-Limit
Scans
0 Greater Than not used 1000 0 0
1 Less Than 50 not used 0 0
2 Outside 700 800 0 0
:
:
None not used not used 0 0
None not used not used 0 0
49 None not used not used 0 0
Table 8
the limit type is normal each channel
can only have 1 limit assigned.
On card 1, we assign limit condition 0 to channel 2. Also on card 1, we assign limit condition 1 to
channel 3. On card 2,
we assign limit condition
0 to channel 4. On card
3, we assign limit
condition 2 to channel 5.
All of the other channels
have the number of limit
conditions set to 0.
We also define the
recording type for the
card. Global limits are
not active.
Card Channel Limit Condition
Assignment
Recording type Number of
Limit
Conditions
1 Record while
limit active
2 0 1
3 1 1
2 Continuous
4 0 1
3 SingleShot
5 2 1
Table 9
Table 10 shows the readings that
satisfy the limit conditions for each
channel in red.
Scan
Number
1 400 100 400
2 500
Card 1
Channel 2
Reading
Card 1
Channel 3
Reading
45
Card 2
Channel 4
Reading
500
Card 3
Channel 5
Reading
400
500
3 800 55 800 800
4
5
6
1050
2000
3000
7 900 70 900
8 600 100 600
55
60
1090 1050
2200 2000
50 990 750
900
950
Table 10
Table 11 shows the recorded scans for each card. Green represents out of limit values. Orange and
green represents readings that are recorded.
Recorded Scans for Card 1:
Scan 2 is recorded because channel 3 has tripped the limit of “less than 50”. Scan 4 is recorded
because channel 2 trips the limit of “greater than 1000”. Since the recording type is “record while
limit active” scans are recorded through scan 6.
Vishay Micro-Measurements System 7000 Programmer’s Reference Manual
Page 32 of 142

Recorded Scans for Card 2:
Scan data is recorded starting at scan 4. Because the recording type is “continuous” all scans are
recorded until recording stops.
Recorded Scans for Card 3:
Card 3 has a recording type of “singleshot”; only the trip scan is recorded when the reading goes
out of range.
Scan
Number
1 400 100 400
2
Card 1
Channel 2
Reading
Card 1
Channel 3
Reading
500 45
Card 2
Channel 4
Reading
Card 3
Channel 5
Reading
400
500 500
3 800 55 800 800
4
5
6
7 900 70
8 600 100
1050 55 1090 1050
2000 60 2200
3000 50 990
2000
750
900 900
600
Table 11
950
Example 2 – Incremental Limits
Table 12 shows a limit
conditions table with 3 limits
defined.
Index Condition Lower
Limit
Upper
Limit
Pre-Limit
Scans
Post-Limit
Scans
0 Greater Than not used 1000 0 0
1 Greater Than not used 2400 0 0
2 Greater Than not used 6000 0 0
:
:
None not used not used 0 0
None not used not used 0 0
49 None not used not used 0 0
Table 12
We have 1 card in our system with a limits type of incremental. The limits recording type is
singleshot. Notice that all 3 limit conditions have been assigned to channel 2. All of the other
channels have the number of
limit conditions set to 0. No
global limits are active.
Card Channel Limit Condition
Assignment
Recording
type
Number of
Limit Conds
1 Singleshot
2 0, 1, 2 3
Table 13
Table 14 shows the readings that satisfy the limit conditions for the channel in red. The way
incremental limits works is that as soon as the limit condition at index 0 is satisfied, we increment to
the limit condition at index 1, when it is satisfied we move on to the condition at index 2, etc… So, in
this case, we satisfy a limit with a reading of 1050 (greater than 1000), we satisfy the second limit
with a reading of 2500 (greater than 2400), and we satisfy our last limit with a reading of 7000
(greater than 6000).
Vishay Micro-Measurements System 7000 Programmer’s Reference Manual
Page 33 of 142

Scan
Number
1 0
2 500
3 1050
4 1090
5 2000
6 2500
7 4800
8 7000
Card 1
Channel 2
Reading
Table 14
Since we are in singleshot recording mode only the trip scans are recorded.
Example 3 – Range Limits
Table 15 represents a limit
conditions table with 1 limit
defined. Range limits only have
the lower limit set.
Index Condition Lower
Limit
Upper
Limit
Pre-Limit
Scans
0 Range 100 not used 0 0
1 None not used not used 0 0
:
None not used not used 0 0
49 None not used not used 0 0
Table 15
We have 1 card in our system with a limits type of range. The limits recording type is singleshot. All
of the other channels
have the number of limit
conditions set to 0. No
global limits are active.
Card Channel Limit Condition
Assignment
1 Singleshot
Recording type Number of
Limit Conds
2 0 1
Table 16
Table 17 shows the readings that satisfy the limit conditions for each channel in red. The first scan is
Scan
Number
Card 1
Channel 2
Reading
1 0
2 50
3 150
4 200
5 40
6 100
7 110
8 70
Table 17
always recorded as a trip scan and the channel reading plus (and minus)
the entered limit value becomes the new limit value. In this example our
first reading is 0, so our next limit will occur when the reading has
changed by plus or minus 100 (0+100=100 and 0-100=-100). Our next
limit is satisfied when our reading is 150 (150>100), so 50 and 250
become our new limit values (150+100=250, 150-100=50). Our final
limit is satisfied when our reading is 40 (40 < 50), and our new limits
become -60 and 140.
Since we are in singleshot recording mode only the trip scans are recorded
Post-Limit
Scans
Vishay Micro-Measurements System 7000 Programmer’s Reference Manual
Page 34 of 142

3.10 Acquiring a Single-Point Channel Reading
A single-point channel reading acquires one sample from the analog-to-digital converter for the specified
channel. The reading is expressed in ADC counts and must be scaled. The reading is not in “raw” ADC
counts but has been corrected based on the channel’s current calibration settings.
Even if you plan to use scanning to acquire your data, you will find single-point readings useful for
performing zeroing and shunt calibrations. You cannot perform single-point reads while the system is
actively scanning.
LabVIEW Read Single Channel VI
Active X GetStaticADCReading method
Low-level Asynchronous Read A/D Converter command
3.11 Arming, Start Scanning, and Stop Scanning
Arming
Arming is initiated by the “arm” command and places the system in the armed state. The system
must be armed before you can start scanning. If the system is armed and you don’t wish to start
scanning, return to the idle state by issuing the “disarm” command.
Starting Scanning
Scanning (acquiring data) is initiated via the “start” command. If configured to do so, while the
system is scanning it is recording data and broadcasting real-time data.
Stopping Scanning
The “stop” command ends scanning and returns the system to the idle state.
LabVIEW Arm VI
Active X Arm method
Low-level Arm command
Start Scanning VI
Stop Scanning VI
StartScanning method
StopScanning method
Start command
Stop command
3.12 Synchronized (Networked) Scanners
Individual scanners may operate independently or be synchronized with each other. (i.e. They perform
simultaneous sampling because their analog-to-digital converter clock signal is shared via
synchronization cables.)
If your application does not require simultaneous sampling, it will simplify your programming (and
physical setup), if you leave your scanners unsynchronized. Unsynchronized is the default.
If you choose to synchronize your scanners, they are referred to as being “networked” together.
Vishay Micro-Measurements System 7000 Programmer’s Reference Manual
Page 35 of 142

System Initialization
At initialization you must defined each scanner's role in the network.
1. A scanner may be a simple member of a network, in which case it is required to be attached
to a "master" scanner via its sync cable.
2. A scanner may be a member of a network and be defined as the "master". A master scanner
is attached via sync cables to other scanners and is responsible for controlling
synchronization. There may only be one master in a network.
3. A scanner may also be configured as not belonging to a network. These independent (non-
networked) scanners will not be synchronized or share global limits with other scanners.
LabVIEW Configure Scanner Network Configuration VI
Active X SetScannerNetworkConfiguration method
Low-level Define Scanner’s Network Configuration command
You should also verify that the synchronization cable is present and that a master scanner is detected on
the network.
LabVIEW Verify Sync Cable Status VI
Active X GetSyncStatus method
Low-level Verify Sync Cable Status command
After Arming
After the “Arm” command has been sent to all scanners in the network, a command is sent to only the
master scanner that performs the synchronization of the analog-to-digital converters.
LabVIEW Synchronize Networked Scanners VI
Active X SynchronizeNetworkedScanners method
Low-level Synchronized Networked Scanners command
After Start
After the “Start” command has been sent to all scanners in the network, a command is sent to only the
master scanner that synchronizes the start clock signal among all scanners. Scanning does not start until
this synch is performed.
LabVIEW Start Networked Scanners VI
Active X StartSynchronizedScanning method
Low-level Start Networked Scanners command
The flowchart in Figure 6 shows the steps necessary to implement synchronized scanning.
Vishay Micro-Measurements System 7000 Programmer’s Reference Manual
Page 36 of 142

Start
Set up scanning, filtering,
and recording parameters for
all cards
No
Issue “Arm” command to all
scanners
Issue “StartScanning“
Command to all scanners
Synchronized
Scanning?
Yes
Issue “ConfigureNetworkScanners”
command and
“VerifySynchCableStatus” for all
scanners
Issue “Arm” command to all
scanners
Issue
“SynchronizeNetworkScanners”
command to Master
Issue “StartScanning“ Command to
all scanners
Issue “StartNetworkScanners”
command to Master
Figure 6 – Flow Diagram for Configuring Synchronized Scanners
3.13 Starting and Stopping Manual Recording
If your system is configured to perform manual recording (see the Recording section), you may
programmatically start and stop manual recording.
LabVIEW Control Manual Recording VI
Active X ControlManualRecording method
Low-level Start Manual Recording command
Vishay Micro-Measurements System 7000 Programmer’s Reference Manual
Scanning
Stop Manual Recording command
Page 37 of 142

3.14 Acquiring and Decoding Recorded Data
3.14.1 Identifying and Reading the Data File
When a card on the System 7000 is configured to record data, the recorded data is stored into a data file
on the card’s compact flash. This file has the extension “.7KD”. You must download the file from the
card and then decode the data in the file. After the file has been successfully downloaded, it is
recommended that you delete the file from the card in order to preserve disk space.
A header file (extension “.7KH”) is stored along with the data file. The header file contains information
such as the number of scans recorded and the time scanning started. You do not have to download or use
this information, but is recommended that you also delete this file.
The LabVIEW instrument driver provides VIs for reading and deleting files. The ActiveX automation
interface provides methods. The process is more difficult when done at a low-level.
NI LabVIEW
The NI LabVIEW instrument driver has a single function that handles identifying, downloading,
and deleting the last data and header files.
The “Read Last Scan Data” VI returns information about the last scanning session including the
name of the last data file, the size of the last data file, the number of scans recorded, and the time
the scan session started. It also returns the contents of the last scan data file. It will delete the
data file and the associated header file.
If you choose not to use this VI there are other VIs that allow you to perform these operations
independently. You will need to use these if you power-cycle or reset the scanner between taking
the data and attempting to download. (The scanner does not maintain the last data file name in
permanent memory.)
Be aware that you may need to tweak the default timeout for reading the blocks of file data as the
timing varies depending on the speed of your PC and Ethernet connection
ActiveX
The ActiveX automation interface has three methods that handle identifying, downloading, and
deleting the last data and header files.
The “GetLastDataFileInformation” method retirms the name of the last data file, the size of the
last data file, the number of scans recorded, and the time the scan session started. The method
“ReadLastDataFile” downloads the contents of the last recorded data file. The method
“DeleteLastDataFile” deletes that last data file (and associated header file).
If you choose not to use this routine there are other methods that allow you to perform these
operations independently. You will need to use these if you power-cycle or reset the scanner
between taking the data and attempting to download. (The scanner does not maintain the last data
file name in permanent memory.)
Be aware that you may need to tweak the default timeout for reading the blocks of file data as the
timing varies depending on the speed of your PC and Ethernet connection.
Vishay Micro-Measurements System 7000 Programmer’s Reference Manual
Page 38 of 142

Low-Level
Obtaining file contents is a multi-step process with the low-level commands.
1. Identify the last recorded data file and get the file size.(Get Scan Data File Info
command)
2. Use the file name retrieved in step 1 to format the header file name.
3. Download the contents of the data file (Retrieve File command)
4. Delete the data file and header file (Delete File command)
Figure 7 describes the overall process of retrieving a file. Be aware that the time between the
transmitted packets of file data may vary.
Programming Tip:
Your application must be able to keep up with reading the TCP packets as they are sent from the System
7000. If during the debug stage, the data port quits transmitting you will likely find it necessary to restart
your PC and the System 7000.
The System 7000 sends 1460 bytes of data in each TCP packet and transmits in bursts of approximately
327680 bytes (except for the last burst). The last burst is only as large as the amount of data remaining
in the file.
LabVIEW Read Last Scan Data VI
Active X GetLastDataFileInformation method
Low-level Get Scan Data File Info command
ReadLastDataFile method
DeleteLastDataFile method
Retrieve File command
Delete File command
Vishay Micro-Measurements System 7000 Programmer’s Reference Manual
Page 39 of 142

Clear Checksum
Send File Retrieve
Command to Command
Acknowledgement and
Port
File Size Received?
No
Block of Data
Received from Data
No
Read Data and Store
Update Checksum
Total Amount of
Data Received =File
Read 2-byte Checksum
from Data Port
Yes
Port?
Yes
Size?
Yes
No
No
Timeout?
Yes
Vishay Micro-Measurements System 7000 Programmer’s Reference Manual
Checksums Match?
No
Yes
Figure 7 – Flow Diagram for Reading Data Files
Error
Finished
Page 40 of 142

3.14.2 Decoding the Data File
In order to maximize data transfer speed and to minimize disk space requirements, the System 7000
employs a proprietary real-time data compression algorithm on its recorded data. This data structure
provides the ability to store data using multiple recording rates. This format also reduces the size of the
raw data file by 50% or more.
Each recorded scan consists of
1 or 2 bytes of Status Information
0 to 6 bytes of Scan ID
8 to 38 bytes of Channel Data
The LabVIEW instrument driver contains a VI that implements the decoding. If you are using the
ActiveX interface or the low-level commands you must programmatically implement the decoding
process
The following sections describe the format of the compressed file data.
LabVIEW Decode Scan Data VI
Active X Programmatically implemented by user
Low-level Programmatically implemented by user
3.14.2.1
Scan ID
The Scan ID is effectively the sequence number for each scan. The Scan ID is assigned based on the scan
rate (not the recording rate). So that the first acquired scan has a Scan ID of 1, the second acquired scan
has a Scan ID of 2, and so forth. But, remember, that you do not have to record every scan so the Scan
IDs recorded to file are not always sequential. If you are only recording every 10th scan, the first recorded
scan has an Scan ID of 1, the second recorded scan has a Scan ID of 10, etc…
The Scan ID grows dynamically as needed.
Size Scan ID Range Max Time (at 1000 samples/sec)
16-bits 1 to 65535 65 seconds
32-bits 65536 to
49.7 days
4294967295
48-bits 4294967296 to
8920 years
281474976710655
Table 18
The Scan ID width is indicated by using 2 bits in the Status Information of each scan. The Scan ID may
be stored in absolute mode or increment mode.
Absolute Mode – The Scan ID is stored as its true value. It may be either 16, 32, or 48 bits. The
first Scan ID is always in absolute mode (as it is your starting reference).
Increment Mode – if scanner detects that the Scan IDs are being incremented by 1, no Scan ID is
stored.
If the Scan ID is stored in increment mode, the scan ID must be calculated based on the most recently
recorded scan.
Vishay Micro-Measurements System 7000 Programmer’s Reference Manual
Page 41 of 142

3.14.2.2
Multiple Record Rates
Multiple record rates are defined as one group of channels recorded at a different rate than another group
of channels.
Up to 4 different groups of channels are allowed to record at different rates, which groups are recorded
are indicated by 4 bits in the Status Information of each scan.
For example:
Channel group A may contain strain gages recorded at 1,000 samples/second.
Channel group B may contain high level cards and transducers recorded at 100 samples/second.
Channel group C may contain thermocouples recorded at 10 samples/second.
Channel group D may contain a combination of other types recorded at 1 sample/second.
When using multiple record rates, data is written for each scan in the following order (as needed):
Group A channels in ascending order (based on channel number), Group B channels in ascending order,
Group C channels in ascending order, Group D channels in ascending order.
3.14.2.3
Varying Data Width
All channel data is sampled in A/D counts as 32-bit signed integers. While 32 bits are needed to represent
the full range of A/D counts, often a single channel’s A/D counts do not jump more than 127 counts from
one recorded scan to the next.
Therefore, the compression algorithm stores the full 32-bit values for all channels on the first scan. On
subsequent scans, it monitors the amount each channel changes. If no single channel changes more than
±127 counts, then it simply records the change in A/D counts (as an 8-bit value) for each channel. If the
algorithm detects a change in A/D counts greater than +-127 for any channel, then the absolute (32 bit)
value for all channels will be stored.
In other words, if all channels change less than +-127 counts then only the amount of change is recorded
for each channel. If any channel changes more than +-127 counts, then the actual (or absolute) reading is
stored for each channel. When the amount of change is stored it is referred to as relative data because we
will have to refer back to the most recently stored absolute value to derive the actual reading.
Whether a given scan holds absolute (32-bit) or relative (8-bit) values for data is designated by a bit in the
Status information.
Programming note: Though data compression has many advantages, it also means that all raw data files
have to be read sequentially. It is impossible to jump to scan number 10,000 without first starting at scan
number 1.
Vishay Micro-Measurements System 7000 Programmer’s Reference Manual
Page 42 of 142

3.14.2.4
The status information is found in 2 bytes. The second (extended) status byte is only present when
indicated.
Status Information
3.14.2.5 Status Byte
Status Byte 0
7 (MSB) 6 5 4 3 2 1 0 (LSB)
CGD
CGC CGB CGA EXT SID1 SID0 ABS
Bit 0: ABS
Does this scan contain absolute or relative data?
0 = Relative data, 1 = Absolute data
Bits 1 and 2: SID0, SID1
Size of ScanID
00 = Auto-increment by 1 from the previous scan, 01 = 16-bits, 10 = 32-bits, 11 = 48-bits
Bit 3: EXT
Extended Status Byte?.
0 = No, 1 = Yes
Bit 4: CGA
Is Channel Group A recorded in this scan?
0 = No, 1 = Yes
Bit 5: CGB
Is Channel Group B recorded in this scan?
0 = No, 1 = Yes
Bit 6: CGC
Is Channel Group C recorded in this scan?
0 = No, 1 = Yes
Bit 7: CGD
Is Channel Group D recorded in this scan?
0 = No, 1 = Yes
Status Byte 1 (Extended Status Byte)
7 (MSB) 6 5 4 3 2 1 0 (LSB)
not used not used not used not used not used not used not used
SAD
Bit 0: SAD
What is the size of the absolute data?
0 = 16-bits, 1 = 32-bits
Vishay Micro-Measurements System 7000 Programmer’s Reference Manual
Page 43 of 142

3.14.2.6 Examples
Example 1
You are scanning at 1000 samples/second and have 2 channels in Channel Group A recorded at 1000
samples/second. The first recorded scan is always recorded with absolute data, to be an initial point of
reference. Notice that the Scan ID and channel data are in little-endian format.
Example 2
You are scanning at 1000 samples/second and have 2 channels in Channel Group A and 1 channel in
Group B. Group A is recording at 500 samples/second and Group B is recording at 200 samples/second.
The first recorded scan is always recorded with absolute data, to be an initial point of reference. Notice
that the Scan ID and channel data are in little-endian format.
Recorded Data (in hex) Scan
3B01010001000000FF00000005000000 01 1 255 5 16-bit absolute Scan ID, 32-bit
1203000000 03 1 255 not
1205000100 05 2 252 not
22060002 06 not
1207000000 07 2 252 not
1209000000 09 2 252 not
320B00000000 11 2 252 7 Incremented Scan ID, relative
Recorded Data (in hex) Scan
ID
1B01010001000000FF000000 01 1 255 16-bit absolute Scan ID, 32-bit
100000 02 1 255 Incremented Scan ID, relative
1005FD 03 6 252 Incremented Scan ID, relative
1900200000FC000000 05 8192 252 Incremented Scan ID, 32-bit absolute
100201 06 8194 253 Incremented Scan ID, relative
(Red = Status Byte(s), Green = Scan ID, Blue = Channel Data)
Chan 1
Value
Table 19
Chan 2
Value
Description
absolute channel data, group A
channel data, group A
channel data, group A (note, here,
the FD represents -3)
data, group A
channel data, group A
Chan 1
ID
Value
present
Table 20
(Red = Status Byte(s), Green = Scan ID, Blue = Channel Data)
Chan 2
Value
not
present
Chan 3
Value
present
present
7 Incremented Scan ID, relative
present
present
Description
absolute channel data, group
A, group B
Incremented Scan ID, relative
channel data, group A
Incremented Scan ID, relative
channel data, group A
data, group B
Incremented Scan ID, relative
channel data, group A
Incremented Scan ID, relative
channel data, group A
channel data, group A, group
B
Vishay Micro-Measurements System 7000 Programmer’s Reference Manual
Page 44 of 142

3.14.2.7 Sample Code
This Microsoft Visual Studio C# code snippet shows a basic technique for decoding the data found in a
System 7000 data file from a single card. It assumes that all 8 channels have been assigned to the same
recording group, but the technique shown can easily be expanded to include all groups. In this sample,
the decoded values are written to a console window. In your application you will store and analyze the
data as appropriate. This snippet has been written to make it easy to understand; it is recommended that
you optimize the logic as needed for your requirements. This snippet is included as a sample for the
ActiveX interface.
byte[] inByte = new byte[6]; // byte is an unsigned 8-bit integer
sbyte[] dataByte = new sbyte[4]; // sbyte is a signed, 8-bit integer
byte statusByte;
byte dataType;
byte scanIDSize;
byte extendedStatusByte;
byte groupARecorded;
byte groupBRecorded;
byte groupCRecorded;
byte groupDRecorded;
byte absDataSize;
ulong scanID; // (ulong is a 64-bit, unsigned integer)
int[] groupAValue = new int[8]; // maximum of 8 channels on a card
int[] groupBValue = new int[8];
// For this sample, hard code the number of channels in each group
int numChannelsinGroupA = 8;
try
{
// Open an existing binary file - a .7KD, System 7000 Data File
BinaryReader inFile = new BinaryReader(File.Open("C:\\Temp\\00011234.7KD",FileMode.Open));
// Each iteration of the loop will process a single scan
// Start by reading 1 byte from the file stream (this single, first byte
// is our status byte
scanID = 0;
while (inFile.Read(inByte, 0, 1) != 0)
{
// Decode the status byte
statusByte = inByte[0];
// 0 = relative data, 1 = absolute data
dataType = (byte)(statusByte & (byte)0x01);
// 00 = auto-increment, 01 = 16 bits, 02 = 32 bits, 11 = 48 bits
scanIDSize = (byte)((statusByte & (byte)0x06) >> 1);
// 00 = No, 01 = Yes
extendedStatusByte = (byte)((statusByte & (byte)0x08) >> 3);
groupARecorded = (byte)((statusByte & (byte)0x10) >> 4);
groupBRecorded = (byte)((statusByte & (byte)0x20) >> 5);
groupCRecorded = (byte)((statusByte & (byte)0x40) >> 6);
groupDRecorded = (byte)((statusByte & (byte)0x50) >> 7);
// if we have an extended status byte, read the absolute data size
if (extendedStatusByte == 1)
{
// Read one byte from our file stream
if (inFile.Read(inByte, 0, 1) == 0) throw new System.ApplicationException();
// 0 = 16 bits, 1 = 32 bits
absDataSize = (byte)(inByte[0] & (byte)0x01);
}
else
{
// If there is no extended status byte assume the data size is 16 bits
absDataSize = 0;
}
// Next in the file stream is the scan id
if (scanIDSize == 00)
{
// auto-increment the scan id
scanID++;
}
else if (scanIDSize == 01)
{
// read in a 16-bit (2 byte) scan id
Vishay Micro-Measurements System 7000 Programmer’s Reference Manual
Page 45 of 142

if (inFile.Read(inByte, 0, 2) == 0) throw new System.ApplicationException();
scanID = (ulong)((ulong)inByte[0] | ((ulong)inByte[1] << 8));
}
else if (scanIDSize == 02)
{
// read in a 32-bit (4 byte) scan id
if (inFile.Read(inByte, 0, 4) == 0) throw new System.ApplicationException();
scanID = (ulong)((ulong)(inByte[0] | ((ulong)inByte[1]) << 8) |
((ulong)inByte[2] << 16) | ((ulong)inByte[3] << 24));
}
else if (scanIDSize == 03)
{
// read in a 48-bit (6 byte) scan id
if (inFile.Read(inByte, 0, 6) == 0) throw new System.ApplicationException();
scanID = (ulong)((ulong)(inByte[0] |((ulong)inByte[1]) << 8) |
((ulong)inByte[2] << 16) | ((ulong)inByte[3] << 24) |
((ulong)inByte[4] << 32) | ((ulong)inByte[5] << 40));
}
else
{
// Invalid scan ID size
throw new System.ApplicationException();
}
// If group A data is recorded
// Write the scan ID to the console
// Note: This example is only supporting group A, expand
// this statement to reflect the number of groups you're supporting.
if (groupARecorded == 01)
{
// write the 64-bit scan id to the console window
Console.WriteLine(scanID);
}
// If groupA is recorded, read a value for each channel in the group
if (groupARecorded == 01)
{
for (int i = 0; i < numChannelsinGroupA; i++)
{
// if a relative (8-bit) data type
if (dataType == 0)
{
// we are reading in a 1-byte relative value, add it to the current value
groupAValue[i] = groupAValue[i] + (sbyte)inFile.ReadByte();
}
else
{
if (absDataSize == 0)
{
// absolute data size is 16 bits so read 2 bytes from file
if (inFile.Read(inByte, 0, 2) == 0) throw new System.ApplicationException();
groupAValue[i] = (int)((int)inByte[0] | ((int)inByte[1] << 8));
}
else
{
// absolute data size is 32 bits so read 4 bytes from file
if (inFile.Read(inByte, 0, 4) == 0) throw new System.ApplicationException();
groupAValue[i] = (int)((int)inByte[0] | ((int)inByte[1] << 8) |
((int)inByte[2] << 16) | ((int)inByte[3] << 24));
}
}
// Write the 32-bit data value to the console window
Console.WriteLine(groupAValue[i]);
} // end for
}// end if group A recorded
if (groupBRecorded == 01)
// not shown in this sample
if (groupCRecorded == 01)
// not shown in this sample
if (groupDRecorded == 01)
// not shown in this sample
} // end while
Vishay Micro-Measurements System 7000 Programmer’s Reference Manual
Page 46 of 142

3.14.3 How Data Files are Named
Data files are named based on a “box id” number and an index. The first four characters of the file name
are the box id and the last four characters are the index. For example, if the box id is “0001” and the
index is “0123”, the file name is “00010123.7KD”.
Generally, you may leave the box id of your scanner to the default value of “0001”. The only purpose of
assigning a box id to a scanner is if you wish to include a unique box id in the file name.
The index value is stored on each card and is incremented each time a new data file is created. After the
index value reaches “9999”, it rolls over to “0001”. The index value is stored in a file named “Index.7KI”.
This file is on each card’s compact flash. If this file is deleted, the index will default to “0001”.
LabVIEW Set Box ID VI
Active X SetBoxID method
Low-level Set Box ID from Scan Header command
3.14.4 What is a Header File?
The System 7000 stores a header file (extension “.7KH”) along with the data file. This is a legacy feature
that is required by Vishay’s StrainSmart application. You do not have to download or use this file, but is
recommended that you delete this file when the corresponding data file is deleted.
The header file contains the following information:
Token Description Defined
by User
GUID= Standard globally unique identifier (GUID),
Yes
Default = {00000000-0000-0000-0000000000000000}
This value is not used by the scanner, but may be
defined by the user.
BoxNumber= May be used to assign a unique box number to
Yes
each scanner in a multiple scanner system. Used
in naming the data files.
BoxIP= This value is not used by the scanner, but may be
Yes
defined by the user. (It should not be confused
with setting the IP address that is used for TCP
communication.)
Iteration= The iteration count indicates how many times
Yes
scanning has occurred for the defined GUID. If
the GUID changes the iteration count resets. Not
used by the scanner.
ProjectName= This value is not used by the scanner, but may be
Yes
defined by the user.
ScanSession= This value is not used by the scanner, but may be
Yes
defined by the user.
CardMask= The card mask indicates the scanner slot where
Yes
the card is located. For example, a value of 08
represents slot 4.
Updated
by
Scanner
Vishay Micro-Measurements System 7000 Programmer’s Reference Manual
Page 47 of 142

DateTimeStamp= The date and time scanning started in
Yes
“MM/DD/YYYY HH:MM:SS” format.
Number of Scans
Recorded=
The number of scans recorded during a scan
session.
Table 21
Yes
Because this is a legacy feature, the commands to set the user-definable fields are available only in the
low-level format. The exception is the command to set the Box Number (ID).
3.15 Acquiring Real-time (Online) Data
The System 7000 has the ability to broadcast real-time (online) data via the UDP data port. This data is
broadcast while the System 7000 is actively scanning.
3.15.1 Configuring the Real-time (Online) Data Transmission
You may configure which channels are to be included in the real-time data and at what rate the data is
transmitted.
Channel Mask –a channel mask for each card defines which channels on the card are to be
included in the real-time data broadcast.
7 6 5 4 3 2 1 0 Bit
8 7 6 5 4 3 2 1 Channel (0=disable, 1=enable)
This mask is bitmapped, so for example, if you would like the system to broadcast data from the
first and fifth channels of a card. Your mask should be 0x11 (0b00010001). Note the ActiveX
automation interface uses a different method for selecting the channels.
Skip Count - This value defines the number of scans to skip between each transmission.
Skipping scans will effectively lower the transmission rate. (For example, if you are scanning at
1000 scans per second and set your skip count to 100 scans you will be broadcasting online data
at a rate of 10 scans per second.) A skip rate of 0 means don't skip any scans.
LabVIEW Configure Online Data VI
Active X ConfigureOnlineDataTransfer method
Low-level Configure Online Data command
Programming Note: A System 7000 is capable of generating a significant amount of data traffic.
It is recommended that you use the skip count to reduce the amount of traffic.
3.15.2 Controlling the Real-time (Online) Data Transmission
If you have configured the System 7000 scanner to broadcast real-time data, you may start and stop the
broadcast programmatically.
LabVIEW Control Online Data Transfer VI
Active X ControlOnlineDataTransfer method
Low-level Start Online Data Transfer command
Vishay Micro-Measurements System 7000 Programmer’s Reference Manual
Stop Online Data Transfer command
Page 48 of 142

3.15.3 Parsing the Real-time (Online) Data
The format of the data in the UDP packet is:
An 8-byte (integer) sequence counter followed by up to 128 (16 cards X 8 channels), 4-byte (integer)
readings.
Sequence count - The sequence count is the number of frames transmitted since the online data
broadcast was started. If you stop and re-start the transmission the sequence count resets to zero.
Channel Readings - The readings are in ADC counts and are in big-endian format. The
readings are in the order of lowest numbered card and channel through highest numbered card
and channel.
For example, if you have requested readings from channel 1 and channel 8 on card 7 and a
channel 1 on card 9, the channel data will be in the following order:
Data for Card 7, Channel 1
Data for Card 7, Channel 8
Data for Card 9, Channel 1
To continue the example, the packet you receive from UDP will appear as shown in the following table.
Note that the values are in hexadecimal.
Sequence Count Reading
Card 7, Chan 1
0000000000000004 00040200 00000100 FFFFFFFC
This translates to a sequence count of 4 (the fourth packet transmitted), and readings of
262656, 256, and -4.
Reading
Card 7, Chan 8
Table 22
Reading
Card 9, Chan 1
3.16 Zeroing and Shunt Calibration
Zeroing (all sensor types)
Zeroing is the act of specifying that the current value of a sensor is the “zero offset” reading. Because
this value is rarely 0.00, many applications remove this zero offset from all subsequent readings (both
scanned and single-point readings).
The zero reading is not stored on the System 7000 scanner, so you must programmatically read and store
this value for each channel.
The steps in zeroing are
1. configure the cards and channels,
2. adjust sensors to correct setting for zero reading,
3. take a single-point reading from each channel and store it as the zero offset (this should be done
before arming),
4. add the zero offset to all data readings (except those done for the purpose of zeroing). Adding the
zero offset should be done before any shunt calibration or scaling is performed on the reading.
LabVIEW Take Zero Reading VI
Active X GetStaticADCReading method (scaling is done
Low-level Asynchronous Read A/D Converter command (scaling is
Vishay Micro-Measurements System 7000 Programmer’s Reference Manual
(all of the data scaling VIs have an input for the zero
reading(s))
programmatically by the user)
programmatically done by user)
Page 49 of 142

Shunt Calibration (strain gage sensors only)
This calibration factor is primarily used to remove any offsets due to lead-wire resistance. The calibration
factor should be near 1. It is used as a multiplier while scaling the channel’s data readings into
milliVolts/Volt or µStrain. You should calculate the calibration factor for a strain gage channel based on
a single-point reading and either the nominal resistance and shunt (or remote) calibration resistor value or
a simulated strain value.
Excitation and the bridge configuration settings should be set to the required values before the strain gage
channel is calibrated. Typically the channel is also zeroed before calibration. If you have a remote sense
circuit attached, you should leave the calibration factor at the default value of 1.
Please refer to the “System 7000 Instruction Manual” for more detailed information.
The steps in performing a shunt calibration are:
1. Configure the channel’s excitation and bridge settings.
2. Take a zero reading.
3. Enable the calibration resistor (either Shunt or Remote).
4. Take a single-point reading.
5. Disable the calibration resistor.
6. Add the zero offset value to the reading.
7. Divide by 2 to convert the reading into µStrain.
8. Divide by the simulated µStrain.
If you are using the LabVIEW instrument driver, VIs have been written that perform steps 3 through 8 for
you.
Following is a pseudo code example:
// Set the excitation to 1000mV
ConfigureStrainGageCardExcitation(card, ENABLE_EXCITATION,1000)
// Configure the channel’s bridge settings as a 120Ω, quarter bridge
ConfigureStrainGageChannelBridgeSettings(card,channel,QUARTER_BRIDGE,120)
// Take a single point reading for the zero reading
Zero_Offset = GetStaticADCReading(channel)
// Enable the shunt calibration resistor (may use the remote resistor instead)
ShuntCalEnable(ENABLE)
// Take a single point reading
Cal_Factor = ReadSingleChannel(channel)
// Disable the shunt calibration resistor
ShuntCalEnable (DISABLE)
// Add the zero offset value to the cal factor
Cal_Factor = Cal_Factor + Zero_Offset
// Convert the cal factor into units of microStrain
Cal_Factor = Cal_Factor / 2
// Calculate the simulated strain value (or use a fixed value). K is the gage
// factor. Rg is the resistance of the shunted bridge arm (nominal resistance).
// Rc is the calibration resistor value in ohms. (10**6 is notation for 106)
Simulated_Strain = (Rg * 10**6) / (K * (Rc + (Rg / 2)))
// Calculate the final calibration Factor
Calibration_Factor = Cal_Factor / Simulated_Strain
Vishay Micro-Measurements System 7000 Programmer’s Reference Manual
Page 50 of 142

LabVIEW CalculateStrainGageCalibrationFactor VI
Active X ShuntCalEnable method
Low-level Shunt Calibration Resistor Enable/Disable command
(all of the data scaling VIs have an input for the calibration
factor(s))
RemoeCalEnable method
GetStaticADCReading
Remote Calibration Resistor Enable/Disable command
Asynchronous Read A/D Converter command
3.17 Scaling the Analog-to-Digital Converter Counts
The values provided by the System 7000 are in 32-bit, analog-to-digital converter counts. The readings
are not in “raw” ADC counts but have been corrected based on the channel’s current calibration settings.
Strain Gage Readings
1 count = 0.5µε, or 0.25µV/V
Typically the strain gage reading is scaled according to the following formulas:
microStrain = (((ADC_Count – Zero_Reading) / 2) * Calibration_Factor)
milliVolt_per_Volt = (microStrain * (Gage_Factor * 10**03)) / 4
Scaling for thermal effects, rosette calculations, etc. is beyond the scope of this manual.
High-Level Readings
1 count = 100µV
Linearization and other scaling are beyond this scope of this manual, please see the
specifications for your sensor.
Thermocouple Readings
1 count = 1µV
To convert the µV readings to temperature units, please see the “NIST Monograph 175” for a
database and calculations.
LVDT Readings
1 count = 50 µV
Linearization and other scaling are beyond this scope of this manual, please see the
specifications for your sensor.
LabVIEW Note: all of the conversion VIs are polymorphic
Active X Scaling is done programmatically by the user
Low-level Scaling is done programmatically by the user
rms
Convert Strain Gage Reading VI
Convert Thermocouple Reading VI
Convert High Level Reading VI
Convert LVDT Reading VI
Vishay Micro-Measurements System 7000 Programmer’s Reference Manual
Page 51 of 142

4 SYSTEM STATUS AND ERROR HANDLING
The System 7000 provides two methods for monitoring the status and error information. You may query
the system via TCP commands or you may monitor the UDP Event port.
The advantage of querying for status information is that it is typically easier to implement
programmatically. The disadvantage is that if you too frequently query the status information you will
significantly degrade the performance of the System 7000.
The alternative is monitoring the UDP Event Port for status information. This typically involves setting
up a background task (or similar) to monitor the port. The advantage is that you are not burdening the
system with a large amount of TCP traffic and its performance will remain at an optimal level.
4.1 Error Handling
There are several different methods of programmatically handling errors and tracking the status of your
System 7000.
Command / Query Responses
When a command or query is passed to the System 7000 a response is returned indicating if the
command is successful (ACK) or if it failed (NAK). If the command failed, an error number is
returned indicating the cause of the failure. You should always perform the appropriate error
handling on command responses.
LabVIEW Each VI uses the standard “error output” indicator. Any
Active X Most methods return a result status. If the result is 0, then
Low-level You must monitor the TCP port for the command response.
Event Messages
Event (error or status change) messages are also broadcast over the UDP Event/Status Port.
There is more information on monitoring these messages later in this section.
Error Log
The System 7000 also maintains an error log file (“Error.Log”) on each card and on the control
module. It is possible to download this file and examine the contents. It is maintained as a
standard, ASCII text file. A snippet from an error log file is shown below. Each line is
terminated by a linefeed character (0x0A).
08/01/2008 00:00:25 Error Code = 165, Cannot initialize date and time
08/20/2008 18:40:28 Error Code = 55, Cannot open or read file for transfer
LabVIEW Retrieve File VI
Active X RetrieveFile() method
Low-level You may start the retrieval of the error log file with the
errors detected in a command response will be reported in
this indicator.
the method was successful. If an error is detected in a
command response, the error number is passed as the
result. The last result status is also found in the
LastErrorCode property. Every method updates this
property. LastErrorCode=0 indicates No Error. Other
values represent error codes.
Each response will indicate an ACK or a NAK.
Retrieve File command. You must also monitor the data
port for the file contents.
Vishay Micro-Measurements System 7000 Programmer’s Reference Manual
Page 52 of 142

4.2 Decoding the Error Number
You may request a text description of any error number returned by the System 7000. The error codes
returned by the System 7000 are in the range 1-500.
LabVIEW Error Query VI (Most instrument driver VI’s automatically
Active X GetErrorMessage () method
Low-level Get Error Message from Error Code command.
call this function and return the description as part of the
“error out” indicator.)
4.3 Querying System Status
Status information may be queried at a system level or at a card level. It is possible to adversely affect the
performance of the system by too frequent status queries when scanning is active.
The system status information includes
system state (i.e. idle, armed, scanning, …),
error state (inactive or active),
last error code,
The card status information includes
card state (i.e. idle, armed, scanning, …),
error state (inactive or active),
last error code,
low disk space,
limit latched,
limit asserted,
channel offscale+ status,
channel offscale- status,
channel calibration status.
LabVIEW Get Card Status VI
Active X GetCardStatus() method
Low-level System Status query
Get System Status VI
GetSystemState()method
Card Status query
4.4 Monitoring the Event/Status UDP Port
The System 7000 Event Interface is implemented as a multicast server which provides messages from the
System 7000 Control Module to any connected multicast clients. Typically these messages contain status
and error information. For example a status message will be broadcast when the scanner changes state
from armed to scanning. Or a message will be broadcast when an error condition is detected.
Vishay Micro-Measurements System 7000 Programmer’s Reference Manual
Page 53 of 142

4.4.1 Message Format
All UDP event packets share the same header structure. The first two bytes represent the length of the
packet. The third byte represents the type of packet. (Note the packet length is in little-endian format.)
The types of packets are:
Packet Type Value
Card Status 0x01
Card Error 0x02
File Transfer1 0x05
Control Module Error 0x06
Calibration Status Messages1 0x07
1 – These packet types are not used in normal operation and are beyond the scope of this manual
Table 23
4.4.2 Card Status Message
Status messages are transmitted when a card changes its operational mode. For example, when a user
arms a card, its status changes from idle to armed. A corresponding status message will be broadcast out
the event port. The status message format is as follows:
Byte
Position
1 Message Length (LSB) excluding the length bytes (0x0A)
2 Message Length (MSB) excluding the length bytes (0x00)
3 Message Type = Card Status (0x01)
4 Card ID (1 through 16)
5 Scanning Flag (0 = not scanning, 1 = scanning)
6 Armed Flag (0 = not armed, 1 = armed)
7 Calibrating Flag (0 = not calibrating, 1 = calibrating)
8 Uploading Flag (0 = not uploading, 1 = uploading)
9 Downloading Flag (0 = not downloading, 1 = downloading)
10 Updating Flag (0 = not updating, 1 = updating)
11 Idle Flag (0 = not idle, 1 = idle)
12 Maintenance Mode Flag (0 = not in maintenance mode, 1 = in maint mode)
Value
Table 24
Vishay Micro-Measurements System 7000 Programmer’s Reference Manual
Page 54 of 142

4.4.3 Card Error Message
Card error messages are transmitted when a card-level error is detected. The message includes an error
code byte and a text error message.
Byte
Value
Position
1 Message Length (LSB) excluding the length bytes
2 Message Length (MSB) excluding the length bytes
3 Message Type = Error (0x02)
4 Card ID (1 through 16)
5 Channel Number (1 through 8)
6 Error Code
7 Error String Byte 0
8 Error String byte 1
… ...
9+N Error String Byte N
Table 25
4.4.4 Control Module Error Messages
Control Module error messages are transmitted when a system-level error is detected. The message
includes an error code byte and a text error message.
Byte
Position
1 Message Length (LSB) excluding the length bytes
2 Message Length (MSB) excluding the length bytes
3 Message Type = Error (0x06)
4 Error Code
5 Error String byte 0
… ...
5+N Error String Byte N
Value
Table 26
Vishay Micro-Measurements System 7000 Programmer’s Reference Manual
Page 55 of 142

5 LABVIEW INSTRUMENT DRIVER
5.1 Overview
LabVIEW is a graphical programming language developed by National Instruments. It is a language
especially designed for the design, control, and test applications industry. From the National Instruments
web site, “an instrument driver is a set of software routines that control a programmable instrument. Each
routine corresponds to a programmatic operation such as configuring, reading from, writing to, and
triggering the instrument. Instrument drivers simplify instrument control and reduce test program
development time by eliminating the need to learn the programming protocol for each instrument.”
If you are experienced with LabVIEW but are not familiar with the format and use of instrument drivers,
please refer to the National Instruments web site. There are several online documents and tutorials
demonstrating how to use instrument drivers.
5.2 System 7000 Instrument Driver
The System 7000 instrument driver is fully compliant with the National Instruments May 2006
“Instrument Driver Guidelines”. As such, each VI is fully self-documented and that documentation will
not be repeated in this manual. Refer to the context help (and front panel and block diagram
documentation) for each VI.
5.2.1 System 7000 Instrument Driver Layout
The following VI Tree (included in the instrument driver project) shows the layout of the instrument
driver.
Vishay Micro-Measurements System 7000 Programmer’s Reference Manual
Page 56 of 142

5.2.2 System 7000 Instrument Driver Examples
The instrument driver project ships with examples showing how to:
configure each card type (strain gage, high level, thermocouple, and LVDT),
configure scanning,
configure time-based recording,
setup and use manual recording,
zero a channel,
take a single reading from a channel,
configure and decode real-time (online) data.
5.2.3 System 7000 Instrument “Readme.html”
As per the driver standard, the System 7000 driver includes the file “Vishay 7000 Readme.html” in the
instrument driver project. This file includes the most recent version information, required software,
installation instructions, and release information.
5.2.4 Supported LabVIEW Versions
This instrument driver was developed and tested using National Instruments LabVIEW version 8.5. This
is the supported version of the instrument driver. We will verify compatibility with subsequent versions
of LabVIEW as they are released.
If you are using LabVIEW versions 8.2 or 8.0, we can use the LabVIEW “save for previous version” tool
to save a copy of the instrument driver project; however these versions of the driver are not supported and
have not been tested. Please contact Vishay’s application engineering department.
The ActiveX interface is also compatible with LabVIEW. This is a good alternative if you are
programming with a legacy version of LabVIEW or if you prefer to use an ActiveX interface instead of
an instrument driver.
Vishay Micro-Measurements System 7000 Programmer’s Reference Manual
Page 57 of 142

6 ACTIVEX INTERFACE
The System 7000 ActiveX library is provided as a single dynamic link library (DLL) that acts as
an in-process ActiveX server. The library name is “VMM7000Control.dll”.
6.1 Active X Interfaces
The System 7000 ActiveX library consists of two interfaces: VMM7000Control and
VMM7000DataTransferStatus.
IVMM7000Control
The IVMM7000control Interface is the primary interface to the library.
IVMM7000DataTransferStatus
The IVMM7000DataTransferStatus interface is a support interface that provides a
convenient callback mechanism when transferring large amounts of data.
6.2 Error Codes
The latest error code generated by the ActiveX interface can be found in the
“LastErrorCode” property. A value of 0 indicates “No Error”; a non-zero value
represents an error code. Error codes less than 1000 are being passed through from the
System 7000. Error codes greater than or equal to 1000 are generated by the ActiveX
interface.
Most methods return an integer value representing pass or fail. A value of 0 indicates
that the method returned successfully (without error). Any non-zero value represents an
error code. With these methods you may check the return value or use the LastErrorCode
property.
However, some methods do not return a pass/fail indication. In these cases, you must
check the “LastErrorCode” property if you wish to know the return status of a method.
If you would like to retrieve a text message describing an error, pass the error code to the
“GetErrorMessage” method.
In the case of commands with a card mask, the System 7000 will return a success or error
code for each card in the mask. In the event of multiple error codes, only the first error
code detected will be returned.
Vishay Micro-Measurements System 7000 Programmer’s Reference Manual
Page 58 of 142

6.3 Card Mask, Channel Mask, and Recording Group Mask Notation
The System 7000 scanner has a control module, a power module, and 1 to 16 input cards.
Card Mask
In order to specify which cards are acted upon, some methods have a Card Mask
argument. The CardMask is configured as:
31-16 15 14 13 12 11 10 9 8 7 6 5 4 3 2 1 0 Bit
Always
0x0000
16 15 14 13 12 11 10 9 8 7 6 5 4 3 2 1 Card
(1 = included, 0=excluded)
For example, a card mask of 0x0804 (0b0000 1000 0000 0100) will cause the method to
act on cards 3 and 12.
Note that for 4-slot scanners, all bits except 0 through 3 should be 0.
Channel Mask
In order to specify which channels (on a card) are acted upon, some methods have a
Channel Mask argument. The Channel Mask is configured as:
31-8 7 6 5 4 3 2 1 0 Bit
Set to 0 8 7 6 5 4 3 2 1 Channel
(1 = included, 0=excluded)
For example, a channel mask of 0x00000005 will cause the method to act on channels 1
and 3.
Recording Group Mask
Recording Groups are often used in methods that configure recording options. The Group Mask
is configured as:
31-4 3 2 1 0 Bit
Set to 0 D C B A Group
(1 = included, 0=excluded)
For example, a group mask of 0x00000009 will cause the configuration to be performed
for Groups A and D.
Vishay Micro-Measurements System 7000 Programmer’s Reference Manual
Page 59 of 142

6.4 Sample Programs
The CD that ships with the electronic version of this manual contains sample programs. Sample
programs are available in Embarcadero Delphi, National Instruments LabWindows/CVI, and
Microsoft Visual C#. These programs are written in a style so that programmers of any language
should be able to follow the logic of the code in any sample.
6.4.1 Delphi Sample Program
The Delphi sample program demonstrates how to:
configure strain gage, high level, LVDT, and thermocouple cards,
configure simple time-based recording,
configure a simple scan session,
arm, start scanning, and stop scanning,
read the last recorded data files from the scanner,
delete the last recorded data files from the scanner.
Programming Note: The sample program includes a type library file generated with the “Import
Type Library” tool. You may wish to re-generate the type library.
6.4.2 Visual C# Sample Programs
The C# sample program demonstrates how to:
configure strain gage cards,
configure online date,
configure a simple scan session,
arm, start scanning, and stop scanning,
control online data,
receive and decode online data.
A separate C# sample program implements the data file decoding process.
6.4.3 LabWindows/CVI Sample Program
The LabWindows/CVI sample program demonstrates how to:
configure strain gage, high level, LVDT, and thermocouple cards,
configure simple time-based recording,
configure online date,
configure a simple scan session,
arm, start scanning, and stop scanning,
read the last recorded data files from the scanner,
delete the last recorded data files from the scanner,
control online data,
receive and online data.
Programming Note: The sample program uses an instrument driver, created with the “Create
ActiveX Controller” tool, to access the ActiveX interface. You may wish to re-create the instrument
driver.
Vishay Micro-Measurements System 7000 Programmer’s Reference Manual
Page 60 of 142

6.5 IVMM7000Control Interface Description
6.5.1 Properties
6.5.1.1 IPAddress Property (Read/Write)
Syntax:
Get: HRESULT _stdcall IPAddress(out retval BSTR * Value );
Set: HRESULT _stdcall IPAddress(in BSTR Value );
Description:
Sets or returns the IP Address of the scanner
Notes:
This property must be set before calling the “Open” method. The address is in IPV4 dotteddecimal notation (e.g. 192.168.0.3).
6.5.1.2 CommandPort Property (Read/Write)
Syntax:
Get: HRESULT _stdcall (out retval long * Value );
Set: HRESULT _stdcall CommandPort(in long Value );
Description:
Sets or returns the command port number for the scanner.
Notes:
This value must be set before calling the “Open” method for the scanner
6.5.1.3 DataPort Property (Read/Write)
Syntax:
Get: HRESULT _stdcall DataPort(out retval long * Value );
Set: HRESULT _stdcall DataPort(in long Value );
Description:
Sets or retrieves the TCP data port to be used when transferring files from the scanner.
Notes:
This value must be set before calling the “Open” method for the scanner
Vishay Micro-Measurements System 7000 Programmer’s Reference Manual
Page 61 of 142

6.5.1.4 LastErrorCode Property (Read/Write)
Syntax:
Get: HRESULT _stdcall LastErrorCode(out retval long * Value );
Set: HRESULT _stdcall LastErrorCode (in long Value );
Description:
Sets or retrieves the last error code detected by the ActiveX interface..
Notes:
6.5.1.5 CommandPortTimeout Property (Read/Write)
Syntax:
Get: HRESULT _stdcall CommandPortTimeout(out retval long * Value );
Set: HRESULT _stdcall CommandPortTimeout(in long Value );
Description:
This timeout value defines the amount of time (in milliseconds) to wait for bytes to be received
on the TCP command port. Effectively, this acts as the amount of time to wait for a response to
a command.
Notes:
This value can vary depending on the number of cards in your scanner and the particular
command that is issued. For example, it typically takes longer to receive a response r for the
“Arm” command than for a simple configuration command.
You have two ways of handling this timeout value.
1. Set the timeout once at initialization. In this case the timeout value should be large
enough to handle the worst-case response time.
2. Set the timeout to a relatively low value at initialization. Increase the timeout value on an
as-needed basis, and return it to the lower value when the method has completed.
This value should not be set to less than 1000.
Vishay Micro-Measurements System 7000 Programmer’s Reference Manual
Page 62 of 142

6.5.1.6 DataPortTimeout Property (Read/Write)
Syntax:
Get: HRESULT _stdcall DataPortTimeout(out retval long * Value );
Set: HRESULT _stdcall DataPortTimeout(in long Value );
Description:
This timeout value defines the amount of time (in milliseconds) to wait for bytes to be received
on the TCP data port.
Notes:
This value should not be set to less than 1000.
Vishay Micro-Measurements System 7000 Programmer’s Reference Manual
Page 63 of 142

6.5.2 Connection Methods
6.5.2.1
Syntax:
Open Method
HRESULT _stdcall Open(out retval long * result );
Description:
Opens the Scanner Command port.
Arguments:
None
Returns:
0 if Successful, otherwise an Error Code
Notes:
The IPAddress, CommandPort and DataPort properties must be set prior to calling Open.
This method must be called before any methods are called.
6.5.2.2
Syntax:
Close Method
HRESULT _stdcall Close(out retval long * result );
Description:
Closes the scanner command port.
Arguments:
None
Returns:
0 if Successful, otherwise an Error Code
Notes:
Once this method is called, no additional methods will be accepted.
Vishay Micro-Measurements System 7000 Programmer’s Reference Manual
Page 64 of 142

6.5.3 Action - Status Group
6.5.3.1 Arm Method
Syntax:
HRESULT _stdcall Arm(in long CardMask, out retval long * result );
Description:
Arms the selected cards. Arming is required prior to scanning.
Arguments:
CardMask It is recommended that you always arm all cards in a scanner.
Returns:
0 if Successful, otherwise an Error Code
Notes:
All selected cards must be in the idle state. After successful completion of this command, the
scanner will be in the armed state. Note if an error code is returned, one or more of the cards
specified in the card mask may not be armed.
The arm command typically takes longer to return a response than other commands in the system.
See the CommandPortTimeout property
6.5.3.2 Disarm Method
Syntax:
HRESULT _stdcall Disarm(in long CardMask, out retval long * result );
Description:
Disarms the selected cards and returns them into the command state.
Arguments:
CardMask It is recommended that you always disarm all cards in a scanner.
Returns:
0 if Successful, otherwise an Error Code
Notes:
All selected cards must be in the armed state. After successful completion of this command, the
scanner will return to idle state. Note if an error code is returned, one or more of the cards
specified in the card mask may not be disarmed.
Vishay Micro-Measurements System 7000 Programmer’s Reference Manual
Page 65 of 142

6.5.3.3 StartScanning Method
Syntax:
HRESULT _stdcall StartScanning(in long CardMask, out retval long * result );
Description:
This method initiates scanning on the selected cards. The cards must be armed
Arguments:
CardMask It is recommended that you always start all cards in a scanner.
Returns:
0 if Successful, otherwise an Error Code
Notes:
All cards must be in the armed state before executing this command. If multiple scanners are to
be synchronized, a subsequent call to StartSynchronizedScanning is required. After successful
completion of this command, the scanner will be in the scanning state. Note if an error code is
returned, one or more of the cards specified in the card mask may not start scanning.
6.5.3.4 StopScanning Method
Syntax:
HRESULT _stdcall StopScanning(in long CardMask, out retval long * result );
Description:
Stops scanning on selected cards
Arguments:
CardMask It is recommended that you always stop all cards in a scanner.
Returns:
0 if Successful, otherwise an Error
Notes:
All selected cards must be in the scanning state when calling this method. After successful
completion of this command, the scanner will return to idle state. Note if an error code is
returned, one or more of the cards specified in the card mask may not stop scanning.
Vishay Micro-Measurements System 7000 Programmer’s Reference Manual
Page 66 of 142

6.5.3.5 ControlManualRecording Method
Syntax:
HRESULT _stdcall ControlManualRecording(in long CardMask, in long Control, out retval long
* result );
Description:
Starts or stops manual recording on selected cards.
Arguments:
CardMask
Control Set to 1 to start manual recording, 0 to stop manual recording
Returns:
0 if Successful, otherwise an Error Code
Notes:
All selected cards must be in the scanning state (See StartScanning) when calling this method.
Use the ConfigureManualRecording method to configure manual recording. Manual recording
may be started and stopped multiple times while scanning is active. Note if an error code is
returned, one or more of the cards specified in the card mask may not start or stop manual
recording.
6.5.3.6 ControlOnlineDataTransfer Method
Syntax:
HRESULT _stdcall StartOnlineDataTransfer(in long Control, out retval long * result );
Description:
This method allows you to start or stop the transmission of real-time data, via the UDP Data Port.
Arguments:
Control Set to 1 to start transfer, 0 to stop transfer
Returns:
0 if Successful, otherwise an Error Code
Notes:
The System must be in the “Scanning” state. . Online data must be configured for this command
to be allowed (see the ConfigureOnlineDataTransfer method).
Vishay Micro-Measurements System 7000 Programmer’s Reference Manual
Page 67 of 142

6.5.3.7
GetSystemState Method
Syntax:
HRESULT _stdcall GetSystemState(out retval long * result );
Description:
Returns the state of the System 7000.
Arguments:
None
Returns:
Bytes 0 (LSB) and 1: A bitmapped flag indicating the state of the system
0x0001 = Idle
0x0002 = Uploading
0x0004 = Armed
0x0008 = Scanning
0x0010 = Calibrating
0x0020 = Downloading
0x0040 = Updating
0x0080 = Maintenance mode
Byte 2: Set to 0x01 if an error is currently active in the system,
0x00 if no error is active.
Byte 3 (MSB): The last error code generated by the system. A value of 0x00
indicates no error
Notes:
This method does not return a Success/Error status. Use the LastErrorCode property to check if
an error occurred during the method.
6.5.3.8 GetSyncStatus Method
Syntax:
HRESULT _stdcall GetSyncStatus(in long CurrentConfig, out retval long * result );
Description:
Returns the synchronization status for the scanner
Vishay Micro-Measurements System 7000 Programmer’s Reference Manual
Page 68 of 142

Arguments:
CurrentConfig The scanner's network configuration
0 = Not a Member of a Network - this scanner is independent and cannot be
synchronized with other scanners.
1 = Network Master - this scanner is attached to another scanner with a sync
cable and is responsible for controlling synchronization.
Returns:
2 = Member of Network - Not the Master - this scanner is a simple member of a
network. It is required to be attached to a "master" scanner via a sync cable.
The status of the synchronization (sync) cable.
Notes:
0x00 = There are no synchronization signals detected at either port
0x01 = Signal detected but no lockup is present. This is an error condition
0x02 = Scanner is configured as a Master and the reference clock is set to Base 2
0x03 = Scanner is configured as a Master and the reference clock is set to Base 10
0x04 = Sync cable detected and the input signal is a valid Base 2 clock
0x05 = Sync cable detected and the input signal is a valid Base 10 clock
Bit 7 (0x0080) is, if the returned state is not valid for the configuration entered.
This method does not return a Success/Error status. Use the LastErrorCode property to check if
an error occurred during the method. This method does not configure the scanner’s network
configuration, it only verifies it. See the SetScannerNetworkConfiguration method.
6.5.3.9 SynchronizeNetworkedScanners Method
Syntax:
HRESULT _stdcall SynchronizeNetworkedScanners(out retval long * result );
Description:
This command initiates a synchronization of all the scanners that are configured to be on a single
sync network. All clocks are synchronized from the master clock and all A/D Converters are
synchronized.
Arguments:
None
Returns:
0 if Successful, otherwise an Error Code
Notes:
This command should only be issued to the master scanner after the following
1) a master has been selected (via the SetScannerNetworkConfiguration method),
2) the network has been verified (via the GetSyncStatus method),
3) and all of the scanners on the network have been armed (via the Arm method).
Vishay Micro-Measurements System 7000 Programmer’s Reference Manual
Page 69 of 142

6.5.3.10 StartSynchronizedScanning Method
Syntax:
HRESULT _stdcall StartSynchronizedScanning(out retval long * result );
Description:
This method starts synchronized scanning on a synchronized network. On a synchronized
network, the StartScanning command prepares for scanning, but waits until this command is
executed before actually scanning
Arguments:
None
Returns:
0 if Successful, otherwise an Error Code
Notes:
This command must only be sent to the scanner designated as the Master. All cards in the
synchronized network must be issued the StartScanning method before this command is executed.
Vishay Micro-Measurements System 7000 Programmer’s Reference Manual
Page 70 of 142

6.5.4 Configuration Group
Recording Configuration
6.5.4.1 ConfigureTimeBasedRecording Method
Syntax:
HRESULT _stdcall ConfigureTimeBasedRecording (in long CardNo, in long GroupMask, in
long Mode, in long SkipCount, in long BurstCount, in long BurstSkipCount, out retval long *
result );
Description:
This method is used to configure time-based recording for one or more recording groups
Arguments:
CardNo The card number (1-16).
GroupMask
Mode 0 = Off (default)
1 = Continuous
2 =Burst
SkipCount Specifies how many scans to skip between each recorded scan. A value of 0
means skip none (i.e. record each scan). (Range: 0 to 4294967295,
Default: 0)
BurstCount The number of scans to record during each burst (Range: 0 to 4294967295,
Default: 0)
BurstSkipCount The number of scans between recording bursts. (Range: 0 to 4294967295,
Default: 0)
Returns:
0 if Successful, otherwise an Error Code
Notes:
To assign a channel to a group call the SetChannelRecordingGroup method
6.5.4.2 ConfigureTimeBasedRecordingStartandStop Method
Syntax:
HRESULT _stdcall ConfigureTimeBasedRecordingStartandStop(in long CardNo, in long Count,
in long Delay, out retval long * result );
Description:
Sets the maximum number of scans to record (the count) and the delay before time-based
recording starts.
Vishay Micro-Measurements System 7000 Programmer’s Reference Manual
Page 71 of 142

Arguments:
CardNo The card number (1-16).
Count Specifies the number of scans to record. A value of 0 indicates that recording will
not stop until scanning stops (Range: 0 to 4294967295, Default: 0)
Delay The number of scans to delay before recording of the data starts. A value of 0
means that you will start recording at the first scan. (Range: 0 to 4294967295,
Default: 0)
Returns:
0 if Successful, otherwise an Error Code
Notes:
6.5.4.3 ConfigureManualRecording Method
Syntax:
HRESULT _stdcall ConfigureManualRecording(in long CardNo, in long RecordMode, in long
BufferSize, out retval long * result );
Description:
Configures the manual recording Modeand sets up the manual record Pre-Record Buffer Size. .
Arguments:
CardNo The card number (1-16).
RecordMode 0 = Off (default)
1 = SingleShot
2 = Continous
BufferSize The number of "pre-trigger" scans to be recorded when the start manual
recording command is received (Range: 0 to 645,000, Default: 0)
Returns:
0 if Successful, otherwise an Error Code
Notes:
Manual recording mode must be set to singleshot or continuous before manual recording can be
started while the system is scanning.
The BufferSize must not be bigger than the configured Scan Buffer Size (see the ConfigureScan
method).
Vishay Micro-Measurements System 7000 Programmer’s Reference Manual
Page 72 of 142

6.5.4.4 SetChannelRecordingGroup Method
Syntax:
HRESULT _stdcall SetChannelRecordingGroup(in long CardNo, in long ChannelNo, in long
Group, out retval long * result );
Description:
Sets the recording group identifier for the selected channel.
Arguments:
CardNo The card number (1-16).
ChannelNo The channel number (1-8)
Group The recording group number
1 = Group A (default)
2 = Group B
3 = Group C
4 = Group D
Returns:
0 if Successful, otherwise an Error Code
Notes:
6.5.4.5
SetLimitType Method
Syntax:
HRESULT _stdcall SetLimitType(in long CardNo, in long LimitType, out retval long * result );
Description:
The limit type defines the style of limit handling active on a card..
Arguments:
CardNo The card number (1-16).
LimitType The limit type
0 = None (default)
1 = Incremental Limit
2 = Range Limit
3 = Normal
Returns:
0 if Successful, otherwise an Error Code
Notes:
See SetLimitsBasedRecordingType method
Vishay Micro-Measurements System 7000 Programmer’s Reference Manual
Page 73 of 142

6.5.4.6
SetLimitsBasedRecordingType Method
Syntax:
HRESULT _stdcall SetLimitsBasedRecordingType(in long CardNo, in long Action, out retval
long * result );
Description:
The recording type determines the recording action of a card when a limit condition is detected
when the limits type is set to Normal mode.
Arguments:
CardNo The card number (1-16).
Action 0 - Off: No recording when a limit is detected (default)
1 - Record while limit active: Records scans while the limit condition remains
active. Recording stops when the limit condition goes inactive.
2 - Singleshot: Records a single scan when a limit condition goes active
3 - Continuous: Recording starts when a limit condition is detected and continues
until scanning stops
Returns:
0 if Successful, otherwise an Error Code
Notes:
See SetLimitsType method
6.5.4.7 ConfigureLimitsBasedRecording
Syntax:
HRESULT _stdcall ConfigureLimitsBasedRecording (in long CardNo, in long GroupMask, in
long Mode, in long SkipCount, in long BurstCount, in long BurstSkipCount, out retval long *
result );
Description:
This method is used to configure limits-based recording for one or more recording groups..
Vishay Micro-Measurements System 7000 Programmer’s Reference Manual
Page 74 of 142

Arguments:
CardNo The card number (1-16).
GroupMask
Mode 0 = Off (default)
1 = Continuous
2 =Burst
SkipCount Specifies how many scans to skip between each recorded scan. A value of 0
means skip none (i.e. record each scan) (Range: 0 to 4294967295,
Default: 0).
BurstCount The number of scans to record during each burst (Range: 0 to 4294967295,
Default: 0)
BurstSkipCount The number of scans between recording bursts. (Range: 0 to 4294967295,
Default: 0)
Returns:
0 if Successful, otherwise an Error Code
Notes:
6.5.4.8
ConfigureLimitCondition method
Syntax:
HRESULT _stdcall ConfiguretLimitCondition(in long CardNo, in long LimitIndex, in long
Condition, in long LowerLimit, in long UpperLimit, in long PreBufferSize, in long
PostBufferSize, out retval long * result );
Description:
Configures the limit event condition for the selected limit. This method should be used to build a
limit condition table for each card in the scanner.
Arguments:
CardNo The card number (1-16).
LimitIndex Index of this limit condition in the Limit Condition Table (0-49)
Condition The limit condition value.
0 = None -This condition does not have a limit assigned. (default)
1 = Greater Than - Trip when the input reading is greater than the upper limit
value.
2 = Less Than - Trip when the input reading is less than the lower limit value.
3 = Equal - Trip when the input reading is equal to the upper limit value.
4 = Between -Trip when the input reading is between the two limit values
specified.
5 = Outside -Trip when the input reading is outside the range specified by the
two limit values.
8 = Range -This condition is valid only when the limits type is set to Range
mode. The limit will be tripped when the input reading is within the specified
range as defined by the increment/decrement values specified.
Vishay Micro-Measurements System 7000 Programmer’s Reference Manual
Page 75 of 142

LowerLimit The lower limit value used in checking the condition. (In analog-to-digital
converter counts). (Range: Full range of 32-bit signed integer, Default: 0)
UpperLimit The upper limit value used in checking the condition. (In analog-to-digital
converter counts). (Range: Full range of 32-bit signed integer, Default: 0
PreBufferSize The number of "pre-limit" scans to be recorded when the limit condition goes
active. (Range: 0 to 645,000, Default: 0)
PostBufferSize The number of "post-limit" scans to be recorded when the limit condition goes
inactive. (Range: 0 to Full range of unsigned 32-bit integer, Default: 0)
Returns:
0 if Successful, otherwise an Error Code
Notes:
The pre- and post-limit buffer size must not be bigger than the configured scan buffer size (see
the ConfigureScan method).
6.5.4.9
SetLimitConditionCount Method
Syntax:
HRESULT _stdcall SetLimitConditionCount (in long CardNo, in long ChannelNo, in long Count,
out retval long * result );
Description:
Sets the total number of limit events for the selected channels in the card
Arguments:
CardNo The card number (1-16).
ChannelNo The channel number on the card (1-8)
Count The number of limit conditions for the selected channel (Range: 0 to 50,
Default: 0
Returns:
0 if Successful, otherwise an Error Code
Notes:
Note that if a Normal or Range type limit is active, a channel may only have one limit condition
assigned. For Incremental limits, a channel may be associated with up to 50 limit conditions.
However, these limits must be assigned sequentially.
Vishay Micro-Measurements System 7000 Programmer’s Reference Manual
Page 76 of 142

6.5.4.10
AssignLimitToChannel Method
Syntax:
HRESULT _stdcall AssignLimitToChannel(in long CardNo, in long ChannelNo, in long
LimitIndex, in long LimitConditionIndex, out retval long * result );
Description:
Assigns a limit condition to the specified channel.
Arguments:
CardNo The card number (1-16).
ChannelNo The channel number on the card (1-8)
LimitIndex Index into the channel’s limit list. (Range: 0 to 49)
LimitConditionIndex Index of the Limit in the Limit Condition Table (as defined in the
method ConfigureLimitCondition) (Range: 0 to 49)
Returns:
0 if Successful, otherwise an Error Code
Notes:
Note that if a Normal or Range type limit is active, a channel may only have one limit condition
assigned. For Incremental limits, a channel may be associated with up to 50 limit conditions.
However, these limits must be assigned sequentially.
6.5.4.11
ConfigureGlobalLimit Method
Syntax:
HRESULT _stdcall ConfigureGlobalLimit(in long CardNo, in long Enable, in long
PreBufferSize, in long PostBufferSize, out retval long * result );
Description:
Enables the detection of global limit events (limits that occur on another card or scanner) for the
selected card. When a limit condition is activated on a card, that card broadcasts a "limit active"
signal to all other cards in the scanner (and all scanners in the network). You may choose to
ignore the signal or you may choose to start limits-based recoding when the signal is detected.
Vishay Micro-Measurements System 7000 Programmer’s Reference Manual
Page 77 of 142

Arguments:
CardNo The card number (1-16).
Enable 0 = Ignore Global Limits (default)
1 = Accept Global Limits
PreBufferSize The number of "pre-trigger" scans to be recorded when the global limit signal
goes active. (Range: 0 to 645,000, Default: 0)
PostBufferSize The number of "post-trigger" scans to be recorded when the global limit signal
goes inactive. (Range: 0 to 4294967295, Default: 0)
Returns:
0 if Successful, otherwise an Error Code
Notes:
The BufferSize must not be bigger than the configured Scan Buffer Size (see the ConfigureScan
method).
Vishay Micro-Measurements System 7000 Programmer’s Reference Manual
Page 78 of 142

Scanning Configuration
6.5.4.12 ConfigureScan Method
Syntax:
HRESULT _stdcall SetScanRate(in long CardNo, in long ScanRate, int long ScanMask, int long
BufferSize, in long StopCount, out retval long * result );
Description:
Configures the scanning parameters including the scan rate and the scan buffer size. It also
defines the scan list for a card. This is the list of channel numbers from which data will be
acquired during scanning.
Arguments:
CardNo The card number (1-16).
ScanRate The scan rate, in scans per second. Valid values are:
2000, 1000 (default), 500, 200, 100, 10
2048, 1024, 512, 256, 128, 64
ScanMask The scan mask for the cards. Decoded as follows:
31-8 7 6 5 4 3 2 1 0 Bit
Set to 0 8 7 6 5 4 3 2 1 Channel (1=include in scan
list, 0 = exclude from scan list)
(For example, to include channels 2 and 7 the mask would be 0x42
(0b01000010) (Default: 00).
BufferSize The scan buffers size in scans. (Range: 20,000 to 645,276, Default: 645,276)
StopCount The number of scans to acquire before scanning is automatically stopped by the
card. A value of 0 indicates that scanning will not stop automatically. This
value should be the same for all cards.(Range: 0 to 4294967295, Default: 0)
Returns:
0 if Successful, otherwise an Error Code
Notes:
Lower scan rates should set the scan buffer to a smaller number to minimize the risk of lost data
due to the buffer not being flushed in the event of a catastrophic failure. Higher scan rates must
be set to a higher value.
The scan buffer size impacts the maximum size of the recording “pre-trigger” buffers. The pretrigger buffers can be no larger than the scan buffer size.
Vishay Micro-Measurements System 7000 Programmer’s Reference Manual
Page 79 of 142

Card and Channel Configuration
6.5.4.13
ConfigureStrainGageCardExcitation Method
Syntax:
HRESULT _stdcall ConfigureStrainGageCardExcitation(in long CardNo, in long Enable, in long
Excitation, out retval long * result );
Description:
Sets the excitation for the selected strain gage card.
Arguments:
CardNo The card number (1-16).
Enable 1 = Enable Excitation,
0 = Disable Excitation (default)
Excitation The excitation value in units of millivolts. (Range: 0 to 10,000mV, Default: 0)
Returns:
0 if Successful, otherwise an Error Code
Notes:
6.5.4.14 ConfigureStrainGageChannelBridgeSettings Method
Syntax:
HRESULT _stdcall ConfigureStrainGageChannelBridgeSettings (in long CardNo, in long
ChannelNo, in long HalfBridgeEnable, in long DummyValue, out retval long *result );
Description:
Defines the bridge settings for full-bridge, half-bridge and quarter-bridge strain gage
configurations.
Arguments:
CardNo The card number (1-16).
ChannelNo The channel number on the card (1-8)
HalfBridgeEnable Enables (or Bypasses) the half bridge circuitry. If your strain gage is not a
half-bridge configuration this should be set to bypass.
0 = Bypass (default)
1 = Enable
DummyValue Selects the dummy resistor to use in a quarter bridge configuration.
0 = Open (default)
1 = 120 Ohm
2 = 350 Ohm
3 = 1000 Ohm (socketed)
If your strain gage is not a quarter bridge configuration. Select 0:Open.
Vishay Micro-Measurements System 7000 Programmer’s Reference Manual
Page 80 of 142

Returns:
0 if Successful, otherwise an Error Code
Notes:
Because the 1000 ohm resistor is socketed, it may be replaced with a different value resistor. If
this is the case choose the 1000 ohm (socket) selection anyway.
6.5.4.15
ConfigureHighLevelCardExcitation Method
Syntax:
HRESULT _stdcall ConfigureHighLevelCardExcitation (in long CardNo, in long Enable, in long
Excitation, out retval long * result );
Description:
Sets the excitation for the selected high-level card.
Arguments:
CardNo The card number (1-16).
Enable 0 = Excitation Disabled (default)
1 = Enable Positive Excitation (Unipolar)
2= Enable Negative Excitation (Bipolar)
Excitation The excitation value in units of millivolts. (Bipolar Range: 0 to +- 12000mV,
Unipolar Range: 0 to +12000 mV, Default 0mV)
Returns:
0 if Successful, otherwise an Error Code
Notes:
6.5.4.16
ConfigureThermocoupleChannel Method
Syntax:
HRESULT _stdcall ConfigureThermocoupleChannel(in long CardNo, in long ChannelNo, in
long CGCType, out retval long * result );
Description:
Sets the thermocouple type (cold junction compensation) for a thermocouple channel. The
thermocouple type setting is used to determine the correct coefficients to use during cold
junction compensation. The compensation point is determined by a temperature sensor on the
panel of the card. When the thermocouple type is set it takes up to two seconds for the new
setting to be processed by the system
Vishay Micro-Measurements System 7000 Programmer’s Reference Manual
Page 81 of 142

Arguments:
CardNo The card number (1-16).
ChannelNo The channel number on the card (1-8)
CGCType The thermocouple type:
0 = None(default)
1 = Type J
2 = Type K
3 = Type T
4 = Type R
5 = Type S
6 = Type B
7 = Type N
8 = Type E
Returns:
0 if Successful, otherwise an Error Code
Notes:
6.5.4.17
ConfigureLVDTCardExcitation Method
Syntax:
HRESULT _stdcall ConfigureLVDTCardExcitation(in long CardNo, in long Frequency, in long
Enable, in long Excitation, out retval long * result );
Description:
Sets the excitation for the selected LVDT card.
Arguments:
CardNo The card number (1-16).
Frequency The LVDT Card operates at 3 Vrms. The Excitation Frequency may be:
0 = Off (default)
1 = 2.5 kHz
2 = 5 kHz
3 = 10 kHz
4 = 125 Hz (test mode only)
Enable 1 = Enable Excitation,
0 = Disable Excitation (default)
Excitation The excitation value in Vrms. The excitation value is based upon your sensor
requirements. Note: Currently the LVDT only accepts 3 Vrms.
Returns:
0 if Successful, otherwise an Error Code
Notes:
Vishay Micro-Measurements System 7000 Programmer’s Reference Manual
Page 82 of 142

6.5.4.18 ConfigureLVDTChannelInputConnections Method
Syntax:
HRESULT _stdcall ConfigureLVDTChannelInputConnections (in long CardNo, in long
ChannelNo, in long HalfBridgeEnable, in long Source, out retval long *result );
Description:
Defines the input configuration for LVDT cards (Primary, Secondary, and Half-Bridge).
Arguments:
CardNo The card number (1-16).
ChannelNo The channel number (1-8)
HalfBridgeEnable Enables (or Bypasses) the half-bridge circuitry. In normal usage half-
bridge is bypassed for 6-, 5-, and 4-wire LVDT inputs. It is enabled for 3wire LVDT inputs.
0 = Bypass (default)
1 = Enable
Source Selects the triggering source for the demodulator.
0 = Positive Reference (default)
1 = Negative Reference (used only in test mode)
2 = Secondary
3 = Primary
Returns:
0 if Successful, otherwise an Error Code
Notes:
The Primary selection is used for 4-wire LVDTs or for LVDTs that don’t have sufficient
common-mode output signal to trigger the secondary winding. The secondary selection is
preferred for 6-, 5-, and 3-wire LVDTs. In this mode, the demodulator trigger is sourced directly
from the secondary winding of the LVDT.
The Positive Reference is the default state and should be selected when excitation is disabled to
prevent oscillation. The System 7000 automatically sets the demodulator source to Positive
Reference when the excitation is disabled.
6.5.4.19
SetDefaultFilter Method
Syntax:
HRESULT _stdcall SetDefaultFilter(in long CardNo, in long ChannelNo, in long ScanRate, out
retval long * result );
Description:
Sets the filter for the channel to be the default filter for the scan rate.
Vishay Micro-Measurements System 7000 Programmer’s Reference Manual
Page 83 of 142

Arguments:
CardNo The card number (1-16).
ChannelNo The channel number(1-8)
ScanRate The Scanning rate, in samples per second. Valid values are:
2000, 1000, 500, 200, 100, 10
2048, 1024, 512, 256, 128, 64
Returns:
0 if Successful, otherwise an Error Code
Notes:
This will not affect the scan rate that has been configured via the ConfigureScan method.
This method requests the system to select the default filter based upon the selected scan rate. It
is possible to have aliasing due to your recording rate being very different then your scan rate.
(i.e. Your scan rate may be 2000 scans/sec, but, with a recording skip count set, your recording
rate may be 100 scans/sec.) To minimize the risk of aliasing you may find it useful, when
selecting a filter, to select a scan rate closer to your recording rate.
6.5.4.20
SetFIRFilterCoefficients Method
Syntax:
HRESULT _stdcall SetFIRFilterCoefficients(in long CardNo, in long ChannelNo, in long
NumTaps, in BSTR Coefficients, out retval long * result );
Description:
Sets the FIR filter coefficients for the selected card and channel.
Arguments:
CardNo The card number (1-16).
ChannelNo The channel number(1-8)
NumTaps The number of taps for the filter. This value must be set to 252.
Coefficients A string containing the filter coefficients. Each coefficient must be represented
as an ASCII value, separated by carriage returns
Returns:
0 if Successful, otherwise an Error Code
Notes:
The default filter may be selected using the SetDefaultFilter method.
The carriage return character is represented by the ASCII character 0x13.
Vishay Micro-Measurements System 7000 Programmer’s Reference Manual
Page 84 of 142

System Configuration
6.5.4.21
SetDateTimeMethod
Syntax:
HRESULT _stdcall SetDateTime(in long CardNo, in long Year, in long Month, in long Day, in
long Hour, in long Minute, in long Second, out retval long * result );
Description:
Sets the date and time on the selected card
Arguments:
CardNo The card number (1-16).
Year The year in 2 digit format
Month The month (1-12)
Day The day of the month (1-31)
Hour The hour (0-23)
Minute The minute (0-59)
Second The second (0-59)
Returns:
0 if Successful, otherwise an Error Code
Notes:
6.5.4.22
ConfigureOnlineDataTransfer Method
Syntax:
HRESULT _stdcall ConfigureOnlineDataTransfer(in long SkipCount, in BSTR ChannelList, out
retval long * result );
Description:
The VMM System 7000 has the ability to broadcast online (real-time) data via a UDP port. This
method defines the broadcast by configuring the channels and rate for online data transfer.
Vishay Micro-Measurements System 7000 Programmer’s Reference Manual
Page 85 of 142

Arguments:
SkipCount The number of scans to skip between each transmission. A skip rate of 0
means don’t skip any scans. (Range: 0 to 32768, Default: 0 scans
ChannelList A list of channels (1-128) which should send online data. The list is delimited
by carriage returns, for example a string containing:
1[CR]
2[CR]
3[CR]
5
will transmit channels 1, 2, 3, and 5. (The carriage return is represented by the
ASCII character 0x13.)
Returns:
0 if Successful, otherwise an Error Code
Notes:
The data will be transmitted from lowest channel to highest channel, regardless of the order of
the channel list.
6.5.4.23
SetScannerNetworkConfiguration Method
Syntax:
HRESULT _stdcall SetScannerNetworkConfiguration(in long Configuration, out retval long *
result );
Description:
This method defines a scanner’s role in a network of scanners.
Arguments:
Configuration 0 = Not a Member of a Network - this scanner is independent and cannot be
synchronized with other scanners. (default)
1 = Network Master - this scanner is attached to another scanner with a sync
cable and is responsible for controlling synchronization.
2 = Member of Network - Not the Master - this scanner is a simple member of
a network. It is required to be attached to a "master" scanner via a sync cable.
Returns:
0 if Successful, otherwise an Error Code
Notes:
Only one scanner can be designated as the “Master” scanner. Scanners that are not members of a
synchronized network will not be synchronized and will not share global limits.
Vishay Micro-Measurements System 7000 Programmer’s Reference Manual
Page 86 of 142

6.5.4.24
SetBoxID Method
Syntax:
HRESULT _stdcall SetBoxId(in long BoxId, out retval long * result );
Description:
Defines a box number for the scanner. If your application involves multiple scanners you may
find it useful to assign a different box number to each scanner. This method is optional
Arguments:
BoxId Box Identifier (Range: 0 to 9999, Default: 1)
Returns:
0 if Successful, otherwise an Error Code
Notes:
Vishay Micro-Measurements System 7000 Programmer’s Reference Manual
Page 87 of 142

6.5.5 Data
6.5.5.1
GetStaticADCReading Method
Syntax:
HRESULT _stdcall GetStaticADCReading(in long CardNo, in long ChannelNo, out retval long
* result );
Description:
Returns a value (in reduced counts) from an averaged, filtered read of the A/D Converter.
Arguments:
CardNo The card number (1-16)
ChannelNo The channel number (1-8)
Returns:
The reading in reduced ADC (analog-to-digital converter) counts.
Notes:
Data is filtered using a lowpass filter.
This method does not return a Success/Error status. Use the LastErrorCode property to check if
an error occurred during the method.
6.5.5.2
GetLastDataFileInformation Method
Syntax:
HRESULT _stdcall GetLastDataFileInformation(in long CardNo, out retval BSTR * result );
Description:
Retrieves information from the last data file that was recorded on the card.
Arguments:
CardNo The card number (1-16)
Returns:
If successful, a string containing the last file information
File Name[CR] (in 8.3 format)
File Size in bytes[CR] (integer, 32-bit value),
Number of scans recorded[CR] (integer, 40-bit value,
Scanning Start Time MM/DD/YYYY HH:MM:SS
Vishay Micro-Measurements System 7000 Programmer’s Reference Manual
Page 88 of 142

Notes:
This method does not return an integer Success/Error status. Use the (LastErrorCode property to
check if an error occurred during the method.
[CR] represents the carriage return character ASCII 0x13.
The last data file information is not available (using this method) after the scanner is powercycled. If you have power-cycled your system before retrieving the scan data and information,
you will have to list the files on the card (ListFiles method), and view the date/time to retrieve
the correct header and data files (“.7KH” and “.7KD” extensions respectively). (Use the
RetrieveFile method.) The header file will contain the scan information and the data file
contains the scan data.
Vishay Micro-Measurements System 7000 Programmer’s Reference Manual
Page 89 of 142

6.5.6 Utilities
6.5.6.1
GetControlModuleInformation Method
Syntax:
HRESULT _stdcall GetControlModuleInformation(out retval BSTR * result );
Description:
Returns control module (system information)
Arguments:
None
Returns:
A string containing the card information, delimited by carriage returns. The returned format is:
A null-terminated system identifier Vishay Micro-Measurements, System 7000[CR]
Firmware Version[CR]
FPGA Device[CR]
FPGA Version[CR]
Serial Number[CR]
Card Hardware Version[CR]
Backplane FPGA Device[CR]
Backplane FPGA Version[CR]
Backplane Card Version[CR]
Number of Backplane Card Slots
Notes:
This method does not return a Success/Error status. Use the LastErrorCode property to check if
an error occurred during the method.
[CR] represents the carriage return character ASCII 0x13.
If the serial number is less than 8 characters it will be padded with NULLS (0x00) up to 8
characters.
Vishay Micro-Measurements System 7000 Programmer’s Reference Manual
Page 90 of 142

6.5.6.2
GetFreeSpace Method
Syntax:
HRESULT _stdcall GetFreeSpace(in long CardNo, out retval long * result );
Description:
Returns the free space remaining on the CompactFlash of the selected card.
Arguments:
CardNo The card number (1-16) Specifying a value of 0 returns the free space on the
control module.
Returns:
The amount of free space, in bytes.
Notes:
This method does not return a Success/Error status. Use the LastErrorCode property to check if
an error occurred during the method.
6.5.6.3
GetCardStatusMethod
Syntax:
HRESULT _stdcall GetCardStatus(in long CardNo, out retval BSTR * result );
Description:
Returns the card status for the selected card
Arguments:
CardNo The card number (1-16)
Returns:
A string representing the current card status, delimited by carriage returns.
Card State[CR]
Last error code[CR] (0 = no error)
Low disk space flag[CR] (1 = low disk space)
Limit latched flag[CR] (1 = limit latched)
Limit asserted flag[CR] (1 = limit asserted)
Masked offscale+ status[CR] (corresponding bit is set if offscale)
Masked offscale- status[CR] (corresponding bit is set if offscale)
Calibration status of current range[CR] (1 = out of range)
Vishay Micro-Measurements System 7000 Programmer’s Reference Manual
Page 91 of 142

Notes:
This method does not return a Success/Error status. Use the LastErrorCode property to check if
an error occurred during the method.
Note that these values are ASCII text values, not byte values. With the exception of card state,
they should be converted to numeric format.
The card state is one of the following strings:
Idle
Uploading
Armed
Scanning
Calibrating
Downloading
Updating
Maintenance mode
Low disk space is true when there is less than 10 megabytes remaining on the compact flash.
The masked offscale (+ or -) status is a bit masks. If any channel is offscale then the
corresponding bit is set in the mask. For example, if the mask is 0x03, then channels 1 and 2 are
offscale. The calibration status is also a bit mask. If any channel’s calibration is out of range,
then the corresponding bit is set in the mask.
6.5.6.4
DetectCards Method
Syntax:
HRESULT _stdcall DetectCards(out retval long * result );
Description:
Detects the cards installed in the system
Arguments:
None
Returns:
A mask value representing which cards are installed in the system. Bit 0 corresponds to Card 1.
If the bit is set, the card is present. A value of 0x0001 indicates only Card 1 is present; a value of
0xFFFF indicates that sixteen cards are present.
Notes:
This method does not return a Success/Error status. Use the LastErrorCode property to check if
an error occurred during the method.
Vishay Micro-Measurements System 7000 Programmer’s Reference Manual
Page 92 of 142

6.5.6.5
GetCardInformation Method
Syntax:
HRESULT _stdcall GetCardInformation(in long CardNo, out retval BSTR * result );
Description:
Returns card information
Arguments:
CardNo The card number (1-16)
Returns:
A string containing the card information, delimited by carriage returns. The returned format is:
Device Type [CR]
o 7001-8-DIO
o 7002-8-A-O
o 7003-8-A-I
FPGA Version [CR]
Card Hardware Version [CR]
Card Serial Number [CR]
Card Firmware Version [CR]
Sensor Card Type [CR]
o 7003-8-SG-FB
o 7003-8-SG-HB
o 7003-8-SG-QB
o 7003-8-SG-QB-120
o 7003-8-SG-QB-350
o 7003-8-SG-QB-1000
o 7003-8-TC
o 7003-8-PE-VM
o 7003-8-PE-CM
o 7003-8-LVDT
o 7003-8-HL
o 7003-8-SG_UN_CMRR
Sensor Card Version [CR]
Sensor Card Serial number [CR]
Sensor Card CPLD version
Notes:
This method does not return a Success/Error status. Use the LastErrorCode property to check if
an error occurred during the method.
[CR] represents the carriage return character ASCII 0x13.
If you are comparing the Sensor Card Type against a constant, for strain gage cards use the
constant value ‘7003-8-SG” as not all strain gage types listed are currently in use.
Vishay Micro-Measurements System 7000 Programmer’s Reference Manual
Page 93 of 142

6.5.6.6
Flash System LEDs Method
Syntax:
HRESULT _stdcall FlashSystemLEDs(in long LEDState, out retval long * result );
Description:
Flashes a pattern on the system’s front panel LEDs.
Arguments:
LEDState 0 = Stop Flashing Pattern
1 = Start Flashing Pattern
Returns:
0 if Successful, otherwise an Error Code
Notes:
6.5.6.7
ResetCard Method
Syntax:
HRESULT _stdcall ResetCard(in long CardNo, out retval long * result );
Description:
Performs a soft-reset on the selected card. The card settings are returned to the default state.
Arguments:
CardNo The card number (1-16)
Returns:
0 if Successful, otherwise an Error Code
Notes:
Vishay Micro-Measurements System 7000 Programmer’s Reference Manual
Page 94 of 142

6.5.6.8
ShuntCalEnable Method
Syntax:
HRESULT _stdcall ShuntCalEnable(in long CardNo, in long ChannelNo, in long Enable, out
retval long * result );
Description:
Enables/disables the shunt calibration circuit for the selected channel
Arguments:
CardNo The card number (1-16)
ChannelNo The channel number on the card (1-8)
Enable 1 = Enable shunt cal, 0 = disable shunt cal
Returns:
0 if Successful, otherwise an Error Code
Notes:
The Shunt Calibration Resistor control enables / disables the parallel shunt cal resistor across the
dummy resistor. The hardware automatically selects the appropriate shunt value for the current
dummy resistor selection. This method is only applicable for strain gage channels in a quarterbridge configuration. In ordinary operation the shunt calibration resistor is disabled. Enable it
when you are performing a shunt cal procedure.
6.5.6.9
RemoteCalEnable Method
Syntax:
HRESULT _stdcall RemoteCalEnable(in long CardNo, in long ChannelNo, in long Enable, out
retval long * result );
Description:
Enables the remote calibration resistor for the selected channel
Arguments:
CardNo The card number (1-16)
ChannelNo The channel number on the card (1-8)
Enable 1 = Enable (connect) remote cal, 0 = disable (disconnect) remote cal
Returns:
0 if Successful, otherwise an Error Code
Notes:
Connects / disconnects the remote calibration resistor into the bridge circuit. Enabling the
remote calibration resistor is only valid for strain gage channels in quarter-bridge configuration.
In ordinary operation, the remote calibration resistor is disabled.
Vishay Micro-Measurements System 7000 Programmer’s Reference Manual
Page 95 of 142

6.5.6.10
ClearErrors Method
Syntax:
HRESULT _stdcall ClearErrors(out retval long * result );
Description:
Clears the errors on the System 7000 scanner (the control module and all I/O cards). Does not
clear the error log files.
Arguments:
None
Returns:
0 if Successful, otherwise an Error Code
Notes:
6.5.6.11
GetErrorMessage Method
Syntax:
HRESULT _stdcall GetErrorMessage(in long ErrorCode , out retval BSTR * result);
Description:
Returns an ASCII text string containing information about the entered error code.
Arguments:
None
Returns:
An ASCII text error string
Notes:
This method should be called when an error code is returned from the System 7000 interface. It
converts the numeric error code into more detailed text message.
Vishay Micro-Measurements System 7000 Programmer’s Reference Manual
Page 96 of 142

6.5.6.12
RetrieveFile Method
Syntax:
HRESULT _stdcall RetrieveFile(in long CardNo, in BSTR SourceName, in BSTR DestPath, in
VMM7000DataTransferStatus * Callback, out retval long * result );
Description:
Retrieves a file from the selected card and copies it to the selected file.
Arguments:
CardNo The card number (1-16). Use 0 to retrieve the file from the control module.
SourceName The name of the source file (in 8.3 format)
DestPath The fully qualified path/filename to copy the file.
Callback A reference (pointer) to the
IVMM7000DataTransferStatus Interface (object)
Returns:
0 if Successful, otherwise an Error Code
Notes:
The IVMM7000DataTransferStatus interface provides critical information about the download.
6.5.6.13
RetrieveLastDataFile Method
Syntax:
HRESULT _stdcall RetrieveLastDataFile(in long CardNo, in BSTR DestPath, in
VMM7000DataTransferStatus * Callback, out retval long * result );
Description:
Retrieves the last created data file from the selected card and copies it to the selected file.
Arguments:
CardNo The card number (1-16).
DestPath The fully qualified path/filename to copy the file.
Callback A reference (pointer) to the
IVMM7000DataTransferStatus Interface (object)
Returns:
0 if Successful, otherwise an Error Code
Notes:
The IVMM7000DataTransferStatus interface provides critical information about the download.
Vishay Micro-Measurements System 7000 Programmer’s Reference Manual
Page 97 of 142

6.5.6.14
ListFiles Method
Syntax:
HRESULT _stdcall ListFiles(in long CardNo, out retval BSTR * result );
Description:
Lists the files on the selected card
Arguments:
CardNo The card number (1-16). Use 0 to list the file on the control module.
Returns:
A string containing a list of files, delimited by carriage returns (0x13), in the format:
Filename, File size, Create Date[MM-DD-YY], Create Time[HH:MM][CR]
Notes:
6.5.6.15
DeleteFile Method
Syntax:
HRESULT _stdcall DeleteFile(in long CardNo, in BSTR FileName, out retval long * result );
Description:
Deletes a file from the selected card
Arguments:
CardNo The card number (1-16). Use 0 to deletes the file from the control module.
Filename The filename to delete (in 8.3 format)
Returns:
0 if Successful, otherwise an Error Code
Notes:
Vishay Micro-Measurements System 7000 Programmer’s Reference Manual
Page 98 of 142

6.5.6.16
DeleteLastDataFile Method
Syntax:
HRESULT _stdcall DeleteLastDataFile(in long CardNo, , out retval long * result );
Description:
Deletes the last created data file (and associated header file) from the selected card
Arguments:
CardNo The card number (1-16).
Returns:
0 if Successful, otherwise an Error Code
Notes:
6.5.6.17
CancelFileTransferMethod
Syntax:
HRESULT _stdcall CancelFileTransfer(in long CardNo, out retval long * result );
Description:
Cancels a file transfer in progress
Arguments:
CardNo The card number (1-16).
Returns:
0 if Successful, otherwise an Error Code
Notes:
System must be in the uploading state.
Vishay Micro-Measurements System 7000 Programmer’s Reference Manual
Page 99 of 142

6.6 IVMM7000DataTransferStatus Interface Description
6.6.1 Properties
6.6.1.1 BytesTransferred Property (Read/Write)
Syntax:
Get:
HRESULT _stdcall BytesTransferred(out retval BSTR * Value );
Set:
HRESULT _stdcall BytesTransferred(in BSTR Value );
Description:
Returns the number of bytes transferred in the current transfer. When Setting the property, the
value is added to the current value, acting as an accumulator. Resetting the TotalBytes property
clears the accumulator.
Notes:
Setting the property is done internally by the ActiveX object. There is no need for the user to set
the property.
6.6.1.2 PercentComplete Property (Read/Write)
Syntax:
Get:
HRESULT _stdcall PercentComplete(out retval BSTR * Value );
Set:
HRESULT _stdcall PercentComplete (in BSTR Value );
Description:
Returns the percent complete for the current transfer.
Notes:
You may read the PercentComplete property to monitor the status of the file transfer.
Programming Note: There may be lag time between calling the RetrieveFile, ListFiles or
RetrieveLastDataFile method and the percent complete property being available. You may need
to insert a delay (100 mSecs or less) in your software to between calling the method and reading
the property. A value of -1 is returned when the property has not been updated. Refer to the
sample programs for an example.
Vishay Micro-Measurements System 7000 Programmer’s Reference Manual
Page 100 of 142
 Loading...