

Page 1

PortablePiano
Manualed’uso-Italiano
UserManual-English
Page 2
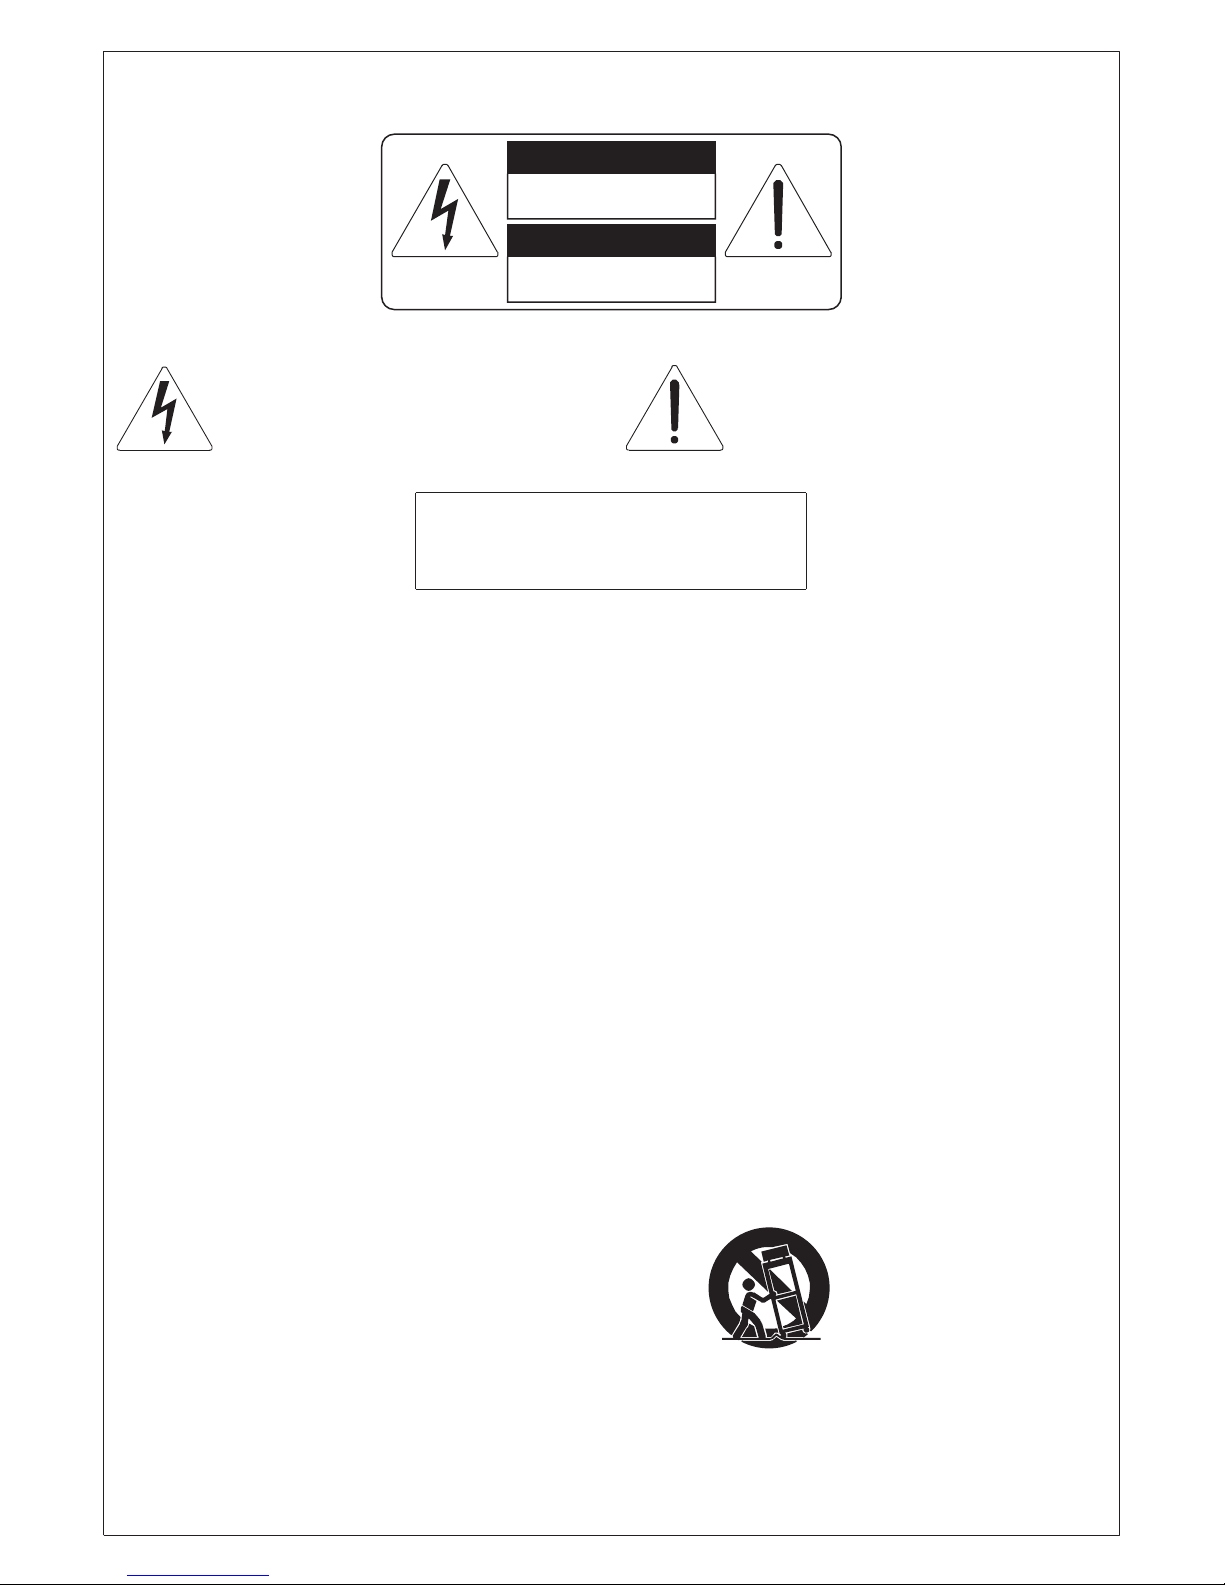
This symbol is intended to alert the user to the
presence of uninsulated “dangerous voltage”
within the product’s enclosure that may be of
sufficient magnitude to constitute a risk of
electric shock to persons.
This symbol is intended to alert the user to
the presence of important operating and
maintenance (servicing) instructions in the
literature accompanying the appliance.
CAUTION
TO REDUCE THE DANGER OF ELECTRIC SHOCK
DO NOT REMOVE COVER (OR BACK)
NO USER-SERVICEABLE PARTS INSIDE
REFER SERVICING TO QUALIFIED SERVICE PERSONNEL
“INSTRUCTIONS PERTAINING TO A RISK OF FIRE,
ELECTRIC SHOCK, OR INJURY TO PERSONS”
IMPORTANT SAFETY INSTRUCTIONS
WARNING:
1) Read these instructions.
2) Keep these instructions.
3) Heed all warnings.
4) Follow all instructions.
5) Do not use this apparatus near water.
6) Clean only with dry cloth.
7) Do not block any ventilation openings. Install in accordance with the manufacturer’s instructions.
8) Do not install near any heat sources such as radiators, heat registers, stoves,
or other apparatus (including amplifiers) that produce heat.
9) Do not defeat the safety purpose of the polarized or grounding-type plug. A polarized plug has two blades with one
wider than the other. A grounding type plug has two blades and a third grounding prong. The wider blade or the third
prong are provided for your safety. If the provided plug does not fit in to your outlet, consult an electrician for replacement
of the obsolete outlet.
11) Protect the power cord from being walked on on pinhead, particularly at plugs, convenience receptacles,
and the point where they exit form the apparatus.
12) Only use attachments/accessories specified by the manufacturer.
13) Use only with the cart, stand, tripod, bracket, or table specified by
the manufacturer, or sold, with the apparatus.
When a cart is used, use caution when moving the cart/apparatus
combination to avoid injury from tip-over.
14) Unplug this apparatus during lightning storms or when unused for long periods of time.
15) Refer all servicing to qualified service personnel. Servicing is required when the apparatus has been damaged
in any way, such ad power-supply cord or plug is damaged, liquid has been spilled or objects have fallen into
the apparatus, the apparatus has been exposed to rain or moisture, does not operate normally, or has been dropped.
SAVE THESE INSTRUCTIONS
WARNING: READ THIS FIRST!
WARNING
AVIS
RISK OF ELECTRIC SHOCK
DO NOT OPEN
RISQUE DE CHOC ÉLECTRIQUE
NE PAS OUVRIR
10) The socket-outlet shall be installed near the equipment and shall be easily accessible.
Page 3
VIVA Series - Digital Piano
23
Index
Welcome......................................................................... p.23
User Manual Information................................................... p.24
Product care.................................................................... p.25
Layer and performance concepts........................................ p.26
Control Panel................................................................... p.27
Performance mode........................................ p.29
Edit mode.................................................... p.31
The back panel................................................................ p.39
Welcome!
Dear Customer:
thank you for choosing a Viscount product.
The Viva digital piano is built with passion, to become your
performance’s reliable partner.
The Viva digital piano guarantee constant time performances
without any particular apparatus maintenance.
We advise you to read carefully this manual before the use.
Enjoy yourself with Viva!
ENGLISH
Page 4

VIVA Series - Digital Piano
24
User manual information
This instruction manual is an integral part of the apparatus.
Descriptions and illustrations of this publication are not binding.
The manufacturer reserves the right to carry out any possible
modifications of parts or details for the improvement of the product
or for commercial or constructive requirements, at any time and
without any engagement to update this publication.
All Rights are reserved; the reproduction of any part of this manual
is forbidden in every form without the manufacturer’s expressed
written permission.
The contents of this guide may be modified without notice.
Maximum care has been taken in the collecting and verification of
the documentation for a better, complete and comprehensible guide.
Page 5

VIVA Series - Digital Piano
25
Product care
Placement
Avoid subjecting the Viscount Viva to high temperatures such as
direct sunlight for example. Do not leave the instrument in very
damp and dusty places or near equipment likely to produce strong
interference or magnetic fields such as radios, TVs, monitors, etc.
Make sure the instrument is placed on a steady level surface.
Do not apply to the instrument excessive vibrations or violent
shocks.
Power supply
Do not connect the instrument to the same electrical circuit as other
equipment likely to create line noise, such as electrical motors or
lighting dimmer switches.
Always remember to disconnect the instrument from the main power
supply when it will not be used for any length of time.
Maintenance
For periodic cleaning, use only a soft dry cloth. To remove stubborn
dirt wipe with a damp cloth but dry the instrument thoroughly
straight away with a dry cloth. Do not attempt to use
benzene, thinners, alcohol or solvents of any kind for cleaning
operations; in this way no harm will be done to the finish and the
materials the instrument is made from.
The instrument contains no user serviceable parts. Do not make any
attempt to repair or modify the instrument; seek the help of an
authorized Service Center for any necessary repairs.
ENGLISH
Page 6

VIVA Series - Digital Piano
26
Layer and performance concepts
The layer is an area on the keyboard associated with a particular
sound: its extension is user defined.
Viva has two layers, therefore can reproduce up to two sounds at
the same time, one above the other or “split” on the keyboards.
Each layer has an independent volume, it has also its proprietary
dynamic and other customization parameters, such as the MIDI
transmission channel.
In addition to the “note” data, the layer contains all setup and MIDI
control data to be sent out when it is recalled (such as Program
Change, Bank Select, aux Control Change, default control data).
The Performance can be defined as a program that contains all
information that prepare the instrument to a certain setup.
In a Performance, for example, in addition to the timbres selected
for the two layers, can be stored the Key Velocity response curves
(dynamic), and can be set the MIDI channels in reference to the
layers, the Program Changes, the controls, and other parameters
that we will examine later on in this manual.
Page 7
VIVA Series - Digital Piano
27
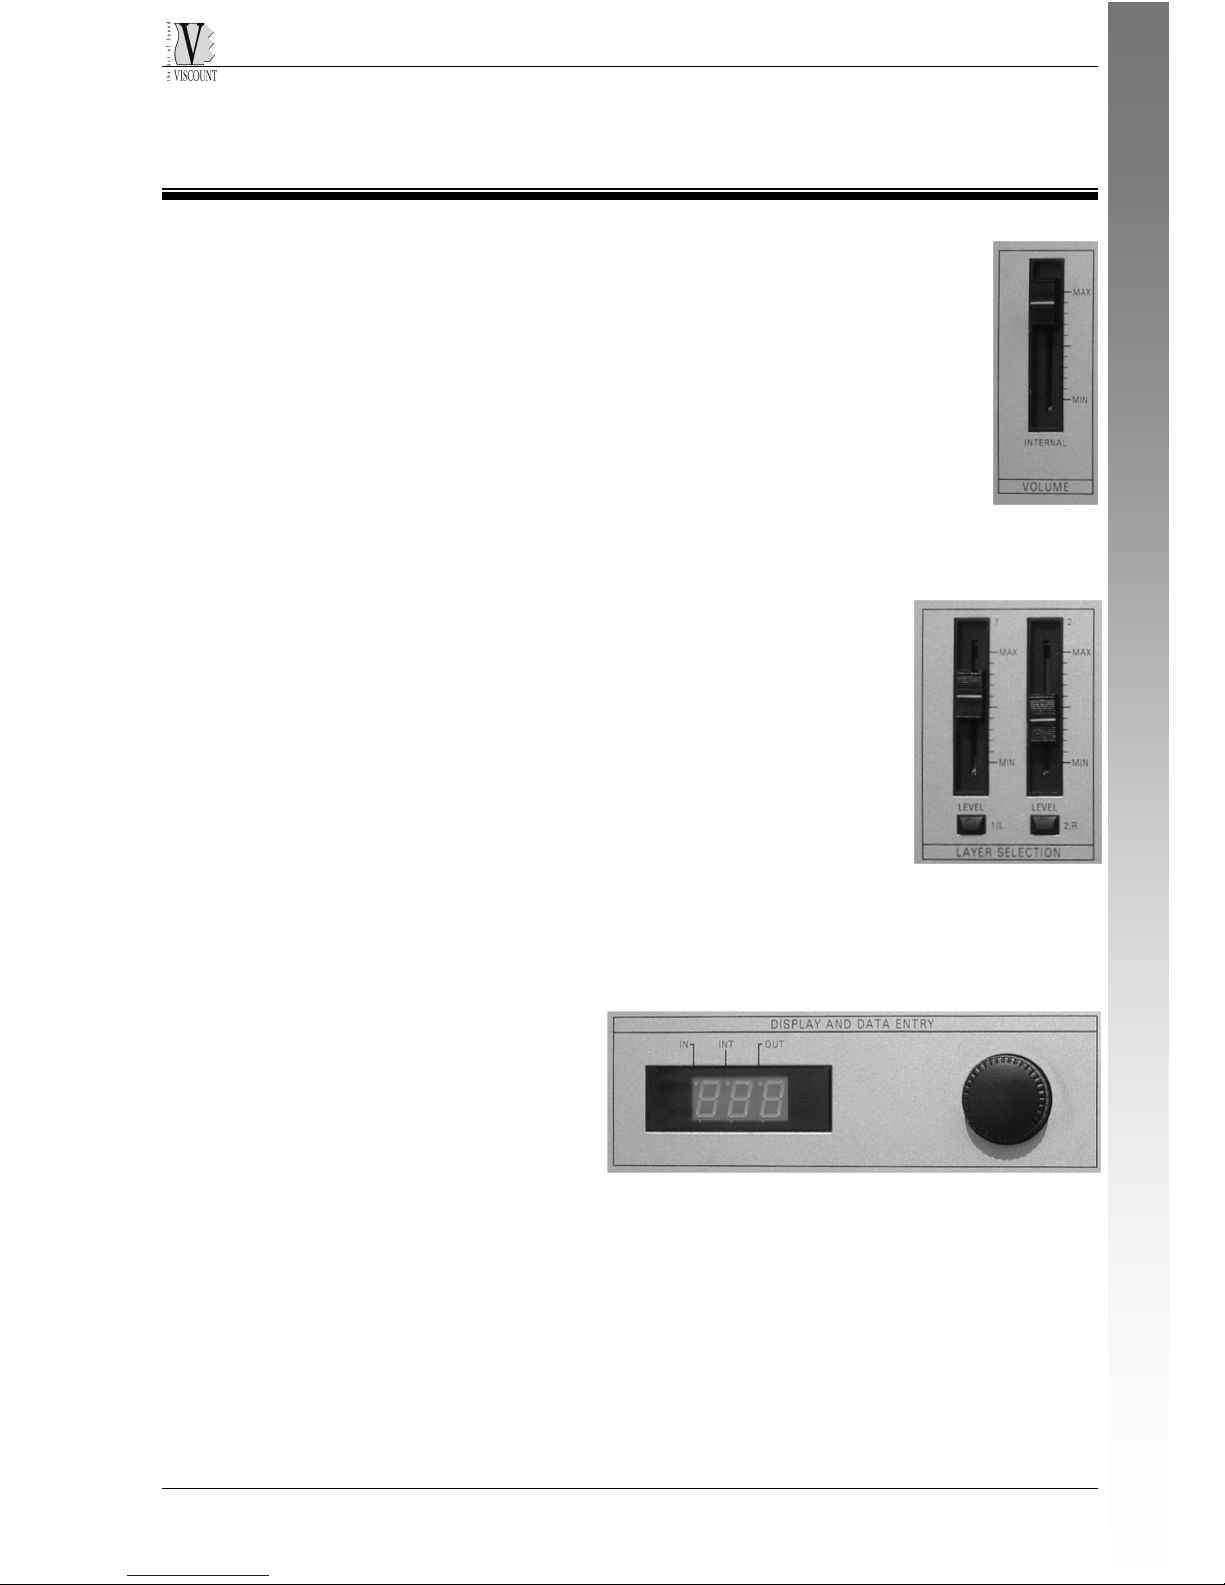
The control panel
VOLUME FADER
Looking the front panel from left to right, firstly we found
the fader for the volume control of the whole instrument.
LAYER SELECTION
After the volume, we find two faders that control the voulme of the
two separate layers; under these faders we find two
keys [1/L] [2/R] with LED. Pressing the key (LED is
then lit) we select the layer in which we operate
(timbre selection of parameter editing).
THE DISPLAY AND ITS KEYS
At the center of the control panel we see a 3 digit display, with three
function keys.
At the right side of the display
we find an encoder that is
used to increase or decrease
the value of the displayed
parameter. Increasing is
clockwise, decreasing is
counterclockwise.
ENGLISH
Page 8
VIVA Series - Digital Piano
28
The SPLIT key activates the split of the sounds on the keyboards
(layer). When the SPLIT key is active, the
first layer is active on the left side of the
split point, the second on the right. When
the SPLIT key is not active, the two layers
cover the whole range of the keyboard, are both active and working.
To change the split point: press the SPLIT key until the display
flashes and indicates the split note on the display. Pressing the
desired key as a new split point the value is selected and indicated
on the display. Pressing SPLIT again the new point is stored and the
number of Performance appears again.
To eliminate the split point press the SPLIT key again.
The TRANSPOSE key is used to transpose the keyboard tune.
Pressing it shortly the function is activated, and pressing the key
again the function is cancelled. Pressing TRANSPOSE for at least two
seconds you can change the transpose interval, acting on the
encoder. The values go from –12 to +12 (they correspond to 1
octave up and one down), and they are visualized on the display.
The STORE key enables the STORE Mode: this is the memory save
mode for the editing on a Performance (see the specific chapter).
Under the encoder we find the PERFORMANCE and EDIT keys.
When we switch on the instrument, or we play normally, the
keyboard is in PERFORMANCE mode; it is possible
to access the EDIT mode when we press the EDIT
key, to modify or set some parameters. Pressing
PERFORMANCE we go back to the Performance
mode again.
With the EDIT mode we can set all parameters included in a
Performance.
On the right side of the control panel, we find the timbre/parameter
selection matrix. The controls act on the layer selected with the
LAYER SELECTION keys.
Page 9

VIVA Series - Digital Piano
29
PERFORMANCE MODE
When the keyboard is switched on, after the display of the “Portable
Piano” words, the number of
performance 01 is displayed
and the timbre “Grand Piano”.
To select another timbre,
press simply the two keys of
the matrix, the timbre
indicated at the “crossing
point” on the matrix will be
activated.
TIMBRES
First row - piano sounds:
GRAND PIANO.
BRIGHT PIANO: Brilliant sound, similar to vertical piano.
EL GRAND PIANO: Electric Grand Piano.
HONKY TONKY: Ragtime piano sound.
ELECTRIC PIANO 1.
ELECTRIC PIANO 2.
VIB: Vibraphone.
Second row – strings and vocal sounds:
STRINGS.
SLOW STRINGS: Slow attack strings.
SINTH STRINGS: Synthetic strings.
TREMOLO STRINGS.
PIZZICATO STRINGS.
CHOIR 1: Polyphonic choir. Vocal attack.
CHOIR 2: “Soloist” Choir.
ENGLISH
Page 10

VIVA Series - Digital Piano
30
Third row – Organ timbre:
ORGAN 1: Electro-mechanic organ.
ORGAN 2: Electro-mechanic organ with percussion.
DETUNED ORGAN: Detuned organ.
VINTAGE ORGAN:’70 electric organ.
ROCK ORGAN: Electro-mechanic organ with percussion and overdrive.
ACCORD: Accordion.
CHURCH ORGAN: Church Organ.
Fourth row – Bass and guitar timbre:
NYLON GUITAR.
STEEL GUITAR.
JAZZ GUITAR: Semi-acoustic guitar.
ACOUSTIC BASS.
FINGER BASS: Bass guitar played with fingers.
PICKED BASS.
FRETLESS BASS.
Fifth row – Synthetic sounds that can be used as PAD (background)
or LEAD (Solo voices). Betweeen these you can find the MUTE
preset, that allow to use one muted layer (performances with one
sound only).
PERFORMANCES
Viscount Viva has 99 Performances, all user editable; the first 30 are
factory preset (so to get confidence with the instrument), and the 31
to 99 are “empty” (preset with GRAND PIANO timbre). You can use
these to create your own performances.
Page 11

VIVA Series - Digital Piano
31
EDIT MODE
The Edit mode allow to set or modify all the parameters of a
Performance. Pressing the Edit key under the encoder, the matrix is
activated.
In the matrix the sounds aer indicated in black, while on the borders
the parameters are indicated in blue color, near to the keys.
STORE FUNCTION
Once selected the parameter to modify, whose LED will flash, with
the encoder we tune the value, that is displayed. This operation can
be repeated for all parameters that we want to change. At the first
editing the STORE key LED is lit.
Once adited all parameters, press the STORE key again. The
Performance number appears again, with a “d” letter (“d” indicates
“destination”, this is the target performance in which we will store
our modifications). Using the encoder it is possible to select a new
target performance.
Press again STORE (as a confirm), the LED will be switched off and
the display shows again, after some seconds, the Performance
number with the “P” digit.
The instruments records the last modification done, therefore if we
call the Edit mode again, the last parameter modification will be
shown.
ENGLISH
Page 12

VIVA Series - Digital Piano
32
IMPORTANT NOTE
Every modification done in editing mode is immediately active and
the values in editing are sent to the MIDI port and to the MIDI
channel of the layer. This to make every modification immediately
“audible”.
All the modifications done in the Edit mode remain in memory. This
means that, once selected one function, it is not needed to store it
immediately. It is possible to make a set of editing and store
everything at the end (e.g. also change the editing layer with the
[LAYER SELECTION] keys) and save everything at the end of the
edit session.
Please note that, if the performance is changed without saving, all
modification done will be lost.
TUNE FUNCTION
The keyboard is tuned at A=440 Hz. If we need to change the
tuning, press EDIT key until the word TUN is displayed. Leaving the
key, the distance value of the tuning from the 440 Hz value is
displayed in Cents (0=tuned).
Rotate the encoder clockwise (pitch increased) or counterclockwise
(pitch decreased) to get the desired tuning. Press STORE to select
and store. The tuning value is a system value, therefore valid of all
timbres and performances.
Page 13

VIVA Series - Digital Piano
33
PARAMETERS DESCRIPTION
REVERB
The REVERB function allow to control, for the layer in editing, the
reverb effect amount; the possible values go from 0 to 127.
As descripted before, the value is displayed and controllable through
the encoder.
CHORUS
The CHORUS function allow to control, for the layer in editing, the
chorus effect amount; the possible values go from 0 to 127.
There is only one chorus value valid for both layers.
BRILLIANCE
The BRILLIANCE function allow to control, for the layer in editing,
the brilliance of the timbre; the possible values go from 0 to 127.
ENGLISH
Page 14

VIVA Series - Digital Piano
34
VELOCITY
The VELOCITY parameter allow to assign to the selected layer one of
the eight dynamic response curves available.
The available curves are the following:
EXTRA-LIGHT
Very light dynamic
response curve,
with the maximum
dynamic values reached very
quickly.
A curve with very little expression.
LIGHT
A light dynamic
response curve.
Although high MIDI
dynamic values are
reached quite quickly, the curve still
guarantees a fair degree of dynamic resolution.
LINEAR
This is a linear (or
standard) dynamic
curve, in which the
velocity applied to
the keyboard is
converted into a
dynamic in linear mode.
HEAVY
“Hard” dynamic
response curve
which is still
fairly linear in
the medium
dynamic zones. Suitable where
the zone to be controlled is to be
set a little in the background,
while still providing a certain
degree of linear expressiveness.
EXTRA HEAVY
A very hard
curve. While the
maximum MIDI
dynamic value is
still in the
conversion table,
it is very difficult to reach this
level.
FLAT 64
Flat dynamic curve with
Velocity value fixed at 64.
FLAT 96
Flat dynamic curve with
Velocity value fixed at 96.
FLAT127
Flat dynamic curve with
Velocity value fixed at 127.
Page 15

VIVA Series - Digital Piano
35
The value on the curves on the display is as follows:
OCTAVE
The OCTAVE function allow, for the layer being edited, a octave
transpose for the selected sound, up to two octave higher or lower.
The selectable values are from –2 to 2.
MIDI
OUT CH
The out channel function defines the MIDI transmission channel for
the selected zone. The possible values are:
• OFF: the MIDI values are not sent
• 0-16: MIDI output channel
ENGLISH
Page 16

VIVA Series - Digital Piano
36
BANK H (BANK SELECT MSB)
The BANK SELECT MSB function allows setting of the value of CC 0
to be sent when the Performance is loaded on the channel/port
assigned to the zone concerned.
The display will show the actual parameter value.
The possible values are:
• OFF: Control Change not sent
• 0-27: Value of CC 0
N.B.: each variation made to this parameter will trigger transmission of the
Bank Select LSB, Bank Select MSB and Program Change messages with the
values currently set, on the MIDI channel assigned to the zone being edited.
BANK L (BANK SELECT LSB)
Similar to the above paragraph.
The BANK SELECT LSB function allows setting of the value of CC 32
to be sent when the Performance is loaded on the channel/port
assigned to the zone concerned.
The display will show the actual parameter value.
The possible values are:
• OFF: Control Change not sent
• 0-27: Value of CC 32
N.B.: each variation made to this parameter will trigger transmission of the
Bank Select LSB, Bank Select MSB and Program Change messages with the
values currently set, on the MIDI channel assigned to the zone being edited.
PRG
The PROGRAM function allows setting of the value of the Program
Change to be sent when the Performance is loaded on the
channel/port assigned to the zone concerned.
• OFF: Program Change not sent
• 1÷128: Value assignable to PRG
Page 17

VIVA Series - Digital Piano
37
IN MODE
Viva has four configuration modes for the [MIDI IN] port:
OFF: messages incoming on the [MIDI IN] port are not loaded.
SYSTEM: The [MIDI IN] port is used to control the instrument. With
a reception channel present, the messages on this channel will be
interpreted in accordance with the following logic:
a) The note messages will be interpreted as if the notes were really
played on the keyboard (and therefore, with the division of the
layers, which transmit on the out ports and channel assigned to
them)
b) The Program Change data will be interpreted as Program Change.
c) The Control Change data will be sent on the active layer/s.
SOFT-THRU: The MIDI data arriving into the [MIDI IN] port will be
sent to the [MIDI OUT] port without being acquired from the
instrument. The data sent will be sum to the messages generated
from the instrument.
SOUND: The data arriving into the [MIDI IN] port will be sent to the
internal sound generation, that will use all 16 MIDI channels.
EXCLUSION: The data arriving into the [MIDI IN] port will be sent to
the internal sound generation, exception made for channels 1 and 2,
that are used for the instrument active layers.
The [MIDI IN] port configurations are displayed as follows:
ENGLISH
Page 18

VIVA Series - Digital Piano
38
IN CH
The in channel function defines the MIDI receive channel for Viva.
Once selected the value, the display will show the receive channel
set.
The possible values are 0 to 16.
The selected value is immediately active and saved.
B. DUMP
The BULK DUMP function allows to send to a sequencer the Viva
memory content, from the [MIDI OUT] port, in order to save the
programmed Performances and have an external data backup,
The system recalls the Bulk Dump function showing “bld” on the
display, indicating the build of the file, and proceeds automatically
with the data transmission displaying from “S01” to “S99” (“s” =
send).
Once made, the display show the word “don” =done.
The receive function is automatic, if we send a previously recorded
file to the MIDI IN port.
Viva recognizes automatically the data present on the MIDI IN port,
and starts the receive stopping all other operation: the display
shows three lines and SPLIT key flashes.
Once loaded the configuration, Viva restarts automatically and
activate the new configuration.
If the receive was correct, the SPLIT key flashes.
In case of error, the display shows EEE and the procedure must be
repeated.
Page 19

VIVA Series - Digital Piano
39
The back panel
Use normal AC cord for power supply.
Near the AC INPUT we find the POWER on switch.
At the center we find the three MIDI ports: [MIDI OUT], [MIDI
THRU], [MIDI IN], used for computer, sequencer, expander, etc.
At the right side we see two jack connector for [PEDALS]:
EXPR for expression pedal,
SUSTAIN for a switch pedal (contact normally open) as a dumper
pedal (sound “sustain” function).
Finally the audio outs [L/MONO] and [R], and the [PHONES]
connector.
The [L/MONO] can be used if we need a MONO out from Viva.
ENGLISH
Page 20

Page 21

MIDI IMPLEMENTATION CHART
VISCOUNT VIVA - VIVA X Date: 27/09/2002 (VIVA) - 08/01/2003 (VIVA X)
Portable Piano Version: 1.0
FUNCTION ... TRANSMITTED RECOGNIZED
REMARKS
BASIC DEFAULT
CHANNEL CHANGED
1-16
1-16
1-16
(1) (2)
1-16
(1) All channels [GM mode]
(2) All channels except 1 and 2
MODE Default
Messages
Altered
Mode 3
Mode 3
NOTE
NUMBER True Voice
0-127
28-103
(3)
21-108
(4)
0-127
21-108
VELOCITY Note ON
Note OFF
O
O
O
O
AFTER Key’s
TOUCH Ch’s
X
X
X
O
PITCH BENDER
X O
CONTROL 0
CHANGE 1
5-6
7
10
11
32
64
65-67
80-81
91
93
98 –101
120- 121
123
126-
127
O
X
X
O
X
O
O
O
X
X
X
X
X
X
O
X
O
O
O
O
O
O
O
O
O
O
O
O
O
O
O
O
(1) (2)
(1) (2)
(1) (2)
(1) (2)
(1) (2)
(1) (2)
(1) (2)
(1) (2)
(1) (2)
(1) (2)
PROGRAM
CHANGE True #
0-127 0-127 (1) (2)
SYSTEM EXCLUSIVE
O
(5)
O
SYSTEM Song Pos
COMMON Song Sel
Tune
X
X
X
X
X
X
SYSTEM Clock
REAL TIME Commands
X
X
X
X
AUX Local On-Off
MESSAGES All note Off
Active Sense
Reset
X
O
O
X
X
O
O
X
NOTES: (1): In mode setted as Sound (4): 88 keys version
(2): In mode setted as Esclusive
(5): Bulk Dump
(3): 76 keys version
- Soft thru function available
- When the “In Mode” is setted as “off” all the incoming messages are not recognized
Mode 1: Omni On, Poly Mode 2: Omni On, Mono O = YES
Mode 3: Omni Off, Poly Mode 4: Omni Off, Mono X = NO
Page 22

Page 23

NOTE: This equipment has been tested and found to comply with the limits for a Class B
digital Device, persuant to Part 15 if the FCC Rules. These limits are designed to provide
reasonable protection against harmful interference in a residential installation. This equipment
generates, uses and can radiate radio frequency energy and, if not installed and used in
accordance with the instruction, may cause harmful interference to radio comunications.
However, there is no guarantee that the interference will not occur in a particular installation. If
this equipment does cause harmful interference to radio or television reception, which can be
determinated by turning the equipment off and on, the user is encuraged to try to correct the
interference by one or more of the following measures:
- Reorient or relocate the receiving antenna.
- Increase the separation between the equipment and receiver.
- Connect the equipment into an outlet on a circuit different from that to which the receiver
is connected.
- Consult the dealer or an experienced Radio/Tv technician for help.
The user is cautioned that any changes or modification not expressly approved by the party
responsable for compliance could void the user’s authority opearate the equipment.
Page 24

 Loading...