

ViscoTec preeflow eco-SPRAY Commissioning And Maintenance Instructions
Commissioning and
maintenance instructions
eco-SPRAY
Micro
spray system

Artikelnummer 21504 Druck 22.1.16

eco-SPRAY
Commissioning and maintenance instructions
Contents
1 These instructions 5
2 The dispenser 5
2.1 Spray head combinations 6
2.2 Retrofitting the spray head 6
3 Safety 7
4 Connection options 7
5 Initial commissioning 8
5.1 Inserting the stator 8
5.2 Making the electrical connection 10
5.3 Supplying and bleeding the medium 11
6 Operation 12
7 Cleaning 12
8 Spare parts 15
9 Maintenance 17
9.1 Changing the stator 17
9.2 Troubleshooting 17
10 Disposal 18
11 Technical specifications 18
Copyright © Version 1.0 3 / 19

Commissioning and maintenance instructions
eco-SPRAY
4 / 19 Version 1.0 Copyright ©
eco-SPRAY
B
A
C
D
GH
E
F
Fig. 1
Commissioning and maintenance instructions
1 These instructions
Dear customer,
These instructions form part of the operating and maintenance instructions for the dosing
system eco-CONTROL EC200.
The operating and maintenance instructions must have been read and understood in full
before commissioning or carrying out maintenance work on the eco-SPRAY.
2 The dispenser
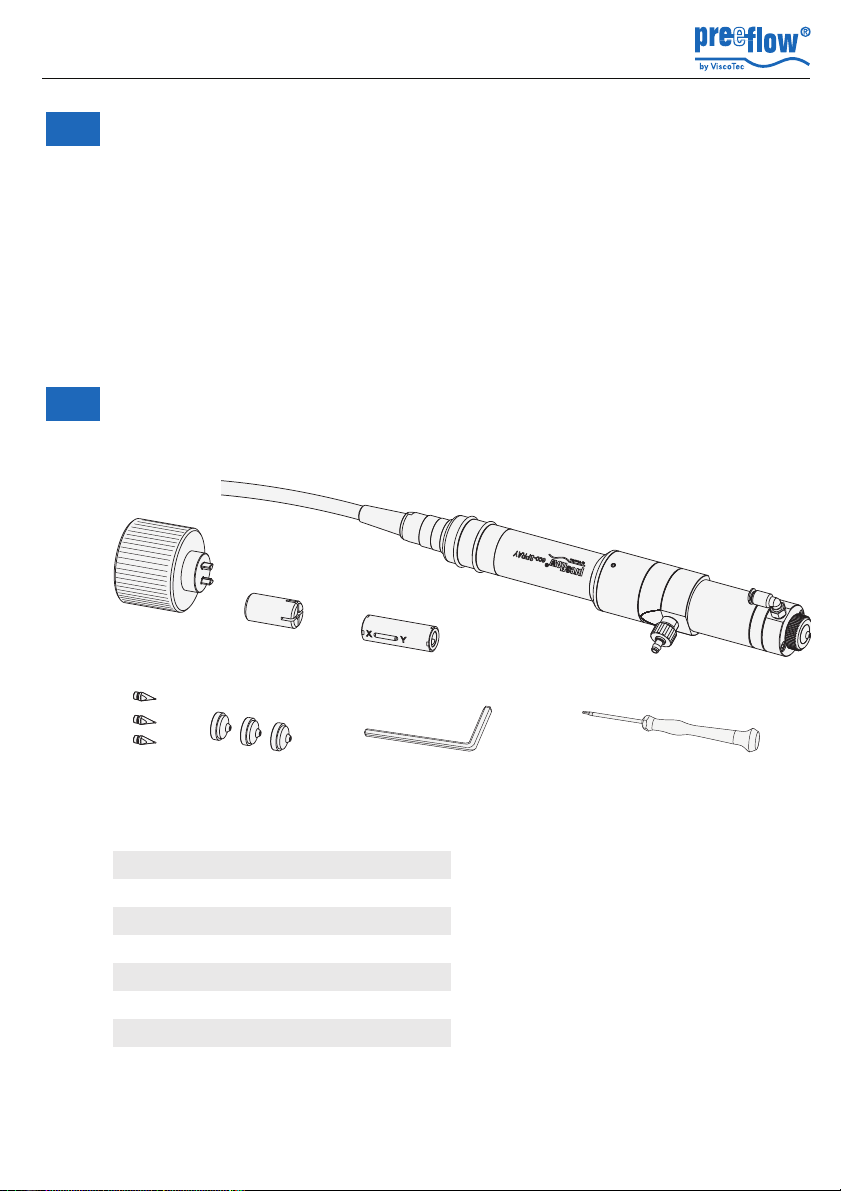
The dispenser is supplied with these components and accessories:
A Dispenser with drive
B Assembly aid
C Nozzle mounting tool
Copyright © Version 1.0 5 / 19
D Stator
E 3x precision dosing needles*
F 3x air caps*
G Screwdriver
H Allen wrench
*1 unit pre-mounted
2.1 Spray head combinations
0,50,30,2
1,45
1,7
2,0
A
B
Fig. 2
Low
H
i
gh
Viscosi
t
y
2
10
3
28
29
31
30
Fig. 3
We recommend selecting the air cap (B)
with the corresponding precision dosing
needle (A) depending on the medium
viscosity.
The appropriate combination must be
selected and tested separately for each
application (viscosity, dosing quantity/
time and temperature).
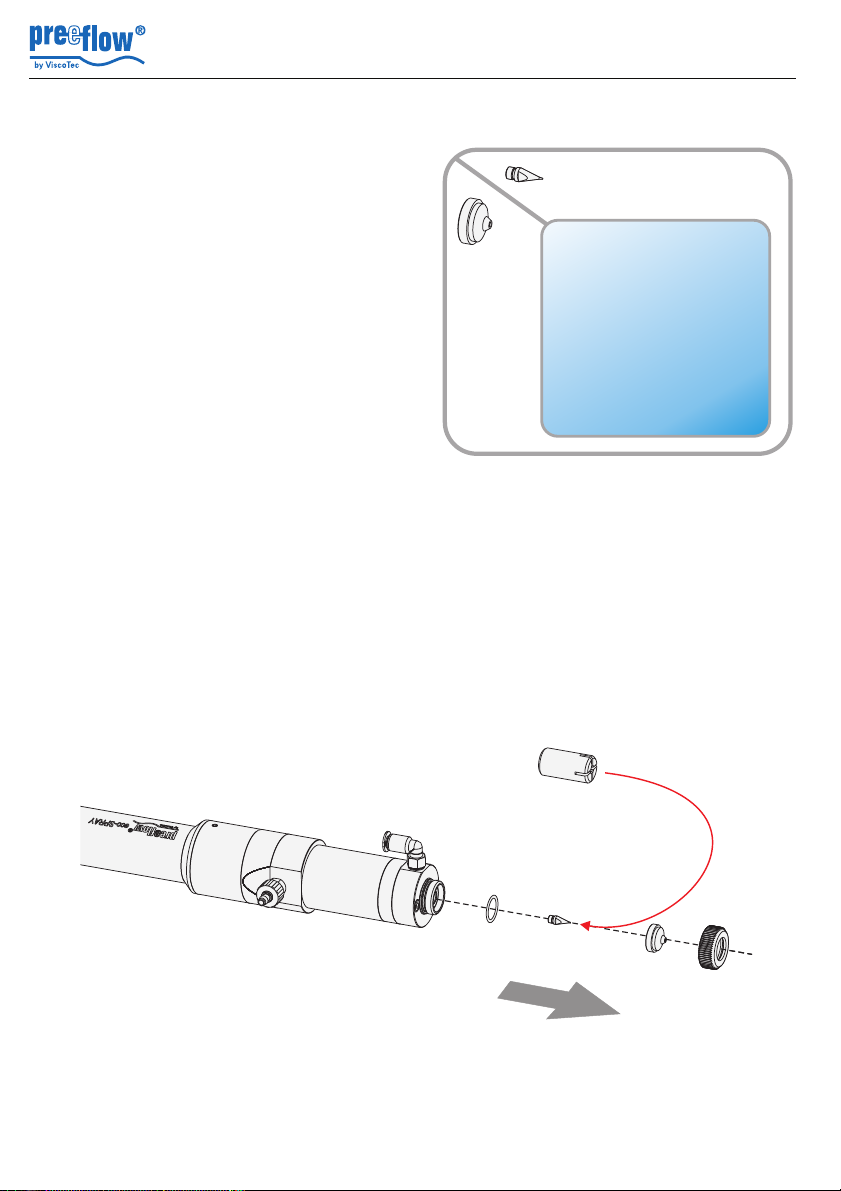
2.2 Retrofitting the spray head
• Undo the union ring (2)
• Remove the air cap (29). The seal (30) remains either in the spray head or stuck to the
air cap (29)
• Carefully attach the nozzle mounting tool (31) to the precision dosing needle (28),
unscrew the precision dosing needle and replace it with another one
• Attach an air cap (29) and re-tighten the union ring (2)
Commissioning and maintenance instructions
eco-SPRAY
6 / 19 Version 1.0 Copyright ©
 Loading...