

Visa Lighting Cade Series, Cade CM2070-W, Cade CM2070-D Installation Instructions Manual
INSTALLATION INSTRUCTIONS
Model:
CM2070-D & CM2070-W
Fixture Family:
Document Description: Installation Instructions for
CADE
Cade Series Luminaires
1717 West Civic Drive Milwaukee, WI 53209
414-354-6600
Design Modification Rights Reserved
© Visa Lighting
Drawing:
762308XX
Rev:
B
CADE
CM2070-D & CM2070-W
Sheet:
1 of 3
Eng:
CG2
Date Drawn:
10/15/18
When using electrical equipment, basic safety precautions should always be followed, including the following:
Read all instructions carefully before installing and save for future use.
•
Make sure all connections are in accordance with the National Electrical Code and local regulations.
•
To avoid possible electric shock, be sure the power supply is turned off before servicing or installing the fixture
•
Service should be performed by qualified personnel.
•
!
These instructions may not cover all details or variations. If additional information is needed, please contact Visa Lighting.
•
INSTALLATION INSTRUCTIONS
Model:
CM2070-D & CM2070-W
Fixture Family:
Document Description: Installation Instructions for
CADE
Cade Series Luminaires
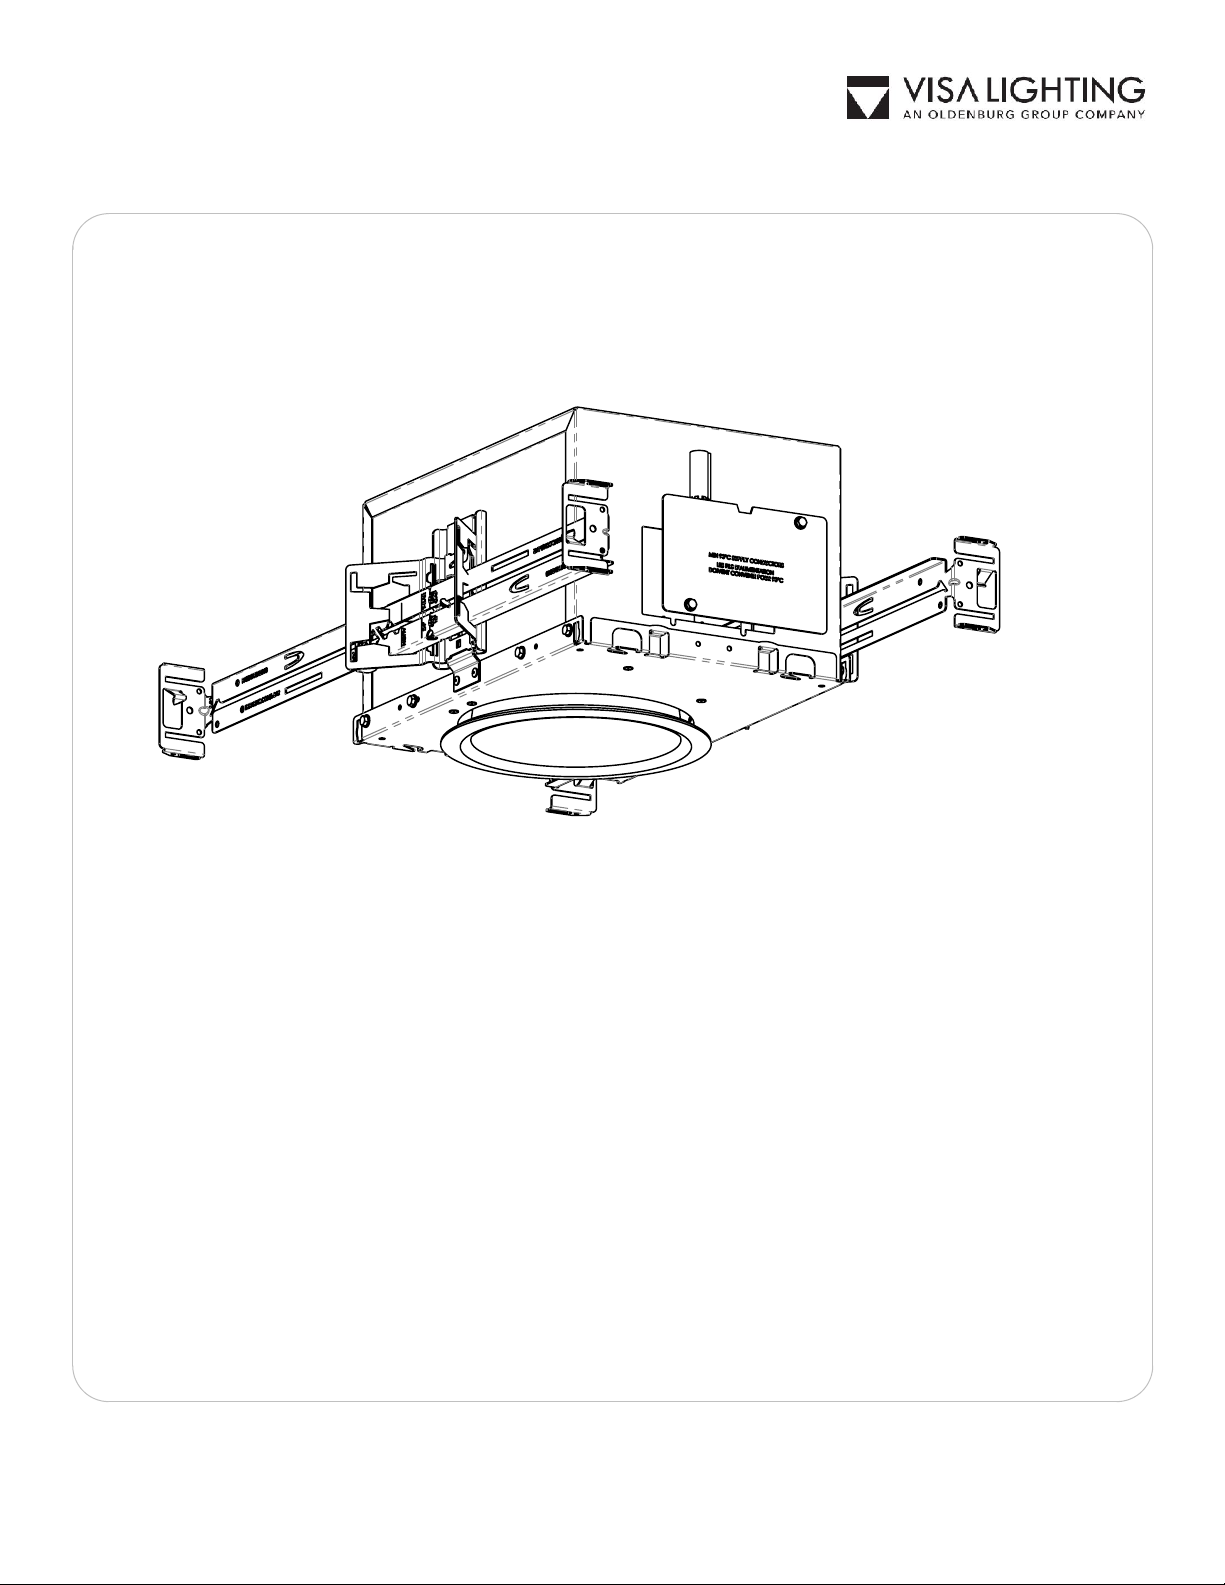
T-Grid and Sheet Rock Installation
J-Box
Wire Connectors
1717 West Civic Drive Milwaukee, WI 53209
414-354-6600
Design Modification Rights Reserved
© Visa Lighting 2016
Hanger Bars
Plaster Flange
Drawing:
762308XX
Rev:
B
Torsion Spring
Reflector Brackets
(inside housing)
Trim Assembly
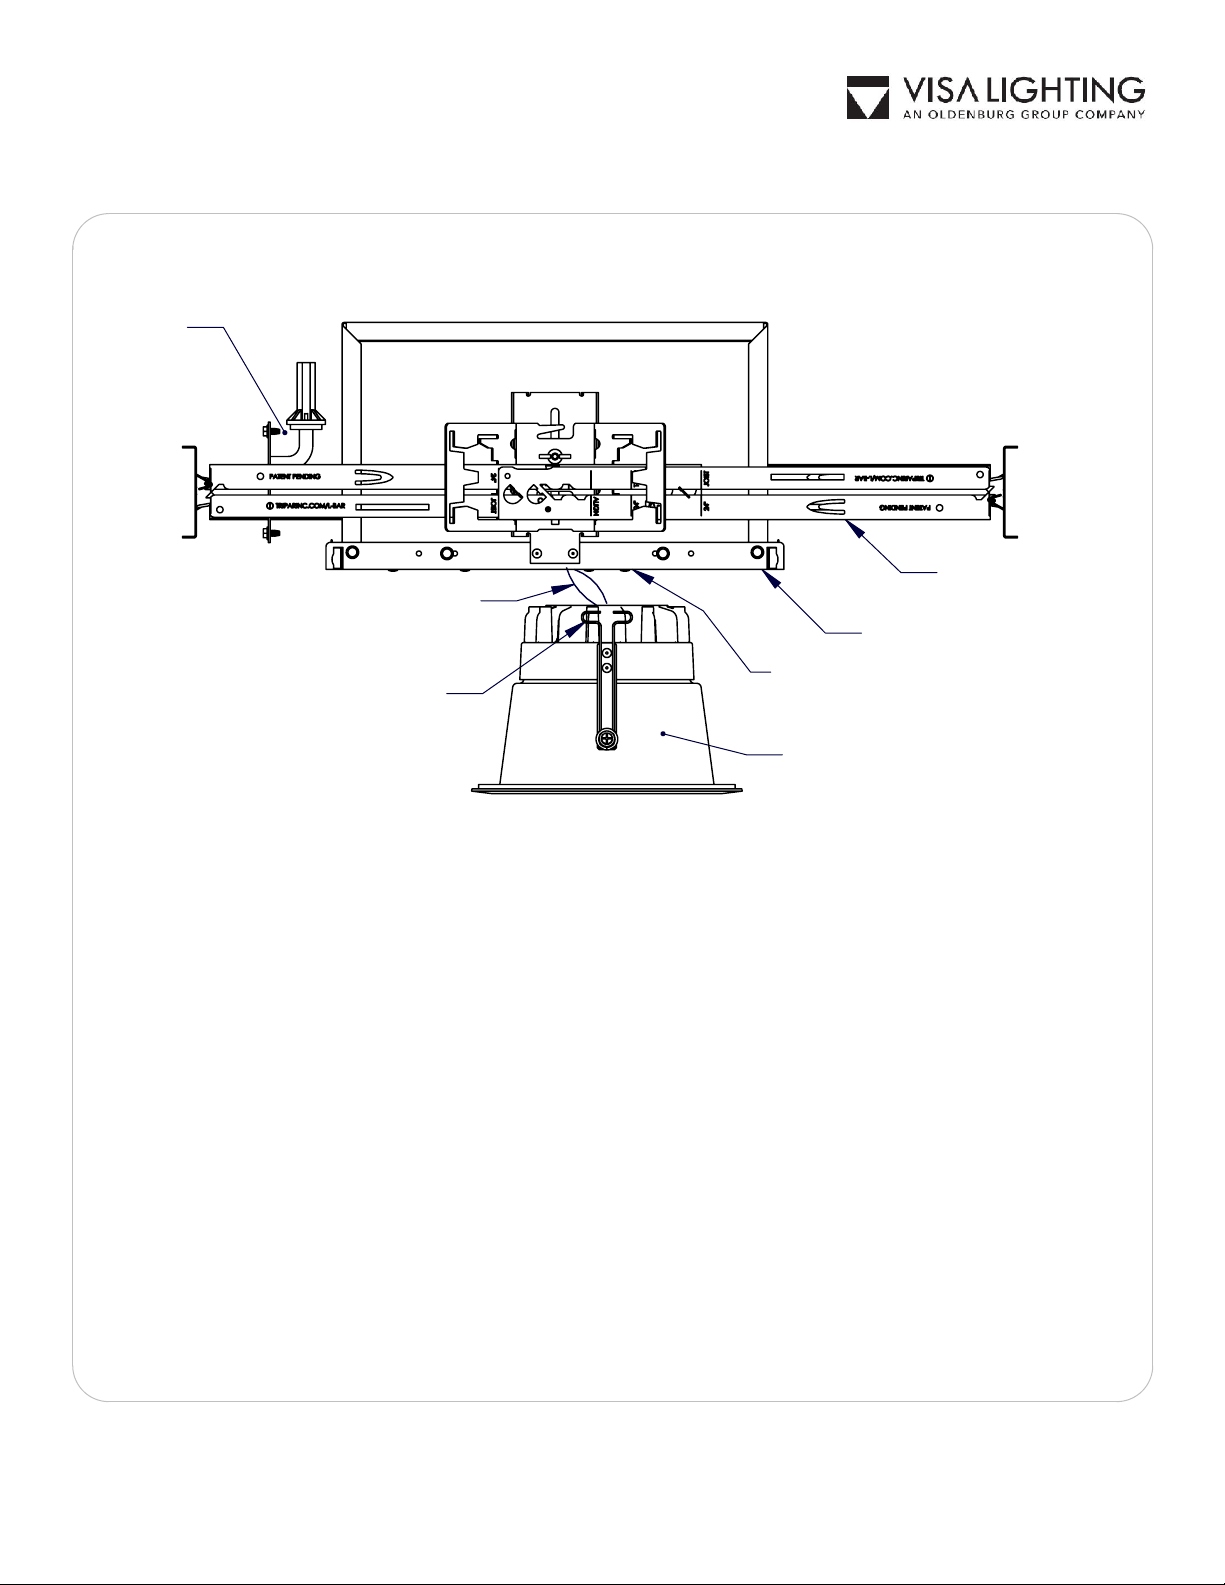
1. Install the fixture in the ceiling using the hanger bars (supplied), or mounting channel or
bars (by others) placed in the adjustable mounting brackets. Mount the fixture in the ceiling
so that the weight of the fixture is supported by the hanger bars, mounting channel, bar,
and/or hanger wires secured to the building structure.
2. With the trim assembly remover, adjust the fixture so the bottom of the plaster flange
opening is flush with the top side of the finished ceiling line and in alignment with adjacent
fixtures. Secure mounting brackets by tightening wing nuts on either side of the fixture.
3. Determine where the supply wiring conduit will enter the J-Box and attach it in
conformance with the National Electric Code.
4. Make necessary wiring and dimmer connections. Consult a qualified electrician for all other
options that require other wiring configurations.
5. Pull driver side connector down through opening in fixture.
6. Connect wire connectors together.
7. Squeeze two torsion springs togther and insert ends into two reflector brackets . Push trim
assembly up towards ceiling until springs draw trim firmly against the ceiling. Make sure
there aren't any pinched wires.
Sheet:
2 of 3
Eng:
CG2
Date Drawn:
10/15/18
When using electrical equipment, basic safety precautions should always be followed, including the following:
Read all instructions carefully before installing and save for future use.
•
Make sure all connections are in accordance with the National Electrical Code and local regulations.
•
To avoid possible electric shock, be sure the power supply is turned off before servicing or installing the fixture
•
Service should be performed by qualified personnel.
•
!
These instructions may not cover all details or variations. If additional information is needed, please contact Visa Lighting.
•
 Loading...