

Page 1

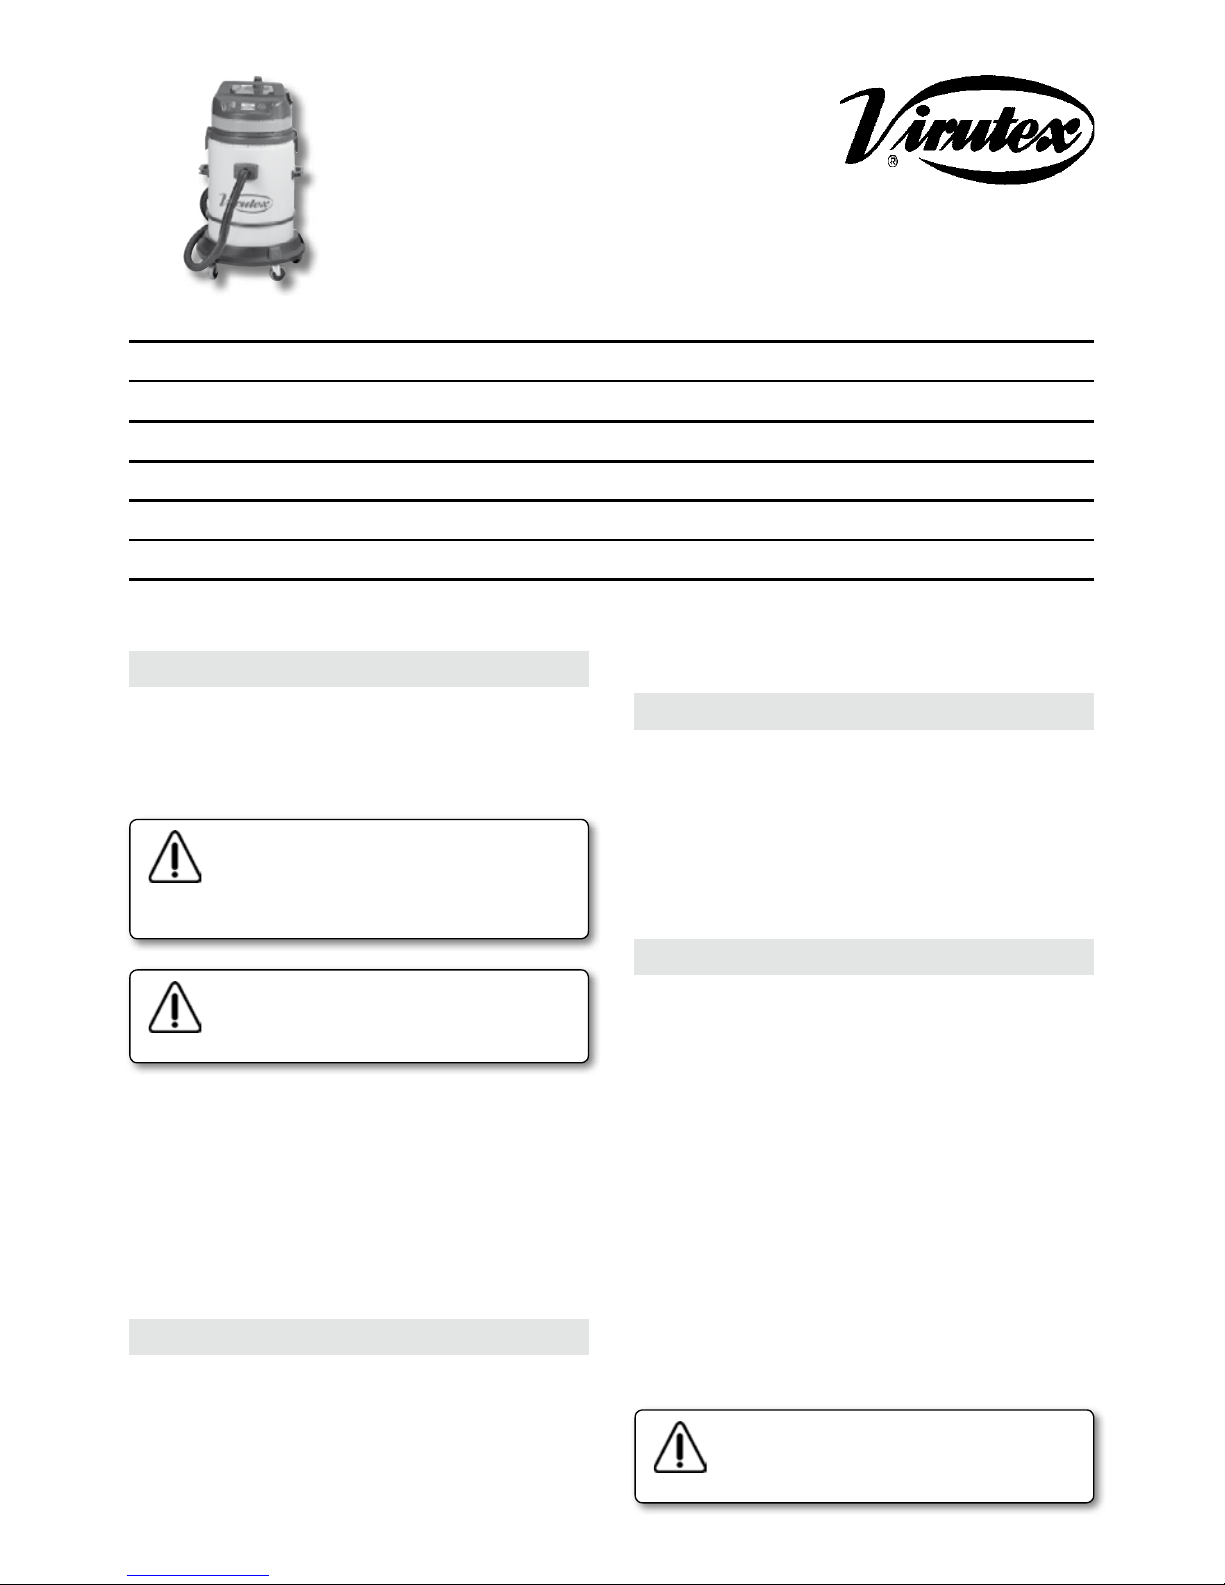
Aspirador
Dust collector
Aspirateur
Sauger
Aspiratore
Aspirador
AS382L
MANUAL DE INSTRUCCIONES
OPERATING INSTRUCTIONS
MODE D’ EMPLOI
GEBRAUCHSANWEISUNG
MANUALE D’ISTRUZIONI
MANUAL DE INSTRUÇÕES
Page 2
2
ESPAÑOL
ASPIRADOR AS382L
(Ver imágenes pag.17, 18, 19)
Lea atentamente el FOLLETO DE INSTRUCCIONES GENERALES DE SEGURIDAD,
que se adjunta con la documentación de
la máquina.
Antes de conectar el aspirador a la red,
verificar que la tensión de alimentación
sea igual a la indicada en el aspirador.
El aspirador AS382L, ha sido diseñado para su uso con
la Aplacadora de cantos EB35. Es un aspirador de gran
capacidad de aspiración, equipado con dos motores y
preparado para en conexión con la Aplacadora, ponerse
en marcha automáticamente, durante el ciclo de perfilado. Puede utilizarse también como un aspirador normal,
adquiriendo los "Accesorios Opcionales" del apartado 5
de este manual.
2. CARACTERÍSTICAS TÉCNICAS
Potencia max..................................................2300 W
Refrigeración..................................................by-pass
Aire aspirado..............................................340 m3/h
Depresión columna de agua.................2200 mm H2O
Capacidad contenedor........................................72 l
Enchufe telecontrol...................................1500 W max
Peso...................................................................25 Kg
3. EQUIPO ESTANDAR
Al abrir la caja de embalaje, encontrará en su interior
los elementos siguientes:
1. Un aspirador AS382L Ref. 8200300
2. Un tubo flexible con conectores para EB35. Ref.
8299204
3. Un cable mando aspirador para EB35. Ref. 8245458
4. Documentación diversa.
4. DESCRIPCIÓN
A - Filtro de polyester para colocarlo en el depósito durante la aspiración de polvo. Cuando aspiremos líquidos
es necessario retirarlo.
B - Cartucho filtro para polvos muy finos. Cuando
aspiremos líquidos es necessario retirarlo.
C - Entrada de aspiración. (Boca de aspiración).
D - Base conexión a EB35.
E - Tubo flexible con conectores para EB35
F - Deposito exterior
G - Toma para herramienta eléctrica.
H - Interruptor
I - Boya. Su función consiste en evitar que el líquido
recogido penetre a los motores durante su aspiración.
J - Bloque motores (cabezal).
K - Ganchos para cerrar el bloque de los motores con
el depósito. (Cierre cabezal)
Para conseguir una mayor eficiencia del
aspirador es conveniente limpiar los filtros
después de cada uso.
MANUAL DE INSTRUCCIONES
OPERATING INSTRUCTIONS
MODE D'EMPLOI
GEBRAUCHSANWEISUNG
MANUALE D'ISTRUZIONI
MANUAL DE INSTRUÇÕES
página/page
seite/pagina
ESPAÑOL Aspirador AS382L
2
ENGLISH AS382L Dust collector
4
FRANÇAIS Aspirateur AS382L
7
DEUTSCH Sauger AS382L
9
ITALIANO Aspiratore AS382L
12
PORTUGUÉS Aspirador AS382L
14
Page 3
3
interior del depósito (boca de aspiración).
- Montar el cabezal del aspirador en el depósito y cerrarlo
con los ganchos K, (Fig. 1).
- Colocar la manguera de aspiración E en la boca del
depósito C (Fig. 1)
- Enchufar el aspirador y presionar el interruptor H para
ponerlo en marcha (Fig. 5).
8. ASPIRADOR DE LÍQUIDOS / FORMA DE USO
- Retirar los filtros A y B (Fig. 1 y 2)
- Montar el cabezal del aspirador en el depósito y cerrarlo
con los ganchos K, (Fig. 1).
- Conectar la manguera E en la boca de aspiración C
(Fig. 1).
- Enchufar el aspirador y presionar el interruptor H para
ponerlo en marcha (Fig. 5).
Si desea volver a utilizar el aspirador para aspirar polvo,
se deben volver a montar los filtros tal como se encontraban originalmente.
No utilizar nunca el aspirador para el
trasiego de líquidos "inflamables"
Si se observa salida de liquido o espuma
del aparato, cortar inmediatamente la
alimentación eléctrica.
9. UTILIZACIÓN CON
HERRAMIENTAS ELÉCTRICAS
Antes de utilizar el aspirador, comprobar:
- Que el saco de filtro A (Fig. 1), ó la bolsa filtro de papel,
esté bien insertado en el interior del aspirador.
- Que el filtro suplementario B (Fig. 1) esté bien insertado
en la parte superior del cuerpo.
Seguidamente:
- Empalmar el tubo aspiración en la boca de aspiración
C (Fig. 4), y en la toma de la herramienta eléctrica.
- Conectar la clavija de la herramienta eléctrica en la
toma suplementaria G (Fig. 5) situada en la parte superior
del cabezal del aspirador.
- Conectar la clavija del aspirador a una toma de corriente y colocar el interruptor G (Fig. 5) en la posición
"II". Así cada vez que se ponga en marcha la herramienta
el aspirador se pondrá también en marcha de forma
automática.
- Si al conectar una máquina portátil con regulación
electrónica al aspirador, observara que éste no se pone
automáticamente en marcha, al arrancar la máquina,
bastará con girar 180° la clavija de conexión de la máquina en el aspirador para solucionar el problema.
- Gracias al accesorio 8299173 conector Y D. 32, es
posible utilizar hasta 2 herramientas simultáneamente
con un mismo aspirador.
5. ACCESORIOS OPCIONALES
8246233 Kit aspirador (Fig. A), compuesto por:
1 8299157 Manguera flexible 2 m
2 8299158 Cepillo doble uso
3 8299159 Cepillo de líquidos
4 8202131 Boquilla plana
5 8299092 Cepillo redondo de PVC
6 8202316 Tubo
7 8203317 Tubo acodado
8 8202134 Boquilla triangular
8299173 Conector Y D.32 (Fig. A)
8299161 Bolsa filtro de papel para AS282K y AS382L
USO DE LA BOLSA FILTRO DE PAPEL
Use la bolsa recogedora de polvo solo con el cartucho
filtro colocado.
La bolsa garantiza la recuperación de los polvos aspirados
en condiciones higiénicas.
La aspiración de materiales cortantes o húmedos, puede
dañar la bolsa de recolección polvo.
Cambiar la bolsa cuando los materiales aspirados alcanzan las dos terceras partes de la capacidad total. La bolsa
no puede ser reutilizada, debe siempre sustituirse.
6. UTILIZACION CON APLACADORA
DE CANTOS EB35
Antes de utilizar el aspirador, comprobar:
- Que el saco del filtro A (Fig. 1), ó la bolsa filtro de papel,
esté bien insertado en el interior del aspirador.
- Que el filtro suplementario B (Fig. 1) esté bien insertado
en la parte superior del cuerpo.
Seguidamente:
- Insertar el tubo de aspiración en la boca C (Fig. 4) del
aspirador y en la toma de la máquina N (Fig. 4)
- Conectar el cable de mando L (Fig. 5) en la base conexión del aspirador D (Fig. 5) y en la base conexión de
la máquina M (Fig. 5)
- Conectar la clavija del aspirador a una toma de corriente
y colocar el interruptor H (Fig. 5) en la posición "II". En esta
posición, cada vez que los perfiladores de la Aplacadora
EB35, se pongan en marcha, lo hará simultáneamente el
aspirador, quedando en funcionamiento unos 5 segundos
mas, después de pararse los perfiladores.
Nunca conectar la máquina Aplacadora
de cantos EB35, en la toma suplementaria
G (Fig. 5) del aspirador.
7. ASPIRADOR DE POLVO / FORMA DE USO
- Colocar los filtros A y B (Fig. 1 y 2). Si usa bolsa filtro
de papel, coloque sólo el cartucho de filtro B (Fig. 2).
- Si el aspirador lleva bolsa de papel, colocarla en el
Page 4
4
deberá ser realizada por personal cualificado. Para un
buen funcionamiento del aspirador es aconsejable:
- Eliminar periódicamente el polvo y los detritos, sacudiendo el saquito de filtro. Limpie frecuentemente el
cartucho filtro con un pincel de cerdas blandas.
- En caso de excesivas inscrustaciones del filtro, no
dude en cambiarlo.
- Se aconseja tener siempre un filtro de repuesto.
- Tener siempre limpios los canales de aspiración. (Una
excesiva presencia de suciedad provoca una pérdida
de aspiración y el sobre calentamiento de los motores)
- Las partes rotativas del aparato no necesitan lubrificación alguna ya que están provistas de cojinetes
autolubricantes.
- Hay que controlar el espesor de las escobillas de carbón
de los motores, en condiciones normales de uso, cada
12 meses o, en todo caso, cambiarlas cuando su espesor
se reduzca a 9 mm.
12. GARANTÍA
Todas las máquinas electroportátiles VIRUTEX, tienen
una garantía válida de 12 meses a partir del día de su
suministro, quedando excluidas todas las manipulaciones
o daños ocasionados, por manejos inadecuados o por desgaste natural de la máquina. Para cualquier reparación,
dirigirse al servicio oficial de asistencia VIRUTEX.
VIRUTEX se reserva el derecho de modificar sus productos
sin previo aviso.
ENGLISH
AS382L DUST COLLECTOR
(See figures in pages 17, 18, 19)
Read carefully the GENERAL SAFETY INSTRUCTIONS LEAFLET, which is included
in the machine documentation.
Before connecting the dust collector to
the mains ensure that the voltage is the
same as that on the dust collector.
The AS328L dust collector is designed for use with the
EB35 Edgebander. This dust collector has a powerful
vacuum function and is equipped with two motors. When
used in conjunction with the edgebander, it switches on
automatically during the trimming cycle. It may also be
used as a normal vacuum, when used with the "Optional
Accessories" described in Section 5 of this manual.
10. INSTRUCCIONES GENERALES
A SEGUIR ESTRICTAMENTE
• Evitar cualquier uso de la máquina que no esté especificado en este manual, ya que puede ser peligroso.
• Cuando el aparato esté en funcionamiento, no acercar
el tubo de aspiración a partes delicadas del cuerpo (ojos,
boca o orejas). Pueden ser dañados.
• Antes de ponerlo en funcionamiento, asegurarse
de que todos los componentes están correctamente
montados.
• Comprobar que la clavija se adapta perfectamente
al enchufe.
• Comprobar que el voltaje indicado en la parte superior del cabezal, es el mismo que proporciona la toma
de corriente.
• No utilizar nunca el aparato cerca de sustancias
inflamables, explosivas o tóxicas (no aspirar la ceniza
de la chimenea).
• Recordar siempre desconectar el aparato antes de
intentar cualquier reparación. No dejar el aparato en
funcionamiento sin vigilancia, puede ser utilizado por
niños o personas no conscientes de sus actos.
• No utilizar el cable eléctrico para levantar o desenchufar el aparato.
• No sumergir nunca ni utilizar componentes agresivos,
para limpiar el aparato.
• Comprobar que el cable eléctrico, enchufe o cualquier
otra parte del aparato no están dañados. En caso de que
lo estuviera, no utilizarlo, y ponerse en contacto con el
Servicio Técnico para su reparación.
• Siempre que se utilicen extensiones (alargos) para
el cable eléctrico, comprobar que estén siempre en
superficies secas y protegidas del agua.
• Nunca debe utilizarse el aparato para recoger agua
de containers, lavabos, tubos, etc.
• No dejar nunca el aparato enchufado ni en funcionamiento si no se utiliza.
• Asegurarse de que el flotador (Fig. 4) no está dañado ni
obstruido, ya que su función es la de parar la aspiración
cuando el tanque está completamente lleno de líquido,
o en caso de que el aparato se haya volcado.
• En caso de que el aparato vuelque, levantarlo antes
de desconectar.
• En caso de que saliera líquido o espuma, desconectar
inmediatamente.
• No utilizar nunca disolventes agresivos o detergentes.
• El fabricante no se hace responsable de cualquier
daño causado a personas, animales o cosas, por una
incorrecta utilización del aparato, o bien por no respetar
las indicaciones especificadas en este manual.
11. MANTENIMIENTO
Antes de cualquier intervención en el aspirador, desconectar la clavija de la red. Toda intervención en la máquina
Page 5
5
2. TECHNICAL CHARACTERISTICS
Power max......................................................2300 W
Cooling...........................................................by-pass
Air delivery..................................................340 m
3
/h
Water column vacuum...........................2200/mm H2O
Container capacity..............................................72 l
Remote control socket.............................1500 W max
Weight................................................................25 Kg
3. STANDARD EQUIPMENT
Inside the box you will find the following components:
1. One AS382L dust collector - Ref 8200300
2. One flexible tube with connectors for EB35 - Ref
8299204
3. One aspirator control cable for EB35 - Ref 8245458
4. Various documents
4. DESCRIPTIÓN
A - Polyester filter to set into the tank to pick up dust,
and to remove for liquid suction.
B - Filtering cartridge for very fine dust. To be removed
for liquid suction.
C - Suction inlet
D - Connection base to EB35
E - Flexible tube with connectors for EB35
F - Tank.
G - Outlet for electric tool.
H - Switch.
I - Float. Designed so that the liquid collected does not
get into the motors during collection.
J - Motor block.
K - Hooks for tightening of motor block to tank.
In order to keep in good efficiency the
machine it is useful to clean the filters
after each utilization.
5. OPTIONAL ACCESSORIES
8246233 Dust collector kit (Fig. A), comprising:
1. 8299157 2-m flexible hose
2. 8299158 Dual-purpose brush
3. 8299159 Liquids brush
4. 8202131 Flat nozzle
5. 8299092 Round PVC brush
6. 8202316 Tube
7. 8203317 Elbow tube
8. 8202134 Triangular nozzle
8299173 Y-connector D.32 (Fig. A)
8299161 Paper filter bag for AS282K and AS382L
FITTING THE DUST BAG
Only use the dust bag together with the filter car-
tridge.
The bag collects all the dust in conditions of hygiene.
If sucked in along with the dust, sharp or wet items
could damage the dust bag.
Change the bag when it has filled to two thirds with dust.
The bag cannot be reused. It must always be changed.
6. USING WITH EB35 EDGEBANDER
Before using the dust collector, please ensure:
- That filter sack A (Fig. 1) or the paper filter bag has
been correctly inserted inside the dust collector.
- That supplementary filter B (Fig. 1) has been correctly
inserted in the upper part of the body.
Next:
- Insert the dust collector tube into opening C (Fig. 4) of the
dust collector and into the socket of machine N (Fig. 4).
- Connect control cable L (Fig. 5) to dust collector
connection base D (Fig. 5) and to machine connection
base M (Fig. 5).
- Plug the dust collector into a power socket and put
switch H (Fig. 5) into position "II". Once in this position,
when the trimmers of edgebander EB35 are working,
the dust collector will automatically switch on, and will
continue to function for approximately 5 seconds after
the trimmers have stopped.
Never connect edgebander EB35 to
supplementary socket G (Fig. 5) of the
dust collector.
7. DRY SUCTION / OPERATING INSTRUCTIONS
- Insert the filters A and B (Fig. 1 and 2). If a paper
filter bag is used, install only the cartridge for filter
B (Fig.2).
- If a paper bag is provided, insert it in the tank on
the deflector.
- Assembly the head on tank and block it by hooks K,
(Fig. 1).
- Connect the flexible E hose to the inlet C (Fig. 1).
- Connect the plug to a power socket and turn switch
H (Fig. 5).
8. LIQUID SUCTION /
OPERATING INSTRUCIONS
- Remove the filters A and B (Fig. 1 and 2)
- Assembly the head on tank and block it by hooks K
(Fig. 1).
- Connect the flexible E hose to the inlet C (Fig. 1).
- Connect the plug to a power socket and turn switch
H (Fig. 5).
If you wish to use the machine for dust collection again,
the filters must be replaced in their original positions.
Page 6

6
Never use the dust collector for decanting
flammable liquids.
If any liquid or foam leaks out of the
appliance, switch off the electrical supply
emmediately.
9. USE WITH POWER TOOLS
Before using the dust collector ensure:
- That the bag filter A (Fig. 1), or the paper filter bag is
correctly inserted inside the aspirator.
- That the supplementary filter B (Fig. 1) is correctly
inserted in the upper part of the body.
Next:
- Connect the aspiration tube to vacuum opening C (Fig.
4) and to the socket on the electric tool.
Connect the plug of the tool to the supplementary
socket G (Fig. 5) on the upper part of the dust collector
head.
Connect the dust collector plug to the mains and turn
switch G (Fig. 5) to position "II". In this way, each time
the tool is used, the dust collector will also switch on
automatically.
- If, on connecting a electronically regulated portable
machine to the dust collector, you should notice that
the dust collector does not start up automatically when
the machine is turned on, just turn the connection plug
of the machine in the dust collector through an angle
of 180° to rectify the problem.
- With accessory 8299173 Y-Connector D. 32, it is possible
to use up to two different tools simultaneously with the
same dust collector.
10. INSTRUCTION TO BE STRICTLY FOLLOWED
• The use of this machine for anything not specified in
this manual may be dangerous and must be avoided.
• The suction nozzle should be kept away from the
body, especially delicate areas such as the eyes, ears
and mouth.
• The equipment should be correctly assembled before
use.
• Ensure that power sockets used are correct for the
machine.
• Check the voltage indicated on the rating plate is the
same as the supply voltage.
• These machines are not designed for picking up
health eddangering dusts or inflammable/esplosive
substances.
• Never leave the equipment unattended whilst in
use.
• Never carry out any maintenance on the machine
without first disconnecting from the mains supply, if
the machine is to be left unattended or can bereached
by childrens or others persons not aware about their
action, the supply should also be terminated.
• The main supply cable should not be used to pull or
lift the machine.
• The machine should never be emersed in water or a
pressure jet of water used for cleaning.
• Periodically examine the mains cable and machine for
damage. If any damage is found contact your service
centre for repair.
• Should extension cables be used, ensure that the cable
rating is suitable for use with the equipment.
Do not use the cable coiled as this could result in a voltage
drop or overheating. Keep dry at all times.
• The equipment should not be used to pick up water
from containers lavatories, tubs, etc.
• Ensure that the float (Fig. 4) is not damaged or obstructed by anything that may stop it from rising. The floats
function is to stop the suction when the tank is full or
if the machine should overturn accidentally.
• If the equipment should overturn it is recommended
that the machine should be stood up before switching
off.
• If foam / liquid should come from the machine exhaust
switch off immediately.
• Aggressive solvents or detergents should not be
used.
• The manufacturer cannot be held responsible for any
damage/injury caused to persons or property, because
of the incorrect use of the machine due to procedures
being used which are not specified in this instruction
manual.
11. MAINTENANCE
Before carrying out any work on the aspirator remove
the plug from the mains. All work carried out on the
machine must be done by qualified technicians. To
ensure the machine is kept in good working order we
recommend you:
- Regularly remove dust and dirt by shaking out the
filter bag. Regularly clean the filter cartridge with a
soft-haired brush.
- The filter cartridge must be discarded when excessively
encrusted or damaged, and replaced with a new filter.
- It is recommended to keep a spare filter handy.
- Always keep the aspiration pipes clean (A build-up of
dirt will result in less effective aspiration and in overheating of the motors).
-The rotating parts of the machine do not need any
lubrication as they are equipped with auto-lubricating
bearings.
- The thickness of the carbon brushes of the motors
must be monitored. Under normal usage conditions,
they should be changed every 12 months, or when they
have been reduced to 9 mm thick.
Page 7

7
12. WARRANTY
All VIRUTEX power tools are guaranteed for 12 months
from the date of purchase, excluding any damage which
is a result of incorrect use or of natural wear and tear
on the machine. All repairs should be carried out by the
official VIRUTEX technical assistance service.
VIRUTEX reserves the right to modify its products with
out prior notice.
FRANÇAIS
ASPIRATEUR AS382L
(Voir images p. 17, 18, 19)
Lire attentivement la BROCHURE
D’INSTRUCTIONS GÉNÉRALES DE SÉCURITÉ qui est jointe à la documentation
de la machine.
Avant de brancher l'aspirateur sur le secteur, vérifier que la tension d'alimentation
est bien la même que celle indiquée sur
l'aspirateur.
L'aspirateur AS382L a été conçu pour être employé
avec la plaqueuse de chants EB35. C'est un aspirateur
ayant une grande puissance d'aspiration, équipé de deux
moteurs et adapté pour se mettre automatiquement en
marche en connexion avec la plaqueuse, durant le cycle
d'arasage. Il peut également être employé comme un
aspirateur normal, avec les "Accessoires Optionnels" du
paragraphe 5 de ce manuel.
2. CARACTÉRISTIQUES TECHNIQUES
Puissance max...............................................2300 W
Refroidissement.............................................by-pass
Débit d'air....................................................340m3/h
Dépression à colonne d’eau.................2200 mm H2O
Capacité cuve.....................................................72 L
Prise télécommande................................1500 W max
Poids..................................................................25 Kg
3. ÉQUIPEMENT STANDARD
En ouvrant la caisse d'emballage, vous trouverez les
éléments suivants:
1. Un aspirateur AS382L Réf. 8200300
2. Un flexible avec connecteurs pour l'EB35. Réf.
8299204
3. Un câble de commande aspirateur pour l'EB35. Réf.
8245458
4. Documentation diverse.
4. DESCRIPTION
A - Filtre en polyester à insérer dans la cuve pour aspirer
la poussière et à enlever pour l'aspiration des liquides.
B - Cartouche filtrante pour poussières très fines, et à
enlever pour l'aspiration des liquides.
C - Connecteur d'aspiration.
D - Base connexion à l'EB35
E - Flexible avec connecteurs pour l'EB35
F - Cuve.
G - Prise pour outil électrique.
H - Interrupteur.
I - Flotteur. Sa fonction consiste à éviter que le liquide recueilli pénètre dans les moteurs lors de son aspiration.
J - Bloc moteur.
K - Crochets pour le serrage du bloc moteur sur la
cuve.
Pour assurer une parfaite efficacité
d'aspiration des poussières, il est nécessarie de nettoyer les filtres de l'appareil
après chaque utilisation.
5. ACCESSOIRES OPTIONNELS
8246233 Kit aspirateur (Fig. A), composé de:
1 8299157 Flexible 2 m
2 8299158 Brosse double usage
3 8299159 Brosse pour liquides
4 8202131 Suceur plat
5 8299092 Brosse ronde en PVC
6 8202316 Tuyau
7 8203317 Tuyau coudé
8 8202134 Suceur triangulaire
8299173 Connecteur Y D.32 (Fig. A)
8299161 Sac filtre de papier pour AS282K et AS382L
UTILISATION DU SAC FILTRE EN PAPIER
Utiliser le sac ramasse-poussière filtre en papier seulement lorsque la cartouche filtre est montée.
Le sac garantit la récupération des poussières aspirées
dans des conditions d'hygiéne.
L'aspiration de matières coupantes ou humides peut
endommager le sachet.
Changer le sachet quand les matières aspirées ont atteint
les deux tiers de sa capacité. Le sachet ne peut pas être
réutilisé mais il doit toujours être remplacé.
6. UTILISATION AVEC LA
PLAQUEUSE DE CHANTS EB35
Avant d'utiliser l'aspirateur, vérifier:
Page 8

8
- Si le sac du filtre A (Fig. 1) ou le sac filtre de papier
est bien installé à l'intérieur de l'aspirateur.
- Si le filtre supplémentaire B (Fig. 1) est bien installé
dans la partie supérieure du corps.
Ensuite:
- Insérer le tuyau d'aspiration dans la bouche C (Fig. 4)
de l'aspirateur et dans la prise de la machine N (Fig.4)
- Brancher le câble de commande L (Fig. 5) sur la base
de connexion de l'aspirateur D (Fig. 5) et sur la base de
connexion de la machine M (Fig. 5)
- Brancher la prise de l'aspirateur sur une prise de courant
et mettre l'interrupteur H (Fig. 5) en position "II". Dans
cette position, chaque fois que les unités d'arasage de
la plaqueuse EB35 se mettent en marche, l'aspirateur se
met en marche simultanément, en fonctionnant encore
5 secondes après l'arrêt des unités d'arasage.
Ne jamais brancher la plaqueuse de chants
EB35, sur la prise supplémentaire G (Fig.
5) de l'aspirateur.
7. ASPIRATION POUSSIERE / MODE D'EMPLOI
- Insérer les filtres A et B (Fig. 1 et 2). Si on utilise le
sac filtre en papier, ne placer que la cartouche filtrante
B (Fig. 2).
- Si on prévoit l'utilisation du filtre en papier, l'indroduire
dans la cuve en l'insérant sur le déflecteur.
- Monter la tête sur la cuve et la bloquer avec les
crochets K, (Fig. 1).
- Insérer le tube flexible E dans le connecteur C (Fig.1).
- Brancher l'aspirateur, et demarrer avec l'interrupteur
H (Fig. 5).
8. ASPIRATION DES LIQUIDES /
MODE D'EMPLOI
- Enlever les filtres A et B (Fig. 1 et 2).
- Monter la tête sur la cuve en la bloquant avec les
crochets K, (Fig. 1).
- Insérer le tube flexible E dans le connecteur C (Fig.1).
- Brancher l'aspirateur, et demarrer avec l'interrupteur
H (Fig. 5).
Si vous souhaitez réutiliser l'aspirateur pour aspirer de
la poussière, il faudra remonter les filtres à leur place
d'origine.
Ne jamais utiliser l'aspirateur pour le transvasement de liquides "inflammables"
Si de la mousse ou du liquide sort
de l'appareil, coupez immédiatement
l'alimentation électrique.
9. UTILISATION AVEC L'OUTIL ÉLECTRIQUE
Avant d'utiliser l'aspirateur, vérifier:
- Que le sachet de filtre A (Fig. 1), ou le sac filtre en
papier, est bien placé à l'intérieur de l'aspirateur.
- Que le filtre supplémentaire B (Fig. 1) est bien placé
sur la partie supérieure du corps.
Ensuite:
- Brancher le tuyau d'aspiration sur la bouche d'aspiration
C (Fig. 4) et sur la prise de l'outil électrique.
- Brancher la prise de l'outil électrique sur la prise supplémentaire G (Fig. 5) située sur la partie supérieure
de la tête de l'aspirateur.
- Brancher la prise de l'aspirateur sur une prise de courant
et mettre l'interrupteur G (Fig. 5) en position "II". Ainsi
chaque fois que l'outil se mettra en marche, l'aspirateur
se mettra également en marche automatiquement.
- Si en branchant une machine portative à réglage
électronique sur l'aspirateur, celui-ci ne se met pas automatiquement en marche quand on démarre la machine,
il suffira de tourner à 180° la fiche de raccordement de
la machine à l'aspirateur pour résoudre le problème.
- Avec l'accessoire 8299173 Connecteur Y D.32, on
peut utiliser jusqu'à 2 outils simultanément avec le
même aspirateur
10. INDICATIONS A
OBSERVER SCRUPULEUSEMENT
• Toute utilisation autre que celle indiquée sur le
présent manuel peut constituer un danger qui peut
donc être évité.
• Quand l'appareil est en fonctionnement, il faut éviter
de mettre l'orifice d'aspiration près d'une partie délicate
du corps comme les yeux, la bouche ou les oreilles.
• Avant l'utilisation, l'appareil doit être monté correctement dans son ensemble.
• Vérifier que la prise murale soit conforme à la fiche
de l'appareil.
• Vérifier que la valeur de la tension indiquée sur le bloc
moteur corresponde à la source d'énergie à laquelle on
ented relier l'appareil.
• Ne pas aspirer de substances inflammables (exemple:
cendres de cheminée), des poussières explosives ou
dangereuses pour la santé.
• Ne pas laisser l'appareil en foctionnement sans
surveillance.
• Enlever toujours la fiche de la prise de courant
avant d'effectuer quelque intervention que ce soit sur
l'appareil, ou quand celui-ci reste sans surveillance ou à
la portée des enfants ou des personnes non resposables
de leurs actes.
• Ne pas tirer ou soulever l'appareil en utilisant le cable
électrique.
• Ne pas immerger l'appareil dans l'eau pour le nettoyage
ni le laver avec un jet d'eau.
• Contrôler scrupuleusement si le cable électrique,
Page 9

9
la fiche ou des parties isolées de l'appareil ne soient
pas endommagées et dans un tel cas ne pas utiliser
l'appareil mais s'adresser au Service après vente pour
sa réparation.
• Dans le cas où une rallonge électrique viendrait à être
utilisée, il faut s'assurer que cet ajout soit sur des surfaces
sèches et protégées des projections éventuelles d'eau.
• S'assurer que le flotteur (Fig. 4), qui a la fonction d'arrêter
l'aspiration quand la cuve se trouve complètement pleine
de liquide ou dans le cas d'un renversement de l'appareil,
ne présente aucun endommagement ou obstruction qui
puisse empécher la montée de ce flotteur.
• En cas de renversement, il fau recommander de relever
l'appareil avant de l'éteindre.
• Eteindre immédiatement l'appareil en cas d'écoulement
de liquide ou de mousse.
• Ne pas utiliser l'appareil pour aspirer l'eau de récipients,
éviers, bassins, etc.
• Ne pas utiliser des solvants ou des détergents agressifs.
• Le fabricant décline toute responsabilité pour des
dommages causés aux personnes, animaux ou choses
par suite de manque de respect de ces instructions ou
si l'appareil a été utilisé d'une façon anormale.
11. ENTRETIEN
Avant toute intervention sur l'aspirateur, débrancher la
prise du secteur. Toute réparation sur la machine doit
être effectuée par un personnel qualifié. Pour un bon
fonctionnement de l'aspirateur, il est conseillé de:
- Éliminer périodiquement la poussière et les détritus, en
secouant le sachet de filtre. Nettoyer fréquemment la
cartouche filtre à l'aide d'un pinceau à poils souples.
- En cas d'encrassement excessif, ou s'il s'est détérioré,
le remplacer sans tarder.
- Il est conseillé de toujours posséder un filtre de
réserve.
- Bien nettoyer les canaux d'aspiration.
(une excessive quantité de saleté provoque une perte
d'aspiration et la surchauffe des moteurs).
- Il faut contrôler l'épaisseur des balais du charbon des
moteurs, dans des conditions normales d'emploi, tous les
12 mois ou, en tout cas, les changer quand leur épaisseur
est réduite à 9 mm.
12. GARANTIE
Toutes les machines électro-portatives VIRUTEX ont une
garantie valable 12 mois à partir de la date d'achat, en
étant exclus toutes les manipulations ou dommages
causés par des maniements inadéquats ou par l'usure
naturelle de la machine. Pour toute réparation, s'adresser
au service officiel d'assistance technique VIRUTEX.
VIRUTEX se réserve le droit de modifier ses produits
sans avis préalable.
DEUTSCH
SAUGER AS382L
(SIEHE ABB. SEITE 17, 18, 19)
Lesen Sie die den Geräteunterlagen beiliegende BROSCHÜRE DER ALLGEMEINEN SICHERHEITSHINWEISE aufmerksam durch.
Überprüfen Sie vor Anschluß des Saugers
ans Stromnetz, ob die Netzspannung
mit der auf dem Sauger angegebenen
übereinstimmt.
Die Absaugung AS382L wurde für den Einsatz mit der
Kantenleimmaschine EB35 entwickelt. Es handelt sich
um eine Absaugung mit großer Saugleistung, die mit
zwei Motoren bestückt wurde und beim Anschluss an
die Kantenleimmaschine für ein automatisches Anlaufen
während des Profilierzyklus ausgelegt ist. In Kombination
mit den "optionalen Zubehörteilen" aus Abschnitt 5 dieses
Handbuchs kann sie auch wie eine normale Absaugung
eingesetzt werden.
2. TECHNISCHE DATEN
Leistung max..............................................2300 W
Kühlung..........................................................By-pass
Luftdurchsatz..............................................340 m
3
/h
Wassersäulen-Unterdruck.....................2200 mm H2O
Fassungsvermögen des Behälters..........................72l
Stecker Fernbedienung............................1500 W max
Gewicht..........................................................25 Kg
3. STANDARD-LIEFERUMFANG
Beim Öffnen der Verpackung finden Sie im Innern
folgende Bestandteile:
1. Eine Absaugung AS382L Art.Nr.8200300
2. Einen Schlauch mit Anschlüssen für EB35 Art.
Nr.8299204
3. Ein Absaugungs-Steuerkabel für EB35 Art.
Nr.8245458
4. Verschiedene Unterlagen.
4. BESCHREIBUNG
A - Polyesterfilter nur zum Trockensaugen; vor dem
Naßsaugen unbedingt zu entternen!
B - Feinststaub-Filtereinsatz. Beim Absaugen von Flüssigkeit bitte Filter abnehmen!
C - Saugstutzen.
D - Steckanschluss an EB35
E - Schlauch mit Anschlüssen für EB35
Page 10

10
F - Behälter.
G - Anschluß für Elektrowerkzeug.
H - EIN/AUS-Schalter.
I - Abscheider. Damit wird verhindert, dass die aufgenommene Flüssigkeit während der Ansaugung bis zu
den Motoren gelangt.
J - Motorkopf.
K - Befestigungsklammern.
Um die Leistungsfähigkeit des Gerätes
zu erhalten, wird empfohlen, nach jedem
Gebrauch zu reinigen.
5. ZUBEHÖR AUF WUNSCH
8246233 Ansaugsatz (Abb. A), bestehend aus:
1 8299157 Schlauchstück 2m
2 8299158 Doppelbürste
3 8299159 Flüssigkeitsbürste
4 8202131 Flachdüse
5 8299092 PVC-Rundbürste
6 8202316 Leitung
7 8203317 Knieleitung
8 8202134 Dreiecksdüse
8299173 Stecker Y D.32 (Abb. A)
8299161 Filterpapierbeutel für AS282K und AS382L
VERWENDUNG DES STAUBSACKS
Den staubsack nur mit eingefügtem filtereinsatz
verwenden.
Der Beutel garantiert, daß das Saubsaugen unter hygienischen Bedingungen stattfindet.
Das Aufsaugen von schneidendem oder feuchtem Material kann den Staubbeutel beschädigen.
Der beutel muß ersetzt werden, wenn er zu zwei Dritteln
mit Staub gefüllt ist. Der Beutel darf nicht wiederverwendet werden, sondern es ist stets ein neuer zu benutzen.
6. EINSATZ MIT KANTENLEIMMASCHINE EB35
Vor der Verwendung der Absaugung stellen Sie bitte
sicher:
- dass der Filtersack A (Abb. 1) bzw. der Filterpapierbeutel
richtig im Innern der Absaugung eingesetzt ist.
- dass der Zusatzfilter B (Abb. 1) richtig im oberen Teil
der Anlage eingesetzt ist.
Anschließend:
- Führen Sie den Ansaugschlauch in die Öffnung C
(Abb. 4) der Absaugung und in den Anschluss an der
Maschine N (Abb. 4) ein.
- Schließen Sie das Steuerkabel L (Abb. 5) an den
Steckanschluss der Absaugung D (Abb. 5) und an den
Steckanschluss der Maschine M (Abb. 5) an.
- Stecken Sie den Stromstecker der Absaugung in eine
Netzsteckdose und stellen Sie den Schalter H (Abb. 5) auf
die Position "II". In dieser Position schaltet die Absaugung
ein, sobald die Profilfräser der Kantenleimmaschine
anlaufen, und läuft noch 5 Sekunden nach Stoppen
der Profilfräser nach.
Schließen Sie die Kantenanleimmaschine
EB35 niemals an den Zusatzanschluss G
(Abb. 5) der Absaugung an.
7. TROCKENSAUGEN / BEDIENUNGSHINWEISE
- Textifilter A und B in Behälter einsetzen (Abb. 1 und
2). Falls Sie Papier-Filterbeutel verwenden, nur Filtereinsatz B (Abb. 2).
- Papierfilter auf den im Gerät befindlichen Stutzen
schieben.
- Motorkopf auf Behälter setzen und mit den Klammern
befestigen K (Abb. 1).
- Saugschlauch E am Saugstutzen C anschließen (Abb.
1).
- Stecker in Steckdose stecken, dann Gerät einschalten
H (Abb. 5).
8. NASS-SAUGEN / BEDIENUNGSHINWEISE
- Textifilter A und B abnehmen (Abb. 1 und 2).
- Motorkopf auf den Tank setzen und mit Klammern
befestigen K (Abb. 1).
- Schlauch E am Saugstutzen C anschließen (Abb.1).
- Stecker in Steckdose stecken, dann Gerät einschalten
H (Abb. 5).
Soll das Gerät erneut als Staubsauger eingesetzt werden, entfernen Sie setzen Sie die Filter wieder in ihrer
ursprünglichen Stellung ein.
Verwenden Sie den Sauger nie zum
Umfüllen von brennbaren Flüssigkeiten.
Ziehen Sie sofort den Netzstecker, wenn
Flüssigkeit oder Schaum aus dem Gerät
ausläuft.
9. EINSATZ MIT ELEKTROWERKZEUGEN
Überprüfen Sie vor Gebrauch des Saugers, ob:
- Das Filtersäckchen A (Abb. 1), Filterbeutel einsetzen
richtig in das Saugerinnere eingelegt.
- Der Zusatzfilter B (Abb. 1) richtig in das Saugeroberteil
eingelegt ist.
Anschließend:
- Schließen Sie den Ansaugschlauch an die Ansaugöffnung C (Abb. 4) und an den Anschluss des elektrischen
Werkzeugs an.
- Stecken Sie den Stecker des Elektrowerkzeugs in die
zusätzliche Steckdose G (Abb. 5) des Saugers, die sich
Page 11

11
am Oberteil des Saugerkopfes befindet.
- Schließen Sie den Stecker des Saugers an eine Netzsteckdose an und bringen Sie den Schalter G (Abb. 5)
in Stellung "II". Auf diese Weise läuft die Absaugung
auch jedes Mal automatisch an, wenn das Werkzeug
anläuft.
- Wenn Sie beim Anschluß einer elektronisch geregelten tragbaren Maschine an den Sauger feststellen,
daß dieser nicht automatisch mit anspringt wenn die
Maschine angestellt wird, reicht es, den Anschlußstecker
Maschine-Sauger um 180° zu drehen, um das Problem
zu beseitigen.
- Dank dem Zubehörteil 8299173 Stecker YD.32 können
bis zu 2 Werkzeuge gleichzeitig mit einer Absaugung
betrieben werden.
10. INFORMATIONEN FÜR DEN
EINSATZ UND IHRE SICHERHEIT
• Jeder Gebrauch des Gerätes, der in dieser Anleitung
nicht beschrieben ist, kann gefährlich sein und muß
daher vermieden werden.
• Wenn das Gerät arbeitet sorfältig darauf achten, daß
die Saugdüse nicht an eine empfindliche Körperstelle
gehalten wird, wie Augen, Mund oder Ohren.
• Vor dem Gebrauch muß das Gerät mit allen Teilen
Korrekt zusammen-sgesetzt werden.
• Überprüfen Sie, ob Steckdose und Gerätestecker
zusammenpassen.
• Das Gerät nur ddann anschließen, wenn die auf dem
Typenschlid angegebene Spannung mit der Netzspannung übereinstimmt.
• Das Gerät niemals in der Nähe entflammbarer,
explosiver oder giftiger Substanzen benutzen ( z.B.
Kaminasche).
• Vor jeder Wartung, Reiningung, dem Filterwechsel und
nach dem Gebrauch Gerät ausschalten und Netzstecker
ziehen. Gerät nicht unbeaufsichtigt lassen, nicht in der
Reichweite von Kindern oder Personen lassen, die sich
ihrer Handlungen nicht bewußt sind.
• Niemals das Gerät an der Anschlußleitung ziehen
oder hochheben.
• Das Gerät zur Reinigung nicht in Wasser tauchen oder
mit einem Wasserstrahl reinigen.
• Sorfältig überprüfen, ob die Netzanschlußleitung, das
Gehäuse oder andere Teile des Gerätes beschädigt sind;
fall ja das Gerät keinesfalls benutzen und Reparatur beim
Kundendienst veranlassen.
• Falls elektrische Verlängerungen benutzt werden,
immer sicherstellen, daß diese für die entsprechende
Anwendung geeignet sind.
Niemals das Gerät benutzen, um Wasser aus Behältern,
Waschbecken, Wannen, etc zu saugen.
• Das in Betrieb befindliche Gerät niemals unbeaufsichtigt lassen.
• Stellen Sie sicher, daß der Schwimmer (Abb. 4) nicht
beschädigt oder blockiert ist, oder das Gerät umkippt.
• Falls das Gerät umgekippt ist, Gerät sofort ausschalten, Netzstecker ziehen und erst dann das Gerät richtig
aufstellen.
• Das Gerät sofort ausschalten und Netzstecker ziehen,
wenn Flüssigkeit oder Schaum austritt.
• Keine aggressiven Lôsungsmittel oder Reiningungsmittel verwenden.
• Der Hersteller ist nicht verantwortlich für jedweden
Schaden an Personen oder Gegenständen, verursacht
durch falschen Gebrauch des Gerätes oder durch
Nichtbeachten der in dieser Anleitung gegebenen
Instruktionen.
11. WARTUNG
Ziehen Sie vor jeglichem Eingriff in den Sauger den
Netzstecker. Jeglicher Eingriff in das Gerät ist von
qualifiziertem Personal auszuführen. Zur Gewährleistung einer einwandfreien Funktionsweise des Saugers
empfehlen wir:
- In gewissen Zeitabständen durch Ausschütteln des
Filters und des Nylonfilters Staub und Rückstände zu
entfernen. Den Filtereinsatz häufig mit einem weichen
Pinsel säubern.
Wenn der Einsatzfilter zu stark verschmutzt oder beschädigt ist, wechseln Sie ihn unbedingt aus.
Es empfiehlt sich, stets einen Ersatz-Einsatzfilter vorrätig
zu halten.
- Die Saugkanäle immer sauberzuhalten (bei zu starker
Verschmutzung kommt es zu einem Verlust der Ansaugleistung und zu einer Überhitzung der Motoren).
- Die Drehteile des Geräts erfordern keinerlei Schmierung,
da sie selbstschmierende Kugellager haben.
- Kontrollieren Sie die Dicke der Kohlebürsten an den
Motoren bei normalen Nutzungsbedingungen alle 12
Monate und wechseln sie diese in jedem Fall aus, sobald
die Dicke auf 9 mm abgenützt ist.
12. GARANTIE
Alle Elektrowrkzeuge von VIRUTEX habe eine garantie von
12 Monaten ab dem Lieferdatum. Hiervon ausgeschlossen
sind alle Eingriffe oder Schäden aufgrund von unsachgemäßem Gebrauch oder natürlicher Abnutzung des Geräts.
Wenden Sie sich im Falle einer Reparatur immer an den
zugelassenen Kundendienst von VIRUTEX.
VIRUTEX behält sich das Recht vor, die Produkte ohne
vorherige Ankündigung zu verändern.
Page 12

12
ITALIANO
ASPIRATORE AS382L
(VEDERE FIGURE A PAG. 17, 18, 19)
Leggere attentamente le ISTRUZIONI
GENERALI DI SICUREZZA allegate alla
documentazione della macchina.
Prima di collegare l'aspiratore alla rete
elettrica, verificare che la tensione corrisponda a quella indicata nell'aspiratore.
L'aspiratore AS382L è stato progettato per essere usato
con la bordatrice di bordi preincollati EB35. Questo
aspiratore possiede una notevole potenza aspirante,
è dotato di due motori, ed è predisposto in modo tale
che quando è collegato alla bordatrice si può avviare
automaticamente durante il ciclo di rifilatura. Può
anche essere adoperato come un normale aspiratore
acquistando gli "accessori opzionali" descritti nel punto
5 di questo manuale.
2. CARATTERISTICHE TECNICHE
Potenza max...................................................2300 W
Raffreddamento..............................................by-pass
Aria aspirata...............................................340 m3/h
Resa aspirazione liquidi......................2200 mm H2O
Capacità contenitore...........................................72 l
Spina tele-controllo...................................1500 W max
Peso...................................................................25 Kg
3. DOTAZIONE STANDARD
Dentro l'imballaggio troverete gli elementi seguenti:
1. Un aspiratore AS382L. Rif. 8200300
2. Un tubo flessibile con attacchi per la EB35. Rif.
8299204
3. Un cavo di comando dell'aspiratore per la EB35. Rif.
8245458
4. Documentazione varia
4. DESCRIZIONE
A- Filtro in poliestere da inserire nel fusto per aspirare
polvere e da togliere per aspirare liquidi.
B - Cartuccia filtrante per polveri molto fini, da togliere
per aspirare liquidi.
C - Bocchettone di aspirazione.
D - Base di collegamento a EB35.
E - Tubo flessibile con attacchi per la EB35.
F - Fusto.
G - Attacco per macchina utensile elettrica.
H - Interruttore.
I - Galleggiante. Serve a impedire che il liquido aspirato
penetri nei motori durante l'aspirazione.
J - Blocco motore.
K - Ganci per il serraggio del blocco motore sul fusto.
Per mantenere in perfetta efficienza
l'apparecchio per l'aspirazione di polvere
è necessario pulire il filtros scuotendolo
dopo ogni utilizzo.
5. ACCESSORI OPZIONALI
8246233 Kit aspirazione (Fig. A) composto di:
1 8299157 Tubo flessibile 2 m
2 8299158 Spazzola doppio uso
3 8299159 Spazzola per liquidi
4 8202131 Bocchetta piatta
5 8299092 Spazzola rotonda di PVC
6 8202316 Tubo
7 8203317 Tubo a gomito
8 8202134 Bocchetta triangolare
8299173 Attacco Y D.32 (Fig. A)
8299161 Sacchetto filtro di carta per AS382K e
AS382L
IMPIEGO DEL SACCO RACCOGLIPOLVERE
Utilizzare il sacco raccoglipolvere solo con la cartuccia
filtro inserita.
Il sacco garantisce il recupero della polvere aspirata in
condizioni di igiene.
L'aspirazione di materiali taglienti o umidi può danneggiare il sacco raccoglipolvere.
Cambiare il sacco quando i materiali aspirati hanno
raggiunto i due terzi della capienza.
Il sacco non può essere riutilizzato ma deve sempre
essere sostituito.
6. COME USARE L'ASPIRATORE CON LA
BORDATRICE DI BORDI PREINCOLLATI EB35
Prima di adoperare l'aspiratore, controllare:
- Che il sacchetto del filtro A (Fig. 1) o il sacchetto
filtro di carta sia correttamente inserito all'interno
dell'aspiratore.
- Che il filtro supplementare B (Fig. 1) sia correttamente
inserito nella parte superiore dell'aspiratore.
Poi:
- Inserire il tubo di aspirazione nell'innesto C (Fig. 4)
dell'aspiratore e nella presa della macchina N (Fig. 4).
- Collegare il cavo di comando L (Fig. 5) nella base di
collegamento dell'aspiratore D (Fig. 5) e nella base di
collegamento della macchina M (Fig. 5).
- Inserire la spina dell'aspiratore in una presa di corrente
Page 13

13
e mettere l'interruttore H (Fig. 5) in posizione "II". In
questa posizione, ogni volta che i rifilatori della bordatrice
EB35 si metteranno in moto anche l'aspiratore lo farà,
e rimarrà in funzione ancora per 5 secondi circa dopo
lo spegnimento dei rifilatori.
Non collegare mai la bordatrice di bordi
preincollati EB35 alla presa supplementare G (Fig. 5) dell'aspiratore.
7. ASPIRAZIONE POLVERE / MODO DI OPERARE
- Inserire gli fietri A e B (Fig. 1 e 2). Se si usa il sacchetto
filtro di carta, mettete solo la cartuccia filtrante B
(Fig. 2)
- Se è previsto l'uso del filtro incarta, inserirlo nel fusto
calzandolo sul deflettore.
- Montare la testa sul fusto e bloccarla con i ganci K
(Fig.1).
- Inserire il tubo flessibile E nel bocchettone C (Fig. 1).
- Accendere l'apparecchio dopo aver collegato la spina
ad una presa H (Fig. 5).
8. ASPIRAZIONE LIQUIDE / MODO DI OPERARE
- Togliere gli fietri A e B (Fig. 1 e 2).
- Montare la testa sul fusto e bloccarla con i ganci K
(Fig.1).
- Inserire il tubo flessibile E nel bocchettone C (Fig. 1).
- Accendere l'apparecchio dopo aver collegato la spina
ad una presa H (Fig. 5).
Quando si desidera impiegare di nuovo l'utensile per
l'aspirazione delle polveri, è necessario rimontare i filtri
nella loro posizione iniziale.
Non utilizzare mai l'aspiratore per travasare liquidi "infiammabili".
Se si osserva una fuoriuscita di liquido
o di schiuma dall'apparecchio, disinserire immediatamente l'alimentazione
elettrica.
9. USO CON UTENSILI ELETTRICI
Prima di fare uso dell'aspiratore, verificare quanto
segue:
- Che il sacchetto filtrante A (Fig. 1), oppure il sacchetto
filtro di carta sia inserito correttamente all'interno
dell'aspiratore.
- Che il filtro supplementare B (Fig. 1) sia inserito correttamente nella parte superiore del corpo.
In seguito:
- Congiungere il tubo di aspirazione all'innesto di aspi-
razione C (Fig. 4) e alla presa dell'elettroutensile.
- Collegare la spina dell'utensile elettrico alla presa
supplementare G (Fig. 5) situata nella parte superiore
della testa dell'aspiratore.
- Collegare la spina dell'aspiratore a una presa di corrente
e mettere l'interruttore G (Fig. 5) in posizione "II". In questo modo, ogni volta che si accende l'elettroutensile anche
l'aspiratore entrerà automaticamente in funzione.
- Se, quando si collega una machina portatile con
regolazione elettronica all'aspiratore, quest'ultimo non
dovesse attivarsi automaticamente con l'accensione
della macchina, basterà girare di 180° la spina di collegamento della macchina nell'aspiratore per risovere
il problema.
- Con l'accessorio 8299173 Attacco Y D.43 si possono
utilizzare fino a 2 elettroutensili contemporaneamente
con un solo aspiratore.
10. INDICAZIONI DA
OSSERVARE SCRUPOLOSAMENTE
• Ogni utilizzo diverso da quelli indicati sul presente
manuale può costituire pericolo pertanto deve essere
evitato.
• Quando l'apparecchio è in funzione, evitare di mettere
l'orifizio di aspirazione vicino a parti delicate del corpo
come acchi, bocca, orecchie.
• Prima dell'uso l'apparecchio deve essere montato
correttamente in ogni sua parte.
• Accertarsi che la presa sia conforme alla spina
dell'apparecchio.
• Accertarsi che il valore di tensione indicato sul blocco
motore corrsponda a quello della fonte di energia cui si
intende collegare l'apparecchio.
• Non aspirare sostanze infiammabili (es. cenere nel
camino), esplosive, tossiche o pericolose per la salute.
• Non lasciare incustodito l'apparecchio funzionante.
• Togliere sempre la spina dalla presa di corrente prima di
effettuare qualsiasi intervento sull'apparecchio o quando
questo rimane incustodito o alla portata di bambini o
di persone non coscienti dei loro atti.
• Non tirare mai o alzare l'apparecchio utilizzando il
cavo elettrico.
• Non immergere l'apparecchio in acqua per la pulizia
né lavarlo con getti d'acqua.
• Controllare scrupolosamente se cavo, spina o parti
dell'apparecchio risultano danneggiate e in tal caso non
utilizzare assolutamente l'apparecchio ma rivolgersi al
Servizio Assistenza per la sua riparazione.
• Nel caso vengano utilizzate prolunghe elettriche
assicurarsi che queste appoggino su superfici asciutte
e protette da eventuali spruzzi d'acqua.
• Assicurarsi che il galleggiante (Fig. 4), che ha la
funzione di fermare l'aspirazione quando il fusto sia
completamente pieno di liquido o in caso di ribaltamento dell'apparecchio, non presenti danneggiamenti
od ostruzioni che possano impedirne la salita.
Page 14

14
• In caso di ribaltamento si raccomanda di rialzare
l'apparecchio prima di spegnerlo.
• Spegnere immediatamente l'apparecchio in caso di
fuoriuscita di liquido o schiuma.
• Non usare l'apparecchio per aspirare acqua da recipienti,
lavandini, vasche, etc.
• Non usare solventi e detergenti aggressivi.
• Il fabbricante declina ogni responsabilità per danni
causati a persone, animali o cose in seguito al mancato
rispetto di queste istruzioni o se l'apparecchio viene
usato in modo irragionevole.
11. MANUTENZIONE
Prima di eseguire interventi sull'aspiratore, staccare la
spina dalla presa di corrente elettrica. Tutti gli interventi
dovranno essere eseguiti da personale qualificato. Per un
buon funzionamento dell'aspiratore, consigliamo di:
- Eliminare periodicamente la polvere e i residui, scuotendo il sacchetto filtrante. Pulire frequentemente la
cartuccia filtro con un pennello a setole morbide.
In caso di eccessive incrostazioni o se deteriorato, procedere senz'altro alla sostituizione.
- Si consiglia di avere sempre un filtro di scorta.
- Mantenere sempre puliti i condotti di aspirazione (una
eccessiva presenza di sporcizia causa un calo del potere
aspirante e il surriscaldamento dei motori). - Bisogna
controllare lo spessore delle spazzole al carbonio dei
motori ogni 12 mesi, in condizioni d'uso normali, e
sostituirle comunque quando il loro spessore si riduce
a 9 mm.
12. GARANZIA
Tutte le macchine elettroportatili VIRUTEX hanno una
garanzia di 12 mesi valida a partire della data di consegna, con l'esclusione di tutte le manipulazioni o danni
derivanti da un uso inadeguato o dall'usura normale della
macchina. Per qualunque riparazione rivolgersi al servizio
autorizzato di assistenza tecnica VIRUTEX.
La VIRUTEX si riserva il diritto di modificare i propri
prodotti senza preaviso.
PORTUGUÉS
ASPIRADOR AS382L
(VER IMAGENS NAS PÁGS. 17, 18, 19)
Leia atentamente o FOLHETO DE INSTRUÇÕES GERAIS DE SEGURANÇA que se
anexa juntamente com a documentação
da máquina.
Antes de ligar o aspirador à corrente
eléctrica, há que verificar se a tensão
de alimentação é igual à indicada no
aspirador.
O aspirador AS382L foi desenhado para ser usado com a
Orladora EB35. É um aspirador de elevada capacidade de
aspiração, equipado com dois motores e preparado para,
uma vez ligado à Orladora, entrar em funcionamento
de forma automática durante o ciclo de perfilamento.
Pode ser utilizado também como um aspirador normal,
adquirindo os "Acessórios Opcionais" do ponto 5 deste
manual.
2. CARACTERISTICAS TECNICAS
Potência max..................................................2300 W
Arrefecimento...............................................................by-pass
Aspiraçao...................................................340 m3/h
Depressão coluna de água...................2200 mm H2O
Capacidade do contentor....................................72 l
Ficha tele controlo....................................1500 W max
Peso...................................................................25 Kg
3. EQUIPAMENTO STANDARD
Ao abrir a caixa da embalagem encontrará no seu interior
os seguintes elementos:
1. Um aspirador AS382L. Ref. 8200300.
2. Um tubo flexível com conectores para EB35. Ref.
8299204.
3. Um cabo de comando aspirador para EB35. Ref.
8245458.
4. Documentação diversa.
4. DESCRIÇÃO
A - Filtro de polyester para colocar no interior do tanque
durante a aspiração de poeiras. Deve ser retirado quando
se aspirar liquidos.
B - Cartucho filtro para pós muito finos. Deve ser retirado
quando se aspirar liquidos.
C - Entrada de aspiração no tanque.
D - Base de ligação a EB35.
E - Tubo flexível com conectores para EB35.
F - Tanque.
G - Tomada para ferramenta eléctrica.
H - Interruptor.
I - Bóia, cuja função consiste em evitar que o líquido
recolhido penetre nos motores durante a aspiração.
J - Bloco de motor.
K - Fechos para aperto do bloco de motor ao tanque.
De forma a manter o bom funcionamento
do aparelho, é util limpar o filtros depois
de cada utilização.
Page 15

15
5. ACESSÓRIOS OPCIONAIS
8246233 Kit aspirador (Fig. A), composto por:
1 8299157 Mangueira flexível 2 m
2 8299158 Escova duplo uso
3 8299159 Escova para líquidos
4 8202131 Bocal plano
5 8299092 Escova redonda de PVC
6 8202316 Tubo
7 8203317 Tubo curvo
8 8202134 Bocal triangular
8299173 Conector Y D 32 (Fig. A)
8299161 Saco filtro de papel para AS282K e AS382L
USO DA BOLSA FILTRO DE PAPEL
Use a bolsa recolhedora de pó somente tendo o cartucho
filtro colocado.
A bolsa garante a recuperação, em condições higiénicas,
dos pós aspirados.
A aspiração de materiais cortantes ou húmidos pode
danificar a bolsa de recolha de pó.
Substituir a bolsa quando os materiais aspirados atingirem dois terços da capacidade total.
A bolsa não pode voltar a ser utilizada; deve ser sempre
substituída.
6. USO COM A ORLADORA EB35
Antes de usar o aspirador, verifique:
- Se o saco do filtro A (Fig. 1), ou o saco filtro de papel
está colocado correctamente no interior do aspirador.
- Se o filtro adicional B (Fig. 1) está colocado correctamente na parte superior do corpo.
Seguidamente:
- Introduza o tubo de aspiração na boca C (Fig. 4) do
aspirador e na abertura da máquina N (Fig. 4).
- Ligue o cabo de comando L (Fig. 5) à base de ligação
do aspirador D (Fig. 5) e à base de ligação da máquina
M (Fig. 5).
- Ligue a ficha do aspirador a uma tomada de corrente
e situe o interruptor H (Fig. 5) na posição "II". Nessa
posição, cada vez que os perfiladores da Orladora EB35
entrarem em funcionamento, o aspirador será accionado
simultaneamente, funcionando durante mais 5 segundos
após a paragem dos perfiladores.
Não ligue nunca a Orladora EB35 à tomada adicional G (Fig. 5) do aspirador.
7. INSTRUÇÕES DE UTILIZAÇÃO
(ASPIRAÇÃO DE POEIRAS)
- Inserir os filtros A e B (Fig. 1 e 2). Se usar bolsa filtro
de papel, coloque somente o cartucho de Filtro B (Fig. 2).
- Se usar saco de papel, inserilo no deflector do tanque.
- Juntar a cabeça de aspiração ao tanque. Prender com
os fechos K (Fig. 1).
- Ligar a mangueira fléxivel E à entrada de aspiração
C (Fig. 1).
- Ligar a ficha do aspirador à tomada de corrente. (Fig. 5).
8. INSTRUÇÕES DE UTILIZAÇÃO
(ASPIRAÇÃO DE LÍQUIDOS)
- Retirar os filtros A e B (Fig. 1 e 2).
- juntar a cabeça de aspiração ao tanque. Prender com
os fechos K. (Fig. 1).
- Ligar a mangueira fléxivel E à entrada de aspiração
C (Fig. 1).
- Ligar a ficha do aspirador à tomada de corrente. (Fig. 5).
Se desejar voltar a utilizar o aspirador para aspirar pó,
deven voltar a montar os filtros, tal como se encontravam originalmente.
Não utilizar nunca o aspirador para o
trasfego de líquidos "inflamáveis".
Se observar saída de líquido ou de espuma do aparelho, corte imediatamente a
alimentação eléctrica.
9. UTILIZAÇÃO COM
FERRAMENTAS ELECTRICAS
Antes de utilizar o aspirador, há que verificar:
- Que o saquinho de filtro A (Fig. 1), ou a bolsa filtro de
papel esteja bem introduzido no interior do aspirador.
-Que o filtro suplementar B (Fig.1) esteja bem introduzido
na parte superior do corpo.
Seguidamente:
- Introduza o tubo de aspiração na boca de aspiração C
(Fig. 4) e na abertura da ferramenta eléctrica.
- Ligar a ficha da ferramenta eléctrica à tomada suplementar G (Fig. 5), situada na parte superior da cabeça
do aspirador.
- Ligar a ficha do aspirador a uma tomada de corrente
eléctrica e colocar o interruptor G (Fig. 5) na posição
"II". Desse modo, cada vez que a ferramenta for accionada, o aspirador também começará a funcionar
automaticamente.
Se, ao ligar uma máquina portátil com regulação electrónica ao aspirador, observasse que este não entra
automaticamente em funcionamiento ao arrancar a
máquina, será suficiente girar de 180° a ficha de ligação
da máquina ao aspirador, para solucionar o problema.
- Graças ao acessório 8299173 Conector Y D 32, é
possível utilizar até 2 ferramentas simultaneamente
com um só aspirador.
Page 16

16
10. ESTAS INSTRUÇÕES DEVEM
SER RIGOROSAMENTE RESPEITADAS
• Qualquer utilização do equipamento não especificada
neste manual poderá ser perigosa, devendo por isso
ser evitada.
• Quando a máquina está em funcionamento, ter
cuidado para não posicionar o acessório de aspiração
perto de partes delicadas do corpo, como os olhos,
boca e ouvidos.
• Antes da sua utilização, o equipamento deve ser ligado
correctamente a todos os acessórios.
• Verificar se a tomada de electricidade é compatível
com a ficha da máquina.
• Verificar se a voltagem do motor corresponde à voltagen
da rede disponível para ligação do equipamento.
• Nunca usar o equipamento perto de substâncias
inflamáveis, explosivas o tóxicas (esemplo: cinzas de
chaminé, diluentes).
• Nunca esquecer de desligar o aparelho da rede antes de
proceder a qualquer reparação ou assistência técnica.
• Nunca puxar ou levantar o equipamento pelo cabo
eléctrico.
• Não mergulhar a máquina em àgua para limpeza.
• Verificar regularmente o estado de conservação do
cabo eléctrico, ficha e outras partes do equipamento. Se
existirem componentes danificados, não deverá utilizar
o equipamento.
• No caso de utilizar uma extensão eléctrica, tomar as
devidas precauções para que a mesma esteja sempre
sobre superficies secas.
• Nunca deixar o equipamento a trabalhar sem vigilância.
• Deve ter a certeza que a boia (Fig. 4) de paragem está
em bom estado e não está obstruída.
• No caso de tombar, é recomendável levantar o aspirador
antes de o desligar.
• Não aspirar solventes ou detergentes agressivos.
• O fabricante não é responsável por danos em pessoas
ou objectos, causados por uso indevido do aparelho ou
por não respeitar as instruções deste manual.
11. MANUTENÇÃO
Antes de qualquer intervenção no aspirador, há que
desligar a ficha da tomada de corrente eléctrica. Qualquer
intervenção na máquina deverá ser realizada por pessoal
qualificado. Para um bom funcionamento do aspirador,
torna-se aconselhável:
-Eliminar periodicamente o pó e os resíduos, sacudindo
o saquinho de filtro limpe com frequência o cartucho
filtro, usando um pincel de cerdas macias.
- Em caso de sucessivas incrustações no filtro, não duvide
em substitui-lo.
- É aconselhável dispor sempre de um filtro de reposição.
-Manter sempre limpos os canais de aspiração (uma
sujidade excessiva provoca uma perda da aspiração e o
superaquecimento dos motores).
-As partes rotativas do aparelho não necessitam de
lubrificação alguma, visto que estão providas de chumaceiras auto-lubrificantes.
- Deve-se verificar a espessura das escovas do carvão
dos motores uma vez por ano, em condições normais
de uso, ou substitui-las quando a espessura for inferior
a 9 mm.
12. GARANTIA
Todas as máquinas electro-portáteis VIRUTEX possuem
uma garantia válida por 12 meses contados a partir
do dia do seu fornecimento, ficando dela excluídas
todas aquelas manipulações ou danos ocasionados por
utilizações não adequadas ou pelo desgaste natural da
máquina. Para qualquer reparação, há que se dirigir ao
Serviço Oficial de Assistência Técnica VIRUTEX.
A VIRUTEX reserva para si o direito de poder modificar os
seus productos, sin a necessidade de aviso prévio.
Page 17

17
H
Fig. 5
G
D
L
E
M
Fig. 1
Fig. 2
J
B
I
J
B
K
C
F
E
A
N
C
Fig. 3
Fig. 4
M
E
Page 18

18
• KIT ASPIRADOR
• DUST COLLECTOR KIT
• KIT ASPIRATEUR
• SAUGER-SET
• KIT ASPIRATORE
• KIT ASPIRADOR
Ref. 8246233
ACCESORIOS OPCIONALES • OPTIONAL ACCESSORIES • ACCESSOIRES OPTIONNELS
ZUBEHÖR AUF WUNSCH • ACCESSORI OPZIONALI • ACESSÓRIOS OPCIONAIS
1
2
3
4
5
6
7
8
A
Nº Referencia • Reference Denominación • Description
Référence • Bestellnr. Description • Bezeichnung
Riferimento • Referência Denominazione • Denominação
1 8299157 MangeraFlexible2m•Flexiblehose2m•Tuyauexible2m
Saugschlauch2m•Tuboex2m•Mangueiraéxivel2m
2 8299158 Cepillodobleuso•Aspirmaticdoubleusebrush•Suceurpédale
DoppelwertigeDüse•Spazzoladoppiouso•Escovaduplouso
3 8299159 Boquilladelíquidos•Wettool•Suceureau•Wassersaugdüse
Spazzolaventosa•Boquilhaparahumidades
4 8202131 Boquillaplana•Flatlance•Lanceplate•Fugendüse•Lancia
piatta•Chupadordefenda
5 8299092
CepilloredondodePVC•PVCroundbrush•BrosserondePVC
RundbürstePVC•PannelloPVC•EscovaredondaparaPVC
6 8202316 Tubo•Pipe•Tube•Rohr•Tubo•Tubo
7 8202317
Tuboacodado•Wand•Coude•Handgriff•Impugnatura•Punho
8 8202134
Boquillatriangular•Triangularnozzle•Busetriangulaire
Dreiecks-Düse•
Ugellotriangolare•Boquilhatriangular
Page 19

19
BOLSA FILTRO DE PAPEL
8299161- BolsadepapelltroparaAS282K/AS382L.
PaperlterbagforAS282K/AS382L.
SacltreenpapierpourAS282K/AS382L.
Papier-FilterbeutelfürAS282K/AS382L.
SacchettoltrodicartaperAS282K/
AS382L.
BolsaltrodepapelparaAS282K/
AS382L.
B
B
C
Page 20

Virutex, S.A.
Antoni Capmany, 1
08028 Barcelona (Spain)
www.virutex.es
8296392 102013
http://www.virutex.es/registre
Acceda a toda la información técnica.
Access to all technical information.
Accès à toute l’information technique.
Zugang zu allen technischen Daten.
Accedere a tutte le informazioni tecniche.
Aceso a todas as informações técnicas.
Dostęp do wszystkich informacji technicznych.
Доступ ко всей технической информации.
 Loading...