

Page 1
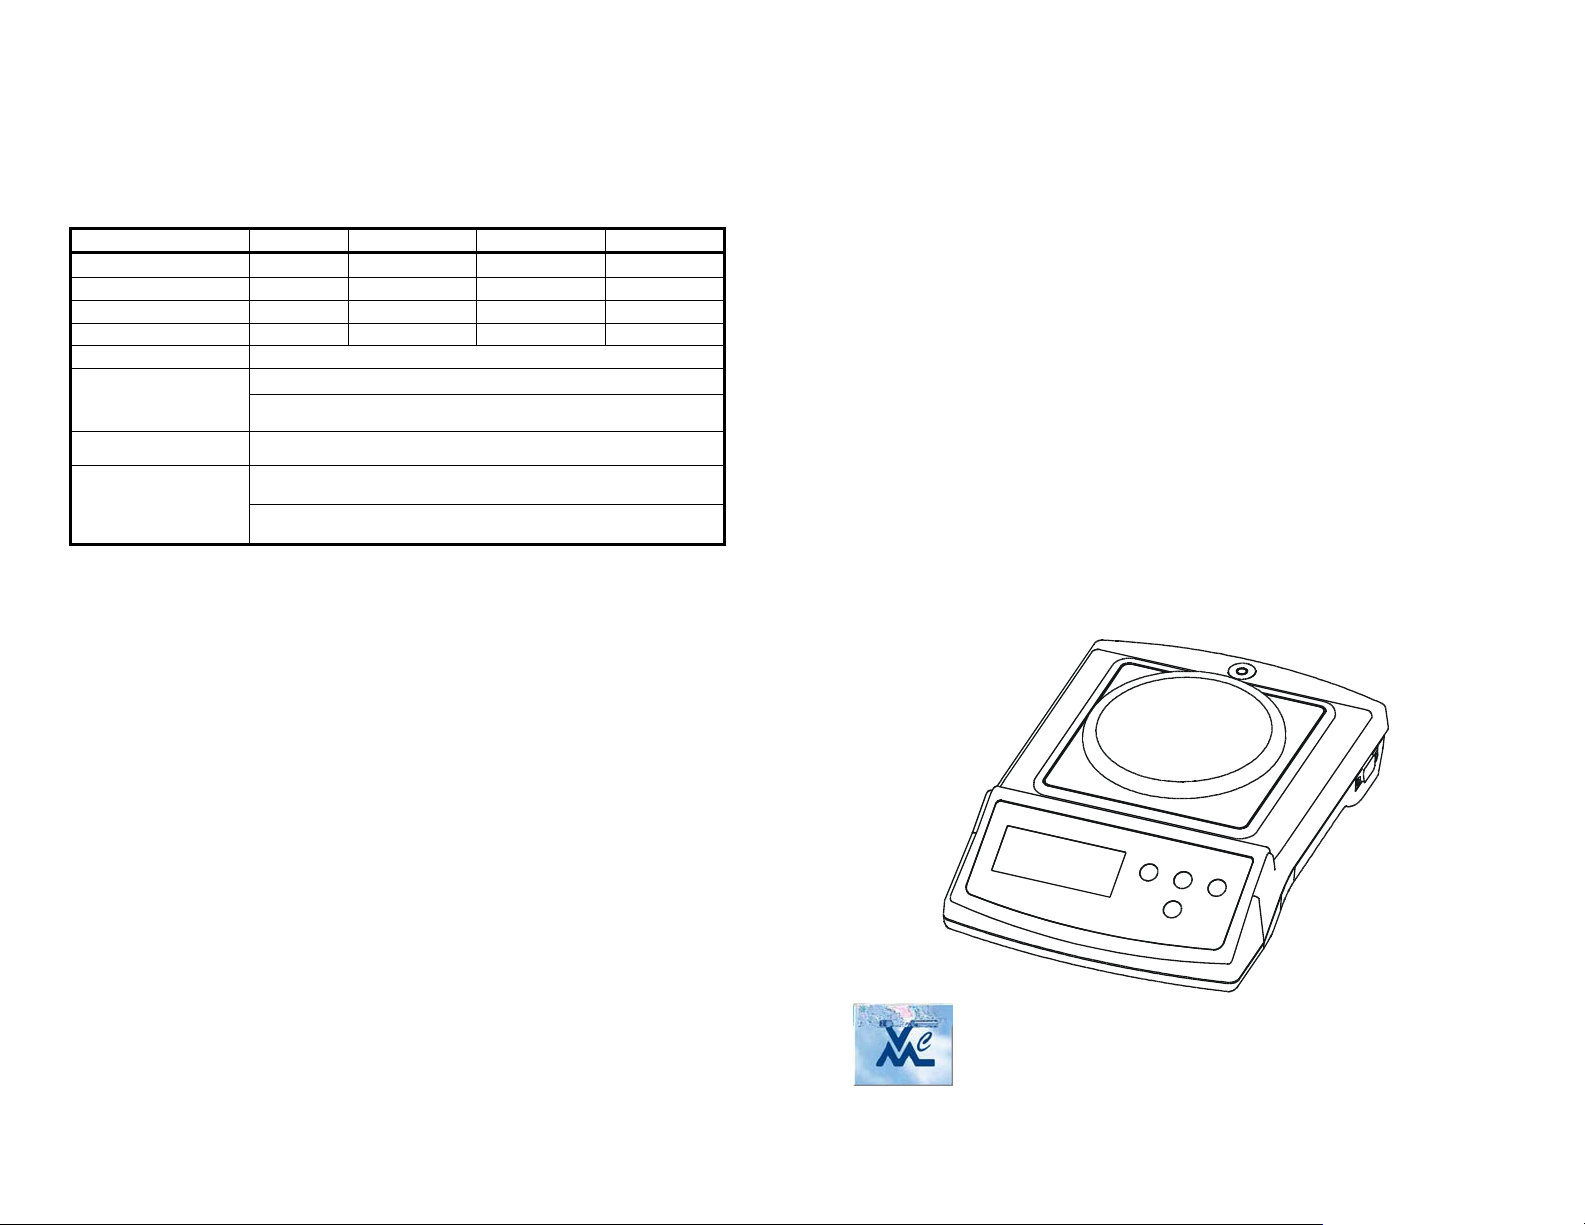
SPECIFICATIONS
A
p
Model number Capacity Graduation Platter Size Windshield
VB-302-500 500g 0.01g
Net/gross weight 510 / 620g
Package
Operating Temp.
Power source
6×AA Size Batteries or AC/DC
Adapter 12V/100mA (optional)
Standard carton: 29×22×14(cm3)
8 Units in one box: 60×45×45(cm
0-40℃(32-104℉)
∅ 100mm
Ye s
3
)
FEATURES
Auto shut off (selectable) ● Auto calibration
Auto zero tracking
Low batter indication
Large LCD (6digits 15 mm high)
Stability indication
http://www.balances.com
● Auto backlight (selectable)
●g/oz/lb/dwt/tl.H(tl.T)/ct/ozt/pcs
● with counting function
PRECISION BALANCE
MODEL : VB-302
www.balances.com is your deep discount distributor
INSTRUCTION MANUAL
USA ASI
Virtual Measurements & c ontrol.Inc. Virtual Measurements & c ontrol (Asia) Pte.Ltd.
3196 Coffey La ne,Suite 604, 24 Hillview Terrace Singapore 6692 35
Santa Rosa, CA 95403, USA Tel: (65) 67625522 Fax: (65) 6763 6656
Tel: (707) 573 3111 Fax: (707) 573 3113 [email protected]
htt
://www.virtualmc.com
Page 2

C
SAFETY PRECAUTIONS
All safety messages are identified by the following the words "WARNING" and
"CAUTION". These words mean the following:
Important information to alert you to a
situation that might cause serious injury and
△ WARNING
CAUTION
△
When using the scale/balance, the following safety precautions should always be
followed.
Use only the AC adaptor with the scale/balance. Other adaptor may cause
damage. (AC adaptor is optional)
Avoid installing the scale/balance in direct sunlight, this may cause discoloration or
malfunctions.
Do not mix the type of batteries. Replace all other batteries at the same time.
If the scale/balance is not to be used for a long period of time, remove all batteries
from the battery compartment to avoid leakage which may cause damage to the
instrument.
Avoid overloading that could cause damage to the scale/balance.
Do not drop water in the scale/balance that is not water-resistant. It causes damage,
if inside of the scale/balance is wet.
Matter charged static electricity could influence the weighing. Discharge the static
electricity. As example, the method is to use the electrification prevention spray, to
spray it to both side of weighing platform.
damage to your property if instructions are
not followed.
Important information that tells how to prevent
damage to equipment.
WARNING
△
CAUTION
△
1
7. Place the items that you want to count onto the tray and the total number of items
will show on the display.
8. Press the [UNIT] key to exit the counting function and return to normal weighing
or you can press ON/OFF to turn the scale off to exit.
NOTE: the weight of unit sample > 10e.
CALIBRATION
When to calibrate
Calibration may be required when it is initially installed, if the scale/balance is
moved to a substantial distance.This is necessary because the weight of a mass in
one location is not necessarily the same in another location. Also, with time and use,
mechanical deviations may occur.
How to calibrate
1. Before entering calibration mode, press [ON/OFF] to turn the power on for 5
minutes.
2. select the calibration unit
Press
[ON/OFF]
press[ON/OFF],the display will show “ ”,the
unit .Press [ZERO] key, the
oz or lb) .Now the calibration unit is selected.
3. Enter calibration mode
Press
[ON/OFF]
while keeping pressing
again,the display show”888888” and then display all segments, finally show the
A/D value .
4. Calibration by the weight
Wait for the stable indicator to be displayed, Press
the display will show "00SAVE",then the display show the calibration weigh ,Place
the calibration weight on platform, after the stable indicator is displayed, then
press [UNIT], waiting for 3 seconds, the display will show "00SAVE"and return to
A/D value, now calibration is finished.
Press
5.
[ON/OFF]
check some weight readings , if not, repeat steps 3-5.
6. Return to weighing mode
Press [ON/OFF] to turn the power off. Press [ON/OFF] again to turn on the
power and the scale/balance return to the weighing mode.
to turn the power off. Press and hold [
AL
sign indicate the different calibration unit (eg: g
▼
to turn the power off. Press
[UNIT]
, the display will show “CAL”then press the
sign indicate the calibration
▼
[UNIT]
first, then Press
[UNIT],
, turn off the power, press
[ON/OFF]
turn on the power again,
6
] first ,then
UNIT
、
[ON/OFF]
[UNIT]
waiting for 3 seconds,
,
Page 3
FUNCTION SETTINGS
Enter function setting mode.
Press [ON/OFF] to turn the power off, Press [ZERO] first, then press [ON/OFF],
while keeping
[ZERO]
pressed, the display will show
A_ON
or
A_OFF.
1. Selection of auto backlight mode.
When the balance enter function setting menu. Press [UNIT] key, the display
will show L_ON or L_OFF, press [ZERO], selection display L_ON, this
means auto backlight function active, press [ZERO] again, the display will
show L_OFF, this means auto backlight function inactive, i.e. shut off
backlight function.
2. Selection of auto shut off mode.
When the balance enter function setting menu. Press [UNIT] key, the display
will show A_ON or A_OFF, press [ZERO], selection display A_ON, this
means auto shut off function active. Press [ZERO] again, the display will
show A_OFF, this means auto shut off function inactive.
3. Return to weighing mode.
Press [ON/OFF] to turn the power off, press [ON/OFF] again to turn on the
power and the scale return to the weighing mode.
Counting procedures
1.Press [ON/OFF] to turn on the scale.
Wait for "0" to appear on the display.
2.Start the Count Procedure
If necessary, press [ZERO] key to set the display to “0”.
3. Place a given number of samples of an item on the pan (the Sample Size should
be either 10、20、50 or 100 pieces). The weight of these samples will show on the
display.
Press the
4.
Select the sample size (the same as you chose above) by pressing the
5.
[UNIT]
(press it as many times as necessary to put it in the correct sample size ,the
sample size is the same as in step three =10、20、50or100.
7. Press t he
[UNIT]
recall the sample size you selected and show the starting sample size on the
display (you can now remove the samples if you want to return the scale to 0)
key several times to put the scale in PCS mode.
key.
[PCS]
key, the display will show “selected pcs”, then the scale will
5
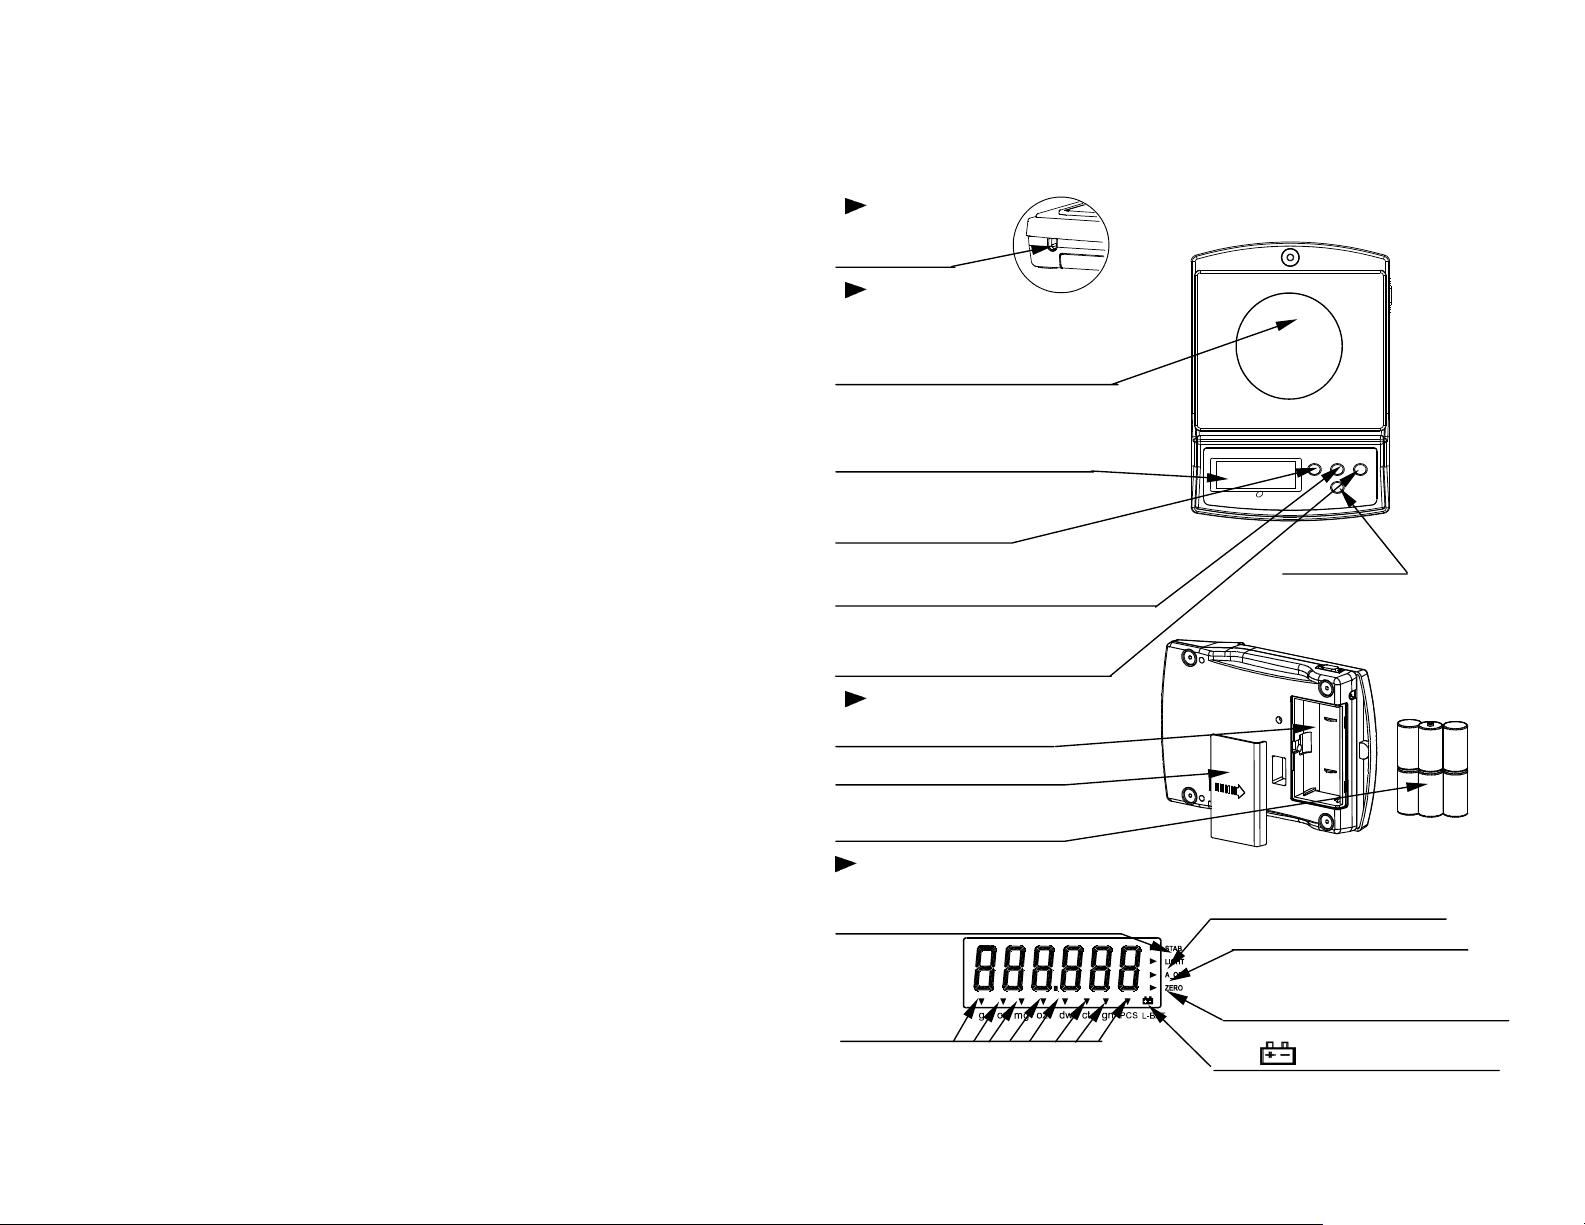
PARTS DESCRIPTION
RIGHT SIDE
AC adaptor
Socket
TOP
Weighing platform
The stainless steel circle pan
Display
ON/OFF key
Turns the scale
power on/off.
PCS key
UNIT key counting mode
Changes weighing units, g, oz, lb, dwt, tl.H, ct, ozt or pcs(counting mode).
ZERO key (for TARE)
ets display to zero or
Subtracts weight of a container.
BOTTOM
Battery compartment
Battery compartment cover
Batteries
Use 6 AA batteries
DISPLAY
STABLE
Indicates when the reading is stable.
Auto shut off function indicator
ZERO indicator
Indicates when the reading is 0
Weighing unit
indicator Auto backlight function indicator
Low battery indicator
2
Page 4
PREPARATION
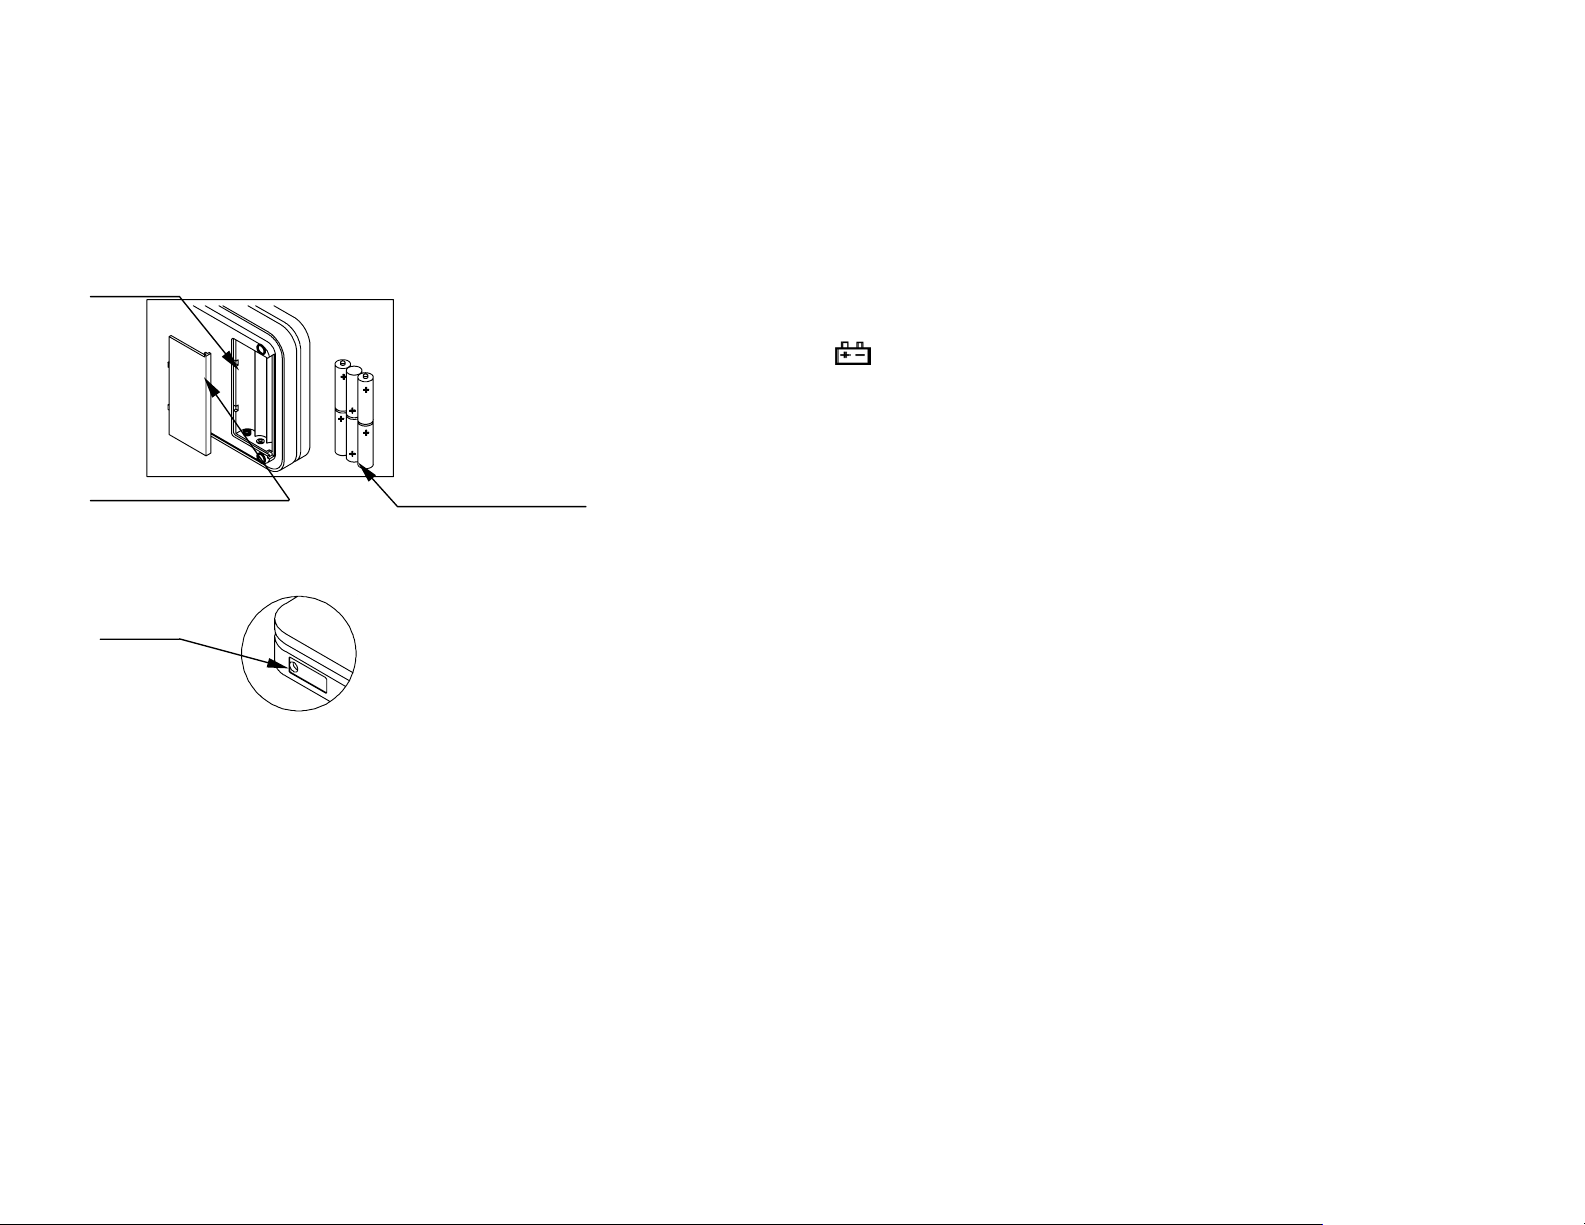
1.Installing batteries/Connecting the AC adaptor
Batteries
Battery Remove the battery compartment
compartment cover and insert six batteries(R6P/LR6
/AAsize) into the battery compartment,
taking extreme care that the polarities
plus and minus is observed.
Dry batteries.
Battery compartment cover (batteries are not included)
R6P/LR6/AA size
AC adapter (optional)
AC adaptor
socket
be 110,120,220,230 or 240Volts
(50/60Hz) depending on the area
where used, so please verify that
the adaptor is correct
Plug the AC adapter to the AC
adapter socket on the side.
The AC input requirement could
2.Setting up the scale/balance
!
CAUTION
△
Avoid installing the scale/balance in direct sunlight, that may cause discoloration or
malfunctions. Place your scale/balance on a firm weighing table so that the
scale/balance is level. (The scale/balance will not perform accurately when it is not
level.)
Place the scale/balance on the firm surface that is flat and level for an accurate
weighing
3
WEIGHING
Before weighing
Whenever possible, please allow the balance to warm up for 10 minutes after first
turning to power on, so that the balance will function. Properly and accurately.
Error mess ages
EEEE: Overload
: Low battery
Calibration may be required before weighing.
Read "CALIBRATION" first and if necessary, calibrate your scale/balance for
accurate weighing.
Weighing procedures
1. Press [ON/OFF] to turn on the scale/balance.
When power is turned on,the display show “888888” then display all segments
appear on LCD for a few seconds and finally "0" will appear on the display.
2. Select the weighing unit with [UNIT].
Press [UNIT] to select a weighing unit, eg. "g"
"tl.H"、"tl.T","ct"、"pcs".
Once the unit has been selected, the selected unit will be displayed to the weight
value.
3. Start weighing
If you do not use a container for weighing,
Verify the reading is "0". If not, press [ZERO] to display "0".
Place objects on the weighing platform to weigh.
When the reading becomes stable, the stable indicator is displayed.
If you use a container for weighing,
Place an empty container on the platform.
Wait for the stability indicator to be displayed and press [ZERO].
Place the objects to be weighed in the container.
When the reading becomes stable, the stable indicator is displayed.
4
" oz " 、" lb "、" dwt "、"ozt"
、
、
 Loading...