

Virgin-Media Netgear-VMDG485, Super-Hub-2 User Manual

InStaLLInG YoUr
VIrGIn medIA
Super Hub
113775_VM_Super Hub_MainGuide_AW02.indd 1 29/10/2010 10:50

HELLo
WELComE to
VIrGIn broAdbAnd
We’re sure you’re itching to get online,
so we’ve put together this guide to take
the hassle out of getting set up.
Before you start, you need to have had
your computer connected to our network
by one of our engineers, or by yourself if
installing services using QuickStart.
All done? Then we’re ready to begin.
113775_VM_Super Hub_MainGuide_AW02.indd 2 29/10/2010 10:50

ContentS
a QUICK CHECKLISt 4
Everything you need to get up and running
HoW to SEt Up 5
Connecting your Super Hub to your computer
aCtIvatInG YoUr broadband 14
Ready, steady, go!
paSSWordS and EmaILS 15
A few things to note
frEQUEntLY aSKEd QUEStIonS 19
Your questions answered
troUbLE GEttInG onLInE? 22
Tips that are always worth trying
GEttInG tHE bESt of broadband 23
Why is my connection slower than normal?
StaY SafE 23
Protecting your computer
nEEd SomE HELp? 24
How to get help when you need it
3
113775_VM_Super Hub_MainGuide_AW02.indd 3 29/10/2010 10:50

A QuICK CHeCKLISt
EvErYtHInG YoU nEEd to GEt Up and rUnnInG
First, check you’ve got all the bits and pieces you need to get set up:
Cable service
Your cable service should be installed
and ready for this set up process,
if not, just give our team a call on
0845 454 1111* .
Super Hub
This will have been connected by our
engineer or by yourself if installing
services using QuickStart.
Ethernet cable
This is the lead which connects your
computer to your Super Hub, but only
if you decide not to go wireless.
Longer Ethernet cables are available
to purchase at your local computer shop.
Super Hub
Ethernet cable
Missing anything?
Just give our team a call on 150 from your Virgin Media phone, or on
0845 454 1111* from any other phone. We’ll arrange to get you what you need.
*For details about how much it costs to call our team, visit our website at virginmedia.com/callcosts
4
113775_VM_Super Hub_MainGuide_AW02.indd 4 29/10/2010 10:50

HoW to Set up
ConnECtInG YoUr CompUtEr
to YoUr SUpEr HUb
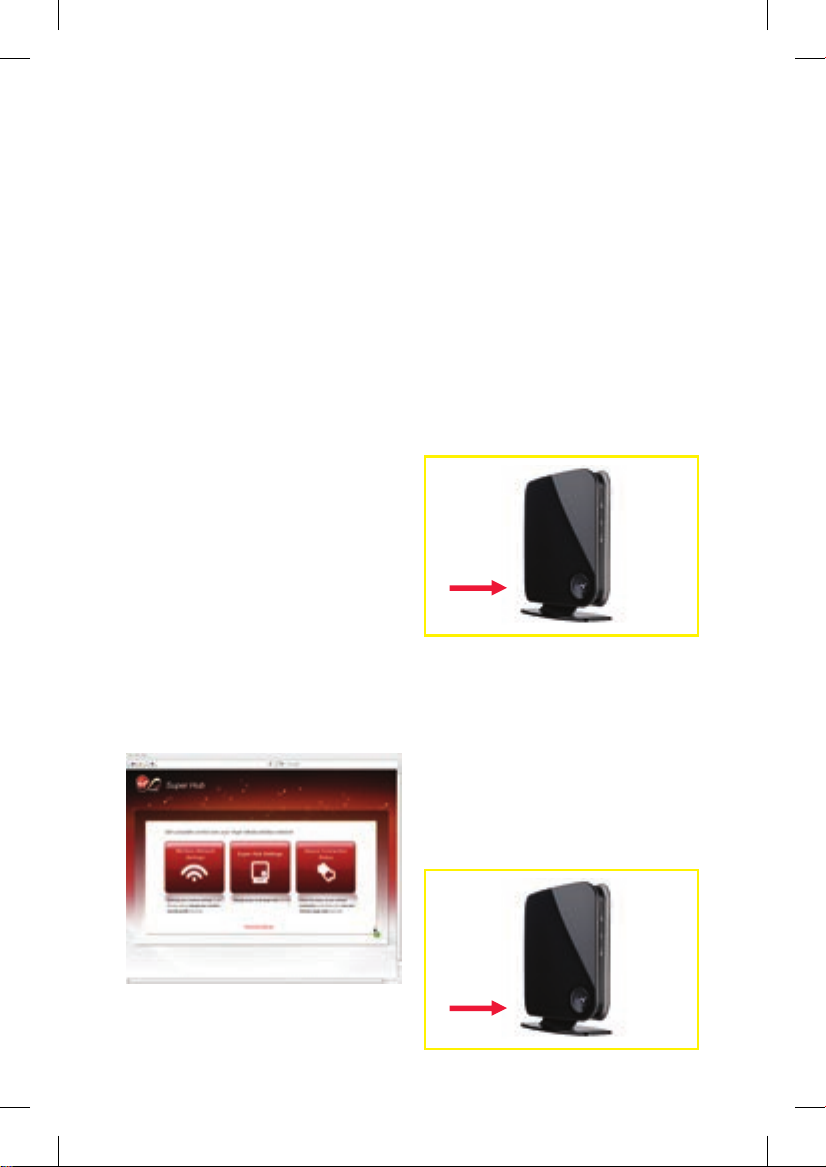
Setting up your
wireless connection
First plug in and switch on the Virgin
Media Super Hub. The power button is
located underneath. The large button
on the front of the unit should flash
and then become a blue colour.
Now switch on your computer.
If the large button fails to light up,
please check that the power cable is
securely connected to the back of your
Super Hub and the power is switched
on at the wall.
Power button
How you connect wirelessly depends
on your computer’s operating system.
Check that the Super Hub’s wireless
light is on. If it isn’t, press the large
button on the front of your Super Hub
for 5-10 seconds, release and re-check.
If you are using the Super Hub USB
Adapter, please skip to page 6.
If you are using a Mac, a different
USB adapter, or an internal wireless
card please follow the instructions that
relate to your operating system:
Windows XP page 8
Windows Vista/Windows 7 page 10
Mac OSX page 12
Wireless light
Your Wireless USB Adapter / internal Wireless
Card will need to be connected and enabled
for you to proceed.
5
113775_VM_Super Hub_MainGuide_AW02.indd 5 29/10/2010 10:50
ConnECtInG vIa tHE SUpEr HUb
WIrELESS USb adaptEr
Connecting your computer to the
Super Hub is easy because it uses
the latest ‘Push 2 Sync’ wireless
technology.
This allows you to connect your
computer securely by pressing a
button on the Super Hub and the
wireless USB adapter.
The Super Hub Wireless USB Adapter is not
compatible with Mac computers. If you have
a Mac, use the inbuilt wireless card instead.
Installing the Virgin
Media Super Hub Wireless
USB Adapter
To install the adapter, connect it to
a spare USB port and the adapter
will install itself. Once installed the
adapter will display the following
information panel:
Connecting to the Super Hub
Step 1
To connect your Computer to the
Super Hub, press the large button
on the front of your Super Hub. This
should be a static blue colour.
Step 2
Press and hold this button for 2-3
seconds and then release it. After a
moment, the button will start flashing
purple. This puts your Super Hub into a
‘Listen mode’ for 2 minutes – waiting
for your Super Hub Wireless USB
Adapter to sync with it.
6
113775_VM_Super Hub_MainGuide_AW02.indd 6 29/10/2010 10:50
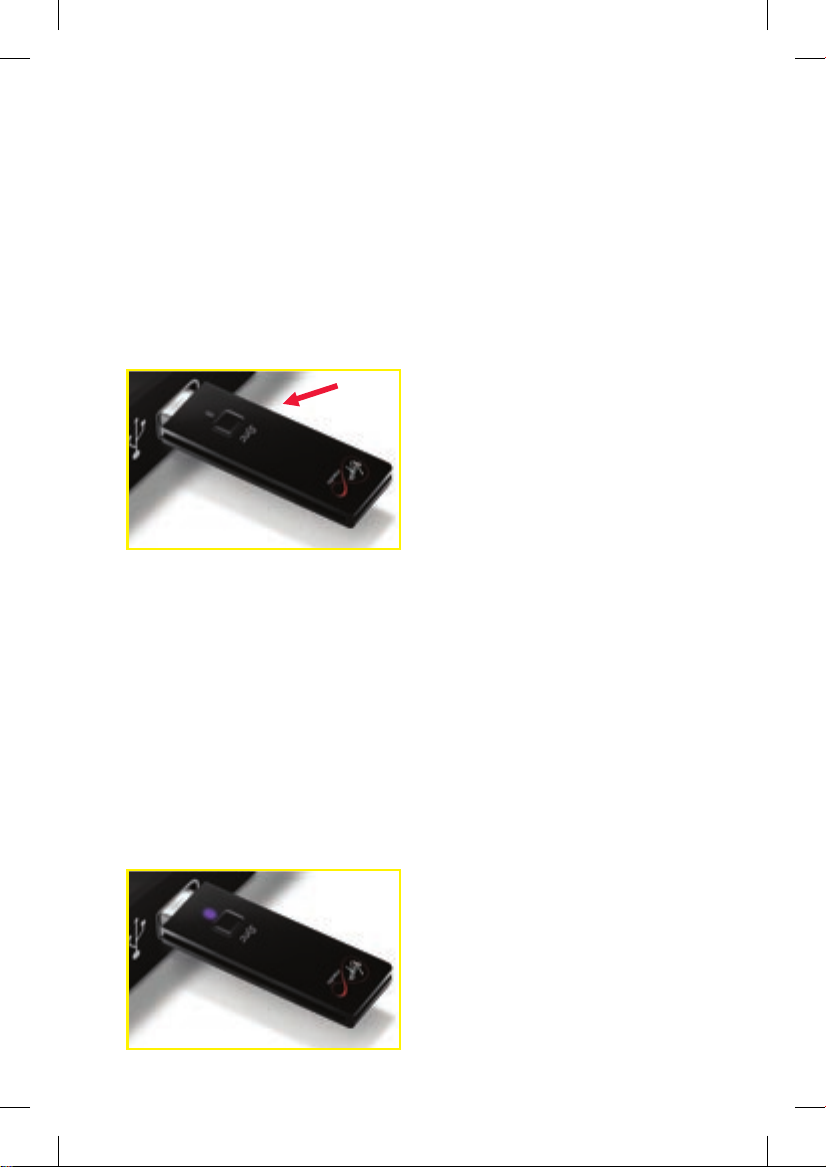
Step 3
Now locate the ‘Sync’ button on your
Super Hub Wireless USB Adapter:
Step 4
Press and hold this button for 2-3
seconds until the adapter’s LED starts
flashing blue and then release it. The
adapter will now wirelessly connect to
your Super Hub with a successful sync
indicated in the adapter’s information
panel and on your Super Hub. The
Virgin Media button on your Super
Hub becomes static purple for around
5 minutes until returning to its original
static blue state.
Now you’ve completed
this section, go to page 14
to activate your
Virgin Broadband.
7
113775_VM_Super Hub_MainGuide_AW02.indd 7 29/10/2010 10:50

WIndoWS Xp SEt Up
Step 1
Click Start and then Control Panel.
From Control Panel double click
Network and Internet Connections.
Step 2
Right click on the Wireless Network
Connection icon and select View
Available Wireless Networks.
Step 3
This will display all wireless networks
in range of your computer: The SSID
(wireless network name) of your
wireless network should be shown
in the list. Your SSID can be found
on the label on the back of your
Super Hub and will be something like
‘virginmedia1234567’. If you don’t
see your wireless network name,
click the Refresh Network List in the
upper left corner. Select your wireless
network and click Connect in the lower
right corner.
Step 4
Windows now prompts you to enter a
network key (Passphrase) to connect to
your wireless network. Your Passphrase
can be found on the label on the
back of your Super Hub. Enter your
Passphrase into the Network Key fields
and then click Connect.
8
113775_VM_Super Hub_MainGuide_AW02.indd 8 29/10/2010 10:50
 Loading...