

Page 1
G
Page 2

Conventions used in this guide
In this user guide, we use the following symbols to indicate useful and important information:
NOTE
NOTE Notes, usage tips, or additional information
Warning Situations that could cause injury to yourself or others
Caution Situations that could cause damage to your device or other equipment
2
Page 3

Contents
Specifications ......................................................................................................................................6
Basics ................................................................................................................................................... 7
In Box ................................................................................................................................................................................7
Phone Overview ................................................................................................................................................................7
Proper Holding Position ....................................................................................................................................................8
Battery .............................................................................................................................................................................9
MicroSD Card ...................................................................................................................................................................10
Turning Phone On or O ..................................................................................................................................................11
Phone Options ................................................................................................................................................................12
Touchscreen Gestures ......................................................................................................................................................12
Keyboard ...........................................................................................................................................13
Using the QWERTY Keyboard ..........................................................................................................................................13
Using the Onscreen Keyboard .........................................................................................................................................13
Editing Text ....................................................................................................................................................................18
Getting Started ..................................................................................................................................20
Google Account .............................................................................................................................................................. 20
Getting to Know the Home Screen .................................................................................................................................20
Customizing the Home Screen .......................................................................................................................................21
Essential Display Icons .................................................................................................................................................... 23
Notications Panel ......................................................................................................................................................... 24
Opening and Switching Between Applications ............................................................................................................... 24
Sleep Mode ....................................................................................................................................................................25
Adjusting Volume ........................................................................................................................................................... 26
Searching Your Phone and the Web ................................................................................................................................26
Connecting Your Phone to a Computer ........................................................................................................................... 27
Phone Calls ........................................................................................................................................29
Making Calls ................................................................................................................................................................... 29
Answering or Rejecting Calls .......................................................................................................................................... 30
Using In-Call Options......................................................................................................................................................31
Using Call Log .................................................................................................................................................................31
Listening to Your Voicemail ............................................................................................................................................33
Using Voice Dialer ...........................................................................................................................................................33
Contacts ............................................................................................................................................34
About Contacts ............................................................................................................................................................... 34
Opening Your Contacts ...................................................................................................................................................34
Getting Started ..............................................................................................................................................................34
Editing/ Deleting Contacts .............................................................................................................................................36
Communicating .............................................................................................................................................................37
3
Page 4

Account Setting ...............................................................................................................................................................38
Messaging.......................................................................................................................................... 39
About Messaging ............................................................................................................................................................39
Sending Messages ..........................................................................................................................................................39
Reading Messages ..........................................................................................................................................................40
Receiving Emergency Alerts Messages ............................................................................................................................41
Changing Messaging Settings .........................................................................................................................................42
Google ............................................................................................................................................... 43
Gmail ..............................................................................................................................................................................43
Google Talk ......................................................................................................................................................................45
Maps ...............................................................................................................................................................................47
Places ..............................................................................................................................................................................49
Navigation ......................................................................................................................................................................50
Latitude ..........................................................................................................................................................................51
Calendar ..........................................................................................................................................................................53
News & Weather .............................................................................................................................................................56
Android Market ...............................................................................................................................................................57
Books ..............................................................................................................................................................................58
Easy Installer ...................................................................................................................................................................60
Web ...................................................................................................................................................61
Email ...............................................................................................................................................................................61
Browser ...........................................................................................................................................................................63
YouTube ..........................................................................................................................................................................66
Wi-Fi ...............................................................................................................................................................................69
Downloads ......................................................................................................................................................................69
Trac Manager ...............................................................................................................................................................70
Bluetooth ........................................................................................................................................... 72
Using Bluetooth ..............................................................................................................................................................72
Disconnecting or Unpairing from a Bluetooth Device ......................................................................................................72
Connecting to a Bluetooth Headset .................................................................................................................................73
Sending and Receiving Information Using Bluetooth ......................................................................................................73
Entertainment ................................................................................................................................... 75
Camera/Camcorder .........................................................................................................................................................75
Gallery ............................................................................................................................................................................77
Videos .............................................................................................................................................................................78
Sound Recorder ...............................................................................................................................................................79
Music ..............................................................................................................................................................................79
Tools ................................................................................................................................................... 82
Clock ...............................................................................................................................................................................82
Calculator ........................................................................................................................................................................83
4
Page 5

Memo .............................................................................................................................................................................83
My Files ...........................................................................................................................................................................83
OceSuite ......................................................................................................................................................................84
Battery Saver ..................................................................................................................................................................85
Virgin Mobile Applications ................................................................................................................. 87
Mobile ID ........................................................................................................................................................................87
My Account .....................................................................................................................................................................88
Settings ............................................................................................................................................. 89
Settings on Your Phone ...................................................................................................................................................89
Safety and use ................................................................................................................................... 93
Please read before proceeding ........................................................................................................................................93
Limitation of damages ....................................................................................................................................................93
Important health information and safety precautions ....................................................................................................93
Regulatory agency identications ...................................................................................................................................99
Warranty .......................................................................................................................................... 102
Manufacturer’s Warranty ...............................................................................................................................................102
5
Page 6

Specifications
Display
t2.8 inches QVGA, IPS full-angle viewing, TFT 262k colors
tMultitouch capacitive touch screen
Camera
t2Mp Full Frame with LED ash
Dimensions and Weight
tDimensions: 4.6 x 2.2 x 0.48 inch (119 x 58 x 12.55 mm)
tWeight: 4.3 oz (122 g)
Memory
t512MB (ROM)/512MB (RAM)
tExternal memory: 2GB microSD card included (supports up to 32GB)
Operating Frequencies
tNetworks: CDMA 1900(BC1) - 1XEV-DO rA
Wi-Fi(802.11 b/g/n) (802.11n 2.4GHz only)
tData speed: Up To HSDPA 7.2Mbps
Operating System
tAndroid 2.3.4 (Gingerbread)
Connectivity
tBT 3.0 (HSP/HFP/A2DP/OPP), Wi-Fi 802.11 b/g/n
Sensors
tAccelerometer, E-compass, Proximity Sensor
LBS
tA-GPS
Power Management (Performance)
Battery Type Capacity Standby Time Talk Time
Lithium-Ion(Li-ion) 1300mAh 270 hours (Slot Index 2) 4.3 hours (CDG89)
6
Page 7
Basics
In Box
The Venture comes with the following items included in the box:
tVenture mobile phone
tMicro USB cable
tBattery cover
t2GB microSD card (mounted in the device)
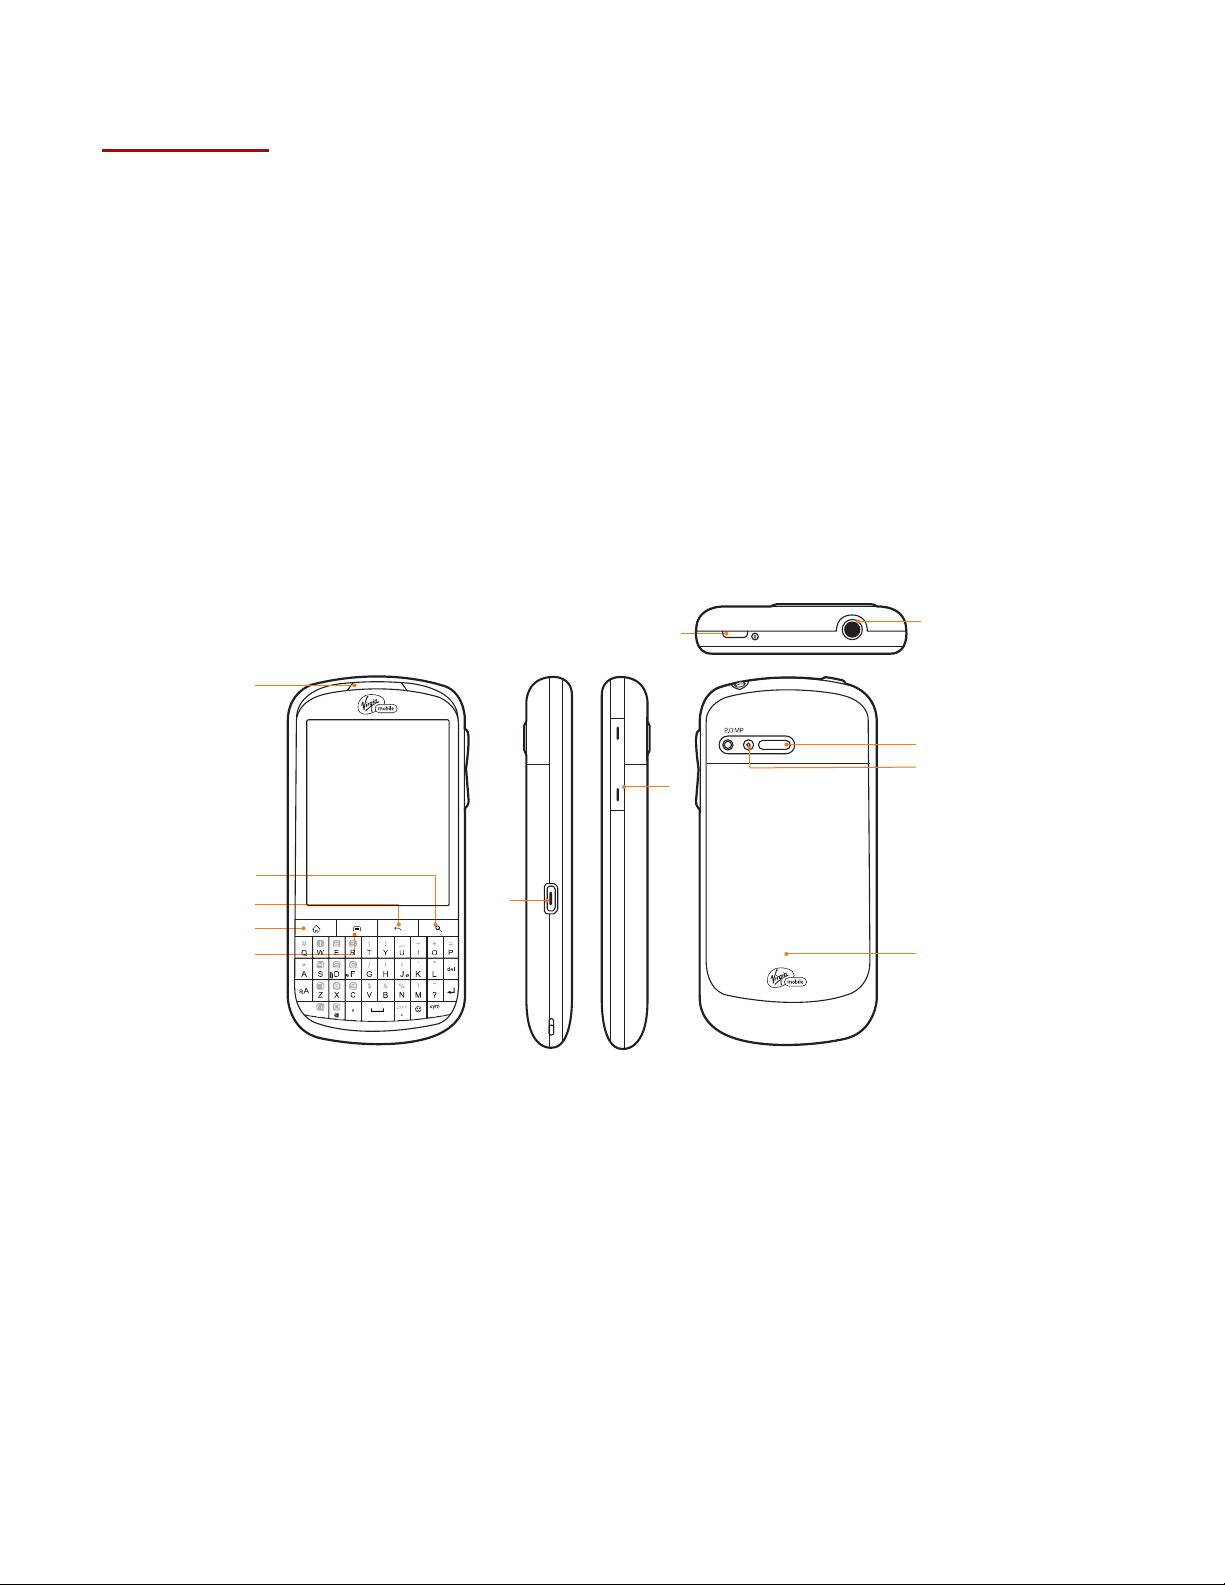
Phone Overview
1
2
3
4
5
Battery
ⰺ
USB power adapter
ⰺ
Basics Guide
ⰺ
8
7
6
9
10
11
12
1. Earpiece
2. Search key
Quick search
3. Back key
Move to the previous screen
4. Home key
Move to Home screen
Press and hold : Show eight most recently used apps.
5. Menu key
Options
6. USB port
Charging / PC connectivity
7. Volume key
Volume Up / Down
8. Power/Lock key
Short press: Screen lock mode
Press and hold: Power ON / Phone options
9. Headset jack
3.5 mm headset jack
10. External speaker
11. Camera
12. Battery cover
7
Page 8
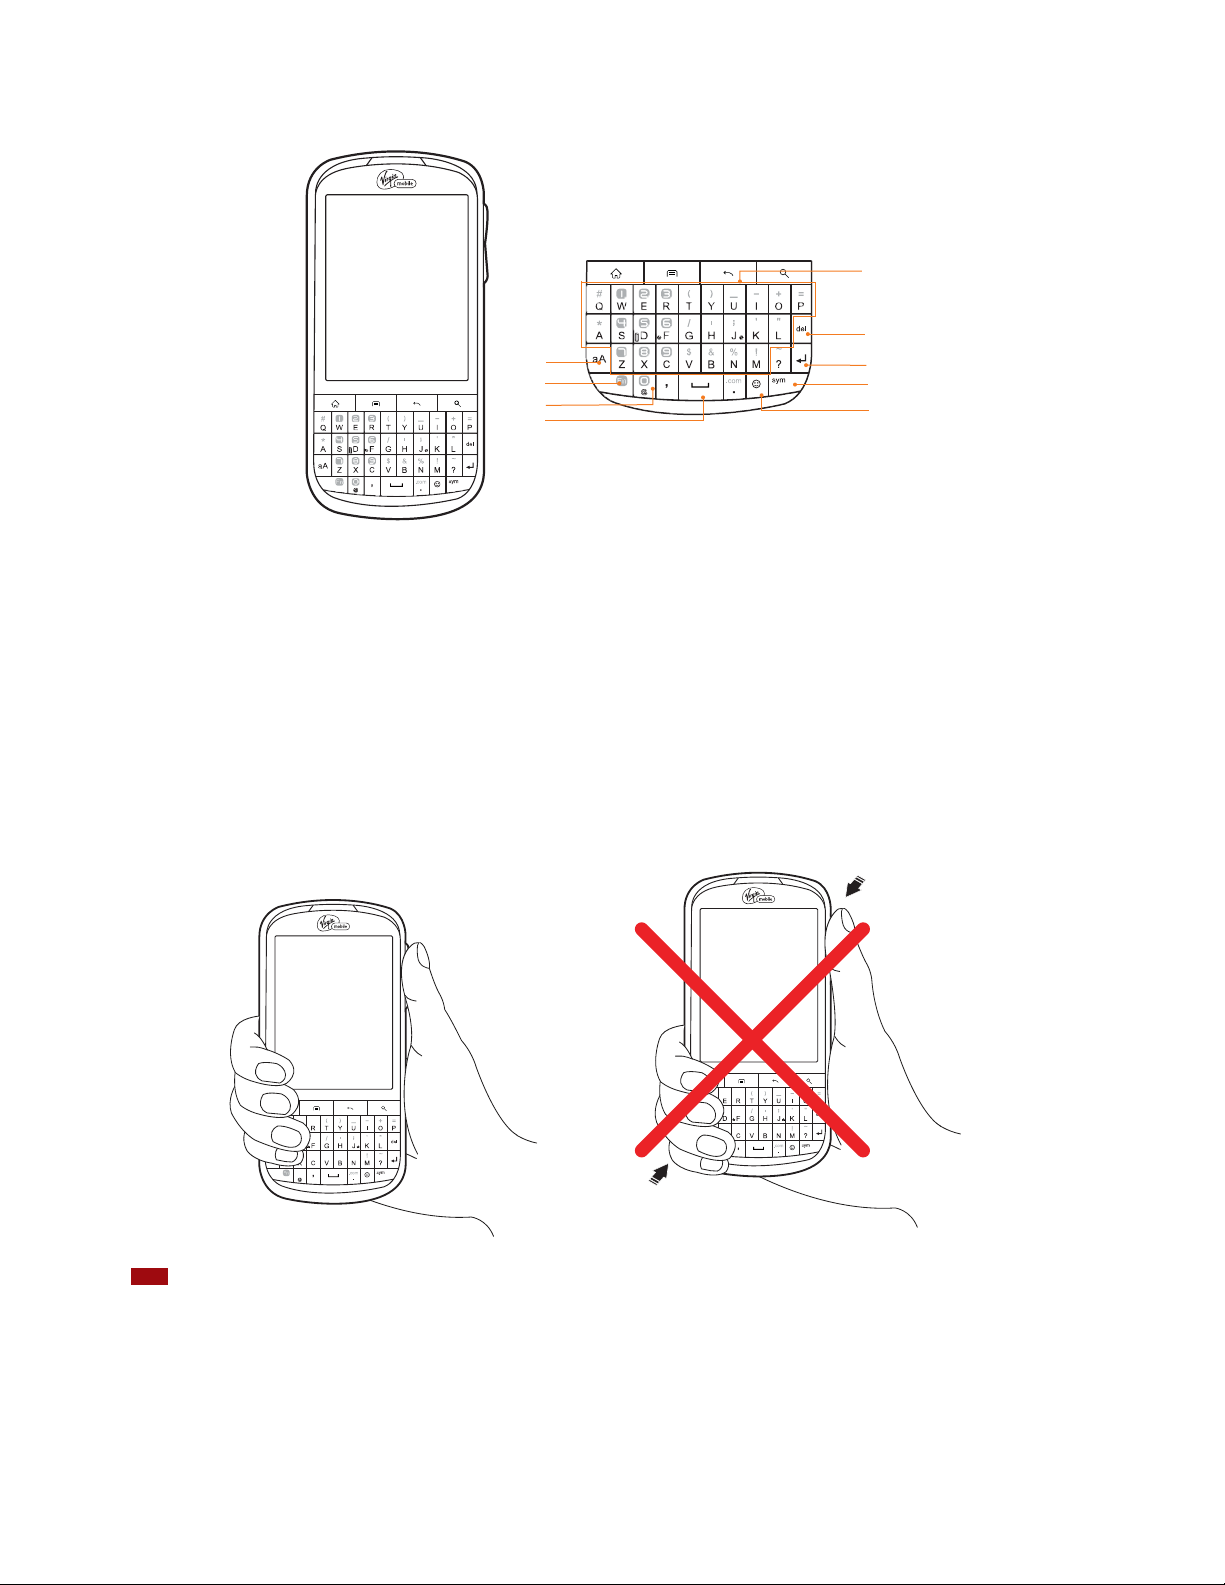
QWERTY Keyboard Overview
1
2
3
4
Your phone has a QWERTY keyboard that allows you faster and easier texting/typing.
5
6
7
8
9
1. Caps/Shift key
2. Function key
3. @
4. Space bar
5. A-Z
Proper Holding Position
6. Delete key
7. Enter key
8. Symbol key
9. Smiley key
The Venture is equipped with an antenna located in the base of the unit. For optimum call quality, hold the phone along the sides and avoid
NOTE
touching the top and bottom of the phone while in a call.
8
Page 9
Battery
Note that browsing the web frequently, extended data usage, being in a poor signal area, or subjecting the device to extreme
temperatures will cause the battery to discharge quickly. To increase battery life, limit your data usage, or turn o GPS and
Bluetooth when not required.
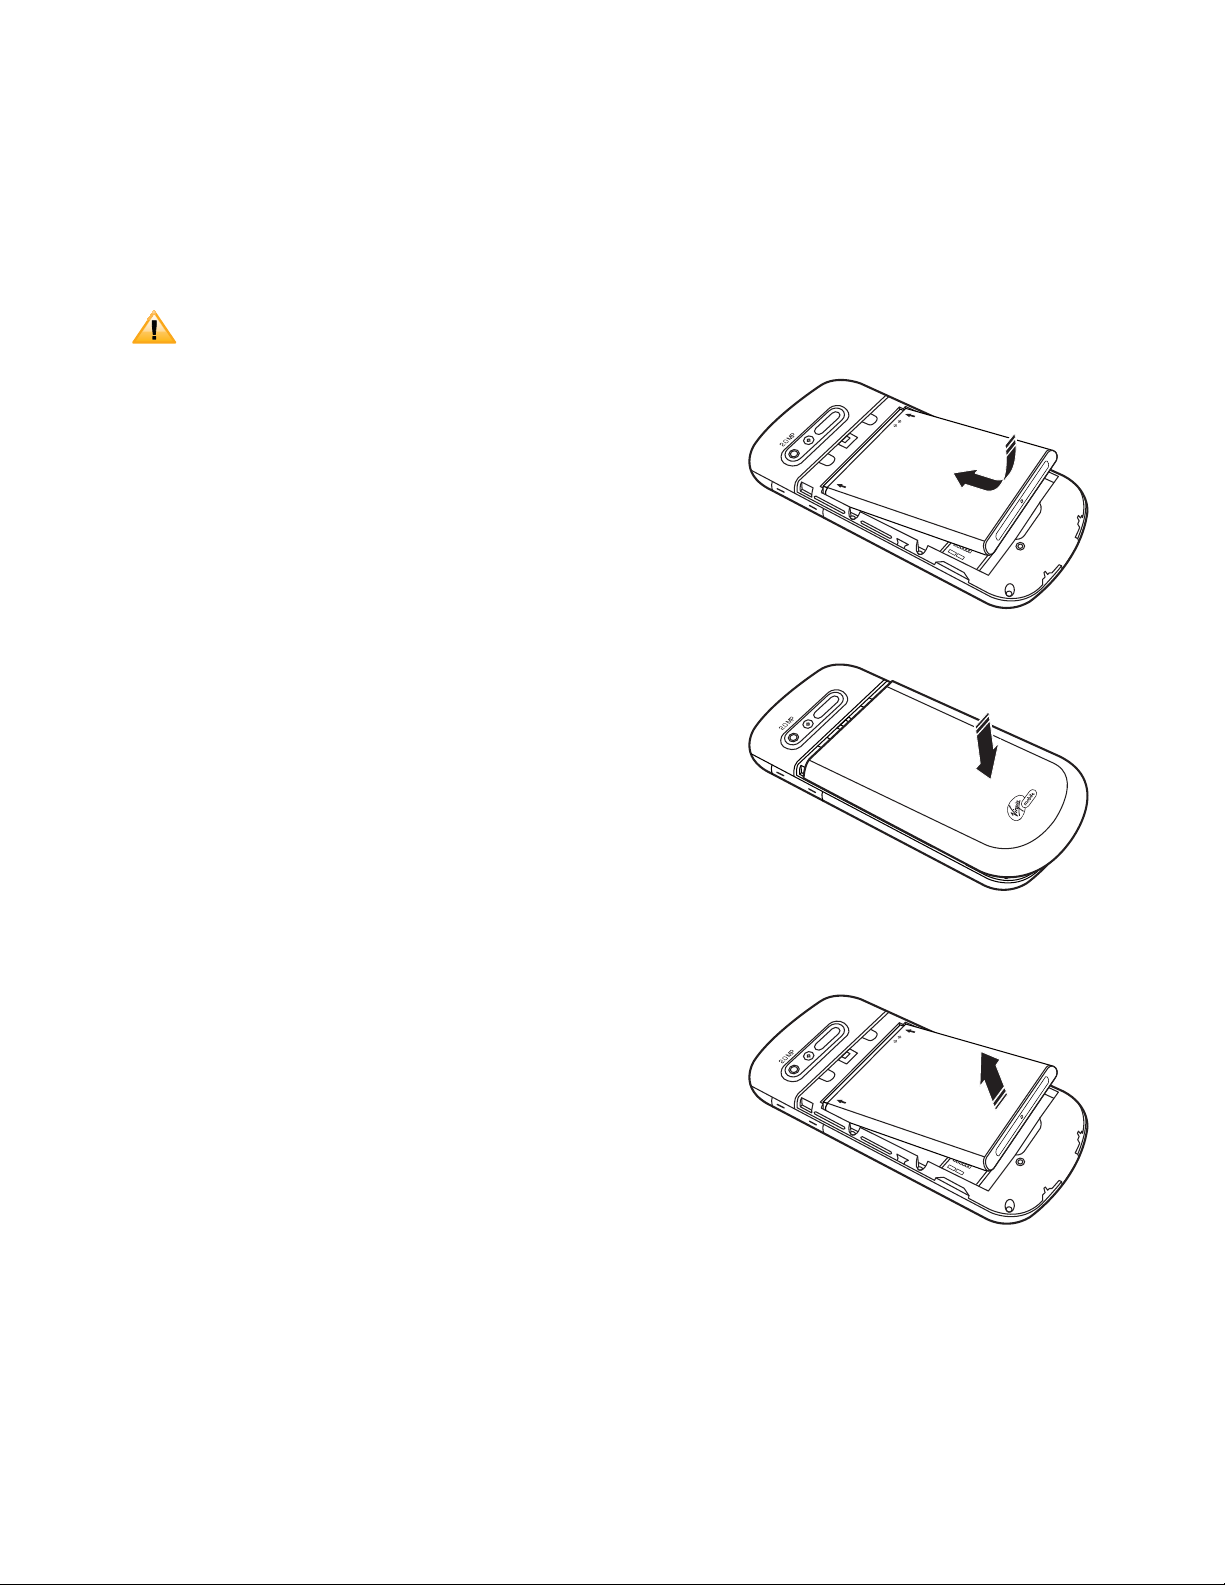
Installing the battery
Please use only the original batteries and accessories you received with your phone or Virgin Mobile recommended replacements.
1. Remove the battery cover from the unit.
2. Align the battery’s exposed gold contacts with the battery connectors
inside the battery compartment.
3. Insert the contact side of the battery rst and then gently push the battery
into place.
4. Replace the battery cover over the battery compartment and press down
until you hear a click.
Removing the battery
1. Make sure that your device is turned o. To remove the battery cover from
your phone, try open the back cover using your nger at the small opening
on the bottom of the phone.
2. Push the bottom of the battery upwards and remove the battery.
9
Page 10
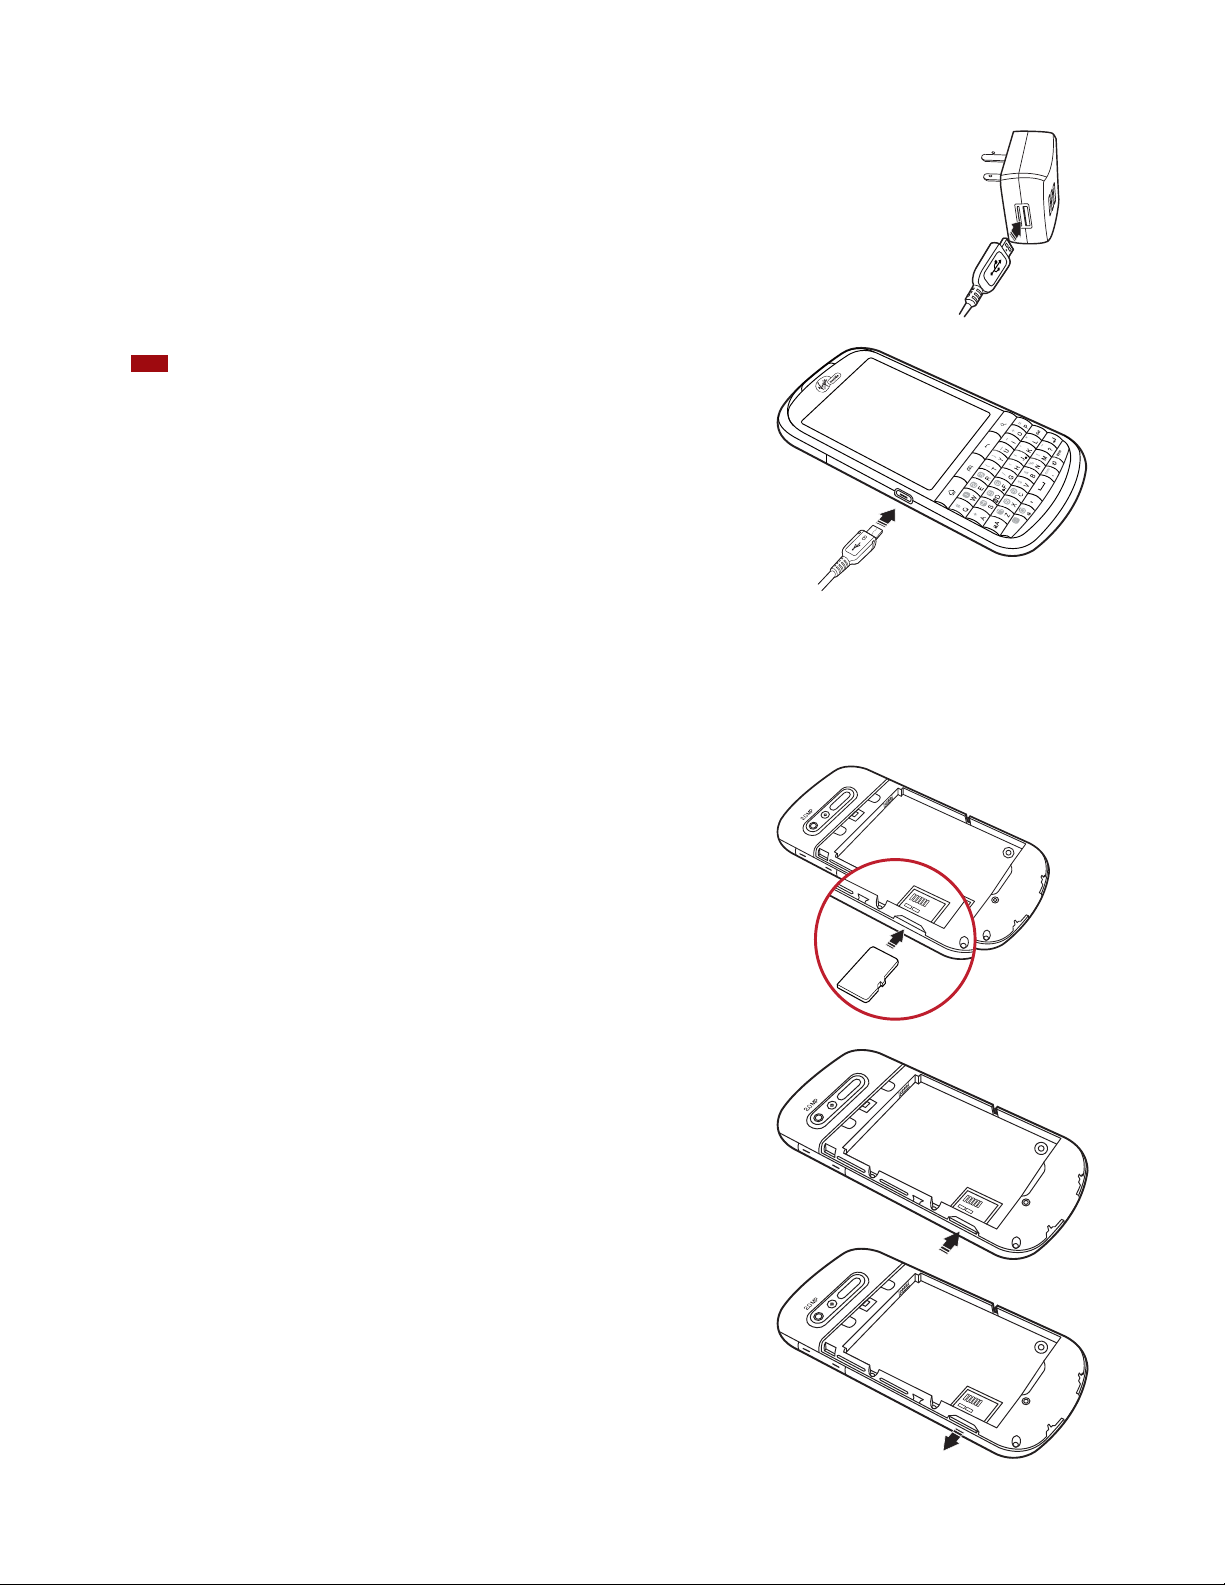
Charging your battery
Before you turn on your device and start using it, it is recommended that you charge the battery.
1. Plug the USB cable into the USB power adapter.
2. Plug the power adapter into a standard outlet.
3. Locate the USB port located on the left side of your device.
4. Plug the other end of the USB cable into the phone’s micro USB port.
5. The USB icon on the cable should always face up when connecting the cable to your device as shown.
t*UJTNPSFFóDJFOUUPDIBSHFUIFCBUUFSZXJUIZPVSEFWJDFQPXFSFEPò
NOTE
t#BUUFSZPQFSBUJOHUJNFHSBEVBMMZEFDSFBTFTPWFSUJNF
MicroSD Card
Use the microSD card to store your photos, videos, music and certain apps from Android (TM) Market. You can also move and
copy les to your computer from your device.
Inserting the microSD card
1. Remove the battery cover.
2. Locate the microSD card slot.
3. Insert the microSD card into the slot with its gold
contacts facing down until it clicks into place.
4. Replace the battery cover.
Removing the microSD card
1. Make sure that your device is turned o,
and then remove the battery cover.
2. Press the microSD card to eject it from the slot,
then slide it out the rest of the way.
10
Page 11

Removing the microSD card while the phone is on
If you need to remove the microSD card while the phone is on, unmount the microSD card rst to prevent corrupting or
damaging the les in the microSD card.
1. From the Home screen, tap
2. Tap
3. Remove the microSD card by following the steps in “
Storage > Unmount SD card > OK.
Apps > Settings. Or press Menu > Settings.
SD card safe to remove”.
Turning Phone On or Off
Turning your phone on
1. Press and hold Power/Lock.
NOTE
The rst time you use your phone you’ll need to set it up. See the Getting Started chapter for details.
Activating your phone
Activate on your computer
Visit virginmobileusa.com/activate and follow the instructions.
Activate on your phone
1. Tap Activate.
2. Your phone will connect to the network, and then the screen will say “Welcome to Virgin Mobile”. Tap
continue the activation process. Your phone will say “Activating your phone now...”. Then your phone will display your new
Virgin Mobile phone number. Write it down.
Get Started Now to
3. Tap
Restart to Use to complete the activation process. Your phone will turn back on by itself.
4. That’s it. You will receive a text message to let you know you can start talking.
Turning your phone off
1. If the display is o, press Power/Lock to turn it back on.
2. Press and hold
3. When Phone options menu appears, tap
Power/Lock for a few seconds.
Power off > OK.
11
Page 12
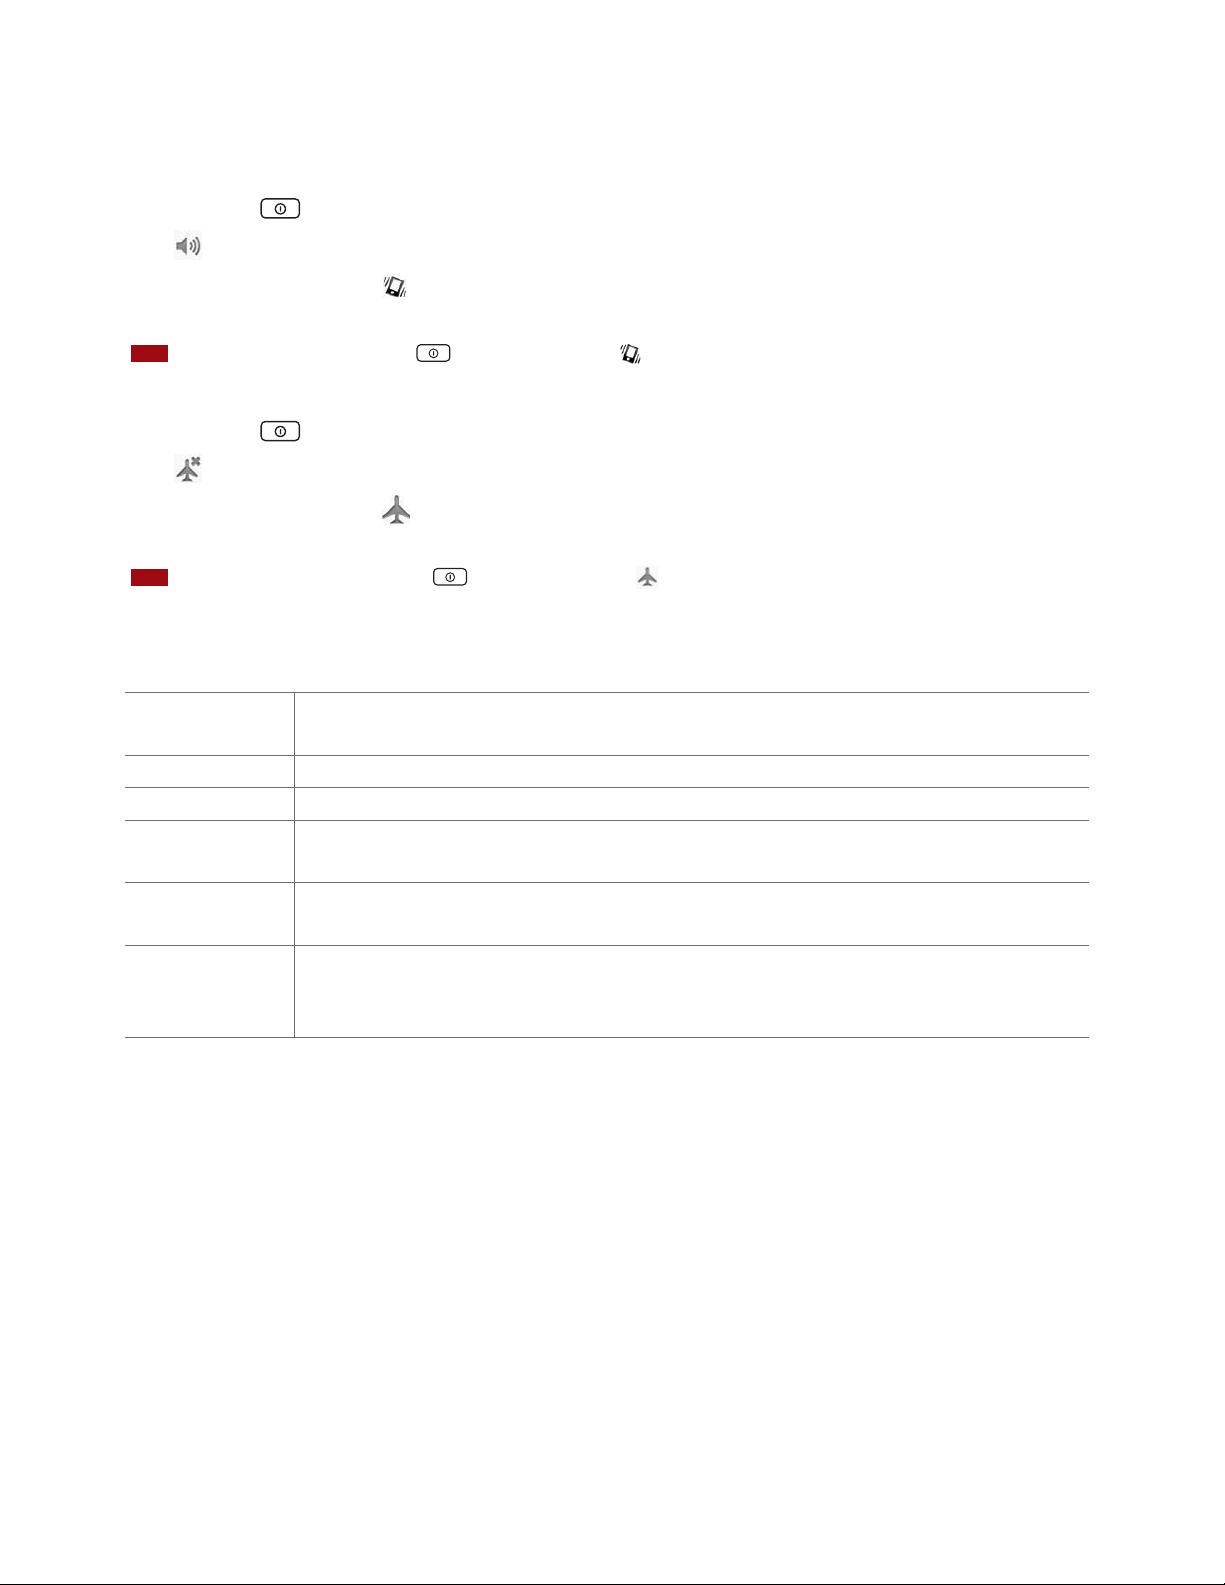
Phone Options
Silent mode
1. Press and hold Power/Lock.
2. Tap
t When you select Silent mode,
NOTE
Silent mode.
is displayed in the Status bar. Ringtones, alerts, and all audible sounds except media
and alarms are silenced.
To turn silent mode o, press and hold Power/Lock and then tap Silent mode again.
Airplane mode
1. Press and hold Power/Lock.
2. Tap
Airplane mode.
t When you set Airplane mode,
disabled.
To turn airplane mode o, press and hold Power/Lock and then tap Airplane mode again.
NOTE
is displayed in the Status bar. Wi-Fi, Bluetooth, and mobile network functions are all
Touchscreen Gestures
Tap To select onscreen items such as application and settings icons or press onscreen buttons, simply touch them
with your nger.
Tap and hold To open available options for the item, simply touch and hold your nger on the screen over the item.
Swipe or slide Quickly drag your nger vertically or horizontally across the screen.
Drag Tap and hold your nger before you start to drag. While dragging, do not release your nger until the item
reaches your desired location.
Flick Flicking the screen is similar to swiping, but you only need to swipe your nger in lighter and quicker strokes.
This nger gesture is always in a vertical direction, such as icking through the contacts or the message lists.
Rotate For most screens, you can automatically change the screen orientation from portrait to landscape by turning
the phone sideways. When entering text, you can turn the phone sideways to bring up a bigger on-screen
keyboard.
12
Page 13
Keyboard
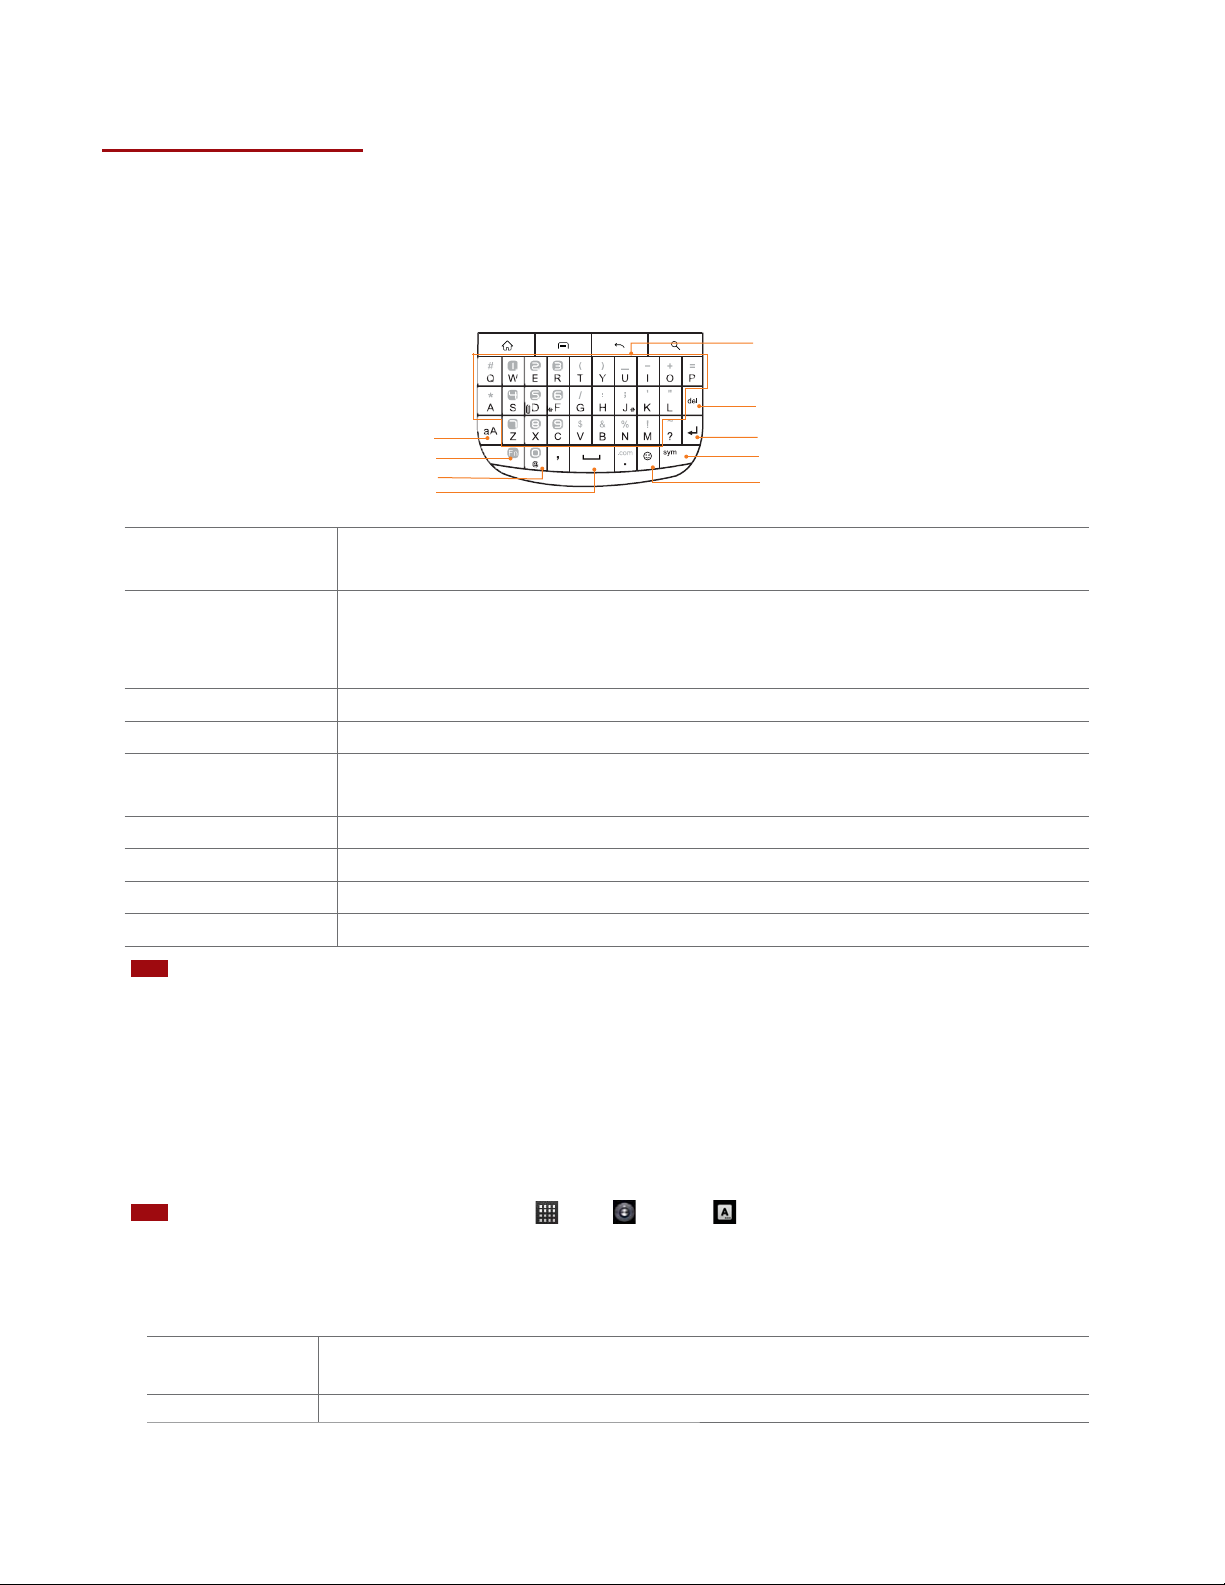
Using the QWERTY Keyboard
Your device has a specially designed QWERTY keyboard that provides a superior, easy, and comfortable typing experience on the
Venture.
5
6
1
2
3
4
1. Caps/Shift key To type a single uppercase letter. To continuously type uppercase letters, press Caps/Shift key twice to
lock it. Press
Fn (Function key) To type the number or symbol printed on the keys in gray, hold down the Fn key and press one or more
2.
letter keys. To return to typing letters, release the
Caps/Shift key again to unlock.
Fn key.
7
8
9
To continuously type numbers and symbols, press
@ To type “@”.
3.
4. Space bar To type a blank space.
5. A-Z (alphanumeric keys) To type numbers, letters or special characters. Go to the Google Search screen if pressed on the Home
screen.
Delete (Delete key) To delete a character. Press and hold Delete key to rapidly delete the entire entry.
6.
Enter (Enter key) To begin a new line.
7.
Sym (Symbol key) Pressing the Sym key opens a pop up menu of additional symbols.
8.
Smiley key To type smiley icons. (Emoticons)
9.
For better performance in low-light environments, your handset includes a backlight feature which illuminates the QWERTY keyboard so you can
NOTE
type with ease.
Fn key twice to lock it. Press Fn key again to unlock.
Using the Onscreen Keyboard
In addition to the QWERTY keyboard, you can also enter text using the onscreen keyboard. Some applications open the
keyboard automatically. In others, tap anywhere in a text eld to open the keyboard. You can choose between two included
on-screen keyboards to select the one that best ts your typing preferences.
To use the onscreen keyboard, from the Home screen, tap Apps > Settings > Language & keyboard > Soft keyboard switch >
NOTE
Select Landscape mode or Portrait mode or both.
tTap Landscape mode to use the onscreen keyboard in landscape orientation on your screen.
tTap
Portrait mode to use the onscreen keyboard in portrait orientation on your screen.
Android keyboard This keyboard is similar to a desktop computer’s keyboard. This is the standard Android keyboard layout.
Android keyboard is selected as the default entry method.
TouchPal Input TouchPal keyboard is an innovative input solution for mobile devices. You need to tap and slide.
tIf you want to change the on-screen keyboard type: Tap and hold the text input eld > Tap Input method > Select
13
Page 14
Android keyboard or TouchPal Input.
tRemember, the Venture has a built-in QWERTY keyboard, which you can use for all phone functions.
You can change all keyboard settings including User dictionar y through the settings menu. From the Home screen, tap Apps > Settings
NOTE
Language & keyboard.
>
Or press Menu > Settings > Language & keyboard.
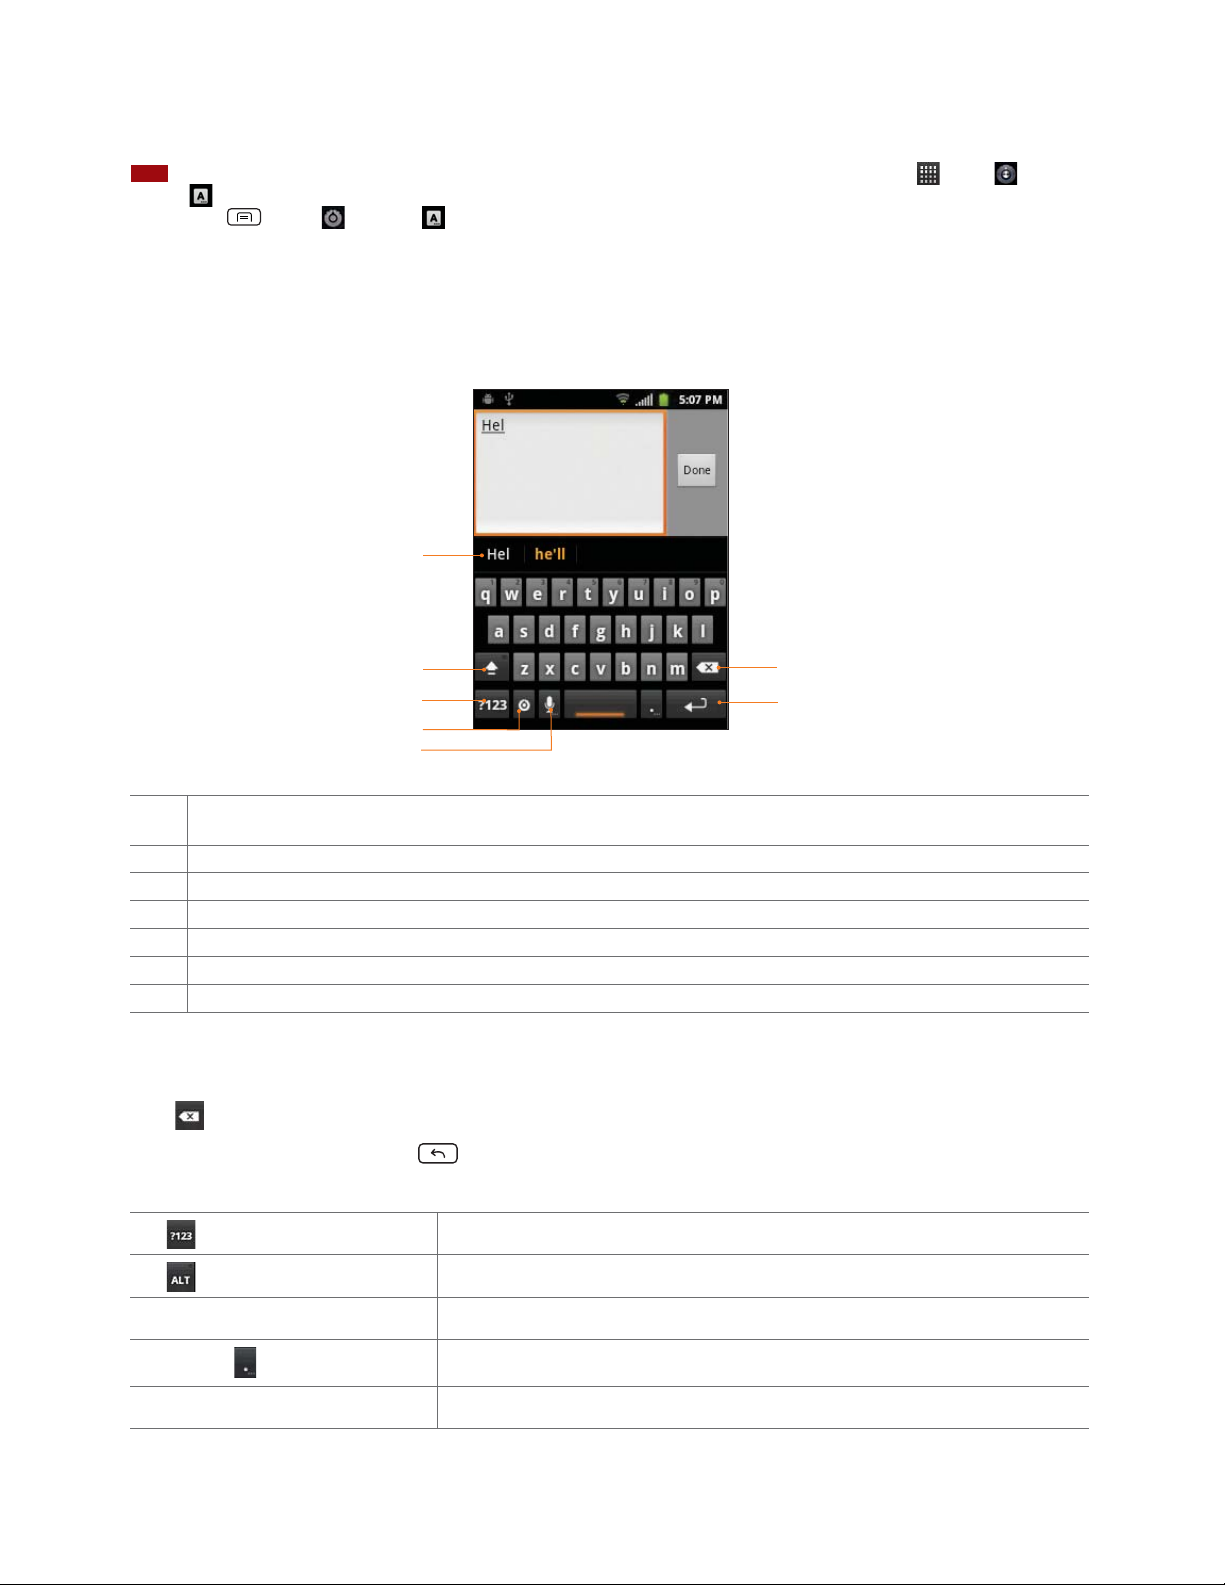
Using the Android keyboard
If you want to switch from TouchPal keyboard to Android keyboard, tap and hold the text input eld > Tap Input method >
Android keyboard.
Select
1
2
3
4
5
1 The characters you’ve typed appear in a strip above the keyboard with word predictions to the right. Tap a suggested word to
enter it. You can also save the characters you’ve typed by tapping it twice in a strip above the keyboard.
2 Shift key. Tap once to capitalize the next letter you type. Tap it twice for all caps.
3 Symbol key. Tap to switch to the numeric and symbol keyboard.
4 Tap to open Input options and tap and hold to select input method.
5 Voice input key. Tap to input by voice.
6 Backspace key. Tap to delete the previous character.
7 Enter key. Tap to create a new line. (In other keyboard mode, you can also enter emoticon.)
6
7
1. Tap the text eld to open the onscreen keyboard.
2. Tap the onscreen keys to type.
3. Use
4. When you’ve nished typing, press
to erase characters to the left of the cursor.
Back to close the keyboard.
To enter numbers, symbols, and other characters
Tap
To switch to the numeric and symbol keyboard.
Tap
on the numeric keyboard
Tap and hold a vowel or the C, N, or S key To open a pop up menu to select an accented vowel or other alternate letter.
Tap and hold
Tap and hold a number or symbol key To open a pop up menu of additional symbols. Not all keys have additional symbols.
To view additional symbols, tap it again to switch back.
To open a pop up menu with a set of common symbols.
t Slide your nger smoothly up from the main keyboard to open an extension keyboard, with numbers and symbols. To
14
Page 15

enter a number or symbol from that keyboard, slide your nger onto it and then lift your nger. When you lift your nger,
the extended keyboard will no longer be visible.
t When you tap a key, a larger version displays briey over the keyboard. Keys with alternate characters display an ellipsis
(...) below the character.
Changing the keyboard language
< Selecting the Android keyboard languages >
1. Tap a text eld to open the onscreen keyboard.
2. Tap
3. Tap
4. Press
Input options > Android keyboard settings.
Or tap and hold
> Input options > Android keyboard settings.
Input languages > Select one or more languages.
Back to save.
< Changing the keyboard language >
If you’ve selected more than one keyboard language, the active keyboard language is displayed on the Space bar. You can
switch languages easily as follows:
1. Tap and hold
.
2. Without lifting your nger, move it to the left or right until the language you want appears in the center of the small
window above
.
3. Lift your nger.
If you have many languages available, you may have to repeat the above steps to reach your desired language.
Entering the text by speaking
You can use voice input to enter text. Voice input is an experimental feature using Google’s speech-recognition service. You
must have a data connection on a mobile or Wi-Fi network to use voice input.
< Turning on voice input >
If the onscreen keyboard does not display
, voice input is not turned on or you have congured it to display only on the
symbol keyboard.
1. From the Home screen, tap
2. Tap
Language & keyboard > Android keyboard.
Or tap
Input options on the onscreen keyboard > Android keyboard settings.
t You can also tap and hold
Apps > Settings. Or press Menu > Settings.
on the onscreen keyboard. In the alternate menu that opens, tap Input options >
Android keyboard settings.
Voice input.
3.Tap
4. Tap the option for where you want to use
(On main keyboard or On symbols keyboard). Or tap Off to turn o voice
input.
< Entering text by speaking >
You can enter text by speaking, in most places that you can enter text with the Android keyboard.
1. Tap a text eld.
2. Tap the
on the keyboard.
3. When prompted to “Speak now,” speak what you want to enter.
tSay “comma,” “period,” “question mark,” or “exclamation point” to enter punctuation.
t When you pause, what you spoke is transcribed by the speech-recognition service, entered in the text eld and
15
Page 16
underlined. You can tap to erase the underlined text. If you start typing or entering more text by speaking, the
underline disappears.
tYou can edit the onscreen text by typing or speaking.
Using TouchPal Text Entry Method
Entering text using TouchPal keyboard
TouchPal keyboard signicantly improves the user experience of inputting on touch screens of handheld devices.
t You only need to tap and use the auto-word prediction to input the right word. In other cases, you can slide left/right for
a specic letter, slide up for uppercase, or slide down for a punctuation.
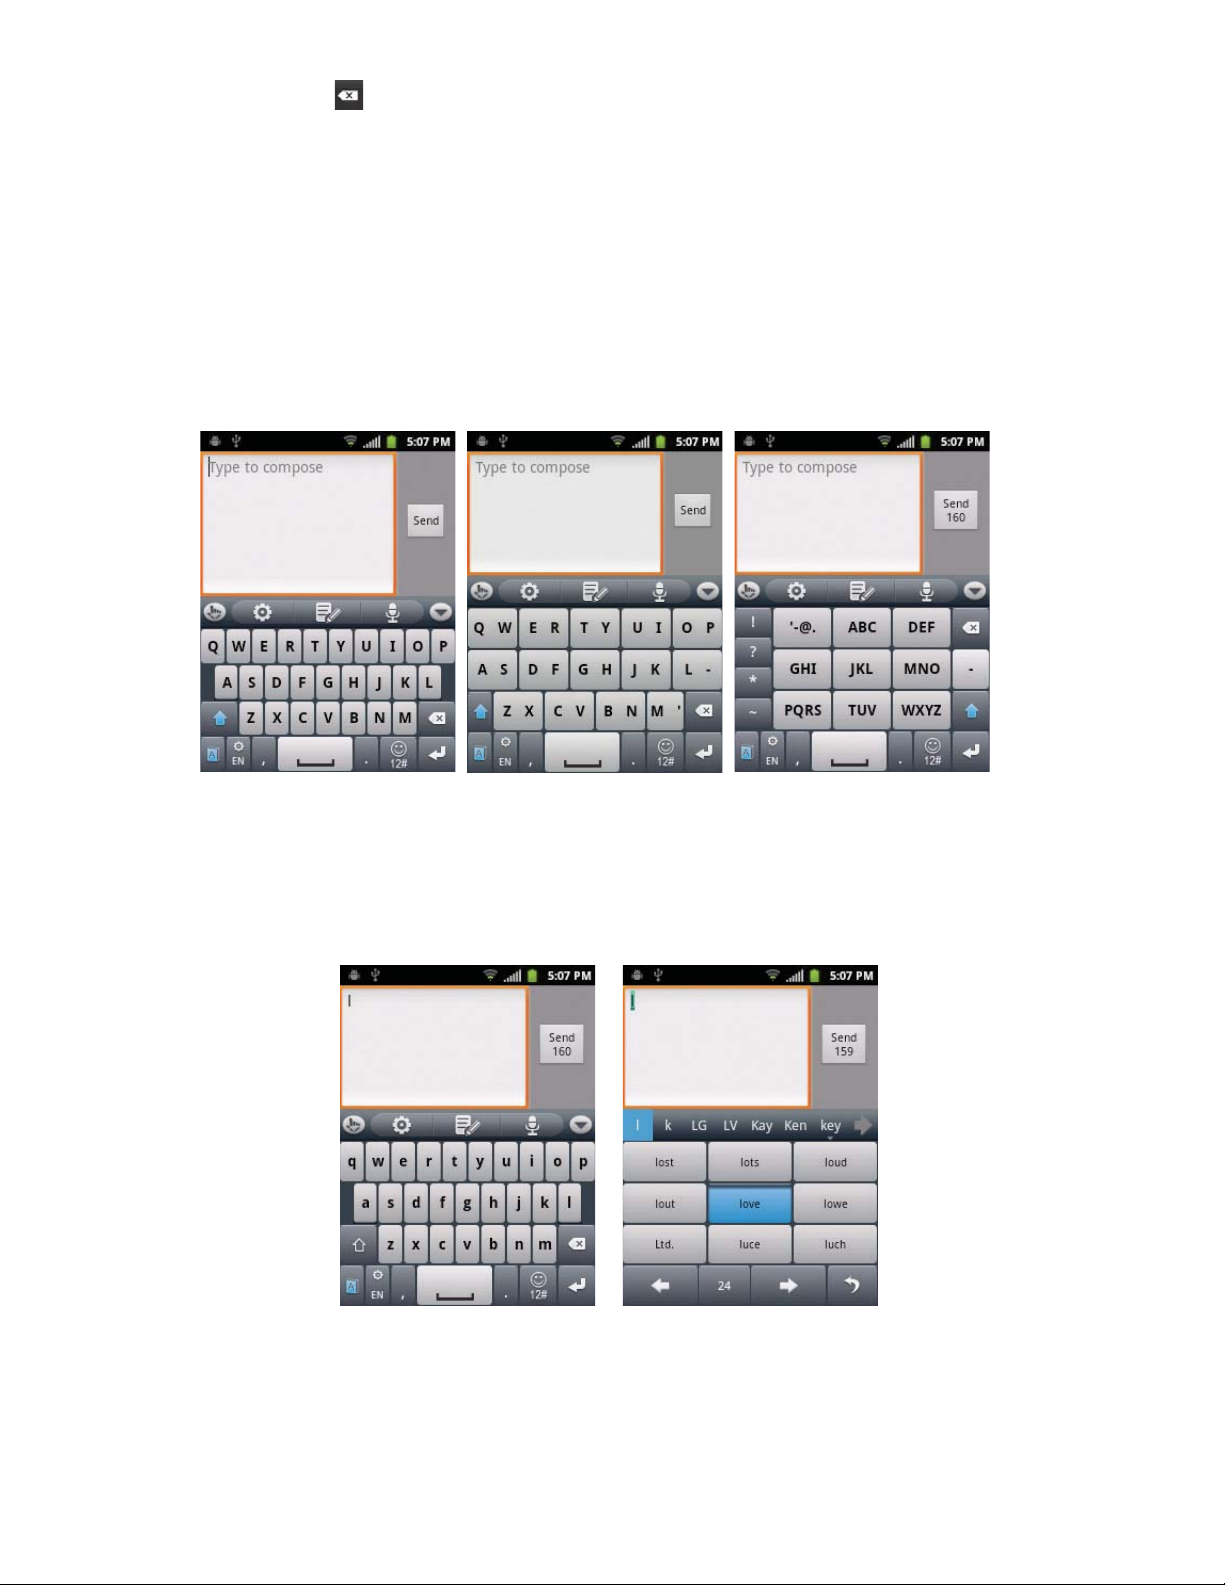
tYou can switch between three dierent keyboard layouts by sliding left or right on the onscreen keyboard.
< layout 1 > < layout 2 > < layout 3 >
tWhen you use TouchPal keyboard, the keyboard layout that you used the last time is displayed.
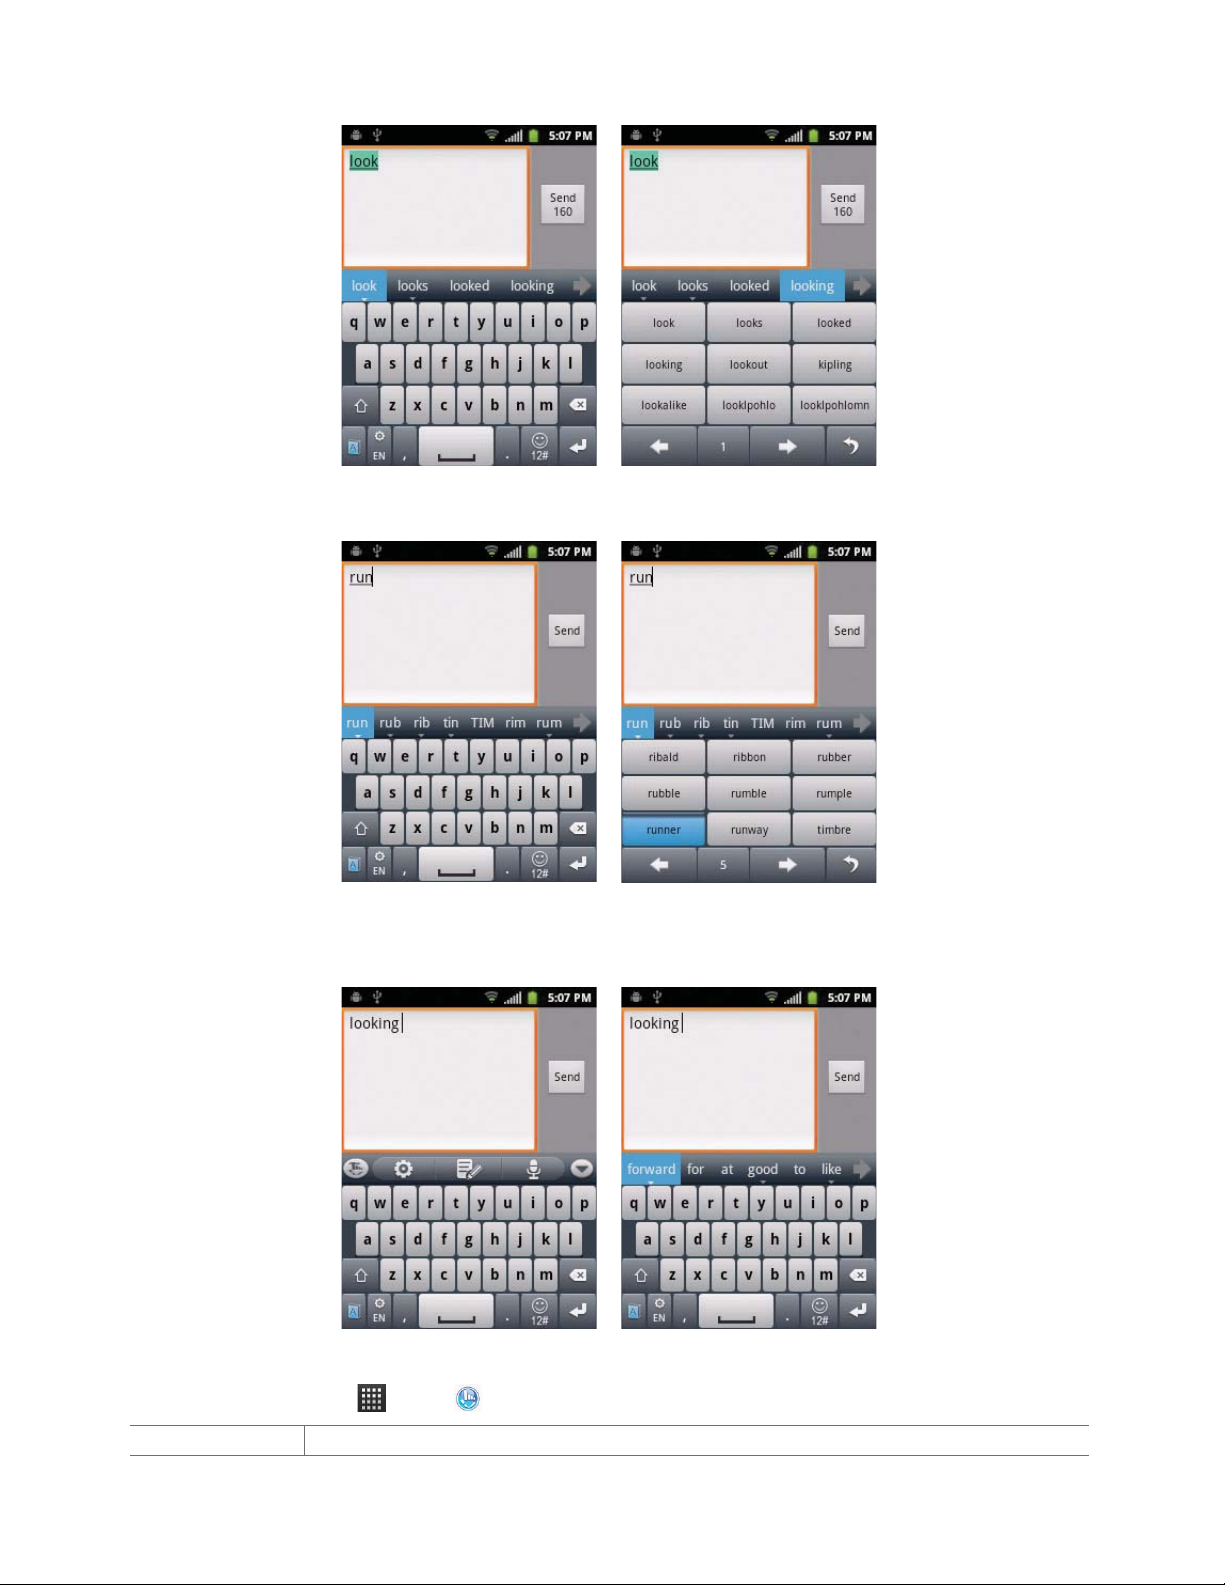
t For example, to enter “love” : If you tap “l”, the related words list will appear. You can select “love” from the list.
(These screenshots are the QWERTY keyboard which is the default layout.)
16
Page 17
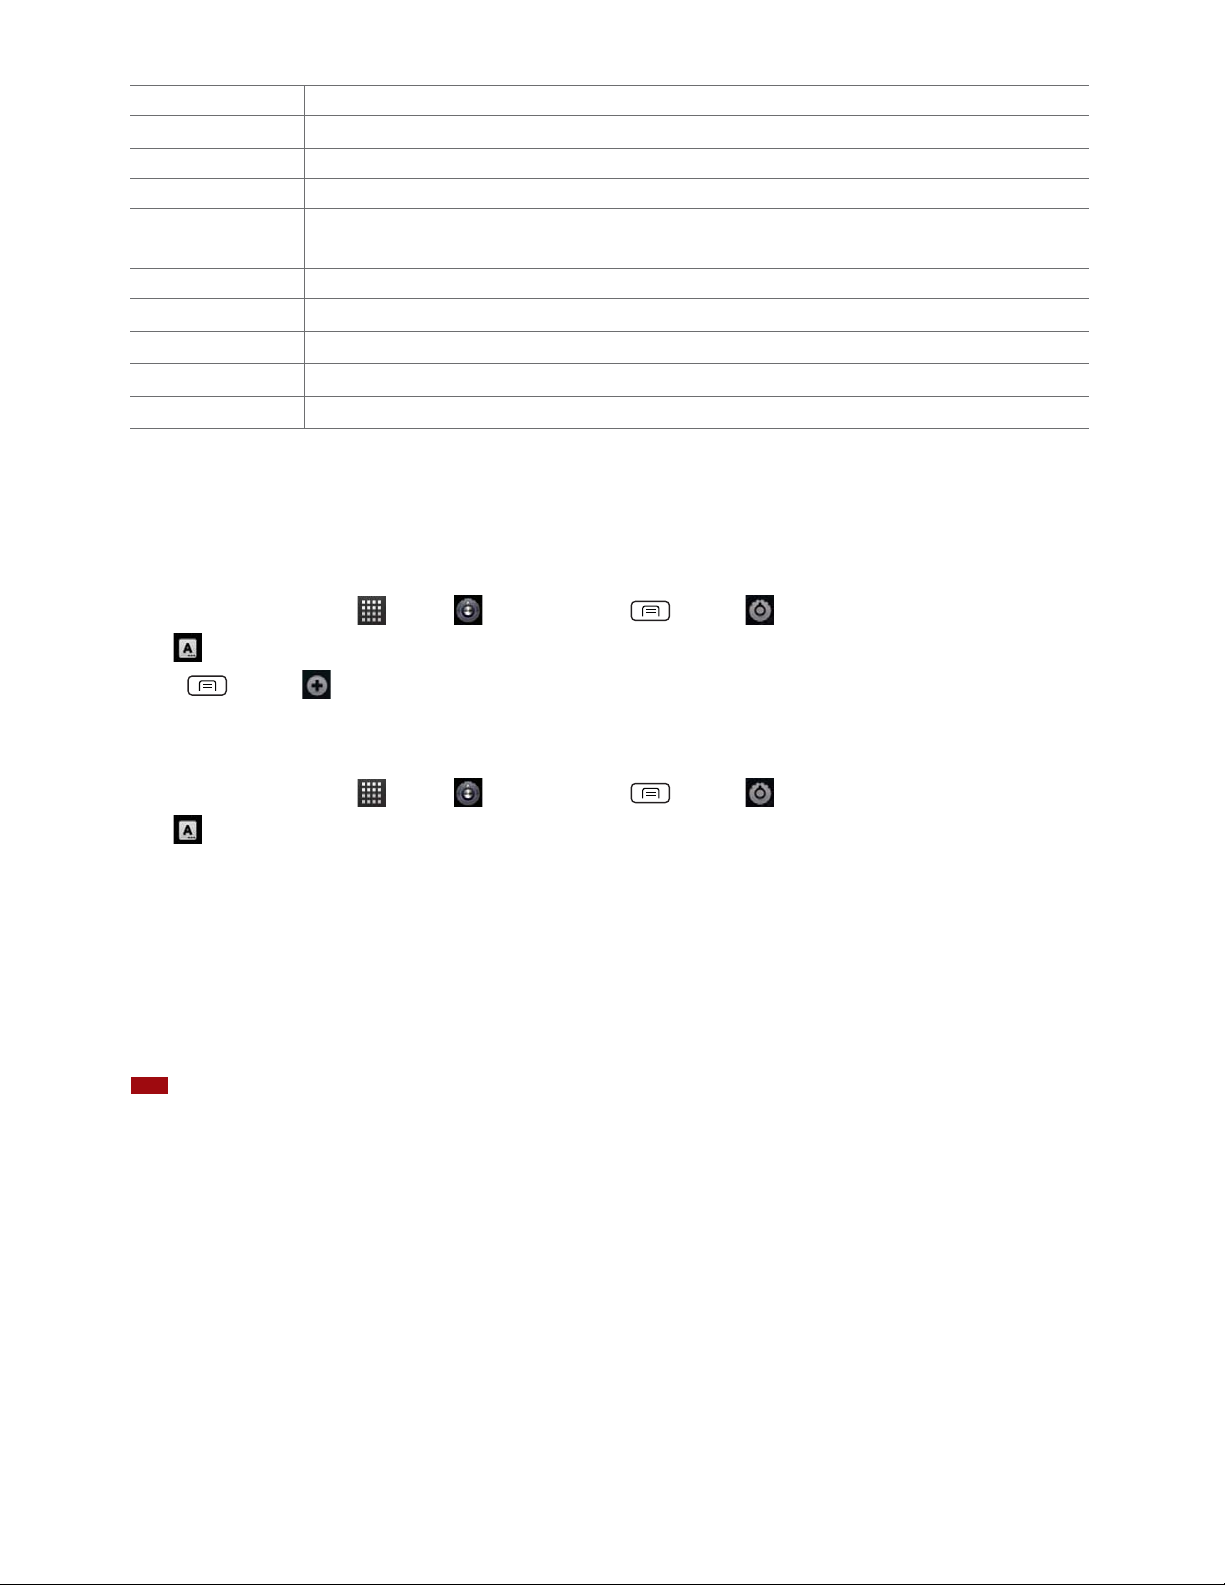
tlooking : This keyboard supports context-based prediction. To enter “looking”, you only need to enter “look”.
t runner : If you enter “run”, you can get “runner” and other candidates.
t looking forward: This keyboard also supports next word prediction. To enter “looking forward”, you need to enter
“looking” or “looked”.
Changing TouchPal Input settings
1. From the Home screen, tap Apps > TouchPal Input.
Key press sound Drag the volume slider left or right to adjust key press sound.
17
Page 18
Key press vibration Drag the slider left or right to adjust key press vibration.
Show Popup Check to enable button pressing popup eect.
Slide-down symbols If checked, you just need to slide down on keys to input symbols.
Keyboard layout Set portrait/landscape layout and others.
TouchPal Input Set basic keyboard settings. Set Word prediction, Predict next word, Correct mistyping, Spellcheck, Adaptive
input learning, Relevant words or Context prediction.
TouchPal Curve
Language Select the language you may use.
Help You can view TouchPal input method help.
Software Update You can update TouchPal input through Internet.
About You can check TouchPal version on your phone.
TM
Set sliding input.
Adding, Editing or Deleting Words in the User Dictionary
Sometimes you may need to add a word to the predictive text dictionary, for example, a name or a specialized technical word.
If you want to add a word to your User dictionary while entering text, double tap the word to highlight it, then tap and hold
the word and select
Add ** to dictionary.
< Adding a word manually >
1. From the Home screen, tap
Apps > Settings. Or press Menu > Settings.
2. Tap
3. Press
4. Type the word > Tap
Language & keyboard > User dictionary.
Menu > Add.
OK.
< Editing or deleting a word >
1. From the Home screen, tap
2. Tap
Language & keyboard > User dictionary.
t To edit words from the dictionary, tap the word you want to edit >
tTo delete words from the dictionary, tap the word you want to delete >
Apps > Settings. Or press Menu > Settings.
Edit > Edit the word > Tap OK.
Delete.
Editing Text
You can select, copy or cut the text you’ve entered, then paste it in another text eld within the user interface.
NOTE
Some applications may oer dierent text editing methods.
Selecting text
1. Tap the text eld.
2. Move the cursor to the beginning or end of the desired text by tapping in the location you want the cursor.
3. Tap and hold the text eld.
Select word in the pop up menu.
4. Tap
tOr tap Select all to select all the text in the text eld.
5. Drag your nger to move the text cursor to a letter within the text that you want to select. The selected text is highlighted
in orange.
Cutting and copying the text
1. Select the text to cut or copy it.
18
Page 19

2. Tap and hold the selected text.
Cut or Copy in the menu that opens.
3. Tap
t If you tap
Cut, the selected text is removed from the text eld. In this case, the text is saved to the clipboard, so that you
can paste it into another text eld.
NOTE
Be sure to only cut one section of text at a time, as the clipboard only saves a single text string.
Pasting the text
1. Cut or copy the text to paste.
2. Tap the text eld where you want to paste the text and move the cursor to your desired location.
t You can paste text that you copied from one application into the text eld in any other application.
3. Tap and hold then select
t The text is inserted after the cursor. The text also remains in the clipboard, so you can paste that same text into another
location.
Paste in the pop up menu.
19
Page 20

Getting Started
Google Account
You must sign in to a Google account to use Gmail, Google Calendar, and other Google applications; to download applications
from Android Market; to back up your settings to Google servers; and to take advantage of other Google ser vices on your phone.
Registering a Google account
Gmail, Android Market, and other applications require a valid Google account for use. You will be prompted to login in to
Google the rst time you use these applications.
Sign in to register your Google account.
1. Tap
tIf you don’t have a Google account, tap
2. Enter your Google account
Username and Password > Tap Sign in.
Create instead. See the next section for more details.
Creating a new Google account
1. Tap Create > Enter First name, Last name and Username > Tap Next.
2. Enter a password in to the
tPassword tip: Your password must be a minimum of 8 characters in length.
3. Select
4. Read through Google Terms of Service > Tap
5. Enter the letters shown on the screen > Tap Next > Tap Finish.
Security question and enter the Answer, which will be needed if you forget your password and then enter a
Secondary Email > Create.
Type a password, Confirm password elds, then tap Next.
I agree, Next.
Adding a Google account
1. From the Home screen, tap Apps > Settings.
2. Tap
3. Tap
4. Tap Sign in to register your Google account.
5. Enter your Google account
tThe Venture supports multiple Google accounts.
t If you have the same contact across multiple Google accounts, you can merge duplicates into a single item in the contact list.
Accounts & sync > Add account.
Google > Tap Next.
Username and Password > Tap Sign in > Finish.
Removing a Google account
1. From the Home screen, tap Apps > Settings.
2. Tap
3. Select the account to be deleted > Tap
t All information associated with that account will be deleted. This includes contacts, emails, messages, calendar events,
NOTE
Accounts & sync.
Remove account > Remove account.
etc. At least one Google account is required for normal phone operation.
The phone must be reset to remove a solitary Google account.
Getting to Know the Home Screen
The Home screen is displayed when the device is in idle mode. You can add your favorite apps, shortcuts, folders and widgets to
the Home screen so they’re only a tap away.
The Home screen is actually ve separate screens. Slide your nger the left or right and you’ll discover more space to add icons,
20
Page 21
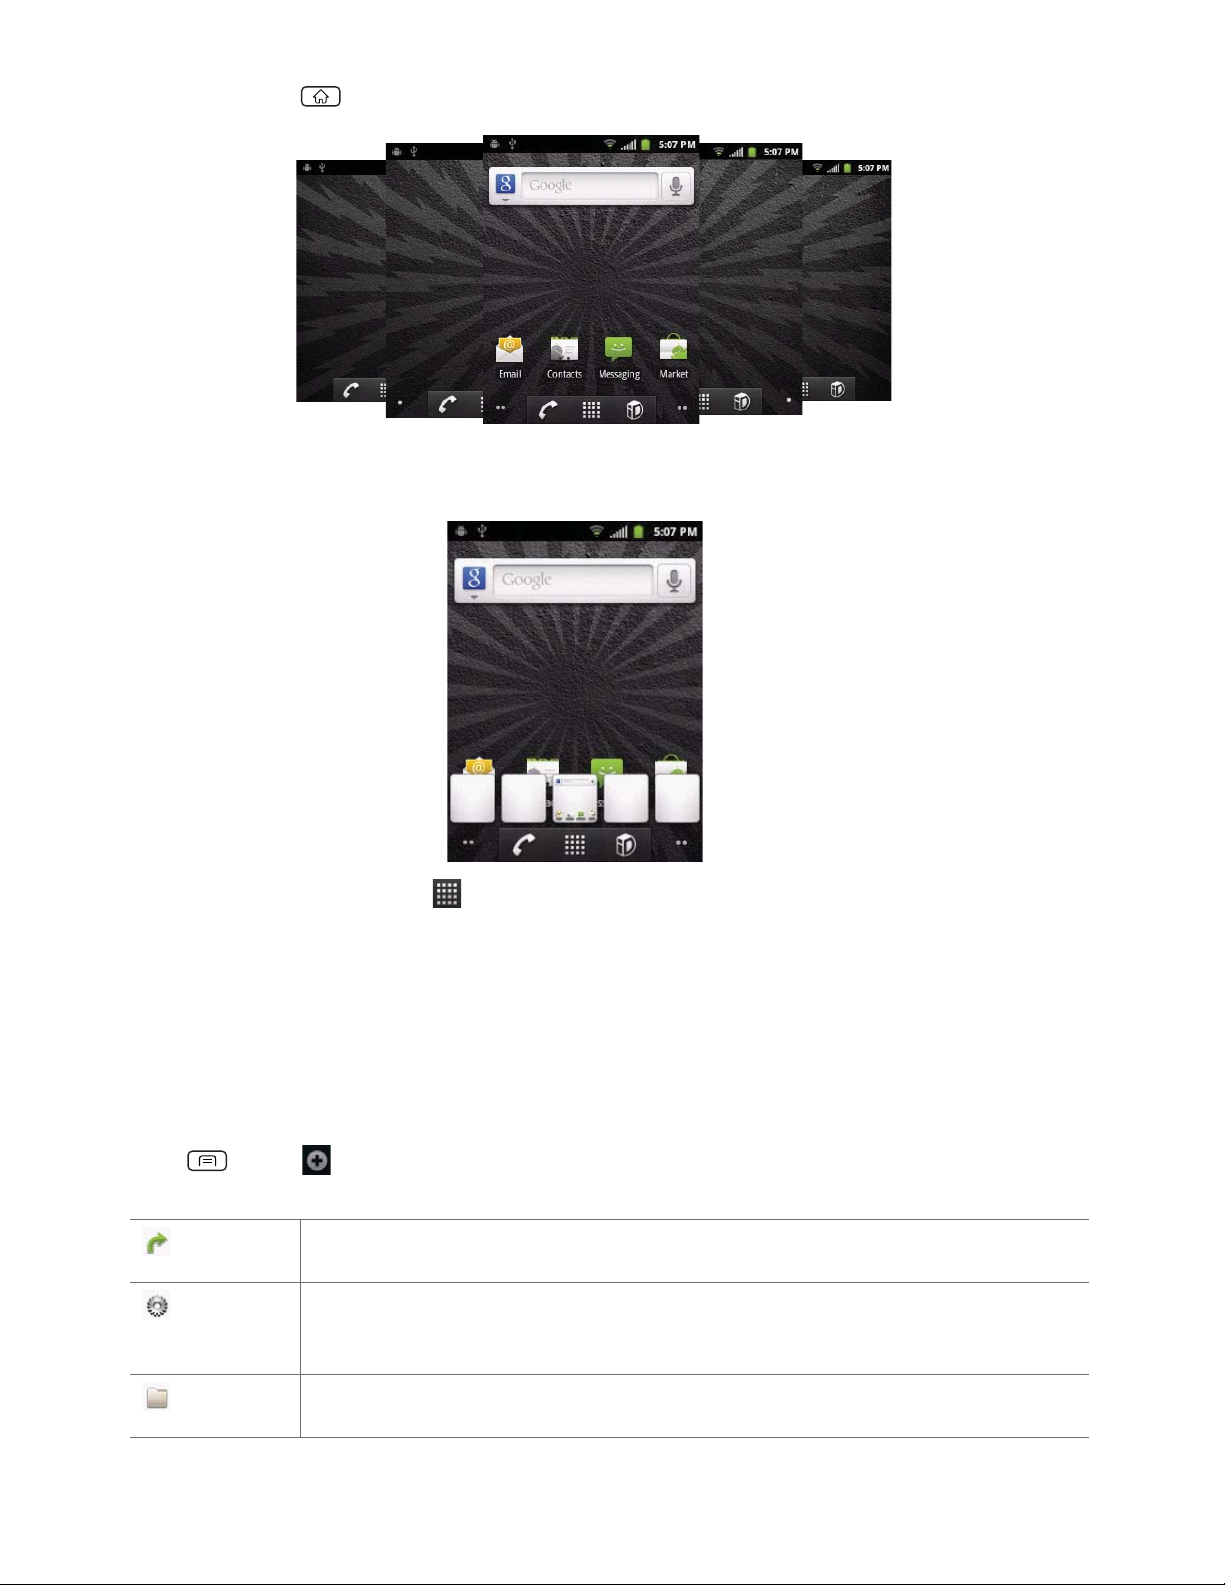
widgets, and more. Press Home to return to the center Home screen.
Previewing the Home screens
1. From any Home screen, tap and hold Apps.
2. When you choose a desired Home screen, the display shifts to the selected Home screen.
Customizing the Home Screen
The Home screens and display wallpaper are extensively customizable.
Home screen customization options
1. Open the Home screen you want to customize.
2. Press
3. On the menu that appears, select from the following choices.
Shortcuts
Widgets
Folders
Menu > Add. Or just tap and hold an empty area on the Home screen.
Shortcuts can cover such functions as Applications, Bookmark, Contact, Direct dial, Direct message,
Directions & Navigation, Email, Gmail label, Music playlist and Settings.
Widgets are mini-applications for functions as Analog clock, Calendar, Digital Clock, Google Search, Home
screen tips, Latitude, Market, Music, News & Weather, Picture frame, Power Control, Trac, Trac Manager,
WorldClock and YouTube.
If you create a new folder, you can drag icons into the folder to organize them. You can also select All
contacts, Bluetooth received, Contacts with phone numbers or Starred contacts.
21
Page 22
Wallpapers
You can choose from your Gallery photos, ID wallpapers, Live wallpapers or Wallpapers to change the display
background.
Moving an item on the Home screen
1. From the Home screen, tap and hold the item you want to move until it vibrates. Don’t lift your nger.
2. Drag the item to a new location on the Home screen.
3. Lift your nger at the location where you want the item.
To add a shortcut to any application from the Launcher, tap
onto a Home screen.
Apps, tap and hold the item, then drag it o the Launcher and
Removing an item from the Home screen
1. From the Home screen, tap and hold an item until it vibrates. Don’t lift your nger. The Dock menu changes into the .
2. Drag the item to the
3. When the item turns red, lift your nger.
.
Changing the Wallpaper of the Home screen
1. From the Home screen, press Menu > Wallpaper. Or just tap and hold any empty area on a Home screen
>
Wallpapers.
2. Tap one of the following:
Gallery
ID wallpapers
Live wallpapers
Wallpapers
Choose a photo from your camera gallery or memory card storage. You can crop the image before
setting it as the wallpaper.
Choose from the available wallpapers that were included in your Mobile ID pack.
Choose from pre-loaded animated wallpapers. Additional live wallpapers can be downloaded from the
Android Market.
Choose from the pre-loaded animated or static wallpapers. Additional wallpapers can be downloaded
from the Android Market.
3. Tap Save or Set wallpaper.
Renaming a folder
1. Tap the folder to open it.
2. Tap and hold the title bar of the folder window.
3. Enter a new name in the dialog box that appears, and then tap
OK.
22
Page 23
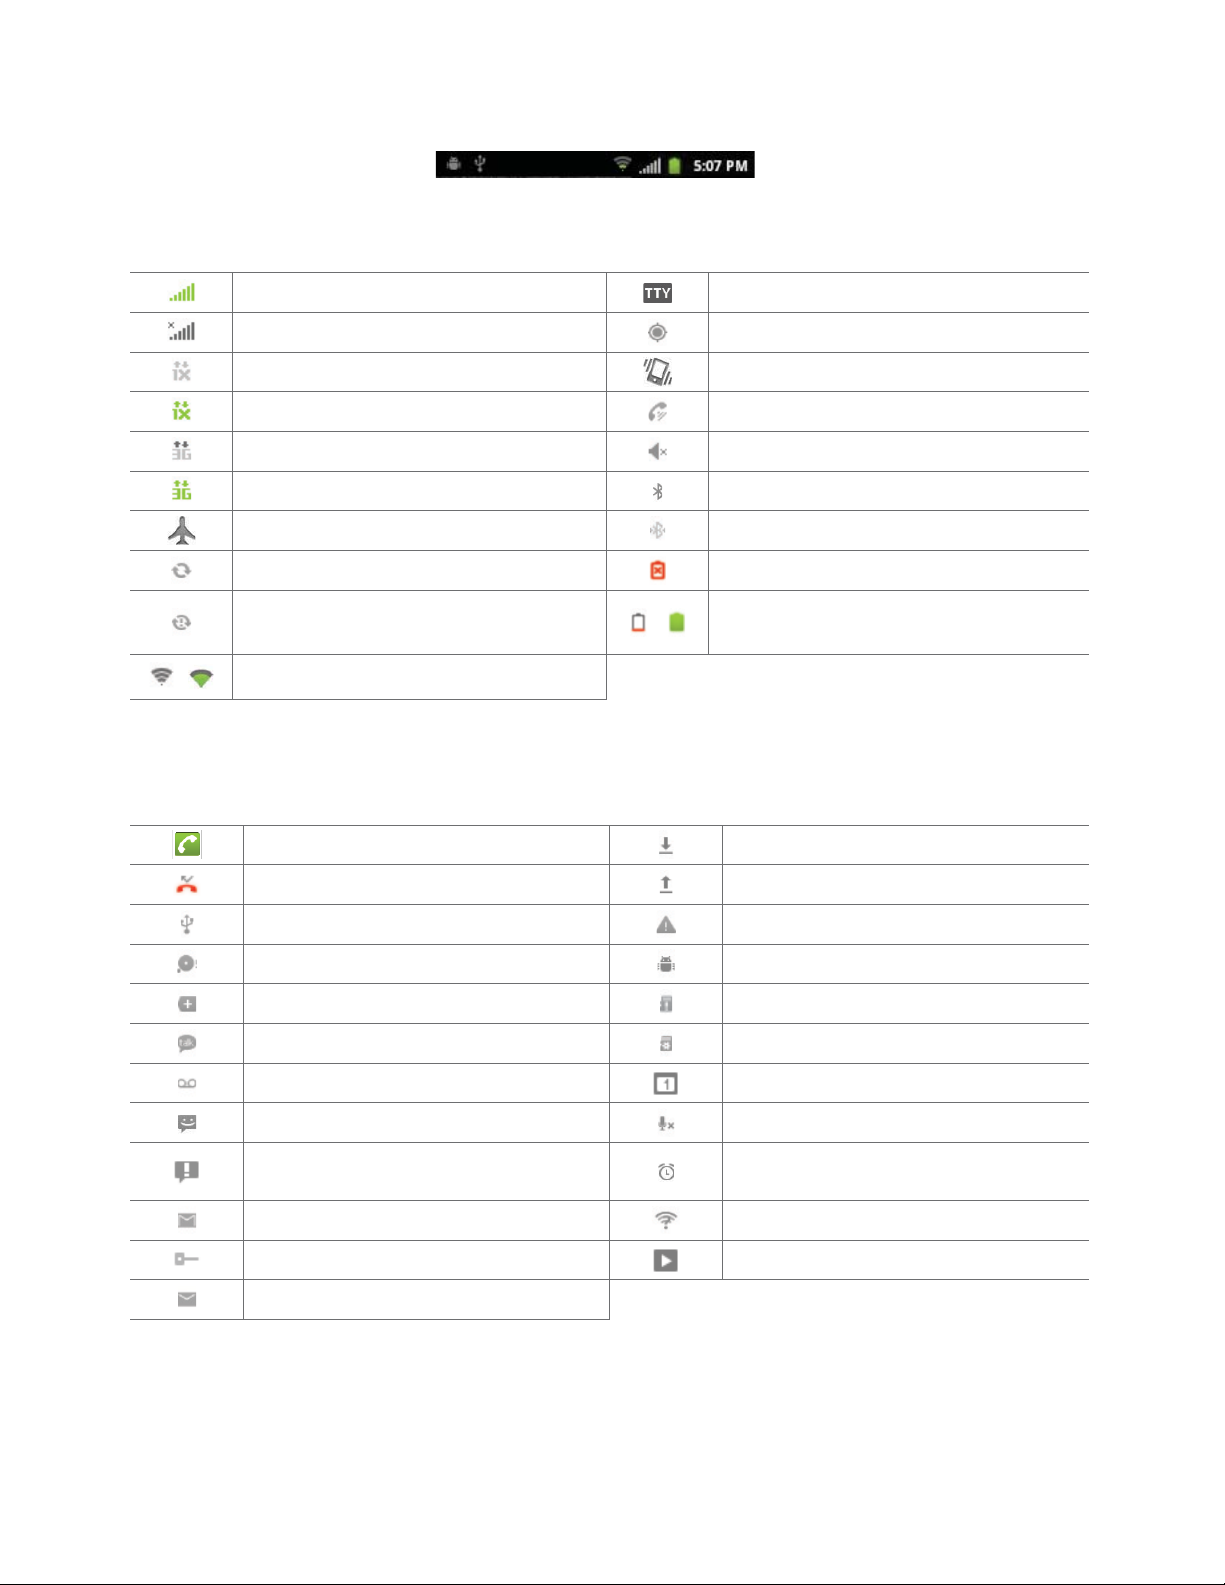
Essential Display Icons
Status icons
You can tell a lot about your phone when you understand the icons in the Status bar. Here’s what each one means:
Signal strength TTY connected
No signal GPS is on and active
1X CDMA connected Vibrate only mode
1X CDMA in use Speakerphone is on
EvDo connected Silent mode-no audio or vibration
EvDo in use Bluetooth is on
Airplane mode Bluetooth device connected
Data synchronizing No battery
Synchronization error
~
Wi-Fi signal strength
~
It indicates that battery is remaining
(Empty to full charge states)
Notification icons
Notication icons in the Status bar alert you to items that may require your attention such as new messages, calendar event
reminders, missed call notications, etc. Here’s what each one means:
Call in progress Downloading data
Missed call Uploading data (animated)
Connected to a computer via USB cable General Warning Icon
Storage card memory is low USB debugging connected
More (not displayed) notications No microSD card installed
New Google Talk instant message MicroSD card is being prepared
New voicemail Upcoming event
New message Microphone is muted
Problem with text or multimedia message
delivery
New Gmail Wi-Fi is on and wireless networks are available
Alarm is set
Connected to or disconnected from VPN Song is playing
New Email
23
Page 24
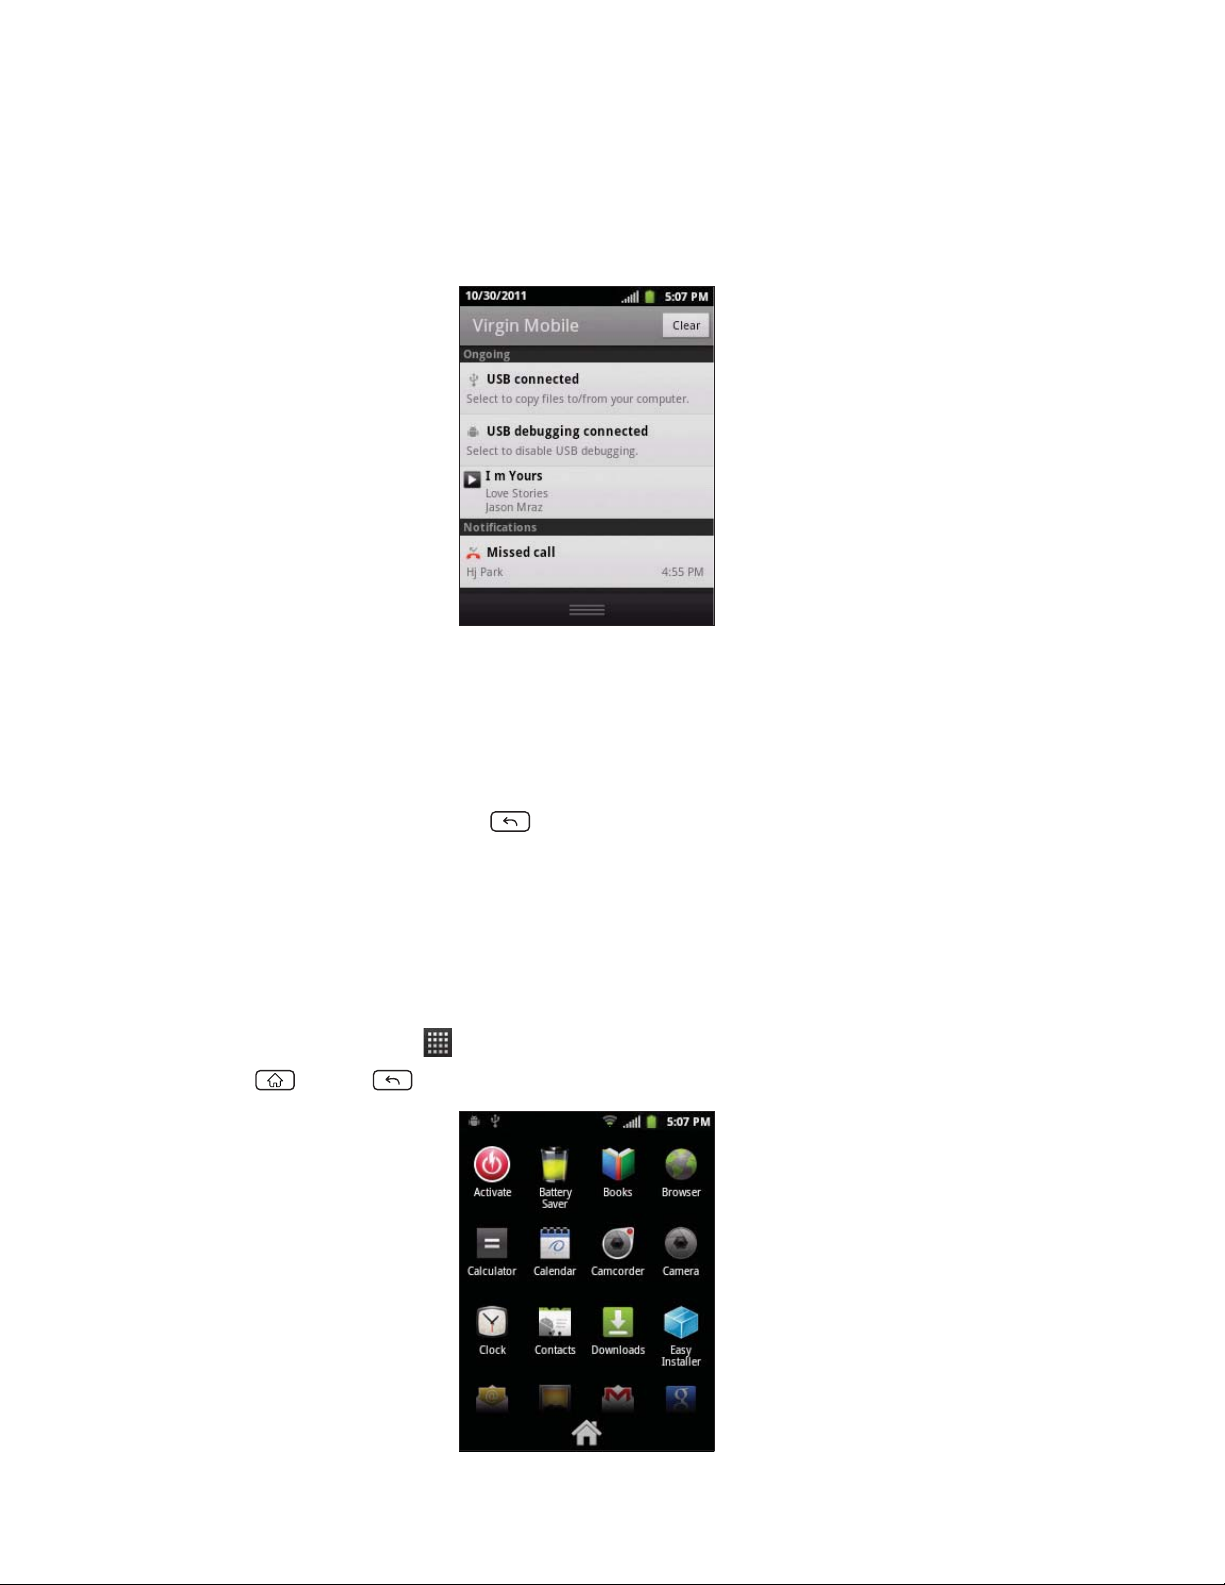
Notifications Panel
When you receive a new notication, an icon will be displayed in your status bar at the top of your screen.
Viewing and responding to Notifications
1. Tap and hold Status bar, and then slide your nger downward to open the Notications panel.
2. If you have multiple notications, you may need to scroll to see them all.
3. Tap a notication to respond to it.
Closing the Notifications panel
Drag the bottom bar of the panel up. Or just press Back.
Opening and Switching Between Applications
The Launcher, which you open from the Home screen, shows the icons of all installed applications on your phone.
Opening and closing the Launcher
1. To open, from the Home screen, tap Apps.
2. To close, press
Home or Back.
24
Page 25
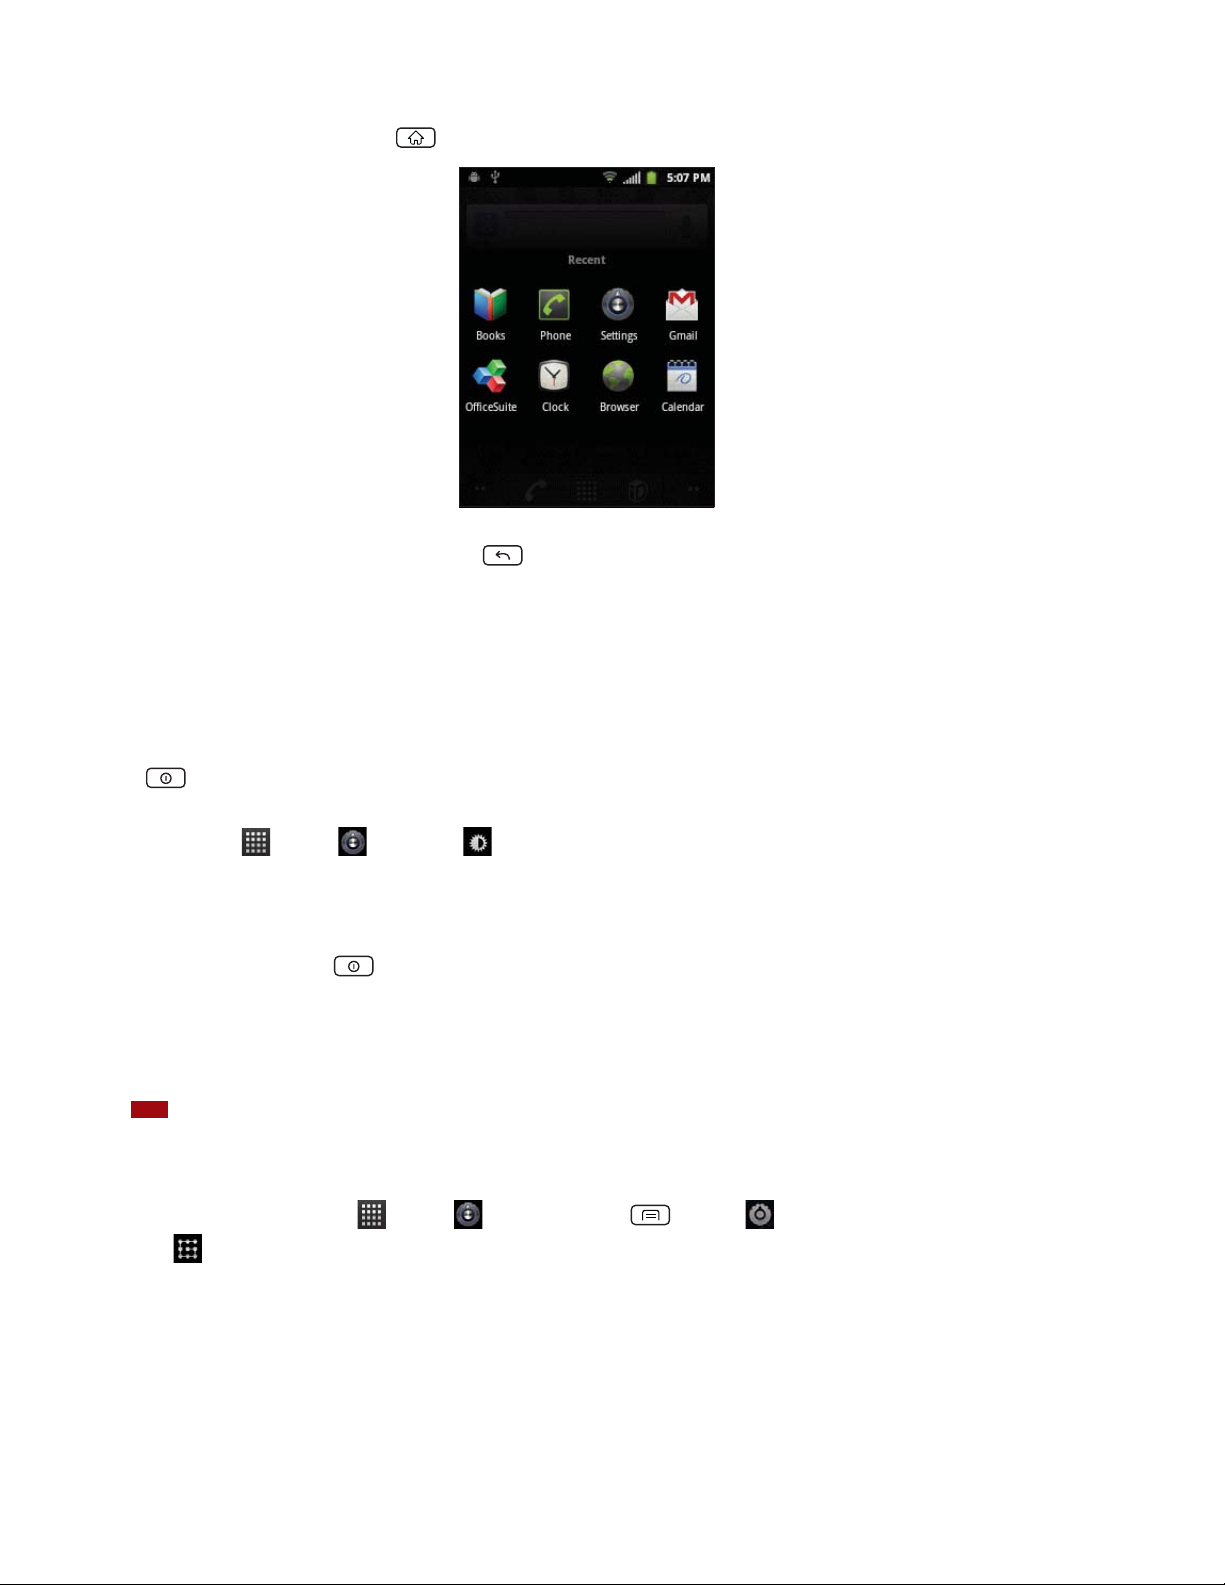
Switching to a recently used application
1. From any screen, press and hold Home.
2. Tap an icon to open the application or press Back to return to your previous screen.
Sleep Mode
Sleep mode saves battery power by turning o your display. You will still receive messages and calls when the display is turned o.
Switching to Sleep mode
Press Power/Lock to switch your phone to Sleep mode.
Your phone automatically turns o the display after a period of inactivity. To customize the screen timeout settings, from the
Home screen, tap
Apps > Settings > Display > Screen timeout.
Waking up from Sleep mode
Your phone automatically wakes up when you have an incoming call.
To wake it up manually, press Power/Lock. You’ll need to unlock the screen as described below.
Unlocking the screen
On the lock screen, tap the unlock icon and slide your nger in the direction of the arrows to unlock the screen. The screen
unlocks automatically when you answer an incoming call.
NOTE
If you have set up a screen unlock pattern, pin, or password, you will be asked to draw the pattern on the screen or enter the PIN or password to
access the phone software.
Activating Secure Screen Lock
1. From the Home screen, tap Apps > Settings. Or press Menu > Settings.
2. Tap
Location & security > Set up screen lock.
t If you have already congured the screen lock, tap
Pattern, PIN, or Password. And then, enter a custom pattern, PIN or password as prompted.
3. Tap
tIf you select ‘
None’, screen unlock security is cancelled.
Change screen lock to change how to lock or unlock your screen.
25
Page 26

Adjusting Volume
Ringtone and Media volume are independent of each other and adjusted separately.
Adjusting the ringer volume
From the Home screen, press Volume up or Volume down on the right side of the phone to adjust the ringer volume to
your desired level.
t While in the lowest ringer volume level, press Volume down once to set your phone to Vibrate mode. To set your
phone to Silent mode, from the Home screen, tap Apps > Settings > Sound > Vibrate > Select Never or
Only when not in Silent mode.
t While in the Silent mode or Vibrate mode, press
Volume up once to switch to ringtone mode.
Adjusting the media volume
While playing music, watching a video or using preloaded or downloaded games or applications, press Volume up or
Volume down on the right panel of the phone to adjust the media volume.
Adjusting the earpiece volume for phone calls
During a phone call, press Volume up or Volume down.
Adjusting the volume via Settings menu
1. From the Home screen, tap Apps > Settings. Or press Menu > Settings.
2. Tap
3. Drag the volume sliders left or right to adjust your phone’s Ringtone, Media, and Alarm. Your phone plays a sample tone
NOTE
4. When you’re done, tap OK.
Sound > Volume.
at the selected volume level while you drag the slider.
If you uncheck the option to use call volume for notications, you can set the notication ringtone volume independently.
Searching Your Phone and the Web
The search key is a powerful part of the Venture’s software and enables you to quickly locate les, contacts, and applications.
You can also search the web using your favorite web search service.
1. Press
2. Begin entering text, or tap a previously used search term.
t As you enter the text, matching items on your phone and suggestions from Google web search will appear on the screen.
3. Tap a suggestion to go directly to that result.
Search. Or tap Apps > Google Search.
26
Page 27
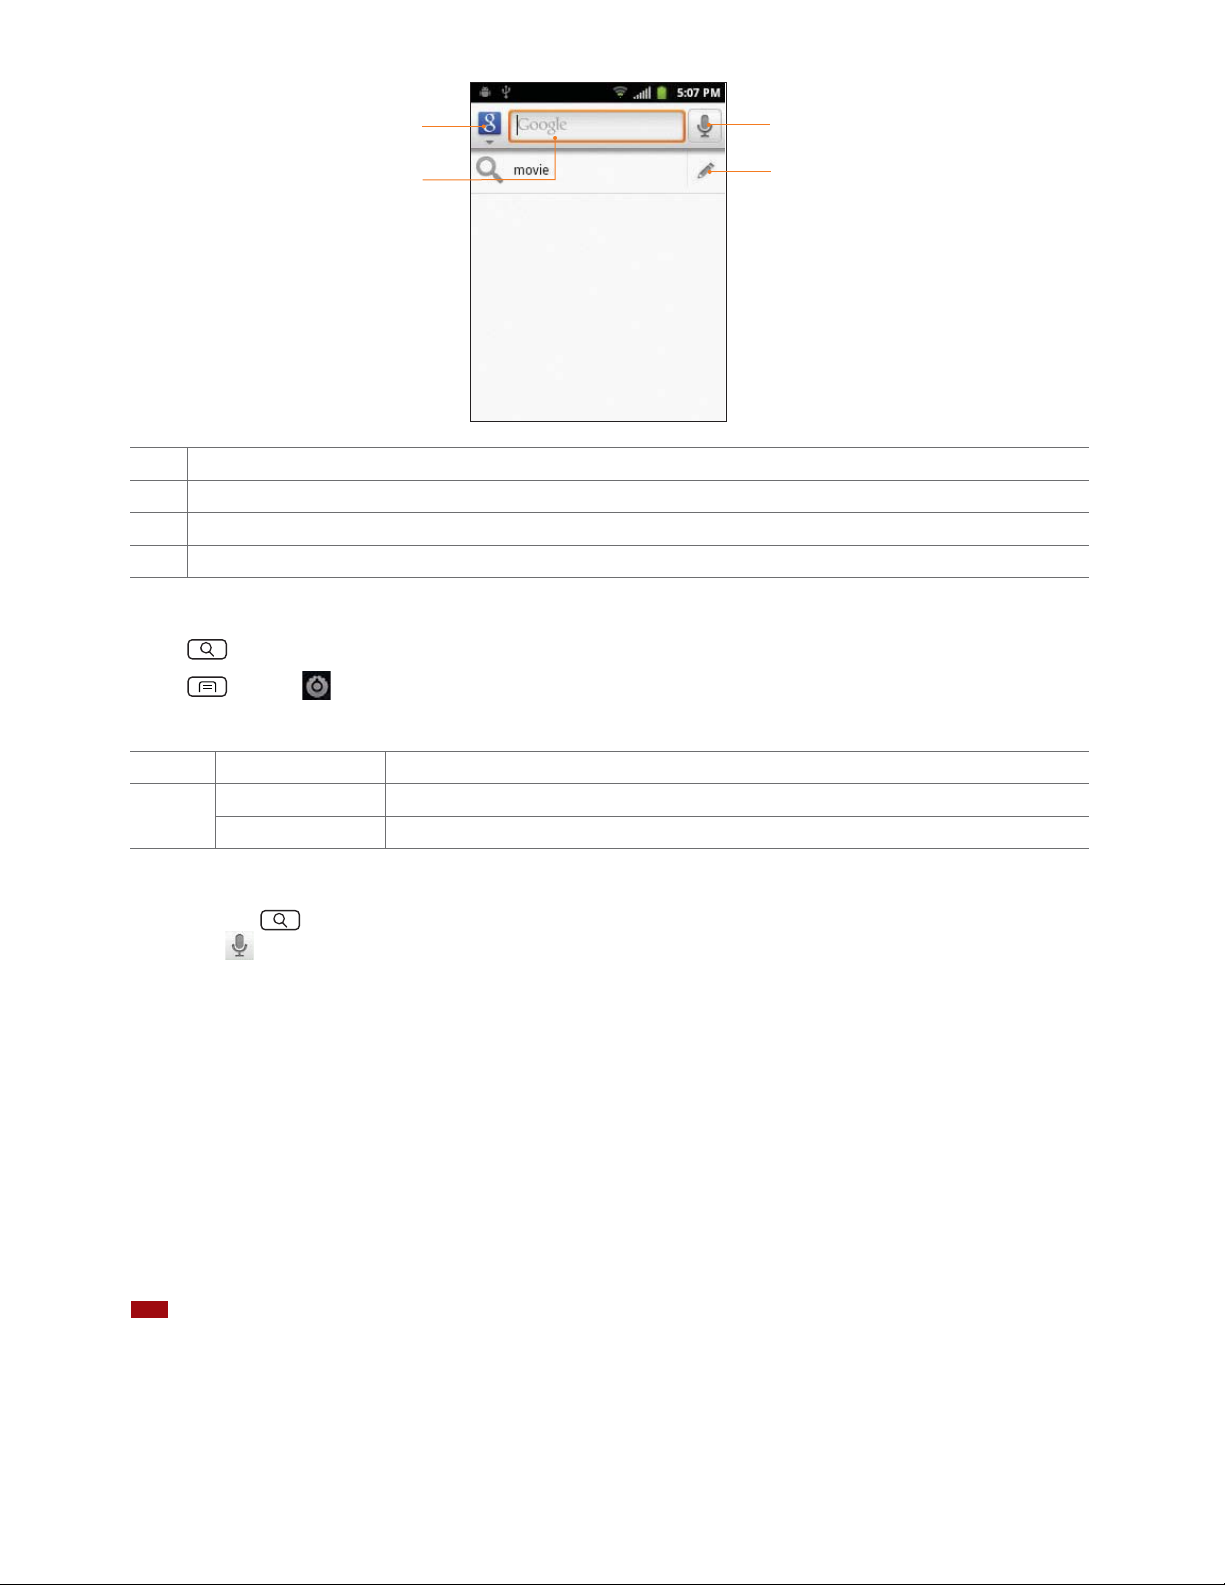
1
3
2
1 Tap to change the target of your search location(All, Web, Apps or Contacts).
2 Type in your search criteria.
3 Tap to search by voice.
4 Tap to enter suggestion automatically.
Setting search options
1. Press Search.
2. Press
3. Tap any of the following:
Menu > Search settings.
4
Web Google search Show web suggestions, Use My Location, Search history, Manage search history.
Phone Searchable items Opens list of searchable locations on your phone.
Clear shortcuts Erases the list of previously chosen search suggestions.
Using Voice search
1. Press and hold Search.
Or tap the
in the Google search box or in the Browser’s URL box.
2. Speak what you want to search for.
3. Searched words with similar pronunciations are listed. If you select a desired search result, the Google result appears with
the corresponding keyword.
t If you speak inaccurately, the desired keyword may not appear.
Connecting Your Phone to a Computer
Copying files to/from the microSD card
You can copy your music, photos, and other les to the microSD card of your phone.
NOTE
This option is available only when a microSD card is inserted into the slot of your phone. While your phone is connected to a computer, USB Mass
storage mode prevents you from using applications that access the memory card.
1. Connect your phone to your computer using the supplied USB cable.
2. Open the Notications panel > Tap
Turn on USB storage.
3. Tap
USB connected.
On your computer, the connected phone is recognized as a removable hard drive.
27
Page 28

4. Navigate to the removable drive and open it.
5. Do one of the following:
tCopy the les from the computer to the microSD card’s root folder.
tCopy the les from the phone’s microSD card to a folder in your computer.
6. After copying the les, unmount the removable drive (that is, your phone) as required by your computer’s operating
system to safely remove your phone.
7. After you have unmounted the removable drive, you can disconnect the phone from the computer.
28
Page 29

Phone Calls
Making Calls
The simplest way to make a call is to dial the number directly. You can also call numbers listed in your call log or Contacts list.
Making a call from the dialer screen
1. From the Home screen, tap Phone. Or tap Apps > Phone.
2. Tap the number you want to dial.
t If you make a mistake, tap
3. Tap
tThe Calling screen is shown and the
tTo change the volume during a call, press
4. To end the call, tap
.
End Call.
to erase a single character. Tap and hold to erase the entire string.
appears in the Status bar while the call is active.
Volume up / Volume down.
Entering a Pause/Wait
Pause and wait options can help you dial additional numbers such as a voicemail password, or phone banking system menus.
1. From the Home screen, tap
2. Tap the number you wish to dial > Press
Or tap and hold
t
Add 2-sec pause : Your phone will wait for 2 seconds then continue to dial the remaining numbers automatically.
t
Add wait : Your phone will wait with the message, ‘Send the following tone?’ until Send is tapped, then continue
dialing the remaining numbers.
* to enter Add 2-sec pause or tap and hold # to enter Add wait on the keypad.
Phone.
Menu > Add 2-sec pause or Add wait.
Making an international call
1. From the Home screen, tap Phone.
2. Tap and hold
0 until the international prex ‘+’ appears.
3. Tap the country code, area code, and phone number.
4. Tap
.
Calling a number from the Call log
Your phone logs all incoming and outgoing calls.
1. From the Home screen, tap
2. Tap
tCalls are listed with the most recent at the top.
tCalls to the same phone number are grouped together.
tScroll up or down to view additional entries in the log.
t If you want to edit a number before calling, tap and hold the desired number, and then tap
at the right of any entry to dial.
Phone > Call log. Or tap Apps > Contacts > Call log.
Making a call from the Contact list
1. From the Home screen, tap Phone > Contacts. Or tap Apps > Contacts.
29
Edit number before call.
Page 30
2. Scroll through the contact list.
t To nd a specic contact, you can search by pressing
the contact you’re searching for. As you type, contacts with matching names appear below the search box. Or you can use
the tab on the right hand side of the screen to scroll through the alphabetical contacts.
3. Tap the contact you want to call.
4. Tap
.
Search or press Menu > Search. Enter the name of
Making an emergency call
Your phone supports international emergency numbers such as 911. Emergency calling is supported anywhere the phone has
a network signal.
Making an emergency call
1. From the Home screen, tap Phone.
2. Tap the emergency number for your location. This is usually
3. Tap
4. To end the emergency call, tap
Making an emergency call while the phone is locked
1. When your phone is no service status, Emergency call button is displayed on the lock screen. Tap Emergency call.
2. Tap the emergency number for your location. This is usually
3. Tap
.
End Call.
.
911, *911 or #911.
911, *911 or #911.
4. To end the emergency call, tap
End Call.
Answering or Rejecting Calls
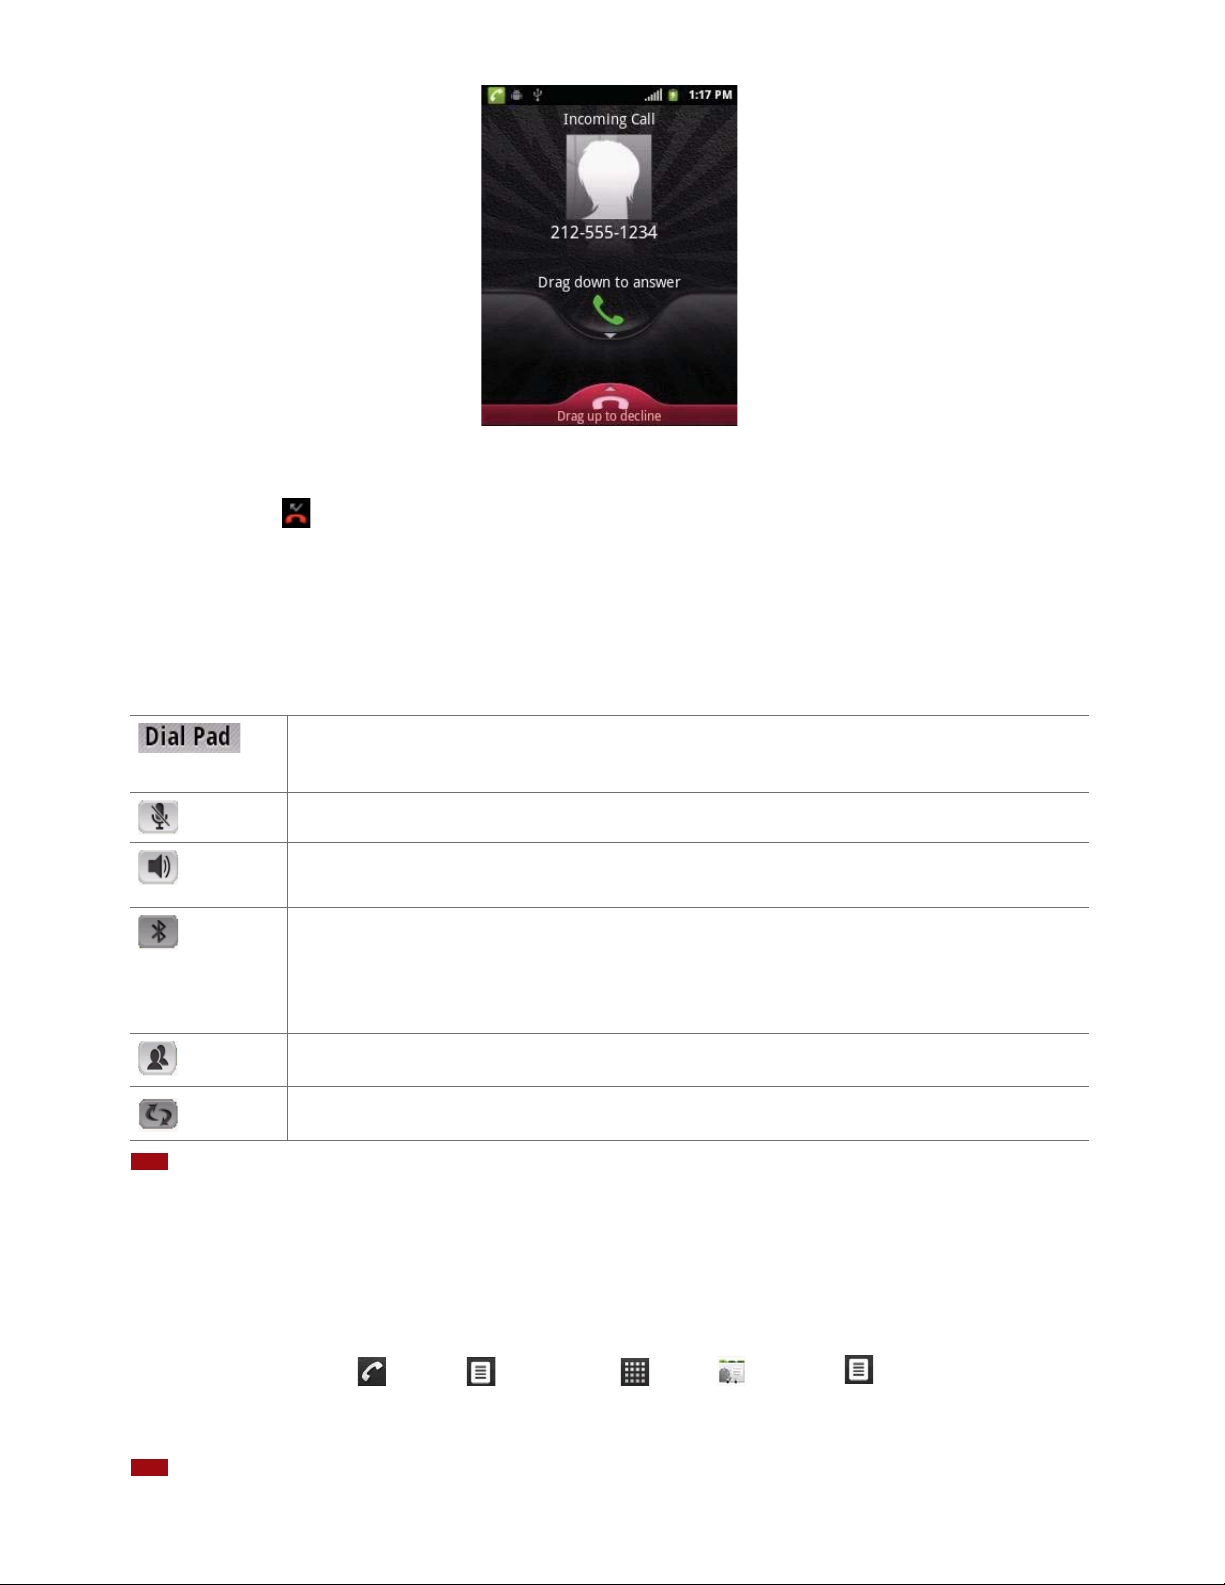
When you receive a phone call, the screen displays the caller’s name, phone number, and caller ID icon (if stored in Contacts).
When you receive a phone call from a phone number not stored in your Contacts, only the default caller ID icon and phone
number are shown.
All incoming calls are recorded in the Call log. If you miss a call, you receive a reminder notication.
Answering or rejecting an incoming call
1. Drag the icon in the direction of the arrows to answer the call. Or drag the icon in the direction of the arrows to
reject the call.
tIf you were already in a call, the rst call is placed on hold during answering the new call.
tTo silence the ringer before answering the call, press either of the volume keys.
NOTE
The caller you reject is sent directly to your voicemail box to leave a message.
30
Page 31
Checking missed calls
tIf you miss a call, is displayed in the Status bar.
t If you open the Notications panel, you will see the number of missed calls. Tap the notication to be taken to the call log
and view detailed information.
Using In-Call Options
When a call is in progress, the following options are available:
Drag Dial Pad in the direction of the arrows to enter additional numbers during your call.
Dial Pad
Mute
Speaker
Bluetooth
Contacts
Swap calls
NOTE
To avoid damaging your hearing, do not hold the phone up to your ear when the speakerphone is on.
You can unmute the microphone by tapping Mute icon again.
You can turn the speakerphone o by tapping the Speaker icon again.
The speaker is turned o automatically when your current call ends.
When a Bluetooth device is paired and connected to your phone, you can conduct all calls using Bluetooth for
hands-free conversation. When using Bluetooth headset during a call, the current call screen has a blue border
and the Ongoing Call icon turns blue in the Status bar.
Tap
Bluetooth icon to toggle in-call audio to and from the Bluetooth accessory.
You can search for contacts during a call.
You can switch between two calls by tapping Swap calls icon.
Using Call Log
The phone stores the numbers of all incoming and outgoing calls in the Call log. The Call log displays the details of the call
including time, date, and duration.
Opening the Call log
1. From the Home screen, tap Phone > Call log. Or tap Apps > Contacts > Call log.
t Calls are listed with the most recent at the top. Calls of the same phone number are grouped together. Scroll to view
earlier entries in the log.
NOTE
You can tap and hold the desired number in the call log list to selec t options such as Call, View contact, Edit number before call, Send text
31
Page 32
message, Add to contacts, Remove from call log.
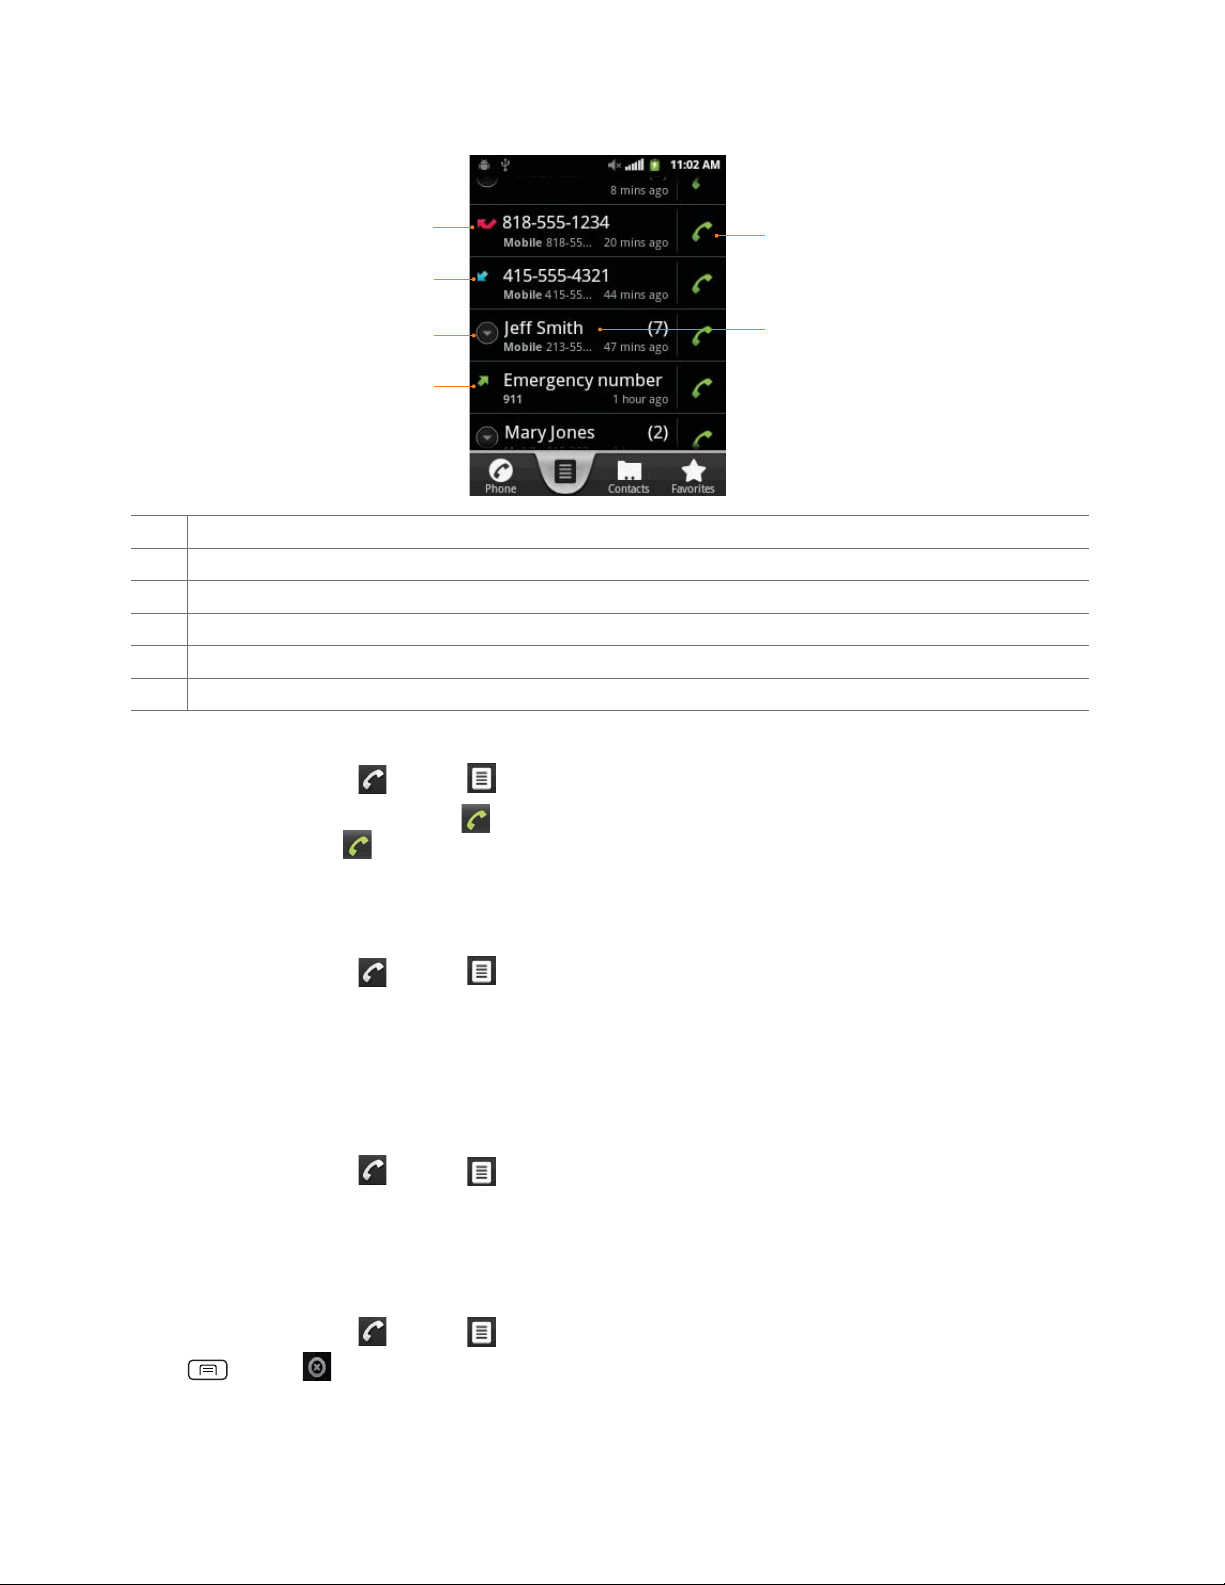
1
2
3
4
1 Missed call.
2 Incoming call.
3 Tap to open a group of calls to the same phone number.
4 Outgoing call.
5 Tap to dial this contact.
6 Tap the number for more call details, or tap and hold the contact for more options.
Calling a number from the Call log
1. From the Home screen, tap Phone > Call log.
5
6
2. If you want to call a number directly, tap at the right of the entry.
Or, select a contact > Tap
.
t If you want to edit a number before calling, tap and hold the desired entry, and then tap
Adding a phone number from your Call log to your the Contacts lists
1. From the Home screen, tap Phone > Call log.
2. Tap and hold the desired entry >
3. In the list of contacts that opens, tap
4. Tap
Done.
Add to contacts.
Create new contact or add to an existing contact.
Sending a text message from the Call log
1. From the Home screen, tap Phone > Call log.
2. Tap and hold the contact >
3. Enter your message and tap
Send text message.
Send.
Clearing the Call log
1. From the Home screen, tap Phone > Call log.
2. Press
Menu > Clear call log > OK.
Edit number before call.
t To remove just one entry from the Call log, tap and hold the entry. In the pop up menu, tap
32
Remove from call log.
Page 33

Listening to Your Voicemail
Voicemail application is displayed only when phone calls are available. When you have a new voicemail message, appears
in the Status bar.
Calling your voicemail
1. From the Home screen, tap Apps > Voicemail.
Calling your voicemail from the Dial Pad
1. From the Home screen, tap Phone.
2. Tap and hold
1. Or, tap 1 and tap .
Calling your voicemail from the Notification panel
1. Open the Notications panel and tap New voicemail.
Using Voice Dialer
You can use the Voice Search application or Voice Dialer application to place a phone call by speaking the name of a contact or a
phone number.
1. From the Home screen, tap
t If you have a Bluetooth headset that supports “voice-recognition” or “voice-dialing,” you may be able to open Voice
Search
by pressing and holding your headset’s main button and dial by voice using your headset. For details, see your
headset manual.
2. The Voice Dialer opens, listens for your spoken instructions, and displays some hints for how to use it.
3. Say “Call” followed by the name of the contact to call.
t Or, follow one of the suggestions for dialing a number or controlling your phone in other ways.
Apps > Voice Dialer.
33
Page 34

Contacts
About Contacts
Contacts give you quick and easy access to the people you want to reach. Contacts from Google accounts are also downloaded
and synced with the Contact list.
You can manage your communications with your contacts via phone, messaging, and email without the need to jump from
one app to another.
Opening Your Contacts
Open Contacts to add, view, and communicate with your friends and acquaintances.
1. From the Home screen, tap
tAll of your contacts are displayed alphabetically in a scrolling list.
t You can use the tab on the right hand side of the screen, or ick your nger up or down to scroll quickly.
Apps > Contacts.
Getting Started
Adding a new contact
1. From the Home screen, tap Apps > Contacts.
2. Press
3. If you have more than one account, select an account, then enter the information for the contact.
tTap
tEnter your contact’s information.
4. Tap
Saving a phone number from the Dial Pad
1. From the Home screen, tap Phone.
2. Enter the number > Press
Menu > New contact.
> Select Take photo or Select photo from Gallery to add a picture.
Done.
Menu > Add to contacts.
Create new contact or an existing contact.
3. Tap
4. Enter the information for the contact > Tap
Storing a contact using Call log
1. From the Home screen, tap Apps > Contacts.
2. Tap
3. Tap
4. If you have more than one account, tap the account where you want to save the contact > Enter the information for the
Call log > Tap the number you want to save > Add to contacts.
Create new contact or select an existing contact.
contact > Tap
Done.
Done.
34
Page 35
Importing / Exporting / Sharing contacts
Importing contacts from your microSD card
If you have contacts stored in vCard format on the microSD card, you can import them into Contacts on your phone.
1. From the Home screen, tap
Press Menu > Import/Export.
2.
Import from SD card.
3. Tap
Apps > Contacts.
4. If you have more than one account on your phone, select the desired account.
5. Tap the option to
6. Tap
OK to conrm. The contacts are imported.
Import one vCard file, Import multiple vCard files or Import all vCard files on the microSD card.
Exporting contacts to your microSD card
1. From the Home screen, tap Apps > Contacts.
2. Press
3. Tap
4. Tap
Menu > Import/Export.
Export to SD card.
OK to conrm.
tThis process creates a le containing all your contacts with a .vcf extension on your microSD card.
Sharing visible contacts
1. From the Home screen, tap Apps > Contacts.
2. Press
3. Tap
Menu > Import/Export.
Share visible contacts > Select Bluetooth, Email, Gmail or Messaging.
Viewing details about a contact
1. From the Home screen, tap Apps > Contacts.
2. Tap the contact whose details you want to view.
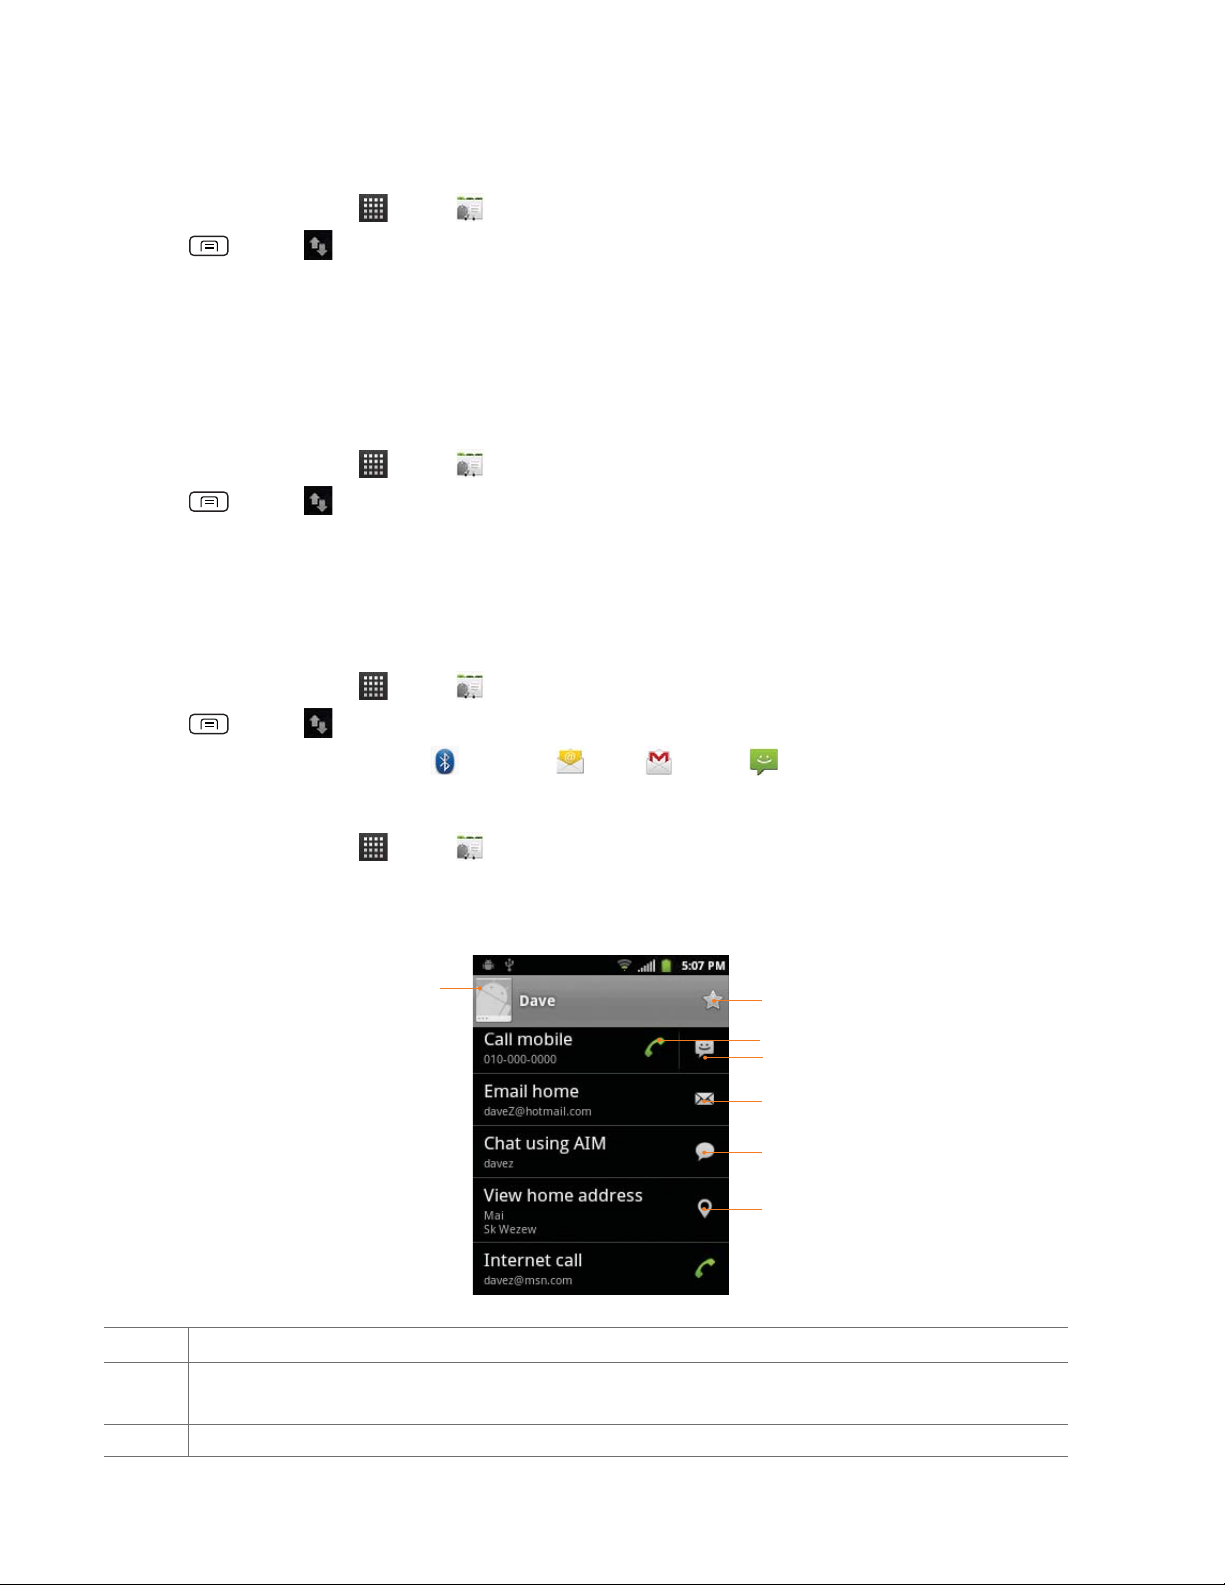
3. Tap the communication icon to start dialing, texting, or emailing the contact.
1
1 Tap to open Quick Contact.
Add to favorites : To remove a contact from your favorites list, tap the gold star again. The star turns gray and the contact
2
is removed from your favorites list.
3 Tap to call.
2
3
4
5
6
7
35
Page 36
4 Tap to compose a text message.
5 Tap to send an email.
6 Tap to chat.
7 Tap to view the address on Maps.
Search for a contact
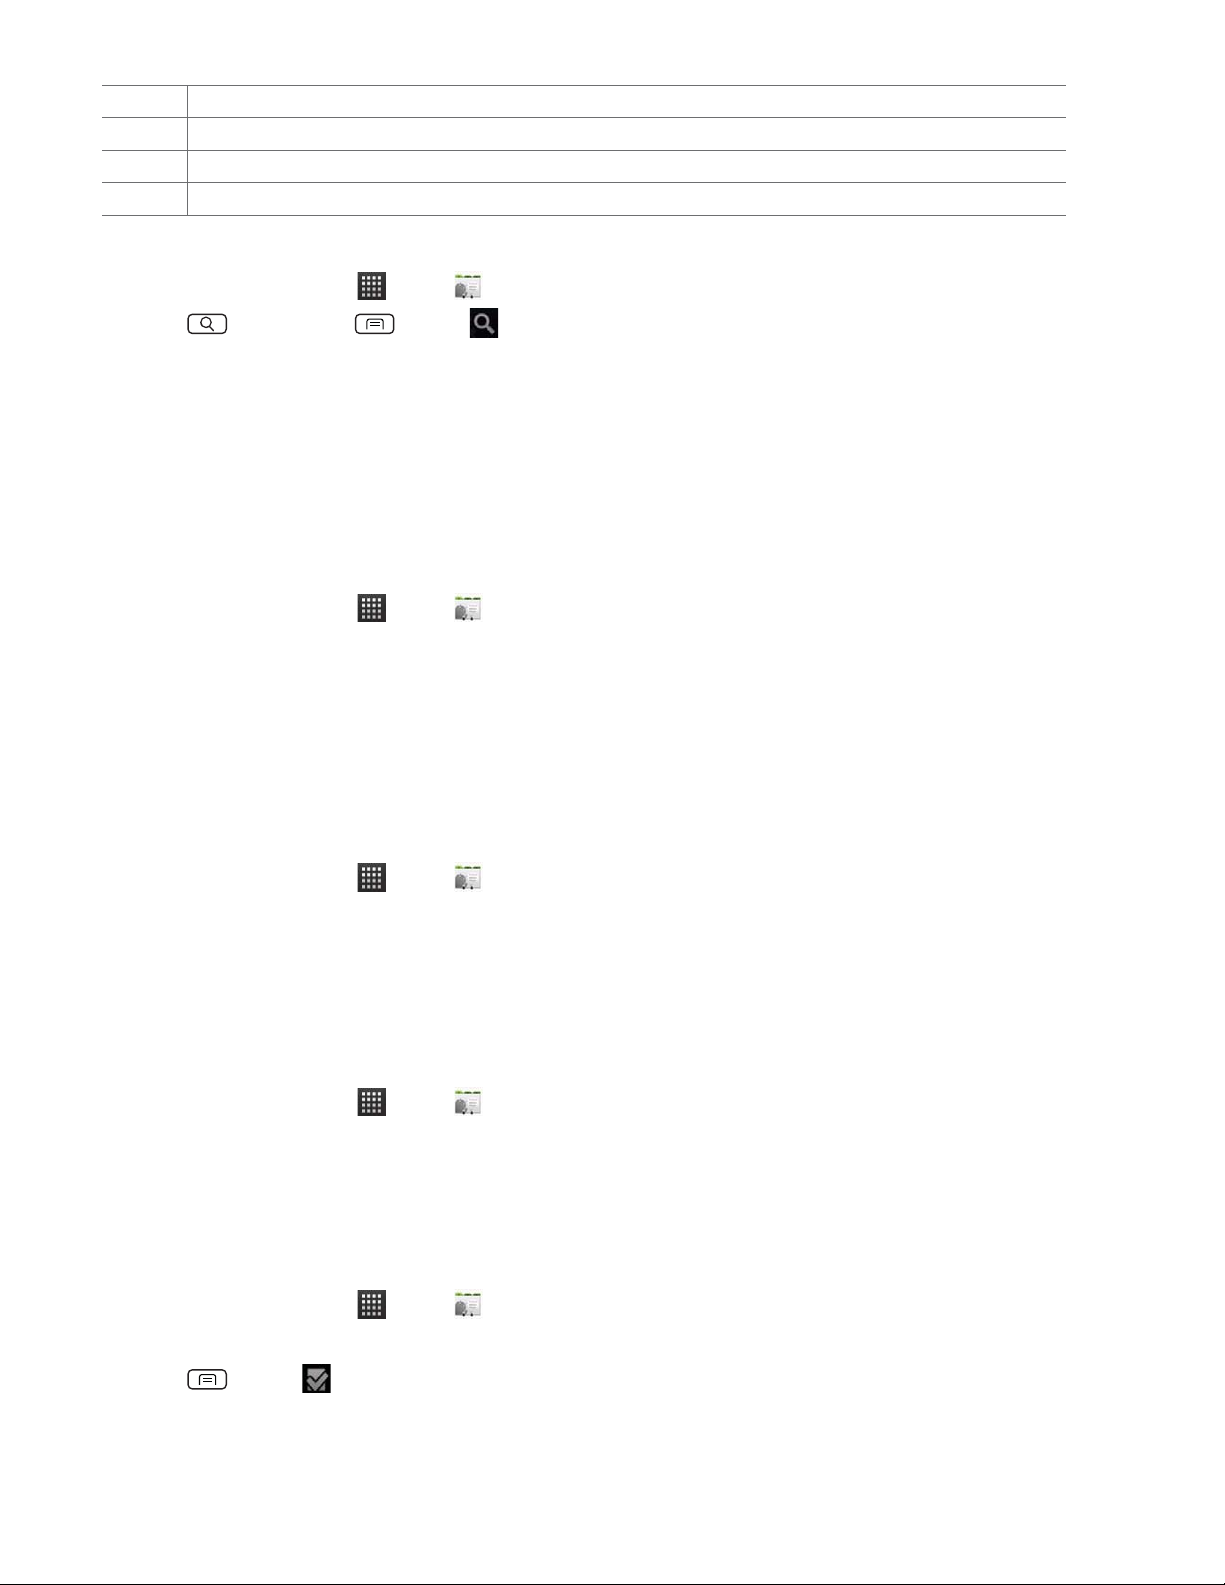
1. From the Home screen, tap Apps > Contacts.
2. Press
3. Start entering the contact’s name.
As you type, contacts with matching names appear below the search box.
4. Tap the matching contact in the list to open.
Search or press Menu > Search.
Editing/Deleting Contacts
Editing contact details
1. From the Home screen, tap Apps > Contacts.
2. Tap and hold the contact you want to edit > Tap
3. Edit the contact information.
4. Tap
Done.
Setting a contact’s default phone number/email
Setting a contact’s default phone number
The default phone number is used when you initiate a call or text message by tapping and holding a contact.
1. From the Home screen, tap
Apps > Contacts.
Edit contact.
2. Find the desired contact > Tap and hold the phone number to designate it as the default phone number.
3. Tap
Make default number.
t The default phone number is indicated with a checkmark.
Setting a contact’s default email
The default email is used when you send an email from the list by tapping and holding a contact.
1. From the Home screen, tap
2. Find the desired contact > Tap and hold the email address to designate it as the default email address.
3. Tap
Make default email.
t The default email is indicated with a checkmark.
Apps > Contacts.
Setting a ringtone for a contact
1. From the Home screen, tap Apps > Contacts.
2. Tap the desired contact.
3. Press
t Tap a ringtone from the list to play when the contact calls. A sample of the ringtone is played.
4. Tap
Menu > Options > Ringtone.
OK.
36
Page 37

Adding a contact to your favorites
1. From the Home screen, tap Apps > Contacts.
2. Tap and hold the desired contact >
Add to favorites.
tTo remove a contact from your favorites list, tap and hold the contact >
Remove from favorites.
Joining contacts
1. From the Home screen, tap Apps > Contacts.
2. Tap the contact you want to save. The others will merge into this le. This is the contact you will see in contacts after
joining.
3. Press
4. Tap the contact you want to join with the rst contact. The information from the second contact is added to the rst
contact, and the second contact is hidden.
Menu > Edit contact > Press Menu > Join.
Separating contacts
1. From the Home screen, tap Apps > Contacts.
2. Tap the contact you want to separate.
3. Press
4. The contact information is split into separate contacts.
Menu > Edit contact > Press Menu > Separate > OK.
Deleting a contact
1. From the Home screen, tap Apps > Contacts.
2. Tap and hold contact you want to delete >
Or tap the contact you want to delete > Press
Delete contact.
Menu > Delete contact.
3. Tap
OK.
Communicating
Sending text message
1. From the Home screen, tap Apps > Contacts.
2. Tap and hold the contact you want to send >
tThe Primary Phone Number is used, or you are prompted to choose a phone number.
Making calls
1. From the Home screen, tap Apps > Contacts.
2. Tap and hold the contact to call >
tThe Primary Phone Number is used, or you are prompted to choose a phone number.
Call contact.
Map of contacts
1. From the Home screen, tap Apps > Contacts.
2. Tap the desired contact > Tap the
place icon of the address.
Text contact.
3. The mapping application will open.
37
Page 38
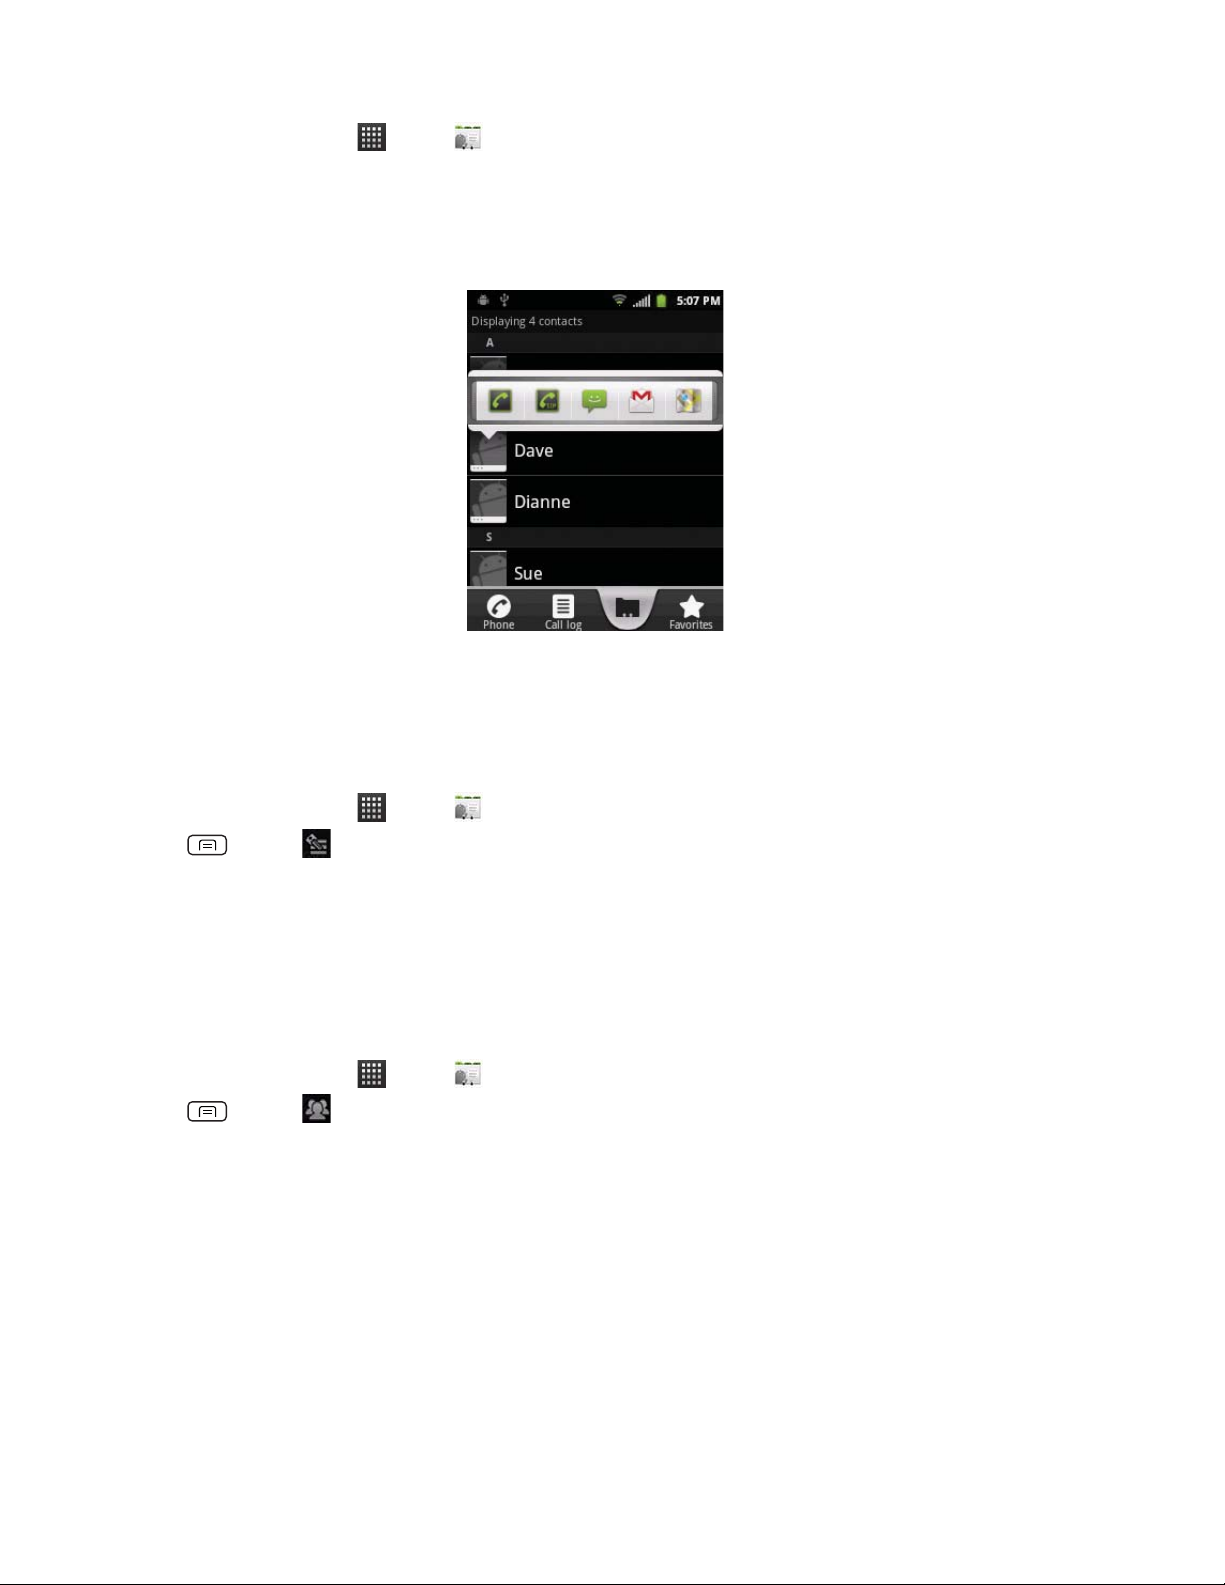
Connecting by using Quick Contact
1. From the Home screen, tap Apps > Contacts.
2. Tap the icon or photo next to your desired contact > Tap the desired communication method.
t Only the icons relevant to your contact’s data are displayed.
t If there are too many icons to t on the screen, drag to the left or right to select an icon.
Account Setting
Working with Google accounts
1. From the Home screen, tap Apps > Contacts.
2.
Press Menu > Accounts.
t After registering your Google account, your online Google contacts are synchronized to your phone. Changes made
online or on the phone are automatically synchronized and updated in both locations. This address book will be used
throughout the user interface.
t If you register two or more accounts, you can merge address books from the multiple accounts into one address book.
Contact List Display Options
1. From the Home screen, tap Apps > Contacts.
2. Press
tOnly contacts with phones: Only contacts with phone numbers are shown in the contacts list.
tSort list by: Select
tView contact names as: Select
t Choose contacts to display: Tap an account to open its list of groups. Check or uncheck the groups you want to display in
the contact list.
Menu > Display options.
First name or Last name.
First name first or Last name first.
3. Tap
Done.
38
Page 39
Messaging
About Messaging
Use Messaging to send text messages (SMS) and multimedia messages (MMS) to other mobile phones and email addresses.
1. From the Home screen, tap
On the Messaging screen, your sent and received messages are neatly grouped into conversations, by contact names or phone
number. You can:
t Scroll up or down the list of conversations by icking your nger on the screen.
tTap a contact name or number to view the conversation history.
tTap the photo or to open additional menu options.
Apps > Messaging.
Sending Messages
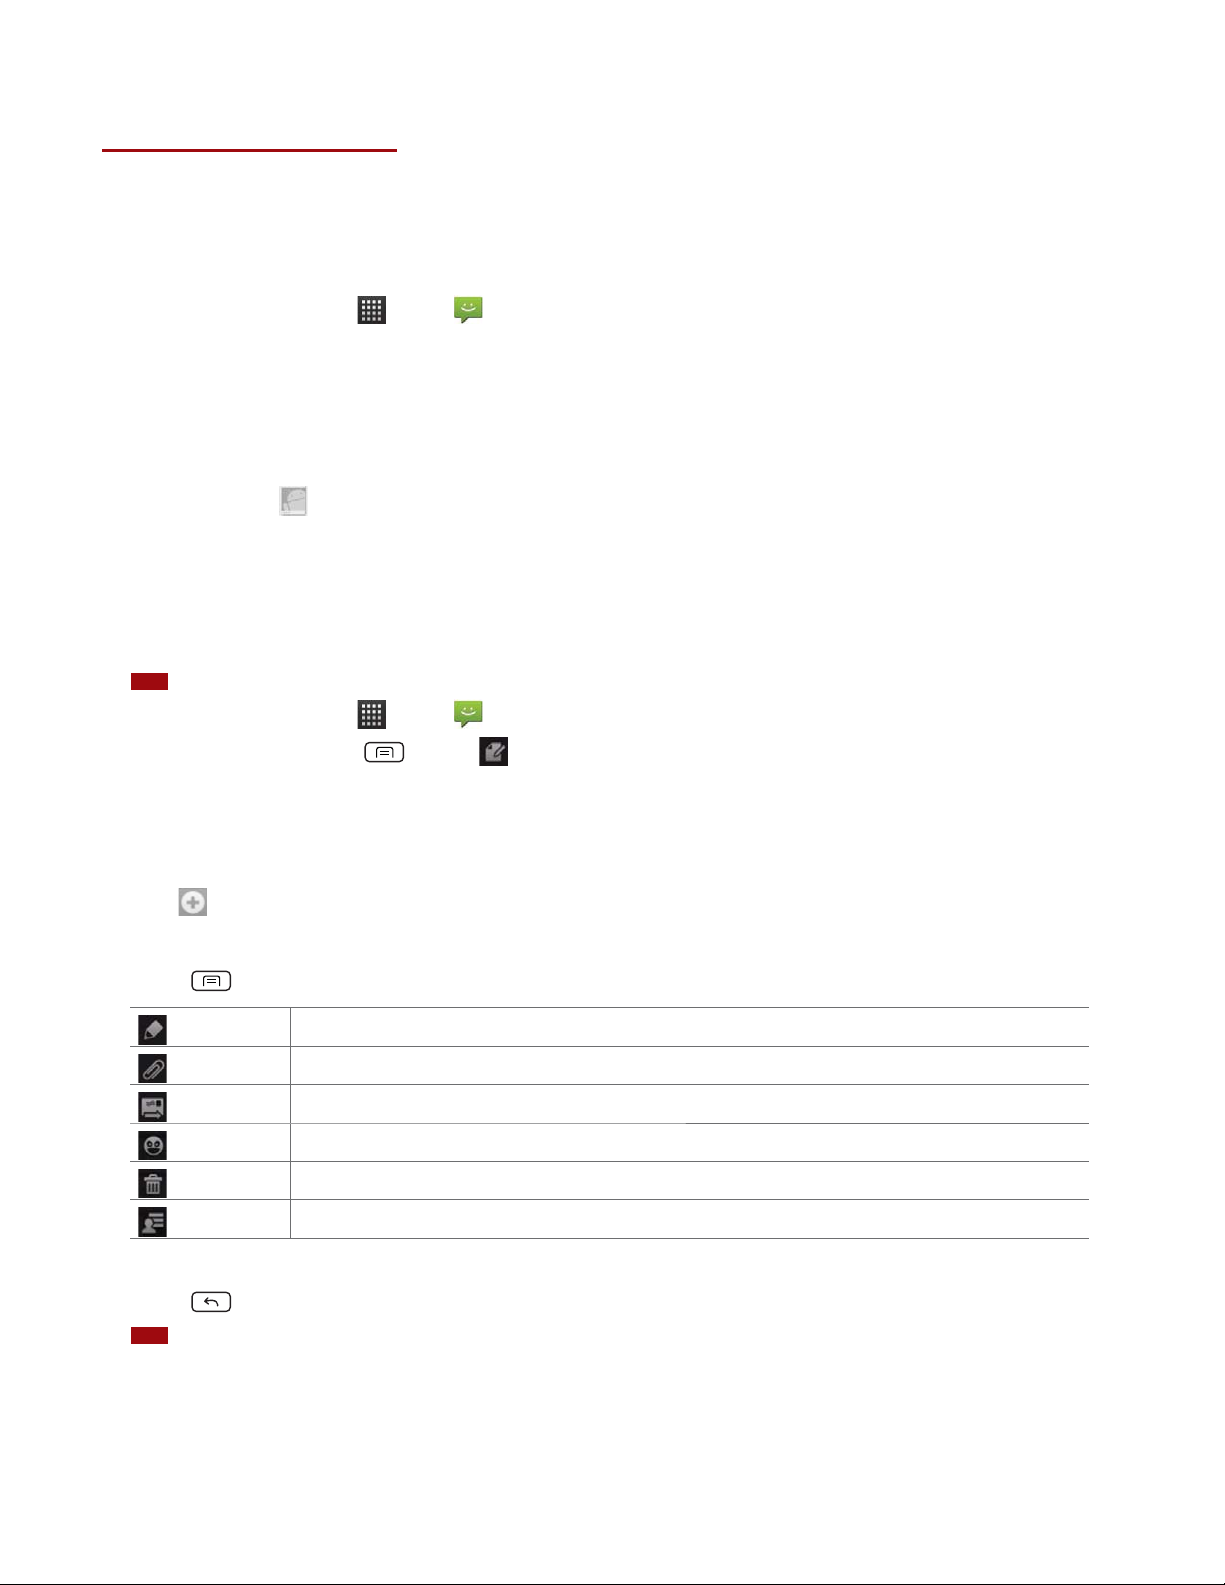
Sending a Text Message
NOTE
Depending on your billing plan, if you exceed the single text message character limit, you will be billed for multiple messages.
1. From the Home screen, tap Apps > Messaging.
New message. Or press Menu > Compose.
2. Tap
3. Enter the phone number in the
t Enter the rst few letters of a contact name or phone number. Matching contacts are displayed. Continue typing or tap a
name or phone number from the search results.
To eld. Fill in one or more recipients. You can:
tTap
4. Tap
tPress
5. Tap Send.
tPress Back to save the message as a draft.
NOTE
t$PNQPTFBNFTTBHFPWFSDIBSBDUFST
t"EETVCKFDU
t"UUBDIBOJUFN
> Select message recipients from your contact list > Add.
Type to compose > Enter your message.
Menu to see more options.
Add subject
Attach
Send
Insert smiley
Discard
All threads
Your text message automatically becomes a multimedia message on below condition:
Add subject.
Attach Media Files or a Slideshow within the message.
Send the message.
Insert a smiley in the message.
Delete the message in progress.
Go back to text messaging inbox.
39
Page 40
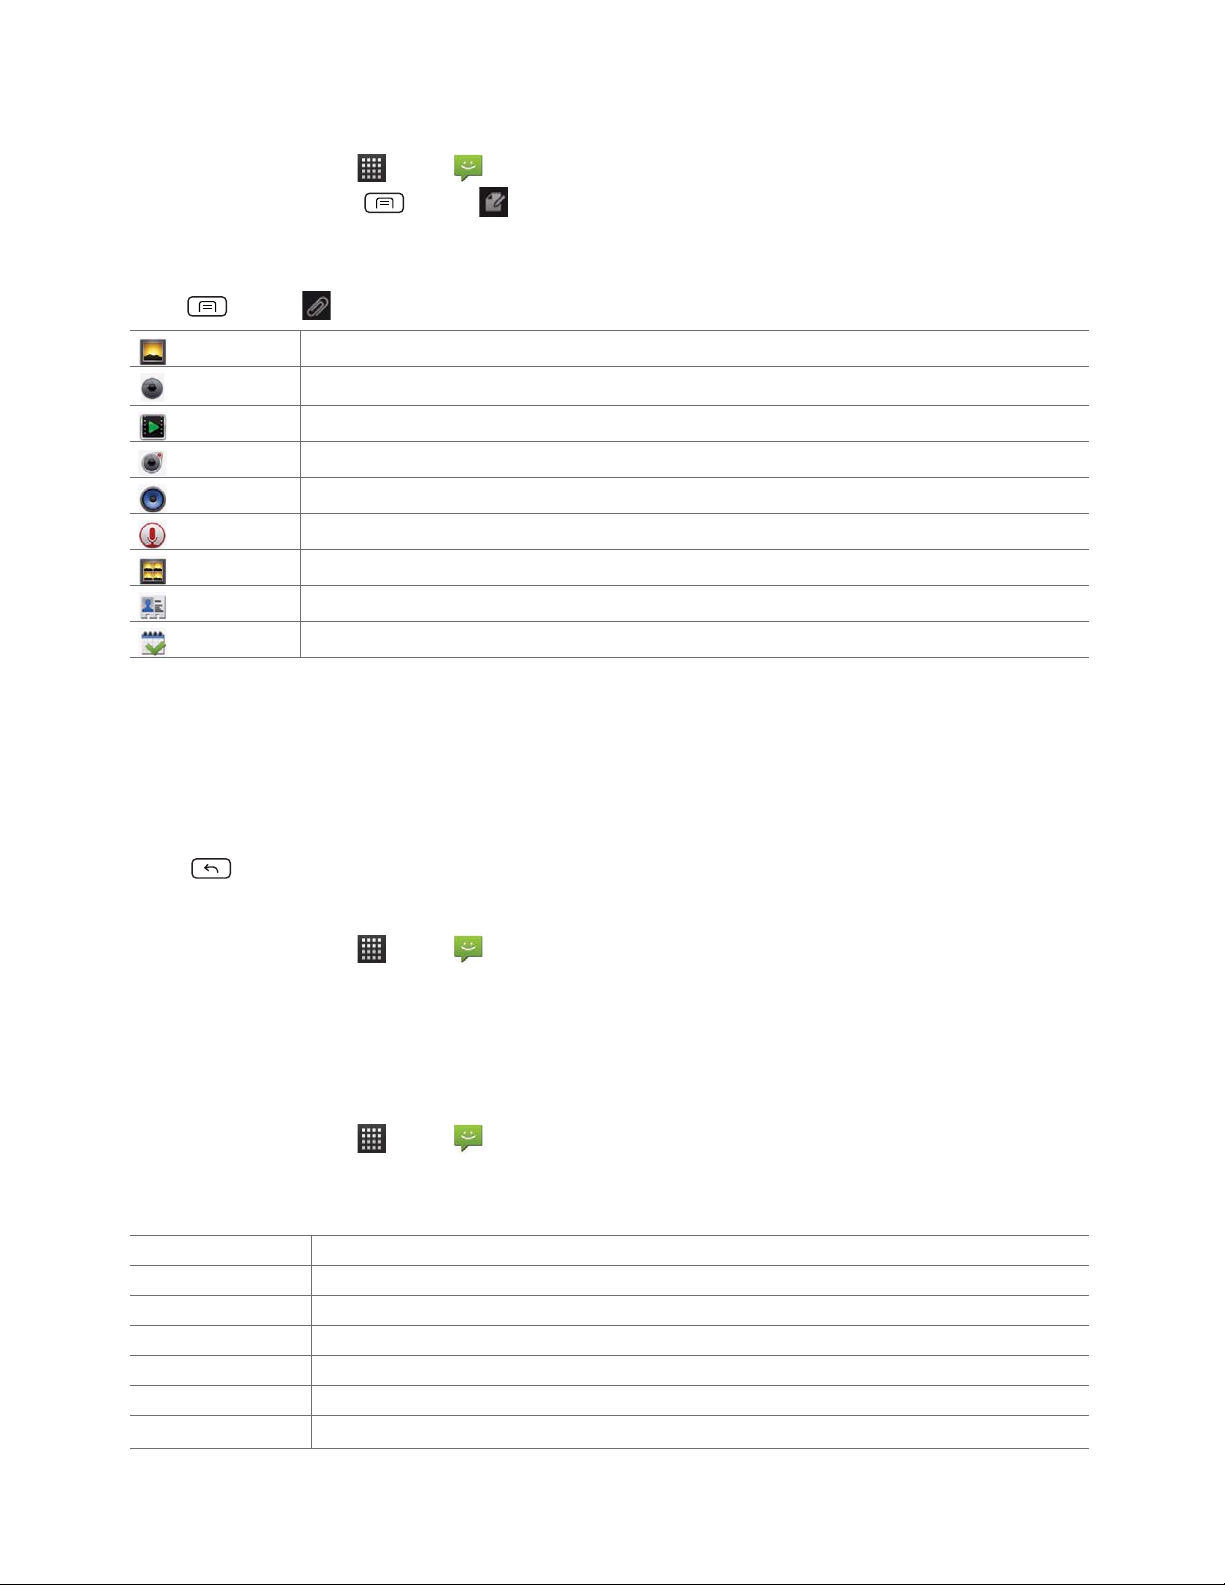
Sending a multimedia message (MMS)
To compose a multimedia message, start by creating a new text message. Then simply add an attachment.
1. From the Home screen, tap
2. Tap
New message. Or press Menu > Compose.
3. Enter the phone number in the
Type to compose > Enter your message.
4. Tap
5. Press
Pictures
Capture picture
Videos
Capture video
Audio
Record audio
Slideshow
vCard
vCalendar
Menu > Attach > Choose the type of attachment.
Select a photo.
Capture a new photo.
Select a video.
Record a new video.
Select an audio le.
Record a new audio le.
Create a slideshow from up to 10 of your photos.
Select a contact card.
Select a calendar event.
Apps > Messaging.
To eld. Or select recipients from the contact list.
6. From the message body, tap:
t
View: To view the attached item.
t
Replace: To change attached les.
t
Remove: To remove attached les.
Send MMS.
7. Tap
tPress
Back to save it as a draft.
Resuming a draft message
1. From the Home screen, tap Apps > Messaging.
2. Tap the message indicated by “
3. When you nish editing, tap
Draft” to resume editing.
Send.
Reading Messages
1. From the Home screen, tap Apps > Messaging.
2. Tap a message thread.
3. Tap and hold an individual message to see more options.
Lock/Unlock message To lock/unlock a message.
Call *** To call the message sender. (Only on incoming messages)
Add *** to Contacts To save the phone number or email address to Contacts. (Only on incoming messages)
Forward To forward a message. Enter a recipient, edit the content of the message as needed > Tap
Copy message text To copy text from a message.
View message details To view details about a message.
Delete message To delete a message.
Send.
40
Page 41
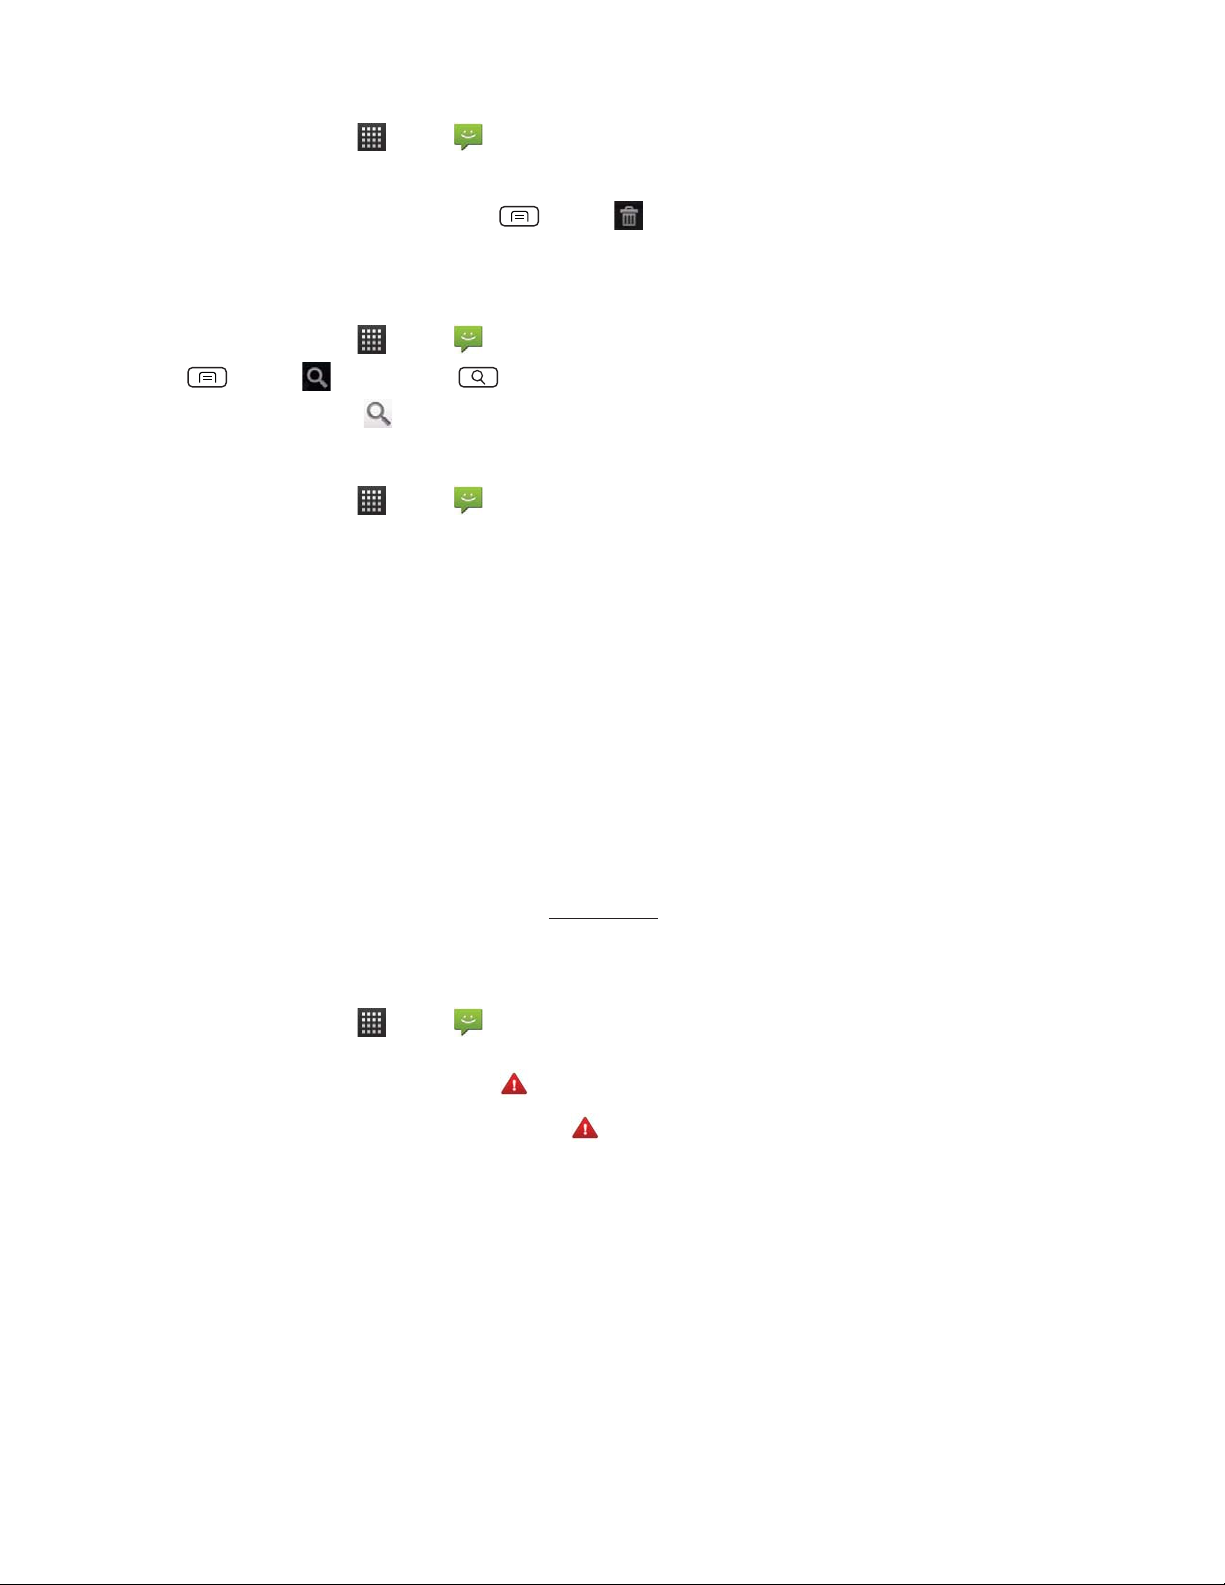
Deleting a message thread
1. From the Home screen, tap Apps > Messaging.
2. Tap and hold the message thread >
tIf you want delete all message threads, press
Delete.
3. Tap
Delete thread.
Menu > Delete threads.
Searching messages
1. From the Home screen, tap Apps > Messaging.
Menu > Search or press Search.
2. Press
3. Enter the search term > Tap
.
Replying to a message
1. From the Home screen, tap Apps > Messaging.
2. Tap the received message > Tap
Send.
3. Tap
Type to compose > Enter your message.
Receiving Emergency Alerts Messages
Emergency Alerts service allows you to receive automatic alerts in times of crisis. (e.g., earthquake, hurricanes, etc.)
Wireless Emergency Alerts (WEA), also known as CMAS, is a part of a national alerting system called IPAWS (Integrated Public
Alert and Warning System) that enables emergency management ocials to rapidly disseminate the warnings and safety
information via text alerts to wireless phones based on the phones’ geographic location, The Federal Emergency Management
Agency or FEMA is responsible for receiving the alerting information and forwarding the alerts to participating wireless carriers
such as Sprint. Such alerts may come from the President of the United States; the National Weather Service, state or county
public safety ocials. This system is integrated into the same national alerting services that serve television and radio today.
For more information regarding WEA/CMAS please go to: FEMA website.
http://www.fema.gov/emergency/ipaws/projects.shtm#6
Receiving Emergency Alerts Messages
1. From the Home screen, tap Apps > Messaging.
2. Tap Emergency alerts message you want to view.
Emergency alert messages are indicated with
t If Emergency alert arrives on your phone during a call,
Emergency alert icon ashes. If non-Presidential, Emergency alert icon is static icon.
tONLY the Presidential Emergency Alert icon is displayed under the Time/Date on the unlock/lock screen.
t If you are on a Emergency alert message screen in the Messaging application, the following options are removed or
disabled :
t If you have power cycled your phone and a Presidential Emergency Alert has NOT been viewed, the Presidential
Emergency Alert icon will continue to ash when the device is powered on again.
Reply, Forward, and Call.
Emergency alert icon.
is displayed in the Status bar. If Presidential Emergency Alert,
41
Page 42
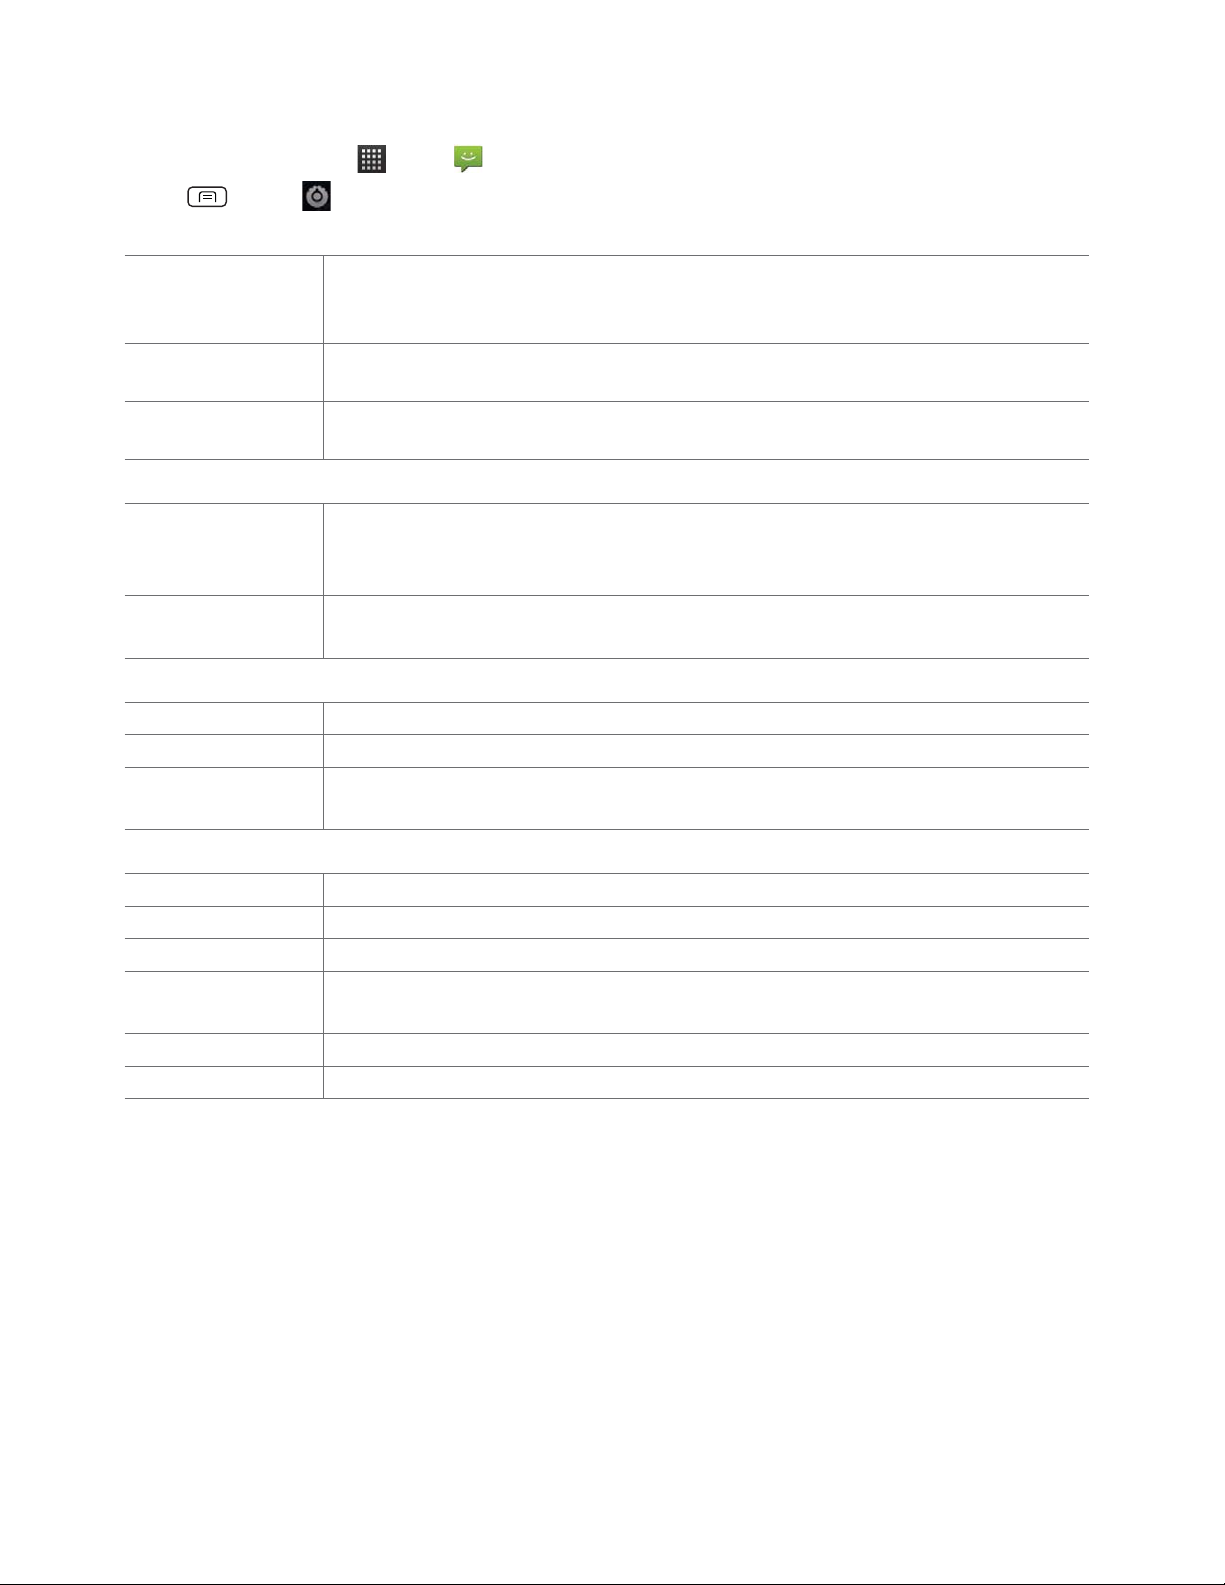
Changing Messaging Settings
1. From the Home screen, tap Apps > Messaging.
2. Press
Menu > Settings.
Storage settings
Delete old messages Check to delete older messages in a thread when messaging memory or thread limits are reached.
Uncheck to keep all messages. You may need to manually delete messages if the messaging memory
limit is reached.
Text message limit Tap to set the number of messages to save per message thread. When the limit is reached, older text
messages are deleted if ‘Delete old messages’ is checked.
Multimedia message
limit
Tap to set the number of multimedia messages to save per message thread. When the limit is reached,
older multimedia messages are deleted if ‘Delete old messages’ is checked.
Multimedia message (MMS) settings
Auto-retrieve Uncheck to download only the heading of multimedia messages. You will need to tap the MMS message
heading and manually download each MMS message. You may want to use this feature when roaming
or when connected to a slow data network.
Number of Retry
Attempts
Set number of retry attempts of download if multimedia message download fails.
Notication settings
Notications Check to be notied in Status bar whenever you receive a new message.
Select ringtone Select a ringtone to sound when you receive new message notications.
Vibrate Set the phone to vibrate every time you receive a new message notication, only when silent mode, or
never.
Receive Emergency Alerts
Emergency Alerts This setting can not be changed.
Presidential Presidential Emergency Alerts are always displayed and this setting can not be changed.
Amber Set to receive Amber Emergency Alerts.
Imminent Threat Extreme
Imminent Threat - Severe Set to receive Severe Emergency Alerts.
Emergency Alert Test Set to receive Emergency Alert Test message.
Set to receive Extreme Emergency Alerts.
42
Page 43

Google
Gmail
Opening your Inbox and Reading your Gmail
The inbox is your default Gmail view. All your received emails are delivered to your inbox.
1. From the Home screen, tap
2. Tap the email you want to read.
tTap
t If the sender is a friend in Google Talk, you can see your friend’s online status.
tTap
tTap
tTap
t Press Menu to see more options( Change labels, Mark read/Mark unread, Mark important/Not
Replying to or forwarding an email message
1. From the Home screen, tap Apps > Gmail.
2. When reading a message,
tTo reply to the sender, tap
tTo reply to all message recipients, tap
tTo forward the message, tap
to star the email.
Archive to archive the message.
Delete to delete the message from your inbox.
or to see the previous or next message in the list.
important
, Go to inbox, Mute, More(Add star/Remove star, Report spam, Settings, Help, Select text)).
Apps > Gmail.
.
> .
> .
Sending a new email
1. From the Home screen, tap Apps > Gmail.
2. From any message list, press
3. Enter a name or address in the
comma.
4. Enter a subject in the
5. Type the message text in the
tTo attach an image le, press
6. Tap
tTo save the message as a draft, Tap
or press Menu > Send.
Subject eld.
Menu > Compose.
To eld. To send the email to several recipients, separate each email address with a
Compose Mail eld.
Menu > Attach > Select the picture you want to attach.
or press Menu > Save draft.
Working with Multiple Email Messages
You can archive, delete or label groups of email messages at the same time.
1. From the Home screen, tap
2. From any message list,
Apps > Gmail.
check the box next to the email messages you want to work with.
43
Page 44
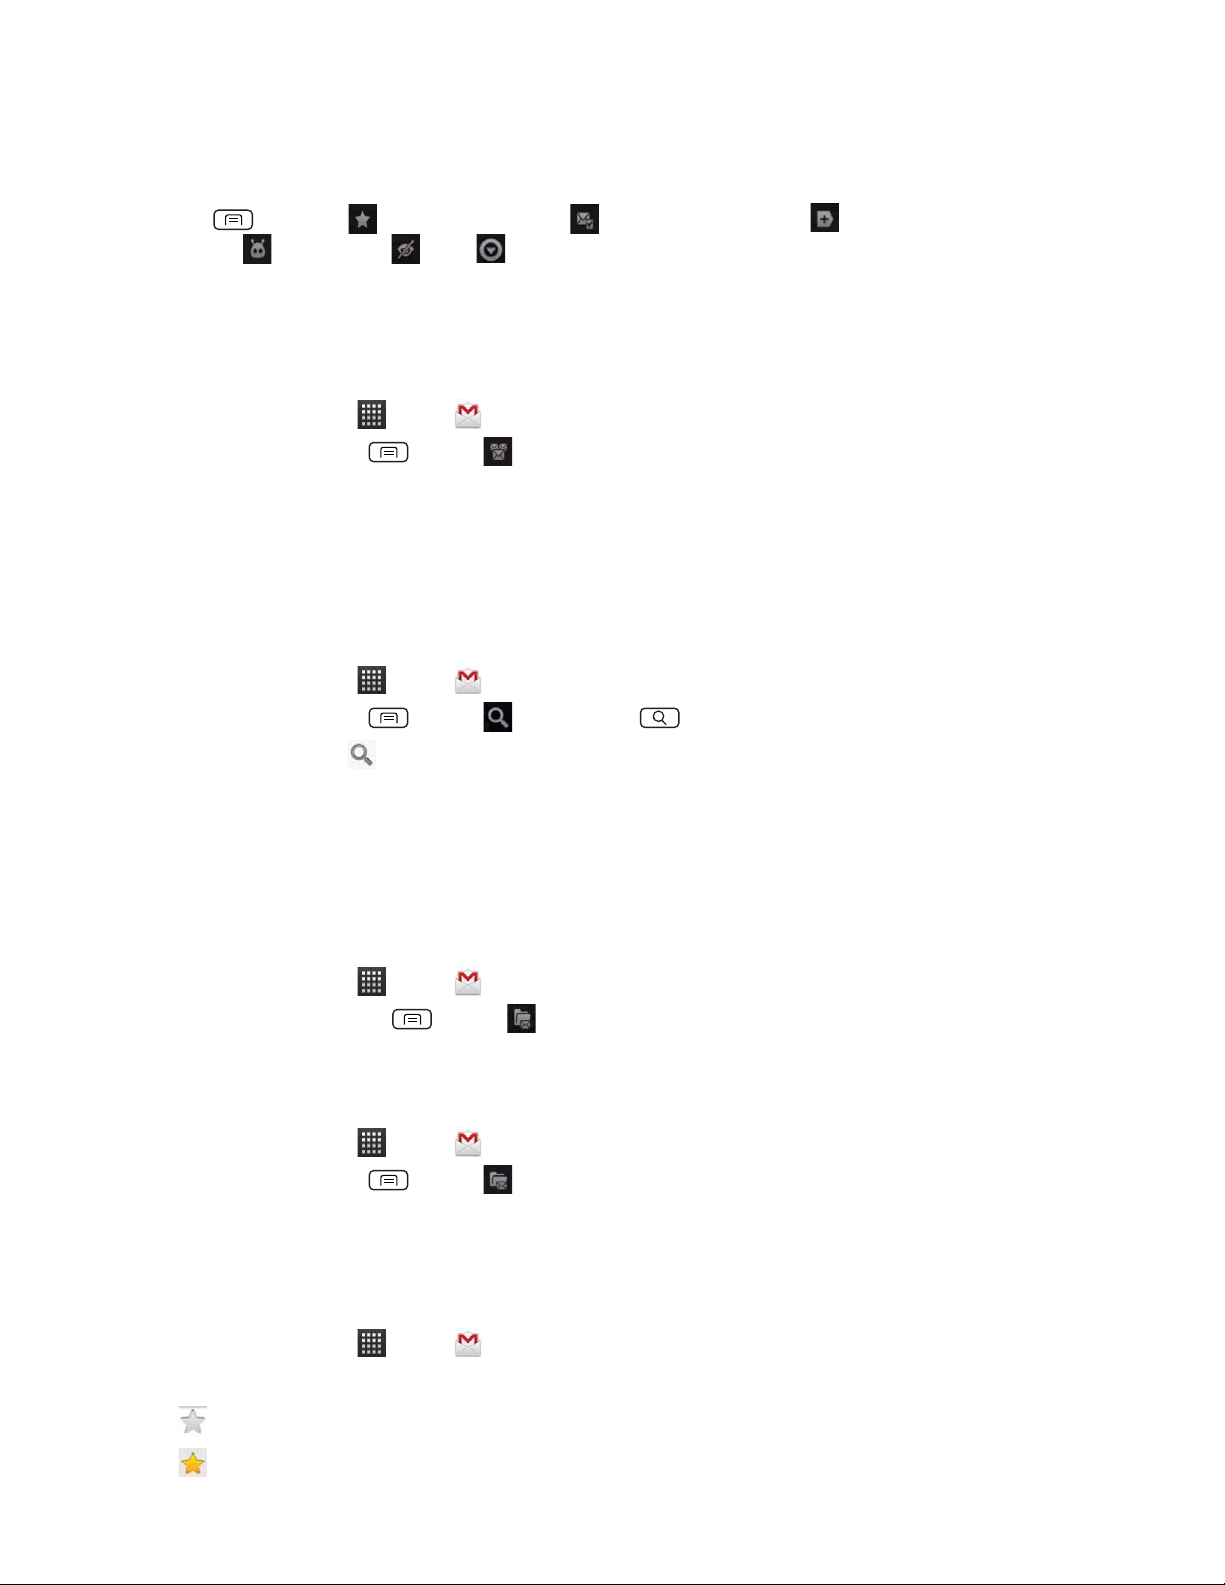
t Tap Archive to move messages out of your inbox without deleting. Archived emails are assigned the All Mail label.
tTap
Delete to delete selected messages.
tTap
Labels > Select the labels that you want to assign > Tap OK.
t Or press
important, Report spam, Mute, More(Deselect all, Help, About)
Menu > To Add star/Remove star, Mark read/Mark unread, Mark important/Not
Switching between Google accounts
If you have set up two or more Google Accounts on your phone, you can switch between them in Gmail.
Gmail displays only one Google Account at a time. The current account is shown at the top right of any message list.
1. From the Home screen, tap
2. From any message list, press
3. Tap the account that you want to view. You can also tap the account name at the top of the screen to see a list of your
accounts.
Apps > Gmail.
Menu > Accounts.
Searching for email messages
All elds of your email messages are searchable.
Search will include all your Gmail Messages, not just those that synchronized to your phone.
1. From the Home screen, tap
2. From any message list, press
3. Enter a search term >
t Your previous searches are shown below the search box.
Tap .
Apps > Gmail.
Menu > Search or press Search.
Labeling email messages
You can organize your emails by label. Gmail has preset labels. Or you can create your own labels in Gmail when viewed on a
computer. (Note: Custom label colors created on the web are not supported on your phone).
Labeling an email
1. From the Home screen, tap Apps > Gmail.
2. When reading a message, press
3. Select a label > Tap
OK.
Menu > Change labels.
Viewing emails by label
1. From the Home screen, tap Apps > Gmail.
2. From any message list, press
3. Tap a label to view matching email messages.
Menu > Go to labels.
Starring/un-starring an email message
You can star an important email to make it easy to nd again. Starred emails are assigned the Starred labels.
1. From the Home screen, tap
2. From any message list,
tTap
to star a message.
Apps > Gmail.
tTap to un-star a message.
44
Page 45
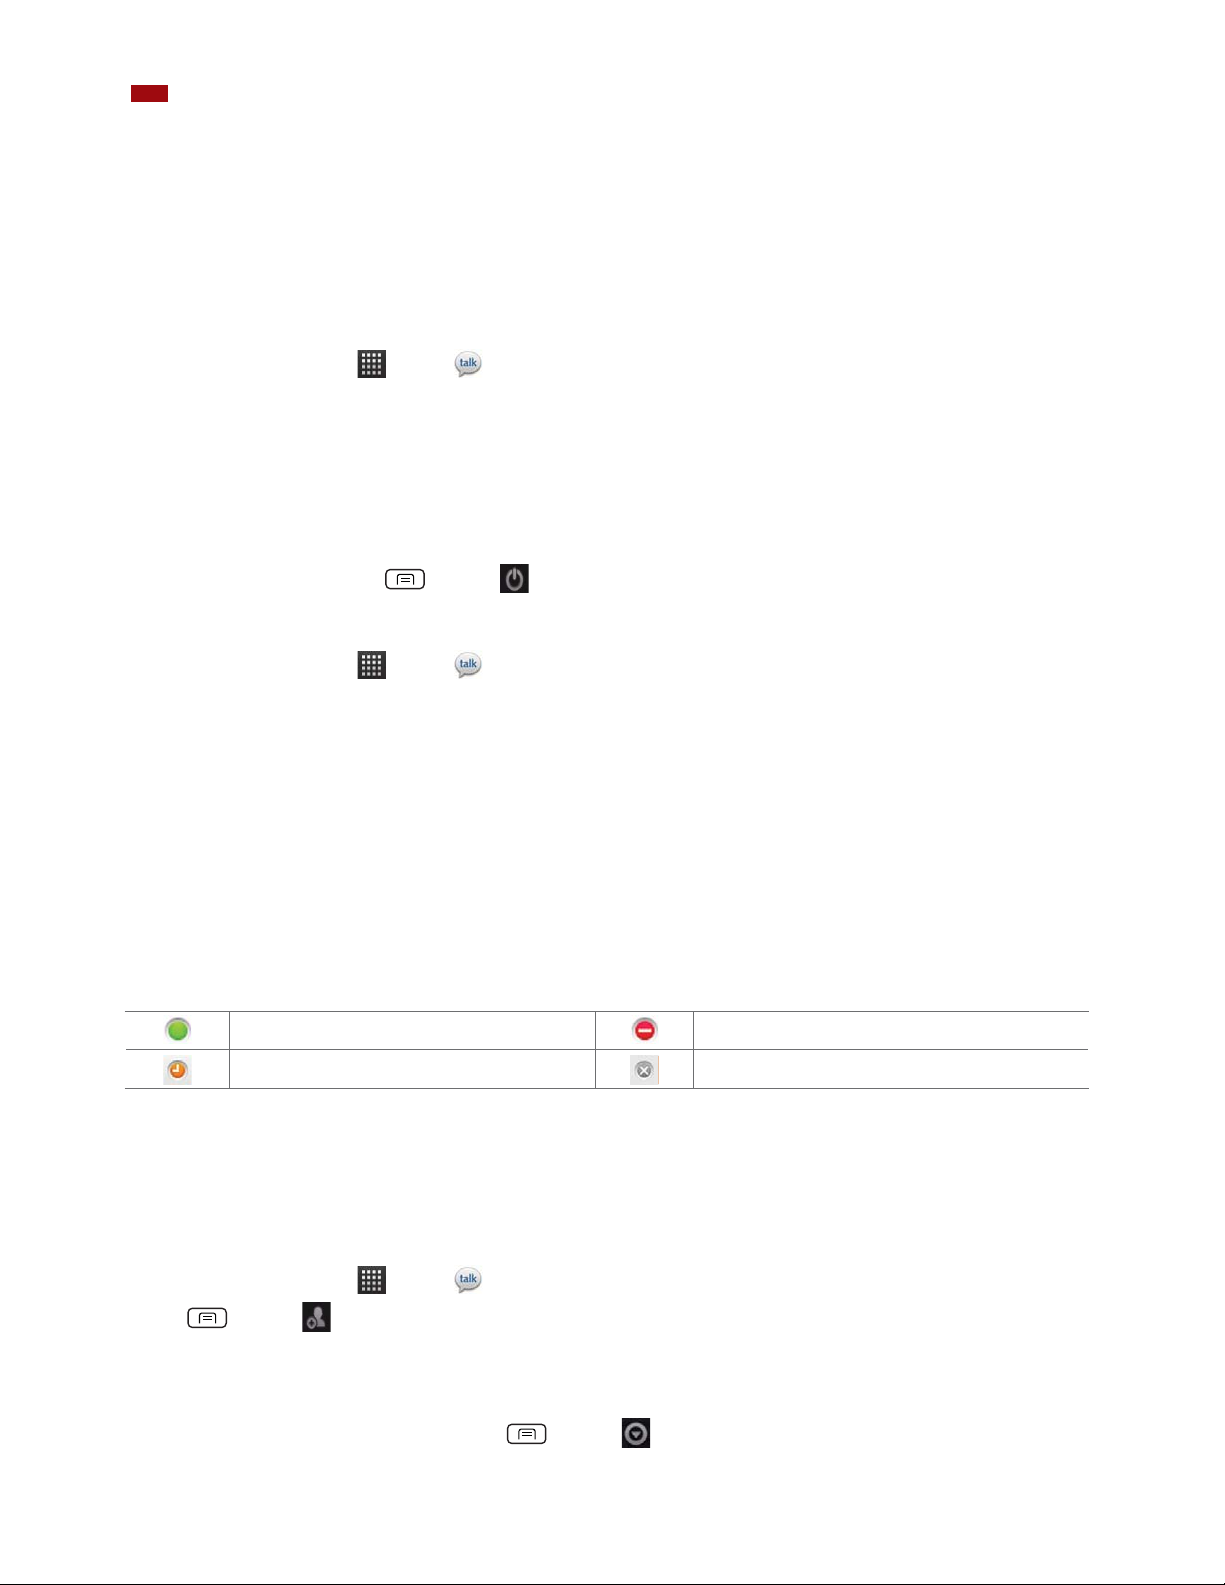
NOTE
Google services (Gmail, Google Talk, etc.) are a data-intensive feature. Virgin Mobile recommends that you upgrade to an unlimited data plan to
avoid additional data charges.
Google Talk
Use Google Talk to send instant messages to other Google Talk users anywhere they are logged in.
Signing in or out of Talk
Opening Talk and Signing in
1. From the Home screen, tap Apps > Talk.
When you rst open Talk, your friends list is displayed.
NOTE: When you rst turn on your phone and sign in to your Google Account, you are automatically signed in to Google Talk.
You will remain signed in, even while you’re using other applications, until you deliberately sign out.
Talk syncs data only from the rst Google Account you added to your phone.
Signing out of Talk
1. From the Talk friends list, press Menu > Sign out.
Updating Your Online Status, Profile Picture, and Status Message
1. From the Home screen, tap Apps > Talk.
2. Tap your name at the top of the Talk friends list.
t Tap your picture
tTap the online status
tEnter a new status message.
3. Tap
Done.
Your picture, online status, and message will be updated anywhere your Talk status is displayed.
> Remove to delete the image or Change to select another picture from your microSD card.
bar > Select your online status: Available, Busy, or Invisible.
Adding and managing friends list
Online Status Indicators
Available
Away
Monitoring online status
The Talk friends list is sorted by online status: active chats, online, away, busy, and oine. Within each status group, friends are
listed alphabetically.
Icons in Talk, Gmail, Maps, and other applications indicate Talk status.
Adding a friend to your friends list
1. From the Home screen, tap Apps > Talk.
Busy
Oine
2. Press
3. Enter a Google Talk ID or a Gmail address
When your friend accepts the invitation, the friend is added to your Talk contacts list.
To view a list of pending invitations to friends, press
Accepting chat invitations
Menu > Add friend.
> Send invitation.
Menu > More > Invites.
45
Page 46

When you are added to a friend’s Talk contact list, you will receive a notication and an invitation appears in your friends list.
1. From the Home screen, tap
2. From the Talk friends list, tap
Accept to accept the invitation. The friend is added to your friend list.
t Tap
t Tap
Cancel if you don’t want to chat or share your Talk status with the sender.
t Tap
Block to block and add the sender to your blocked users list.
Apps > Talk.
Chat invitation.
Viewing all friends or most popular friends
1. From the Home screen, tap Apps > Talk.
t Press
Menu > All friends to view all your friends.
t When viewing All friends, press Menu > Most popular to view only friends that you often chat with.
Managing a friend
1. From the Home screen, tap Apps > Talk.
2. Tap and hold a friend’s name to see more options (
friend
, View contact, Always show friend/Auto show friend, Hide friend).
NOTE
Block friend: This option will block a user from sending you messages and add the user to your blocked friends list.
Always show friend: This setting will add the friend to your Most popular list. To remove a friend from the Most popular list, tap and hold the
friend’s name then tap > Auto show friend.
Start chat/Go to chat/End chat, Friend info, Block friend, Remove
Chatting with friends
Chatting with a friend
1. From the Home screen, tap Apps > Talk.
2. Tap an online friend.
3. Enter your message in the text box >
Send.
Accepting an invitation to chat
When a friend sends you a Talk message, you receive a notication. There are 2 ways to respond:
t On your friends list, tap the friend who sent you the chat invitation or
t Open the notications panel and tap the chat notication.
Adding another friend to your chat
1. When you’re chatting with a friend, press Menu > Add to chat.
2. Tap a friend to invite.
This will start a new group chat for all parties. Only those who accept the new chat invitation will be joined to the group chat.
Switching between active chats
You can switch between multiple active chats.
1. When you’re chatting with a friend,
tPress
Menu > Switch chats > Tap the desired active chat.
tOr swipe left or right across the screen to switch between chats.
On the record or o the record your chats
You can make your chats on the record or o the record.
1. When you’re chatting with a friend, press
Menu > Chat on record.
46
Page 47
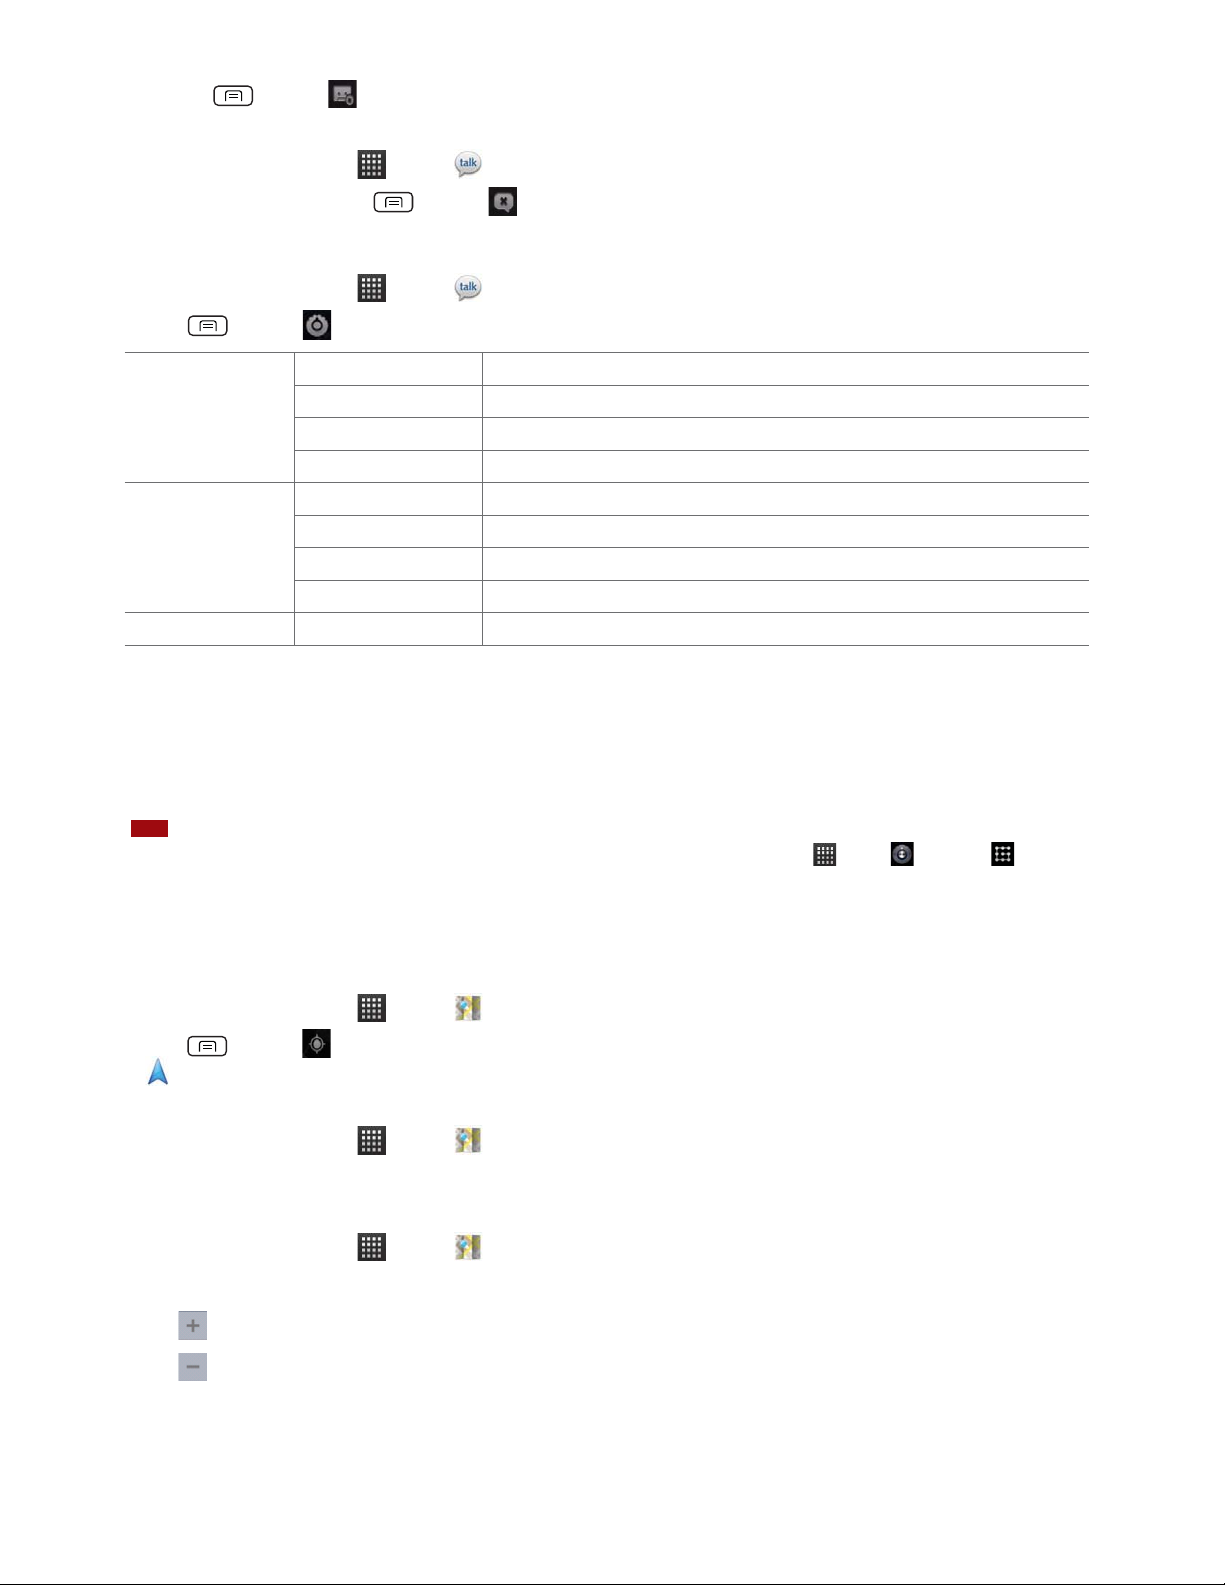
tOr press Menu > Chat off record to make your chats o the record.
Ending your current chat
1. From the Home screen, tap Apps > Talk.
2. From any chat window, press
Menu > End chat.
Talk settings
1. From the Home screen, tap Apps > Talk.
2. Press
General settings Automatically sign in Automatically sign in to Talk when you turn your phone on.
Notication settings IM notications Show a notication icon in Status bar when you have a new message.
About Terms & privacy Read detailed Google Talk legal Terms and privacy statements.
Menu > Settings.
Mobile indicator When selected, your status will indicate you are using Talk on your mobile phone.
Automatic away-status Set your status to away when your phone’s display is o.
Clear search history Clear previous Talk chat searches from showing up in the Search box.
Select ringtone Select the Talk Notication ringtone.
Vibrate Set to vibrate the phone when a new Talk message arrives.
Invitation notications Notify in Status bar when friend invitations are received.
Maps
Use Maps to nd your current location and get directions. You can search for addresses, landmarks and businesses directly on a
street map or satellite image.
NOTE
You need an active mobile data or Wi-Fi connection to use Maps.
To see your location and get directions, you must turn on location services. From the Home screen, tap Apps > Settings > Location
& security. Select one or both from Use wireless networks or Use GPS satellites.
Maps may not be available for all locations.
Opening and viewing Maps
Viewing your location
1. From the Home screen, tap Apps > Maps.
2. Press
Menu > My Location.
shows your location on the map and points north for your reference.
Using Maps
1. From the Home screen, tap Apps > Maps.
2. While viewing a map, swipe to any direction on the screen.
Zooming in and out of a map
1. From the Home screen, tap Apps > Maps.
2. To Zoom In/Out of a map,
tTap
tTap
or double-tap on the map to zoom in.
to zoom out.
Viewing location details
Viewing information for a location
47
Page 48
1. From the Home screen, tap Apps > Maps.
2. While viewing a map, tap and hold a location, starred place, or a search result on the map.
tA balloon opens over the location, with summary information.
3. Tap the balloon to see the address or more information.
Starring or un-starring a location
Add a Star to bookmark and easily return to a map location.
1. While viewing detail information for a location,
tTap
tTap
Viewing a location in Street view
Street view mode provides a street-level view of the location. Street view may not be available for all areas.
1. From the Home screen, tap
2. While viewing detailed information for a location, tap
tTo view surrounding areas, swipe the screen in any direction.
to star the location.
to un-star the location.
Apps > Maps.
.
Searching for a location
You can search Google Maps for specic locations, company names, or business types.
1. From the Home screen, tap
2. Press
Menu > Search or press Search to open the Search Maps.
3. Enter the search criteria. As you type, suggested matches from your contacts, the web, and previously searched items are
displayed.
tTap
tTap a suggested search term.
4. The search results are displayed as
to search or
Apps > Maps.
markers with letter labels on the map.
tTap markers and titles to view more information.
tTap
to show the search results as a list > Tap each item to see more information.
Viewing map layers
Initially, Google Maps opens with a street map. You can view additional map layers, such as satellite images and trac
information. You can also view custom Web created Google Maps.
1. From the Home screen, tap
2. Press
3. Turn layers on or o by tapping the layer name. A check mark indicates the layer is selected.
tTap
Layers may change the map entirely or overlay additional information. Tap icons or interactive items to explore dierent layer types.
Menu > Layers. A dialog opens with a list of layers.
Clear Map to deselect all layers.
Apps > Maps.
Getting directions
1. From the Home screen, tap Apps > Maps.
2. Press
Menu > Directions.
48
Page 49

3. Use your current location as the starting point, or enter a location in the Start point eld.
Or tap
to select an address from your contacts, a point that you tap on a map, or My Places.
4. Enter your destination in the
End point eld. Or tap to select an address from your contacts, a point that you tap on
the map, or My Places.
5. Tap
or or to select your transportation method > Tap Get directions.
Places
Use Google Places to explore your current location.
NOTE
You need an active mobile data or Wi-Fi connection to use Places.
To see your location and get directions, you must turn on location services. From the Home screen, tap
& security. Select one or both from Use wireless networks or Use GPS satellites.
Maps may not be available for all locations.
Searching
1. From the Home screen, tap Apps > Places.
2. From the Places categories,
t Tap the
select a category before searching.
3. The search results display in a list, with their approximate distance and direction.
t Tap
Find places eld on top of the screen > Enter the place you want to search > Tap . To narrow your results,
to see your results on a map.
Apps > Settings > Location
t Tap a place to view more information.
49
Page 50

Navigation
Navigation is an internet-connected GPS navigation system with voice guidance.
Navigation provides both spoken and on-screen turn-by-turn driving directions.
NOTE
You need an active mobile data or Wi-Fi connection to use Navigation.
To see your location and get directions, you must turn on location services. From the Home screen, tap Apps > Settings > Location
& security. Select one or both from Use wireless networks or Use GPS satellites.
Maps may not be available for all locations.
Opening & Using Navigation
There are many ways to view the map and travel progress while in Navigation mode. See the Changing Views section below for
more information.
Navigating with Turn by Turn Directions
1. From the Home screen, tap Apps > Navigation or tap when viewing driving directions in Google Maps.
2. Customize your navigation settings for highways or tolls by tapping
tTap
3. From the list of destination options,
tTap
tTap Type Destination to enter the destination.
tTap
tTap
tTap a recent destination to select the previous destination.
A map opens with your route drawn in blue. Specic instructions are listed at the top of the screen.
As you navigate your route, each direction is spoken in turn, and the next turn is displayed. Your current location is shown as a
blue arrow on the map, which is updated as you navigate your route.
Google Navigation downloads and temporarily stores a copy of the directions and other information about your route on the
phone, so if you lose your connection to a data network, you can still navigate to your destination.
You can control the volume of the spoken instructions with
directions, press
Previewing your route
1. From an active navigation, tap the directional instruction banner at the top of the screen.
Map to begin tracking your journey, even if you haven’t chosen a destination.
Speak Destination to search the destination with voice.
Contacts to use a contact’s address information.
Starred Places to select the destination from starred places.
Volume up / Volume down. To turn o the spoken
Menu > Mute.
.
2. Tap
When you preview a route, tap
Changing views of your route
You can view your progress on your route as a map with dierent informational layers. Zoom in and out or drag to view
adjacent areas. You can also view your progress in Satellite or Street View.
1. While viewing an active navigation,
t Press
t Press
or to preview the next or previous segment of your route.
to switch to the street-level view of your route.
Menu > Layers to switch to views trac or a Satellite View, or to show the locations of parking, restaurants,
and other landmarks along your route.
Menu > Route Info for a high-level summary of your route, with options to pick a new route, see trac
information, and more.
50
Page 51

Tap while on the Route Info screen to view each turn as a scrolling list of written directions.
tDrag the map to view adjacent areas, or tap the map to see controls for zooming in and out.
Finding an alternate route
If trac is slow on your current route, or if you just want to try a dierent route, you can request an alternate route from the
Google Maps Navigation service.
1. From an active navigation,
2. Press
3. Select the alternate route you’d like to use to resume turn-by-turn guidance.
Exiting Navigation
You can exit Navigation mode when you reach your destination, or at any time by pressing Menu > Exit Navigation.
Menu > Route Info > .
Latitude
Latitude allows you to share your location with friends and view their locations on a map.
Your location is not shared automatically. You must join Latitude, and then invite your friends to view your location or accept
their invitations. Only friends that you have explicitly invited or accepted can see your location.
NOTE
You need an active mobile data or Wi-Fi connection to use Latitude.
To see your location and get directions, you must turn on location services. From the Home screen, tap Apps > Settings > Location
& security. Select one or both from Use wireless networks or Use GPS satellites.
Maps may not be available for all locations.
Joining and opening Latitude
1. From the Home screen, tap Apps > Latitude.
2. The rst time you join Latitude, you’re prompted to accept or reject the Google privacy policy.
Adding friends
Add friends to Latitude to share your location with them and request to see their location. Only friends you have explicitly
invited or accepted can see your location within Latitude.
Inviting friends
1. From the Home screen, tap Apps > Latitude.
2. Tap
t Tap
t Or tap
tOr tap
If your friends are current Latitude users, they will appear at the top of your Google Contacts lists with a Latitude icon. Current
users will receive email request and a request within Latitude.
If your friends aren’t using Latitude, they’ll receive a location request email, but they must sign into Latitude with a supported
Google account before they can accept your request. If you invite a friend who is not using a Google ID, you or your friends will
need to re-send any location requests once they have signed into Latitude with a supported Google account.
Responding to an invitation
1. From the Home screen, tap Apps > Latitude.
or press Menu > Add friends.
Select from Contacts > Select contacts to invite > When asked to conrm, Yes.
Add via email address > Enter one or more email addresses, separated by “ , ” > Add friends > When asked to
conrm, Yes .
to add a friend from suggested friends’ list > Yes .
51
Page 52
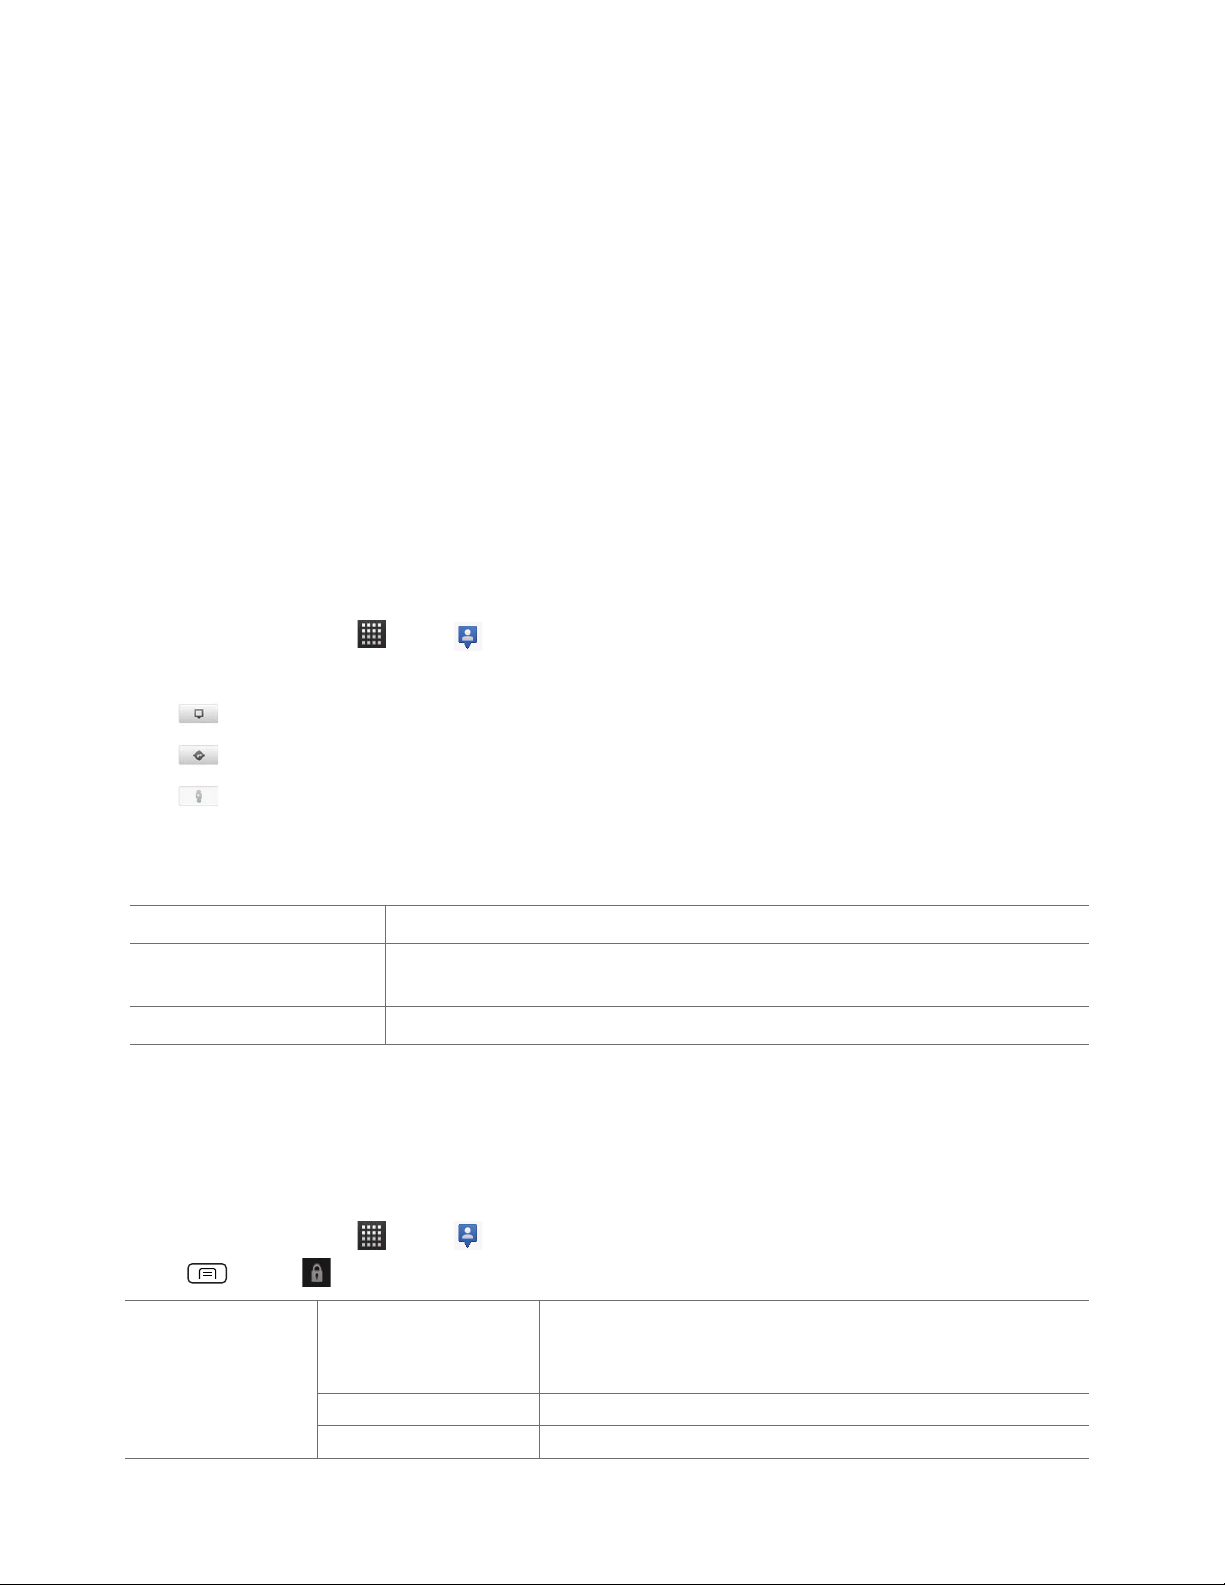
2. Tap New sharing request.
tTap
Accept and share back to share locations between you and your friend.
tTap
Accept, but hide my location to see the friend’s location, and hide your location.
Don’t accept to reject the request.
tTap
Viewing friends’ locations and managing friends
You can view your friends’ locations on a map or in a list.
t When you open Latitude, you are shown list of your Latitude friends with location summaries.
t When you open Maps, your friends’ locations are shown. Each friend is represented by a photo and arrow indicating their
approximate location. If a friend has chosen to share only city-level location details, the friend’s photo is shown in the
friend’s city center location.
Viewing friends’ prole
tWhile using Map mode, tap the friend’s photo. Your friend’s name appears in a balloon. Tap the balloon.
t From the Latitude friend’s list, tap a friend.
Managing friends’ communication and privacy options
1. From the Home screen, tap Apps > Latitude.
2. From a friend’s prole,
tTap
tTap
tTap
to view the friend’s location on the map.
to get directions to the friend’s location.
to view the friend’s location in street view.
t Tap the friend’s photo to open Quick contact where you can view contact details, send an email, and more.
t Tap
Sharing options to change sharing options for the friend.
Share best available location Share your precise location information.
Share only city level location Share only your city location, not a street-level location. Your friend will see your picture in the
middle of your current city.
Hide from this friend Stop sharing your location with this friend.
t Tap Remove this friend to remove the friend from your list and stop sharing locations.
Privacy settings
Only the last location sent to Latitude is stored by Google. If you turn o Latitude or are hiding, no location is stored.
To change your privacy settings:
1. From the Home screen, tap
2. Press
Menu > Latitude settings.
Apps > Latitude.
Location reporting Detect your location Let Latitude detect and update your location as you move. The update
frequency is determined by several factors, including your phone’s battery
level and how recently your location has been updated.
Set your location Choose from several methods and set your location manually.
Do not update your location Hide your location from all your friends.
52
Page 53
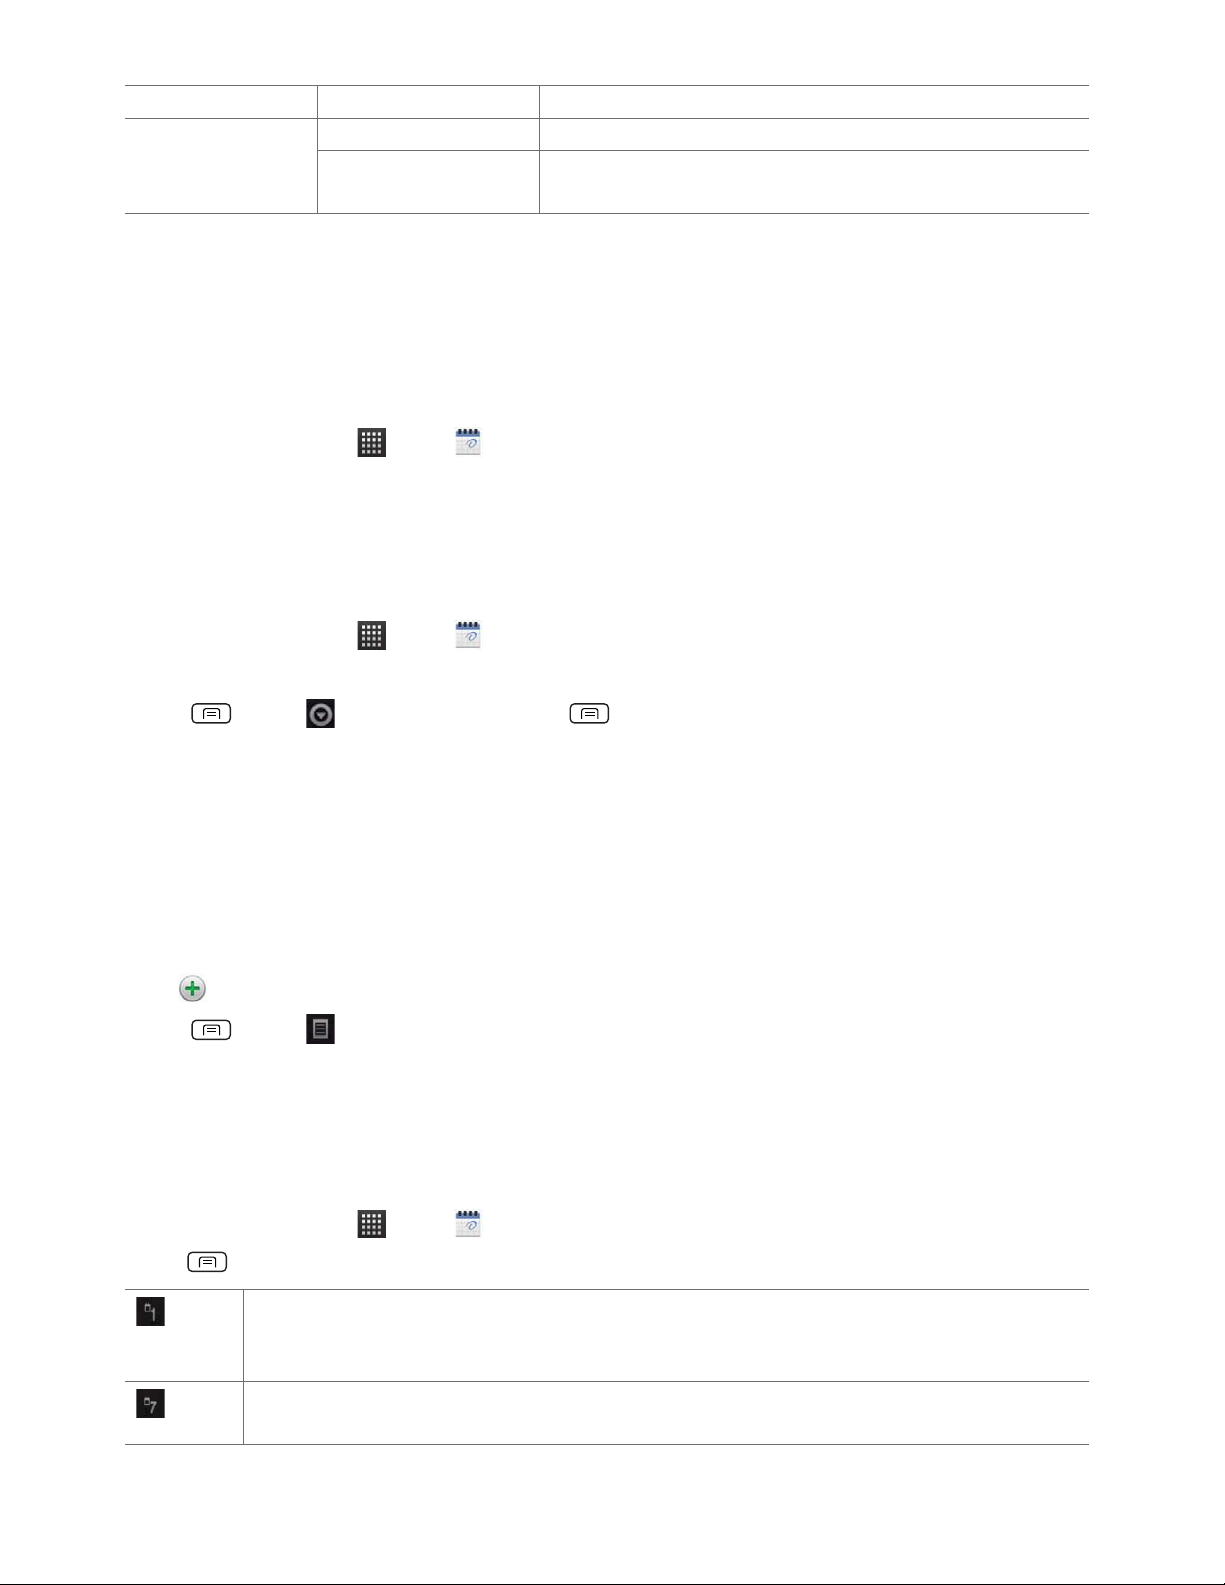
Location history Enable location history Store your past locations and visualize them on the Latitude website.
Latitude location
sharing
Manage your friends Add or remove friends who can see your location.
Sign out of Latitude Disable Latitude and stop sharing your location and status. You can always
join Latitude again.
Calendar
The Calendar application data on your phone syncs with the web-based Google Calendar service. It is also compatible with
Microsoft Exchange ActiveSync Calendar.
Opening Calendar
1. From the Home screen, tap Apps > Calendar.
Events are color coded to enable you to distinguish between multiple calendars. Events times are shown using your local time
zone, which is provided by your active mobile network. When traveling, you may want to set a home time zone in Calendar.
Creating an event
Events created on your phone will be synced to Google Calendar or Microsoft Exchange automatically.
1. From the Home screen, tap
2. There are two ways to create an event:
tPress
t In Day, Week, or Month view, tap and hold the screen at the date and/or time you want >
3. Enter the name, time, location, description, and optional additional details for your event.
tIf you have more than one calendar, choose the calendar to which to add the event.
t In the Guests eld, enter email addresses of anyone you want to invite. Separate multiple addresses with commas ( , ). If
your invitees use Google Calendar, they’ll receive an invitation in Calendar and by email.
t If the event occurs on a regular basis, tap the Repetition box and choose the reoccurrence information.
t Tap
t Press Menu > Show extra options to add additional details about the event.
4. Tap
Menu > More > New event. Or press Menu + n at the same time.
to add reminders. You can set multiple for an event.
Done.
Apps > Calendar.
New event.
Viewing calendar and events
Changing calendar view
When you open Calendar, Month view is shown by default. You can also view the Calendar by Agenda, Day, or Week.
1. From the Home screen, tap
2. Press
Day
Week
Menu > Choose the type of view that you want.
Displays a chart of the events of one day, in a table of one-hour rows. All-day and multiday events are displayed
at the top. Each event is displayed at the corresponding time. Swipe left or right to change dates, and swipe up or
down to view earlier or later times.
Displays one week calendar. All-day and multiday events are displayed at the top. Swipe left or right to change
weeks, and swipe up or down to view earlier or later times.
Apps > Calendar.
53
Page 54
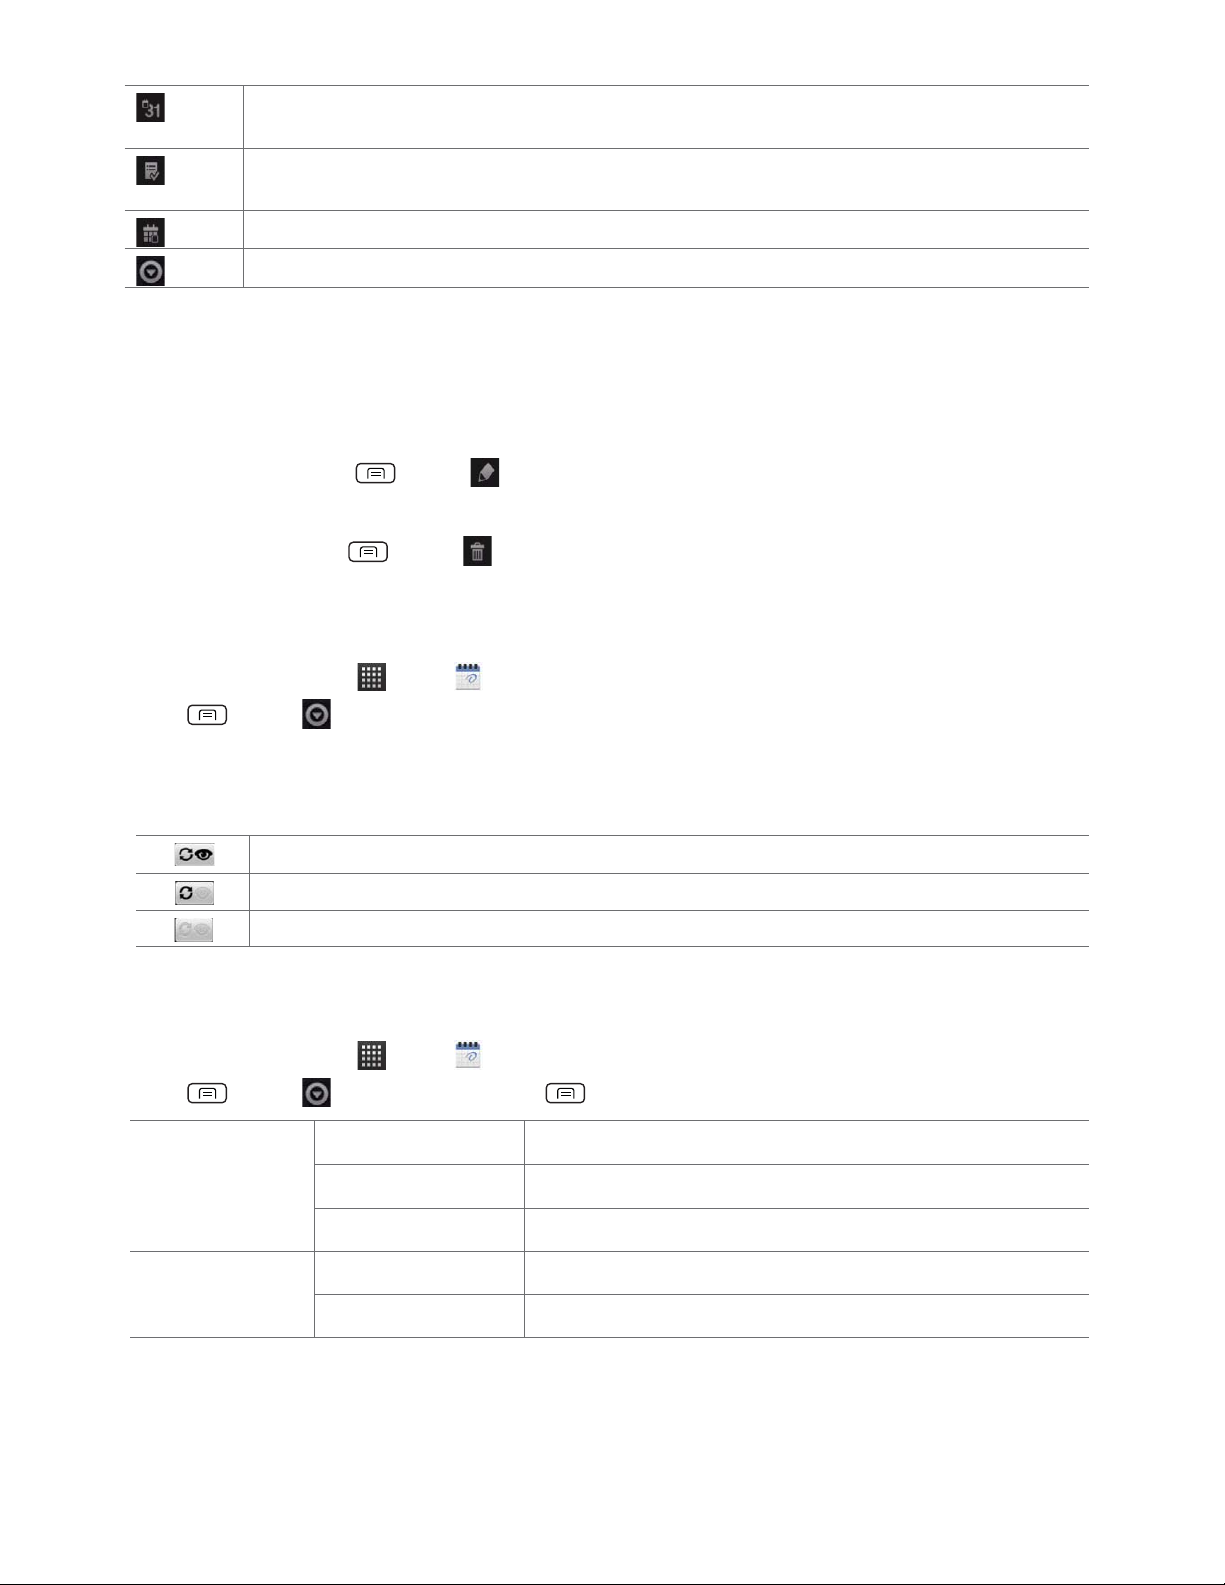
Month
Agenda
Today
More
Displays a chart of the events of the month. Events are shown as blue bars on each calendar date. Swipe left or right
to change months.
A list of your events in chronological order. All-day and multiday events are listed at the start of each day. Days
without events are not shown. Flick up or down to view earlier or later events.
Displays a chart of the events of today.
You can select New event, Calendars or Settings.
Viewing event details
t In Day, Week, or Agenda view, tap an event.
tIn Month view, tap a day to switch to Day view > Tap an event.
Editing or deleting an event
1. In event details view, press Menu > Edit event to edit the event.
2. Make your changes to the event > Tap
tTo delete the event, press
Done.
Menu > Delete event > Tap OK.
Synchronizing and displaying calendars
You can select which calendars to show or hide on your phone’s Calendar, and which ones to synchronize.
1. From the Home screen, tap
2. Press
Menu > More > Calendars.
Apps > Calendar.
All the calendars you’ve added or subscribed to are displayed. (Calendars for accounts you’ve congured not to synchronize are
not included in the list.)
3. Tap the icon next to a calendar to change storage and visibility settings.
Calendar events stored on phone and visible in Calendar
Calendar events stored on phone but not visible in Calendar
Calendar events not synchronized to phone
4. Tap OK.
Changing Calendar settings
1. From the Home screen, tap Apps > Calendar.
2. Press
Calendar view setting Hide declined events Check if you don’t want to see events to which you’ve declined invitations.
Week number setting Display week number Check if you want to see week number in Calendar.
Menu > More > Settings. Or press Menu + p at the same time.
Use home time zone Displays calendars and event times in your home time zone when traveling.
Home time zone If Use home time zone is checked, you can set home time zone.
First week of year If Display week number is checked, you can set rst week of year.
54
Page 55

Reminder settings Set alerts & notications Congure event reminders.
Select ringtone Select which ringtone will sound when you receive an event reminder.
Vibrate Congure the phone to vibrate whenever you receive an event reminder.
Default reminder time Select the default reminder time used when creating new calendar events.
55
Page 56
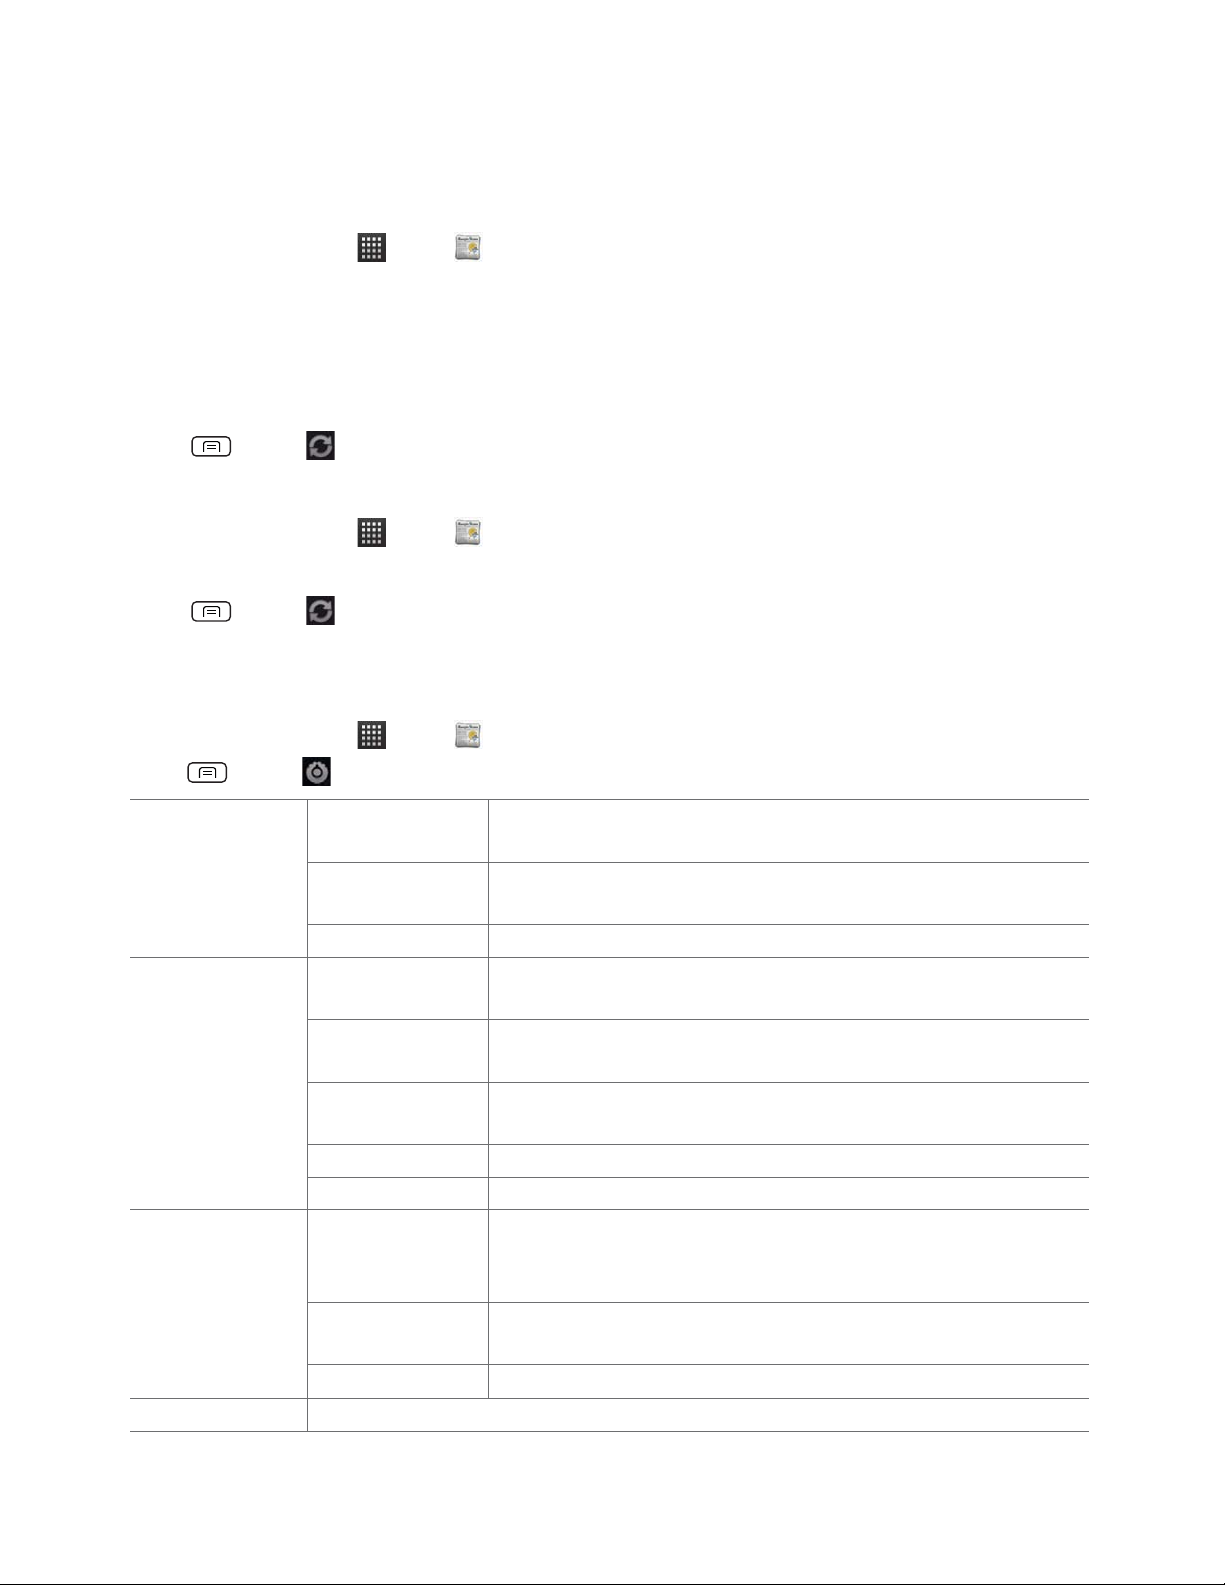
News & Weather
The News & Weather application oers updates on current events and local weather forecasts.
Viewing the weather information
1. From the Home screen, tap Apps > News & Weather.
2. Tap
Weather at the top of the screen. Or ick left across the screen to switch to Weather view.
3. Tap the weather summary for a more detailed forecast.
tTap a time on the weather graph for a detailed, hour-by-hour forecast.
tTap the weather detail screen to return the weather summary.
tPress
Menu > Refresh to get the latest information.
Reading news articles
1. From the Home screen, tap Apps > News & Weather.
2. Tap a news category at the top of the screen. Or swipe left or right across the screen to switch news categories.
tPress
Menu > Refresh to get the latest information.
3. Tap a headline to view a detailed news article in your browser.
News & Weather settings
1. From the Home screen, tap Apps > News & Weather.
2. Press
Weather settings Use my location Use the phone’s location service to determine your location when displaying
News settings Select news topics Select the categories of news to include in the scrolling list of News & Weather
Refresh settings Auto-refresh Update information automatically, at the frequency you set with Refresh interval.
Menu > Settings.
Set location When Use my location is unchecked, tap to specify the location for weather
Use metric Toggle metric/imperial units.
Prefetch articles Download news articles so that they open more quickly and are available when
Prefetch images Prefetch news images in addition to news text, when the headlines are
News terms of service Details about the terms of service for Google News.
Mobile privacy policy Display the Google Mobile Privacy Policy.
Refresh interval Set how often to update the News & Weather automatically, if Auto-refresh is
Refresh status Displays the date and time of the last refresh.
weather information.
information by entering a city or postal code.
tabs. You can also tap
you don’t have a data connection.
downloaded. This setting is only available when Prefetch articles is checked.
For automatic refresh to work, you must also have Background Data turned on in
the Settings application.
checked.
Custom topic to enter specic topics.
Application version Displays the application version installed on your phone.
56
Page 57
Android Market
Android Market provides direct access to applications and games to download and install on your phone.
To access Android Market, you must rst sign into your Google account using a Wi-Fi or data connection.
When you open Android Market for the rst time, you must read and accept the terms of service to continue.
Finding applications
Browsing applications
You can browse and sort applications by category.
1. From the Home screen, tap
GAMES, BOOKS & REFERENCE, BUSINESS or COMICS, etc. at the left of the Market screen.
2. Tap
Apps > Market.
tScroll to view subcategories and tap one to explore.
3. Tap the subcategory you want.
Searching for applications
1. From the Home screen, tap Apps > Market.
2. Tap
3. Enter the name or type of app you’re looking for > Tap
at the top right of the screen, or press Search.
.
Viewing details about an application
1. While browsing Android Market, or in a list of search results, tap an application to view more details.
Application details screens include a description, ratings, and specic information about the application. The Comments tab
includes comments from people who have used the application. You can download and install an application from this screen.
Installing applications
Installing an application
1. From the Home screen, tap Apps > Market.
2. Find the application you want to purchase and view the application details.
Download to download and install the application.
3. Tap
For paid applications, the download button is labeled with the application’s price. Tap the price to buy the application.
The subsequent screen noties you whether the app will require access to your personal information or access to certain
functions or settings of your phone.
Accept & download to begin downloading and installing the app. If you selected a paid app, you will be redirected to
4. Tap
the Google Checkout screen to pay for the app before it’s downloaded to your phone.
NOTE
Be cautious when downloading apps that have access to phone functionality or a signicant amount of personal data. You’re responsible for the
results of using downloaded apps on your phone.
Creating a Google Checkout account
You must have a Google Checkout account to purchase items from Android Market. You can set up a Checkout account with
your rst purchase from Android Market.
tIn a web browser, go to http://checkout.google.com to create a Google Checkout account.
t From the phone, you will be prompted to enter your billing and credit card information when you buy your rst
application from Android Market.
NOTE
Once you’ve purchased something from Android Market, the phone remembers your password, so you don’t need to enter it the next time. Be
sure to secure your phone with a password to prevent unauthorized purchases.
57
Page 58

Managing your downloads
Viewing downloaded applications
1. From the Home screen, tap Apps > Market.
2. Press
In the list of the free and paid applications that opens, you can tap an application to rate it, uninstall it, request a refund, and more.
Updating an application
You can update downloaded applications.
1. From the Home screen, tap
2. Press
3. Tap
4. Tap the explanation that best matches why you’re installing > Tap
The application is installed. You can uninstall the application again at any time. If you paid to buy the application, you will not
be charged again.
Uninstalling an application
You can uninstall applications from Android Market. You can also uninstall downloaded applications from the Settings.
1. From the Home screen, tap
2. Press
3. Tap
4. Tap the explanation that best matches why you’re uninstalling > Tap
The application is uninstalled. You can install the application again at any time. If you paid to buy the application, you will not
be charged again.
Menu > My Apps.
Apps > Market.
Menu > My Apps > Tap the application to update.
Update > Accept & download.
Open or press Back.
Apps > Market.
Menu > My Apps > Tap the application to uninstall.
Uninstall > OK.
OK.
Books
You can search books you want and enjoy reading books on your phone with Books application.
If you aren’t signed in to your Google account, you must rst sign into your Google account using a Wi-Fi or data connection to
access Books.
Opening Books
1. From the Home screen, tap Apps > Books.
2. Tap the book you want to read.
t Press
t Press
tPress
tPress
Finding books
Browsing Android Market
1. From the Home screen, tap Apps > Books.
2. Tap
3. Tap
Menu > Sort order to sort the books by Date, Title or Author.
Menu > Manage library to remove a book from the My eBooks shelf or manage your downloaded books.
Menu > Refresh to refresh the current page.
Menu > Accounts to select the desired account or add account.
to open Android Market.
at the top right of the screen, or press Search.
4. Enter the title, author or keyword of the book you want > Tap
58
.
Page 59
5. Scroll through the search results and tap a book to view details about the book.
Searching for books
1. From the Home screen, tap Apps > Books.
2. Tap
3. Enter the title or author of book you’re looking for > Tap
4. Scroll through the search results from My eBooks or Google eBooks.
at the top right of the screen, or press Search.
.
Reading a book
Viewing contents of the book
1. While reading a book, press Menu > Contents.
2. Scroll through the contents of the book and tap the chapter you want to read.
t Tap the screen to see the title and author of the books on the top of the screen and the controls. Drag the slider to go
directly to a specic chapter of a book.
Changing reading settings
1. While reading a book, press Menu > Settings.
Text size, Line space, Typeface, Justification, Themes or Brightness.
2. Set
Going to original pages
1. While reading a book, press Menu > Original pages.
2. You can read the original pages of the book.
tPress Menu > Flowing text to return to the text mode.
Searching in the book
1. While reading a book, press Menu > Search.
2. You can search words in the book.
Sharing a book
1. While reading a book, press Menu > Share.
2. Select
Using other functions
1. While reading a book, press Menu > More.
2. Tap
t
My library: Scroll through the books you downloaded and tap a book to read it.
Help : Tap one of the items shown below:
t
Quick tips You can see quick tips for using Google Books on Android.
Help center You can learn how to make the most of Google Books on Android.
Contact us You can get help with issues reading Google Books on your Android device.
Report a problem You can report a problem about typo or other error in a book.
Bluetooth, Email, Gmail or Messaging.
My library or Help.
Books settings
Customize your Books settings to optimize your reading experience.
1. From the Home screen, tap
2. Press
Menu > Settings.
Apps > Books.
Storage location Set the location to store your books. You can select microSD card or internal storage.
59
Page 60
About Show the version of Books application on your phone.
Terms of Service Read the Mobile Terms of Service.
Privacy Policy Read the Mobile Privacy Policy.
Open source licenses Check out license details for open source software and fonts.
Easy Installer
You can install apps from apk les on microSD card with Easy Installer.
Opening Easy Installer
1. From the Home screen, tap Apps > Easy Installer.
2. You can see apk les on your microSD card.
t Type app name in the textbox to search the apps that you want to install.
tTap
Clear to delete the entire entry.
t Press
Menu or tap to see more options( Un/Check All, Delete, Sort, Setting, Feedback or
More(About, Help)).
Installing apk files on microSD card
1. From the Home screen, tap Apps > Easy Installer.
2. Check apps that you want to install > Tap
t Tap and hold the specied app in the list to view a pop-up menu. You can select
Market
.
Install to install the app. Or tap Cancel to cancel the installation.
3. Tap
t If your phone is set to block installation of apps not obtained from Android Market, you can check Unknown sources in
the Application settings and then install apps.
Install Selected Apps.
Install, Delete, Send or Search Google
Easy Installer settings
1. From the Home screen, tap Apps > Easy Installer.
2. Press
System Notication Bar Icon Check if you want to show notication bar icon to switch quickly.
Installer Save Sort-By Type Check it to save sort-by type as default when changed.
Feedback Feedback You can send the feedback to the author.
Share Share To Friends You can share Easy Installer to your friends.
Update Automatically Update Check it to update and notice automatically.
Menu or tap > Setting.
Automatically Startup Check if you want to start up automatically when boot your phone.
Clear Cache You can clear apk scan cache, and it will lead to re-scan the microSD card in the next
open.
More Applications You can view more excellent applications.
60
Page 61
Web
Email
The Email application is used to read and send email from services other than Gmail. The Email application includes a wizard
enabling easy setup for several popular email service providers.
Email Account Setup
Initial setup
1. From the Home screen, tap Apps > Email.
2. Enter the
t If you select email account from the list, account settings will be set automatically. Some email accounts are not
supported.
3. Enter a name for this account and a name to include on outgoing messages >
Adding an additional email account
You can add one or more email accounts to your phone.
1. From the Home screen, tap
2. Press
3. Press
4. Repeat the steps to add an account as described in Initial setup above.
Deleting an email account
1. From the Home screen, tap Apps > Email.
2. Press
3. Tap and hold the account >
Refreshing an email account
1. From the Home screen, tap Apps > Email.
2. Press
Email address and Password for your email account > Next.
Done.
Apps > Email.
Menu > Accounts.
Menu > Add account.
Menu > Accounts.
Remove account.
Menu > Refresh.
t If you have several email accounts, you can refresh them all at the same time.
From any message inbox, press
Menu > Accounts > Combined Inbox > Refresh.
Reading an email
You can read messages in your Combined Inbox or individual account folders.
1. From the Home screen, tap
tPress
2. Tap an email you want to read.
t Press
Replying to a message
1. While reading an email, select Reply or Reply all.
t A Compose Message window opens with recipient addresses, and subject line pre-populated. A copy of the original
Menu to see more options.
Menu to see more options.
Apps > Email.
61
Page 62
message is quoted below the message body text box.
2. Compose your response and tap
Forwarding a message
1. While reading an email, Press Menu > Forward.
2. Address the email, enter a subject, and type your message in the appropriate text elds.
3. Tap
Send.
Deleting a message
1. While reading an email, tap Delete.
Send.
Sending a new email
1. From the Home screen, tap Apps > Email.
2. Press
3. Enter a name or email address in the
addresses with a comma “ , ”.
t As you enter text, matching addresses are suggested from your Contacts list.
tPress
4. Enter a
t To attach an image le, press
NOTE
5. Tap Send.
Menu > Compose.
To eld. If you are sending the mail to several recipients, separate the email
Menu > Add Cc/Bcc to add additional recipient eld types.
Subject and type your message.
Menu > Add attachment > Select the picture you want to attach.
The attachable le size is limited to 5 MB.
tTo save an unsent email message on your phone, tap
tTo cancel an email message, tap
Discard.
Save as draft.
Starring/un-starring an Email
You can star an important message to nd it easily later. Once you star a message, a Starred folder is added to the Accounts
screen.
1. From any email list or while reading a message,
tTap
tTap
to star the message.
to un-star.
Working with Email Messages
Viewing starred messages
1. From the Home screen, tap Apps > Email.
2. Press
Resuming a draft email message
1. From the Home screen, tap Apps > Email.
2. Press
3. Tap an email you want to resume > Finish editing the message.
Menu > Accounts > Starred.
Menu > Folders or Accounts > Drafts.
4. Tap
Send.
62
Page 63
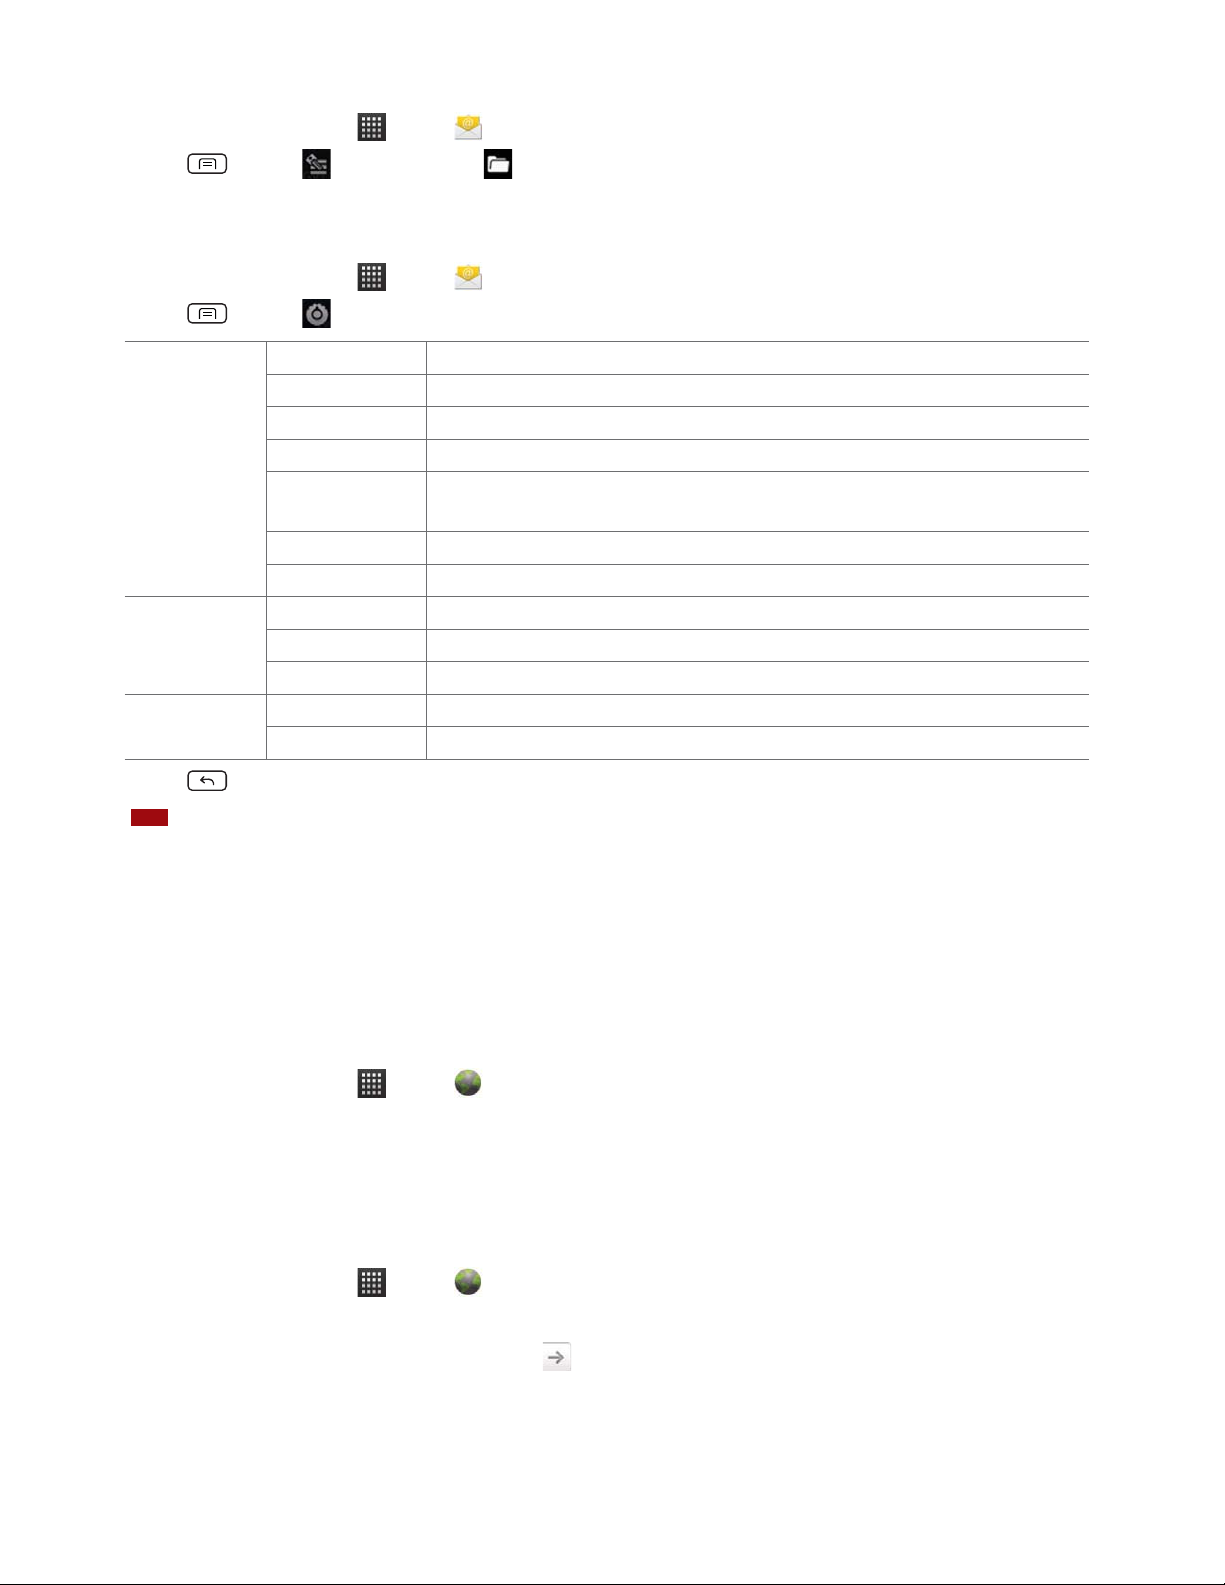
Viewing individual account folders
1. From the Home screen, tap Apps > Email.
2. Press
Menu > Accounts > Select to view individual account folders. Select any folder to open, view, or edit
contents.
Email account settings
1. From the Home screen, tap Apps > Email.
2. Press
General settings Account name The name of the account as it appears in the Accounts and Folders screens.
Notication
settings
Server settings Incoming settings Congure Incoming server settings for this account.
Menu > Account settings.
Your name Your name shown in outgoing messages.
Use Signature Check it to use signature.
Signature Enter a signature to append to messages sent from this account.
Email check
frequency
Download Options You can select Head Only, 1k, 5k, 25k, 50k, 100k, 1M or All.
Default account Check it to set this account as the ‘default’ account for outgoing messages.
Email notications Check it to receive notications when new messages are received in this account.
Select ringtone Select a notication ringtone.
Vibrate Select to congure vibration notications when new emails arrive in this account.
Outgoing settings Congure Outgoing server settings for this account.
Set how often the phone will for new email sent to this account.
3. Press Back to save changes.
NOTE
Web services (Email, Browser, YouTube, etc.) are a data-intensive feature. Virgin Mobile recommends that you upgrade to an unlimited data plan
to avoid additional data charges.
Browser
Search for information or browse webpages using the Browser. To access the internet, you must have an active data or Wi-Fi
connection.
Opening Browser
1. From the Home screen, tap Apps > Browser.
t When you open the Browser, the default homepage is displayed. If you have used the Browser recently, your most
recently viewed webpage is displayed.
t The Browser also opens when you select a web link in other applications like email or text messaging.
Accessing a webpage or searching the web
1. From the Home screen, tap Apps > Browser.
2. Tap the URL eld on top of the screen.
3. Enter the URL of a webpage or search term and tap
.
t As you type, suggestions of webpages and key words will appear on the screen. Tap a suggestion to go directly to that
webpage or view search results.
63
Page 64

Navigating on a webpage
Some websites are displayed as special mobile versions, designed to be easily viewed from a mobile phone.
Webpages that aren’t designed specically for mobile devices typically open in overview mode. You can view these webpages
by zooming and scrolling.
Zooming in or out on a webpage
tDouble-tap the screen to zoom in. To return to the default zoom level, double-tap again.
tTap your nger on the screen to reveal the Zoom controls. Tap
tYou can also use 2 ngers on the screen, pinching them open and closed to zoom in and out.
Scrolling a webpage
1. Slide your nger on the screen to navigate and view other areas of the webpage.
or to zoom out or in.
Using Browser options
Stopping page loading
1. While webpage is loading, press Menu > Stop. Or tap on the right of the URL eld.
Refreshing the current page
1. Press Menu > Refresh. Or press Menu + r at the same time.
Getting information about the current page
1. On the Browser screen,
2. Press
Finding the text on the current page
1. While viewing any webpages, press Menu > More > Find on page. Or press Menu + f at the same time.
2. Enter the search term.
t As you type, matching characters will be highlighted. Tap
Menu > More > Page info. Or press Menu + g at the same time.
or to scroll to the previous or next matching term.
Selecting and copying text from a webpage
1. While viewing any webpages, press Menu > More > Select text. Or press Menu + e at the same time.
2. Drag across the text you want to copy.
t The text you select is copied to the clipboard. You can paste the copied text into any text eld by tapping and holding on
a text box and selecting paste.
Sharing a webpage
1. While viewing any webpages, press Menu > More > Share page. Or press Menu + s at the same time.
2. Tap an application to send the URL. The application opens with the URL you’ve entered.
Downloading files
You can download images, les, and applications from webpages. All downloaded les are saved to the microSD card.
1. Tap and hold an image, a link or a le you want to download.
2. Tap the desired action (
Viewing downloaded les
1. From the Home screen, tap Apps > Browser.
2. Press
tThe les you’ve downloaded are arranged by date. Tap a le to open.
Menu > More > Downloads. Or press Menu + d at the same time.
Save image, View image, or Set as wallpaper).
64
Page 65
tIf you want to delete a downloaded le, check the le > Delete.
Navigating webpages
Opening a new Browser window
1. From the Home screen, tap Apps > Browser.
2. Press
Menu > New window. Or press Menu + n at the same time.
A new window opens with the default homepage.
Opening a link
1. Tap any link to open it.
If you prefer to open the link in a new window, tap and hold the link >
Open in new window.
Navigating between webpages
t Press Back to return to the previous webpages.
Or press Menu > Forward if you pressed Back by accident.
Switching between Browser windows
1. From any webpages, press Menu > Windows. Or press Menu + t at the same time.
2. Tap the window to view it full screen. You can also tap
NOTE
You can have up to 8 browser windows open at one time.
to close a window.
Using bookmarks
Browser bookmarks are stored shortcuts which allow you to quickly access webpages without having to type in its full address.
Bookmarking a webpage
1. While viewing webpages, press Menu > More > Add bookmark. Or press Menu + a simultaneously.
2. Edit the name or location if needed > Tap
OK.
Opening a bookmark
1. When viewing any webpages, tap at the right of the URL eld. Or press Menu > Bookmarks.
2. Tap a bookmark to open it.
t If you prefer to open the webpages in a new window, tap and hold the bookmark and tap
Open in new window.
Editing a bookmark
1. From any webpages, press Menu > Bookmarks.
2. Tap and hold the bookmark to edit >
3. Edit the name and/or location > Tap
Edit bookmark.
OK.
Deleting a bookmark
1. From any webpages, press Menu > Bookmarks.
2. Tap and hold the bookmark to delete >
Delete bookmark > OK.
65
Page 66
Browser settings
Customize your browser settings to optimize your browsing experience.
1. From the Home screen, tap
2. Press
Page content settings Text size Select the size of the text.
Privacy settings Clear cache Delete temporary les.
Security settings Remember passwords Save your passwords for some webpages that require you to sign in.
Advanced settings Set search engine Select the web search engine you want to use.
Menu > More > Settings. Or press Menu + p at the same time.
Default zoom Select the zoom level that Browser uses when rst opening a webpage.
Open pages in overview Check to open webpages zoomed out.
Text encoding Change the character-encoding standard.
Block pop-up windows Prevent pop-up windows unless you request it.
Load images Display images on webpages.
Auto-t pages Optimize the presentation of text and other elements of webpages to t your
Landscape-only display Display webpages in landscape orientation on your screen.
Enable JavaScript Allow JavaScript to run on webpages.
Enable plug-ins Allow plug-ins to run on webpages.
Open in background Open new windows in the background.
Set home page Set the default homepage.
Clear history Delete the history of webpages you visited.
Accept cookies Allow sites to save and read cookie data.
Clear all cookie data Delete all cookie data.
Remember form data Remember what you enter in form elds.
Clear form data Delete all the information the browser remembered.
Enable location Allow sites to request access to your location.
Clear location access Delete location access for all websites.
Clear passwords Delete all saved passwords.
Show security warnings Show warning of security alerts.
Website settings Set for individual websites.
Reset to default Restore default settings.
Apps > Browser.
phone’s screen.
YouTube
YouTube is Google’s online video streaming service for viewing, discovering, and sharing videos.
Opening and signing into YouTube
Signing into YouTube
You can discover and watch YouTube videos without a YouTube account, but if you want to take advantage of many YouTube
features, you must sign into your YouTube account.
1. From the Home screen, tap
2. Press
Menu > My Channel.
Apps > YouTube.
66
Page 67
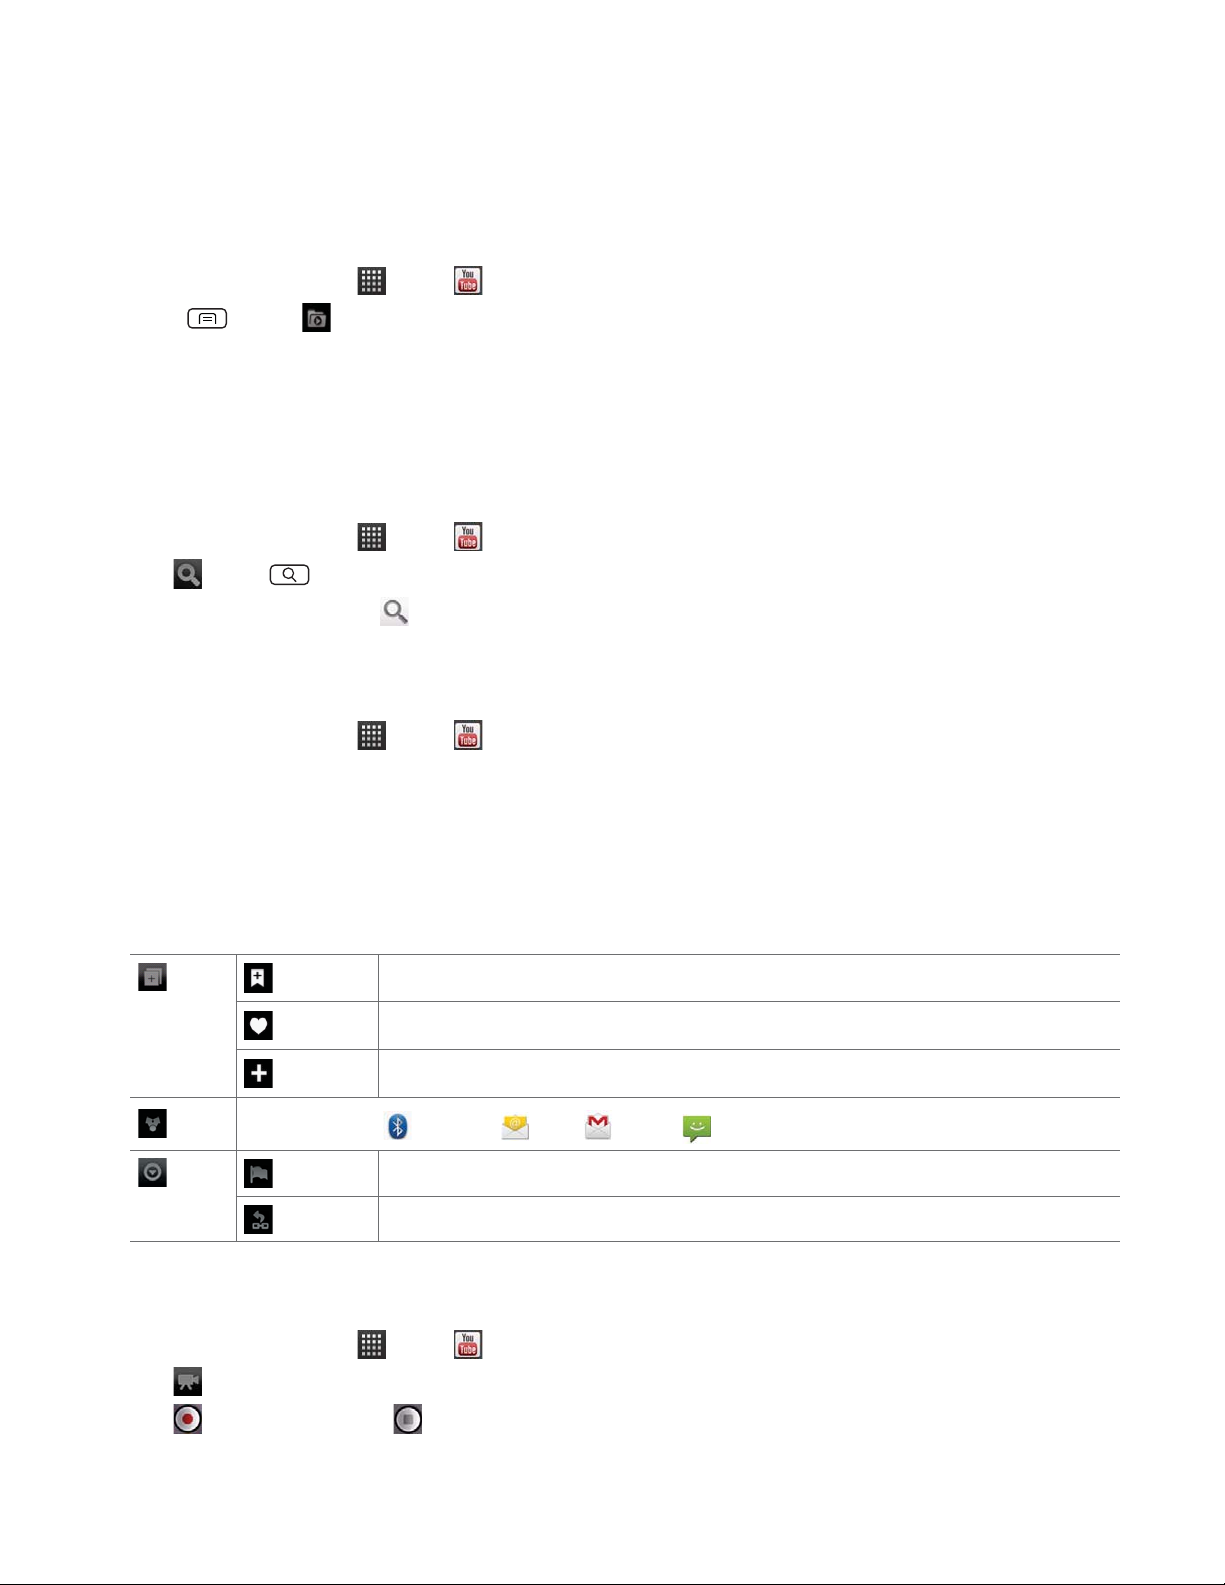
The rst time you use a YouTube feature that requires an account, you’re prompted to sign in. Create a new account or enter
your YouTube sign in information if you already have an account.
For more information about YouTube accounts, visit YouTube on the web.
Finding videos
Browsing videos by category
1. From the Home screen, tap Apps > YouTube.
2. Press
Menu > Browse.
3. Tap a category in the scrolling list.
t Tap the current time lter setting at the top of the category screen to change the time period and reduce the number of
videos listed.
tTap
Most viewed, Top rated, Most discussed or Top favorited.
Searching for videos
1. From the Home screen, tap Apps > YouTube.
2. Tap
3. Enter the search criteria > Tap
or press Search.
.
4. Scroll through the search results and tap a video to watch it.
Watching videos
1. From the Home screen, tap Apps > YouTube.
2. Tap a video to begin playback.
t Tap the video to pause or resume playback.
Info, Related videos or Comments to learn more about the video.
t Tap
t Rotate your phone to watch the video in full-screen view. You can also double-tap the video to toggle full-screen view on
and o.
Add to
Share
More
Watch later
Favorites
New playlist
Share the video via Bluetooth, Email, Gmail or Messaging.
Flag
Copy URL
Bookmark the video to watch it later.
Add the video to your Favorites.
Add your new playlist.
Flag the video as inappropriate.
Copy the video’s web address. You can paste into a message or other applications.
Uploading videos
To shoot and upload a new video
1. From the Home screen, tap Apps > YouTube.
2. Tap
3. Tap
4. Enter a title for the video and more details > Tap
. The Camera will open in video mode.
to start recording > Tap to stop recording.
Upload.
67
Page 68
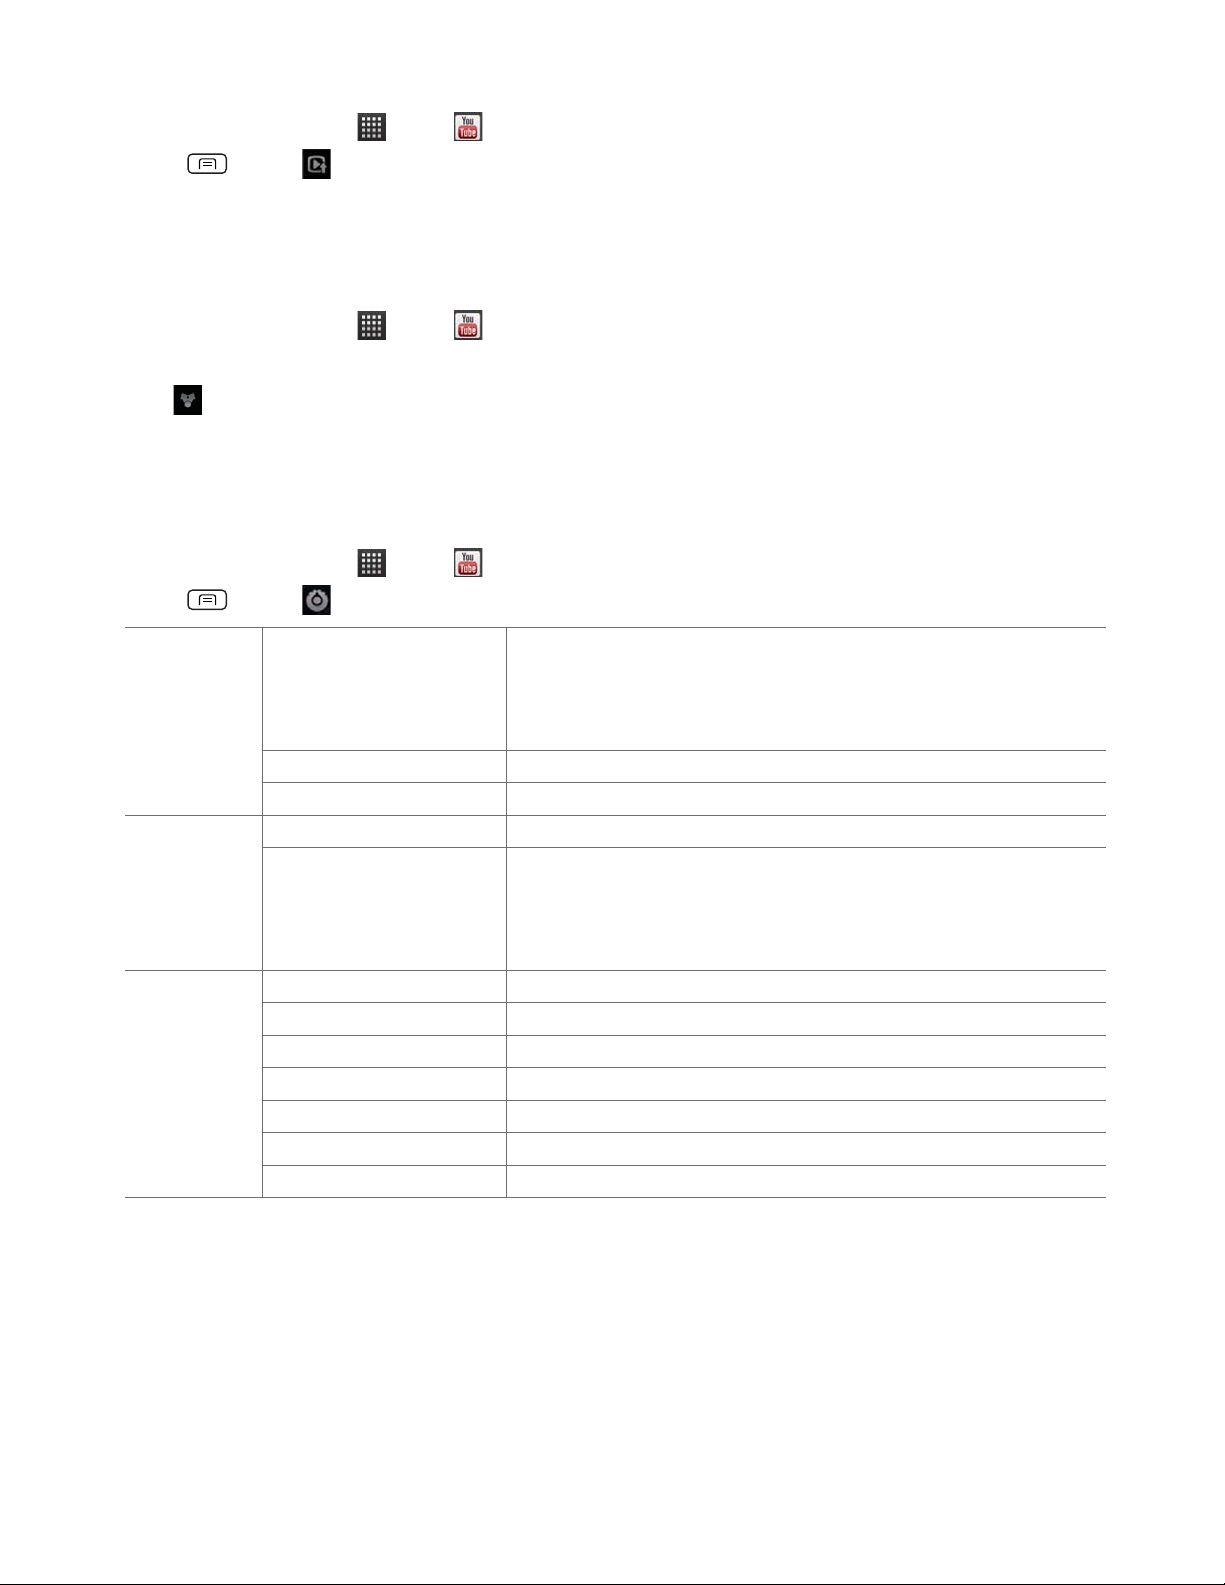
To upload an existing video
1. From the Home screen, tap Apps > YouTube.
2. Press
Menu > Upload. The Gallery will open.
3. Tap the video you want to upload.
4. Enter the title for the video and more details > Tap
Upload.
Sharing videos
1. From the Home screen, tap Apps > YouTube.
2. Tap a video to play.
3. Tap
Share.
4. Tap the application you want to use to share the video.
YouTube settings
You can change the following settings for YouTube on your phone.
1. From the Home screen, tap
2. Press
General settings High quality on mobile Check if you prefer to watch videos in high resolution by default when connected
Search settings Clear search history Remove previous YouTube video search results.
About Help Open the YouTube Help Center in your phone’s Browser.
Menu > Settings.
Caption font size Set the preferred text size when viewing video captions.
Uploads Specify network preferences for uploads.
SafeSearch ltering Select if you want Google SafeSearch ltering to block some results when you
Feedback Open a YouTube feedback form in your phone’s Browser.
Google Mobile Terms of Service Display the Google Mobile Terms of Service.
YouTube Terms of Service Display the YouTube Terms of Service.
Google Mobile Privacy Policy Display the Google Mobile Privacy Policy.
YouTube Privacy Policy Display the YouTube Privacy Policy.
Application version The YouTube application version number installed on your phone.
Apps > YouTube.
to mobile networks. Watch videos in standard mode to reduce startup time and
data use. This setting has no eect if you are connected to a Wi-Fi network, where
videos are always shown in higher resolution.
search for videos. Settings are: Block no search results (Don’t lter), only explicit
or oensive videos (Moderate), or both explicit and oensive text and videos
(Strict).
68
Page 69

Wi-Fi
Turning Wi-Fi on and connecting to a wireless network
1. From the Home screen, tap Apps > Settings.
2. Tap
3. Select the
4. The network names and security settings of detected Wi-Fi networks are displayed.
5. Tap a Wi-Fi network to connect.
t If you selected a network that is secured, enter the security key and then tap
Wireless & networks > Wi-Fi settings.
Wi-Fi check box to turn Wi-Fi on.
Connect. Depending on the network type
and security settings, you may also need to enter more information or choose a security certicate.
Connecting to a Wi-Fi network with EAP-TLS security
You may need to install a network certicate to your phone before you can connect to a Wi-Fi network with EAP-TLS
authentication protocol.
1. Save the certicate le to the root folder of the microSD card.
2. From the Home screen, tap
3. Tap
4. Select the network certicate needed to connect to the EAP-TLS network.
5. After the certicate is installed, follow the steps in the previous section to connect to the Wi-Fi network.
Location & security > Install from SD card.
Apps > Settings.
Checking wireless network status
1. From the Home screen, tap Apps > Settings.
2. Tap
3. Tap the wireless network that the phone is currently connected to.
A message box is then displayed showing the Wi-Fi network name, status, speed, signal strength, and more.
Wireless & networks > Wi-Fi settings.
Connecting to another Wi-Fi network
1. From the Home screen, tap Apps > Settings.
2. Tap
3. Detected Wi-Fi networks are displayed in the Wi-Fi networks section. To manually scan for available Wi-Fi networks, on
tTo set advanced settings, on the Wi-Fi settings screen, press
4. Tap another Wi-Fi network to connect to it.
Wireless & networks > Wi-Fi settings.
the Wi-Fi settings screen, press
Menu > Scan.
Menu > Advanced.
Downloads
Images, les and other items you download in Browser, Gmail, Email are stored on your phone. You can view, manage or
delete what you have downloaded.
Opening Downloads
1. From the Home screen, tap Apps > Downloads.
69
Page 70
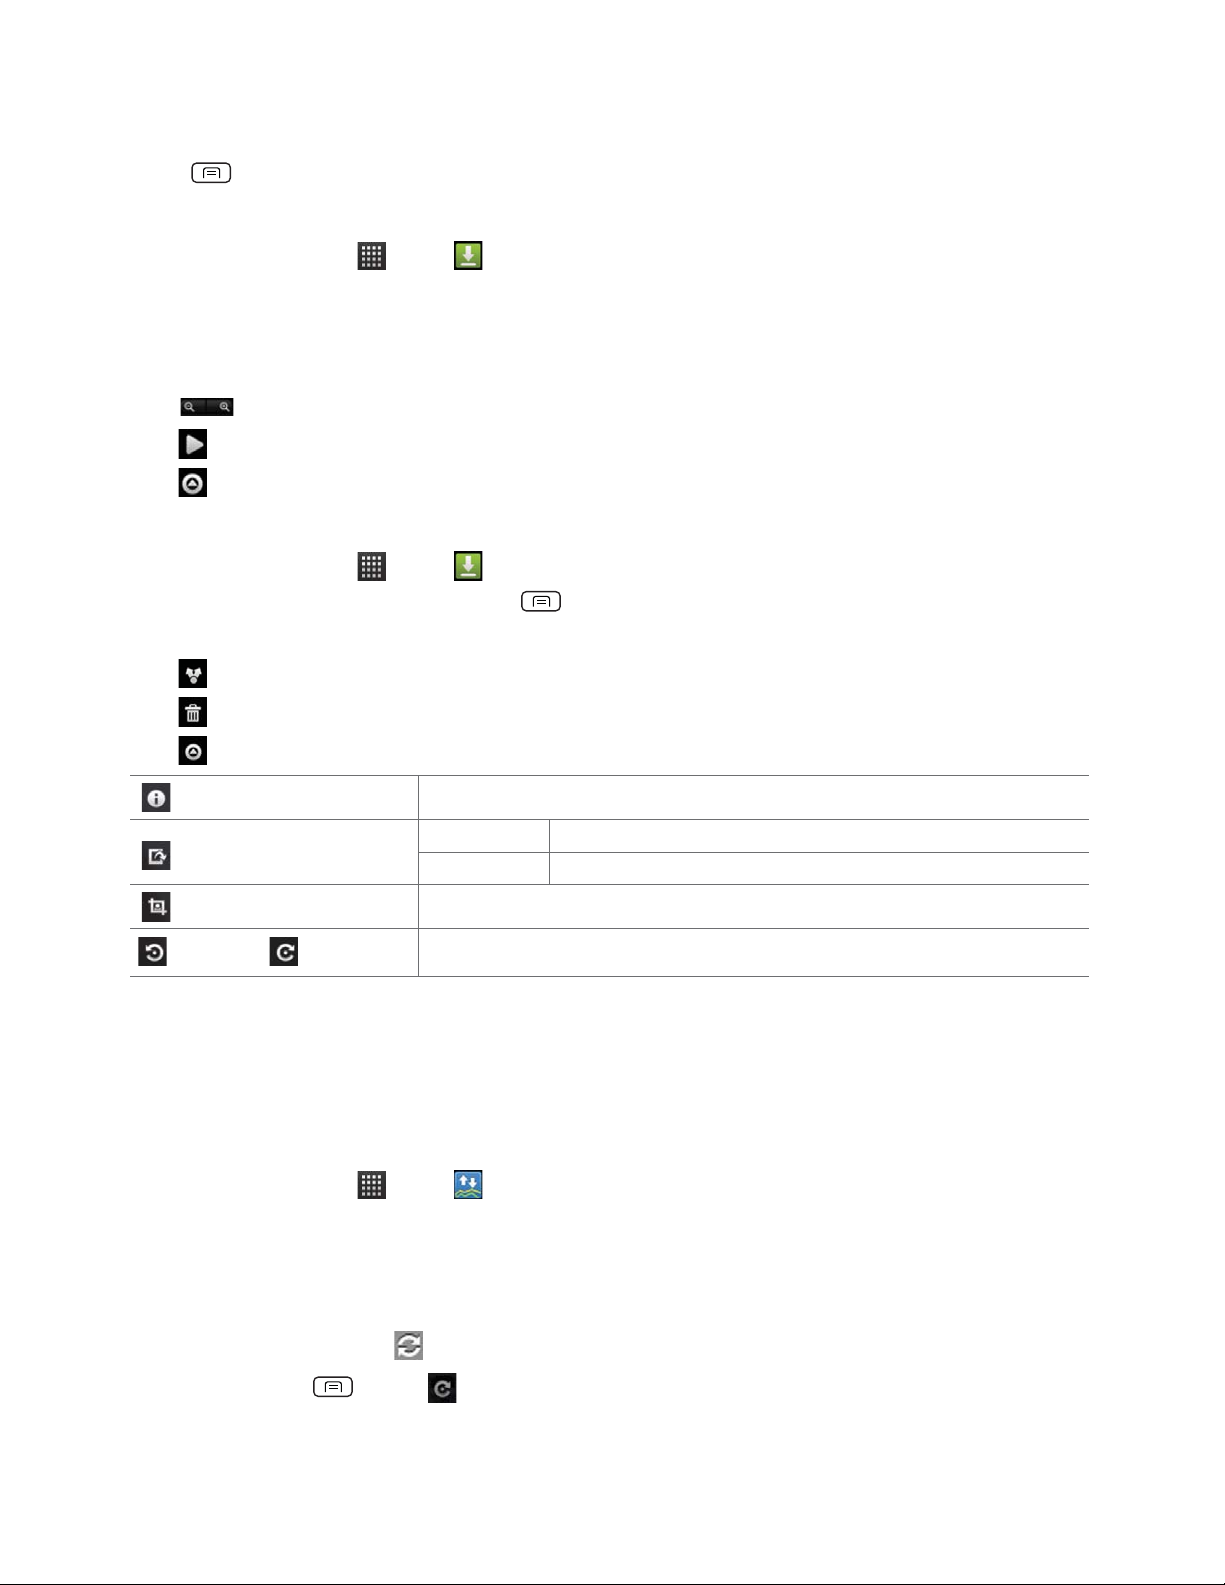
2. Tap an item you want to view it.
tCheck the checkbox of the item you want to delete and then tap
tPress
Menu to select Sort by size or Sort by time.
Delete.
Viewing a file
1. From the Home screen, tap Apps > Downloads.
2. Tap the le you want to open.
t Turn your phone left or right to view the le in upright (portrait) or sideways (landscape) orientation.
3. Tap the screen to see the controls.
t Tap
t Tap
t Tap
or double-tap the screen to zoom in or out.
Slideshow to watch a slideshow of the selected le.
Menu to view more options.
Working with files
1. From the Home screen, tap Apps > Downloads.
2. Tap the le you want to manage, and then press
Share, Delete or More.
3. Tap
t Tap
t Tap
Share > Tap the application to use to share the selected le.
Delete > Tap Confirm Delete to delete the selected le.
Menu.
t Tap
More > Tap one of the icons shown below:
Details
Set as
Crop
Rotate Left /
Rotate Right
Get details about the le.
Contact icon
Wallpaper Use a picture as Home screen wallpaper.
Crop a picture.
Rotate a picture.
Use a picture as a contact icon.
Traffic Manager
You can check use of Data, Call, SMS and Applications on your phone very easily with Trac Manager.
Viewing Traffic Manager
1. From the Home screen, tap Apps > Traffic Manager.
2. Tap
General or Apps.
t
General : You can view usage of Data, Call and SMS.
tApps : You can view usage of Applications. Apps are sorted in data usage from highest to lowest.
tTo refresh the current page, tap
tTo reset values, press
tTo set counter settings for Data, Call and SMS, tap each item.
Menu > Reset all > Ye s. All general counter is reset to 0.
.
70
Page 71
Counter enabled Check to enable or disable this counter.
Counting period Set period length of counting.
Period start Set day of month to start counting.
Reset Set to reset counter value to
*** limit Set to warn you when *** limit is reached. When limit is reached, dialog box is displayed.
Limit You can set a limit to use of Data, Call and SMS.
0.
Traffic Manager settings
1. From the Home screen, tap Apps > Traffic Manager.
2. Press
Update interval You can set update interval of trac values.
Notication If checked, Trac Manager icon is displayed in the Status bar.
Menu > Settings.
Using Traffic Manager widget
1. Tap and hold an empty area on the Home screen.
2. Tap
3. Tap Trac Manager widget and then you can go to Trac Manager directly.
Widgets > Traffic Manager. Trac Manager widget is displayed.
71
Page 72

Bluetooth
Using Bluetooth
Bluetooth is a short-range wireless communications technology that devices can use to exchange information over a distance
of about 30 feet. The most common Bluetooth devices are headphones, hands-free car kits, and portable devices, including
laptops and cell phones.
Turning Bluetooth on or off
1. From the Home screen, tap Apps > Settings.
2. Tap
3. Check or uncheck Bluetooth to turn it on or o.
Wireless & networks.
Changing the phone’s Bluetooth name
The phone name identies your phone to other devices.
1. From the Home screen, tap
2. Tap
3. If Bluetooth isn’t turned on, check Bluetooth to turn it on.
4. Tap
5. Enter the name for your phone in the dialog box >
Wireless & networks.
Bluetooth settings > Device name.
Apps > Settings.
OK.
Pairing your phone with a Bluetooth device
1. From the Home screen, tap Apps > Settings.
2. Tap
3. If Bluetooth isn’t turned on, check Bluetooth to turn it on.
4. Tap Bluetooth settings > Scan for devices. A list of nearby Bluetooth devices is displayed.
5. Tap the ID of the other device to pair them.
Wireless & networks.
Connecting to a Bluetooth device
Once paired, your phone will automatically connect whenever it detects a paired Bluetooth device. You can also manually
connect Bluetooth devices as follows:
1. From the Home screen, tap
2. Tap
3. If Bluetooth isn’t turned on, check Bluetooth to turn it on.
4. Tap
5. When the phone and the device are connected, the device is displayed as connected in the list.
Wireless & networks.
Bluetooth settings > Scan for devices.
Apps > Settings.
Disconnecting or Unpairing from a Bluetooth Device
Disconnecting a Bluetooth device
72
Page 73

1. From the Home screen, tap Apps > Settings.
2. Tap
3. In the Bluetooth devices section, tap and hold the device name to disconnect.
4. Tap
Wireless & networks > Bluetooth settings.
Disconnect.
Unpairing from a Bluetooth device
You can make your phone forget its pairing connection with another Bluetooth device.
1. From the Home screen, tap
2. Tap
3. In the Bluetooth devices section, tap and hold the device name to unpair.
4. Tap
Wireless & networks > Bluetooth settings.
Unpair.
Apps > Settings.
Connecting to a Bluetooth Headset
1. From the Home screen, tap Apps > Settings.
2. Tap
3. If Bluetooth isn’t turned on, check Bluetooth to turn it on.
4. Tap
Wireless & networks > Bluetooth settings.
Scan for devices. Your phone will start to scan for Bluetooth devices within range.
5. When you see the name of your headset displayed in the Bluetooth devices section, tap the name. Your phone then
automatically tries to pair with the Bluetooth device.
6. If automatic pairing fails, enter the passcode supplied with your headset.
Reconnecting a headset
1. Put the Bluetooth device in pairing mode.
2. From the Home screen, tap
3. Tap
4. If Bluetooth isn’t turned on, check Bluetooth to turn it on.
5. Tap the device’s name in the Bluetooth devices section.
6. If prompted to enter a passcode, try 0000 or 1234, or consult the headset documentation to nd the passcode.
Wireless & networks > Bluetooth settings.
Apps > Settings.
Sending and Receiving Information Using Bluetooth
You can use Bluetooth to transfer information between your phone and another Bluetooth-enabled device such as a phone or
laptop computer. You can send the following types of information, depending on the device you are sending to:
tImages and videos
tContacts
tAudio les
To send les, your phone must have a microSD card installed.
NOTE
The rst time you transfer information between your phone and another device, you need to enter or conrm a security passcode. Your phone and
the other device are then paired, and you will not need to exchange passcodes to transfer information in the future.
73
Page 74

1. On your phone, open the application that contains the item you want to send.
2. Follow the steps for the type of the application, select
3. If you are prompted to turn on Bluetooth, tap
4. Tap the name of the receiving device.
5. On the receiving device, accept the le.
Turn on.
Send File or Send in the menu. Then select Bluetooth.
Receiving information from another device
Your device is capable of receiving a wide variety of le types with Bluetooth, including photos, music tracks, and documents
such as PDFs.
To receive les from another device, your phone must have a microSD card installed.
1. From the Home screen, tap
2. Tap
3. If Bluetooth isn’t turned on, check Bluetooth to turn it on.
4. Tap the
5. On the sending device, send one or more les to your phone.
6. If a Bluetooth authorization request is displayed on your phone, enter the same passcode on both your phone and the
7. When your phone receives a le transfer request notication, slide down the notications panel, and then tap
Wireless & networks > Bluetooth settings.
Discoverable check box.
other device, or conrm the auto-generated passcode.
Apps > Settings.
Accept.
8. When the transfer is complete, a notication is displayed. To open the le immediately, slide down the notications
panel, and tap the notication.
Adding the Bluetooth received folder to the Home screen
You can add a folder to the Home screen that shows all les you have received with Bluetooth.
1. Tap and hold an empty area on the Home screen, tap
2. Tap and hold the Bluetooth received folder icon, and drag it to your desired Home screen location.
tTo rename the folder, tap and hold the title bar of the folder window > Enter a new name >
To view the folder contents, tap the folder icon. To open a le, tap the le name.
Folders > Bluetooth received.
OK.
74
Page 75
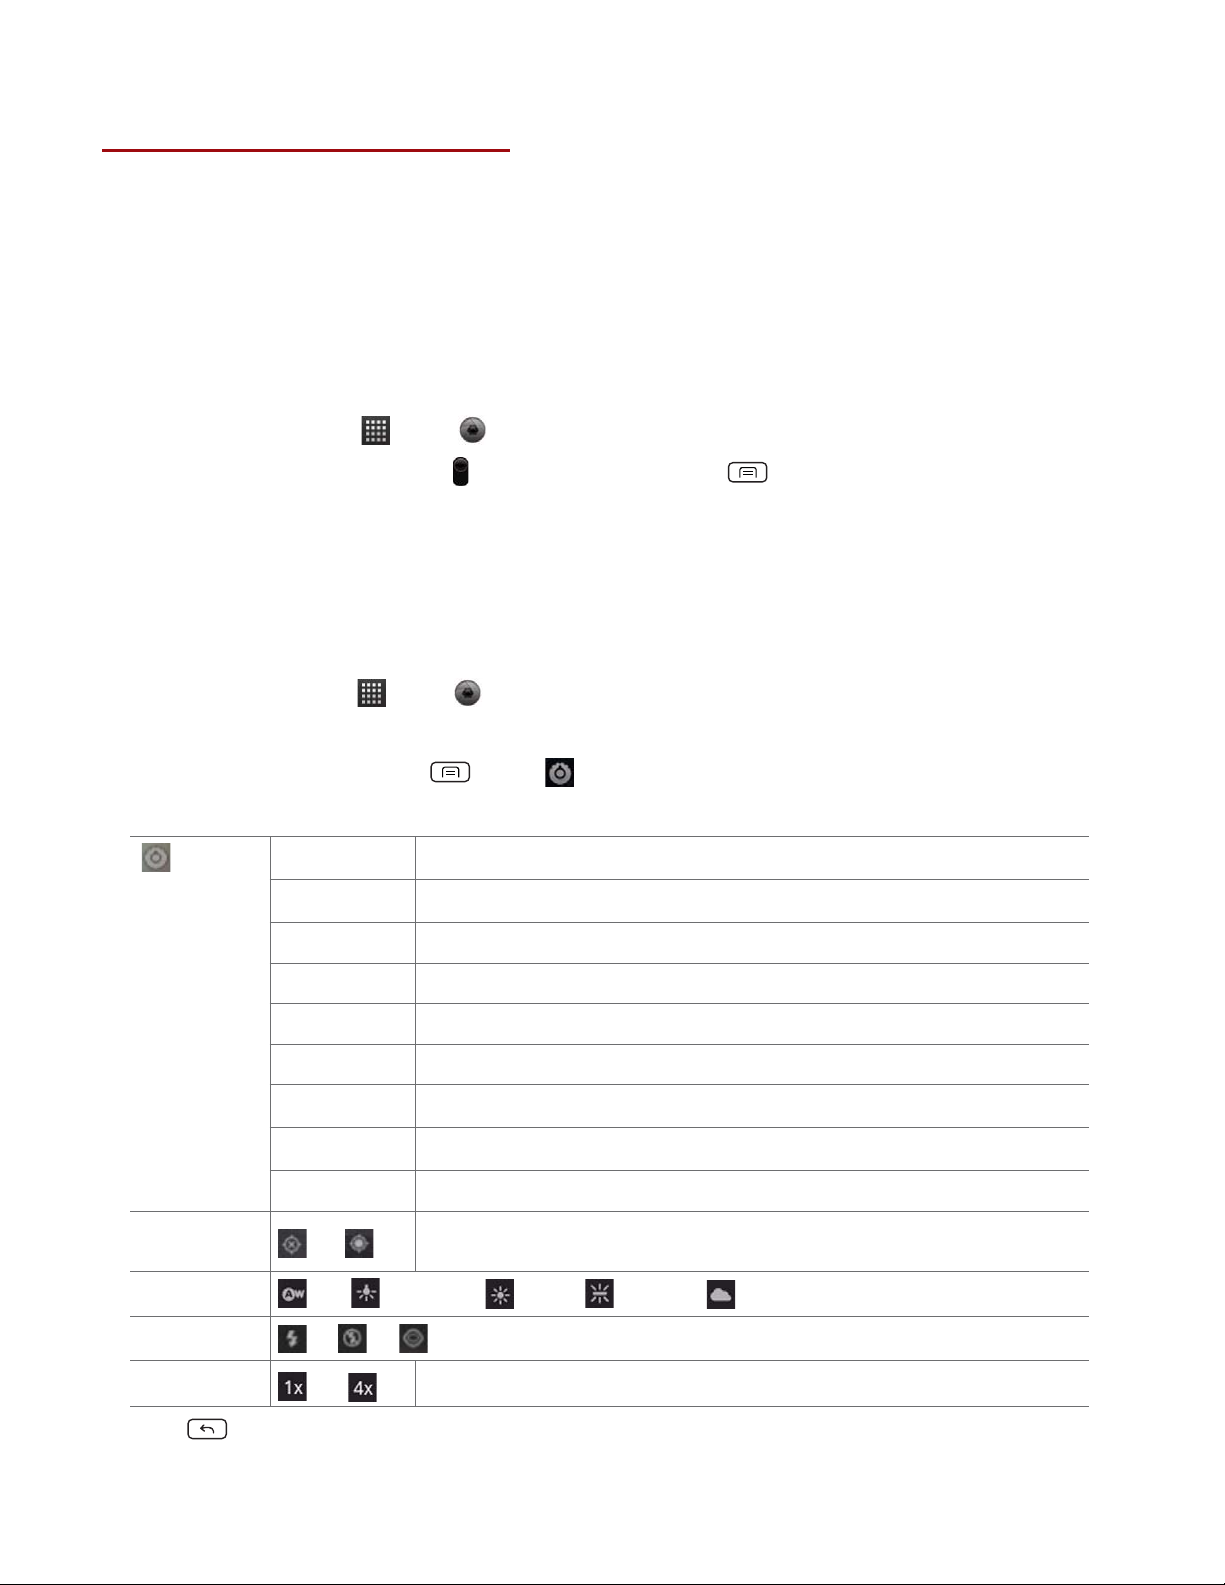
Entertainment
Camera/Camcorder
You can take pictures and shoot videos with Camera/Camcorder.
Photos and videos captured with the camera will be stored on the phone’s microSD card. A microSD card must be installed to
use the Camera/Camcorder.
Opening Camera
tFrom the Home screen, tap Apps > Camera.
t Or, when in Camcorder mode, drag the
When you’re in Camera mode and you turn your phone left or right, the onscreen camera controls automatically rotate the
display.
to the Camera position. Or, press Menu > Switch to camera.
Camera settings
When in Camera mode, Camera settings are displayed on screen. Before taking the photo, you can adjust your camera settings
or leave the controls in automatic mode.
1. From the Home screen, tap
2. Tap a setting icon. The settings open over the screen.
t To hide settings on the screen, press
3. Tap the setting you want to change.
General settings
Exposure +2, +1, 0, -1, -2
Scene mode Auto, Night
Picture size 2M Pixels, 1M Pixels
Picture quality Jpeg 55%, Jpeg 85%, Jpeg 100%, Super ne, Fine, Normal
Color eect None, Mono, Sepia, Negative
Apps > Camera.
Menu > Hide settings.
Anti Banding 50 Hz, 60 Hz, Auto
Remaining shots Show, Hide
Auto review Disable, 1 Second, 2 Seconds, 3 Seconds
Camera settings Restore defaults
Store location
White balance
Flash mode
Zoom
4. Press Back or tap the screen to close the settings menus.
O / On
Auto,
On, O,
1x ~ 4x
Activate to use your phone’s location-based services. Take pictures wherever you are and tag
them with the location.
Incandescent,
Red eye
Tap the amount of zoom you want.
Daylight,
Taking a picture
75
Fluorescent, Cloudy.
Page 76
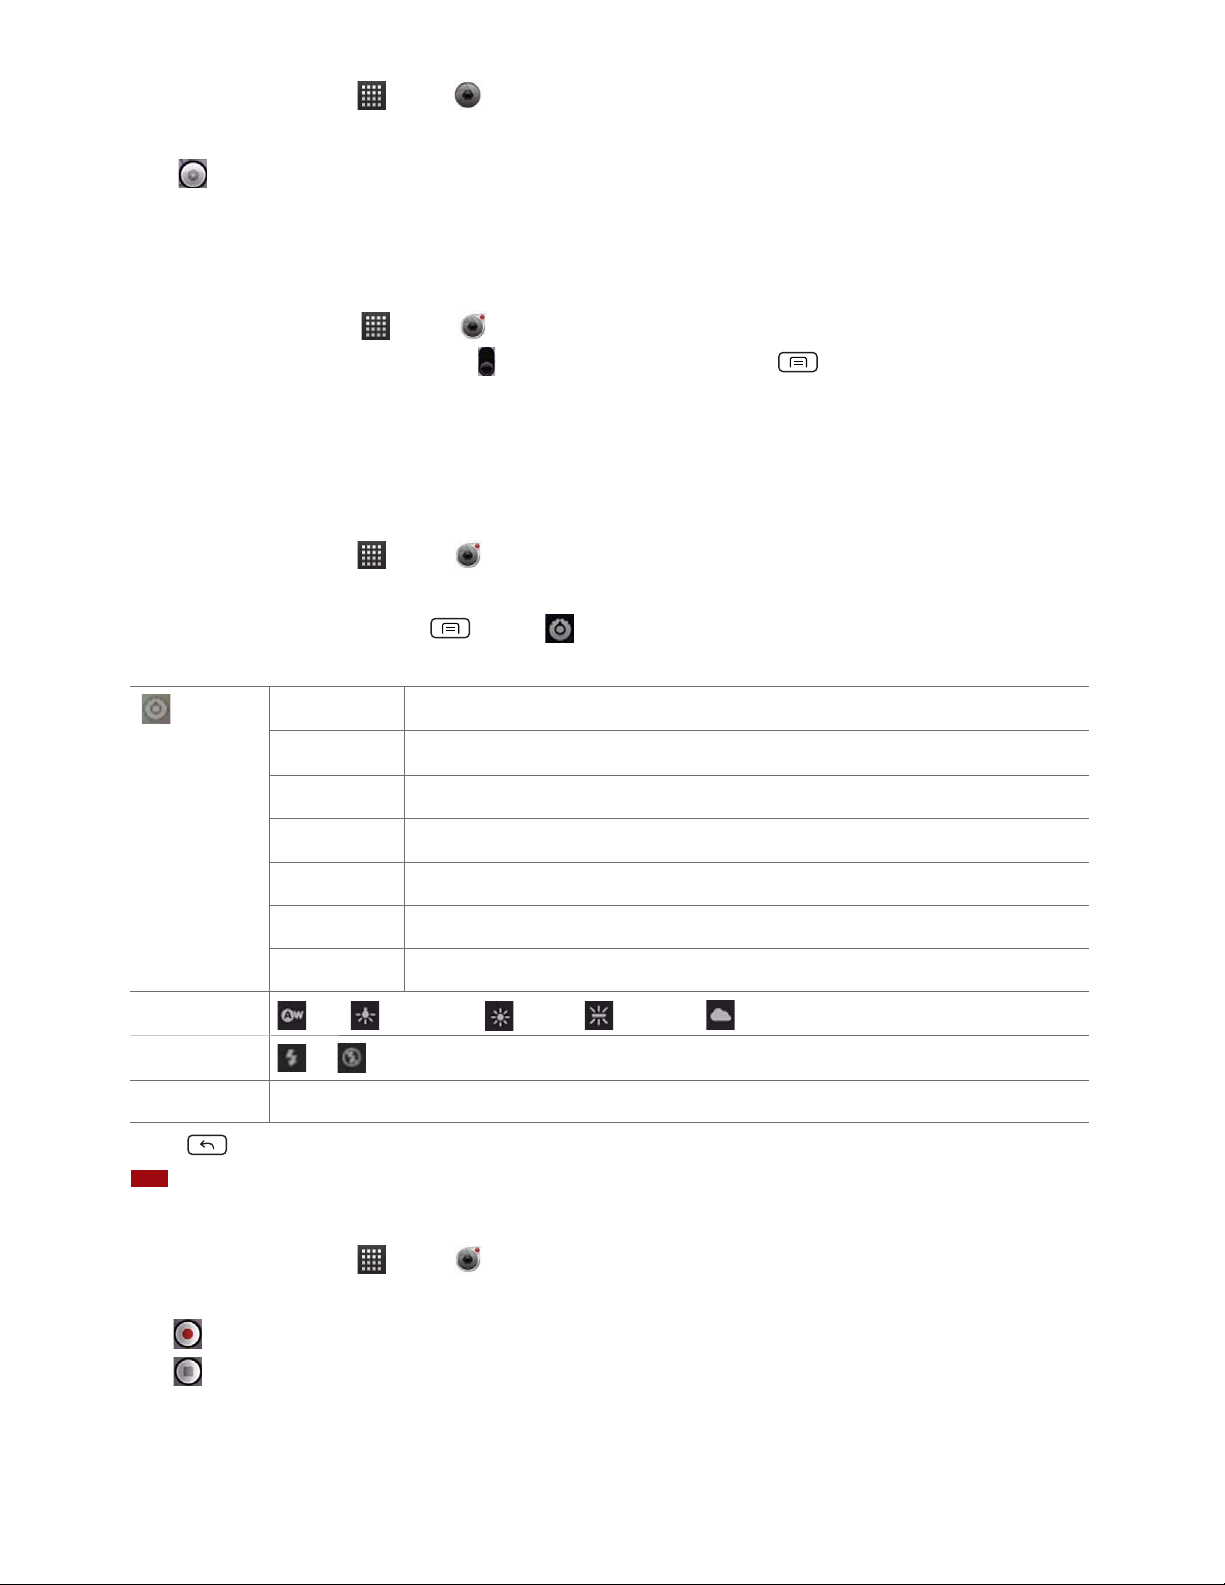
1. From the Home screen, tap Apps > Camera.
2. Frame your subject on screen.
t Tap
. The camera brings the image into focus. When the image is in focus, the camera takes a picture.
The picture you just took is briey previewed full-screen, and then is displayed as a thumbnail at the top right. Tap the
thumbnail to view, share, or work with your pictures in Gallery.
Opening Camcorder
tFrom the Home screen, tap Apps > Camcorder.
t Or, when you’re in Camera mode, drag the
to the Camcorder position. Or, press Menu > Switch to video.
The camcorder interface does show in landscape mode. Just sideways.
Camcorder settings
When in Camcorder mode, Camcorder settings are displayed on screen. Before recording, you can adjust your camcorder
settings or leave them in automatic mode.
1. From the Home screen, tap
2. Tap a setting icon. The settings open over the screen.
tTo hide settings on the screen, press
3. Tap the setting you want to change.
General settings
Color eect None, Mono, Sepia, Negative
Video quality WVGA, VGA, CIF, QVGA, QCIF
Apps > Camcorder.
Menu > Hide settings.
Video Encoder MPEG4, H263, H264
Audio Encoder AMRNB, AAC
Video duration 20 seconds, 10 minutes, 30 minutes
Remaining time Show, Hide
Camera settings Restore defaults
White balance
Flash mode
Video quality High (30m), Low (30m), MMS (Low, 20s), YouTube (High, 10m), Custom
Auto,
On,
Incandescent,
O
Daylight,
Fluorescent,
4. Press Back or tap the screen to close the settings menus.
NOTE
Depending on the selected video quality, not all video quality and video encoder options may be available.
Recording videos
1. From the Home screen, tap Apps > Camcorder.
2. Frame the scene where you want to start recording.
3. Tap
4. Tap
to start recording.
to stop recording.
Cloudy.
An image from your most recent video is displayed as a thumbnail at the top right. Tap the thumbnail to view, share, or work
with your videos in Gallery.
76
Page 77
Gallery
Use Gallery to view your pictures and videos. You can edit and add eects to your photos. You can also easily add a photo as
your contact icon, location icon, or wallpaper.
Opening Gallery and viewing album lists
Opening Gallery
tFrom the Home screen, tap Apps > Gallery.
tOr when you’re in Camera/Camcorder mode, tap the thumbnail image at the top right.
Your album list is displayed. Albums are groups of images and videos in folders.
Managing albums
1. From the Home screen, tap Apps > Gallery.
2. Press
3. Check the albums you want.
t Tap
more albums.
t Tap
t Tap
Menu twice.
Share > Tap the application to use to share the selected albums. You can share the entire contents of one or
Delete > Tap Confirm Delete to delete selected albums and all contents from your microSD card.
More > Tap Details to get details about selected albums.
Opening an album and viewing its contents
Viewing contents of an album
After you’ve selected an album, you can browse through your pictures and videos. Albums open displaying the pictures and
videos they contain in a chronologically ordered grid. The name of the album is shown at the top of the screen.
1. From the Home screen, tap
2. Swipe left or right across the screen to view additional albums, then tap an album to open and view its contents.
3. When you open an album,
tSwipe left or right across the screen to view more contents. Tap a thumbnail image to view it.
t Drag
easily locate an image.
to the left or right to scroll adjust scrolling speed. The image creation dates is displayed enabling you to
Apps > Gallery.
t Tap
and location.
Working with pictures or videos in batches
You can select one or more pictures or videos in an album to work on them in batches.
1. From the Home screen, tap
2. Tap the album you want to open, and then press
3. Check the pictures or videos you want.
t Tap
t Tap
t Tap
The controls available depend on the mix of selected items.
to change the album view mode. You can view the pictures and videos in a grid or in stacks, sorted by date
Apps > Gallery.
Menu twice.
Share > Tap the application to use to share the selected items.
Delete > Tap Confirm Delete to delete selected items from your microSD card.
More > Tap Details to get details about selected items.
77
Page 78
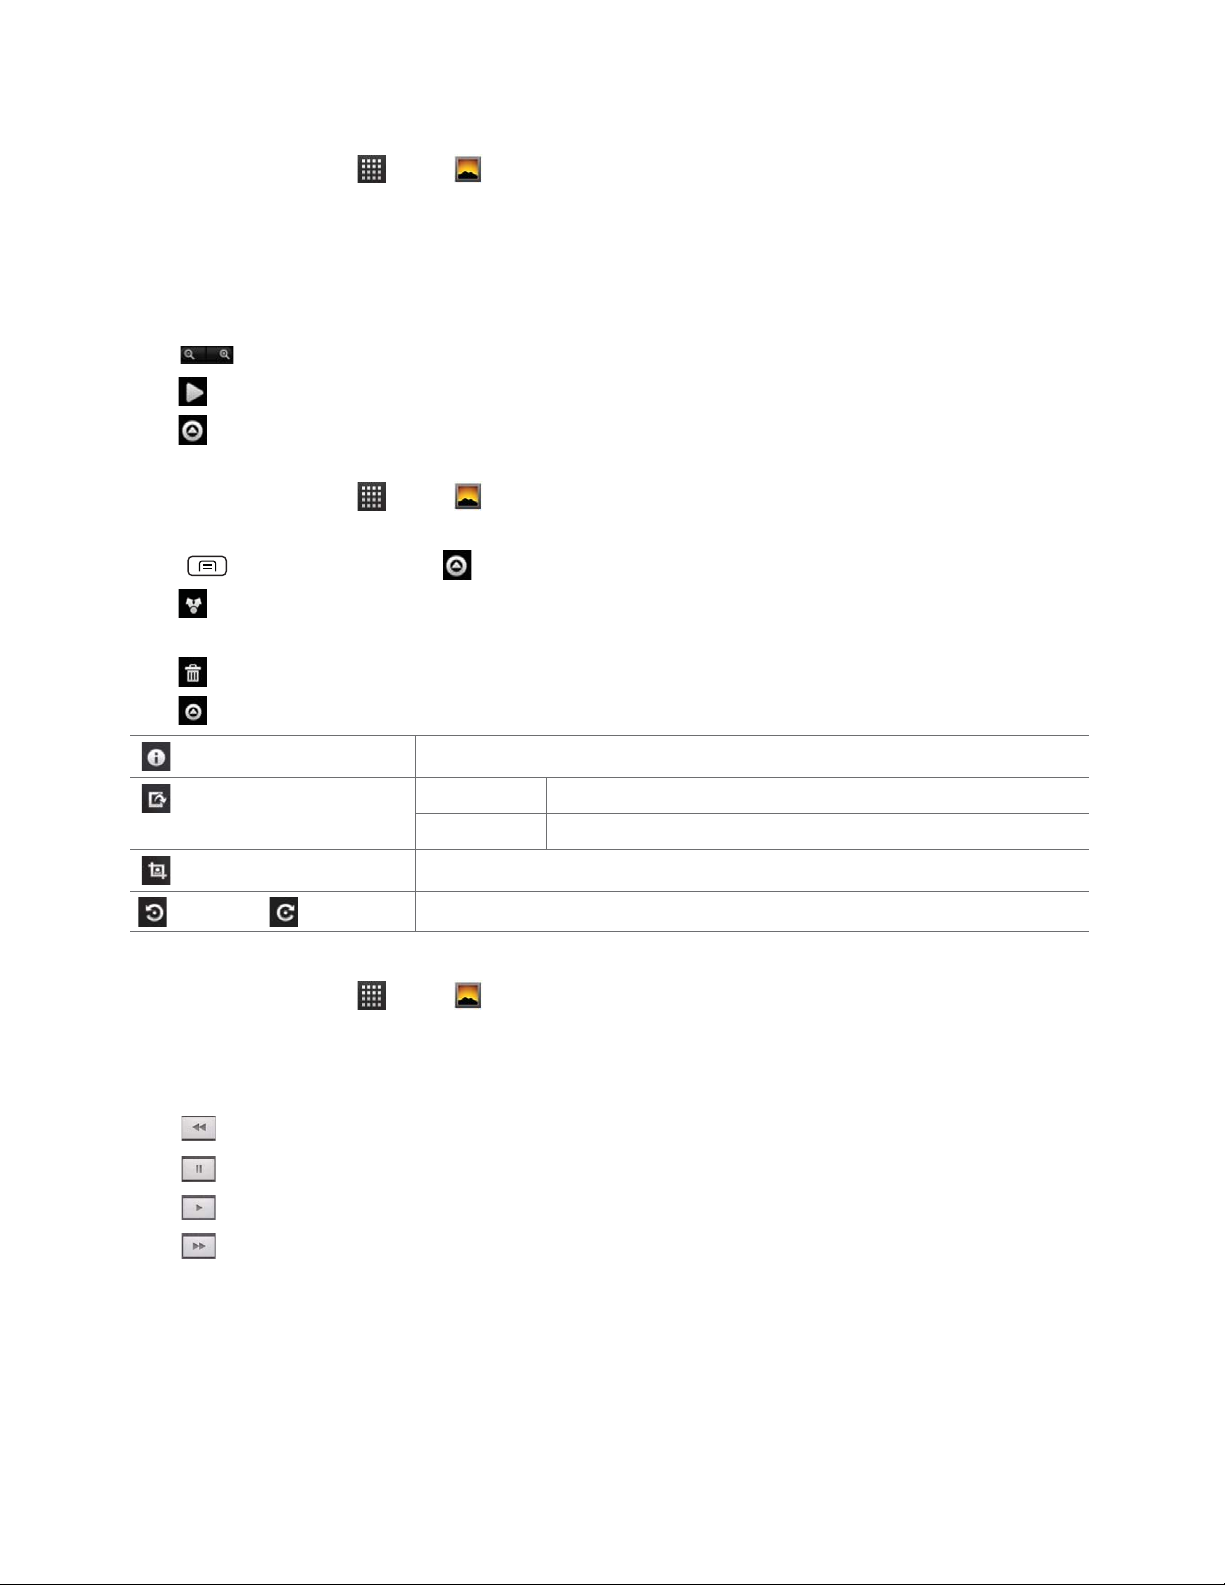
Viewing pictures
Viewing a picture
1. From the Home screen, tap Apps > Gallery.
2. Tap the album you want to open, and then tap a thumbnail image of picture to view it.
tSwipe left or right across the screen to view the previous or next picture in the album.
t Turn your phone left or right to view the picture in upright (portrait) or sideways (landscape) orientation.
3. Tap the screen to see the controls.
t Tap
t Tap
t Tap
Working with pictures
1. From the Home screen, tap Apps > Gallery.
2. Tap the album you want to open, and then tap a thumbnail image of the picture.
3. Press
t Tap
Picasa web album.
t Tap
t Tap
Details
Set as
Crop
Rotate Left /
or double-tap the screen to zoom in or out.
Slideshow to watch a slideshow of your pictures and videos in the album. Tap the screen to stop the slideshow.
Menu to view more options.
Menu. Or tap the screen > Menu.
Share > Tap the application to share the picture. You can share a picture by sending it to friends or posting it in a
Delete > Tap Confirm Delete to delete the picture from your microSD card.
More > Tap one of the icons shown below:
Get details about the picture.
Rotate Right
Contact icon
Wallpaper Use a picture as Home screen wallpaper.
Crop a picture.
Rotate a picture.
Use a picture as a contact icon.
Playing videos
1. From the Home screen, tap Apps > Gallery.
2. Tap the album you want to open, and then tap a thumbnail image of the video to view it. You can view the video in
landscape or portrait mode.
3. Tap the screen to view the controls.
t Tap
t Tap
t Tap
t Tap
to skip backwards.
to pause the video.
to resume playback.
to skip forward.
Videos
Opening Videos and viewing video lists
Use the Videos application to play videos that you’ve recorded with the Camcorder, downloaded from the web, or copied onto
your microSD card.
78
Page 79
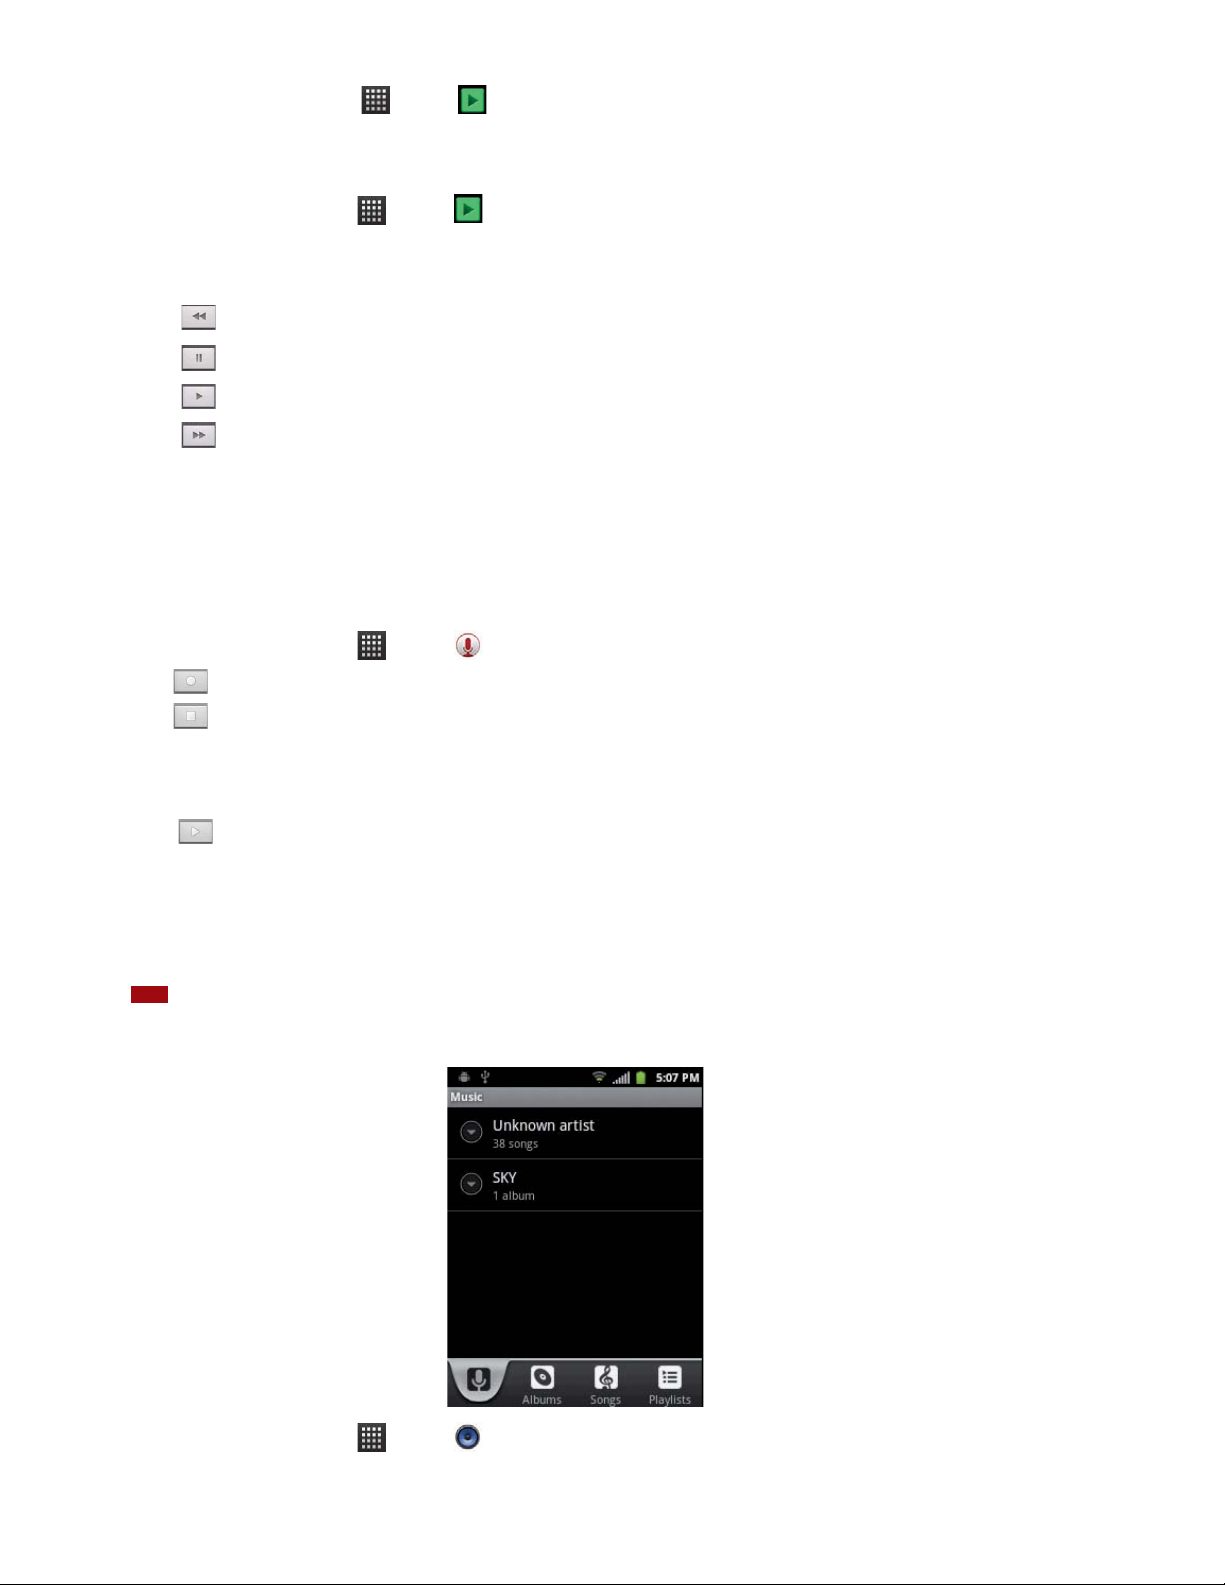
t From the Home screen, tap Apps > Videos.
Your video list is displayed.
Playing videos
1. From the Home screen, tap Apps > Videos.
2. Tap a video to view it.
3. Tap the screen to view the controls.
t Tap
t Tap
t Tap
t Tap
to skip backwards.
to pause the video.
to resume playback.
to skip forward.
Sound Recorder
Opening Sound Recorder
You must have a microSD card installed to use Sound Recorder.
1. From the Home screen, tap
2. Tap
3. Tap
t To save the voice clip, enter voice record name > Tap
tTo discard the voice clip, tap
t Tap
to start recording a voice clip.
to stop recording.
to listen to the recording.
Apps > Sound Recorder.
Save > Tap Confirmation.
Discard.
Music
Play music and audio les with Music application.
NOTE
You need to copy music les to your microSD card to use the Music application.
Viewing your music library
1. From the Home screen, tap Apps > Music.
2. You can select library to open at the bottom of the screen.
79
Page 80
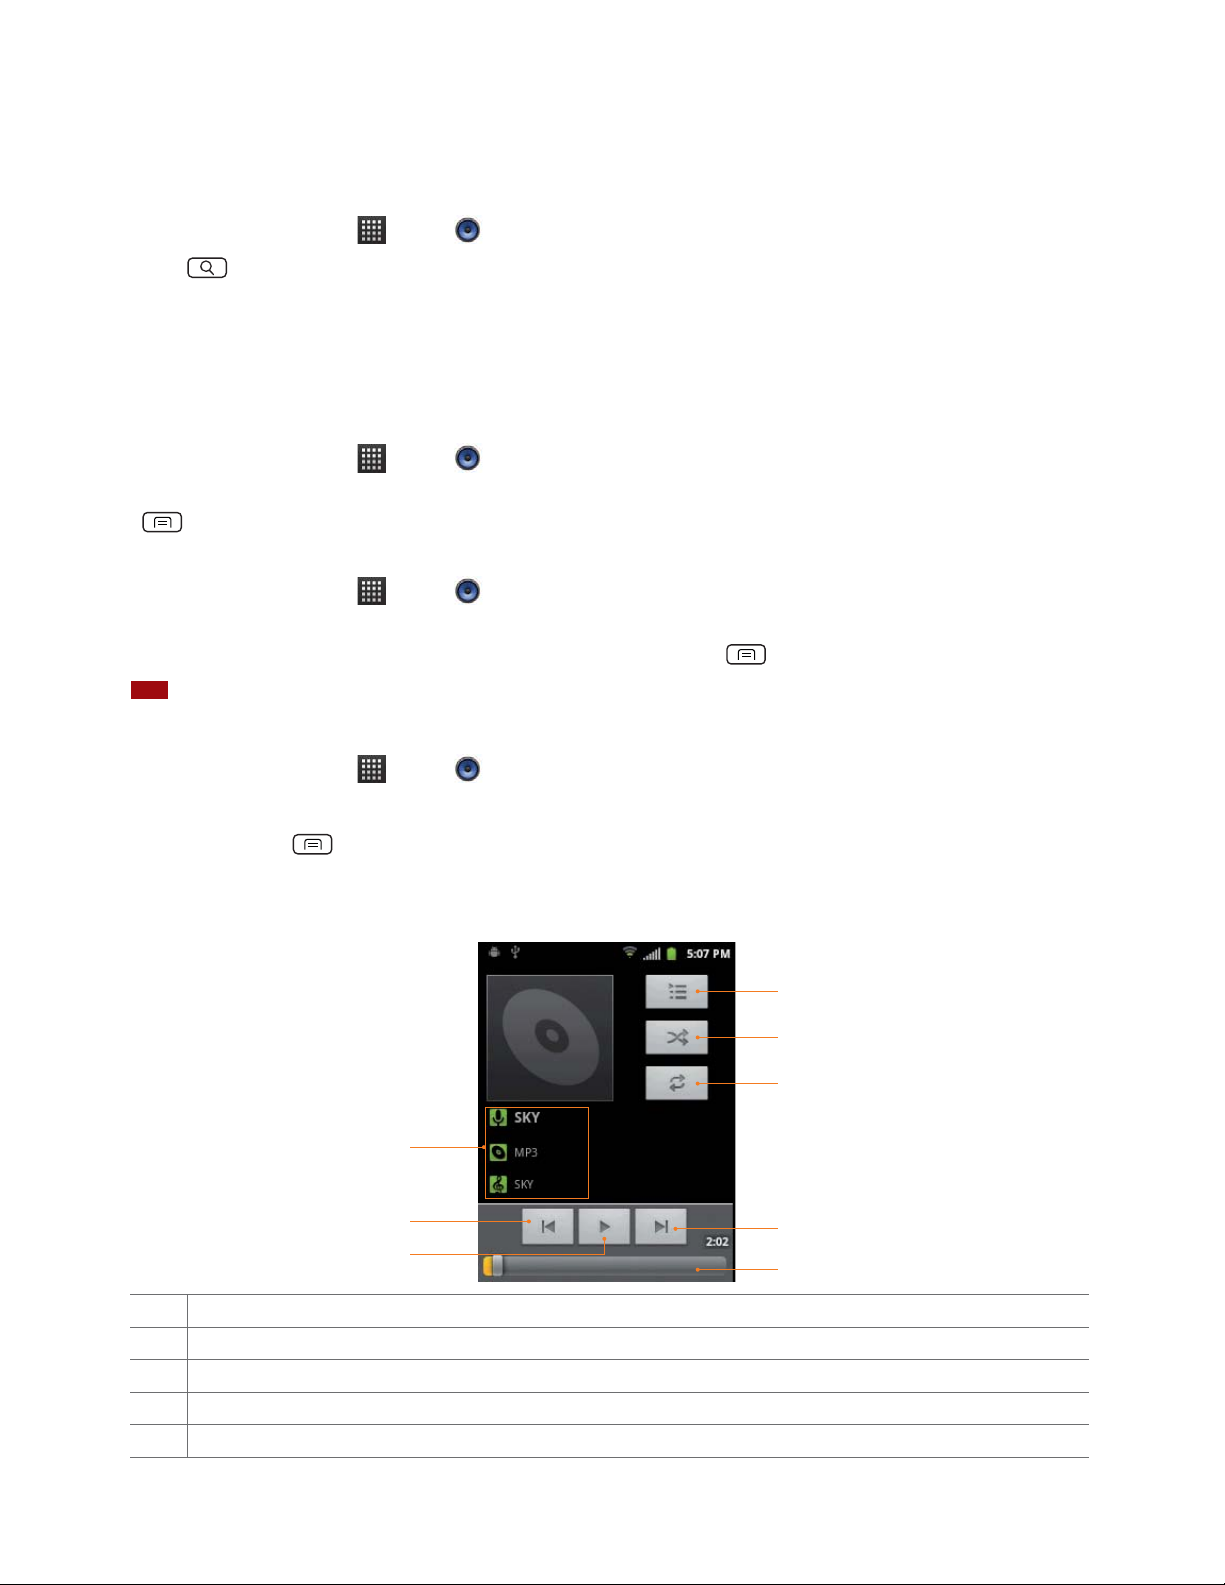
t You can view the lists of music in the microSD card.
t The lists are automatically organized according information contained in the music les. To view each list of music, you
can tap the corresponding category;
Artists, Albums, Songs or Playlists.
Searching for music in the library
1. From the Home screen, tap Apps > Music.
2. Press
Search.
t Start typing the name of an artist, album, or track. Matches are displayed in the list below the search box.
t Tap a matching song to play it. Or tap a matching album or artist to view a list of associated songs.
Using a song as a ringtone
You can use a song as your phone ringtone.
1. From the Home screen, tap
2. Tap and hold a song in a library list. In the menu that opens, tap
Apps > Music.
Use as phone ringtone. Or on the Playback screen, press
Menu > Use as ringtone.
Deleting a song from the microSD card
1. From the Home screen, tap Apps > Music.
2. Tap and hold a song.
In the menu that opens, tap
NOTE
If you are playing the song, the song can not be deleted.
Delete > OK. Or on the Playback screen, press Menu > Delete > OK.
Playing music
1. From the Home screen, tap Apps > Music.
2. Tap the library you want to open at the bottom of the screen.
3. Tap a song or press
vary according to each library setting.
Menu > Tap Play all mode, Party shuffle mode or Shuffle all mode. Available playback modes
tTap the on screen icons to control music playback, select a song to play, repeat songs, and more.
1
2
3
4
5
6
1 Open the current playlist.
2 Turn shue on or o. (Shue is o when button is gray.)
3 Repeat the current playlist: Repeat all songs, Repeat current song, Repeat o.
4 Tap and hold, then search for the corresponding information in Browser/Music/YouTube.
5 Go to the previous song in the current playlist.
7
8
80
Page 81
6 Play/Pause.
7 Go to the next song in the current playlist.
8 Drag the slider to go directly to a specic section of a track.
Music playing features
1. From the Home screen, tap Apps > Music.
2. Open the library you want, and then tap the music le.
t To adjust the volume, press
Volume up and Volume down.
t While music is playing, it is possible to exit to the Home screen or open another application.
t You can also return to the Music application by opening the Notication panel.
Working with playlists
You can organize the music les by creating playlists.
Creating a playlist
1. From the Home screen, tap Apps > Music.
2. Tap and hold the desired track >
3. Enter the playlist name >
Adding a song to a playlist
1. While in the Music application, tap and hold the desired track > Add to playlist > Current playlist, New or tap the
playlist you want.
Current playlist The selected music is added to the current playlist.
New When you enter the name of a playlist and tap
Removing a song from a playlist
1. While in the Music application, tap Playlists > Tap the desired playlist.
Add to playlist > New.
Save.
Save, the music is added to the new playlist.
2. Tap and hold the track to be deleted >
Delete > OK.
tThe song is permanently deleted from the playlist and the microSD card.
Deleting a playlist
1. From the Home screen, tap Apps > Music.
2. Tap the
Playlists > Tap and hold a playlist to be deleted > Delete.
tAlthough you delete a playlist, music les will remain on your phone’s memory card.
81
Page 82
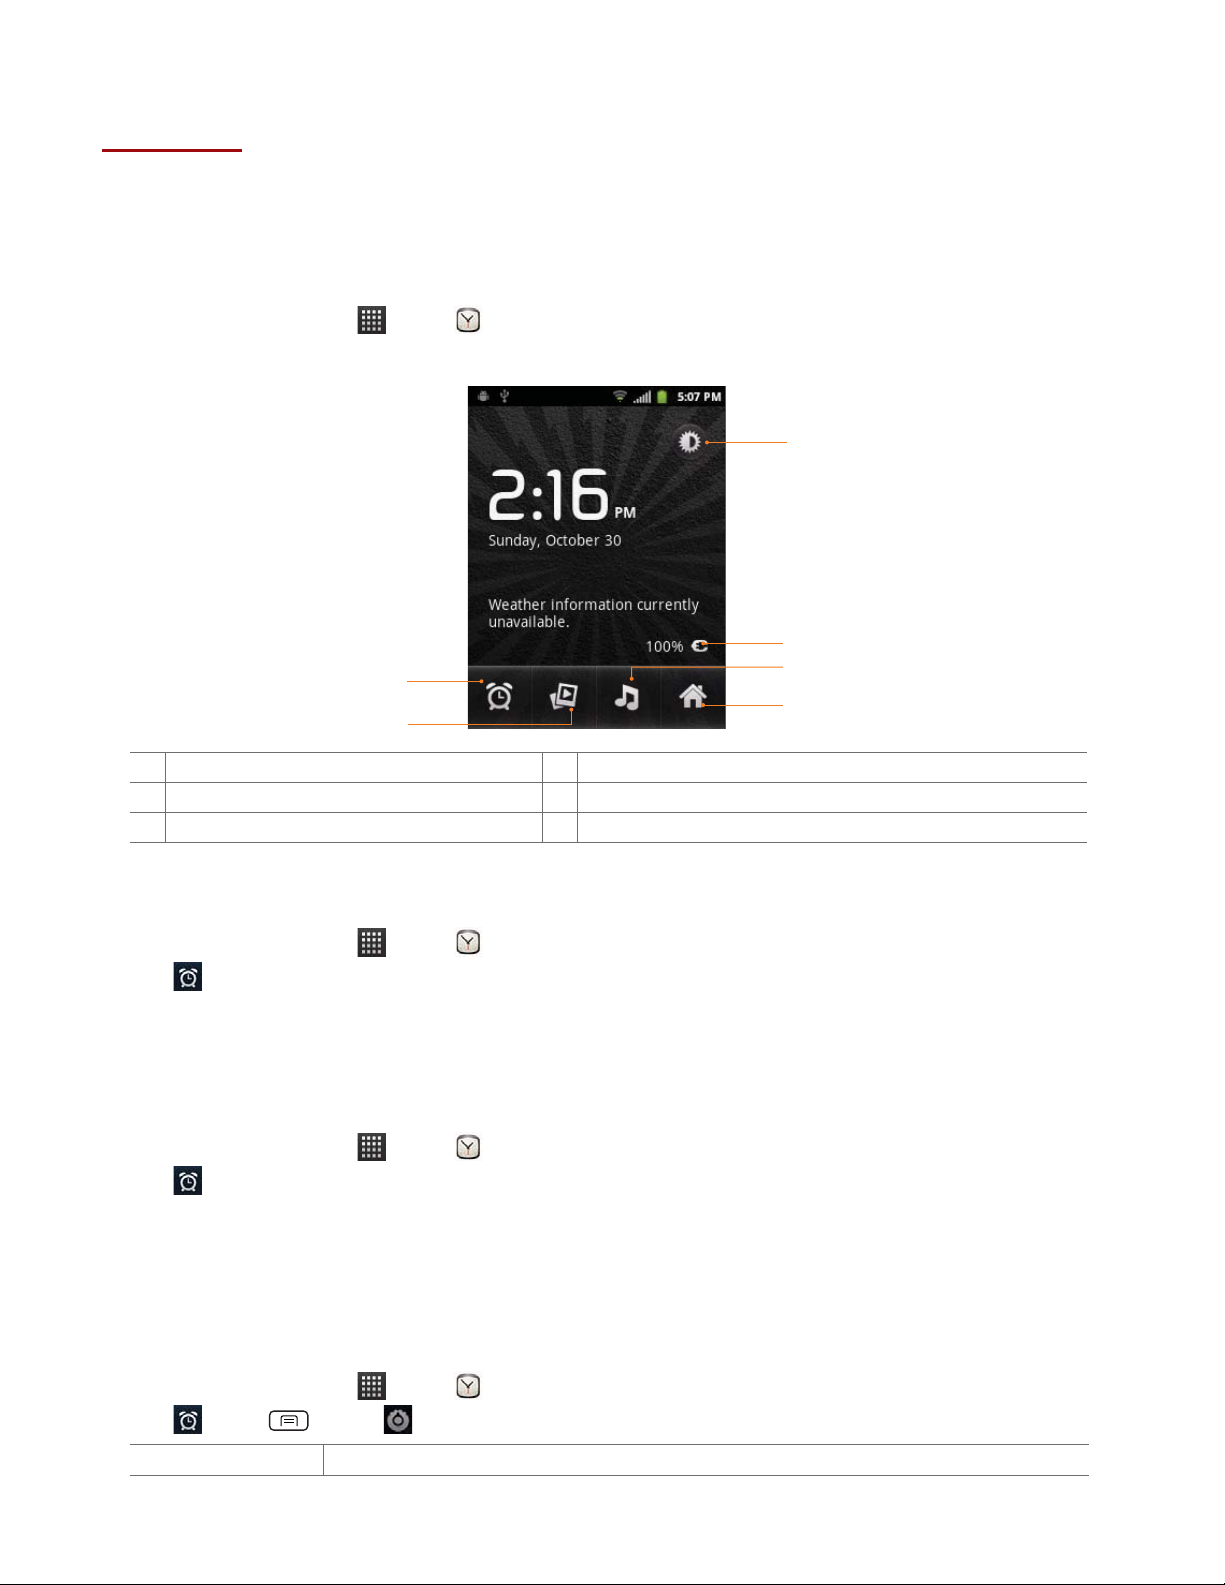
Tools
Clock
Opening the Clock
1. From the Home screen, tap Apps > Clock.
t The Clock application opens and displays the date, time, local weather and other useful information.
1
2
3
4
5
6
1 Tap to dim the screen 2 The battery charge level, displayed only while the phone is charging.
3 Set an alarm and check old alarms 4 View a slideshow
5 Music application 6 Home screen
Managing Alarms
Adding a new alarm
1. From the Home screen, tap Apps > Clock.
2. Tap
3. To change the alarm time, tap +/- or type the number using the keyboard. Then toggle AM/PM >
4. Check the checkbox, ‘
5. Edit
Editing an alarm
1. From the Home screen, tap Apps > Clock.
2. Tap
3. Turn the alarm on or o by checking or un-checking the checkbox, ‘
underlined in green.
4. Edit
> Add alarm.
Turn alarm on’.
Turn alarm on, Time, Repeat, Ringtone, Vibrate and Label > Done.
> Tap an existing alarm.
Time, Repeat, Ringtone, Vibrate and Label > Done.
Or tap
Delete to remove the alarm > OK.
Set.
Turn alarm on’. In the alarm list, set alarms are
Changing alarm settings
1. From the Home screen, tap Apps > Clock.
2. Tap
Alarm in silent mode Check to play alarms even when the phone is in silent mode.
> Press Menu > Settings.
82
Page 83
Alarm volume Set the volume of alarms.
Snooze duration Set how long Clock waits before playing an alarm again.
Side button behavior Set the side button behavior for alarms.
Stopping an alarm
1. When the alarm sounds, tap Dismiss to stop the alarm.
tTap
Snooze to repeat the alarm after a specied length of time.
Calculator
Using Calculator
1. From the Home screen, tap Apps > Calculator.
2. Enter numbers and arithmetic operators.
t Drag the screen to the left to open the Advanced panel. Or press
t Tap and hold the Calculator’s display to open a text editing menu. You can cut, copy, and select text for use in Calculator
or other Applications.
t Tap
CLEAR to delete the last number or operator you entered. Tap and hold CLEAR to delete everything in the display.
Menu > Advanced panel.
Memo
Adding a new memo
1. From the Home screen, tap Apps > Memo.
2. Tap
Add New Memo.
3. Enter the text >
Managing memos
1. From the Home screen, tap Apps > Memo.
2. Tap the memo you want to manage:
tTap the Memo screen to edit the text > Edit the text >
tPress Menu > Send via to send it > Tap an application to use to send the selected memo.
Save.
Save.
t Press
delete > Press Menu > Delete > OK.
Menu > Delete > All or check on memos you want to delete > Done. Or tap the memo you want to
My Files
You can use the My Files application to manage the contents of your microSD card. If the card memory is full, delete content
les to free memory for other items.
NOTE
Your applications store settings and conguration information on the microSD card. Be very careful when moving or deleting les as missing or
damaged les can cause applications to crash or fail to function.
83
Page 84
Opening My Files
1. From the Home screen, tap Apps > My Files.
2. Tap the folder you want to view.
Music and image les will be opened by their corresponding applications. Some le types may not be supported and will be
unable to be opened.
Creating a new folder
1. From the Home screen, tap Apps > My Files.
2. Select to the location where you want to create a new folder > Press
3. Enter the folder name >
OK.
Menu > Tap New Folder.
Managing file or folder
1. From the Home screen, tap Apps > My Files.
2. Find the le or the folder you want to manage,
t Tap and hold the item you want to move to another location >
here
.
t Tap and hold the item you want to rename >
t Tap and hold the item you want to delete >
screen > OK.
t Tap and hold the le you want to send >
t Tap and hold the le you want to copy >
Rename > Enter the le or folder name > OK.
Delete > “Do you really want to delete (item name)?” will appear on the
Send > Tap the application you want to use to send the selected le.
Copy > Copy here.
Move > Select the desired folder or location > Move
OfficeSuite
OceSuite is a le viewer. It is capable of reading Microsoft Oce le formats, viewing PDF and image les, and
decompressing ZIP les.
NOTE
You can upgrade to the Pro version by buying OceSuite Professional 5 version on the MobiSystems website.
Opening OfficeSuite
1. From the Home screen, tap Apps > OfficeSuite.
2. Select
t Device : You can view the documents stored on the internal phone storage.
t
Memory card : You can view the documents stored on the microSD card.
t
OfficeSuite Pro : You can access MobiSystems website directly.
Device, Memory card or OfficeSuite Pro.
Viewing a document
1. From the Home screen, tap Apps > OfficeSuite.
2. Tap
tPress
t Press
Device or Memory card > Tap the desired le.
Menu > Sort to sort the les by Name, Type, Size or Date modified.
Menu > Updates to upgrade your OceSuite version by buying it on the MobiSystems website.
84
Page 85
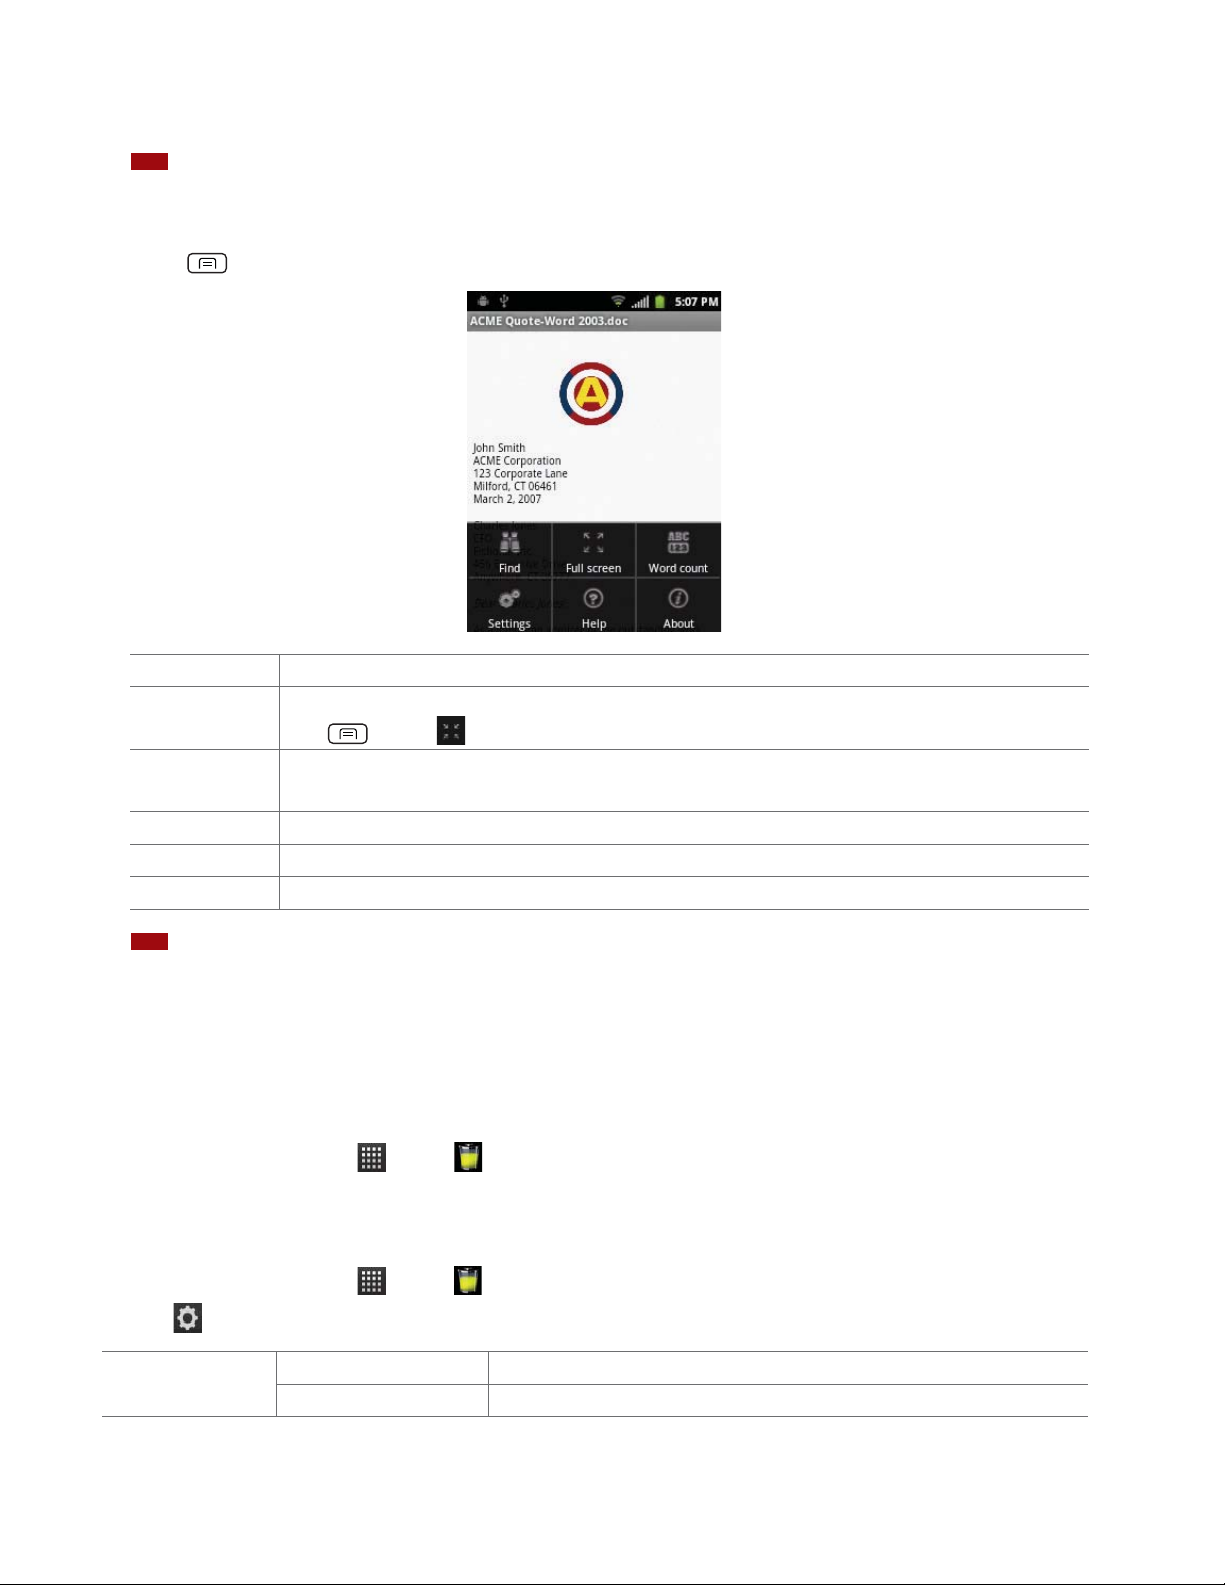
t Supported formats - Microsoft Word 97-2007 (.doc & .docx), Microsoft Excel 97-2007 (.xls & .xlsx), Microsoft PowerPoint
97-2007 (.ppt & .pptx), Adobe PDF, Text (.txt), Zip Archives (.zip).
NOTE
Text (.txt) format is partly supported in case Encoding type is selected as Korean(EVC-KR).
t Tap the screen to see the pages panel and zoom in and out panel. Double tap the screen to zoom in or out when viewing
a le. Drag across the screen to view specic areas of the document.
3. Press
Menu to use the additional options while you are viewing the document.
Find You can search words in the document.
Full screen You can see the screen in full screen mode.
Press
Word count You can see the number of words, characters, characters (with spaces), paragraphs and sections in the
document.
Settings You can set text encoding.
Help You can learn how to make the most of OceSuite by opening Web browser.
About You can check out more information about the version of OceSuite on your phone.
Menu > Normal screen to return to the normal screen mode.
NOTE
Depending on le formats, the menu may vary.
Battery Saver
You can check status and level of battery.
Opening Battery Saver
1. From the Home screen, tap Apps > Battery Saver.
2. You can view the status and level of battery.
Changing Battery Saver settings
1. From the Home screen, tap Apps > Battery Saver.
2. Tap
After screen locked ** min after screen locked Select 15 Min, 30 Min or 60 Min.
Settings.
Disable data Check to disable mobile data after screen locked.
85
Page 86

When battery is low Disable data Check to disable mobile data when battery is low.
Turn brightness down Check to turn brightness down when battery is low.
Saving your battery
1. From the Home screen, tap Apps > Battery Saver.
2. Tap
3. Check each application you want to kill its task >
Tasks.
Kill Tasks.
86
Page 87
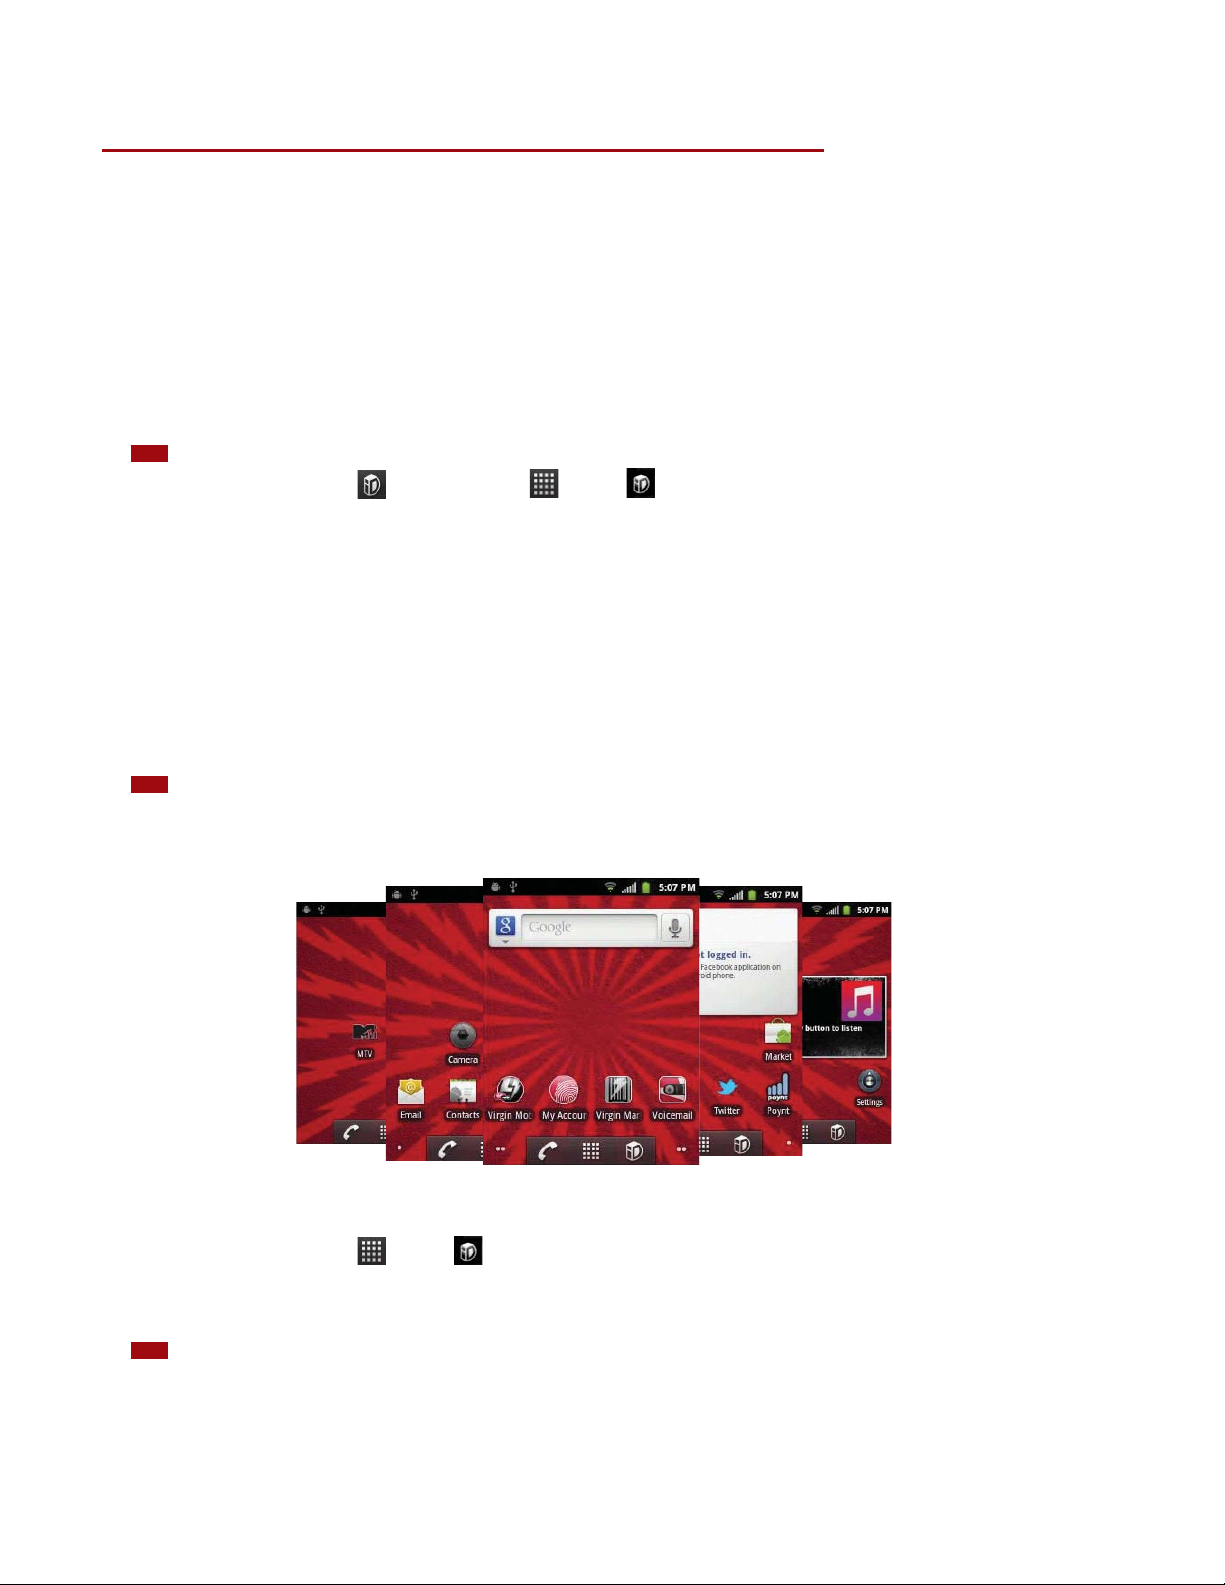
Virgin Mobile Applications
Mobile ID
Mobile ID lets you download a complete mobile experience on demand. Choose from custom ID Packs that include apps,
ringtones, widgets, wallpapers, and more - all in a single, quick-to-install package.
You can have up to six ID Packs installed at any one time and you can easily switch from one ID Pack to another without losing
any applications already installed.
Installing Your First ID Pack
NOTE
Your phone must be activated, your battery should be fully charged, and you should be in a network coverage area before you install an ID Pack.
1. From the Home screen, tap Mobile ID. Or tap Apps > Mobile ID.
2. Tap
Continue on the Welcome to Mobile ID screen.
Get New ID Packs on the Choose Your ID screen.
3. Tap
t The Mobile ID pack comes with wallpapers, ringtones, and applications such as Navigation, Music.
4. Read the information screen for a description of the ID Pack and tap
5. Tap
Agree to accept the Terms & Conditions of the ID Pack.
6. If prompted, tap
7. If the download is complete, tap
NOTE
DO NOT interrupt the download process.
After updating of Mobile ID, Home screen wallpapers will be changed. Below are examples of screen layouts for one of the available Mobile ID
packs.
Continue on any following screens until you see the Downloading icon on the top left on your screen.
ID ready to install > OK.
Switching ID Packs
Install.
1. From the Home screen, tap Apps > Mobile ID.
2. Tap an ID Pack to replace your current pack. Or tap
First ID Pack” .
NOTE
Certain features of Mobile ID are subject to change. For the most up-to-date information about using Mobile ID, please visit www.
virginmobileusa.com.
Get New > Get New ID Packs > Follow steps 3-7 of “Installing Your
87
Page 88

My Account
My Account is a free application that lets you stay connected to all the latest news and information from Virgin Mobile.
Included here are Virgin Mobile promotions, news, feedback, featured apps and tips/tricks for your device.
1. From the Home screen, tap
2. Navigate through the list to nd your My Account.
3. Tap a link to continue to that page.
t You can select
My Account, Top-Up, Find a Store or I Need Help.
Apps > My Account.
88
Page 89
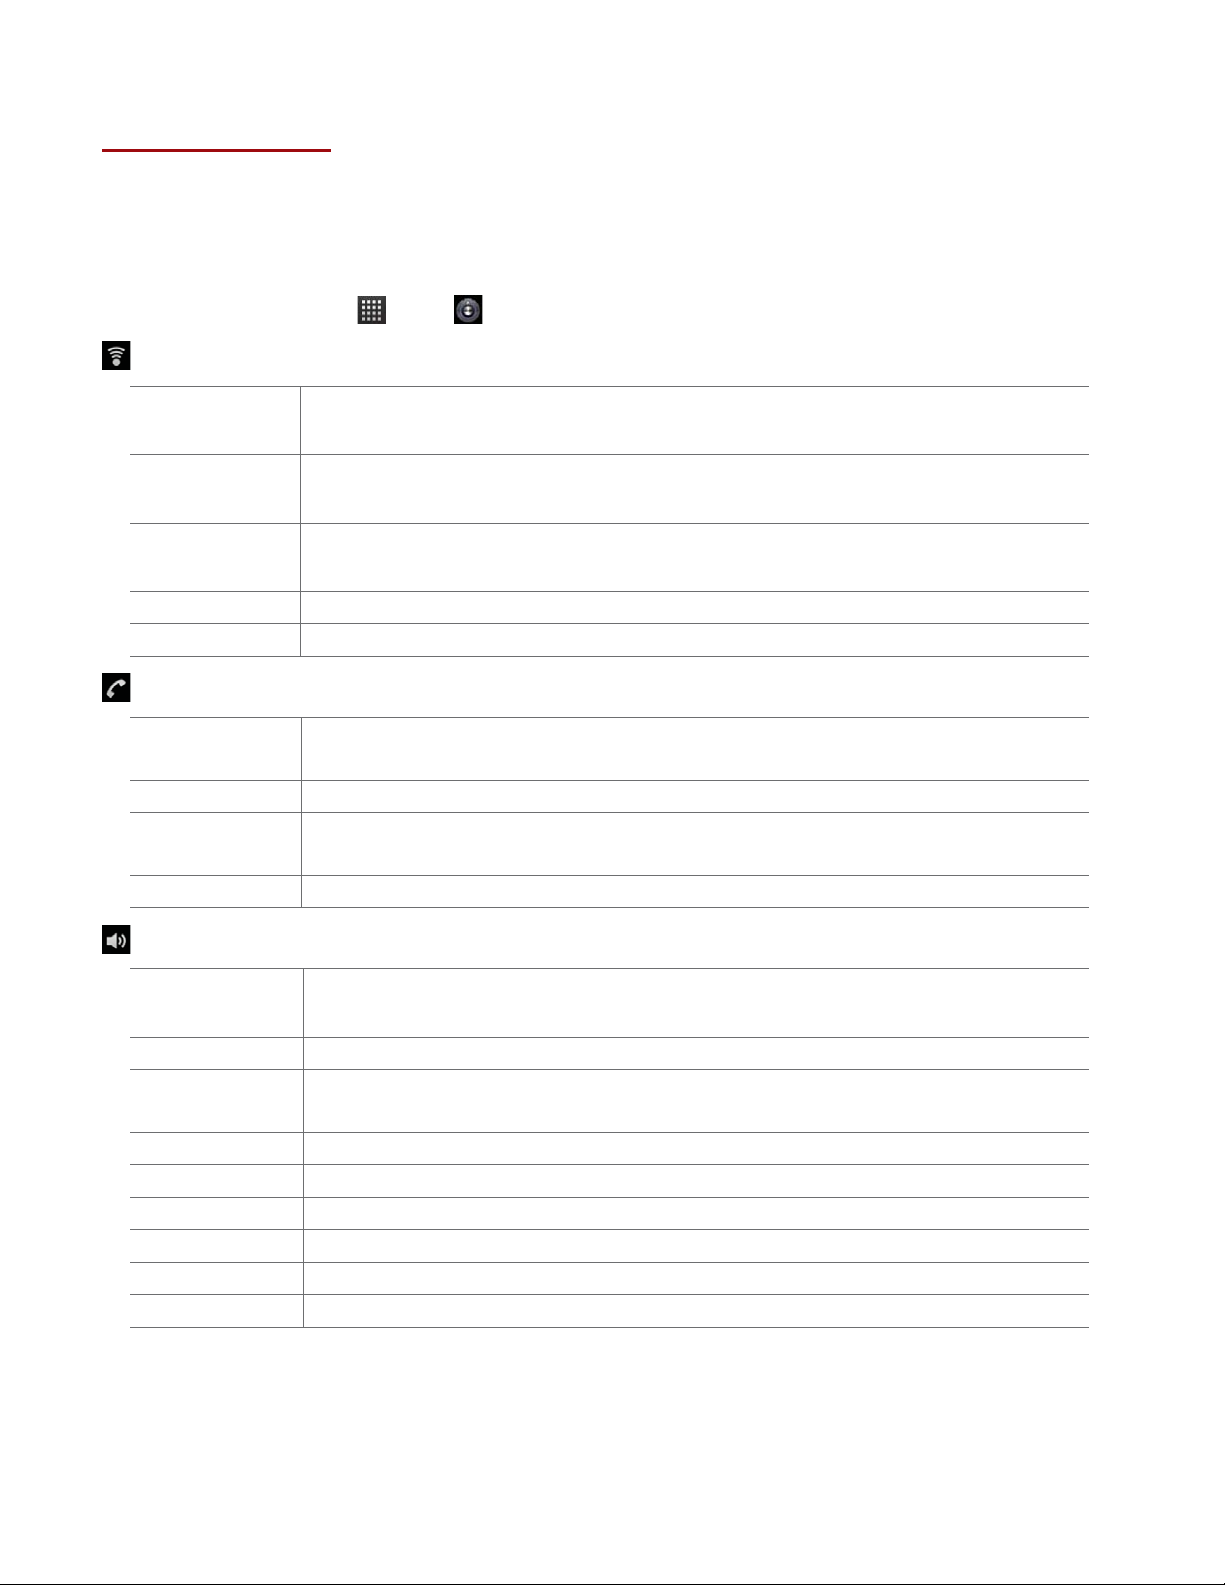
Settings
Settings on Your Phone
Control and customize phone settings on the Settings screen.
1. From the Home screen, tap
Apps > Settings.
Wireless & networks
Airplane mode Airplane mode On / O.
Check to turn o all the phone’s radios that transmit voice or data.
Wi-Fi/ Wi-Fi settings Wi-Fi On / O.
Set up and manage Wi-Fi networks. For details about working with these settings, see “Wi-Fi” .
Bluetooth/ Bluetooth
settings
VPN settings Set up and manage Virtual Private Networks (VPNs).
Mobile networks Set options for roaming, networks and APNs.
Bluetooth On / O.
For details about working with these settings, see “Bluetooth” .
Call settings
North American
dialing
International dialing Set international dialing code for outgoing calls.
TTY mode The teletypewriter (TTY) is a telecommunications device that allows people, who are deaf or hard of
DTMF Tones Set the length of DTMF tones.
Check to replace + width International dialing code except +1.
hearing, or who have speech or language disabilities, to communicate via a telephone.
Sound
Silent mode When set to silent mode, your phone doesn’t play any ring, alert, and eects sounds.
You must silence media and alarms in their own applications.
Vibrate Congure when you want the phone to vibrate when you receive a phone call or notication.
Volume Set the volume of ringtones that sound when you receive a phone call or notication, media (music, videos,
and so on), and alarms.
Phone ringtone Select the ringtone to sound when you receive a phone call.
Notication ringtone Select the ringtone to sound when you receive a notication.
Audible touch tones Check to play tones when using dial pad.
Audible selection Check to play sound when making screen selection.
Screen lock sounds Check to play sounds when locking and unlocking the screen.
Haptic feedback Check to vibrate when pressing soft keys and on certain UI interactions.
89
Page 90
Display
Brightness Adjusting the brightness of the screen.
Auto-rotate screen Automatically switch the orientation of the screen as you turn the phone sideways or even upside down.
Animation Congures the level of user interface animation.
Screen timeout Adjust the delay before the screen automatically turns o.
Location & security
Use wireless networks Location determined by Wi-Fi and/or mobile networks.
Use GPS satellites When locating, accurate to street level(uncheck to conserve battery).
Set up screen lock Congure your phone to require a pattern, PIN, or password to unlock your screen.
Visible passwords Show password characters as you enter them.
Select device
administrators
Use secure credentials Allow applications to access secure certicates and other credentials.
Install from SD card Install encrypted certicates from microSD card.
Set password Set or change the credential storage password.
Clear storage Clear credential storage of all contents and reset its password.
Add or remove device administrators.
Applications
Unknown sources Check to allow installation of non-Market applications.
Quick launch Set keyboard shortcuts to launch applications.
Manage applications Manage and remove installed applications.
Running services View and control currently running services.
Storage use View storage used by applications.
Development Set options for application development.
Accounts & sync
Background data Set whether applications can sync, send and receive data at any time.
Auto-sync Check to allow applications to sync data automatically.
Manage accounts Lists of the Google accounts and other accounts you’ve added to the phone. If you tap an account, its
account screen opens.
Add account You can add Corporate or Google account on your phone.
Privacy
Factory data reset Erases all data on phone. This will erase all data from your phone, including: your Google account, system
and application data and settings, downloaded applications. And it will not erase: current system software
and bundled applications, microSD card les, such as music or photos.
90
Page 91
Storage
Total space Check the total space of microSD card.
Available space Check the available space on microSD card.
Unmount SD card Unmount the microSD card for safe removal.
If you unmount the microSD card, some applications you are using will stop and may be unavailable until
you remount the microSD card.
Erase SD card This will erase all data from the microSD card. You must unmount a microSD card before you can format it.
Available space Check the available space on internal phone storage.
Language & keyboard
Select language Select the language to use for the text on your phone.
User dictionary Add or delete the words suggested when entering text.
TouchPal Input /
TouchPal Input
settings
Set Key press sound, Key press vibration, Show Popup, Slide-down symbols, Keyboard layout, TouchPal
Input, TouchPal Curve
TM
or Language.
Android keyboard
/ Android keyboard
settings
Soft keyboard switch You can change soft keyboard mode by selecting Landscape mode or Portrait mode or both when using
Built-in keyboard Settings for built-in, physical keyboard.
Set Vibrate on keypress, Sound on keypress, Popup on keypress, Touch to correct words, Autocapitalization, Show settings key, Voice input, Input languages, Quick xes, Show suggestions or Autocomplete.
For details about working with these settings, see “Using the onscreen keyboard” .
soft keyboard.
Voice input & output
Voice recognizer
settings
Text-to-speech
settings
Set Language, SafeSearch, Block oensive words, Personalized recognition or Google Account dashboard.
Set Listen to an example, Always use my settings, (Default Engine, Install voice data, Speech rate,
Language), (Pico TTS settings). In order to use the text-to-speech feature, voice data must be downloaded
from the Android Market to your phone’s microSD card. Select the Install voice data menu item to install
Text-to-speech data.
Accessibility
Accessibility Accessibility options are activated after downloading the Accessibility service from the Android Market.
TalkBack TalkBack is a screen reader that provides spoken feedback when using native Android applications. Once
installed it becomes part of the Android system and cannot be uninstalled. TalkBack does not run if
Accessibility is disabled. You can download this plug-in from Android Market.
Power button ends call If checked, during a call, pressing Power ends call instead of turning o screen.
Date & time
Use 24-hour format Display the time using 24-hour format.
Select date format Select the format for displaying date.
91
Page 92

About phone
System updates You can upgrade your system to up-to-date version.
Status Information about your Phone number, signal, etc.
Activate Phone You can activate your phone.
Battery use Check what has been using the battery.
Legal information Legal information about Open source licenses, Google legal and Virgin Mobile legal.
Model number Check the Model number.
Android version Check the Android version.
Baseband version Check the Baseband version.
Kernel version Check the Kernel version.
Software version You can check software version.
Hardware version You can check hardware version.
92
Page 93

Safety and use
Please read before proceeding
THE BATTERY IS NOT FULLY CHARGED WHEN YOU TAKE IT OUT OF THE BOX. DO NOT REMOVE THE BATTERY PACK WHEN THE
PHONE IS CHARGING. YOUR WARRANTY IS INVALIDATED IF YOU DISASSEMBLE OR ATTEMPT TO DISASSEMBLE THE DEVICE.
Privacy restrictions
Some countries require full disclosure of recorded telephone conversations, and stipulate that you must inform the person with
whom you are speaking that the conversation is being recorded. Always obey the relevant laws and regulations of your country
when using the recording feature of your phone.
Disclaimers
ANY WEATHER, STOCK, OR OTHER INFORMATION, DATA, OR DOCUMENTATION (“ACCESSED INFORMATION”) ARE PROVIDED “AS
IS” AND WITHOUT ANY WARRANTY OR ANY TECHNICAL SUPPORT. TO THE MAXIMUM EXTENT PERMITTED BY APPLICABLE LAW,
TCT MOBILE AND ITS AFFILIATES expressly disclaim any and all representations and warranties, arising by law or otherwise,
related to the Accessed Information, including without limitation any express or implied representation or warranty of
merchantability, tness for a particular purpose, non-infringement, quality, accuracy, completeness, eectiveness, reliability,
or usefulness. Without limiting the foregoing, it is further understood that TCT Mobile and its Aliates are not responsible for
any use of the Accessed Information or the results arising from such use, and that you use such information at your own risk.
Limitation of damages
TO THE MAXIMUM EXTENT PERMITTED BY APPLICABLE LAW, IN NO EVENT SHALL TCT MOBILE OR ITS AFFILIATES BE LIABLE
TO YOU, ANY USER, OR THIRD PARTY FOR ANY INDIRECT, SPECIAL, CONSEQUENTIAL, INCIDENTAL OR PUNITIVE DAMAGES OF
ANY KIND, ARISING IN CONTRACT, TORT, OR OTHERWISE, INCLUDING, BUT NOT LIMITED TO, INJURY, LOSS OF REVENUE, LOSS OF
GOODWILL, LOSS OF BUSINESS OPPORTUNITY, LOSS OF DATA, AND/OR LOSS OF PROFITS, REGARDLESS OF THE FORESEEABILITY
THEREOF OR WHETHER TCT MOBILE OR ITS AFFILIATES HAVE BEEN ADVISED OF THE POSSIBILITY OF SUCH DAMAGES. AND IN NO
EVENT SHALL THE TOTAL LIABILITY OF TCT MOBILE OR ITS AFFILIATES EXCEED THE AMOUNT RECEIVED FROM YOU, REGARDLESS
OF THE LEGAL THEORY UNDER WHICH THE CAUSE OF ACTION IS BROUGHT. THE FOREGOING DOES NOT AFFECT ANY STATUTORY
RIGHTS WHICH MAY NOT BE DISCLAIMED.
Important health information and safety precautions
When using this product, the safety precautions below must be taken to avoid possible legal liabilities and damages.
Retain and follow all product safety and operating instructions. Observe all warnings in the operating instructions on the
product.
To reduce the risk of bodily injury, electric shock, re, and damage to the equipment, observe the following precautions.
Electrical safety
This product is intended for use when supplied with power from the designated battery or power supply unit. Other usage may
be dangerous and will invalidate any approval given to this product.
Safety precautions for proper grounding installation
Connecting to improperly grounded equipment can result in an electric shock to your device.
93
Page 94
This product is equipped with a USB Cable for connecting with desktop or notebook computer. Be sure your computer is properly grounded (earthed)
before connecting this product to the computer. The power supply cord of a desktop or notebook computer has an equipment grounding conductor and
a grounding plug. The plug must be plugged into an appropriate outlet which is properly installed and grounded in accordance with all local codes and
ordinances.
Safety precautions for power supply unit
Use the correct external power source
A product should be operated only from the type of power source indicated on the electrical ratings label. If you are not sure
of the type of power source required, consult your authorized service provider or local power company. For a product that
operates from battery power or other sources, refer to the operating instructions that are included with the product.
This product should be operated only with the following designated power supply unit(s).
Travel charger: Input: 100-240 V, 50/60 Hz, 0.15 A
Output: 5 V, 1000 mA
Handle battery packs carefully
This product contains a Lithium-ion polymer or Lithium-ion battery. There is a risk of re and burns if the battery pack is
handled improperly. Do not attempt to open or service the battery pack. Do not disassemble, crush, puncture, short external
contacts or circuits, dispose of in re or water, or expose a battery pack to temperatures higher than 140°F (60°C).
Danger of explosion if battery is incorrectly replaced. To reduce risk of re or burns, do not disassemble, crush, puncture, short external contacts,
expose to temperature above 140°F (60°C), or dispose of in re or water. Replace only with specied batteries. Recycle or dispose of used batteries
according to the local regulations or reference guide supplied with your product.
NOTE
This product should be operated only with the following designated Battery Pack(s).
Battery: Lithium 1300 mAh
Take extra precautions
tKeep the battery or device dry and away from water or any liquid as it may cause a short circuit.
tKeep metal objects away so they don’t come in contact with the battery or its connectors as it may lead to short circuit
during operation.
tThe phone should only be connected to products that bear the USB-IF logo or have completed the USB-IF compliance
program.
tDo not use a battery that appears damaged, deformed, or discolored, or the one that has any rust on its casing,
overheats, or emits a foul odor.
tAlways keep the battery out of the reach of babies and small children, to avoid swallowing of the battery. Consult the
doctor immediately if the battery is swallowed.
tOnly use the battery with a charging system that has been qualied with the system per this standard, IEEE-Std-172
5-2006. Use of an unqualied battery or charger may present a risk of re, explosion, leakage or other hazard.
tReplace the battery only with another battery that has been qualied with the system per this standard, IEEE-Std-172
5-2006. Use of an unqualied battery may present a risk of re, explosion, leakage or other hazard.
tAvoid dropping the phone or battery. If the phone or battery is dropped, especially on a hard surface, and the user
suspects damage, take it to a service centre for inspection.
tIf the battery leaks:
94
Page 95

tDo not allow the leaking uid to come in contact with skin or clothing. If already in contact, ush the aected area
immediately with clean water and seek medical advice.
tDo not allow the leaking uid to come in contact with eyes. If already in contact, DO NOT rub; rinse with clean water
immediately and seek medical advice.
tTake extra precautions to keep a leaking battery away from re as there is a danger of ignition or explosion.
Safety precautions for direct sunlight
Keep this product away from excessive moisture and extreme temperatures. Do not leave the product or its battery inside a
vehicle or in places where the temperature may exceed 140°F (60°C), such as on a car dashboard, window sill, or behind a
glass that is exposed to direct sunlight or strong ultraviolet light for extended periods of time. This may damage the product,
overheat the battery, or pose a risk to the vehicle.
Prevention of hearing loss
Permanent hearing loss may occur if earphones or headphones are used at high volume for prolonged periods of time.
Safety in aircraft
Due to the possible interference caused by this product to an aircraft’s navigation system and its communications network,
using this device’s phone function on board an airplane is against the law in most countries. If you want to use this device
when on board an aircraft, remember to turn o your phone by switching to Airplane Mode.
Environment restrictions
Do not use this product in gas stations, fuel depots, chemical plants or where blasting operations are in progress, or in
potentially explosive atmospheres such as fuelling areas, fuel storehouses, below deck on boats, chemical plants, fuel or
chemical transfer or storage facilities, and areas where the air contains chemicals or particles, such as grain, dust, or metal
powders. Please be aware that sparks in such areas could cause an explosion or re resulting in bodily injury or even death.
Explosive atmospheres
When in any area with a potentially explosive atmosphere or where ammable materials exist, the product should be turned
o and the user should obey all signs and instructions. Sparks in such areas could cause an explosion or re resulting in bodily
injury or even death. Users are advised not to use the equipment at refueling points such as service or gas stations, and are
reminded of the need to observe restrictions on the use of radio equipment in fuel depots, chemical plants, or where blasting
operations are in progress. Areas with a potentially explosive atmosphere are often, but not always, clearly marked. These
include fueling areas, below deck on boats, fuel or chemical transfer or storage facilities, and areas where the air contains
chemicals or particles, such as grain, dust, or metal powders.
Road safety
Full attention must be given to driving at all times in order to reduce the risk of an accident. Using a phone while driving
(even with a hands free kit) causes distraction and can lead to an accident. You must comply with local laws and regulations
restricting the use of wireless devices while driving.
Safety precautions for RF exposure
tAvoid using your phone near metal structures (for example, the steel frame of a building).
tAvoid using your phone near strong electromagnetic sources, such as microwave ovens, sound speakers, TV and radio.
tUse only original manufacturer-approved accessories, or accessories that do not contain any metal.
tUse of non-original manufacturer-approved accessories may violate your local RF exposure guidelines and should be
avoided.
95
Page 96

Interference with medical equipment functions
This product may cause medical equipment to malfunction. The use of this device is forbidden in most hospitals and medical
clinics.
If you use any other personal medical device, consult the manufacturer of your device to determine if they are adequately
shielded from external RF energy. Your physician may be able to assist you in obtaining this information.
Turn your phone OFF in health care facilities when any regulations posted in these areas instruct you to do so. Hospitals or
health care facilities may be using equipment that could be sensitive to external RF energy.
Nonionizing radiation
Your device has an internal antenna. This product should be operated in its normal-use position to ensure the radiative
performance and safety of the interference. As with other mobile radio transmitting equipment, users are advised that for
satisfactory operation of the equipment and for the safety of personnel, it is recommended that no part of the human body be
allowed to come too close to the antenna during operation of the equipment.
Use only the supplied integral antenna. Use of unauthorized or modied antennas may impair call quality and damage the
phone, causing loss of performance and SAR levels exceeding the recommended limits as well as result in non-compliance
with local regulatory requirements in your country.
To assure optimal phone performance and ensure human exposure to RF energy is within the
guidelines set forth in the relevant standards, always use your device only in its normal-use
position. Contact with the antenna area may impair call quality and cause your device to operate
at a higher power level than needed. Avoiding contact with the antenna area when the phone is IN
USE optimizes the antenna performance and the battery life.
Electrical safety
Accessories
tUse only approved accessories.
tDo not connect with incompatible products or accessories.
tTake care not to touch or allow metal objects, such as coins or key rings, to contact or short circuit the battery terminals.
Connection to a car
Seek professional advice when connecting a phone interface to the vehicle electrical system.
Faulty and damaged products
tDo not attempt to disassemble the phone or its accessory.
tOnly qualied personnel must service or repair the phone or its accessory.
General precautions
You alone are responsible for how you use your phone and any consequences of its use. You must always switch o your phone
wherever the use of a phone is prohibited. Use of your phone is subject to safety measures designed to protect users and their
environment.
Avoid applying excessive pressure to the device
Do not apply excessive pressure on the screen and the device to prevent damaging them and remove the device from your
pants’ pocket before sitting down. It is also recommended that you store the device in a protective case and only use the device
stylus or your nger when interacting with the touch screen. Cracked display screens due to improper handling are not covered
by the warranty.
Device getting warm after prolonged use
When using your device for prolonged periods of time, such as when you’re talking on the phone, charging the battery
or browsing the Web, the device may become warm. In most cases, this condition is normal and therefore should not be
96
Page 97

interpreted as a problem with the device.
Heed service markings
Except as explained elsewhere in the Operating or Service documentation, do not service any product yourself. Service needed
on components inside the device should be done by an authorized service technician or provider.
Protect your phone
tAlways treat your phone and its accessories with care and keep them in a clean and dust-free place.
tDo not expose your phone or its accessories to open ames or lit tobacco products.
tDo not expose your phone or its accessories to liquid, moisture or high humidity.
tDo not drop, throw or try to bend your phone or its accessories.
tDo not use harsh chemicals, cleaning solvents, or aerosols to clean the device or its accessories.
tDo not paint your phone or its accessories.
tDo not attempt to disassemble your phone or its accessories, only authorized personnel must do so.
tDo not expose your phone or its accessories to extreme temperatures, minimum -4°F (-20°C) and maximum 122°F
(50°C).
tPlease check local regulations for disposal of electronic products.
tDo not carry your phone in your back pocket as it could break when you sit down.
Damage requiring service
Unplug the product from the electrical outlet and refer servicing to an authorized service technician or provider under the
following conditions:
tLiquid has been spilled or an object has fallen into the product.
tThe product has been exposed to rain or water.
tThe product has been dropped or damaged.
tThere are noticeable signs of overheating.
tThe product does not operate normally when you follow the operating instructions.
Avoid hot areas
The product should be placed away from heat sources such as radiators, heat registers, stoves, or other products (including
ampliers) that produce heat.
Avoid wet areas
Never use the product in a wet location.
Avoid using your device after a dramatic change in temperature
When you move your device between environments with very dierent temperature and/or humidity ranges, condensation
may form on or within the device. To avoid damaging the device, allow sucient time for the moisture to evaporate before
using the device.
NOTICE: When taking the device from low-temperature conditions into a warmer environment or from high-temperature
conditions into a cooler environment, allow the device to acclimate to room temperature before turning on power.
Avoid pushing objects into product
Never push objects of any kind into cabinet slots or other openings in the product. Slots and openings are provided for
ventilation. These openings must not be blocked or covered.
97
Page 98

Air bags
Do not place a phone in the area over an air bag or in the air bag deployment area. Store the phone safely before driving your
vehicle.
Mounting accessories
Do not use the product on an unstable table, cart, stand, tripod, or bracket. Any mounting of the product should follow the
manufacturer’s instructions, and should use a mounting accessory recommended by the manufacturer.
Avoid unstable mounting
Do not place the product with an unstable base.
Use product with approved equipment
This product should be used only with personal computers and options identied as suitable for use with your equipment.
Adjust the volume
Turn down the volume before using headphones or other audio devices.
Cleaning
Unplug the product from the wall outlet before cleaning. Do not use liquid cleaners or aerosol cleaners. Use a damp cloth for
cleaning, but NEVER use water to clean the LCD screen.
Small children
Do not leave your phone and its accessories within the reach of small children or allow them to play with it. They could hurt
themselves or others, or could accidentally damage the phone. Your phone contains small parts with sharp edges that may
cause an injury or which could become detached and create a choking hazard.
Repetitive motion injuries
To minimise the risk of RSI, when Texting or playing games with your phone:
tDo not grip the phone too tightly
tPress the buttons lightly
tMake use of the special features in the handset which minimise the number of buttons which have to be pressed, such as
message templates and predictive text.
tTake lots of breaks to stretch and relax.
Operating machinery
Full attention must be given to operating the machinery in order to reduce the risk of an accident.
Loud noise
This phone is capable of producing loud noises which may damage your hearing.
Emergency calls
This phone, like any wireless phone, operates using radio signals, which cannot guarantee connection in all conditions.
Therefore, you must never rely solely on any wireless phone for emergency communications.
98
Page 99

Regulatory agency identifications
For regulatory identication purposes, your product is assigned a model number of Venture.
To ensure continued reliable and safe operation of your device, use only the accessories listed below with your Venture device.
The Battery Pack has been assigned a model number of CAB31P0000CX.
Operating temperature range: 32°F to 104°F (0°C to 40°C)
NOTE
This product is intended for use with a certied Class Limited Power Source, rated 5 Volts DC, maximum 1 Amp power supply unit.
Federal Communication Commission Interference Statement
This equipment has been tested and found to comply with the limits for a Class B digital device, pursuant to Part 15 of the FCC
Rules. These limits are designed to provide reasonable protection against harmful interference in a residential installation.
This equipment generates, uses and can radiate radio frequency energy and, if not installed and used in accordance with the
instructions, may cause harmful interference to radio communications. However, there is no guarantee that interference will
not occur in a particular installation. If this equipment does cause harmful interference to radio or television reception, which
can be determined by turning the equipment o and on, the user is encouraged to try to correct the interference by one of the
following measures:
- Reorient or relocate the receiving antenna.
- Increase the separation between the equipment and receiver.
- Connect the equipment into an outlet on a circuit dierent from that to which the receiver is connected.
- Consult the dealer or an experienced radio or television technician for help.
FCC Caution: Any changes or modications not expressly approved by the party responsible for compliance could void the
user’s authority to operate this equipment.
This device complies with Part 15 of the FCC Rules. Operation is subject to the following two conditions: (1) This device may not
cause harmful interference, and (2) this device must accept any interference received, including interference that may cause
undesired operation.
Important Note
Radiation Exposure Statement:
This equipment complies with FCC radiation exposure limits set forth for an uncontrolled environment. End users must follow
the specic operating instructions for satisfying RF exposure compliance. To maintain compliance with FCC RF exposure
compliance requirements, please follow operation instruction as documented in this manual.
This transmitter must not be co-located or operating in conjunction with any other antenna or transmitter, except the
transmitters built-in with the device.
FCC Hearing-Aid Compatibility (HAC) Regulations for Wireless Devices
On July 10, 2003 , the U.S. Federal Communications Commission (FCC) Report and Order in WT Docket 01- 09 modied the
exception of wireless phones under the Hearing Aid Compatibility Act of 1988 (HAC Act) to require digital wireless phones be
compatible with hearing-aids. The intent of the HAC Act is to ensure reasonable access to telecommunications services for
persons with hearing disabilities. While some wireless phones are used near some hearing devices (hearing aids and cochlear
implants), users may detect a buzzing, humming, or whining noise. Some hearing devices are more immune than others to
this interference noise, and phones also vary in the amount of interference they generate. The wireless telephone industry has
developed a rating system for wireless phones, to assist hearing device users nd phones that may be compatible with their
hearing devices. Not all phones have been rated. Phones that are rated have the rating on their box or a label located on the
box. The ratings are not guarantees. Results will vary depending on the user’s hearing device and hearing loss. If your hearing
device happens to be vulnerable to interference, you may not be able to use a rated phone successfully. Trying out the phone
with your hearing device is the best way to evaluate it for your personal needs.
99
Page 100

M-Ratings: Phones rated M3 or M4 meet FCC requirements and are likely to generate less interference to hearing devices than
phones that are not rated. M4 is the better/higher of the two ratings. Your device is rated M4.
T-Ratings: Phones rated T3 or T4 meet FCC requirements and are likely to be more usable with a hearing aid’s telecoil than
phones that are not rated.
T4 is the better/higher of the two ratings. Your device is rated T4.
Please power o the Bluetooth function while using hearing aid devices with your Venture. Hearing devices may also be rated.
Your hearing device manufacturer or hearing health professional may help you nd this rating. Higher ratings mean that the
hearing device is relatively immune to interference noise.
The hearing aid and wireless phone rating values are then added together. A sum of 5 is considered acceptable for normal use.
A sum of 6 is considered for better use. A sum of 8 is considered for best use. In the above example, if a hearing aid meets the
M2 level rating and the wireless phone meets the M3 level rating, the sum of the two values equal M5. This should provide the
hearing aid user with “normal usage” while using their hearing aid with the particular wireless phone. “Normal usage” in this
context is dened as a signal quality that is acceptable for normal operation.
This methodology applies equally for T ratings. The M mark is intended to be synonymous with the U mark. The T mark is
intended to be synonymous with the UT mark. The M and T marks are recommended by the Alliance for Telecommunications
Industries Solutions (ATIS). The U and UT marks are referenced in Section 20.19 of the FCC Rules. The HAC rating and
measurement procedure are described in the American National Standards Institute (ANSI) C63.19 standard.
For information about hearing aids and digital wireless phones
FCC Hearing Aid Compatibility and Volume Control:
http://www.fcc.gov/cgb/dro/hearing.html
Gallaudet University, RERC:
https://allfoss.fcc.gov/oetcf/eas/reports/GenericSearch.cfm
SAR Information
HEAD BODY
PCS1900 1.17 W/kg 0.53 W/kg
THIS MODEL DEVICE MEETS THE GOVERNMENT’S REQUIREMENTS FOR EXPOSURE TO RADIO WAVES. For body worn operation,
this phone has been tested and meets the FCC RF exposure guidelines when used with the TCT Mobile Limited. Accessories
supplied or designated for this product. Use of other accessories may not ensure compliance with the FCC RF exposure
guidelines.
Your wireless mobile phone is a radio transmitter and receiver. It is designed and manufactured not to exceed the emission
limits for exposure to radio frequency (RF) energy set by the Federal Communications Commission of the U.S. Government.
These limits are part of comprehensive guidelines and establish permitted levels of RF energy for the general population. The
guidelines are based on the safety standards previously set by both U.S. and international standards bodies:
- American National Standards Institute (ANSI) IEEE. C95.1-1992 .
- National Council on Radiation Protection and Measurement (NCRP). Report 86. 1986.
- International Commission on Non-Ionizing Radiation Protection (ICNIRP) 1996.
- Ministry of Health (Canada), Safety Code 6. The standards include a substantial safety margin designed to assure the
safety of all persons, regardless of age and health.
The exposure standard for wireless mobile phone employs a unit of measurement known as the Specic Absorption Rate, or
100
 Loading...