

VIRCO PTH106-SS Installation & Operating Instructions Manual
GAS-FIRED INFRARED
OUTDOOR PATIO HEATER
Virco Associates, Inc. INSTALLATION, OPERATION
145, Brea Canyon Road MAINTENANCE INSTRUCTIONS
Walnut, CA 91789, U.S.A.
FOR MODEL PTH106-SS
TABLE OF CONTENTS PAGE
IMPORTANT …………………………………………………………………… 1
TOOLS & PARTS ……………………………………………………………….. 2
PRECAUTIONS………………………………………………………………….. 3
ASSEMBLY INSTRUCTIONS …………………………………………………. 4
GAS REQUIREMENTS & LEAK TESTING ………………………………….. 7
SAFETY CHECKS ………………………………………………………………. 8
LOCATING HEATER FOR USE ………………………………………………. 9
LIGHTING / SHUTDOWN ………………………………………………………. 10
STORAGE / BURNER REMOVAL………………………………..……………. 12
BURNER INSTALLATION / PILOT CLEANING ……………………………… 13
BURNER REMOVAL ……………………………………………………………. 14
TROUBLE SHOOTING .………………………………………………………… 15
PARTS LIST ……………………………………………………………………… 16
WARRANTY ……………………………………………………………………… 17
READ THE FOLLOWING INSTRUCTIONS CAREFULLY AND BE SURE YOUR PATIO HEATER IS
PROPERLY INSTALLED, ASSEMBLIED AND CARED FOR. FAILURE TO FOLLOW THESE
INSTRUCTIONS MAY RESULT IN SERIOUS BODILY INJURY AND/OR PROPERTY DAMAGE. IF
YOU HAVE QUESTIONS CONCERNING ASSEMBLY OR OPERATION, CONSULT YOUR
DEALER, GAS APPLIANCE SERVICE REPRESENTATIVE OR YOUR GAS COMPANY.
NOTE TO INSTALLER:
LEAVE THESE INSTRUCTIONS WITH THE CONSUMER AFTER INSTALLATION.
NOTE TO THE CONSUMER:
RETAIN THESE INSTRUCTIONS FOR FUTURE REFERENCE.
PLEASE CONTACT 1-800-913-8999 FOR ASSISTANCE
STOP
DO NOT RETURN TO PLACE OF PURCHASE

IMPORTANT NOTICE:
DO NOT return to place of purchase!!!
Please contact Customer Service hotline at 800-913-8999 for help.
IMPORTANT
* * *
For outdoor use only (outside any enclosure)
WARNING
* * *
Improper operation, installation, adjustment, alteration,
servicing or maintenance can cause severe property
damage or serious injury or death. Please read the
installation, operation & maintenance instructions
thoroughly before installing or servicing this equipment.
* * *
FOR YOUR SAFETY
* * *
If you smell gas:
Shut off gas to appliance.
Extinguish any open flame.
If odor continues, immediately call your gas
supplier.
For your safety:
Do not store or use gasoline or other flammable vapor
and liquids in the vicinity of this or any other appliance.
Page 1

TOOLS AND PARTS NEEDED FOR ASSEMBLY
NOTE: 20 pound, 5 Gallon LPG Tank is not supplied
Tools Needed:
Adjustable Opening Wrench
Spray Bottle of Soapy Water (To check for leaks)
Parts Supplied:
Reflector (1)
Heater Head Assembly (1
Post Assembly (2)
Gas Tank Enclosure Assembly (2)
LPG Gas regulator with Hose (1
Tank Hook (1)
Hardware Bag
Post Socket 1/4
Post 3/16
Reflector 1/4
Reflector 1/4
Heater Head 3/16
” Acorn-cap (4
” Flat Head Screw (3)
” Acorn-cap (4
” Flat Washer (4
” Truss Head Screw (4)
)
)
)
)
)
For Service Questions Replacement parts or other assistance, Please call VAI Customer Service Hotline at:
VAI
145 Brea Canyon Road
Walnut, CA 91789
(800) 913-8999
Page 2

IMPORTANT NOTICE:
DO NOT return to place of purchase!!!
Please contact Customer Service hotline at 800-913-8999 for help.
Do not use this space heater in an
explosive atmosphere. Keep heater away
from areas where gasoline or other
flammable liquids or vapors are stored.
Prior to use, check for damaged parts
such as hoses regulators, pilot or burner.
Do not attempt to alter unit in any manner .
EXAMPLE: using the heater without the
top canopy reflector or radiant screen. Do
not shorten the burner post assembly.
Heater must always be placed on a solid
and level surface.
Always maintain proper clearance to
combustible materials.(Top 36" Side 36")
Always assure there is ample fresh air
ventilation for outdoors use ONLY.
Never replace or substitute the regulator
with any regulator other than the factory
suggested replacement.
Do not clean heater with cleaners that are
combustible or corrosive.
Do not paint radiant screen, control panel
or top canopy reflector.
All leak test should be done with a soapy
solution. NEVER USE AN OPEN
FLAME TO CHECK FOR LEAKS.
The LP tank should be turned off when
the heater is not in use.
At least once a year, the unit should be
inspected for the presence of spiders,
spider webs or other insects. The burner
area is a common spider haven and can
damage the heater and render it unsafe
for use, Check the heater immediately if
any of the following exists:
1. The smell of gas in conjunction with
extreme yellow tipping of the burner
flames.
2. The heater does not reach temperature.
NOTE: PLEASE READ THE FOLLOWING SAFETY
PRECAUTIONS
3. The burner makes popping noise during
use (a slight popping noise is normal
when the burner is extingui
The LP regulator/hose assembly shall be
located out of pathways where people
may trip over it or in area where the hose
will not be subject to accidental damage.
Children and adults should be aware of
hazards of high surface temperature and
shall stay away to avoid burns of clothing
ignition.
Young children should be carefully
supervised when they are in the area of
the heater.
Clothing or other flammable material
should not be hung from the heater, or
placed on or near the heater.
Any guard or other protective device
removed for servicing the heater must be
replaced prior to operating the heater.
Installation and repair should be done by
a qualified service person, the heater
must be should be inspected before use
and at least annually by a qualified
service person. More frequent cleaning
may be required as necessary. It is
imperative that control compartment,
burner and circulating air passageways of
the heater be kept clean.
Keep the appliance area clear and out of
combustion material, gasoline and other
flammable vapors and liquids.
Do not obstruct the flow of combustion
and ventilation air.
Keep the ventilation opening of the
cylinder enclosure free and clear of
debris.
Page 3
shed).
IMPORTANT NOTICE:
DO NOT return to place of purchase!!!
Please contact Customer Service hotline at 800-913-8999 for help.
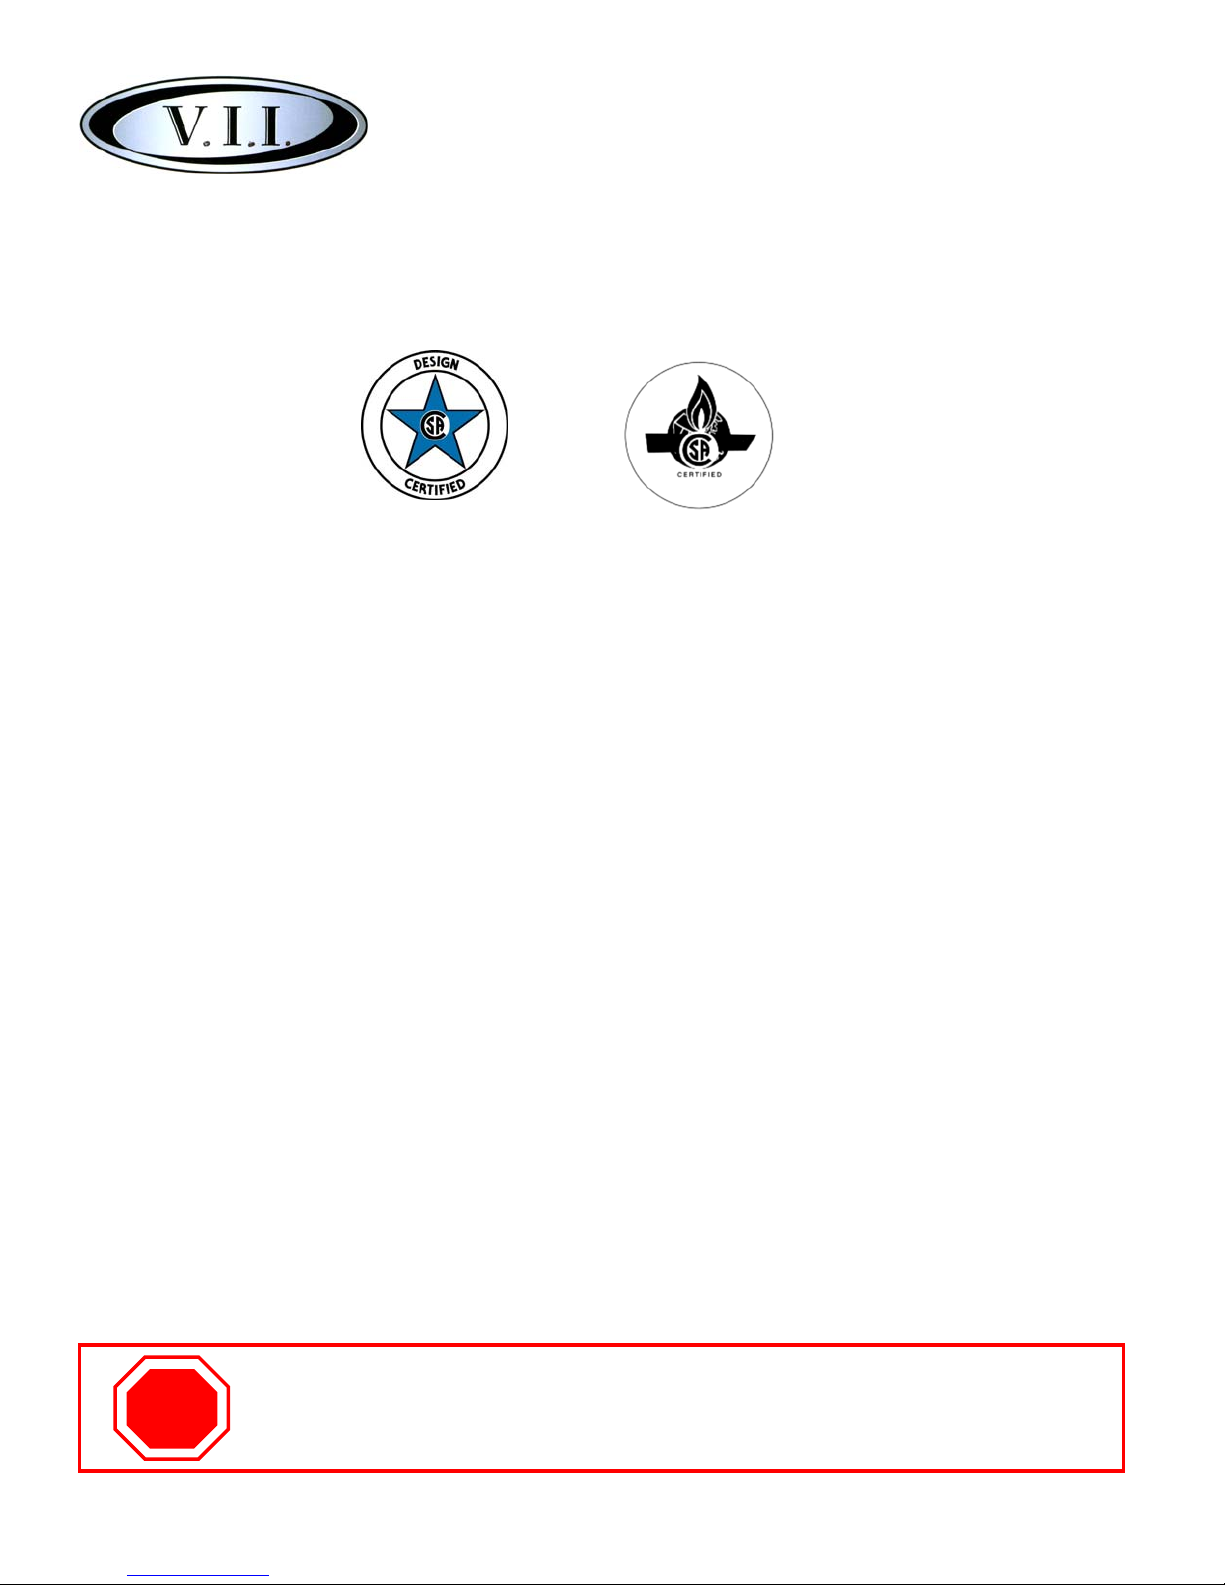
STEP 1. Attach Post socket
Attached the post socket to the top of the
tank enclosure using four of 1/4” acorn-cap.
ASSEMBLY INSTRUCTION
STEP 2: Secure The Post
Connect post on with three 3/16” flat hea
d
screw.
Page 4
IMPORTANT NOTICE:
DO NOT return to place of purchase!!!
Please contact Customer Service hotline at 800-913-8999 for help.
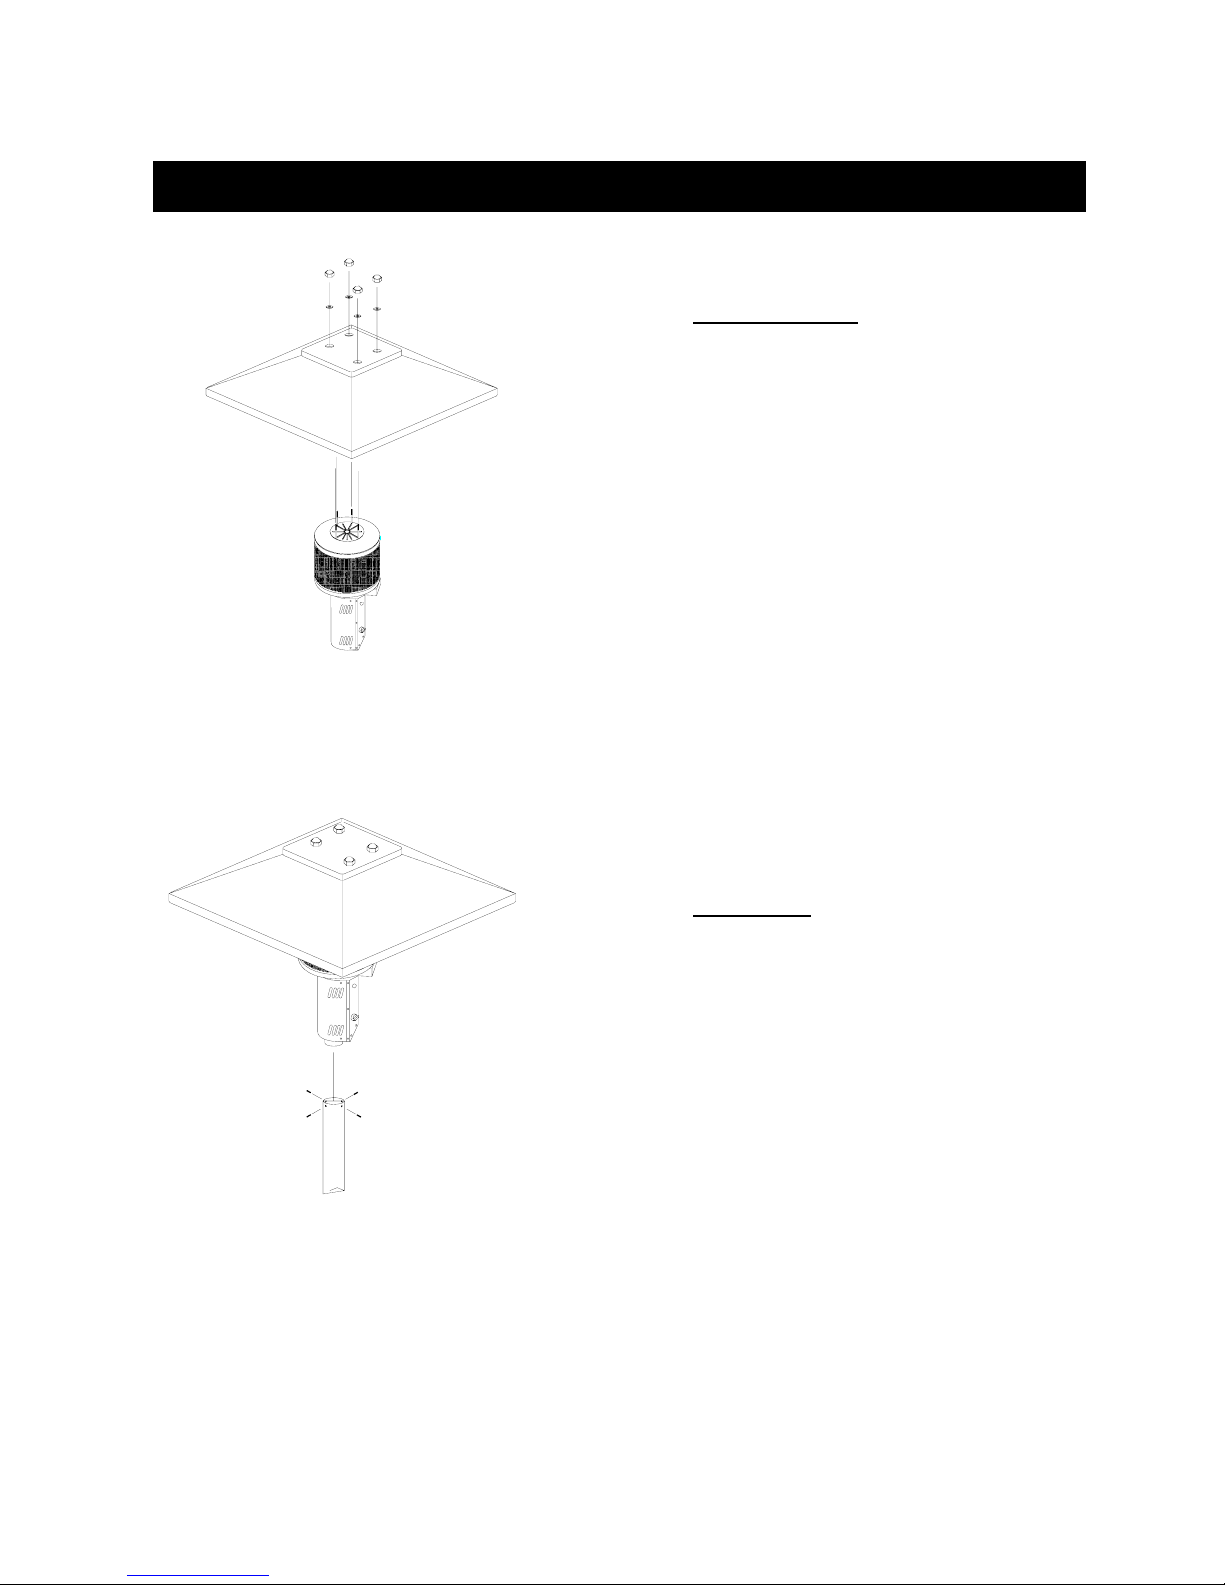
STEP 4: Attach Post
Attach post on to heater head with four of 3/16”
truss head screw.
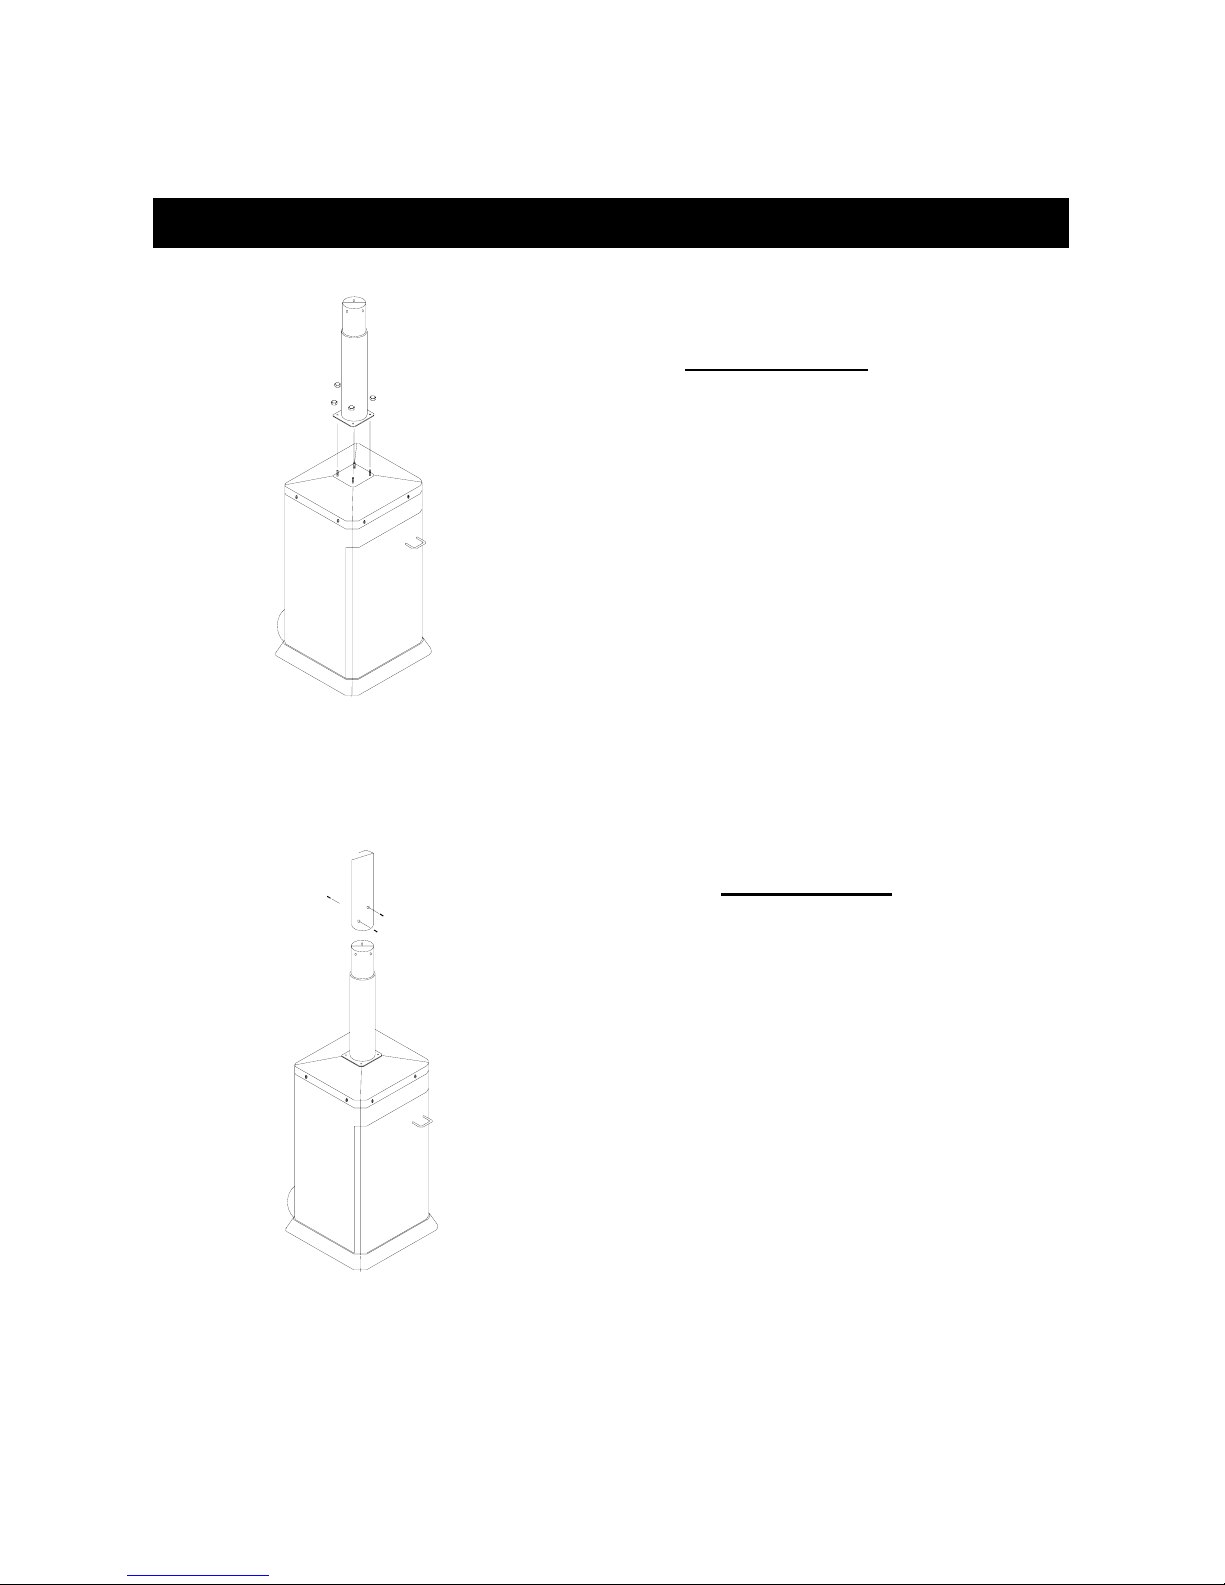
STEP 3:
Attach Reflector
Attach reflector to the top of emitter grid.
Secure with four of 1/4” acorn-cap and fou
r
1/4” flat washer until tight.
ASSEMBLY INSTRUCTION
Page 5
 Loading...