

VIPowER External Drive User Manual

External Drive
USER MANUAL
Rev. A1.0 Date: Oct. 15, 2003
ViPowER
www.vipower.com

CONTENTS
1. INTRODUCTION …………....…………………………………….……1
2. SYSTEM REQUIREMENTS ………….....………………………….…...1
3. HARDWARE INSTALLATION …...................................................................1
4. DRIVERS INSTALLATION …...................................………………..……2
4.1 WINDOWS 98SE...........................................................................................3
4.1.1 AT2 ………....……....……..............................…..…………..……..3
4.1.2 Genesys …………..…..……….….................................….…..…….9
4.1.3 MYSON ………………....…………...……....……………...….15
4.1.4 SMAC .....................................................................................................21
4.1.5 ISD300A1 .............................................................................................27
4.2 WINDOWS ME/2000/XP ….........………..…..……….…….….....…33
4.3 Mac OS ………………............…………...……....……………...….34
5. USING THE USB 2.0 EXTERNAL DRIVE ………...............……………35
5.1 Connect the USB 2.0 External Drive to computer …......….......………35
5.2 Disconnect the USB 2.0 External Drive from computer …....…….…..35
6. PARTITIONING THE USB 2.0 EXTERNAL HARD DISK DRIVE ..........37
6.1 PARTITION UNDER WINDOWS 98/ME …………......................…..37
6.2 PARTITION UNDER WINDOWS 2000/XP………..…….......……...39
Copyright 2003-2004 ViPowER, Inc. All rights reserved.

1. INTRODUCTION
The USB 2.0 External Drive is a portable compact storage drive that incorporates
the USB 2.0 (Universal Serial Bus 2.0) high speed interface. The USB 2.0 External
Drive provides a fast and easy way to add more storage space to your computer. The
Plug & Play feature gives you a great convenience on the road, the USB 2.0 External
Drive can re-connected while the computer is running.
The USB 2.0 External Drive is compatible with Apple Macintosh and Windows
Computers.
Note:
In order to reach USB 2.0 speed, you must have a computer or host adapter
card that has USB 2.0 support. This device will auto sense the speed of your USB
port and adjust between USB 1.0 and USB 2.0 speed.
2. SYSTEM REQUITEMENTS
Hardware:
Notebook and desktop computer with USB or USB 2.0 port supported.
Operation system:
Windows 98SE / Me / 2000 / XP, and Mac OS 8.6 or above.
3. HARDWARE INSTALLATION
Step 1 Boot-up your computer make sure the USB / USB 2.0 Port device driver
has installed and is available in operation system.
Step 2 Plug the port connector of the USB cable into the USB Port of your USB
2.0 External Drive.
Step 3 Plug the power cord to the inlet of your USB 2.0 External Drive and
power on the drive. Your USB 2.0 External Drive will be ready to use.
USB 2.0 External Drive 1
Step 4 Plug the port connector of the USB cable into USB port of computer.
Step 5 Follow the Software Installation for the next.
Note:
In order to reach USB 2.0 speed, you must have a computer or host adapter
card that support USB 2.0 . This device will automatically sense the speed of
your USB port and adjust between USB 1.0 and USB 2.0 speed.
4. Drivers INSTALLATION
There are two different versions of USB controllers, each reguires
different software driver.
Please try to find a round sticker on your ViPowER USB device to choose the
right driver and installation procedure accordingly.
AT2 =
AT2
MYSON=
ISD300A1 =
MY
C
Genesys =
SMSC =
G
SM
2 USB 2.0 External Drive
4.1 Windows 98SE
4.1.1 AT2
If this is the first time you use USB 2.0 External Drive, you have to run the
[STEPUP.EXE] from USB 2.0 install CD before you connect your USB 2.0
External Drive to computer.
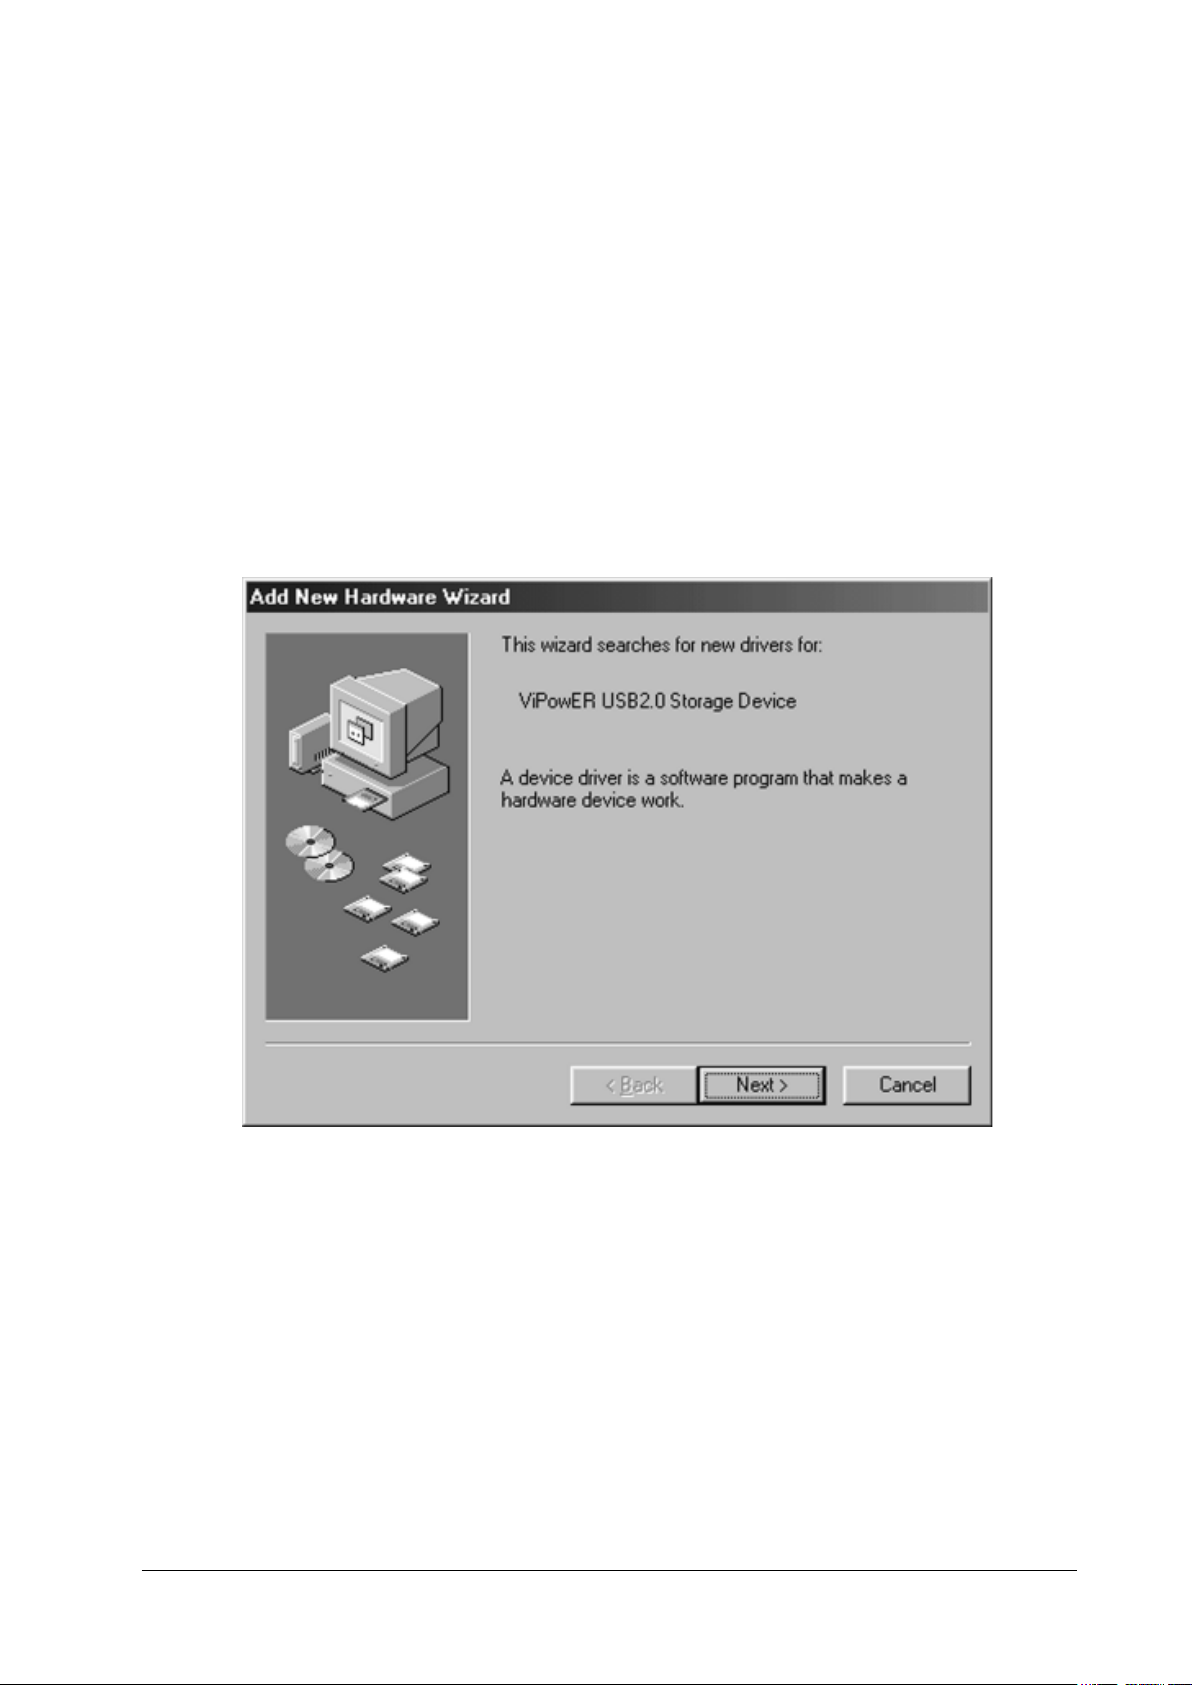
1. Connect your USB 2.0 external drive to your computer.
2. A “Add New Hardware Wizard” will pop-out. Click on [Next].
USB 2.0 External Drive 3
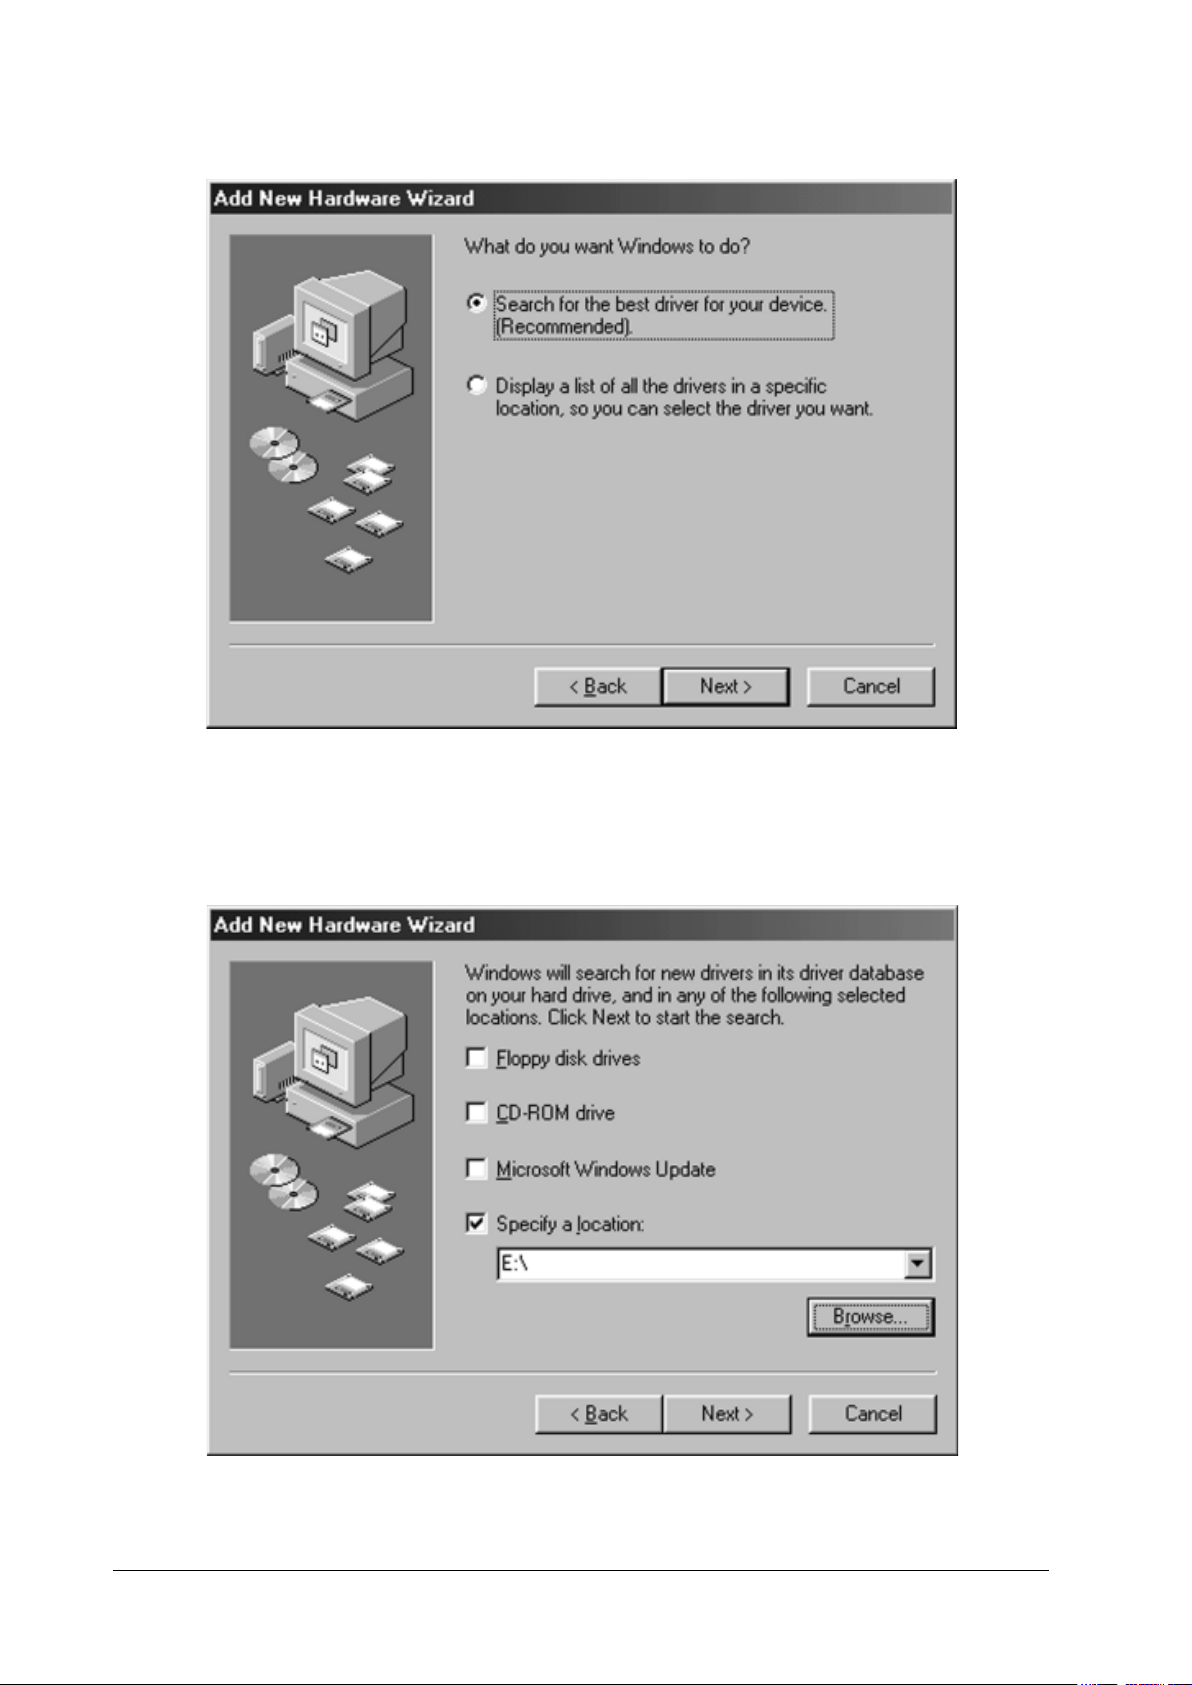
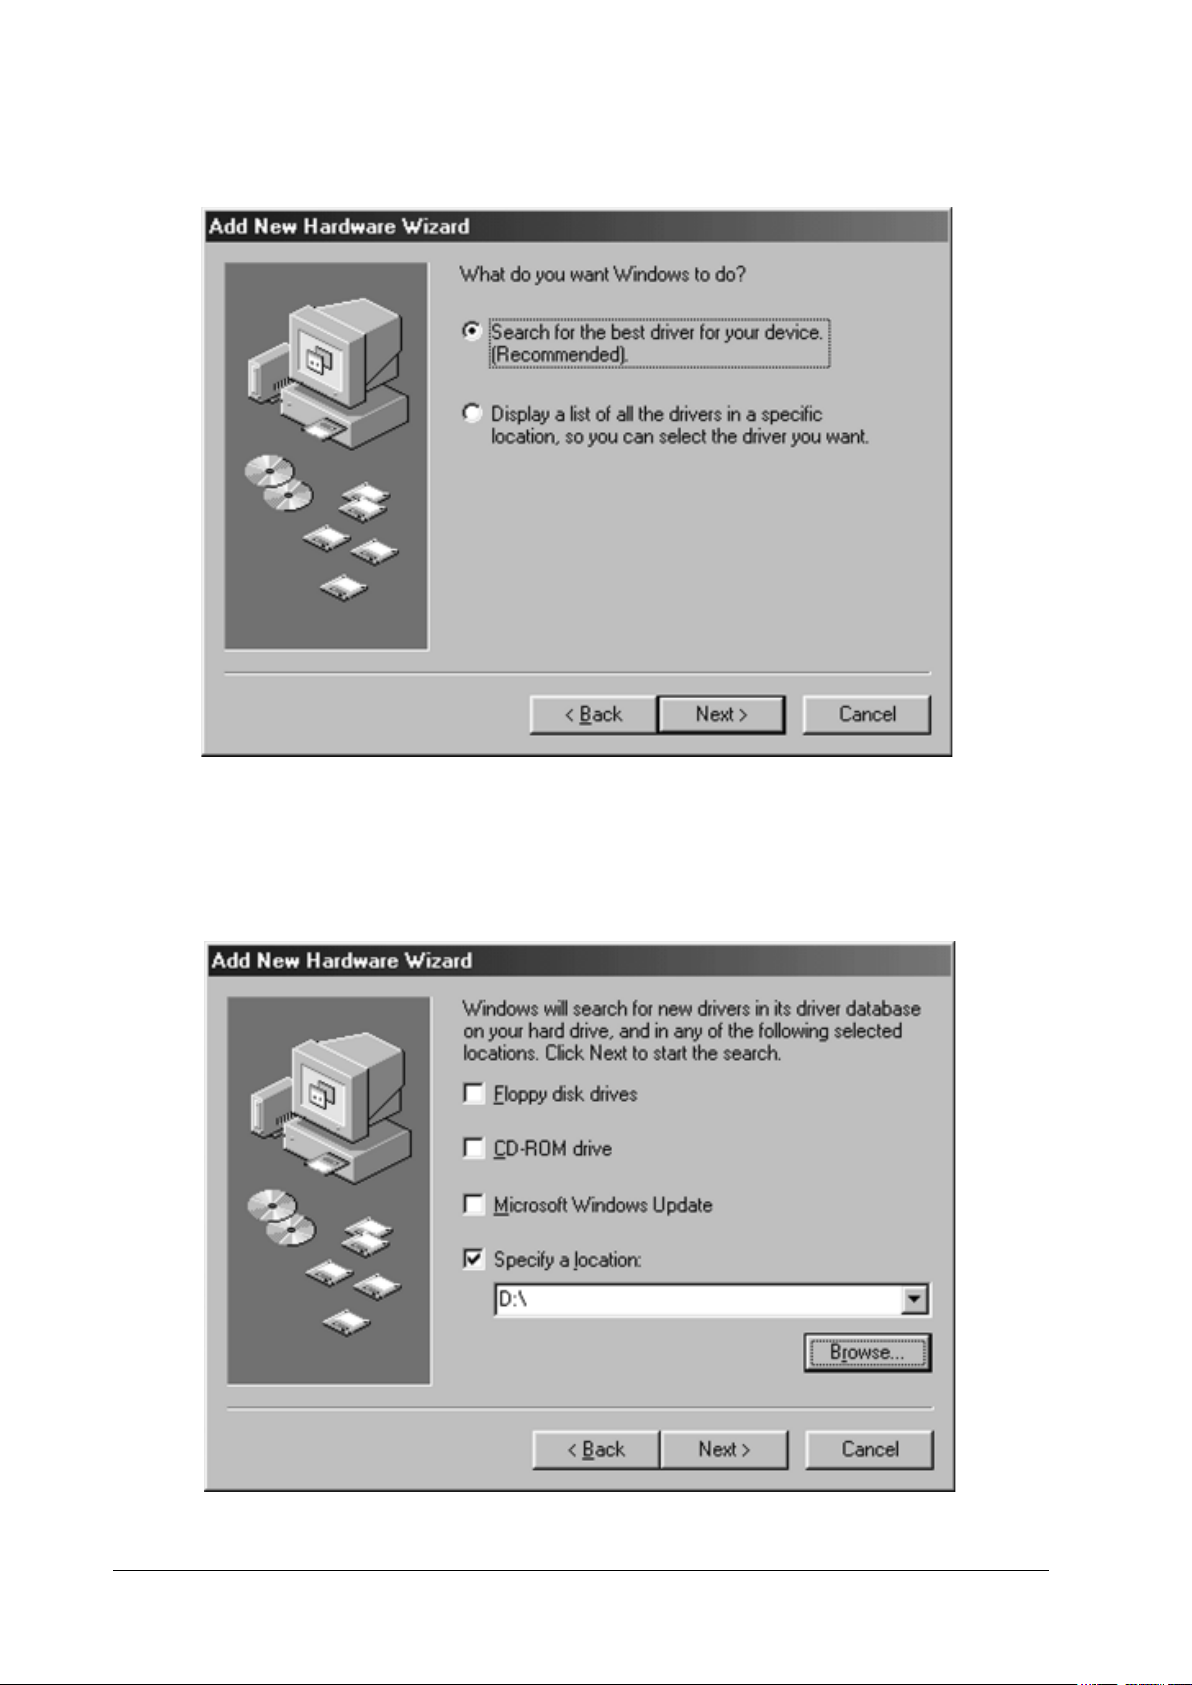
3. Select “Display a list of all drivers” then click on [Next].
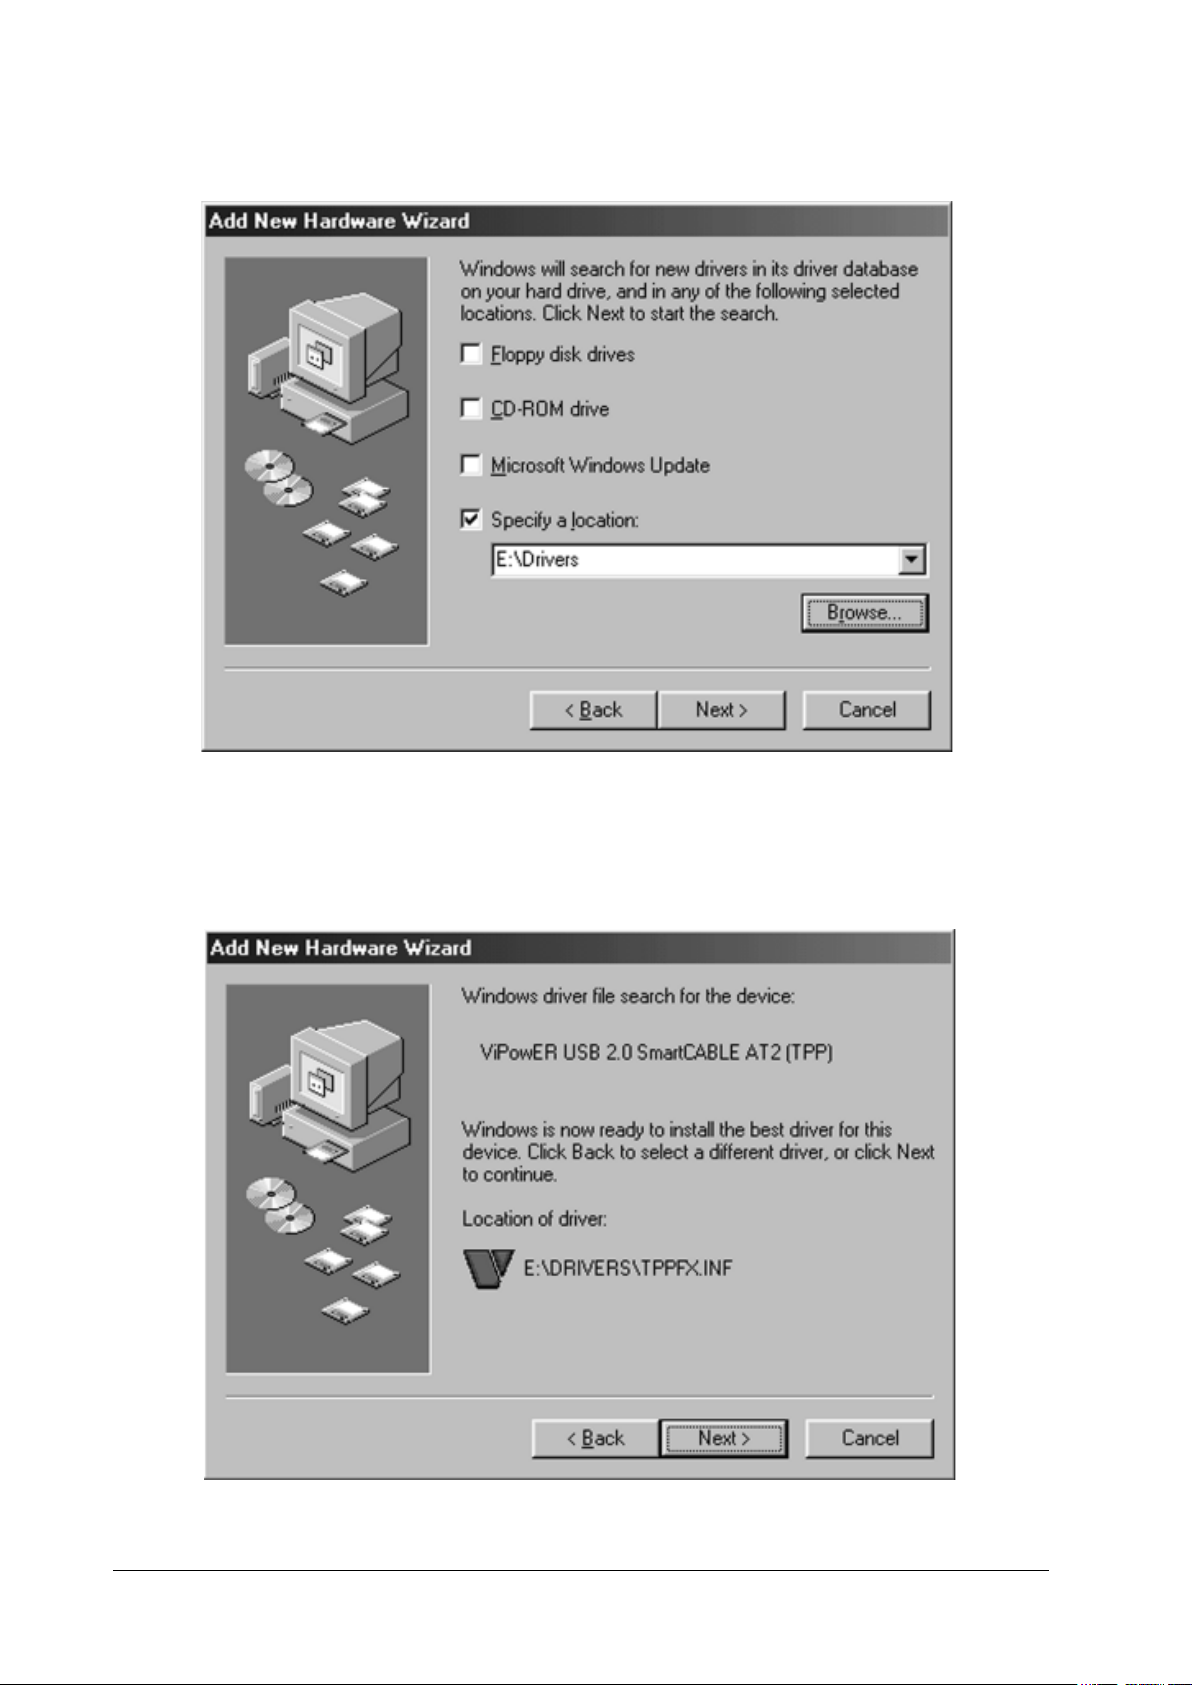
4. Click on [Browse].
4 USB 2.0 External Drive
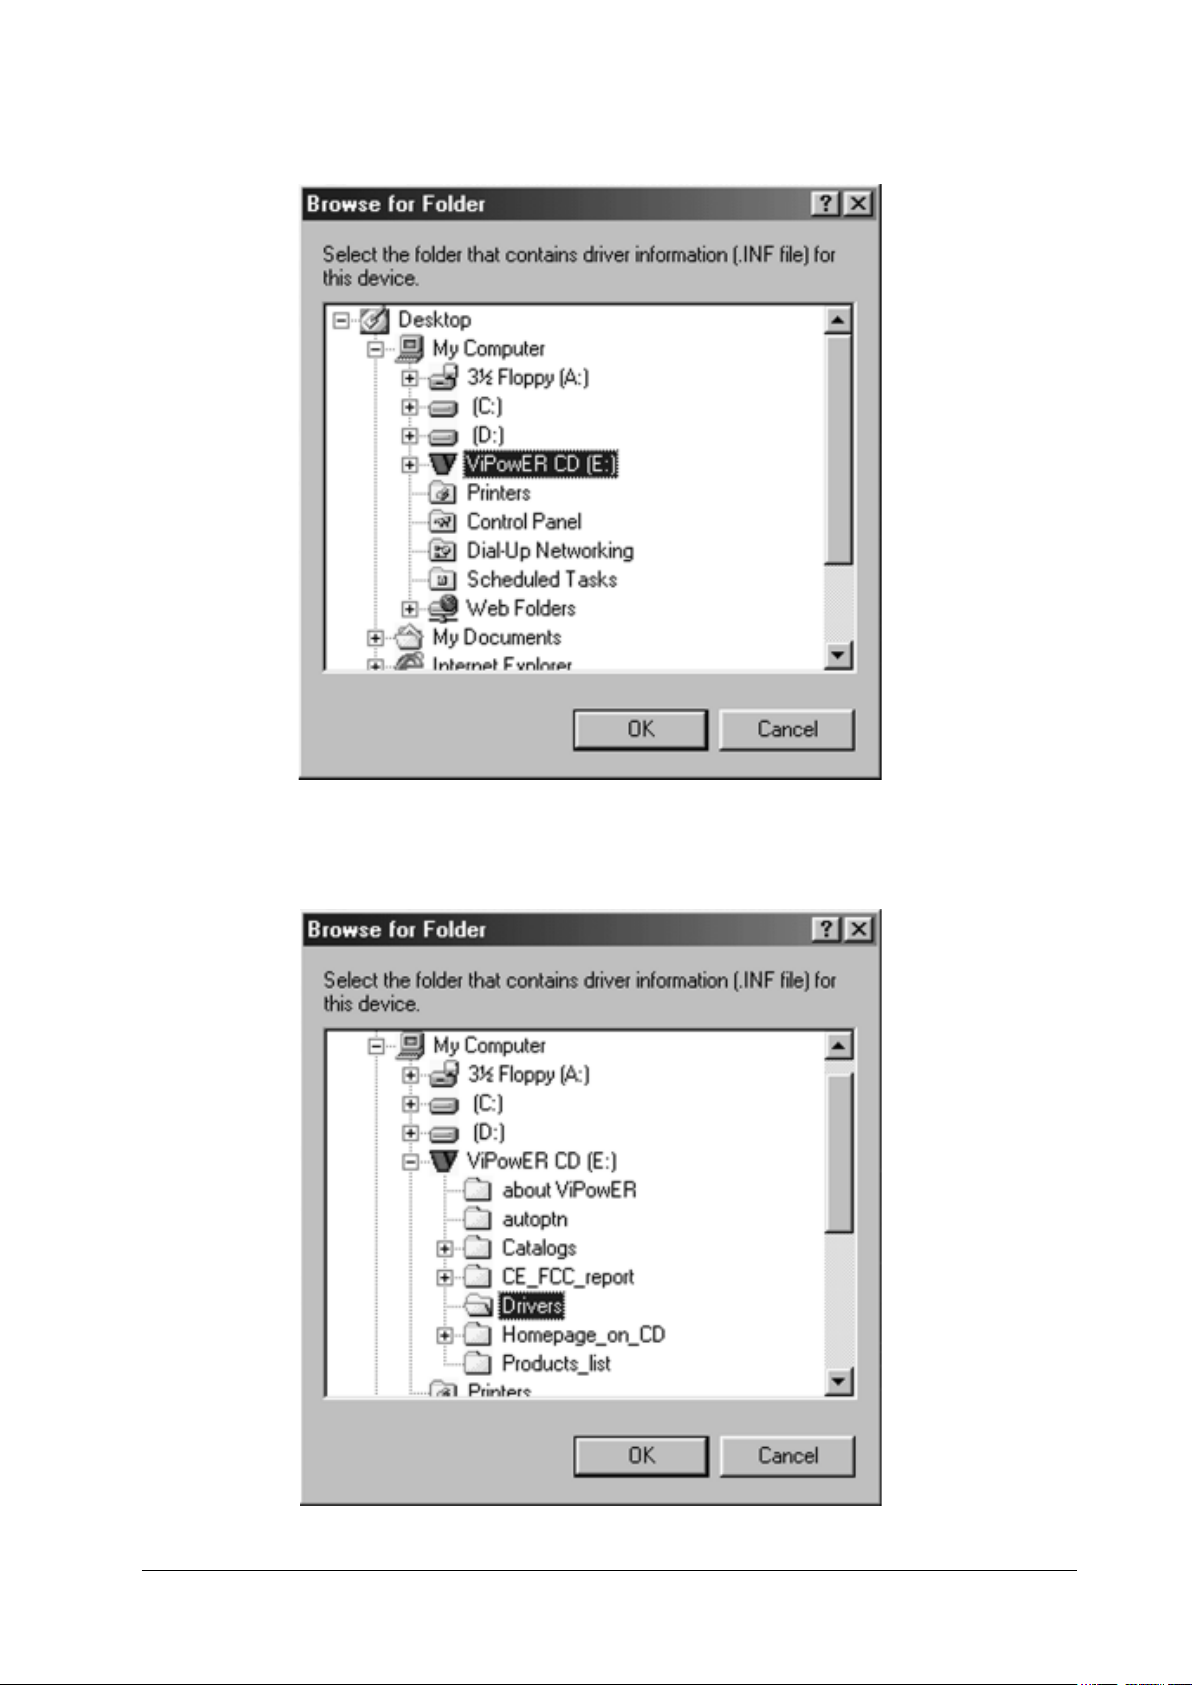
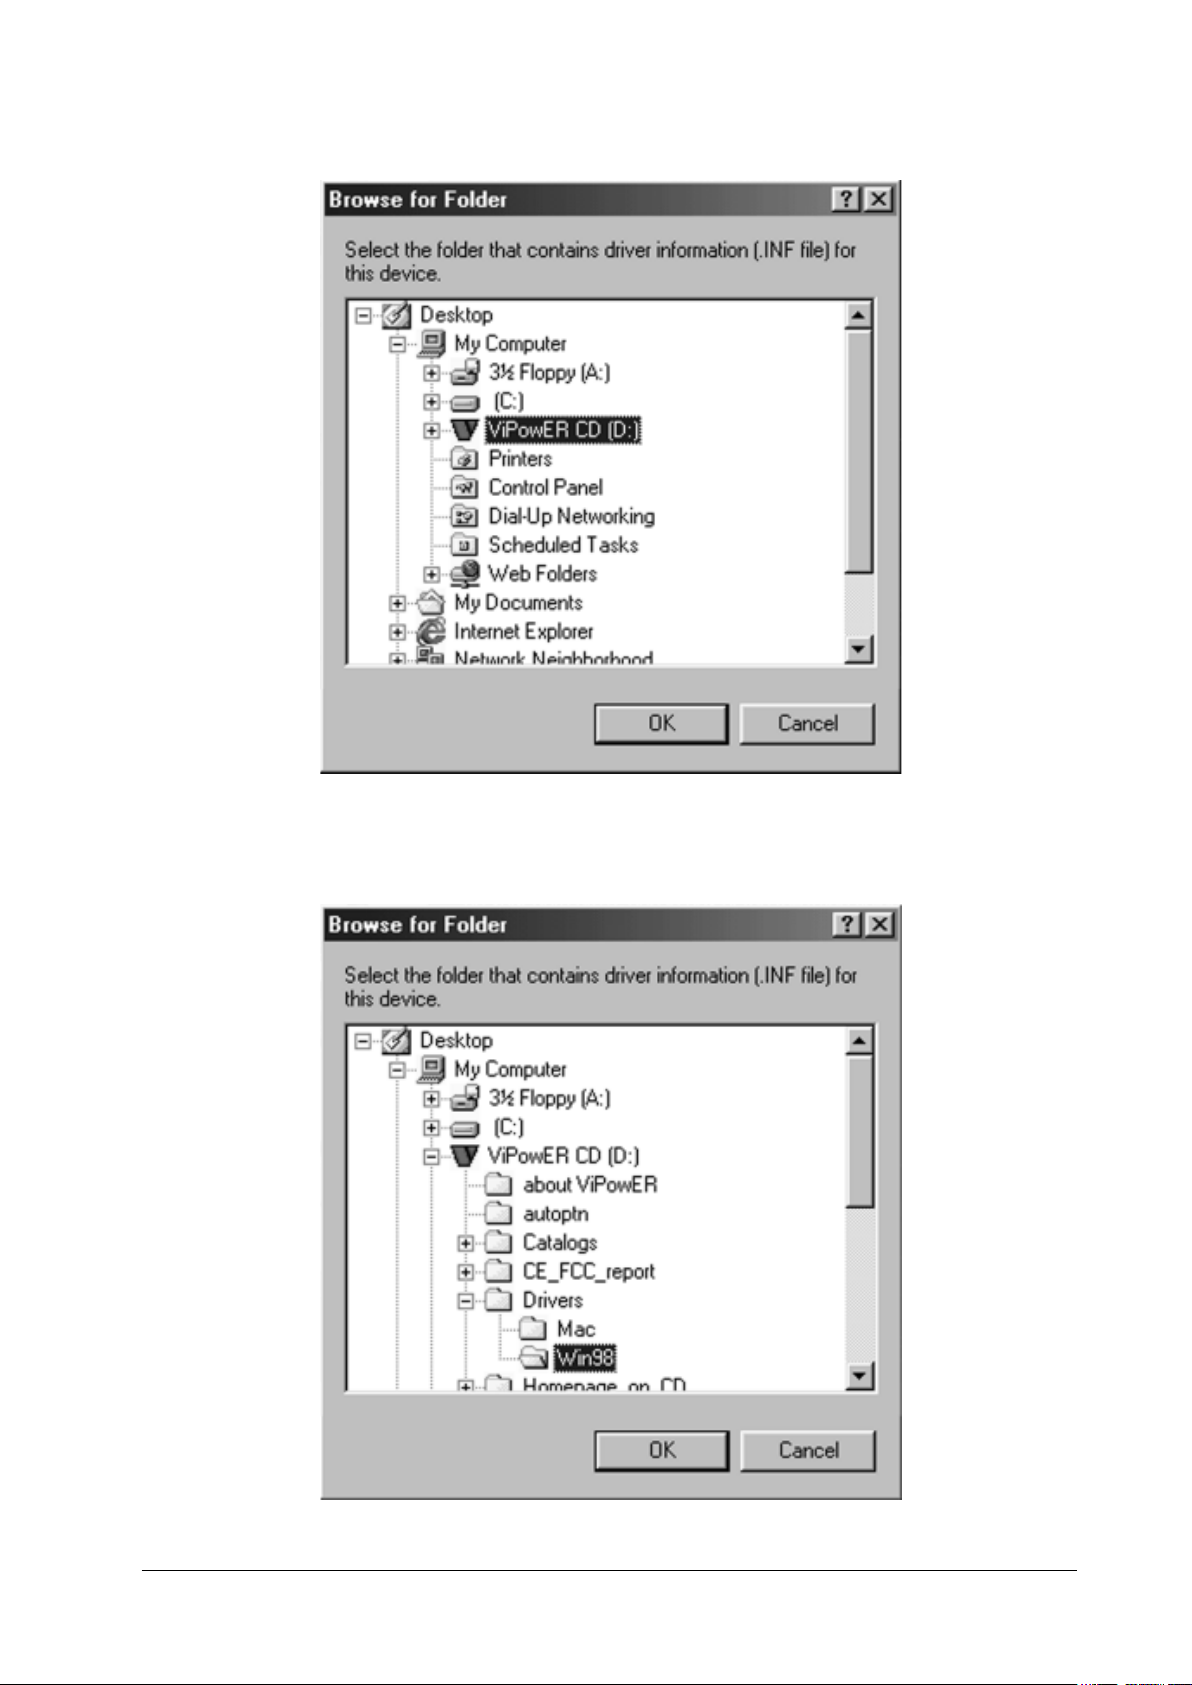
5. Double click on the ViPowER CD icon.
6. Click to choose “Driver” directory, then click [OK].
USB 2.0 External Drive 5
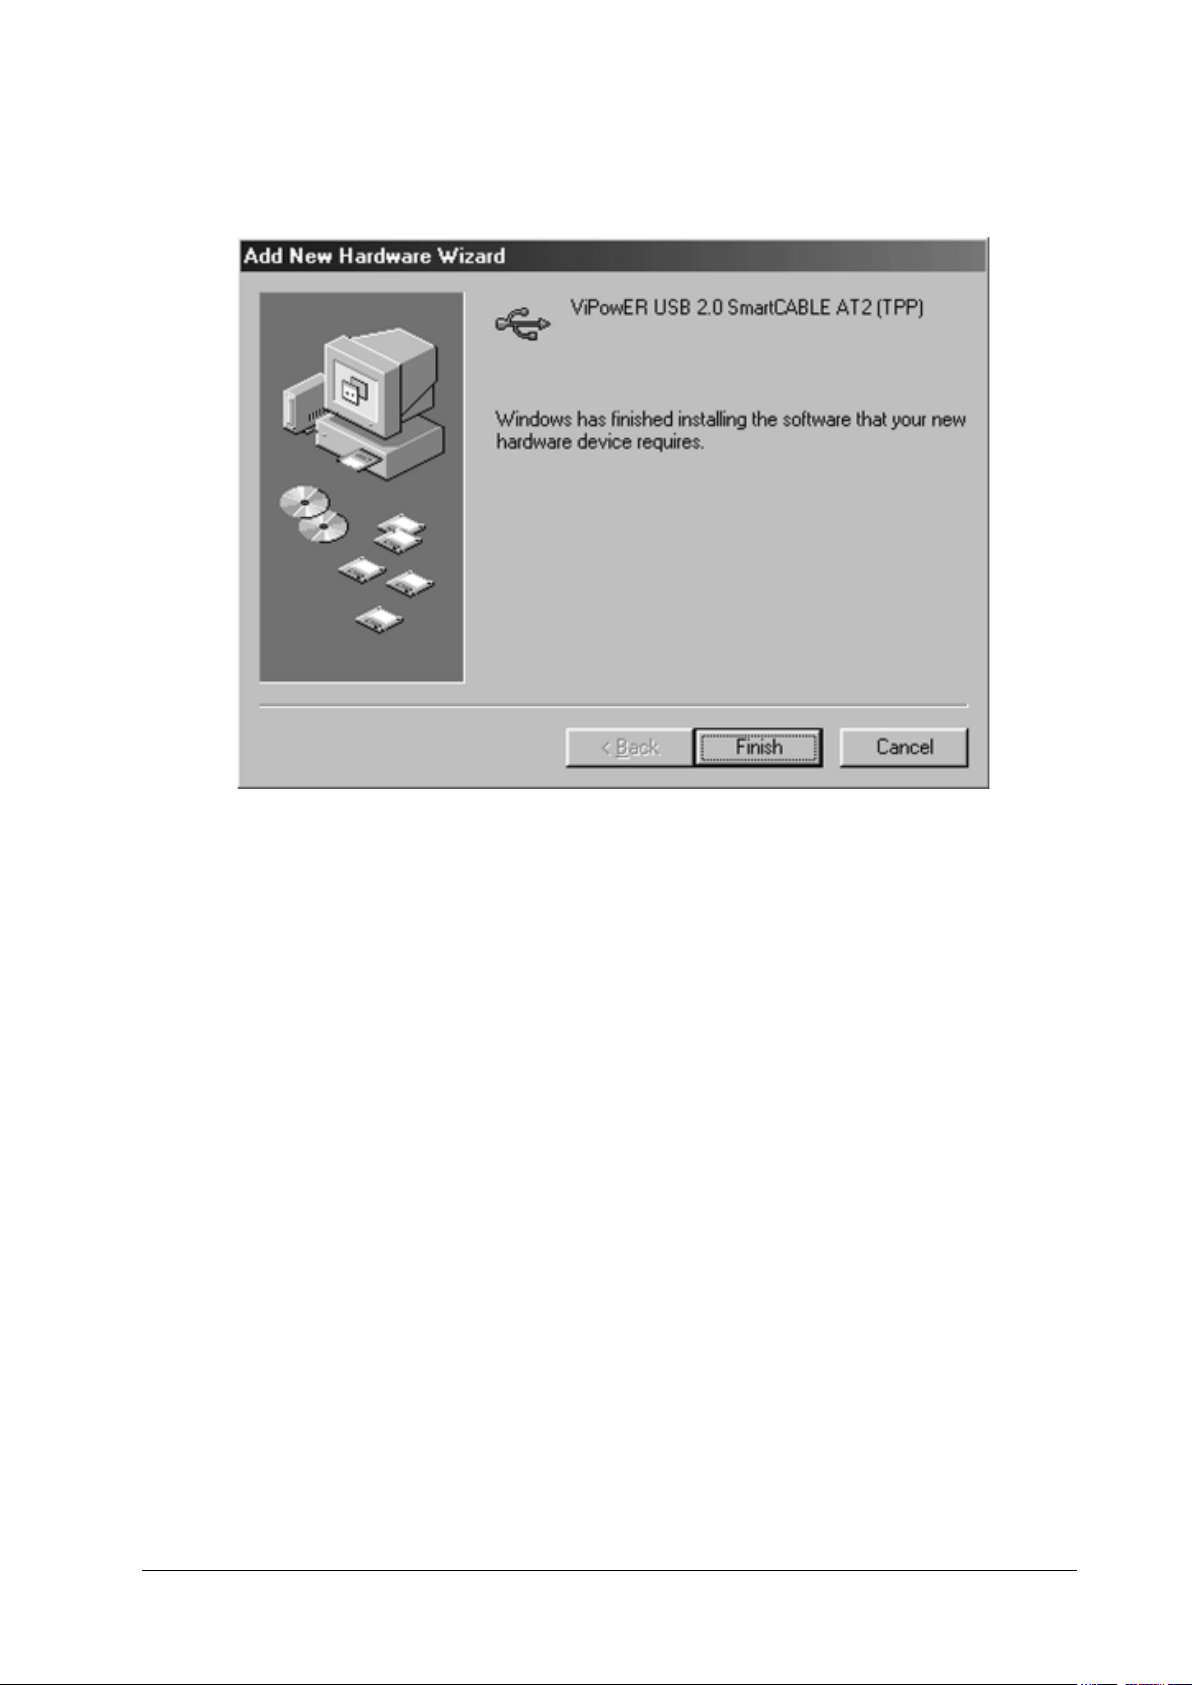
7. Click on [Next].
8. Click on [Next].
6 USB 2.0 External Drive
9. The system will request you to restart your computer now. Click on
[FINISH].
10. After the system restart, the installation is complete. You can connect your
USB 2.0 External Drive to computer now.
USB 2.0 External Drive 7
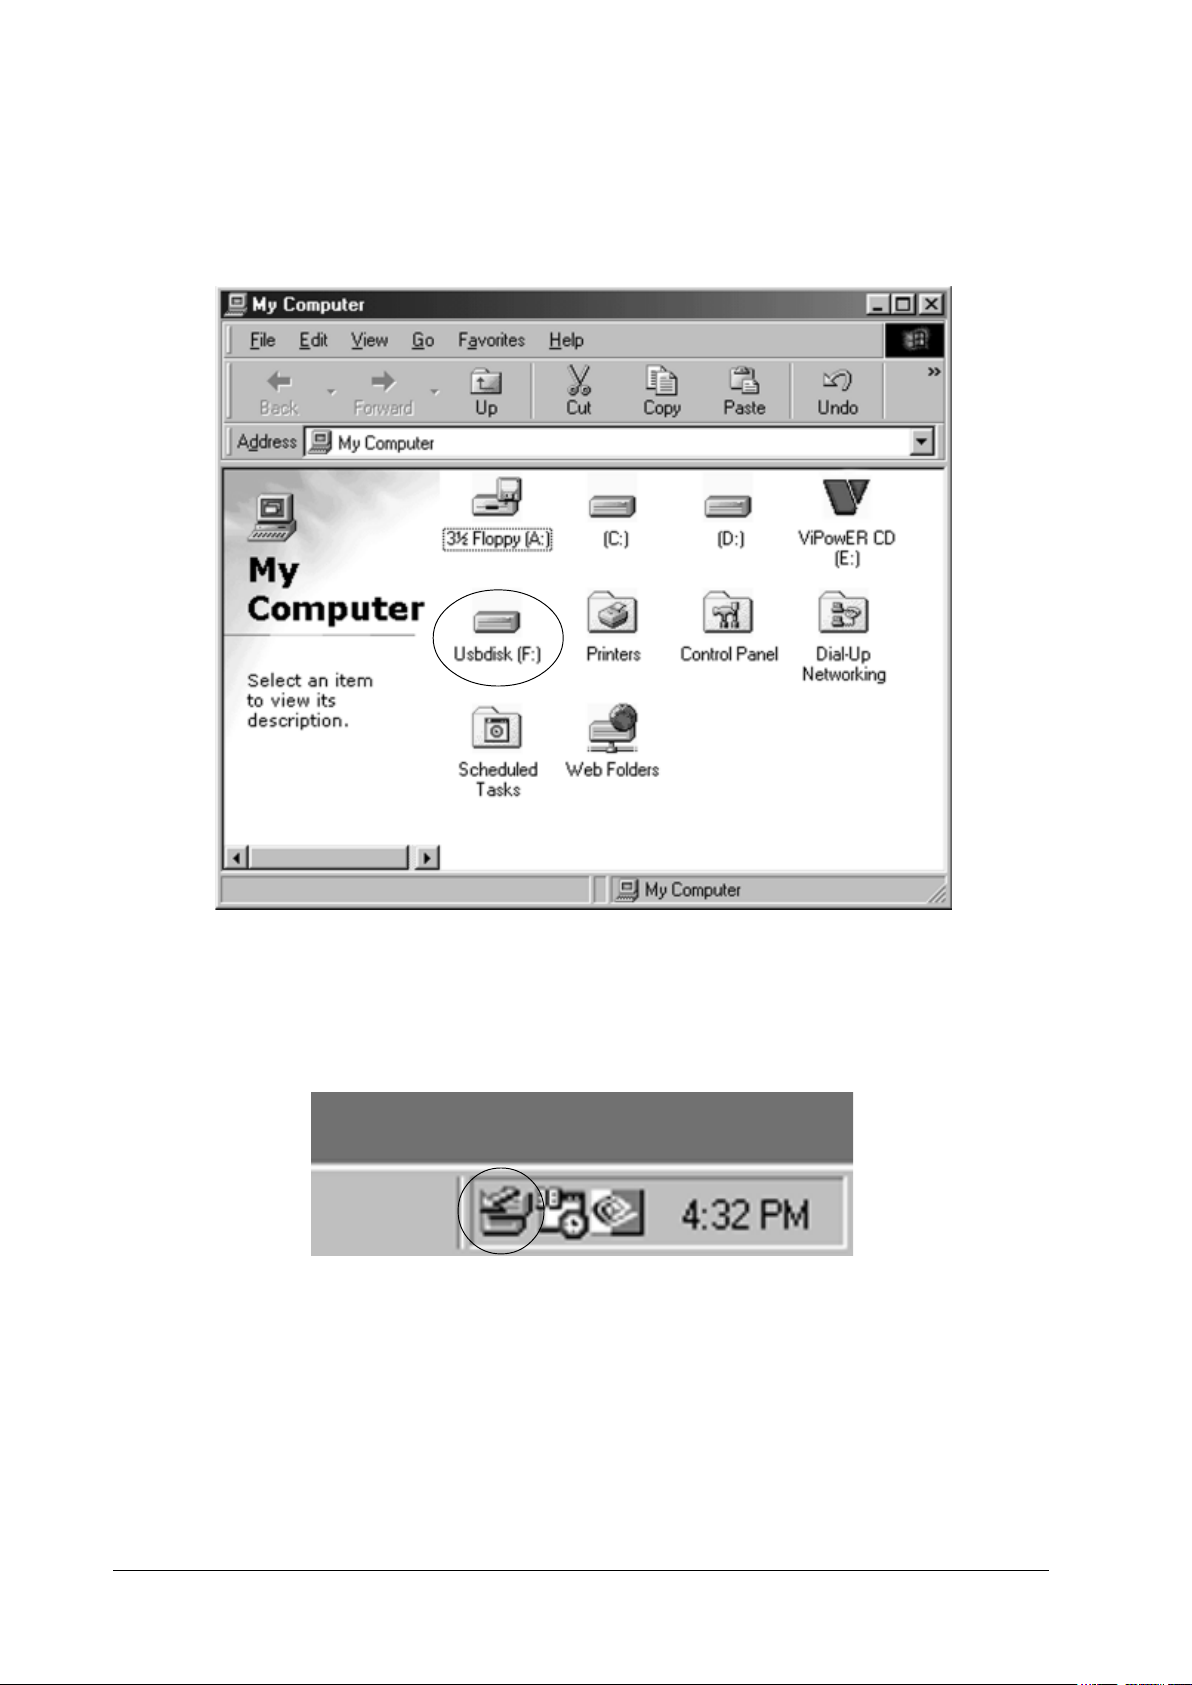
11. After you connect your USB 2.0 External Drive to your computer. Double
click on [My Computer], a new drive Disk is added, it is the USB 2.0 External
Drive which just installed.
A green Unplug or Eject hardware icon will appear in system tray too.
If the new drive doesn’t appear in My Computer, it means this USB 2.0 External
Drive is a whole new hard disk drive which doesn’t contain any partition. Please refer
to chapter 6 to prepare your USB 2.0 Hard Disk.
8 USB 2.0 External Drive

4.1.2 Genesys
If this is the first time you use USB 2.0 External Drive, you have to run the
[STEPUP.EXE] from USB 2.0 install CD before you connect your USB 2.0
External Drive to computer.
1. Connect your USB 2.0 external drive to your computer.
2. A “Add New Hardware Wizard” will pop-out. Click on [Next].
USB 2.0 External Drive 9
3. Select “Display a list of all drivers” then click on [Next].
4. Click on [Browse].
10 USB 2.0 External Drive
5. Double click on the ViPowER CD icon.
6. Click to choose “Driver” directory, then click [OK].
USB 2.0 External Drive 11
 Loading...