

Page 1
Viper Shovelnose Wet Vac
Operating Instructions
Page 2

IMPORTANT!
Operator’s Manual
It is important that
you read the
operator’s
manual before
using any
machine.
This presentation will only outline
a few common issues that pertain
to the Viper Shovelnose Wet Vac.
Page 3
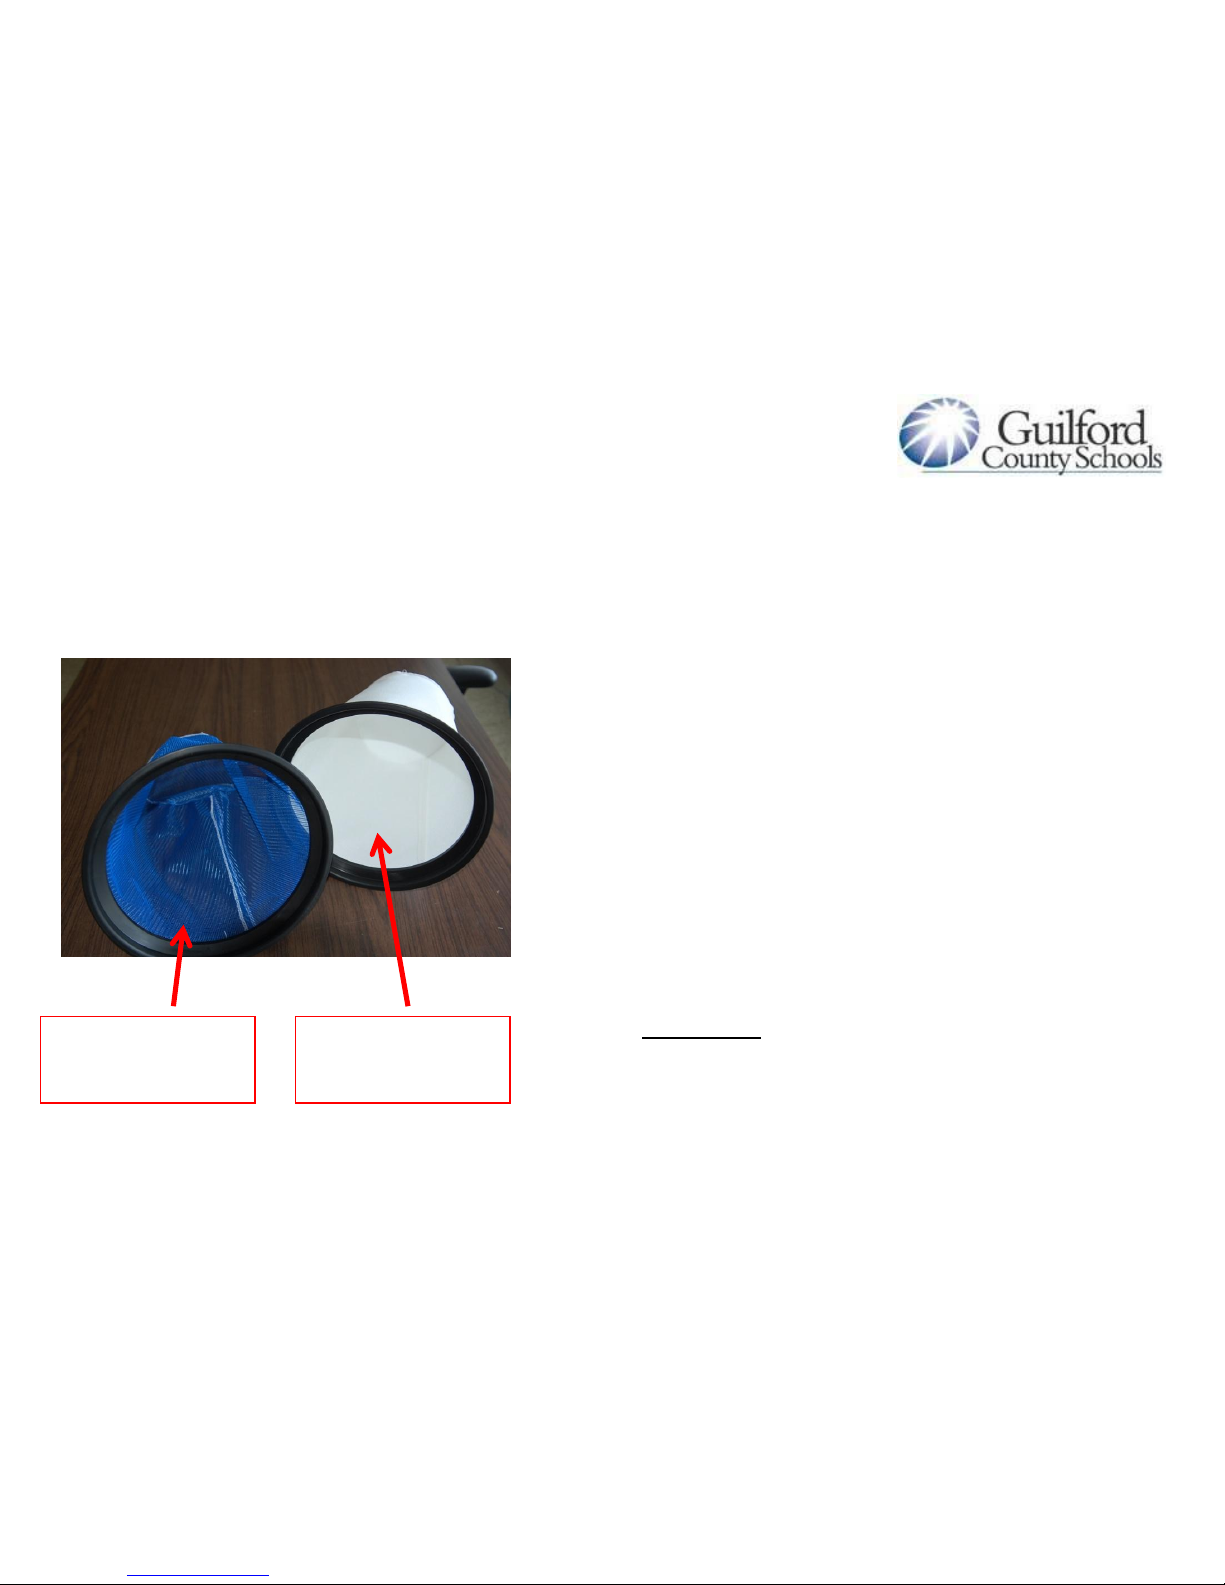
FILTERS
The Viper Wet Vac comes from the
factory with two filters—one for
WET pick up (BLUE mesh), and
one for DRY pick up (WHITE
cloth). DO NOT pick up wet
material with the WHITE filter
placed in the machine. If you
only use the machine for wet pick
up, it may be in your best interest
to discard the WHITE filter.
Filter for WET
pick-up
Filter for DRY
pick-up ONLY
Page 4
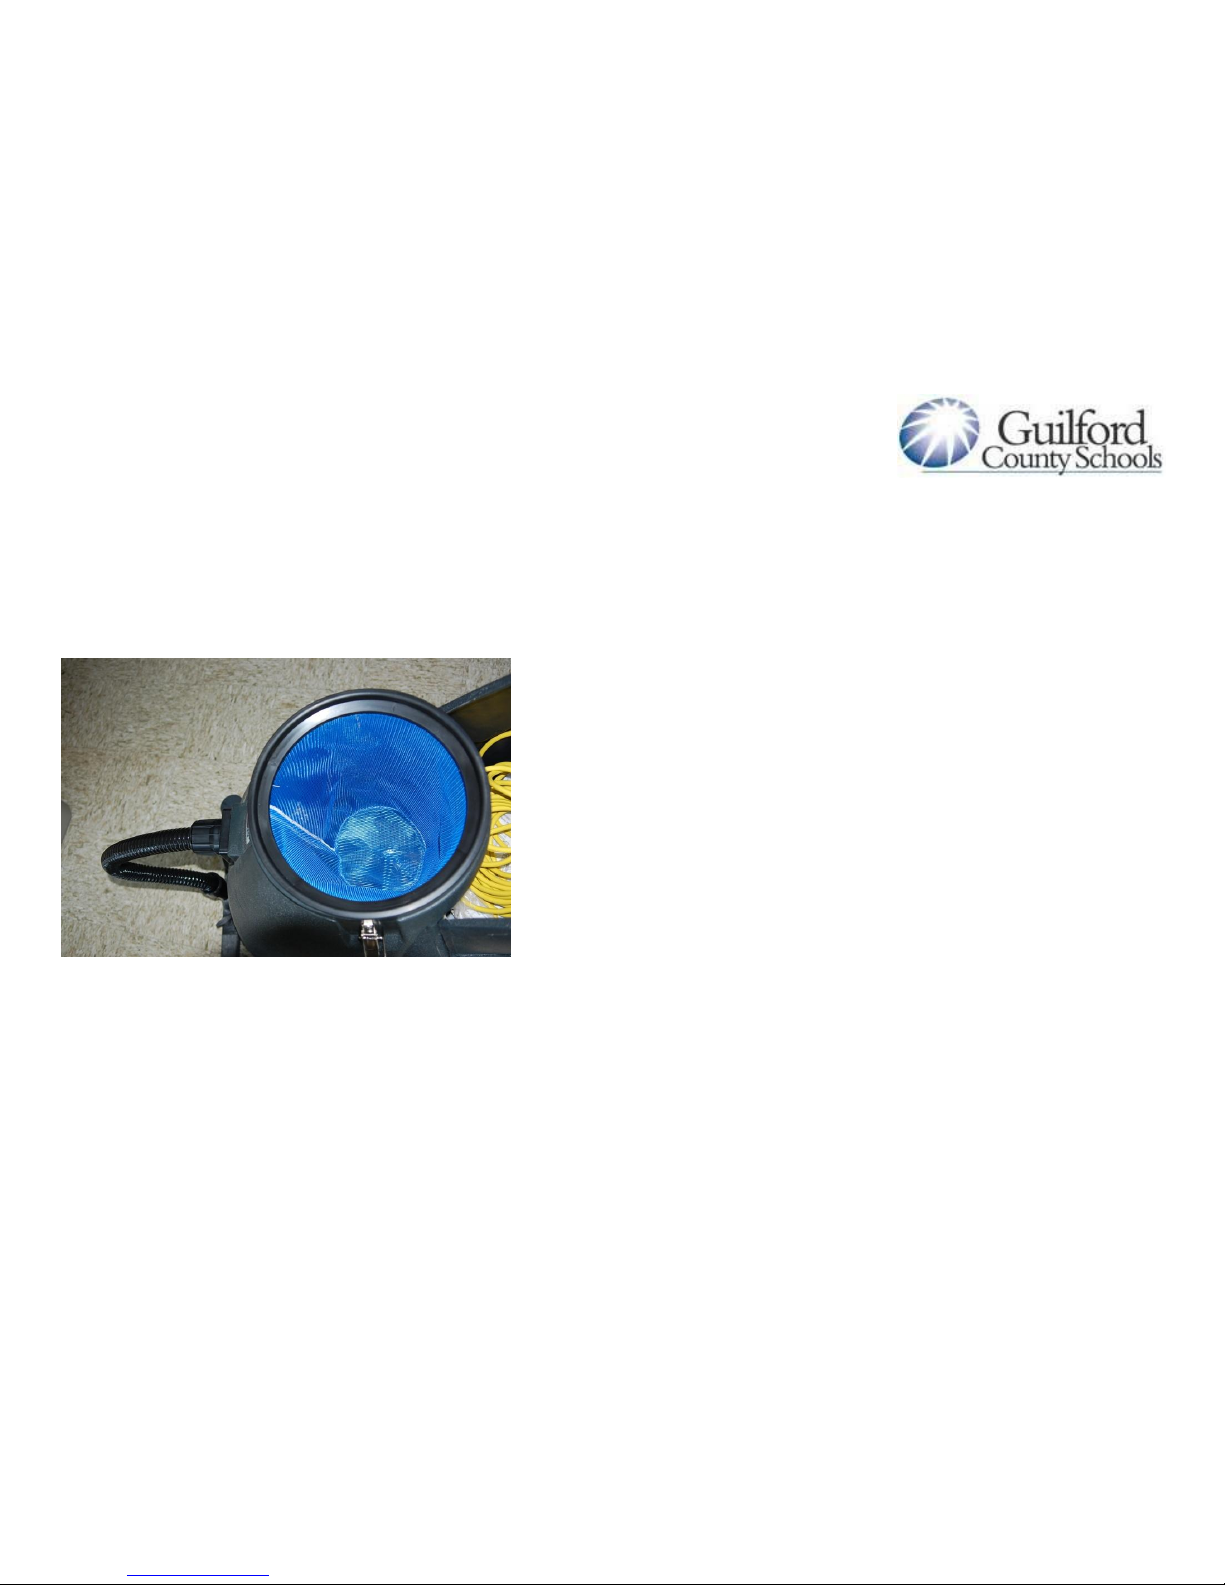
FILTERS
Place BLUE mesh filter inside tank.
The black gasket should rest on
the outside edge of the tank, and
vacuum head assembly should
be placed over the filter.
This filter is designed to keep foam
build-up from entering the
vacuum motor.
Page 5
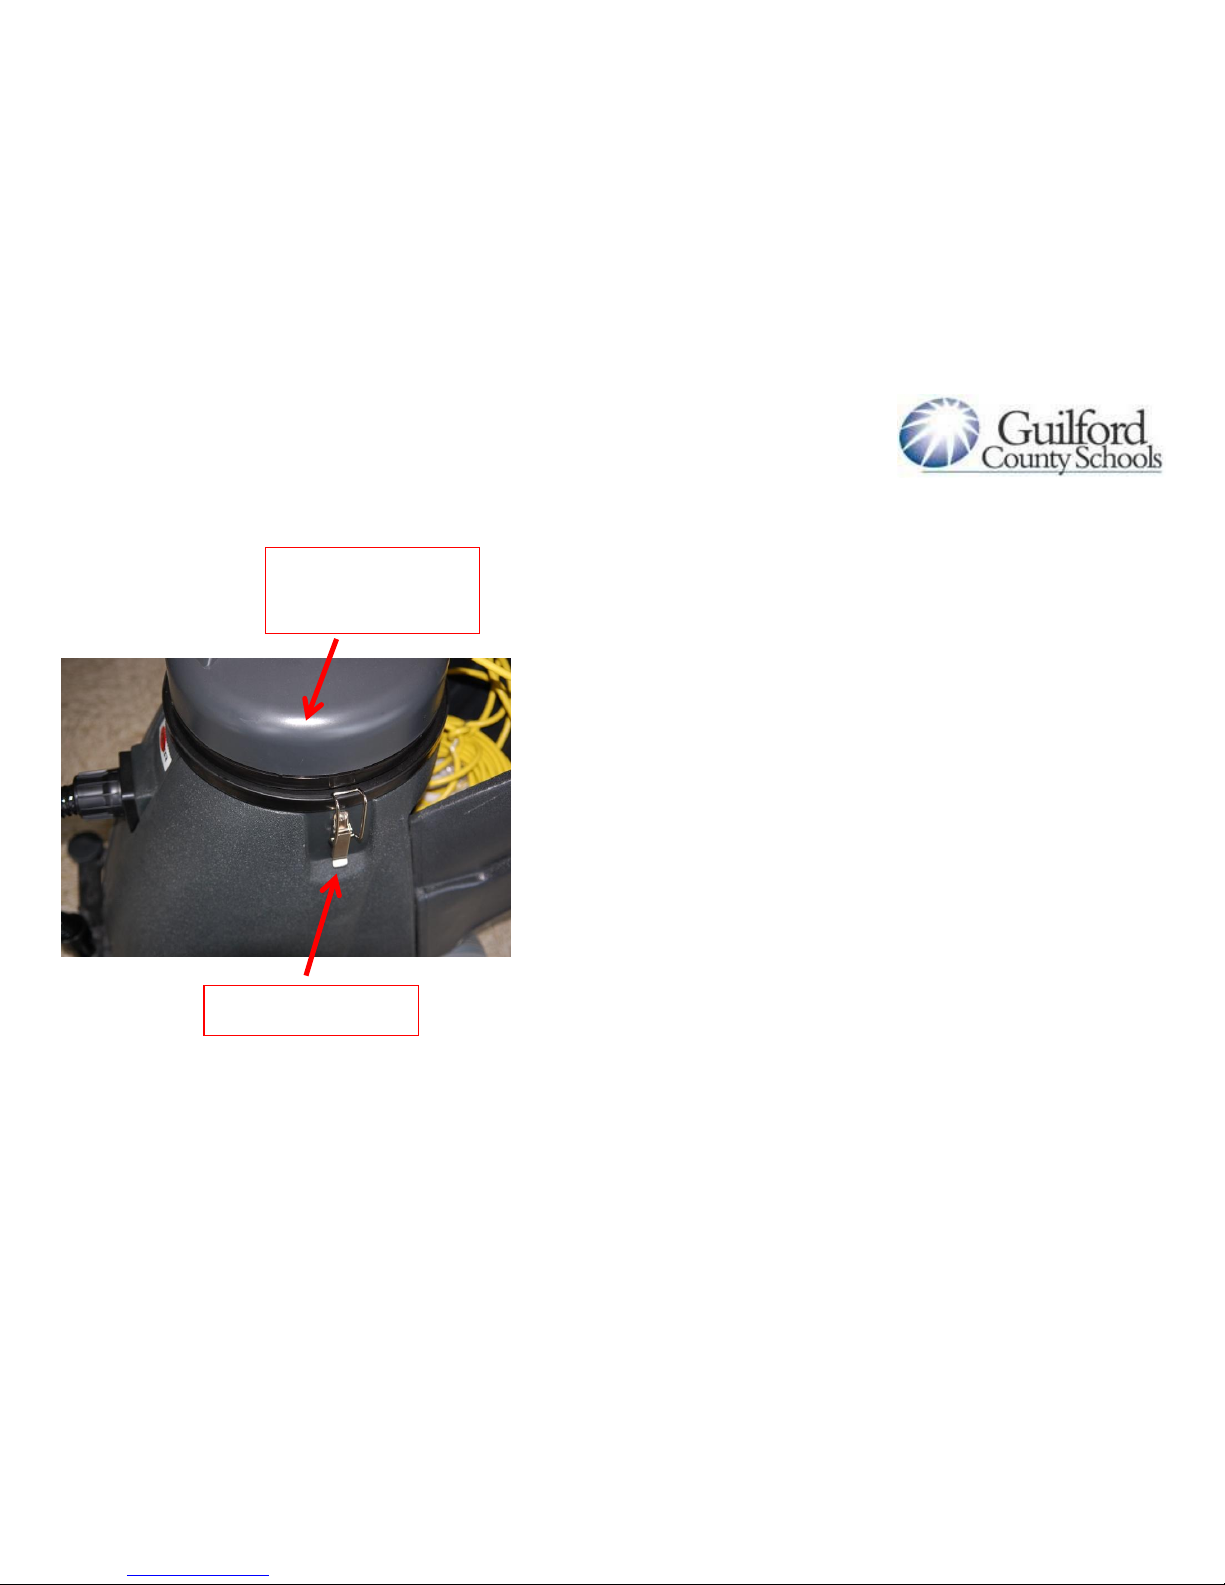
Vac-Motor Assembly
The vac-motor assembly should fit
easily over the tank. Latches are
often broken if the vac-motor
head is not properly seated on
the tank.
The latches are easily replaceable
with two screws.
Vac-Motor
Assembly
Latch
Page 6

Vac-Motor Assembly
The vac motor assembly should be
kept clean and dry at all times.
Water should not be allowed to
reach the “trumpet” (base).
Frequent emptying of the tank
will keep the vac motor from
being damaged by liquid.
Trumpet
Page 7

Ball Float Shut-Off
As a preventive measure, a ball
float shut-off is in place to keep
liquids out of the vacuum motor.
When the tank is full of liquid,
the ball will rise and you should
be able to hear the vac motor
“winding up”, like there is a clog.
This indicates that the tank is
full. However, FOAM BUILD-UP
WILL NOT ACTIVATE THE SHUTOFF!
Ball float
NOTE: “Shut-off” does not mean that the machine will power
off. It means that the vac motor air intake will be sealed—at
this point you should observe that the machine has lost
suction.
Page 8

When should I empty the
tank?
When the machine is about ¾ full,
empty the tank and properly
dispose of contents. As a rule,
do not pick up more than 10-12
gallons of solution at one time.
The red line in the photo shows the
approximate maximum fill-level.
Once that is reached, the
machine will need to be
emptied.
NOTE: Remember that FOAM will not activate the ball shut-
off. It is recommended by the manufacturer that “defoamer”
be used in the tank to dissipate foam from stripper and finish
solution.
Page 9

Excessive Foam Build-Up
and Overfilling
The Vacuum Air Intake filter screen
should remain free of any
obstruction. If it becomes clogged,
the vacuum is not going to function
properly and the motor will
overheat. This can be prevented by
proper emptying and using a
“defoamer” solution. If the
machine is overfilled, the liquid is
suctioned through this screen
directly into the vacuum motor. At
this point, it is likely that damage
has occurred.
Vacuum Air
Intake Filter
Screen
NOTE: If this area is clogged, it will cause the ball float shut-
off to activate immediately once the vacuum is powered on.
Page 10

Ground Plug
Do not operate a wet vac or any
other machine when this prong
is missing. This plug is most
often broken by not unplugging
the machine properly. Do not
unplug anything by pulling on
the cord.
Unplug electrical device by pulling
the PLUG from the outlet. If this
plug is missing, follow proper
procedures to have it replaced
immediately.
Ground
Page 11

Hose Assembly
After each use, remove the coupler
from the front of the machine
and rinse thoroughly. It is
helpful to add a lubricant to the
treads so that future removal will
be problem-free.
Coupler
Page 12

Hose Cuff
The hose cuff should be removed
after each use and rinsed
thoroughly. Floor strippers can
cause these to become brittle,
and cracking can occur in the
cuff. The vacuum will not
operate properly when the cuff
is not in good condition. These
can be easily replaced. The
custodial services department
has replacement cuffs should
you encounter this problem.
Hose Cuff
Page 13

Maintenance
1. Drain and rinse recovery tank after each use.
2. Clean ball float shut-off after each use.
3. Clean the outside of the machine with a mild
cleaner
4. Check the power cord for any damage
5. Rinse the squeegee blades with water and wipe
with a cloth.
6. Check the vacuum hose and dump hose for holes or
clogs.
7. Lubricate wheels and casters with a water-resistant
lubricant every month.
8. Check machine for loose or missing nuts or bolts,
and replace when necessary.
9. Clean the BLUE screen after each use to prevent
build-up, which will reduce air flow.
Page 14

Storage
1. Unplug machine from power
source
2. Store in upright position in a dry
area
3. Store with squeegee OFF the
ground
4. Store with the vacuum head off
unit so the tank can “breathe”
 Loading...