

Page 1
© 2013 Directed. All rights reserved.
1
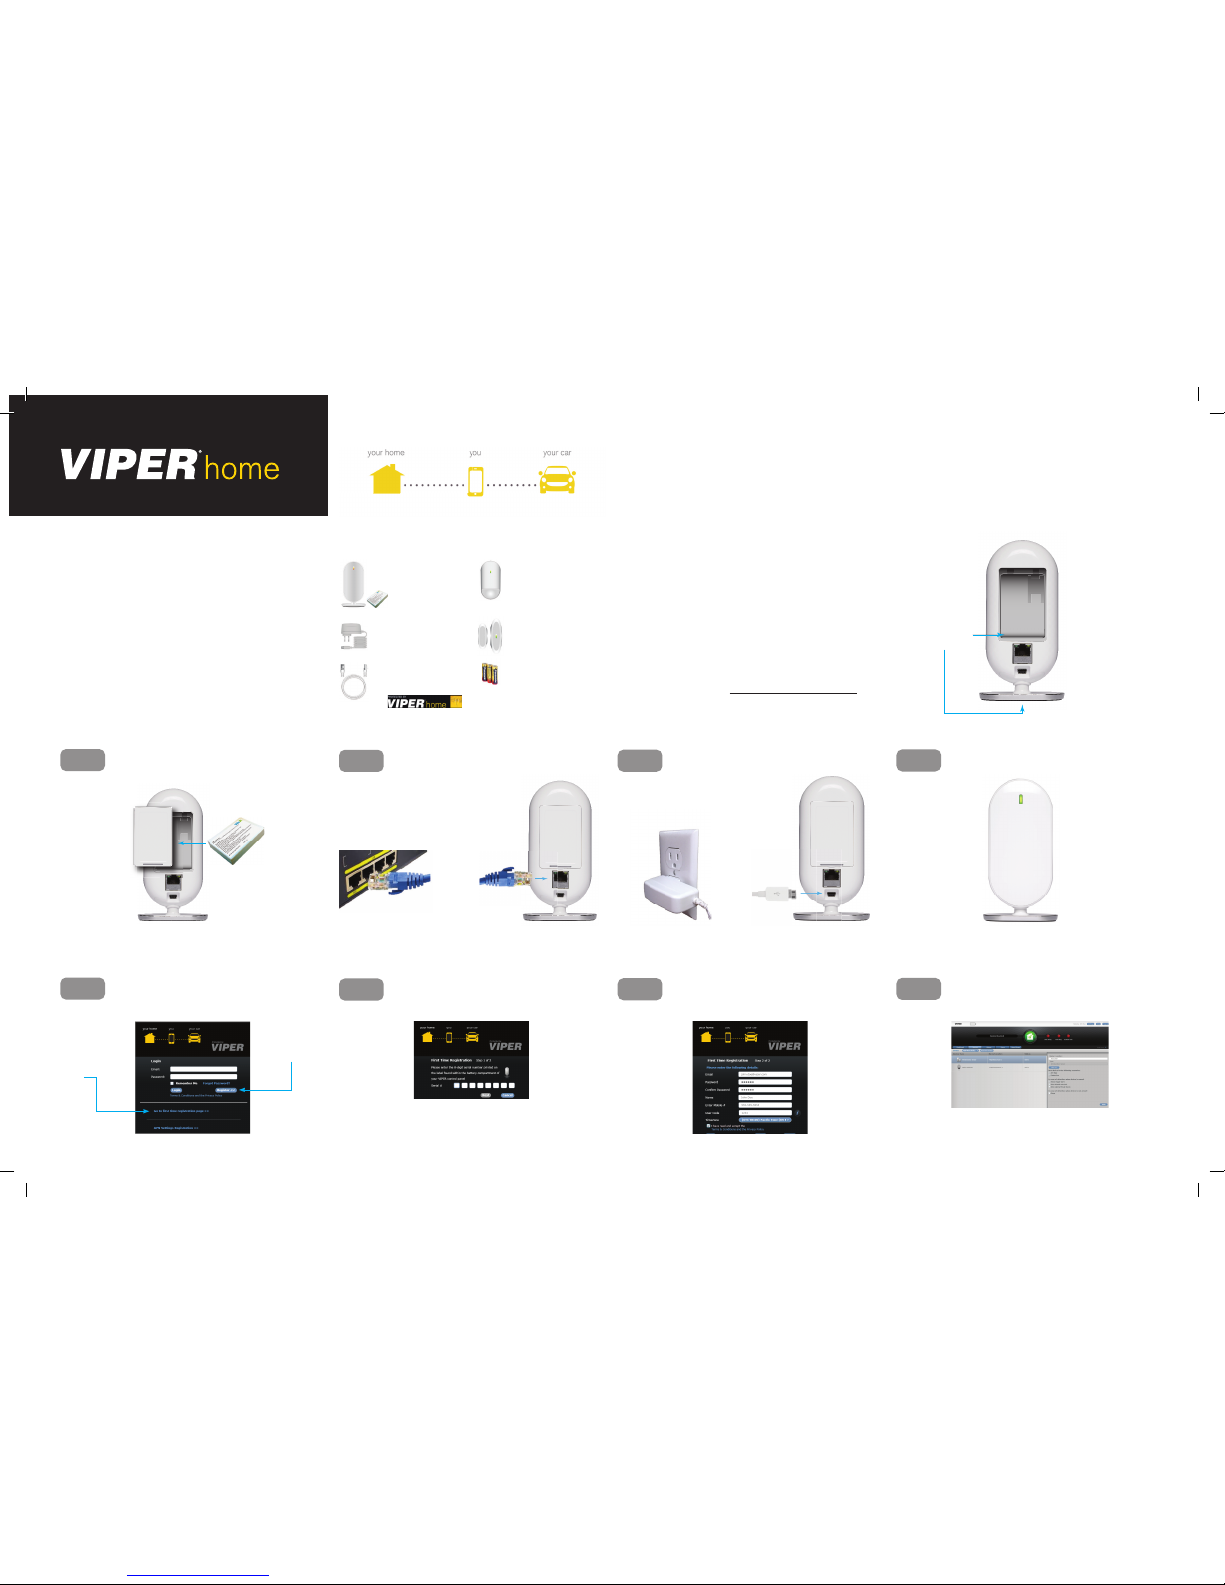
Getting Started
Thank you for purchasing the VIPER home monitoring and security system starter kit. The VIPER home starter kit includes everything you need to monitor one entry point and detect motion in
one room. The system also has home control expandability. Visit
www.viper.com for additional product and warranty information.
Quick Start Guide
What’s Included What’s Needed
• Computer with internet connection
• Internet access point with RJ-45 port (required for the Central Controller connection)
• Tape measure (used when mounting the motion sensor)
• A coin to open the door / window sensors for battery installation
Note: The 8 digit serial number is located on the bottom of the
Central Controller and inside the battery compartment.
Record serial number here:
1 Central Controller
and Backup Battery
1 Power Adapter
1 Ethernet/LAN Cable
1 Window Decal
3 AA Alkaline Batteries
1 Door/Window Sensor
Set
1 Indoor Motion Sensor
S/N: 000111AE
Serial Number
(2 Locations)
Connecting the Central Controller
Step 1
Install the backup battery fi rst by removing the
Central Controller battery cover to and then reattach once installed.
Step 1
Step 2
Connect the ethernet/LAN cable to the Central
Controller and your wireless router/modem.
Step 1
Step 2
Step 3
Plug the power adapter into the back of the controller and the other end into the home wall outlet.
Step 1
Step 2
Step 3
Step 4
The LED is amber upon turn on and changes to
green once the connection process is complete.
Registration of System and Services
Step 1
After confi rming that the Central Controller displays
a green light. Please visit home.viper.com to begin
the registration process.
Step 1
Step 2
Enter your 8 digit Central Controller serial number
recorded at that top of this page and click next. If
you receive an error, please confi rm the panel LED is
green.
Step 1
Step 2
Step 3
Complete the registration process as shown below.
Keep note of your e-mail, password, and user code.
These are used to log into the smartphone app.
Step 1
Step 2
Step 3
Step 4
Registration is complete when the VIPER home
managements center opens. You are now ready to
install each of the sensors.
Select each of the devices and name them for the location they
will be placed.
Select Go to fi rst
time registration
page
Click Register
Page 2
© 2013 Directed. All rights reserved.
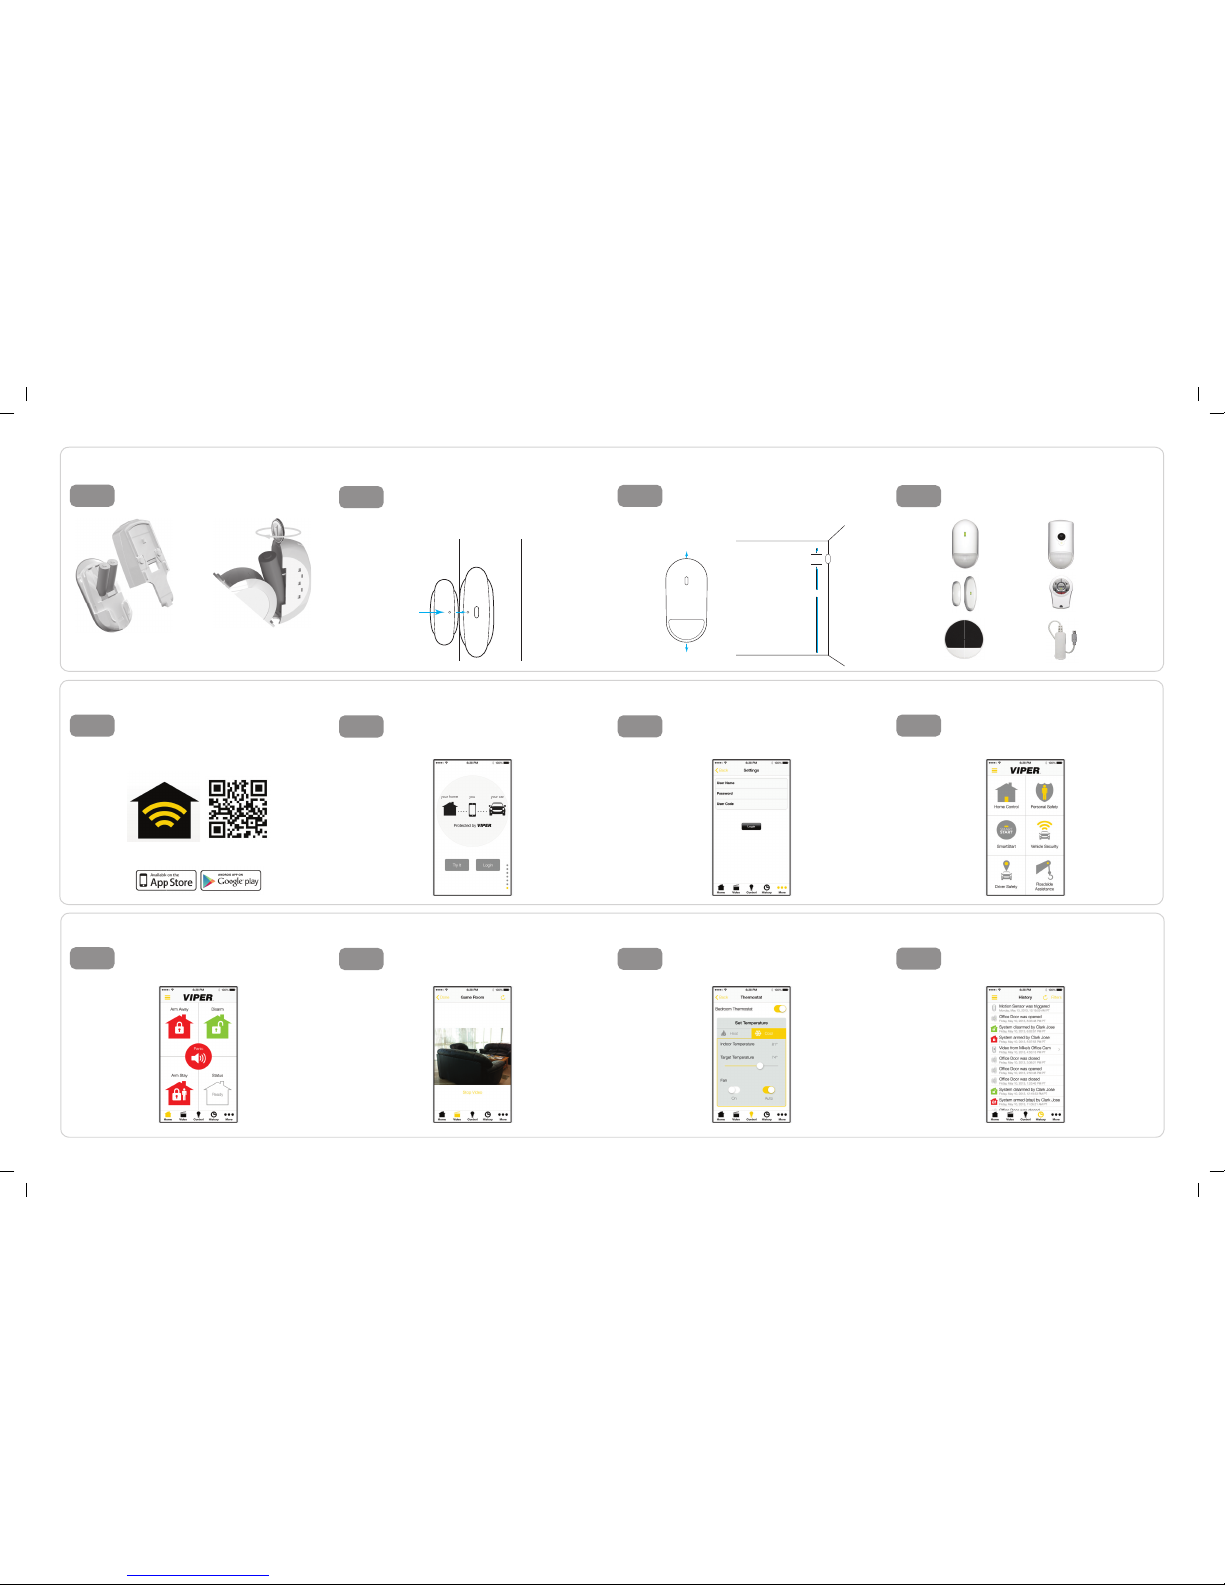
2
Installing Sensors
Step 1
Install batteries in each of the sensors as shown
below.
Need installation help? Instructional videos and more can be
found online at: www.viper.com
Connecting the App
Step 1
Download the ViperConnect app from the App
Store for iPhone/iPad, and Google play for
Android devices. Scan QR code below to download app.
.
ViperConnect
Using the App
Step 1
Use buttons to Arm (away & stay), Disarm, Panic,
and receive current system status.
Step 1
Step 2
Mount the door/window sensors in the desired
location. Align the dots across from each other
when the door or window is in the closed position,
any space between them should be less than ¾”.
Step 1
Step 2
Once the app has been downloaded, it takes you
through a quick tutorial of the features. Once
complete, click the login button.
Step 1
Step 2
Access live video* feed on demand and receive
alerts with recorded video of any intruders.
* Indoor camera with motion detector required.
Step 1
Step 2
Step 3
Mount the motion sensor in a corner or on a fl at
wall. Avoid mounting in direct sunlight and make
sure it is at least 4” from the ceiling and 72” from
the fl oor.
Step 1
Step 2
Step 3
Log into your account with user name (e-mail
address), password, and 4 digit user code.
Step 1
Step 2
Step 3
Control lights, thermostats, garage doors, locks, and
more from your smartphone with ViperConnect and
the Z-wave® Bridge (sold separately).
Step 1
Step 2
Step 3
Step 4
Other
Additional accessories available at Best Buy and
Online
Step 1
Step 2
Step 3
Step 4
Once logged in successfully, you are directed to
the app screen (below) where you can access the
entire suite of VIPER connected products. Launch
Home Control.
Step 1
Step 2
Step 3
Step 4
View history by all users; arm, disarm, accesses,
intrusion alerts, and videos. All history is saved
for 60 days.
Door or
Window
Align
dots
Door Frame or
Window Frame
Ceiling
Floor
4”
72”
Indoor Motion
Sensor (502M)
Door/Window
Sensor (501C)
Indoor Siren
(504S)
Z-wave Bridge
(505Z)
2-way Remote
Control (7250R)
Indoor Motion Sensor
with Camera (503V)
Premium service plan required Premium service plan required Premium service plan required
 Loading...