

Viper ACEWELL 1100 Quick Start Manual
ACEWELL 1100 Quick Start Guide
Installation
The brown wire is the units constant power
supply. It allows the unit to maintain the time
date and most importantly your max rpm after
each session. It should be wired directly to the
battery.
The red wire should be wired directly to your
master power switch.
The black wire is the ground wire. It should be
grounded directly to unpainted metal on the
engine or chassis
The yellow wire drives the tachometer. It can
either be wrapped around the plug wire or wire
directly to the engine’s tachometer wire. Wiring
into the engine’s tachometer wire is preferable.
In some instances the wire
but be yellow and black or
another color. Reference
your engine’s shop manual
for specific information.
Following is basic information on the physical installation of your
tachometer unit. For specific information, please reference the user’s
manual that accompanied your Acewell 1100.
Tips and Tricks for Getting Started
The user manual that came with your Acewell 1100 contains much more information than this Quick Start Guide. Our intention with this sheet is to answer some
of the frequently asked questions...and to serve as a reminder to read the User’s
Guide.
Tachometer Configuration - After you’ve successfully physically connected your
tachometer to a power source and the engine, you will need to configure the RPM
Factor to ensure that the tachometer reads correctly-- This is also known as the
number of engine rotations per signal. This is determined in the settings screens. To
get into this press both the Mode and Reset buttons together. Press the Mode button
to move through the different screens until you reach RPM SPC-X.X. The default
value is 1.0 and available options include 2.0,3.0 and .5. The best way to determine
which value is correct is by actually running your engine while viewing the tachometer
values. Most engines should idle between 900 and 1400 RPMs. If your tachometer is
registering outside of that value then change the RPM factor to a different setting. For
instance, we have found that many of the Yamaha R6 motors use .5 as the RPM
factor, while most GSXR 750-1000cc motors use 1.0.
Max RPM - If your Maximum RPMs for the session is the same every time, it is likely
that you are not resetting the Maximum RPMs after each session. To reset the Maximum RPMs press the Mode button until you reach the Maximum RPM screen. Then
press the Reset button until the value on the screen returns to 0.
Special Instructions for Yamaha R6
This may not apply to all years and models of the Yamaha R6, but has
proven effective in some. Locate the Yellow/Black line with Black Blocks
and the Yellow/Blue line with blue blocks. Twist these two together and
then attach to the Acewell 1100’s yellow wire. Set the RPM factor at .5.
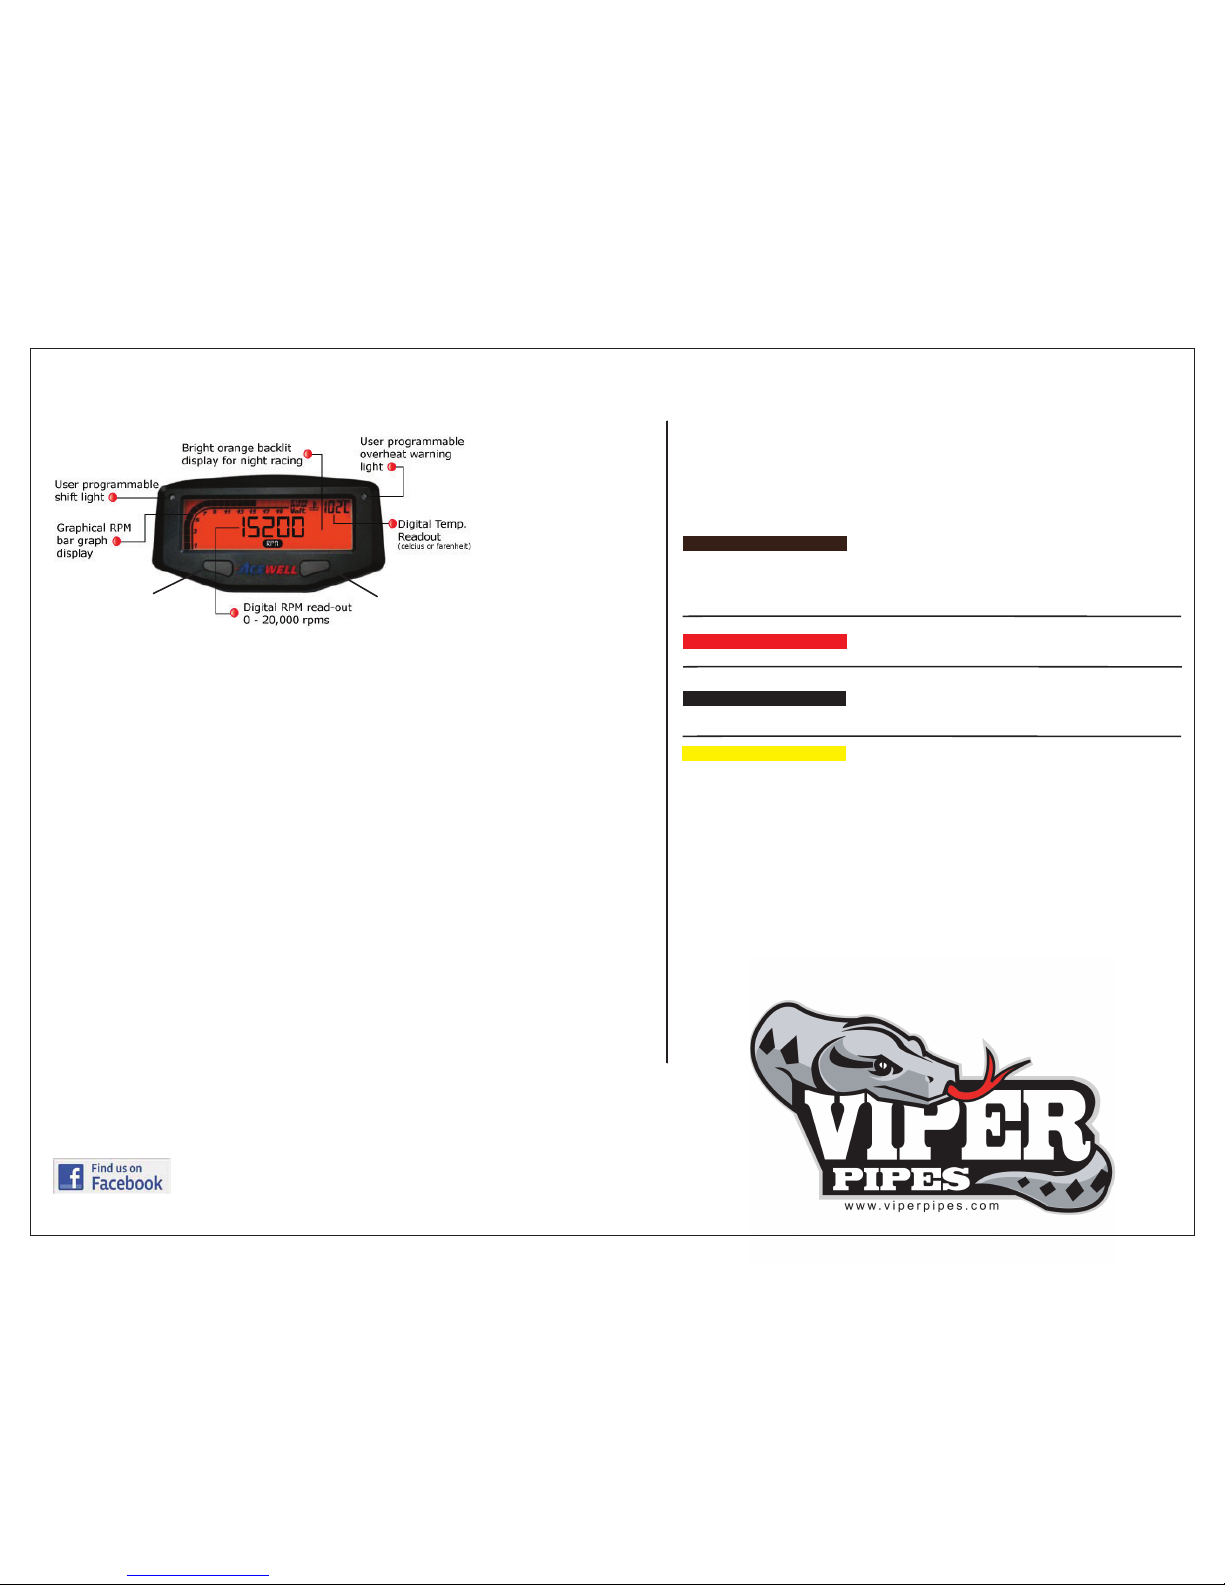
Reset Button
Mode Button
Type FOZ Marketing
 Loading...