

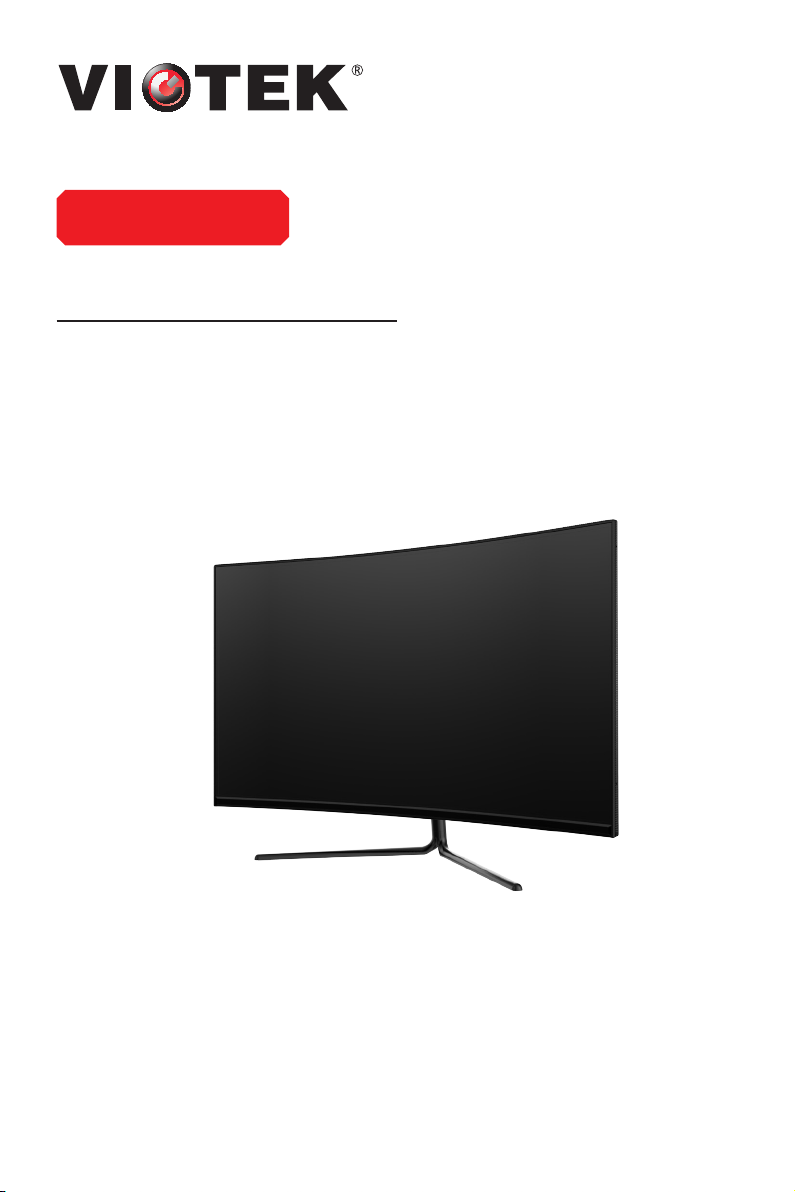
GNV32DB
GAMING MONITOR
USER MANUAL
In order to c ontinue serving our customers and providing the best products, our product information
including our user manuals may receive updates from time to time. Please check our website for the latest
user manuals and product materials.


Table of Contents
Section 1: Safety Precautions ............................................ 4
Section 2: Box Contents ..................................................... 5
Section 3: Product Overview .............................................. 6
3.1 – Monitor Buttons ....................................................... 6
3.2 – Monitor Ports .......................................................... 6
Section 4: Stand Installation .............................................. 7
Section 5: Mount Installation .............................................. 8
Section 6: Basic Operation ................................................. 9
Section 7: Indicator Light .................................................... 9
Section 8: OSD ..................................................................... 10
8.1 – OSD Menu Functions .............................................. 11
Section 9: ECO Modes and Gameplus............................... 12
Section 10: Troubleshooting ............................................... 13
Section 11: Specifications .................................................. 14
Section 12: One-Year Limited Hardware Warranty ........... 14
3

Section 1: Safety Precautions
Read and observe the following warnings and information below.
1. Before cleaning, always unplug your monitor. It is recommended that you use
dry cloth or lightly damp cloth to clean your monitor. Dry cloth is, however,
the safest. If using damp cloth, wait for your monitor to completely dry before
plugging it in again.
2. Do not use alcohol or ammonia-based cleaner and/or liquids to clean your
monitor.
3. This monitor features ventilation openings on the back of the unit. Avoid blocking
these openings to prevent the monitor from overheating.
4. Avoid placing this monitor near any heat sources, e.g., portable heaters or
heating vents, as this may cause damage to your monitor.
5. Do not spray cleaner and or any kind of liquid directly onto the monitor’s screen
or any part of the monitor.
6. Do not insert anything into any part of the monitor especially the ventilation
openings.
7. Always make sure your monitor is placed on a secure, level surface to prevent it
from falling and sustaining damage.
8. Unplug your monitor during any extended periods of non-use.
9. Do not place heavy items on the monitor or monitor cables.
10. Do not attempt to disassemble or remove parts from the monitor. Any
disassembly or modication not performed by an authorized technician can
result in damage to the monitor and/or possible exposure to high voltage
electricity which may lead to serious injury or death.
VIOTEK® shall not be held responsible for injury or damage of products or persons
due to failure to adhere to the aforementioned precautions or any others noted
hereafter.
The terms HDMI and HDMI High-Denition Multimedia Interface, and
the HDMI Logo are trademarks or registered trademarks of HDMI
Licensing Administrator, Inc. in the United States and other countries.
4
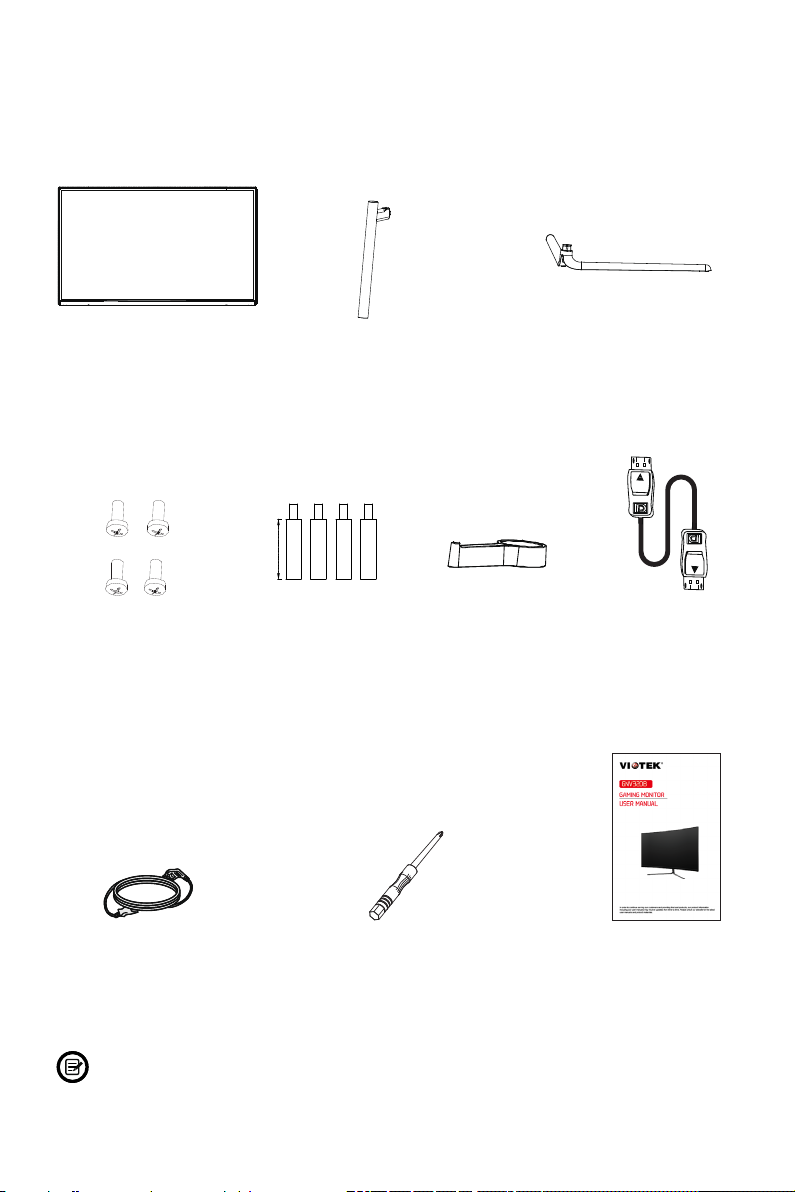
Section 2: Box Contents
26mm
35mm
26mm
Monitor x 1 Stand Stem x 1 Stand Base x 1
(for Stand Installation)
Power Cable x 1
(AC 100-240V, 50/60Hz)
NO. 2 Screws x 4
(for Wall Mounting)
Screwdriver x 1 User Manual x 1
Extra screws may be included as backup.
Headphone ClipNO. 1 Screws x 4
DP Cable x 1
5

Section 3: Product Overview
3.1 – Monitor Buttons
2 3 4 5 61
1
M Menu Button
2
Down Button
3
Up Button
4
E Exit Button
Power Button
5
6
LED Indicator: Changes colors to indicate status. Refer to Section 7.
The E button can also be used to switch between “Limit” and “Full” color gamuts when
a compatible graphics card and either HDMI or DP connections are in use.
: Press to display the OSD menu or enter sub-menus.
: Press to move down in the menus.
: Press to move up in the menus.
: Press to exit.
: Press to turn the monitor on/off.
3.2 – Monitor Ports
HDMI 2.0 HDMI 1.4
7 9 10
7
Power Connector: Insert the power cable to supply power to the monitor.
8
Audio Output: Insert the audio cable for output of audio signals.
9
DP Connector: Insert one end of the DP cable into the computer’s DP output
8
and connect the other end to the monitor’s DP port.
HDMI Connectors: Insert one end of the HDMI cable into the computer’s
10
HDMI output and connect the other end to the monitor’s HDMI port.
6

Section 4: Stand Installation
Keep the foam underneath the monitor before attaching the stand.
1. Open the package and take out the monitor with foam still attached. Gently place
it top-down on a desktop or table.
2. Take out the stem, headphone clip and base. Use the included screwdriver and
one screw to fasten base to the stem.
Headphone Clip
Stand Stem
Base
Screw x 1
3. Remove the foam covering the bottom of the monitor, then remove the adapter
from the back of monitor. Use two NO. 1 screws to fasten adapter onto the stem.
Adapter
Screws x 2
4. With the stand fully assembled, reattach it onto the back of monitor. Then remove
the remaining foam on monitor and stand it up on a at, level desktop or table.
Press the button to remove the monitor from the bracket if mounting.
Button
Make sure the monitor is laid on a at surface before removing the stand.
7

Section 5: Mount Installation
1. Open the package and take out the product with foam still attached. Gently
place it on a desktop or table. Remove the extra parts and the foam covering the
monitor. If the monitor is already attached to the stand, remove the stand.
Button
2. Press the button to remove the adapter on back of monitor, then tighten the
included four NO. 2 screws onto the mounting holes on back of monitor.
NO. 2
Screws x 4
3. Install the monitor on the wall, mount, or xture as desired.
Mount
(not included)
8

Section 6: Basic Operation
1. Insert one end of the DisplayPort (DP) cable into your PC’s graphics card. An
HDMI cable (not included) may also be used.
2. Connect the other end of the cable to the corresponding connector on your
monitor.
Power Connector
3. Connect the power cable to your monitor then connect the other end to your
power source. It is recommended that you use a surge protector with adequate
voltage if a wall outlet cannot be reached directly.
4. Locate the power button on the monitor and press it to turn the monitor on.
AMD FreeSync
This feature is off by default. To activate, you must have hardware with FreeSync
capability, a DP or HDMI cable, and the latest graphic drivers. After connecting your
computer and monitor with a DP or HDMI cable, you may receive a prompt to enable
the feature on your computer. If you do not, you may need to enable the function in
your graphics card menu. See your graphics card manufacturer’s documentation for
instructions.
DP Port HDMI2.0 HDMI1.4
Audio Out HDMI Por ts
Section 7: Indicator Light
Indicator Light
Solid blue light indicates power is on and the monitor is operating normally. Flashing
blue light indicates no video source, no horizontal or vertical signal has been
detected or voltage is low. Please ensure your computer is on and all video cables
are fully inserted and/or connected.
9

Section 8: OSD
The On-Screen Display (OSD) Menu may be used to adjust your monitor’s settings
and appears on screen after turning on the monitor and pressing the M button.
When using the monitor for the rst time, settings will automatically adjust to
optimal settings according to your computer’s conguration.
1. Press any one of the buttons (M, , , E, ) to activate the navigation window.
eco
2. Press M ( ) to enter the OSD menu.
Resolution:1920x1080@60Hz
DP
DP
Input Source
Input Source
Brightness/Contrast
Brightness/Contrast
Color Setting
Color Setting
Picture Quality Setting
Picture Quality Setting
Display
Display
Audio
Audio
Multi-Window
Multi-Window
OSD
OSD
Other
Other
DP
DP
HDMI 1 (2.0)
HDMI 1 (2.0)
HDMI 2 (1.4)
HDMI 2 (1.4)
HDMI 3 (1.4)
HDMI 3 (1.4)
Resolution:2560x1440@60Hz
Wind ow1:
3. Press ( ) or (
Wind ow1:
Inpu tSour ce:DP
Inpu tSour ce:HDMI2
Reso lutio n:1920x 1080@ 60Hz
Reso lutio n:2560x 1440@ 60Hz
eco
) to browse functions.
Window2:
Window2:
InputSource:
InputSource:
Resolution:
Resolution:
• Highlight the desired function, then press M ( ) to enter the sub-menu.
• Press ( ) or (
eco
) to browse sub-menus, then press M ( ) to highlight the
desired function.
• Press ( ) or (
eco
) to highlight an option, then press M ( ) to conrm the
settings and exit the current screen.
4. Press E ( ) to exit the current screen.
10

8.1 – OSD Menu Functions
Main Menu Sub-Menu Options Description
DP NONE Switch to DP signal input
Input Source
Brightness/
Contrast
Color Setting
Picture
Quality
Settings
Display
Audio
MultiWindow
HDMI 1 (2.0),
HDMI 2 (1.4),
HDMI 3 (1.4)
Brightness 0~10 0 Adjust display brightness
Contrast 0~10 0 Adjust display contrast
DCR
Gamma
Picture Mode
Color
Temperature
Low Blue Light 0~100 Set blue light ltering level
Hue 0~10 0 Adjust hue levels
Saturation 0~10 0 Adjust saturation levels
Sharpness 0~100 Adjust display sharpness
Response Time
Noise Reduction
Super Resolution
Dynamic
Luminous Control
Aspect Ratio
LedMode Normal Select DP version
Mute On, Off Turn mute mode on/of f
Volu me 0-100 Adjust audio volume
Audio Source
Multi-Window Off, PIP Mode,
Sub Win2 Input HDMI 1.4, HDMI
PIP Size Small, Medium,
PIP Position Top Right, Top
Swap NONE Swap the PIP/PBP signal sources
NONE Switch to HDMI signal input
On Turn on DCR function
Off Turn off DCR function
Gamma 2.0
Gamma 2.2
Gamma 2.4
Standard, Photo,
Movie, Game, FPS,
RTS
Warm, Cool, User Select color temperature
Off, High, Middle,
Low
Off, High, Middle,
Low
Off, High, Middle,
Low
On, Off
Wide Screen, 4:3,
Auto
Auto Source,
HDMI, DP
PBP 2Win
1.4, HDMI 2.0, DP
Large
Left, Bottom Right,
Bottom Left
Set Gamma add-in
Set visual mode according to activity
Adjust response time
Reduce the interference of image noise
caused by signal source interference
When the resolution of the display screen
is low, this function can be turned on to
enhance the image resolution
Compensate for gray scale display screen
and strengthen the expression of gray scale
Select on-screen aspect ratio
Select audio signal input via HDMI or DP
Select PIP/PBP modes according to the
number of input signals
Select according to input signal for PIP/PBP
mode
Adjust the PIP/PBP display window size
Adjust the PIP/PBP window position
11

Main Menu Sub-Menu Options Description
OSD Language English, Español,
OSD H-Position 0-100 Adjust the OSD’s horizontal position
OSD V-Position 0 -10 0 Adjust the OSD’s vertical position
OSD
Transparency
OSD Time Out 5-10 0 Set how long the OSD remains open after
OSD Rotation Normal, 90, 180,
Other D P Ver sion DP1.2 Select DP version
FreeSync
(Adaptive Sync)
Reset Reset monitor congurations
Русс кий, Français,
한국, 日本語, 简体
中文
0-100 Adjust OSD’s overall transparency
270
On, Off Turn on/off Freesync
Set OSD language
non-use
When the user ips the display, this function
can also ip the OSD to achieve the best
display angle
Section 9: ECO Modes and Gameplus
1. Press any one of the buttons (M, , , E, ) to activate the navigation window.
eco
2. Press ( ) button to switch Gameplus modes. Choose the crosshair icon best suited for
your game. These game icons are primarily designed to optimize your aim during shooting
games, though they can be used for other scenarios.
3. Press (
eco
) button to switch ECO modes. These modes include Standard, Photo, Movie,
Game, FPS, and RTS and can be used to optimize settings according to your activity.
Standard mode is suitable for most activities.
Standard
4. Press E ( ) button to switch color gamuts mode between “Limited” and “Full”
RGB R ange:Full
12

Section 10: Troubleshooting
The screen is blank
• Press the power button to turn the monitor on.
• Conrm the brightness and contrast settings are set normally.
• Check if the indicator light is ashing. If so, there is no signal from your video
source.
• If your source is a notebook or laptop, be sure that its settings are in mirror or
extension mode and the device itself is powered on.
The image is out of focus
• Ensure the video cable is inserted properly at both ends.
The screen is flashing
• Try an alternative power source. If the current one is insufcient, it may be
causing this issue.
• Ensure devices such as non-shielded speakers, uorescent lighting, AC
transformers, table fans, etc., are a safe distance away from your screen to avoid
magnetic disturbances.
The color bleeds or visual effects appear unusual.
• If your screen is all red or blue, or any colors disappear, check to see that the
cable is properly inserted. A loose connection can cause a bad signal.
• Try connecting to another video source for comparison.
The screen appears to be scrolling, rolling, or moving unusually.
• Check that your source frequency is within 48-60Hz.
• Reconnect and ensure your video cable is secure.
The monitor needs cleaning
• Make sure the monitor has been powered off before cleaning.
• Always use soft, non-abrasive cloth when cleaning.
• Use dry, non-abrasive cloth to gently remove debris or dust.
• If necessary, lightly dampen a non-abrasive cloth with water and gently clean the
surface.
• Never use alcohol or ammonia-based cleaning solutions.
• Never spray liquid directly onto any part of the monitor.
The indicator light does not work
• Check that the power is on.
• Check that the power line connected with power.
Cannot plug and play.
• Make sure the monitor is compatible with PC.
• Make sure the graphics card is compatible with the monitor.
• Check cable connectors for curved or damaged pins. Replace cables if needed.
Dim image
• Adjust the brightness and/or contrast ratio.
Image jitter/moire pattern
• Nearby electric equipment may interfere with the monitor.
Light indicator is on or flashing, but there is no image displayed on screen
• Check that the monitor is receiving power.
• Check that the graphics card is installed properly.
• Check that the power cable is securely connected to the monitor.
• Check cable connectors for curved or damaged pins. Replace cables if needed.
13

Color shortage (red, green, or blue)
• Check cable connectors for curved or damaged pins. Replace cables if needed.
Color difference (colors are not optimized)
• Adjust RGB color or reset color temperature settings.
Section 11: Specifications
Item Detail
Model Number GVN32DB
Screen Size 31.5”
Curvature 1500R
Viewing Angle H178°/ V178°
Aspect Ratio 16:9
Resolution 2560x1440p
Backlight E-LED
LED Indicator Power on: Blue (solid); Power saving: Blue (ashing)
Typical Brightness 300 cd/m
Default Color Temp. 6500
Color Gamut 99% sRGB; 85% NTSC; 90% DCI-P3; 85% Adobe RGB
Contrast Ratio 3000:1 (static)
Dot Pitch 0.0908 x 0.2724 mm
Response Time 6ms
Refresh Rate 144Hz
Ports HDMI 2.0 x 1, HDMI 1.4 x 2, DP x 1, Audio out x 1
Power AC 100-240V, 50/60Hz, 1.5A
Power Consumption Typical: 46W; Max: 70W; Off/Sleep mode: ≤ 0.5W
OSD Language
English, Español, Русский, Français, 한국, 日本語, 简体
中文
Usage Temp. 32°F~104°F (operating), -4°F~ 140°F (storage), 10-85%
RH (non-condensing)
Tilt Angle Forward 5°; Backward 15°
Dimension (With Stand) 28.1 x 8.9 x 19.9 in (712.5 x 226.5 x 505.6 mm)
Weight 15.5 lb. / 20 lb. (include package)
2
Section 12: One-Year Limited Hardware Warranty
Your VIOTEK® GNV32DB Curved Gaming Monitor (“Product”) includes a One-Year Limited
Hardware Warranty (“Warranty”). The Warranty covers product defects in materials and
workmanship under normal use. This Warranty is limited to residents of the United States and
Canada only and is available only to original purchasers. This Warranty gives you specic legal
rights and you may also have other rights which vary from state to state. This Warranty starts
on the date of your purchase and lasts for one year (the “Warranty Period”). The Warranty
Period is not extended if the Product is repaired or replaced. We may change the availability
of this limited warranty at our discretion, but any changes will not be retroactive. Warranty
services are provided by Viotek Warranty Pro (“WP”). If a hardware defect arises and a valid
claim is received within the Warranty Period, at its option and to the extent permitted by law,
14

WP will: (1) repair the hardware defect by using new or refurbished parts that are equivalent to
new in performance and reliability; or (2) exchange the Product with a product that is new or
refurbished which is substantially equivalent to the original product. This Warranty is for one
replacement only of like-items and does not cover items out of production if the product is no
longer made or stocked. This Warranty is not assignable or transferable. The original purchaser
may call WP’s toll-free number at 1-855-229-9472 for service requests. When a product or part
is exchanged, any replacement item becomes your proper ty and the replaced item becomes
WP’s property. This warranty only covers technical hardware defectiveness during the warranty
period and under normal use conditions. WP does not warrant uninterrupted or error-free
operation of this Product. This Warranty does not cover any damage due to: (a) transportation;
(b) storage; (c) improper use; (d) failure to follow the product instructions or to perform any
preventive maintenance; (e) modications; (f) unauthorized repair; (g) normal wear and tear; (h)
overclocking; or (i) external causes such as accidents, abuse, or other actions or events beyond
our reasonable control.
Important: Do not disassemble the Product. Disassembling the Product will void this Warranty.
Only WP or a party expressly authorized by WP should perform service on this Product.
DISCLAIMER OF WARRANTY: THE REMEDIES DESCRIBED ABOVE ARE YOUR SOLE
AND EXCLUSIVE REMEDIES AND OUR ENTIRE LIABILITY FOR ANY BREACH OF THIS
LIMITED WARRANTY. OUR LIABILIT Y SHALL UNDER NO CIRCUMSTANCES EXCEED THE
ACTUAL AMOUNT PAID BY YOU FOR THE DEFECTIVE PRODUCT, NOR SHALL WE UNDER
ANY CIRCUMSTANCES BE LIABLE FOR ANY CONSEQUENTIAL, INCIDENTAL, SPECIAL
OR PUNITIVE DAMAGES OR LOSSES, WHETHER DIRECT OR INDIRECT. SOME STATES
DO NOT ALLOW THE EXCLUSION OR LIMITATION OF INCIDENTAL OR CONSEQUENTIAL
DAMAGES, SO THE ABOVE LIMITATION OR EXCLUSION MAY NOT APPLY TO YOU. THE
DURATION AND REMEDIES OF ALL IMPLIED WARRANTIES, INCLUDING WITHOUT
LIMITATION THE WARR ANTIES OF MERCH ANTABILITY AN D FITNESS FOR A PARTICUL AR
PURPOSE ARE LIMITED TO THE DURATION OF THIS EXPRESS LIMITED WARRANTY.
DECLARATION OF CONFORMITY
This device complies with Part 15 of the FCC Rules.
Operation is subject to the following t wo conditions: (1) This device may not cause harmful
interference, and (2) this device must accept any interference received, including inter ference
that may cause undesired operation.
FCC RELATED INFORMATION:
This equipment has been tested and found to comply with the limits for a Class B digital
device, pursuant to Part 15 of the FCC Rules. These limits are designed to provide reasonable
protection against harmful interference in a residential installation. This equipment generates,
uses, and can radiate radio frequency energy and, if not installed and used in accordance with
the instructions, may cause harmful interference to radio communications. However, there is
no guarantee that interference will not occur in a particular installation. If this equipment does
cause harmful interference to radio or television reception, which can be determined by turning
the equipment off and on, the user is encouraged to tr y to correct the inter ference by one or
more of the following measures:
· Reorient or relocate the receiving antenna.
· Increase the separation between the equipment and receiver.
· Connect the equipment into an outlet on a circuit different from that to which the receiver is
connected.
· Consult the dealer or an experienced radio/TV technician for help.
The manufacturer is not responsible for any radio or TV interference caused by unauthorized
modications to this equipment. Such modications could void the user’s authority to operate
the equipment.
15

COPYRIGHT © 2020 VIOTEK. ALL RIGHTS RESERVED.
 Loading...