

Page 1
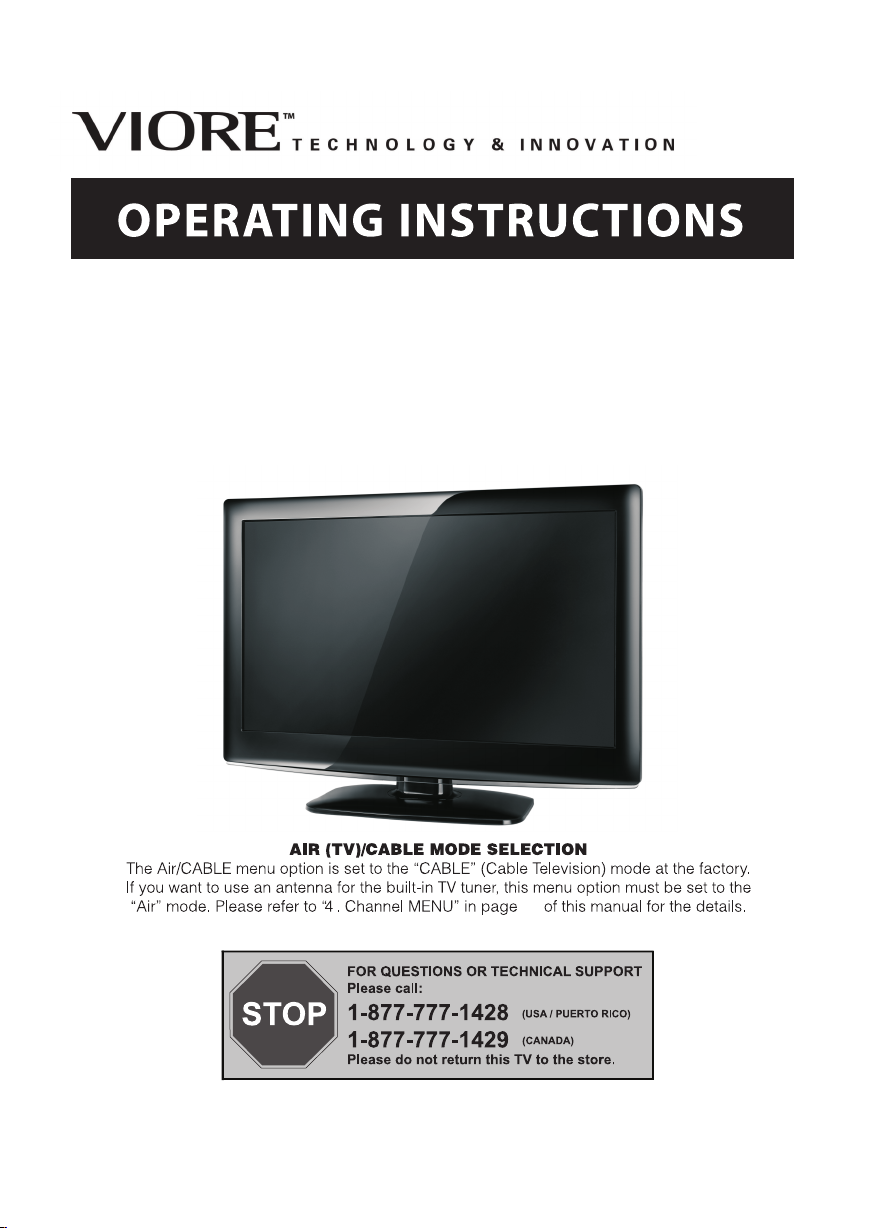
24" 1080p LCD Television
LC24VF56PN LC24VF56WT
LC24VF56BL1 LC24VF56PR
LC24VF56BL2 LC24VF56GM
15
Page 2

Contents
Safety and w arnings....... .............. .............. .............. .............. .............. .........2-3
Introduc tion.......... .............. .............. .............. .............. .............. ... ............ ..4
Installa tion.......... .............. .............. .............. .............. .............. .............. .....5-8
Wall M ount
........ .............. .............. .............. .............. .............. .............. ...... 9
Remote Con trol.......... .............. .............. .............. .............. .......... ..... ..........10
Operatio n............. .............. .............. .............. .............. .............. .............. ....11-15
Trouble Sho oting......... .............. .............. .............. .............. .............. ...........16
-1-
Page 3
SA FET Y AND WAR NIN GS
IMPORTANT SAFETY INSTRUCTION
1) Read th ese i nstruct ion s.
2) Keep th ese i nstruction s.
3) Heed al l war nings.
4) Follow all i nstruct ion s.
5) Do not use thi s apparatus ne ar water.
6) Clean o nly w ith dry clo th.
7) Do not block a ny ventil ati on openin gs, i nstall
in accor dan ce with the i nst ruction s.
8) Do not insta ll near any h eat s ources such as
radiat ion s, heat reg ist ers, stoves, o r other
appara tus ( includi ng am plifier s) th at produc e
heat.
9) Do not defea t the safet y pur pose of the
polari zed p lug. If the p rov ided plug d oes n ot fit
into you r out let, cons ult a n electri cia n for
replac eme nt of the obs ole te outlet .
10) Protect ed the power cor d from being wal ked
on or pinched p articul arl y at plugs, c onv enience
recept acl es, and the p oin t where the y exi t from
the appa rat us.
11) Only use att achments/a ccessories s pecified
by the man ufa cturer.
12) Unplug th is apparatus d uring lighti ng
storms o r whe n unused for lon g periods of tim e.
13) Refer all s ervicin g to qu alified s erv ice
personnel . Servicing is r equired when t he
appara tus h as been dam age d in any way, su ch as
power-supply co rd or p lug is dama ged , liquid
has been s pil led or objects h ave falle n int o the
appara tus , the appar atu s has been ex pos ed to
rain or mo ist ure, does n ot op erate normal ly, or
has been d rop ped.
14) Mains plu g is used as the dis connect devi ce,
the disc onn ect devic e sha ll remain r ead ily
operab le.
15) The ventila tion should no t be impeded by
coveri ng th e ventila tio n opening s wit h items,
such as newsp apers, table -cloth, curt ains, etc.
16) No naked fl ame sources, s uch as lighted
candle s, sh ould be placed o n the appar atu s.
17) Att ention shoul d be drawn to the
enviro nme ntal aspe cts o f battery d isp osal.
18) The use of appa ratus in moder ate climate.
19) The apparat us shall not be ex posed to
dripping or s plashing and t hat no objects f illed
with liq uid s, such as vases , shall be place d on
the appa rat us.
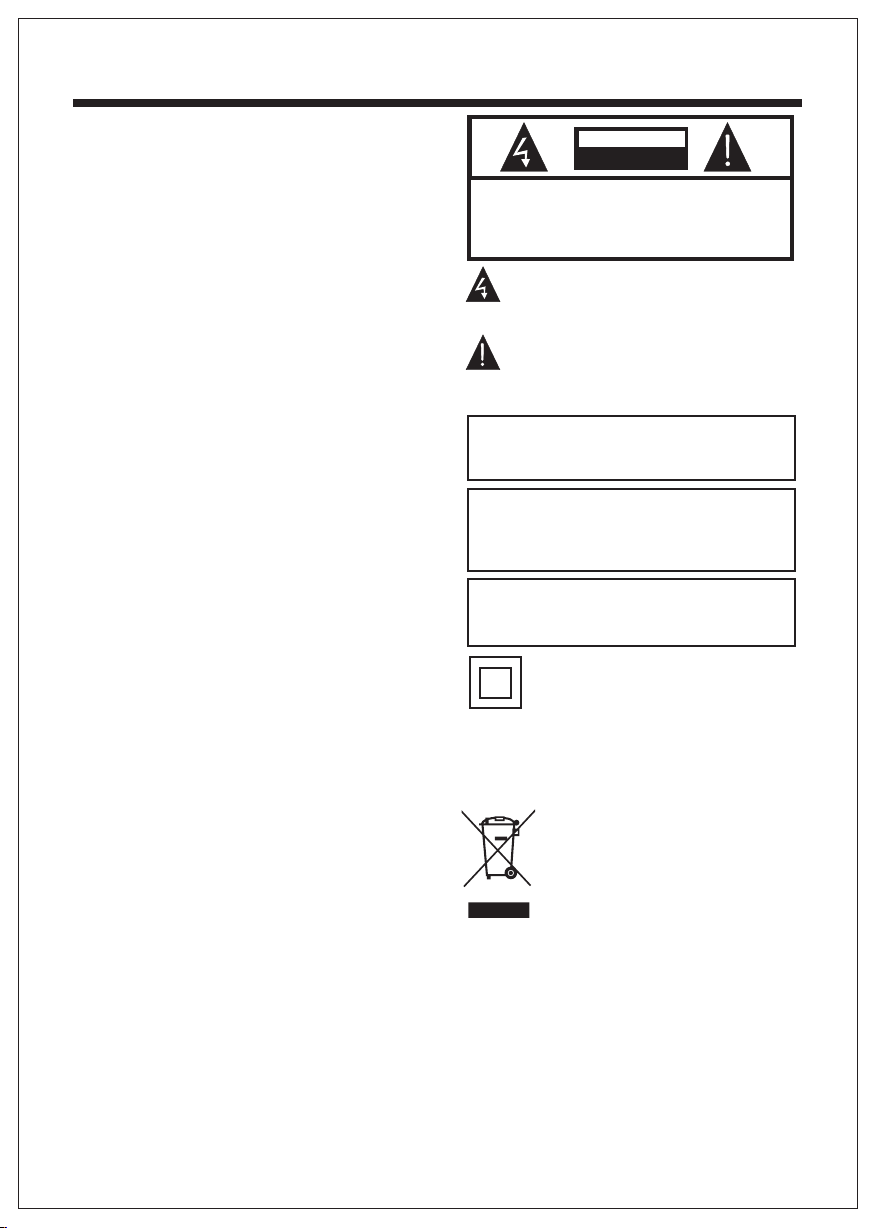
CAUT ION
RISK OF ELECTRIC SHOCK
DO NOT OPEN!
TO REDUCE THE RISK OF ELECTRIC SHOCK, DO
NOT REMOVE COVER (OR BACK).NO USER
SERVICEABLE PARTS INSIDE. REFER SERVICING
TO QUALIFIED SERVICE PERSONNEL.
CAUTION
The symbol indicates that dangerous
voltages constituting a risk of electric shock
are present within this unit.
The symbol indicates that there are
important operating and maintenance
instructions in the literaturaccompanying this
unit.
WARNING:
To red uce the risk of fi re or electric s hock, do
not expo se th is apparatus t o rain or moistu re.
WARNING:
The batt eri es shall no t be ex posed to
excess ive h eat such as s uns hine, fire or th e
like.
WARNING:
The exce ssi ve sound press ure from earph ones
and head pho nes can cau se he aring los s.
This symbol indicates that this product
incorporates double insulation betw een
hazardous mains vo ltage and user accessibl e
parts. When servicing use only
identical replacement parts.
This mar kin g indicat es th at this pro duc t should
not be dis pos ed with other ho usehold wast es
throughou t the EU. To prevent p ossible harm t o
the envi ron ment or hum an he alth from
uncontrol led waste disp osal, recycl e it
responsib ly to promote th e sustainabl e reuse of
materi al re sources . To retu rn your used dev ice,
please u se th e return an d col lection s yst ems or
contac t the r etailer w her e the produ ct wa s
purchased . They c an ta ke this pro duc t for
enviro nme ntal safe r ecy cling.
-2-
Page 4
High voltages are used in the operation of this television
receiver. Do not remove the cabinet back from your set.
Refer servicing to qualified service personnel.
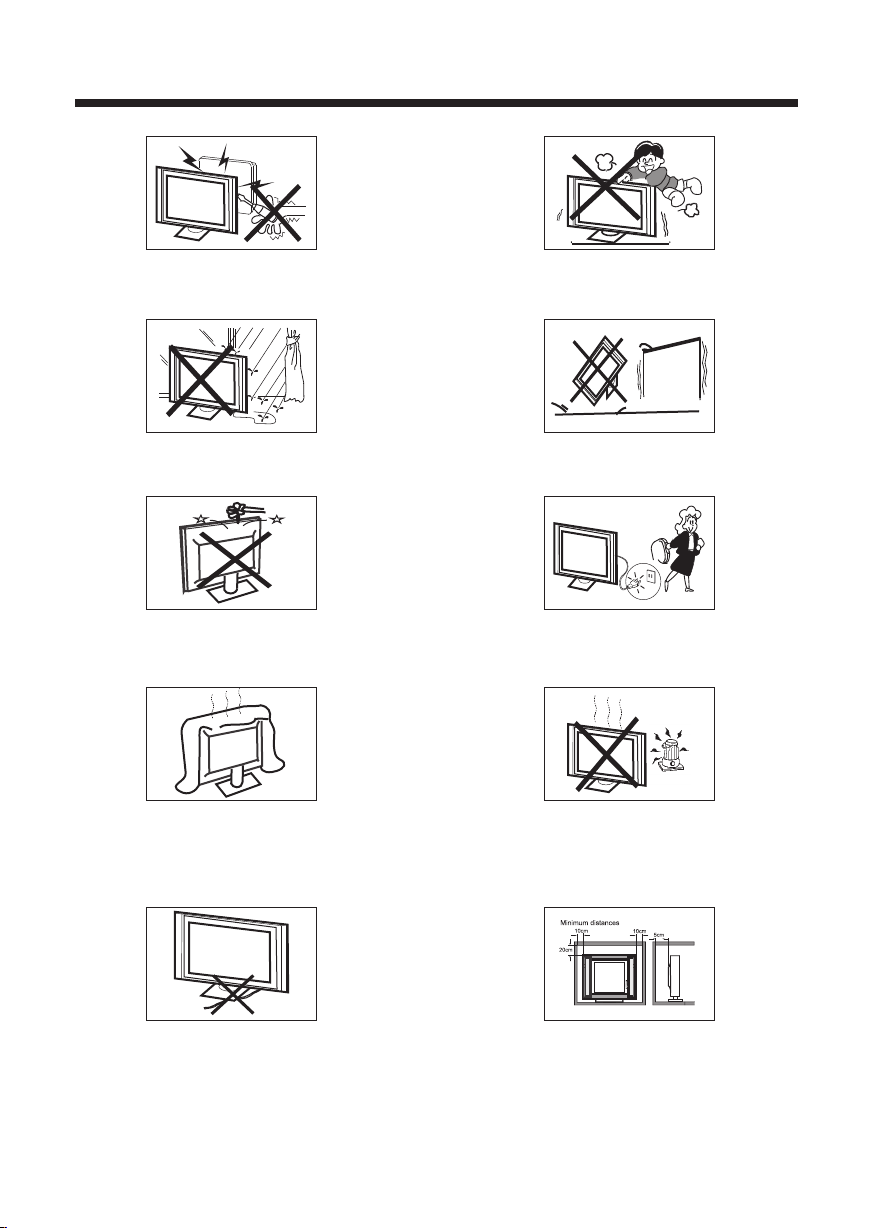
SA FET Y AND WARNINGS
Never stand on, lean on, or suddenly push the television or
its stand. You should pay special attention to children.
Serious injury may result if it falls.
To prevent fire or electrical shock hazard, do not expose
the television receiver to rain or moisture.
Do not drop or push objects into the television cabinet
slots or openings. Never spill any kind of liquid on the
television receiver.
Do not block the ventilation holes in the back cover.
Adequate ventilation is essential to prevent failure of
electrical components.
Do not place your television on an unstable cart, stand,
shelf or table. Serious injury to an individual , and damage
to the television, may result if it falls.
When the telev isio n rece iver is not used fo r an
extended per iod of t ime, i t is advisable to d isco nnec t
the AC power co rd fro m the AC ou tlet .
Avoid exposing the television receiver to direct sunlight
and other sources of heat. Do not stand the television
receiver directly on other products which give off heat,
e.g. video cassette players and audio amplifiers. Do not
place naked flame sources, such as lighted candles on
the television.
Do not trap the power supply cord under the television
receiver.
If the television is to be built into a compartment or similar
enclosure, the minimum distances must be maintained. Heat
build-up can reduce the service life of your television, and
can also be dangerous.
-3-
Dim:515*320mm(不包 括底座)
Page 5
INTRODUCTION
Main features
■ 1920 x 1080 nati ve res olut ion for Full-HD ( 1080 p)
performanc e
■ Integrated ATSC TV t uner for HDTV b road cast reception
■ High brightn ess pr ovid es a vivid and brilli ant pi ctur e
■ Deeper black s and brig hter whites wit h h igh contrast
■ Wide S creen aspec t rati o (16: 9) for a complete h ome
thea ter ex peri ence
®
■ HDMI input for true d igit al connection
■ VGA po rt fo r connection to P C
■ Built-in s tere o speaker syst em
■ Full-funct ion Remote C ontr ol
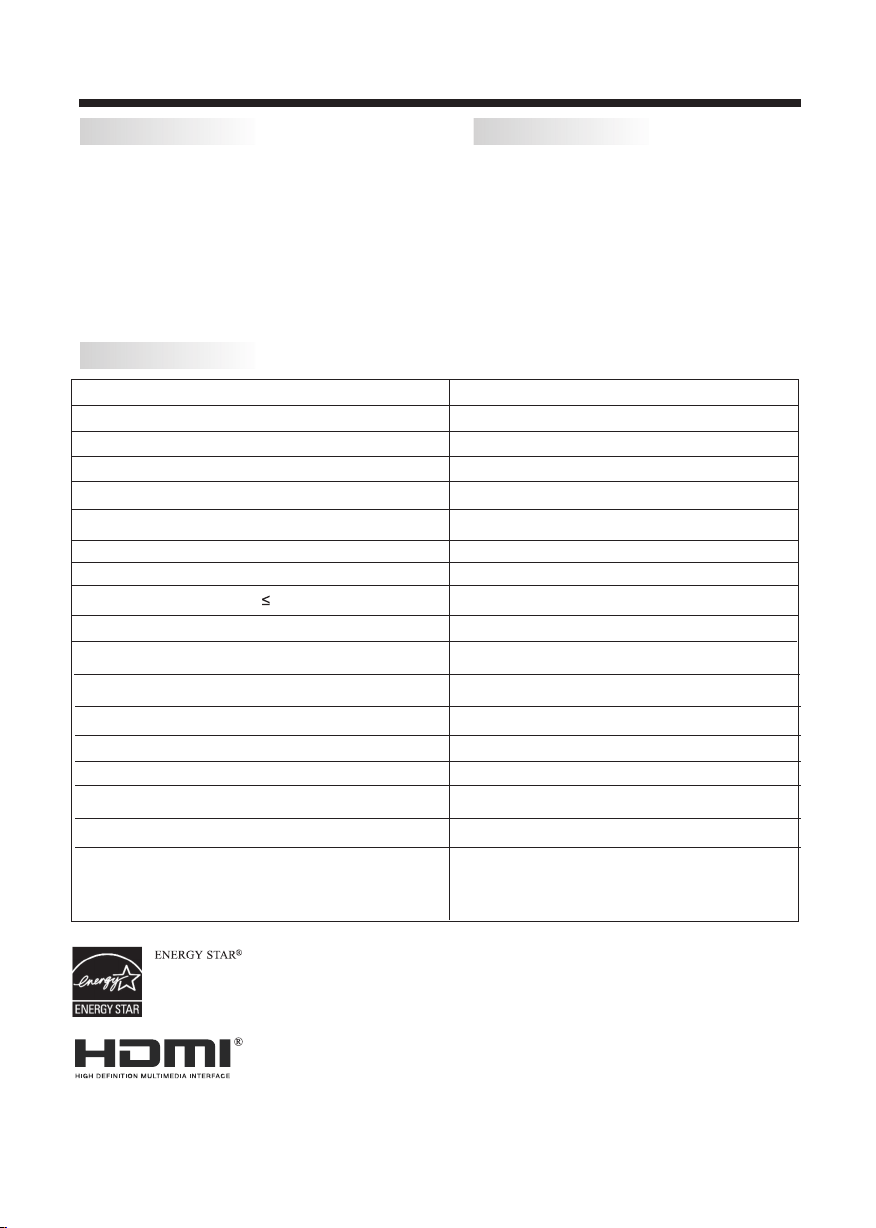
Specifications
Viewing Picture Size(diagonal)
Resolution:
Aspect Ratio:
TV Sy stem:
Video Si gnal System:
Receiving Channel:
Maximum Power Consumption:
Input Power Voltage:
Audio Output Power(THD 7%): 3W x 2
High-Definition Multimedia Interface(HDMI) Input x 2
YCb(Pb)Cr(Pr) Input
Rear Composte Video Input x 1
Analog RGB(VGA) Input x 1
Audio Input x 2
Headphone Output
Coaxial Output
USB Port
Horizontal definition(TV line)
Accessories
Power Cable. .... .... ........... .... .... .........
Infrared Rem ote Co ntro l.......... .
User’s M anual .......... .... .... ......
Battery(AA A).. .... ........... .... .... . 2
Quick Start Gu ide .. .... ........... ... 1
23.6 inches
1920 x 1080
16:9
ATSC Digital system an d NTSC Analog system
NTSC/PAL/SECAM
Cable :1-135/ Air: 2-69(ATV&DTV)
60W
AC 100-240V 50 /60Hz
x 1
x 1
x 1
x 1
Composite Video Input >=350
Video In put >=400
YCb(Pb)Cr(Pr) >=400
1
1
1
ENERGY STAR qualified products prevent greenhouse gas emissions by meeting strict energy efficiency guidelines set by the U.S.
Environmental Protection Agency and the U.S. Department of Energy. This television meets the ENERGY STAR requirements with
its default settings and configuration. Changing the default settings or enabling optional features may increase energy consumption
beyond the limits required for ENERGY STAR qualification.
HDMI, the HDMI Logo, and High-Definition Multimedia Interface are trademarks or registered trademarks of HDMI
Licensing LLC in the United States and other countries.
User Information.
-4-
Page 6
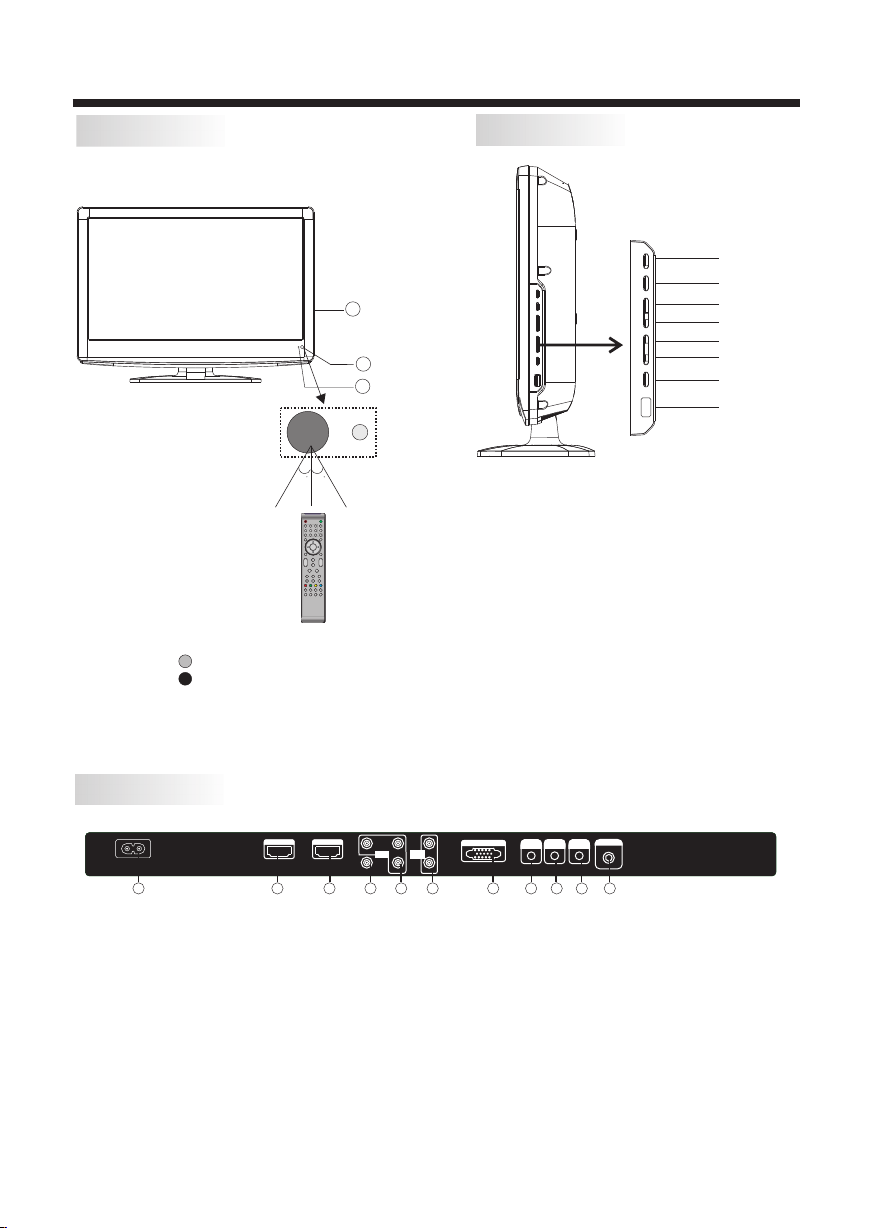
INSTALLATION
Front panel
1: Remot e con trol sens or.
2: Indic ato r LED:
GREEN POWER O N.
RED STAND BY.
3: Key board.
30 30
1 2 3
4 5 6
7 8 9 0
VOL
Side panel
SOU RCE
MEN U
3
1
2
1.SOURCE
To dis play the input s ource menu.
2.MENU
+
CH
_+_
To dis play main MENU .
3.CH+/CHIn TV mode,to chan ge the channel u p
and down.
In MENU mode, t o select th e men u items .
In standby mo de, it can tu rn on t he TV.
4.VOL+/VO LTo adj ust sound leve l.
In MENU mode, to select the me nu items.
5. STANDBY : Press th is button to tur n the
unit ON from STANDBY mode. P ress it
again to t urn t he set back t o STANDBY.
6. USB
CH+
CH-
VOL +
VOL -
STAND BY
USB
REAR AV PASTER
HDMI1 I NPUT HDMI2 INP UT
AC INPUT
100-240 V~50/ 60Hz
1 2
1.HDMI1 Input
2.HDMI2 Input
3.Composite Video Input
4.Component Video (YPbPr) Input
5.Audio Input
Pb
Pr
Y Pb Pr
INPUT
Y
AV
3
4 5
VGA INPUT
L
AUDIO
INPUT
R
7.Headphone Output
8.PC Audio Input
9.Coaxial
10.Antenna Socket
11.AC Power Socket
6.VGA Port (PC Input)
Note: 1.Composite video input and component video input share the audio input.
2. When DVI connector is used on HDMI 1 Input, use “PC Audio” for the audio signal input.
3. When DVI connector is used on HDMI 2 Input, Use “YPbPr Audio” for the audio signal input.
-5-
PC AUDIO
HEADPHONE
7
6
RF INPUT
COAXIAL
INPUT
1011
8
9
Page 7

PC
STEPS:
Be sure both th e TV and computer a re set to Power off.
1.Connect VGA and au dio cable.
2.Connect t he power cord.
3.Power on th e TV, switch t o VGA mode.
4.Power on th e VGA.
This sequen ce is very impor tant.
AC INPUT
100-240V ~50/60 Hz
PRESET MODE
1
2
3
4
5
6
7
8
9
10
HDMI1 IN PUT HDMI2 INPU T
Pr
Y Pb Pr
INPUT
AV
RESOLUTION
720*400
640*480
640*480
800*600
800*600
1024*768
1024*768
1024*768
1280*1024
1280*1024
VGA INPUT
Pb
L
AUDIO
INPUT
R
Y
HEADPHONE
INSTALLATION
PC AUDIO
RF INPU T
COAXIAL
INPUT
V.Freq.(Hz) H.Freq.(KHz)
70
60
75
60
75
60
70
75
60
75
31.47
31.47
37.50
37.88
46.88
48.36
56.48
60.02
63.98
80.00
-6-
Page 8

ANTENNA
INSTALLATION
Note:
Aerial conne ctio ns:I EC(female).
Input impend ance :75 un balanced.
-7-
Page 9

INSTALLATION
AV EQUIPMENT
This TV provides one group of AV ,one group of YPbPr for convenient connectionto VCR,DVD or
other video equipment. Please refer to the owner s manual of the equipment to be connected as well.
You can use the input terminals on TV set rear as follows.
VIDEO EQUIPMENT with YPbPr
G
R
AC INPUT
100-240 V~50/ 60Hz
B
Y
Yellow (video)
W
White(audio L)
R
Red(audio R or Pr)
B
Blue(Pb)
G
Green(Y)
HDMI
W
R
HDMI1 I NPUT HDMI2 INP UT
G
R
B
Pr
Y Pb Pr
INPUT
AV
Pb
AUDIO
INPUT
Y
W R
R
W
PC AUDIO
VGA INPUT
L
R
HEADPHONE
RF INPUT
COAXIAL
INPUT
VIDEO EQUIPMENT
W R
TO VIDEO
output
To audio outputs
It can be connected to the following appliances: VCR, multi disc player, DVD, camcorder, video game
or stereo system, etc.....
YPbPr can support these video formats:480i,576i,480p,576p,720p,1080i.
-8-
Page 10

Instruction for Wall Mount
A wall mount kit (purchased separately) would allow you to mount your VIORE
TV on the wall. For detailed information on installing the wall mount, refer
to the instructions provided by the wall mount manufacturer. It is strongly
recommended to contact a technician for professional assistance for wall mount
installation. VIORE is not responsible for any damage to the product or injury to
yourself or others resulting from the wall-mounting.
Dimensions for Mounting Hole Pattern
100 mm
100 mm
WALL MOUNT
- This VIORE TV is compatible with a 100mm x 100mm mounting hole pattern.
- 4 pcs of type M4 screws are required for installing the wall mount bracket to
your VIORE TV. Do not use screws that are longer than 10 mm. Screws that
are too long may cause damage to the inside of the TV set.
- Do not fasten the screws too tight for this may damage the TV or cause the
TV to fall, resulting in personal injury. VIORE is not liable for these kinds of
incidents.
- Do not mount your VIORE TV at more than a 15 degree tilt.
- Always use two people to mount the TV to a wall.
- Do not install your Wall Mount Kit while your TV is turned on. It may result in
personal injury due to electric shock.
-9-
Page 11

REMOTE CONTROL
ENTE R
S.M
P.M
EPG
3
6
9 0
PAGE DOW N
MUTE
RECA LL
SOUR CE
TV DIS PLAY
CH
ASPE CT
HDMI
11
12
13
14
15
+
_
16
17
18
21
22
23
28
29
30
1
POWE R
2
3
1 2
4
7
MENU
5
8
4
5
EXIT
6
7
+
VOL
_
PAGE UP
8
9
10
19
20
24
25
26
27
SLEE P P.G
CH LIS T FAVEPG
DTV
STRE NGTH
YPbP r
TV AV
CC M TS/SA P VGA
RC2 010V
Insert Batteries Into the Remote Control
1 2
1. Remove the battery cover.
2. Inserting the 2 AAA 1.5V batteries making sure the
polarity (+ or -) of the batteries matches the polarity
marks inside the unit.
3. Mount the battery cover.
Replace with new batteries when the TV set begins
to show the following symptoms:
Operation is unsteady or erratic. Sometimes the TV
set does not function with Remote Control Unit.
Remark:
1) Alkaline Battery Recommended.
2) Remove batteries when they are exhausted or if the
remote control is not to be used for long time.
3
1: POWER
To set t he TV standby or on.
2: NUMBER KEY
For direct acc ess to p rogr am.
3: MENU
To dis play T V menu or to ret urn to t he pre vious menu.
4: CURSOR
To mov e with in the menu.
5: EXIT
Used to exit men u.
6: VO L+/ To adjust so und le vel.
7: P.M
To swi tch pi cture mode.
8: PAG E DOWN /PAGE U P
In EPG mode, use t his ke y to pag e up/down the EPG
informatio n.
9: SLEEP
Set time to turn o ff the TV.
10: P.G
Setting the Pa rent al Con trol level cont rol.
11: M UTE
To dis able o r enable the soun d.
12: RECALL
To acc ess th e previously vi ewed p rogr am.
13: SOURCE
To dis play o r exit TV in put so urce menu.
14: ENTER
Confirms sel ecti on.
15: TV DISP LAY
Displays/r emov es the p rogram Inform atio n
16: S.M
To swi tch so und mode.
17: CH+/CH To acc ess th e next or previou s Prog ram.
18: ASPECT
To cha nge pi cture aspect .
19: CH LIST
Used to displa y the ch anne l list.
20: EPG
Display all th e info rmat ion of DTV pro grams.
21: FAV
Used to ac cess y our fa vourite chann els in d igit al TV mode.
22: HDMI
Hot key di rect ly go to H DMI source.
23: AV
Hot key direct ly go to AV sour ce.
24: DTV STR ENGTH
Used to displa y the DT V sign al str engt h menu.
25: TV
Hot k ey dir ectly go to TV s ourc e.
26: YPbPr
Hot key direct ly go to YP bPr source.
27: CC
Enable or disa ble th e CC fun ction.
28: VGA
Hot key direct ly go to VGA sour ce.
29: MTS/SAP
Switch the sou nd ste reo, S AP and mono.
30: COLOR KEYS
R eserved keys
-10--10-
Page 12

1.SETUP WI ZARD
The Setup Wiz ard is p rovi ded so that you can s elec t
"Home" mode or " Reta il" mo de for the initia l pict ure
mode setting . The defini tion s of "Ho me" mode
and"Retail " mode a re as ex plained in the me nu.
Select "Home " or "Re tail " by using "up/do wn arr ow"
keys on your rem ote co ntro l, and press "ENT ER" ke y.
OPERATION
2)If "Retail" mode is selected, the following menu
will be displayed to confirm your selection. Select
"Yes" by using "left/right arrow" keys on your remote
control, and press "ENTER" key to confirm that you
selected "Retail" mode.
If you want to return to the prev ious menu, select
"No" and press "Enter" key.
Setup Wi zard
Sele ct "Hom e" mode o r "Reta il" mod e
by usi ng "up/ down ar row" ke ys on you r
remo te cont rol, an d press " ENTER " key.
Home m ode opt imize s the pic ture
sett ings fo r energ y savin g
Reta il mode o ptimi zes the p ictur e
sett ings fo r use in a re tail
show room or d emo env ironm ent
ENTE R
Sel ect
1)If "Home" mode is selected, the following menu
will be displayed to confirm your selection. Select
"Yes" by using "l eft/right arrow" keys on your remote
control, and press "ENTER" key to confirm that you
selected "Home" mode.
If you want to return to the prev ious menu, select "No"
and press "ENTER" key.
Scr oll
Home
Reta il
Men u
Exi t
Setup Wi zard
Are yo u sure yo u want to e nter th e “Home ” mode?
Scr oll
Yes
Exi t
Men u
NO
Sele ct "Yes" o r "No" by u sing "l eft/r ight ar row" ke ys on you r
remo te cont rol, an d press " ENTER " key.
ENTE R
Sel ect
Setup Wi zard
Are yo u sure yo u want to e nter th e “Reta il” mod e?
Scro ll
Yes
Men u
NO
Sele ct "Yes" o r "No" by u sing "l eft/r ight ar row" ke ys on you r
remo te cont rol, an d press " ENTER " key.
ENTE R
Sel ect
Exi t
-11-
Page 13

1. PICTURE MENU
The first item of the MENU is PICTUR E MENU.
You can adjust picture effect here, such as contrast,
brightness, etc.
Press to select and press to adjust. Press
MENU to exit.
OPERATION
3. SETUP M ENU
The third item of the MENU is SETUP MENU.
You can setup system here.
Press to select and press to adjust. Press MENU
to exit.
Pict ure Mod e
Cont rast
Brig htnes s
Colo r
Tint
Shar pness
Adva nced Vi deo
Adju st
Note:
If you want to adjust contrast, brightness, color,
or sharpness, the picture mo de must return to
“Custom”status.
Home
< >
>
Menu
Sele ct
50
50
50
0
50
Exit
Advanced Video :
Press button t o sele ct Adva nced Vi deo an d pres s
button. The scre en wil l disp lay as follows:
Colo r Temp. Nor mal
Aspe ct Wide
Nois e Reduc tion Mi ddle
Adju st
< >
< >
< >
Menu
Sele ct
Exit
2.AUDIO menu
The second item of the MENU is AUDIO MENU.
You can adjust sound here.
Press to select and press to adjust. Press
MENU to exit.
Soun d Mode Stan dard
Bass
Treb le
Bala nce
Surr ound
AVL
Digi tal Out put PCM
Audi o Langu age Engl ish
Adju st
< >
Off
< >
Off
< >
< >
< >
Menu
Sele ct
50
50
0
Exit
Pare ntal Co ntrol s
Time r
Clos ed Capt ion
Menu S ettin gs
VGA Set tings
Rest ore Def ault
Adju st
Note:
Restore Defa ult: R eset a ll the settings t o defa ult
value.
>
>
>
>
>
>
Menu
Sele ct
Exit
3.1. Pare ntal Controls:
Press button t o sele ct and
press button . The screen w ill di spla y as follows:
Ente r Passw ord --- -
Adju st
Input the pass word s o that t he screen shows t he
Control
menu. Factor y defa ult pa ssword is 6666.
Chan ge pass word
P.G switch
US
Cana da
RRT se tting
Rese t RRT
Adju st
Parental Con trol s
Menu
Sele ct
>
Off
< >
< >
< >
< >
< >
Menu
Sele ct
Exit
Exit
Parental
Note:
The item of Audio language is available in ATSC
program.
-12-
Page 14

Change Passw ord:
Press button a nd the s cree n will display as f ollo ws:
Old pa sswor d
New pa sswor d
Conf irm pas sword
Adju st
Sele ct
----
----
----
Menu
Exit
1).Old passw ord: I nput t he old password
2).New passw ord: I nput t he new password
3).Confirm p assw ord: I nput the new pass word a gain
P.G swi tch:
When the switch is ON, th e foll owin g
options can be a djus ted.
US: Press butt on, an d the sc reen will displ ay as
follows:
1):TV: Pre ss button and the s cree n will d ispl ay as
follows:
Parental Con trol
TV
MPAA N/A
Adju st
>
< >
Sele ct
Menu
Exit
OPERATION
V
(Viol ence)
X
X
X
Des cript ion
Con tent
S
(Se xual
sit uatio n)
X
X
X
L
(Ad ult
lan guage )
X
X
X
Parental
D
(Se xuall y
sug gesti ve
dia log)
Rat ing Con tent
TV-Y (Al l
chil dren)
TV-Y7( Direc t to
orde r child ren)
Sug geste d
TV-G(G enera l
age
audi ence)
TV-PG( Paren tal
Guid ance
sugg ested )
TV-14( Paren ts
stro ngly
caut ioned )
TV-MA( Matur e
audi ence on ly)
And use ENTER ke y to swi tch lo ck/ unlock
Control
feature.
2).MPAA: swit ch the m ovie-rating c ontr ol lev el; N/ A,
G,PG, PG-13, R,NC -17, X.
Rat ing
G Gene ral aud ience s, All Ages ad mitte d
PG
PG- 13
Age
R
NC- 17
X
Canada: Pres s butt on and t he screen will di spla y
as follows:
FV
(Fa ntasy
vio lence )
X
Par ental G uidan ce sugg ested . Some ma teria l may not b e
Sui table for c hildr en.
Par ents st rongl y cauti oned. S ome mat erial m ay be
Ina pprop riate f or chil dren un der 13.
Res trict . Under 1 7 requi res acc ompan ying pa rent or a dult
gua rdian (age va ries in s ome jur isdic tions )
No on e 17 and un der adm itted .
X is an o rder ra ting th at is uni fied wi th NC-1 7 but may b e
enc oded in t he data o f order m ovies .
X
X
TV rat ing
ALL FV V S L D
TV-Y
TV-Y7
TV-G
TV-PG
TV-14
TV-MA
Bloc k Pre ss ENTE R to lock o r unloc k
Adju st
Sele ct
Menu
Cana da Engl ish
Cana da Fren ch
Adju st
Exit
1): Canada Eng lish : Swit ch the english ra ting c ontr ol
level:EXEM PT,C,C8+, G,PG ,14+ ,18+ .
EXEM PT
< >
EXEM PT
< >
Menu
Sele ct
Exit
-13-
Page 15

OPERATION
Rat ing
E Exe mpt: In clude s news, s ports , docum ents an d other i nform ation
pro gramm ing: ta lk show s, musi c video s, and va riety p rogra mming .
C Chi ldren : Inten ded for y ounge r child ren und er the ag e of 8 year s.
Pay s caref ul atte ntion t o theme s that co uld thr eaten t heir se nse of
sec urity and wel l-bei ng.
C8+ C hildr en over 8 y ears ol d: Cont ains no p ortra yal of vi olenc e as the
pre ferre d, acce ptabl e, or onl y way to re solve c onfli ct; nor e ncour age
chi ldren t o imita te dang erous a cts whi ch they m ay see on t he scre en .
G Gen eral: C onsid ered ac cepta ble for a ll age gr oups, Ap propr iate
vie wing fo r the ent ire fam ily, cont ains ve ry litt le viol ence, p hysic al,
ver bal or em otion al.
PG Pa renta l Guida nce: In tende d for a gen eral au dienc e, but ma y not be
Age
sui table f or youn ger chi ldren ( under t he age of 8 ) becau se it cou ld
con tain co ntrov ersia l theme s or issu es.
14+ O ver 14 Years : Could c ontai n theme s where v iolen ce is one o f the
dom inant e lemen ts of the s toryl ine But i t must be i ntegr al to the
dev el opme nt of plo t or char acter. L angua ge usag e could b e profa ne
and n udity , p resen t withi n the con text of t heme.
18+ Ad ults: I ntend ed for vi ewers 1 8 years a nd olde r and mig ht cont ain
dep ictio ns of vio lence , which w hile re lated t o the dev elopm ent of
plo t, char acter o r theme s, are in tende d for adu lt view ing. Co uld
con tain gr aphic l angua ge and po rtray als of se creta ry and nu dity.
2).Canada Fr ench : Swit ch the French-r atin g cont rol
level: E, G,8A NS+, 13 ANS+ ,16A NS+,18A NS+.
Rat ing
E Exe mpt pro gramm ing
G Gen eral :A ll ages a nd chil dren, c ontai ns mini mal dir ect vio lence ,
but m ay be int egrat ed into t he plot i n a humor ous or un reali stic
man ner .
8an s+ Gene ral but i nadvi sable f or youn g child ren :Ma y be view ed by a
wid e publi c audie nce, bu t could c ontai n scene s distu rbing t o
Age
chi ldren u nder 8 wh o canno t disti nguis h betwe en imag inary a nd
rea l situa tions . Recom mende d for vie wing wi th pare n.
13a ns+ Ove r 13 year s: Coul d conta in scen es of fre quent v iolen t scene s
and i n tense v iolen ce.
16a ns+ Ove r 16 year s: Coul d conta in freq uent vi olent s cenes a nd viol ence.
18a ns+ Ove r 18 year s: Only f or adul t viewi ng. Cou ld cont ain fre quent
vio lent sc enes an d extre me viol ence.
Des cript ion
Des cript ion
RRT se ttin g: Thi s is ava ilab le only for ATSC.
Reset RRT: Press butto n and th e scre en will be
displayed as f ollo ws:
3.2 Tim er
You can adjust timer here.
Press to select, and press to adjust. Press MENU
to exit.
Slee p timer
Time z one
DST
Cloc k
Adju st
Sleep Timer: yo u can se t the sl eep Tim er .
Note:
Tim e zone , DST, and Cloc k are on ly for ATSC .
Off
< >
Paci fic
< >
Off
< >
1999 /12/3 1 04:03 PM
Menu
Sele ct
Exit
3.3 Closed Cap tion : Swit ching close cap tion m ode.
Press button t o sele ct Clo sed Caption and p ress
button. The scre en wil l disp lay as follows:
CC Mod e
Basi c Selec tion
Adva nced Se lecti on
Opti on
Adju st
Off
< >
CC1
< >
Serv ice 1
< >
>
Menu
Sele ct
Exit
1) Adv anced sel ecti on: Th is is av aila ble on ly for ATSC.
2) Option: This is for editi ng the C C font .
Press button a nd the s cree n will display as f ollo ws:
NO
Pres s“ENTER”K ey To Selec t
Adju st
Are yo u sure?
Sele ct
Mode
Font s tyle
Font s ize Defa ult
Font E dge sty le Defau lt
YES
Menu
Exit
Font E dge col or Default
FG col or Defa ult
BG col or D efaul t
FG opa city Defa ult
BG opa city Defau lt
Adju st
Cust om
< >
Defa ult
< >
< >
< >
< >
< >
< >
< >
Menu
Sele ct
Exit
NOTE: This is available only for ATSC.
-14-
Page 16

3.4 Menu Setti ngs
You can adjust Menu Sett ings here .
Press to select. Press to adjust. Press MENU
to exit.
Tran spare ncy 25%
Menu L angua ge Engl ish
Adju st
< >
< >
Menu
Sele ct
Exit
3.5 VGA Setting s: Thi s is ava ilable only in PC M ode.
Press button t o sele ct VGA Se ttin gs and p ress
button. The scre en wil l disp lay as follows:
Menu
50
50
50
50
Exit
H-po s
V-pos
Cloc k
Phas e
Auto
Adju st
1).H-Pos:A djus t the ho rizontal posi tion o f the sc reen.
2).V-Pos :Adj ust th e vertical posi tion o f the sc reen .
3).Clock: Fi ne tun e the sc reen width.
4).Phase: Fi ne tun e the ph ase of the screen .
Thi s adju stment is not req uire d in nor mal case.
5).Auto: Auto a djus t to fit t he scr een.
4. Channel ME NU
The fourth item of the MENU is Channel MENU.
You can adjust digital and analog e TV Channel.
Press to select and press to adjust.
>
Sele ct
OPERATION
Are yo u sure?
YES
NO
Pres s“ENTER”K ey To Selec t
Adju st
Select“yes”and press the ENTER button .
You will see the following screen that sh ows
progress of Auto Scan.
R F CH: 4
Foun d: 4
Anal og: 1
Digi tal: 3
Adju st
3). Favorite: Press bu tton to choose/delete the
favorite channel .
4). Show/Hide: Press button to display or hide
the current channel.
5). Channel NO.: Display the current ch annel number.
6). Channel lable: Press button to edit the current
channel name.
7). DTV signal : Display DTV signal in tension. It can't be
selected or adjusted .
5. Multimed ia MENU
You can play JPEG files by connecting the media to
the USB port.
Press the Input Source botton, and sell ect“Storage”
from the menu. You will see the following screen.
Sele ct
Sele ct
Menu
Menu
Exit
Exit
Air/ cable
Auto S can
Favo rite
Show /Hide
Chan nel NO.
Chan nel Lab le.
DTV si gnal: G ood
Adju st
1). Air/ Cable: Se lect Air TV signal or cable TV signal.
2). Auto Scan: If you selected Air on Air/Cable selection,
scanning all TV channels is required prior to starting
watching the TV programs. Press the button , and you
will see the following menu.
Air
< >
>
>
>
2-1
< >
>
Menu
Sele ct
Exit
USB
Pho to
..
C:
011.j pg
200 81222 21788 78787 .jpg
200 81.jp g
200 87.jp g
202 87.jp g
207 87.jp g
200 87.jp g
207 87.jp g
200 87.jp g
Total s ize:3 .7 GB 1024 x 7 68 372. 72KB
Unu sed siz e: 3.7 GB 20 06:07 :14 15: 37:42
Use to select the jpg files or folders, and use“OK”
key to play. Use EXIT key to stop playing or go to
upper menu.
:17 0 01/01 8
C:\ photo \
011.j pg
-15-
Page 17

TR OUB LE SH OOT ING
Tro ubl e phe nom eno n Symptom
Picture Audio
Snow Noise
Ghost
Interf erence
Normal P icture
No pictu re Mute
No colou r Normal au dio Colour contr ol
Normal a udio
Noise
Mute
Inspection Check
antenna posi tion , dire ction
or connectio n
antenna posi tion , dire ction
or connectio n
electronic e quip ment ,car/
motorcycle ,flu ores cent light
Volume( chec k if mut e is
activated or i f the au dio sy stem
connection s are no t corr ect)
Power cord is no t inse rted
Power switch i s not op ened
Contrast and b righ tnes s/volume
setup
Press standb y key on t he rem ote
control for in spec ting
Pictur e
breaki ng up
No colou r
Normal a udio
or weak
Noise
retune chann el
TVs yste m
The LCD TV panel is built with very high precision technology giving you fine picture details
in vibrant color. Occasionally, a few non-active pixels may appear on the screen as a fixed
point of red, green, blue, black or white. Please note this does not affect the performance of
the product.
-16-
Page 18

Viore,Inc.
7801 Hayvenhurst Avenue, Van Nu ys, CA 914 06
Ver.111129-1
Printed in China
 Loading...