

Viola Systems arctic c-1260, arctic p-2250, arctic c-1240, arctic p-2220, arctic p-2260 Quick Start Manual
...
Quick Start Guide
Version 1.2
This document covers the following products:
-Arctic C-series (C-1230, C-1240, C-1260)
-Arctic P-series (P-2220, P-2250, P-2260)
-Arctic R-series (R-3221, R-3222, R-3251, R-3252, R-3261, R-3262)
More documentation is available at http://www.violasystems.com/docs
1. Overview
This document is a short description how to power up the Arctic product and how
to get it operational. This document contains the following sections:
• Physical connections and switches
• Inserting a SIM card
• Setting an IP address using a web browser
• GPRS/3G/LTE network settings
Viola Systems Ltd. Phone: +358 (0)201 226 226 www.violasystems.com support@violasystems.com
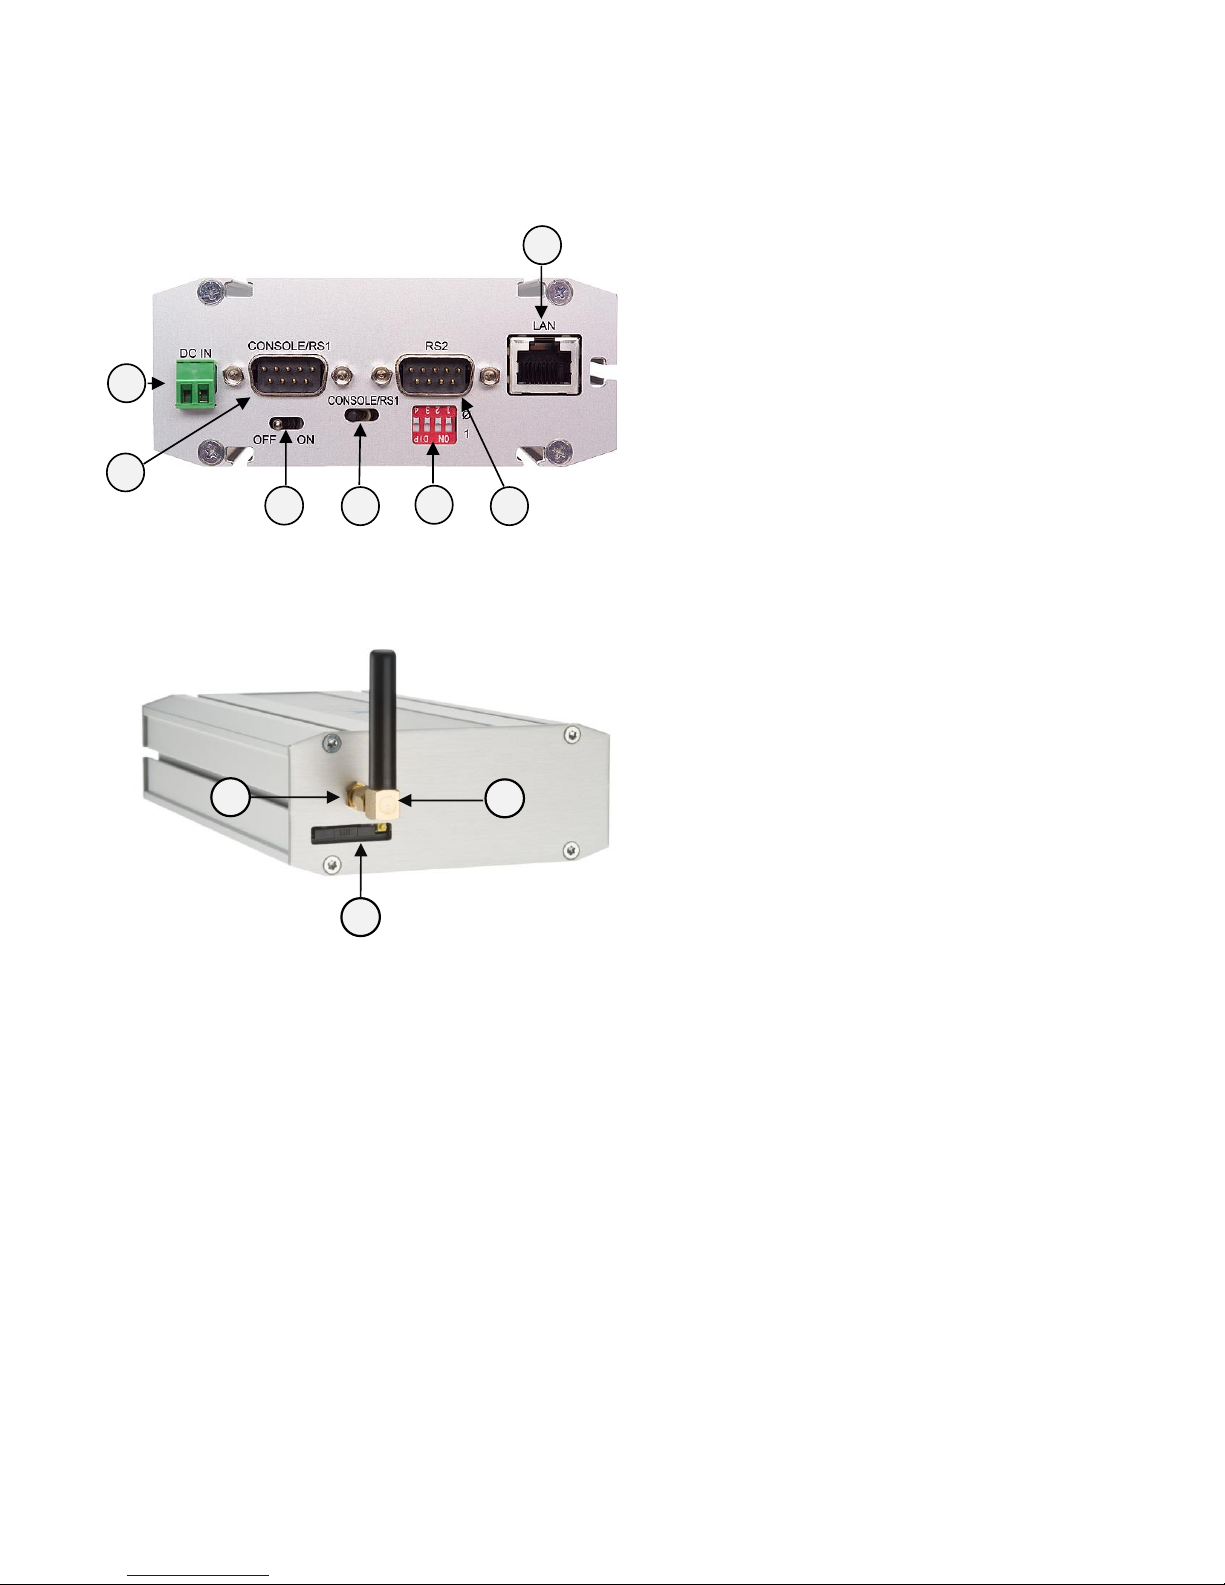
Figure 1. Front Panel
2. Physical connections and switches
Figure 2. Back Panel
1. SMA (female) antenna connector
2. SMA (male) antenna
3. SIM Card slot
3. SIM Card
SIM card slot is located on the rear panel of the Arctic device (see figure 2).
Push the yellow button in the SIM card slot to eject the SIM card tray and
insert the SIM card to the tray (contacts facing up) and push the SIM card tray
firmly and carefully back to its holder.
Note! If your SIM card requires a PIN code, please do not install the SIM card
before you set up the Arctic device PIN code settings (see chapter 5).
The SIM card could lock up if done otherwise.
Also please note, It is recommended NOT to insert or remove the SIM card
while the Arctic device is in operation and connected to the mobile network.
1. Power supply 12-48 VDC
2. Console serial port (RS1)
3. Power switch
4. Console/serial port switch
5. DIP switches
6. Application serial port (RS2)
7. LAN port
1
2
3
4
5
6
7
1
2
3
 Loading...