

3
Features
Contents
■ Features and Set-up
Precautions ................................................4
Package Contents and Descriptions..........6
LCD/Battery Recharging ............................7
Connecting to a PC....................................8
■ Basic Operations
Power ON/OFF/Playback .........................11
Volume Control/Interval Repeat ...............12
Bookmarks ...............................................13
EQ Mode / Navigation..............................14
FM Radio..................................................15
FM Recording...........................................16
Voice Recording.......................................17
External Input Recording..........................18
How to Use Programs..............................19
■ Menu Structure and How to use
Each Menu
MENU Structure .......................................20
MODE.......................................................21
SYSTEM...................................................22
CONTROL................................................24
DISPLAY ..................................................28
SOUND ....................................................30
How to upgrade Firmware
.
.......................31
■ How to Use IMAGE EDITOR
.....32
■ How to use LyricsED
....................38
■ Specifications
....................................40
●
MP3, WMA Playback
Store and play Microsoft WMA/MP3 files.
●
FM Receiving and Recording
Receive FM transmissions and record FM
sound into MP3 file format.
●
High-Quality MP3 Voice Recording
Save and play back voice signals into MP3
files of the highest sound quality.
●
MP3 Recording from External Audio Input Signals
Convert and save audio signals from all types
of analogue audio devices into MP3 files without using a PC.
●
Lyrics Editor
Provides an Lyrics Editing Program and displays three-line lyrics.
●
96X64 dot 2-Color (Orange/Blue) 16 gray OLED
Uses OLED which can display high definition
image files and moving picture frames.
●
Convenient Firmware Upgrade
Download upgrade files, restart the player, and
files are automatically upgraded. This function
enables you to always use the latest Functions.
●
Variable Bit Rate Setting
You can adjust audio recording quality by changing bit rates for voice recording or line-in recording according to place or time. This function
enables you to use the memory effectively.
●
Speed Control
Control the playback speed - fast or slow.
●
IMAGE EDITOR Program
Provides an Image Editor Program to edit image
files and moving image frame files at will
●
Built-in Rechargeable Li-polymer Battery
Easily recharge the battery through the USB
of a PC, or external outlet. No need to purchase extra batteries.
●
Bluetooth
- Display Caller ID.
-
Pairing for up to 3 Bluetooth enabled devices.
-
Supports both Headset and Handsfree profiles.
- Low Power Consumption.
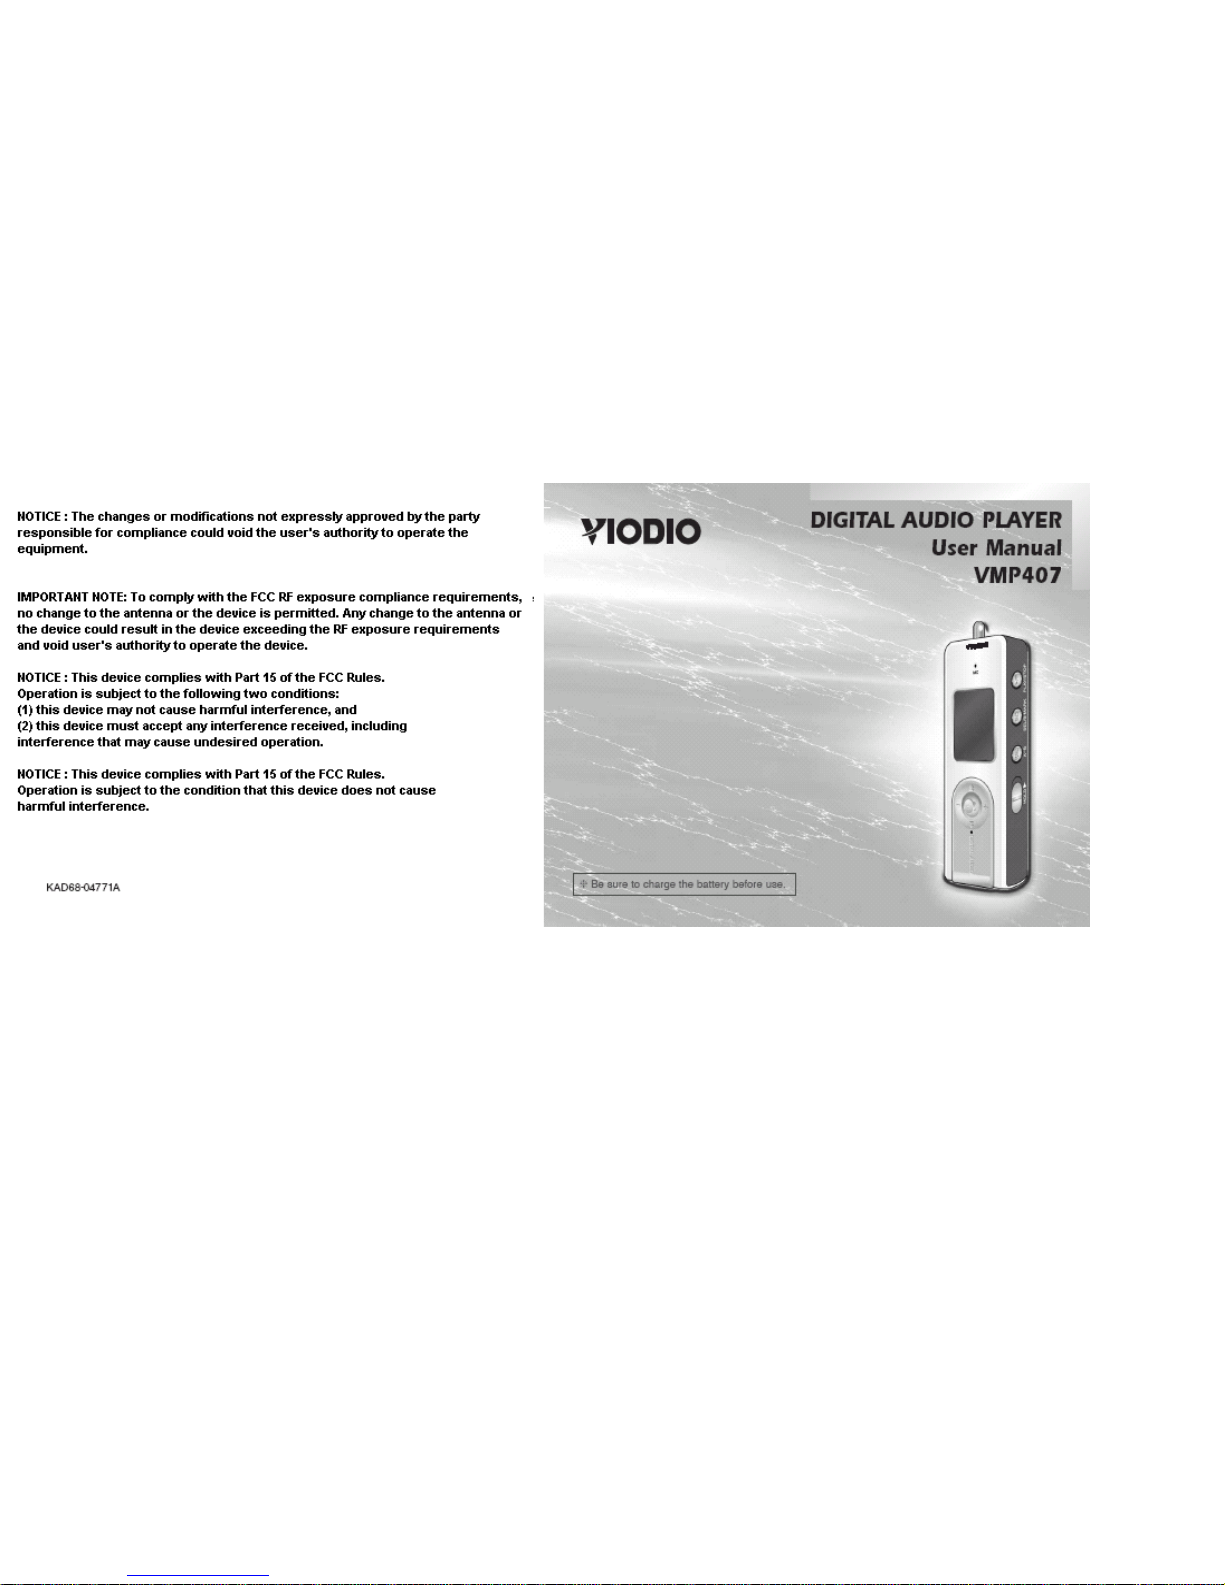
Features
SF2000B-VMP407(eng) 9/2/04 11:37 AM Page 2
Precautions
5
Read and Understand all the instructions to avoid injury to yourself and damage to the
equipment.
Please check the following if any problems occur while using the device.
1. Not working and
nothing appears
on the LCD.
- Recharge the built-in battery. - Check if files are saved in
the memory.
- Check if the volume is set
to "0".
- Check if the earphone jack
is properly inserted.
- Check if "Hold" is locked. - Check if the product is connected to a PC.
- Check the USB extension
cable connection between
Device and PC.
2. No sound during
playback.
3. Buttons don’t
work.
4. Unable to download files.
Safety Precautions
1. Listening to music at a high volume for long periods of time may damage your hearing.
2. Do not repair, disassemble, or alter the product yourself.
3. Do not use the product where it is prohibited to use electronics devices (i.e. in an airplane)
4. It is dangerous to drive a car, motorcycle, or bike while using your headset/earphones.
(It may cause an accident if you turn up the volume of the earphones while walking on streets, especially while
using pedestrian crossings.)
5. Be careful not to let the player’s neck-strap get caught in doors or other obstacles.
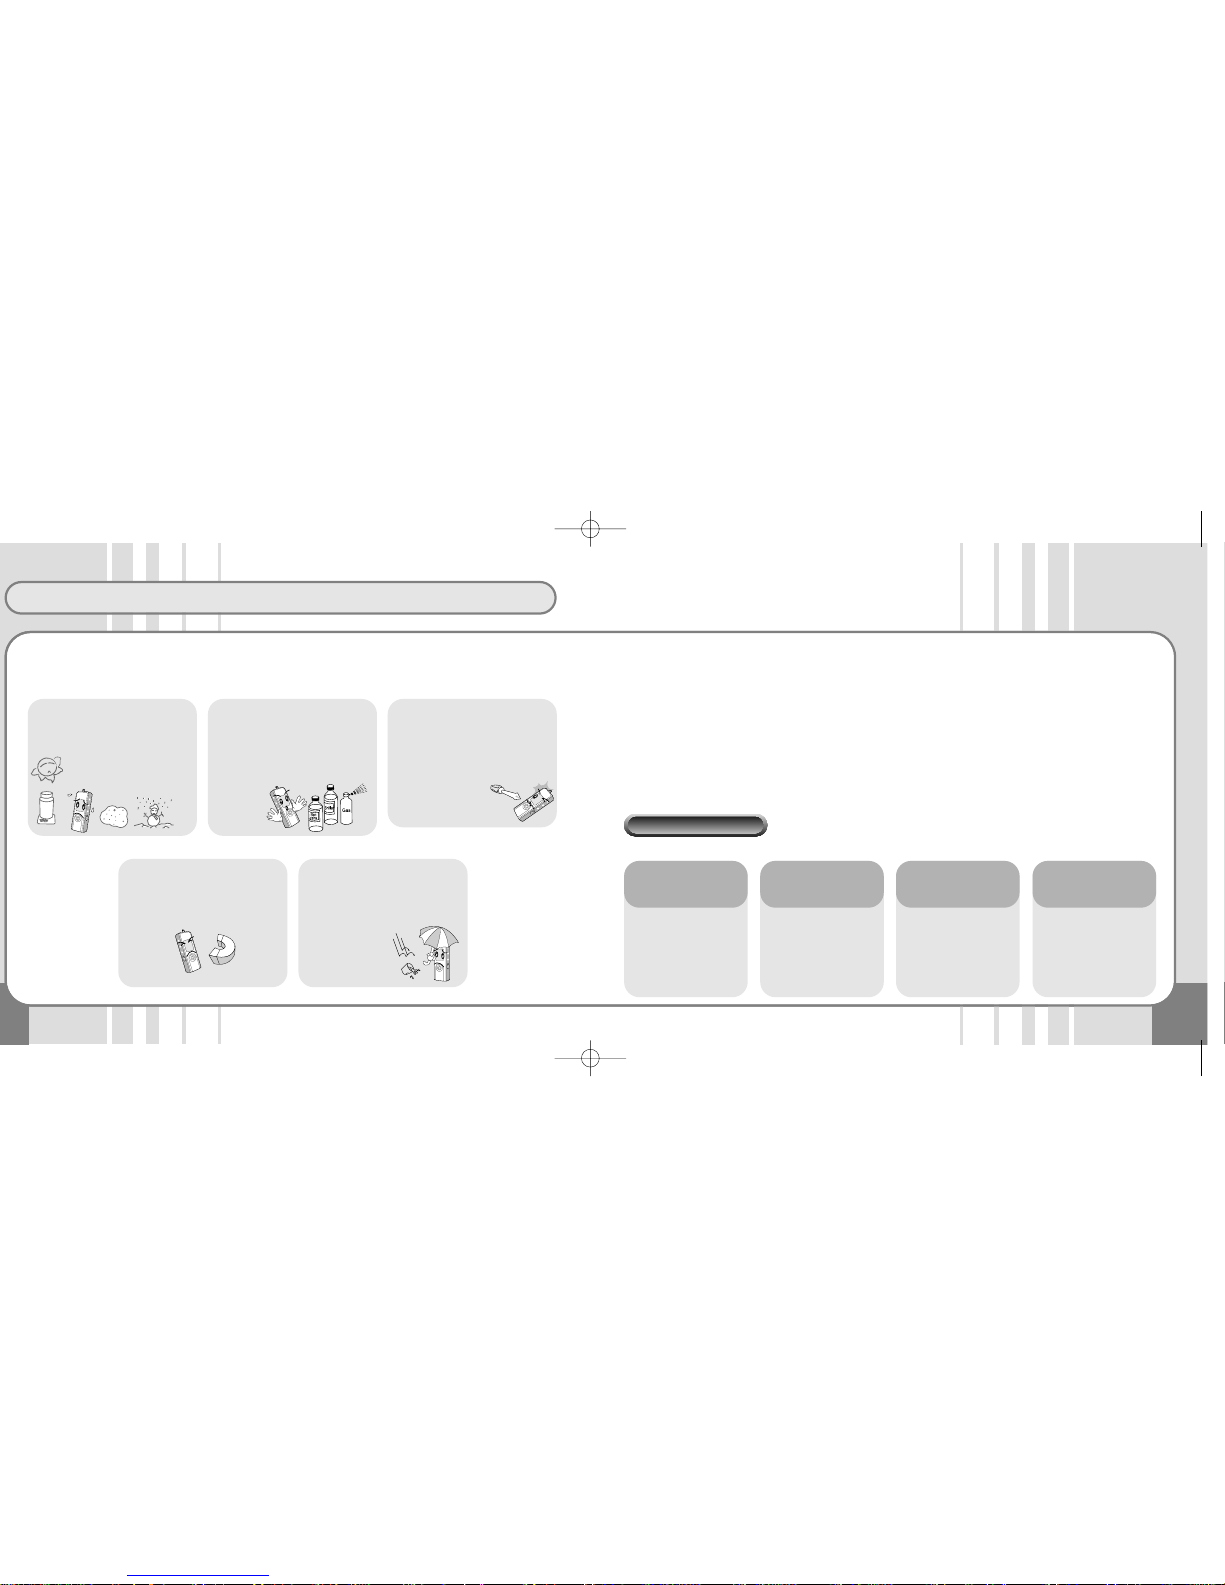
❈ Optimal Conditions for Use • Temperature: 5˚C ~ 35˚C (23°F ~ 95°F)
• Humidity: 10%~75%
Do not expose to extremely
high temperatures (over
35°C/95°F), low temperatures (below -5°C/23°F),
direct sunlight , inside a car,
dusty areas, or high-humidity area such as bathrooms.
To clean, use a dry soft cloth.
Do not use any solvents, benzene, or thinners.
(Such materials may damage
the surface or affect the color of
the product.)
Do not let any foreign matter
get into the product. If water or
any other liquid is spilt into the
product, stop using it and contact a service
center.
Do not apply excessive pressure to the LCD. Do not disassemble, repair, or convert the
product yourself. The company
is not responsible for the loss of
files caused by damage, repair
or any other reasons.
Be aware that this product may
affect Credit Cards and any
other magnetic cards due to
the magnetic device inside.
Troubleshooting
SF2000B-VMP407(eng) 9/2/04 11:37 AM Page 4
7
LCD / Charging Battery
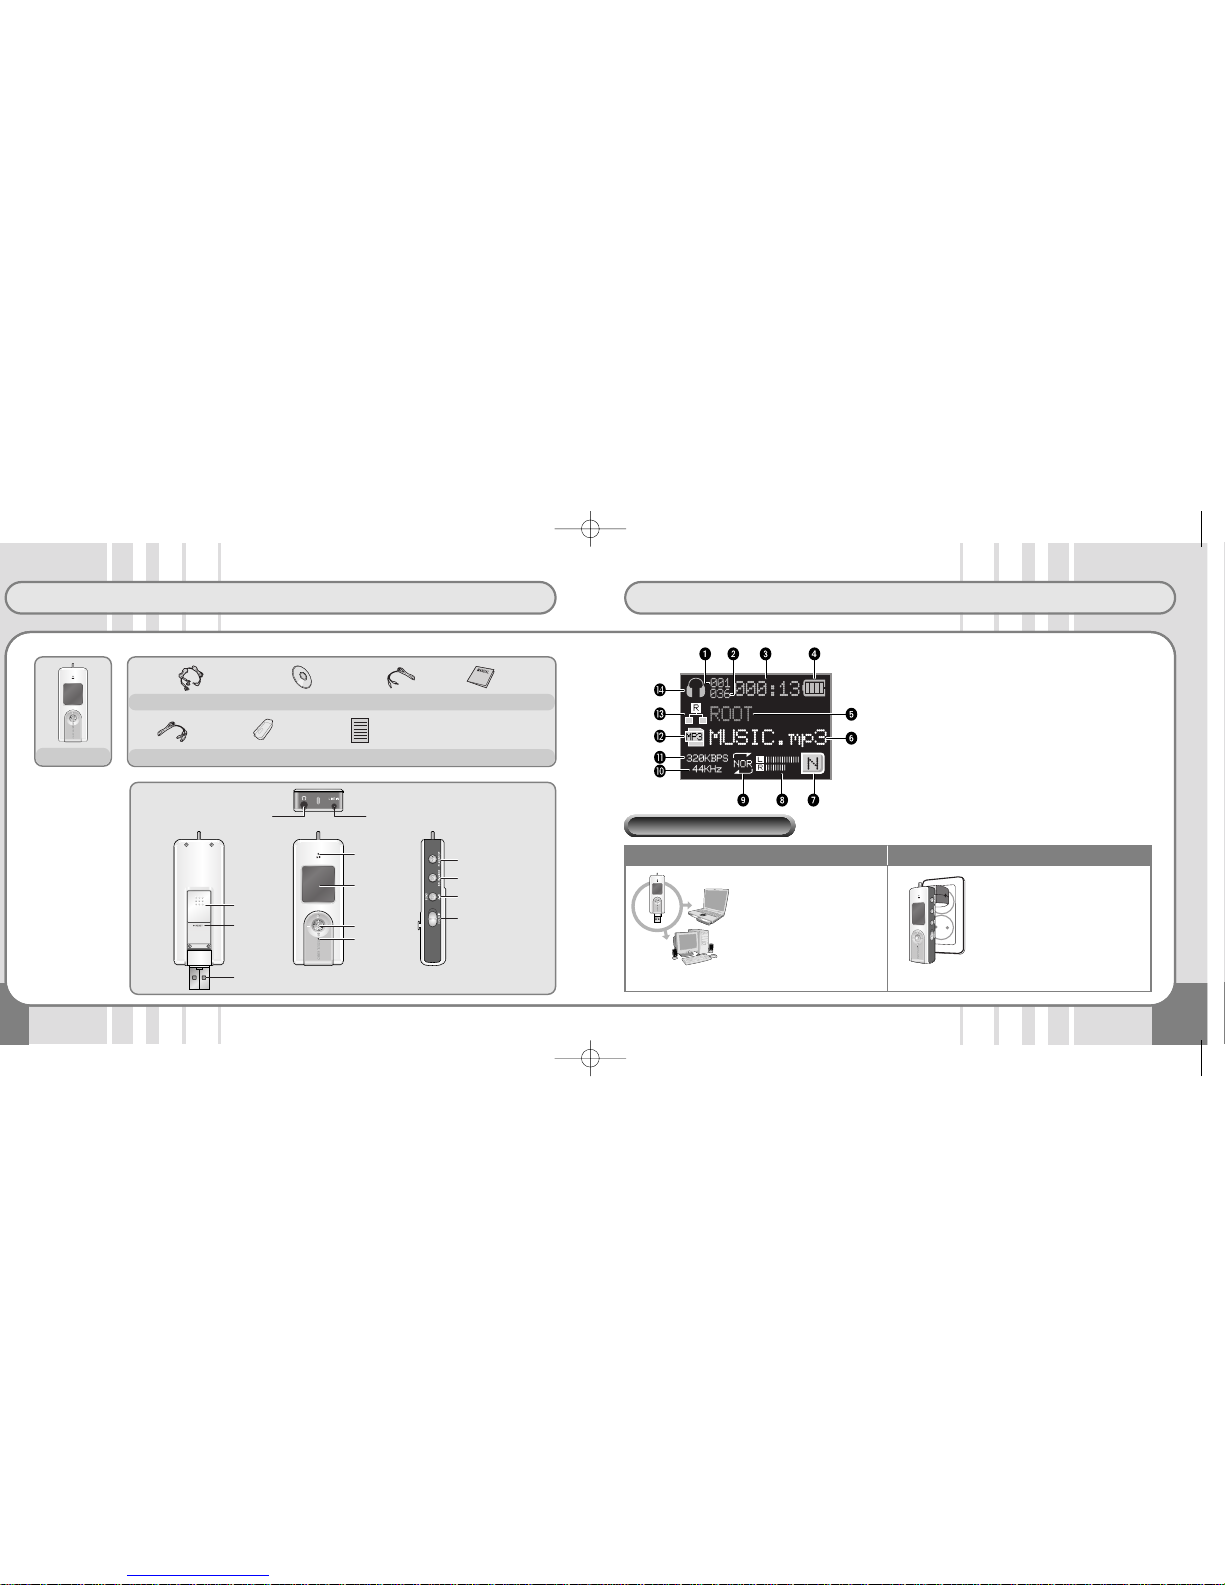
Package Contents and Descriptions
Necklace type earphone Line in Cable
Carrying Case (Option) Bluetooth Manual
Manual
USB Cable
Main Unit
Installation CD
Microphone
LCD
Direction,
Selection Button
/ MENU Button
LED (Charge /
Operation
Indicator)
Power, Play/Pause
Button
EQ / Bookmark Button
Interval Repeat /
Record Button /
SEND (Bluetooth)
HOLD Switch
USB Plug
USB Cover
RESET Button
Line-in JackEarphone Jack
Current Song Number
Total Stored Songs
Playback Time Indicator
Remaining Battery
Indicator
Folder Title Display
File Name and ID3Tag
Information Display
EQ Mode Indicator
Level Meter
Playback Mode Indicator
Sampling Frequency
Bit Rate Display
File Format Display
Folder Type Display
Mode Type Display
and HOLD Indicator
Using the PC link Using the adapter
• Turn the computer power on
and connect the VIODIO to the
USB port of computer.
•
The Battery Charging LED on the
main unit lights up during charging and is turned off when the battery is fully charged (2~3 hours).
•
Charging times vary depending on
the computer’s USB port availability.
❈
Connect to a PC for charging after turning off Main unit’s power.
• Connect the VIODIO to an adaptor.
• The battery will be fully charged
within 2 to 3 hours, if it is completely
discharged.
• The Battery Charging LED on the
main unit lights up during charging
and is turned off when the battery is
fully charged.
❈ The adaptor is optional.
Charing the battery
❈
The Bluetooth function does not work during charging.
SF2000B-VMP407(eng) 9/2/04 11:37 AM Page 6
Connecting to a PC
9
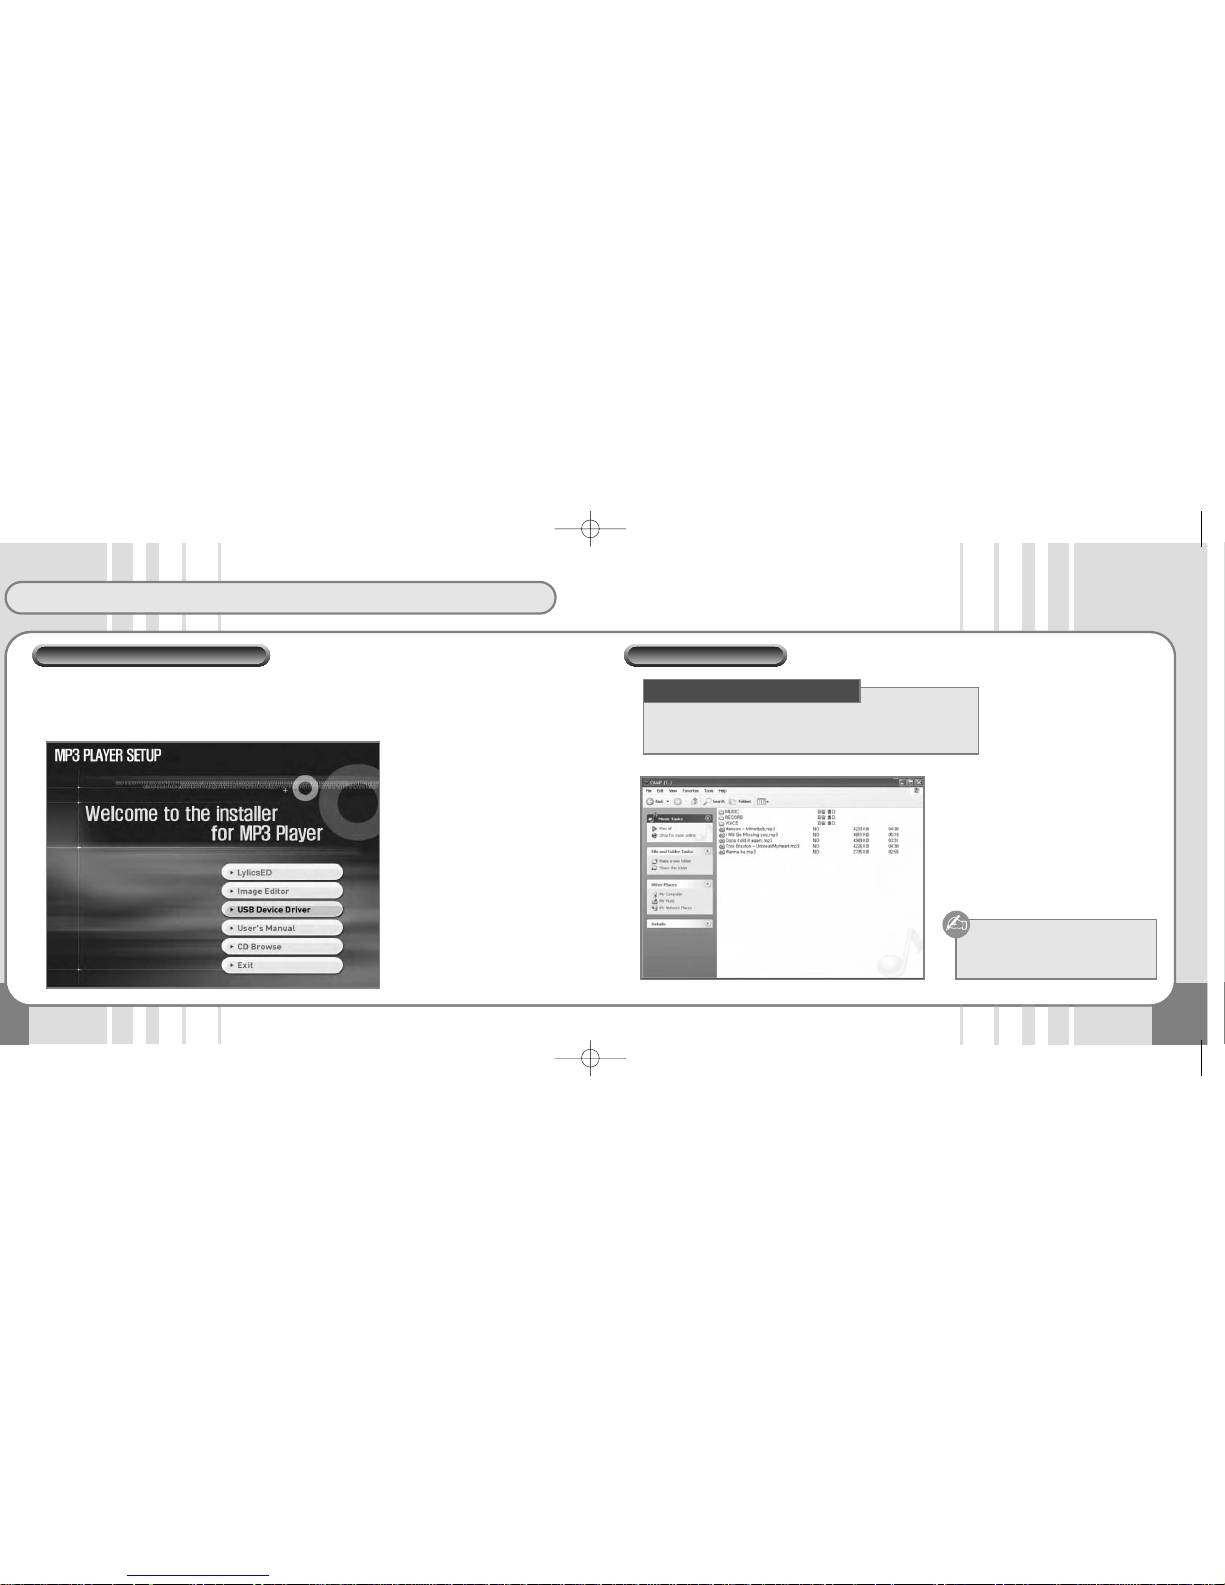
The USB Device Driver is only for PCs using the Windows 98/SE OS.
Insert the Software Installation CD supplied with the product into the CD-ROM drive. Next, select "USB
Device Driver", and the program on the CD will be automatically opened. Press the "Next" Button following the instructions on the installation window.
Power on the VIODIO.
Connect VIODIO to USB Port of PC. "
Mobile Disk " will be indicated in your
"Removable Disk" Folder.
After selecting the files you want to transfer
from your PC , drag and drop or Copy it to
the VIODIO.
• CPU: Pentium MMX or better
• OS : Win98SE/ME/2000/XP/Mac/Linux
• Peripherals : CD-ROM Drive/At least 50MB HDD/ USB Port
Caution : Do not remove the USB
jack while files are
transferring.
Minimum Hardware Requirements
USB Device Driver Installation Connecting to a PC
SF2000B-VMP407(eng) 9/2/04 11:37 AM Page 8
Connecting to a PC
11
Power On / Play back
• This player is recognized as a ‘Removable Disk’ folder
when it is connected to a PC. There are three folders:
MUSIC, VOICE and RECORD.
•
MP3, WMA Music files can be saved in any folder.
• asv files created using the Image Editor can be saved
in any folder.
• Voice recording files are saved in the Voice Folder.
• FM recording and encoding files are saved in the
Record Folder.
• Up to 512 folders or files can be saved under the the
ROOT Directory.
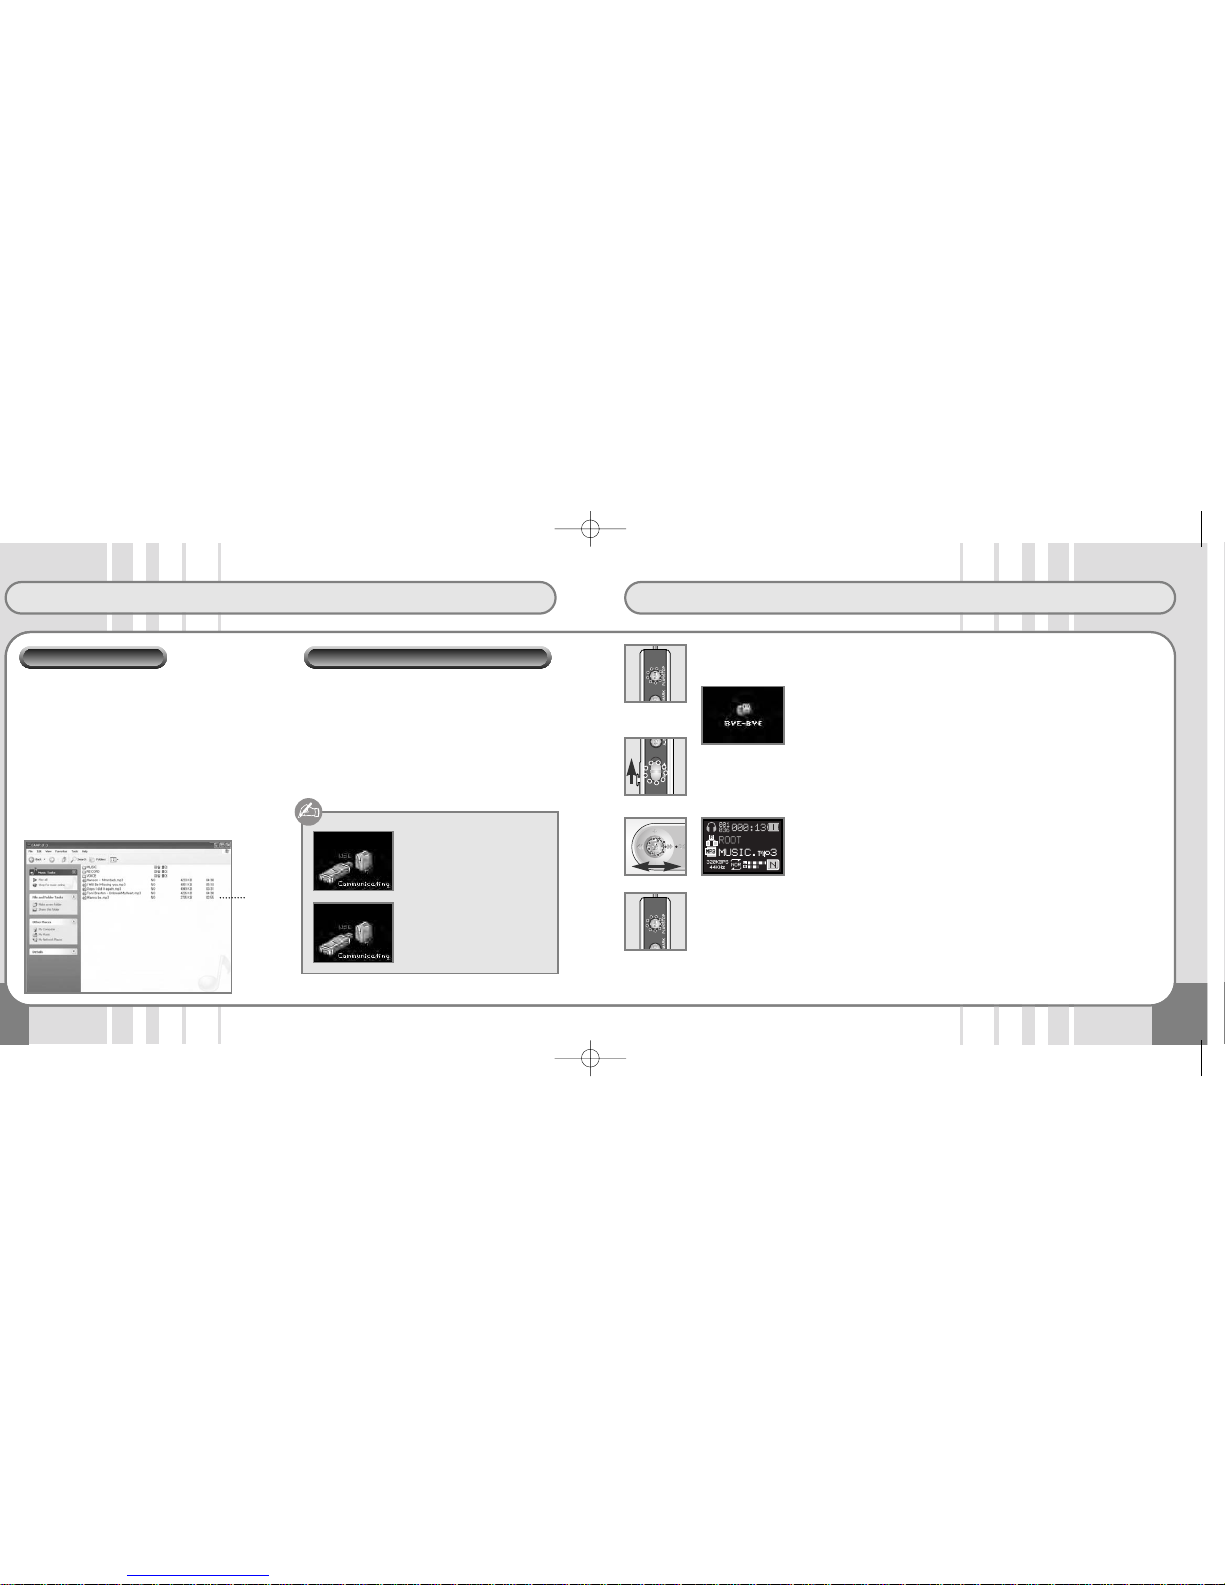
• Do not disconnect the VIODIO from PC while the
data is transferring. If you do, the data will be damaged.
• For disconnection from a PC with Windows2000 /
ME / XP, click the ‘Disconnect and Remove
Hardware’ icon on the taskbar at the bottom right of
the Monitor Screen to stop the device from running,
then disconnect the VIODIO
COMM MODE
The file is being transferred.
Do not dissconnect VIODIO.
REMOVABLE
The file transfer is completed.
You may disconnect the VIODIO.
ROOT
File Management
Disconnect the Main Unit from PC.
●
Power ON
Press the ‘Play/Pause’ button [/■] for 1 ~ 2 Seconds shortly.
●
Power OFF
Press the ‘Play/Pause’ button [/■] for over 2 seconds.
The LCD displays "Bye-Bye" and the power turns off.
●
HOLD Switch
Push the HOLD switch in the direction of the arrow to disable all buttons.
●
Playback
For playback of MP3, WMA files, press the ‘Play/Pause’ button [/■].
●
Music Selection
Push the Jog Key in the reverse direction or the forward direction , and
the previous song or next song is played.
If you push the Jog Key in the reverse direction within 5 seconds after playback, the previous song is played. If you do it 5 seconds after playback, the current song is played from the beginning.
Push and hold the Jog Key in the reverse direction or foward direction to rewind
or fastfoward.
●
Stop
To stop playback , press the ‘Play/Pause’ button [/■].
To continue playback, press the ‘Play/Pause’ button [/■] again.
SF2000B-VMP407(eng) 9/2/04 11:37 AM Page 10

13
Bookmarks
Volume Control / Interval Repeat
●
Volume Control
The volume level runs from 0 to 40.
Push the Volume Control in the (+) direction to increase the volume.
Push and hold the Volume Control, and the volume is steadily increased.
Push the Volume Control in the (-) direction to decrease the volume.
Push and hold the Volume Control, and the volume is steadily decreased.
❈ The maximum volume level may be harmful to your hearing or cause dam-
age to the earphones. Be careful when adjusting the volume.
●
Interval Repeat REC/A↔B Playback
Press the REC/A↔B button at the starting point to repeat during playback.
The icon appears.
Press the REC/A↔B button at the ending point to repeat once again.
The icon is displayed and the selected files are repeated.
To stop Repeat, press the REC/A↔B button again.
The icon disappears and the Repeat is cancelled.
●
Bookmarks
Bookmark Setting
Press and hold the EQ button for a few seconds during playback, and the bookmarks are saved in sequential order.
Search Bookmarks
Press the EQ button while paused, and the Bookmark List appears.
Move to the bookmark using the +/- key of the Jog Button on the front side of the
VIODIO and press the FF key . The LCD then shows the selected bookmark
position.
(Use the button in the same way as for Navigation)
Delete Bookmarks
Press the EQ button while paused, and the Bookmark List appears.
Move to the bookmark using the +/- key of the Jog Button on the front side of the
VIODIO body and press the EQ button. The selected bookmark is then deleted.
To delete all the saved bookmarks, press and hold the EQ button for a few seconds. All bookmarks are then deleted at the same time.
If even one file with a bookmark set in the Mobile Disk is
changed with Delete/Move/Add, a NO ENTRY message
appears when the file with the bookmark is played.
Therefore the bookmark function is only available when the
file location is not changed after the file download.
SF2000B-VMP407(eng) 9/2/04 11:37 AM Page 12

15
FM Radio
EQ Mode / NavigationEQ
●
EQ (Sound Field) Mode
EQ Mode enables users to enjoy the music in a various quality of tones.
Each time the EQ button is pressed the tone quality will change.
NORMAL, ROCK, JAZZ, CLASSICAL, POP, ULTRA BASS, USER EQ, SRSWOW
(User-defined Tones)
●
Navigation
Press the Menu Key and the Navigation Mode is immediately displayed.
Search the file to play using the Jog Key and push the Jog Key in the FF
direction. The selected file is immediately played.
Move to subfolders
Select a folder and push the Jog Key to the FF direction.
Move to upper-level folders
In the current folder, push the Jog Key to the REW direction.
●
FM Radio (87.5~108.0MHz)
Press the Jog Key for a few seconds, and the Main Menu Window is shown.
Select MODE and then select FM Mode using the Jog Key.
❈ Make sure the earphones are properly connected before using the FM
radio. The earphones work as an antenna.
There are two station search modes: Autoscan / Preset.
Press the Jog Key shortly, and two modes are displayed in the order: Autoscan ➝
Preset.
Autoscan Mode
Push and hold the Jog Key to the REW or FF direction, and stations are
automatically searched as the frequencies go up and down. (EX: 89.1 ➝ 91.9MHZ)
Manual Mode
Push the Jog Key to the REW or FF direction to find the stations that you
want to listen to. Frequencies go up or down by 100KHz. (EX: 91.8 ➝ 91.9)
Preset Search Mode
Push the Jog Key to the REW or FF direction, and stations are automatically
searched as the Preset Numbers go up and down. ( 93.1 ➝ 95.9 ➝ 97.3)
Save Channels
Press the SEL button in the center of the side of VIODIO; the channel numbers
appear and the relevant frequencies are saved.
Delete Channels
Press the SEL button with channels selected, and the channel numbers and relevant frequencies are deleted.
Automatic Search and Save Function
Press and hold the SEL button for a few seconds; frequencies are automatically
searched and up to 20 preset numbers are saved.
SF2000B-VMP407(eng) 9/2/04 11:37 AM Page 14

17
Voice Recording
FM Recording
●
FM Recording
Press the REC button while listening to FM radio, and the player starts recording.
Pause during Recording
Press the Play/Pause button [/■] during recording, and the recording is paused.
Press the button again, and the recording is resumed.
❈ File names flash during the Pause state.
Finish Recording
Press the REC button shortly during recording; the recording is stopped and
recorded files are automatically created and saved in the Record folder.
Recording time is indicated during the process. When the recording time limit
(depending on memory capacity) is exceeded, recording is automatically stopped
and the file saved until the recording time limit is used up.
❈ Recording Time (based on 256MB)
128 kbps (4 hours), 64 kbps (9 hours), 32 kbps (18 hours), 16 kbps (36 hours)
●
Voice Recording
Press and hold the REC button for a few seconds, and Recording Mode is started.
Press and hold the REC button in Recording Mode, and recording is started.
Pause Voice Recording
Press the Play/Pause button [/■] during recording, during recording to pause.
Press the button again to resume recording is resumed.
❈ File names flash during the Pause state.
Finish Voice Recording
Press the [REC] button shortly during recording; recording is stopped and recorded
files are generated in the Voice folder.
Recording time is indicated during the process. When the recording time limit
(depending on memory capacity) is exceeded, recording is automatically stopped
and the file saved until the recording time limit is used up.
How to Record
SF2000B-VMP407(eng) 9/2/04 11:37 AM Page 16

19
How to Use Program
External Input Recording
●
External Input Recording (Line in Recording) Mode Setting
Connect the Line-In cable to the Line-IN Jack of the external device and VIODIO.
External Input Recording Mode Setting
Press and hold the Jog Key for a few seconds, and the Main Menu will appear.
Select the Encoding Mode from among the MODE menus and press the Jog Key.
External Input Recording
Press the Record button [REC] shortly during playback, and recording is started.
Press the Play/Pause button [/■] to stop recording.
Finish External Input Recording
Press the Record button [REC] shortly during recording; recording is stopped and
the recorded file is generated in the Record folder.
Recording time is indicated during the process. When the recording time limit
(depending on memory capacity) is exceeded, recording is automatically stopped
and the file saved until the recording time limit is used up.
❈ For external input recording, turn the external device volume up. If the recording
volume is low, the volume of the recorded file may be low after recording.
External Audio Input
●
How to Use Program
Start the Program Mode
Select MENU ➝ CONTROL ➝ PROGRAM, and the Program Mode is displayed.
Create Program
Select file names to add to the list in Navigation Mode and press the EQ button
shortly. The files are then added to the program in sequence.
Press the Jog Key on the VIODIO in PROGRAM Mode shortly, and the File List is
shown. At this point, you can select any files you want to add to the program and
so create the program.
Play Program
Move to a program file using the +/- key of the Jog Key in PROGRAM Mode and
press the FF Key . Only the files on the program will then be played.
During playback of the program files , the File Icon is displayed as a PROGRAM
ICON on the window.
Delete Program
Move to a program file using the +/- key of the Jog Key in PROGRAM Mode and
press the EQ button. The files in the relevant program are then deleted from the list.
To delete all saved lists, press and hold the EQ button for a few seconds, and all
lists will be deleted at the same time.
Exit Program Mode
To return to Normal Mode, go to NAVIGATION Mode and select files. The
Program Mode is then released. In other words, go to Navigation Mode and select
other files during playback, and the mode will be changed to NORMAL Mode.
During Play back, the file icon is indicated as " PROGRAM ICON"
SF2000B-VMP407(eng) 9/2/04 11:37 AM Page 18

21
How to Use MENU
MENU Structure
MENU
☞ Press the Jog Key for a few seconds.
SOUND
NORMAL
ROCK
JAZZ
CLASSIC
POP
ULTRA BASS
USER EQ
SRSWOW
DISPALY
CONTRAST
SCR SPEED
SCR SAVER
LCD OFF
ADDITION
MODE
MUSIC
FM
VOICE
ENCODING
SYSTEM
DELETE
FORMAT
DEFAULT
SYS INFO
MEM INFO
POWER OFF
CONTROL
BLUETOOTH
LANGUAGE
PLAY MODE
PROGRAM
RECORDING
SLEEP TIME
STUDY KEY
PLAY SPEED
VOLUME LIMIT
RADIO CTRL
MODE
● MUSIC: You can listen to a variety of music files such as MP3,
WMA.
Select
M
o
v
e
● FM: This mode is to listen to or record FM radio.
● VOICE: This mode is to record voice or to play recorded files.
● ENCODING: This mode is to record and play audio signals
from external devices as MP3 files.
➤
➤
➤
➤
SF2000B-VMP407(eng) 9/2/04 11:37 AM Page 20

How to Use MENU
SYSTEM
● DELETE: To delete files in the player directly. ● DEFAULT: To initialize all setting values to the default values.
● FORMAT: To format memory. Notice that all data is deleted
after formatting the memory.
■
NORMAL:
To format for system stabilization before and after
firmware upgrade.
■
LOW LEVEL:
To format when the system is completely down.
➤
1. DELETE
2. FORMAT
3. DEFAULT
4. SYS I NFO
5. MEM I NFO
6. POWER OFF
SYSTEM
DEFAULT
Confirm?
➤
1. DELETE
2. FORMAT
3. DEFAULT
4. SYS I NFO
5. MEM I NFO
6. POWER OFF
SYSTEM
SYS INF O
F/W VE RSION
VER 1 .0. 0K
➤➤
1. DELETE
2. FORMAT
3. DEFAULT
4. SYS I NFO
5. MEM I NFO
6. POWER OFF
SYSTEM
1. NORMAL
2. LOW L EVEL
3. RETURN
FORMAT
NORMAL
Confirm?
➤➤
1. DELETE
2. FORMAT
3. DEFAULT
4. SYS I NFO
5. MEM I NFO
6. POWER OFF
SYSTEM
1. NORMAL
2. LOW L EVEL
3. RETURN
SRSWOW
LOW LEV EL
Confirm?
➤➤
1. DELETE
2. FORMAT
3. DEFAULT
4. SYS INFO
5. MEM INFO
6. POWER OFF
SYSTEM
EErraassee
Confirm?
● SYS INFO: To check the MP3 device firmware version.
✓
YES NO
✓
YES NO
✓
YES NO
✓
YES NO
Select
M
o
v
e
SYSTEM
● MEM INFO: Display information such as the total memory
size, memory in use, and memory available for
use in the player.
• USED: Memory in use
• REMAIN: Available memory remaining for use
● POWER OFF: The system is automatically powered off
after a predefined time in the Pause state.
You can define the time for Auto Power
Off from 1 to 30 minutes.
■
POWER DOWN:
In the pause state, if certain time is being
passed, the power will be off automatically.
■
POWER SAVE:
In the pause state, if certain time is being
passed, it is minimized the consumtion of current
without being powered off , and it is immediatly
operated when it receive key-in or call signal.
➤
1. DELETE
2. FORMAT
3. DEFAULT
4. SYS I NFO
5. MEM I NFO
6. POWER OFF
SYSTEM
MEM INF O
TOTAL
256MB
USED
110MB
REMAIN
141MB
➤➤
1. DELETE
2. FORMAT
3. DEFAULT
4. SYS I NFO
5. MEM I NFO
6. POWER OFF
SYSTEM
POWER O FF
Select
M
o
v
e
WAIT TI ME
2. POW ER DOWN
3. POW ER SAVE
WAIT TI ME
14
14 Min.
SF2000B-VMP407(eng) 9/2/04 11:37 AM Page 22

How to Use MENU
25
CONTROL
● LANGUAGE: Select the relevant language for correct display
of ID3TAG information or lyrics.
Select
M
o
v
e
CONTROL
Select
M
o
v
e
➤
1. BLUETOO TH
2. LANGUAG E
3. PLAY MODE
4. PROGRAM
5. RECORDI NG
6. SLEEP TIME
CONTROL
AFRIKAANS
2. ALBANIA N
3. BLLGARI AN
4. CHINESE SIM
5. CHINESE TRA
6. CROATIA N
LANGUAGE
● PLAY MODE: Set the Play Mode that you want.
Select Control in the Main Menu and then
Play Mode. Next, select the Play Mode that
you want.
■
PLAY MODE
NORMAL Play each file in order in DIR once .
REPEAT Repeat files in DIR
SHUFFLE DIR Randomly repeat files in DIR once
NORMAL ALL Play all files once in order
REPEAT ALL Repeat all files
SHUFFLE ALL Randomly play all files once
REPEAT 1 Repeat one file
INTRO Play all files in DIR for 10 seconds per file
➤
1. BLUETOO TH
2. LANGUAG E
3. PLAY MODE
4. PROGRAM
5. RECORDI NG
6. SLEEP TIME
CONTROL
1. NORMAL DIR
2. REPEAT DIR
3. SHUFF DIR
4. NORMAL ALL
5. REPEAT ALL
6. SHUFF ALL
PLAY MO DE
● PROGRAM: Select and play files that you want to listen to.
• How to Set Program(File Sequence)
Press the Jog Key shortly, and the Navigation
Mode appears.
Select files that you want using the Jog Key.
Next, designate the selected files by pressing the
EQ button shortly.
• How to Play Programs in Order
Select MENU ➝ CONTROL ➝ PROGRAM by
pressing the Jog Key for a few seconds, and the
Program List is shown.
Select the files that you want and push the Jog
Key in the FF(
) direction. The files are then
played in the order specified in the Program List.
➤➤
1. BLUETOO TH
2. LANGUAG E
3. PLAY MODE
4. PROGRAM
5. RECORDI NG
6. SLEEP TIME
CONTROL
PROGRAM
● RECORDING: Set the sound quality for external device
recording, FM recording and voice recording.
■
BITRATE:
Set the sound quality as desired.
For low Bit Rates, the file sizes are small, but the
sound quality is poor. For high Bit Rates, the sound
quality is better but the file sizes are larger so that the
available recording time is reduced.
➤➤
1. BLUETOO TH
2. LANGUAG E
3. PLAY MODE
4. PROGRAM
5. RECORDI NG
6. SLEEP TIME
CONTROL
1. BITRATE
2. SYNC
3. MIC V AD
4. RETURN
RECORDING
BITRATE
64Kbps
22KHz
MPEG2
MONO
06
■
SYNC:
While in SYNC, VIODIO automatically detects pauses in
between songs during encoding (recording) and saves
each song separately.
➤➤
1. BLUETOO TH
2. LANGUAG E
3. PLAY MODE
4. PROGRAM
5. RECORDI NG
6. SLEEP TIME
CONTROL
1. BITRATE
2. SYNC
3. MIC V AD
4. RETURN
RECORDING
SYNC
Confirm?
✓
YES NO
SF2000B-VMP407(eng) 9/2/04 11:37 AM Page 24

How to Use MENU
27
CONTROL
Select
M
o
v
e
CONTROL
■
MIC VAD:
Turn the VAD function ON/OFF VAD recording saves
memory by automatically detecting voices.
➤➤
1. LANGUAG E
2. PLAY MODE
3. PROGRAM
4. RECORDI NG
5. SLEEP TIME
6. STUDY KEY
CONTROL
1. BITRATE
2. SYNC
3. MIC V AD
4. RETURN
RECORDING
MIC VAD
Confirm?
✓
YES NO
Select
M
o
v
e
● SLEEP TIME:
Set the timer to automatically turn the power off.
Define the desired time from 0 to 60 minutes.
➤➤
1. BLUETOO TH
2. LANGUAG E
3. PLAY MODE
4. PROGRAM
5. RECORDI NG
6. SLEEP TIME
CONTROL
1. WAIT TIME
2. REMAIN TIME
3. RETURN
SLEEP T IME
REMAIN TIME
➤
6. SLE EP TIME
7. STU DY KEY
8. PLA Y SPEED
9. VOL UME LIM IT
10. RA DIO CTR L
11. RET URN
CONTROL
PLAY SP EED
96%
● STUDY KEY: Move forward or back quickly for a certain
time length by pushing the Jog Key to the left
or right in a file.
Push the Jog Key to the left or right, and the
file moves forward or back according to predefined values. This function is useful for files
which need long time for recording, such as
language learning files.
❈ if set 00(Disabled), the STUDY function is
disabled.
● PLAY SPEED: Adjust the playback speed.
100%(00) is the normal speed. "-" and "+"
adjustments provide slow and fast playback.
➤
6. SLE EP TIME
7. STU DY KEY
8. PLA Y SPEED
9. VOL UME LIM IT
10. RA DIO CTR L
11. RET URN
CONTROL
STUDY K EY
130 Sec.
26
03:56
-02
● VOLUME LIMIT: It is function to set the Volume Level when
user turn on again after turn off. (It is the
function to protect hearing ability)
➤
6. SLE EP TIME
7. STU DY KEY
8. PLA Y SPEED
9. VOL UME LIM IT
10. RA DIO CTR L
11. RET URN
CONTROL
VOLUME LIMIT
24
SCAN LE VEL
04
➤
6. SLE EP TIME
7. STU DY KEY
8. PLA Y SPEED
9. VOL UME LIM IT
10. RA DIO CTR L
11. RET URN
CONTROL
RADIO C TRL
● RADIO CTRL
■
BAND WIDTH:
Select different frequency range from country to
country.
■
SCAN LEVEL:
Set the FM reception sensitivity.
➤
BAND WI DTH
1. BAN D WIDTH
2. SCA N LEVEL
3. RETU RN
1. US/ EUROPE
2. JAP ANESE
3. RETU RN
➤
6. SLE EP TIME
7. STU DY KEY
8. PLA Y SPEED
9. VOL UME LIM IT
10. RA DIO CTR L
11. RET URN
CONTROL
RADIO C TRL
➤
1. BAN D WIDTH
2. SCA N LEVEL
3. RETU RN
SF2000B-VMP407(eng) 9/2/04 11:37 AM Page 26

2928
How to Use MENU
DISPLAY
● SCROLL SPEED: Set the scrolling speed of file names
indicated in the window from 0 to 10.
● SCR SAVER: After a predefined time from the last input, a
selected logo or picture is automatically
enabled as a screen saver.
■
FILE SEL:
Select the file you want.
● CONTRAST: Adjust the brightness of the LCD.
■
WAIT TIME:
The setting values range from 0 to 30 seconds.
➤
1. CONTRAS T
2. SCR S PEED
3. SCR S AVER
4. LCD O FF
5. ADDITIO N
6. RETURN
DISPLAY
CONTRAST
09
➤
WAIT TI ME
09
➤
1. CONTRAS T
2. SCR S PEED
3. SCR S AVER
4. LCD O FF
5. ADDITIO N
6. RETURN
DISPLAY
SCROLL SPEED
05
➤
1. CONTRAS T
2. SCR S PEED
3. SCR S AVER
4. LCD O FF
5. ADDITIO N
6. RETURN
DISPLAY
SCR SAV ER
➤
1. CONTRAS T
2. SCR S PEED
3. SCR S AVER
4. LCD O FF
5. ADDITIO N
6. RETURN
DISPLAY
SCR SAV ER
Select
M
o
v
e
1. FIL E SEL
2. WAI T TIME
3. MAS K AREA
4. CLR LOGO
5. RETU RN
1. FIL E SEL
2. WAI T TIME
3. MAS K AREA
4. CLR LOGO
5. RETU RN
■
MASK AREA:
You can select entries in orange in the window while
the screen saver is enabled.
(1) Disable : Indicate the Orange color area.
(2) Blank : Not indicate the Orange color area.
(3) Music INFO :
Indicate the music number & playing time.
➤
MASK AR EA
➤
1. CONTRAS T
2. SCR S PEED
3. SCR S AVER
4. LCD O FF
5. ADDITIO N
6. RETURN
DISPLAY
SCR SAV ER
1. FIL E SEL
2. WAI T TIME
3. MAS K AREA
4. CLR LOGO
5. RETU RN
1. DISA BLE
2. BLAN K
3. MUS IC INFO
4. RETU RN
■
CLR LOGO:
Select whether to display the logo and image screen
when the power is on.
➤➤
1. CONTRAS T
2. SCR S PEED
3. SCR S AVER
4. LCD O FF
5. ADDITIO N
6. RETURN
DISPLAY
1. FIL E SEL
2. WAI T TIME
3. MAS K AREA
4. CLR LOGO
5. RETU RN
ADDITION
CLR LOG O
Confirm?
✓
YES NO
DISPLAY
● LCD OFF: The LCD is automatically turned off after a prede-
fined time to save battery life. The setting values
range from 0 to 180 seconds.
■
LYRIC DISP:
Display lyrics which is in the music file on the LCD.
For music files without lyrics, the file names are displayed.
● ADDITION: Other additional functions.
■
BLINK LED: LEDs blink during playback. With this function, you can
check the playback state even when the LCD is off.
➤➤
1. CONTRAS T
2. SCR S PEED
3. SCR S AVER
4. LCD O FF
5. ADDITIO N
6. RETURN
DISPLAY
1. BLINK LED
2. ID3 D ISP
3. LYRIC DISP
4. RETURN
ADDITION
BLINK L ED
Confirm?
➤
1. CONTRAS T
2. SCR S PEED
3. SCR S AVER
4. LCD O FF
5. ADDITIO N
6. RETURN
DISPLAY
LCD OFF
07
70 Sec .
✓
YES NO
Select
M
o
v
e
■
ID3 DISP: Display ID3TAG information for a file instead of the file name.
➤➤
1. CONTRAS T
2. SCR S PEED
3. SCR S AVER
4. LCD O FF
5. ADDITIO N
6. RETURN
DISPLAY
1. BLINK LED
2. ID3 D ISP
3. LYRIC DISP
4. RETURN
ADDITION
ID3 DIS P
Confirm?
✓
YES NO
➤➤
1. CONTRAS T
2. SCR S PEED
3. SCR S AVER
4. LCD O FF
5. ADDITIO N
6. RETURN
DISPLAY
1. BLINK LED
2. ID3 D ISP
3. LYRIC DISP
4. RETURN
ADDITION
LYRIC D ISP
Confirm?
✓
YES NO
SF2000B-VMP407(eng) 9/2/04 11:37 AM Page 28

3130
How to Use MENU How to Upgrade Firmware
SOUND
NORMAL
2. ROCK
3. JAZZ
4. CLASSIC
5. POP
6. ULTRA BASS
SOUND
● USER EQ: You can adjust the tone quality desired from bass
to treble.
Select the Band values by moving the Jog Key to
the left or right, and set the values.
● SRSWOW: 2-channel headphones or speakers can only
implement stereo sound. However, SRS sound
can express more advanced sound than stereo
sound. It emulates multi-speaker directional
sound that cannot be produced with conventional
stereo sound.
● SOUND: Select the tone quality suitable for each genre.
NORMAL, ROCK, JAZZ, CLASSICAL, POP,
ULTRA BASS
Select
M
o
v
e
➤➤
7. USER EQ
SRSWOW
9. RETURN
1. NORMAL
2. ROCK
3. JAZZ
SOUND
1. TURN ON
2. SRS
3. TRUBASS
4. FOCUS
5. RETURN
SRSWOW
SRSWOW
Confirm?
➤➤
7. USER EQ
SRSWOW
9. RETURN
1. NORMAL
2. ROCK
3. JAZZ
SOUND
1. TURN ON
2. SRS
3. TRUBASS
4. FOCUS
5. RETURN
SRSWOW
SRS
11
✓
YES NO
➤
USER EQ
8. SRSWOW
9. RETURN
1. NORMAL
2. ROCK
3. JAZZ
SOUND
■
TURN ON:
Turn SRSWOW ON/OFF.
■
SRS:
Adjust 3D sound effects.
■
TRUBASS: Emphasize the bass.
■
FOCUS:
Emphasize the sensitivity of trebles and tones.
➤➤
7. USER EQ
SRSWOW
9. RETURN
1. NORMAL
2. ROCK
3. JAZZ
SOUND
1. TURN ON
2. SRS
3. TRUBASS
4. FOCUS
5. RETURN
SRSWOW
FOCUS
12
➤➤
7. USER EQ
SRSWOW
9. RETURN
1. NORMAL
2. ROCK
3. JAZZ
SOUND
1. TURN ON
2. SRS
3. TRUBASS
4. FOCUS
5. RETURN
SRSWOW
TRUBASS
11
❈ Root Directory: The highest directory level, including all directories and files.
How to Use the Latest Functions from Firmware Upgrade
❈ Download the latest firmware revisions from the Web site and save them
in the player.
Note that firmware upgrade files need to be saved in the Root Directory.
Turn the player’s power off and restart the player, and the firmware is
automatically upgraded.
Make sure that the battery is sufficiently charged to process the upgrade.
If the power goes off during upgrading because of a low battery level, it may cause
serious damage to the product.
Note that you need to check the power level to prevent interruption during upgrade.
■ For more details on firmware upgrade, refer to the homepage.
SF2000B-VMP407(eng) 9/2/04 11:37 AM Page 30

41
Warranty
Specifications
Specifications
Audio
FM Radio
Bluetooth
Items Specifications
No. of Channels Stereo (Left and Right)
Frequency Range 20Hz ~ 20KHz
Headphone Output Left:12mW + Right:12mW (Maximum Volume)
Signal to Noise Ratio Over 90dB (Filter applied)
Frequency Range 76.0MHz ~ 108MHz (selectable)
Signal to Noise Ratio 50dB
Decoding Files MPEG 1/2/2.5 Layer3, WMA
Encoding Files MP3
Bit Rate MP3:16Kbps ~ 320Kbps, VBR (Variable Bit Rate) WMA: 32Kbps ~ 192Kbps
Tag ID3 V1 Tag, ID V2 Tag
Size (W X H X D) Approx. 31.4 X 80 X 15mm
Weight Approx 44g (including battery)
Playback Time (Music File)
Approximately 14 hours (base on 128 kbps, MP3, EQ Normal,Vol 20)
Playback Time (FM Radio) Approximately 24 hours (based on Vol 20)
Language Multilingual Support
Memory (Memory Capacity is marked on the packaging box)
USB Specification USB 1.1
Recharge Recharge using PC USB power or an adaptor; charge complete within 2~3 hours
Battery Li-Polymer Battery (550mA)
LCD 4-line 16gray Area Color OLED
Carrier Frequency 2400MHz to 2483.5MHz(USA, Europe)
Modulation Method GFSK, 1Mbps, 0.5BT Gaussian
Transmission Power Typ. 1.0 dBm
Hopping 1600hops/sec, 1MHz channel space
Rx. Sensitivity Typ. -83.0dBm
Built in Memory Flash memory (4MBit)
Operating Temperature -20 ~ 70C
Storage Temperature -40 ~ 85C
Supported Profile Headset and Handsfree
Security Level Level 3
Talking range 10m(talking available)
Files
Supported
General
Dimensions
The warranty is effective for one year.
Service Information
• VIODIO provides a product warranty as described below
by item, in accordance with the Consumer Damage
Compensation Regulations.
• If the product malfunctions, please contact your vendor for
a speedy response.
Product VIODIO MP3 Player
Mode VMP407
Purchase Date
Vendor
VIODIO MP3 Player
VMP407
Consumer’s Name
Consumer’s Address
This warranty has to be submitted in order to obtain repair.
This warranty will not be reissued, so please keep it in a safe place.
Free Service
• Free service only applies for malfunctions that occur within one year (the Warranty Period) from the date when you
purchased it.
• If you use normal products for any commercial purposes,
the warranty period is reduced to six months.
1. This product is manufactured using strict quality manage-
ment and inspection procedures.
2. If the product malfunctions during normal use, your vendor or the head office service center will provide free service during the Warranty Period.
Charged Service Conditions:
• If the product is not damaged
If you request a service and the product turns out not to
be damaged, you will be charged for our costs. Therefore
please read the user manual carefully.
• If the product is damaged as a result of consumer error
• If the product is damaged as a result of consumer negli-
gence or unauthorized repair or alteration.
• If the product is damaged as a result of the use of an
incor-rect power rating
EG) if excessive or insufficient voltage (outside our specifica-tion range) is used.
• If the product is damaged by being dropped
• If the product is damaged as a result of the use of unau-
tho-rized accessories or optional extras
Other Causes
• If a product is damaged as a result of natural calamity
(fire, salt water, water flood)
• When the normal lifespan of consumable items has
expired (battery, power supplies, adapter, etc)
Therefore please keep the warranty together with the user
manual in a safe place.
SF2000B-VMP407(eng) 9/2/04 11:37 AM Page 40
 Loading...