


• • • • • •
POV.1 User Manual
•
•
•
1
•
•
•

Copyright © 2007, V.I.O., Inc. All rights reserved.
POV.1, POV Manager, V.I.O. and the V.I.O. logo are trademarks of V.I.O., Inc. All other product and brand names may be
trademarks or registered trademarks of their respective owners.
•
•
•
2
•
•
•

Contents
• • • • • •
Introduction to the POV.1. . . . . . . . . . . . . . . . . . . . . . . . . . . . . . . . . . . . . . . . . . . . . . . . . . . . . . . . . . 7
What’s in the Box . . . . . . . . . . . . . . . . . . . . . . . . . . . . . . . . . . . . . . . . . . . . . 9
Overview of the User Manual . . . . . . . . . . . . . . . . . . . . . . . . . . . . . . . . . . . 11
Overview of Shoot, Tag, Edit, and Share . . . . . . . . . . . . . . . . . . . . . . . . . . 11
POV.1 Recorder. . . . . . . . . . . . . . . . . . . . . . . . . . . . . . . . . . . . . . . . . . . . . . . . . . . . . . . . . . . . . . . . . 13
Setting up the POV.1. . . . . . . . . . . . . . . . . . . . . . . . . . . . . . . . . . . . . . . . . . 13
Protecting the POV.1 Recorder Display. . . . . . . . . . . . . . . . . . . . . . . . 13
Connecting the Camera Head to the POV.1 Recorder . . . . . . . . . . . . . 14
Installing the Batteries . . . . . . . . . . . . . . . . . . . . . . . . . . . . . . . . . . . . . 15
Installing the SD Card . . . . . . . . . . . . . . . . . . . . . . . . . . . . . . . . . . . . . 17
Powering the POV.1 . . . . . . . . . . . . . . . . . . . . . . . . . . . . . . . . . . . . . . . 20
Powering the Remote Control . . . . . . . . . . . . . . . . . . . . . . . . . . . . . . . 21
Using the POV.1 . . . . . . . . . . . . . . . . . . . . . . . . . . . . . . . . . . . . . . . . . . . . . 22
Recording Video with the POV.1 . . . . . . . . . . . . . . . . . . . . . . . . . . . . . . . . 23
Clip Recording vs. Loop Recording. . . . . . . . . . . . . . . . . . . . . . . . . . . 24
Recording Quality and Resolution . . . . . . . . . . . . . . . . . . . . . . . . . . . . 24
The Video Recording Display Screen . . . . . . . . . . . . . . . . . . . . . . . . . 25
Recording in Clip Mode . . . . . . . . . . . . . . . . . . . . . . . . . . . . . . . . . . . . 26
Recording in Loop Mode . . . . . . . . . . . . . . . . . . . . . . . . . . . . . . . . . . . 27
Working with SD Memory Cards. . . . . . . . . . . . . . . . . . . . . . . . . . . . . 28
Playing Video . . . . . . . . . . . . . . . . . . . . . . . . . . . . . . . . . . . . . . . . . . . . . . . 30
Connecting the POV.1 to a TV or Other Video Device. . . . . . . . . . . . 31
Settings . . . . . . . . . . . . . . . . . . . . . . . . . . . . . . . . . . . . . . . . . . . . . . . . . . . . 33
Mounting the Camera Head. . . . . . . . . . . . . . . . . . . . . . . . . . . . . . . . . . . . . 35
C-clamp mount . . . . . . . . . . . . . . . . . . . . . . . . . . . . . . . . . . . . . . . . . . . 35
•
•
•
3
•
•
•

Base mounts . . . . . . . . . . . . . . . . . . . . . . . . . . . . . . . . . . . . . . . . . . . . . 36
Tips for Mounting the POV.1 . . . . . . . . . . . . . . . . . . . . . . . . . . . . . . . . . . . 39
Optional Mounting Accessories . . . . . . . . . . . . . . . . . . . . . . . . . . . . . . 41
Mounting the POV.1 Recorder . . . . . . . . . . . . . . . . . . . . . . . . . . . . . . . . . . 43
Mounting the Wireless Remote Control . . . . . . . . . . . . . . . . . . . . . . . . . . . 44
Changing the Remote I.D. Channel. . . . . . . . . . . . . . . . . . . . . . . . . . . . . . . 44
Connecting the POV.1 to a Computer. . . . . . . . . . . . . . . . . . . . . . . . . . . . . 47
Connecting to a PC. . . . . . . . . . . . . . . . . . . . . . . . . . . . . . . . . . . . . . . . 47
Connecting to a Mac. . . . . . . . . . . . . . . . . . . . . . . . . . . . . . . . . . . . . . . 48
POV Manager. . . . . . . . . . . . . . . . . . . . . . . . . . . . . . . . . . . . . . . . . . . . . . . . . . . . . . . . . . . . . . . . . . . 49
Getting Started. . . . . . . . . . . . . . . . . . . . . . . . . . . . . . . . . . . . . . . . . . . . . . . 49
System Requirements . . . . . . . . . . . . . . . . . . . . . . . . . . . . . . . . . . . . . . 49
Software Overview. . . . . . . . . . . . . . . . . . . . . . . . . . . . . . . . . . . . . . . . 50
Installing the POV Manager Software . . . . . . . . . . . . . . . . . . . . . . . . . . . . 50
Connecting the POV.1 to the Computer. . . . . . . . . . . . . . . . . . . . . . . . 51
Creating a User Profile . . . . . . . . . . . . . . . . . . . . . . . . . . . . . . . . . . . . . 52
Understanding the POV Manager Interface . . . . . . . . . . . . . . . . . . . . . . . . 54
About the Buttons. . . . . . . . . . . . . . . . . . . . . . . . . . . . . . . . . . . . . . . . . 54
About the Panes . . . . . . . . . . . . . . . . . . . . . . . . . . . . . . . . . . . . . . . . . . 54
List Pane . . . . . . . . . . . . . . . . . . . . . . . . . . . . . . . . . . . . . . . . . . . . . . . . 55
View Pane. . . . . . . . . . . . . . . . . . . . . . . . . . . . . . . . . . . . . . . . . . . . . . . 55
Storyboard Pane . . . . . . . . . . . . . . . . . . . . . . . . . . . . . . . . . . . . . . . . . . 56
Using the POV Manager . . . . . . . . . . . . . . . . . . . . . . . . . . . . . . . . . . . . . . . 56
•
•
•
4
Contents
•
•
•
Managing your Videos . . . . . . . . . . . . . . . . . . . . . . . . . . . . . . . . . . . . . . . . 57
POV.1 . . . . . . . . . . . . . . . . . . . . . . . . . . . . . . . . . . . . . . . . . . . . . . . . . . 57
Copying Videos to the POV.1 . . . . . . . . . . . . . . . . . . . . . . . . . . . . . . . 57
Copying Videos to the POV Library . . . . . . . . . . . . . . . . . . . . . . . . . . 58
Deleting Videos . . . . . . . . . . . . . . . . . . . . . . . . . . . . . . . . . . . . . . . . . . 58
Playing Videos. . . . . . . . . . . . . . . . . . . . . . . . . . . . . . . . . . . . . . . . . . . . . . . 58
Editing Videos. . . . . . . . . . . . . . . . . . . . . . . . . . . . . . . . . . . . . . . . . . . . . . . 59
Extracting Clips . . . . . . . . . . . . . . . . . . . . . . . . . . . . . . . . . . . . . . . . . . 59
Arranging Clip Sequence . . . . . . . . . . . . . . . . . . . . . . . . . . . . . . . . . . . 61
Deleting Clips. . . . . . . . . . . . . . . . . . . . . . . . . . . . . . . . . . . . . . . . . . . . 61
Previewing Videos . . . . . . . . . . . . . . . . . . . . . . . . . . . . . . . . . . . . . . . . 62
Saving Videos. . . . . . . . . . . . . . . . . . . . . . . . . . . . . . . . . . . . . . . . . . . . 62

Sharing Videos . . . . . . . . . . . . . . . . . . . . . . . . . . . . . . . . . . . . . . . . . . . . . . 63
FCC Compliance . . . . . . . . . . . . . . . . . . . . . . . . . . . . . . . . . . . . . . . . . . . . . 65
Limited Warranty and Disclaimer . . . . . . . . . . . . . . . . . . . . . . . . . . . . . . . . 65
Return Policy . . . . . . . . . . . . . . . . . . . . . . . . . . . . . . . . . . . . . . . . . . . . . . . . 66
Obtaining Service and Technical Assistance . . . . . . . . . . . . . . . . . . . . . . . 67
Specifications . . . . . . . . . . . . . . . . . . . . . . . . . . . . . . . . . . . . . . . . . . . . . . . . . . . . . . . . . . . . . . . . . . 68
POV.1 Hardware Specifications . . . . . . . . . . . . . . . . . . . . . . . . . . . . . . . . . 68
Index. . . . . . . . . . . . . . . . . . . . . . . . . . . . . . . . . . . . . . . . . . . . . . . . . . . . . . . . . . . . . . . . . . . . . . . . . . 71
•
•
•
5
•
•
•

•
•
•
6
Contents
•
•
•
Introduction to the POV.1
• • • • • •
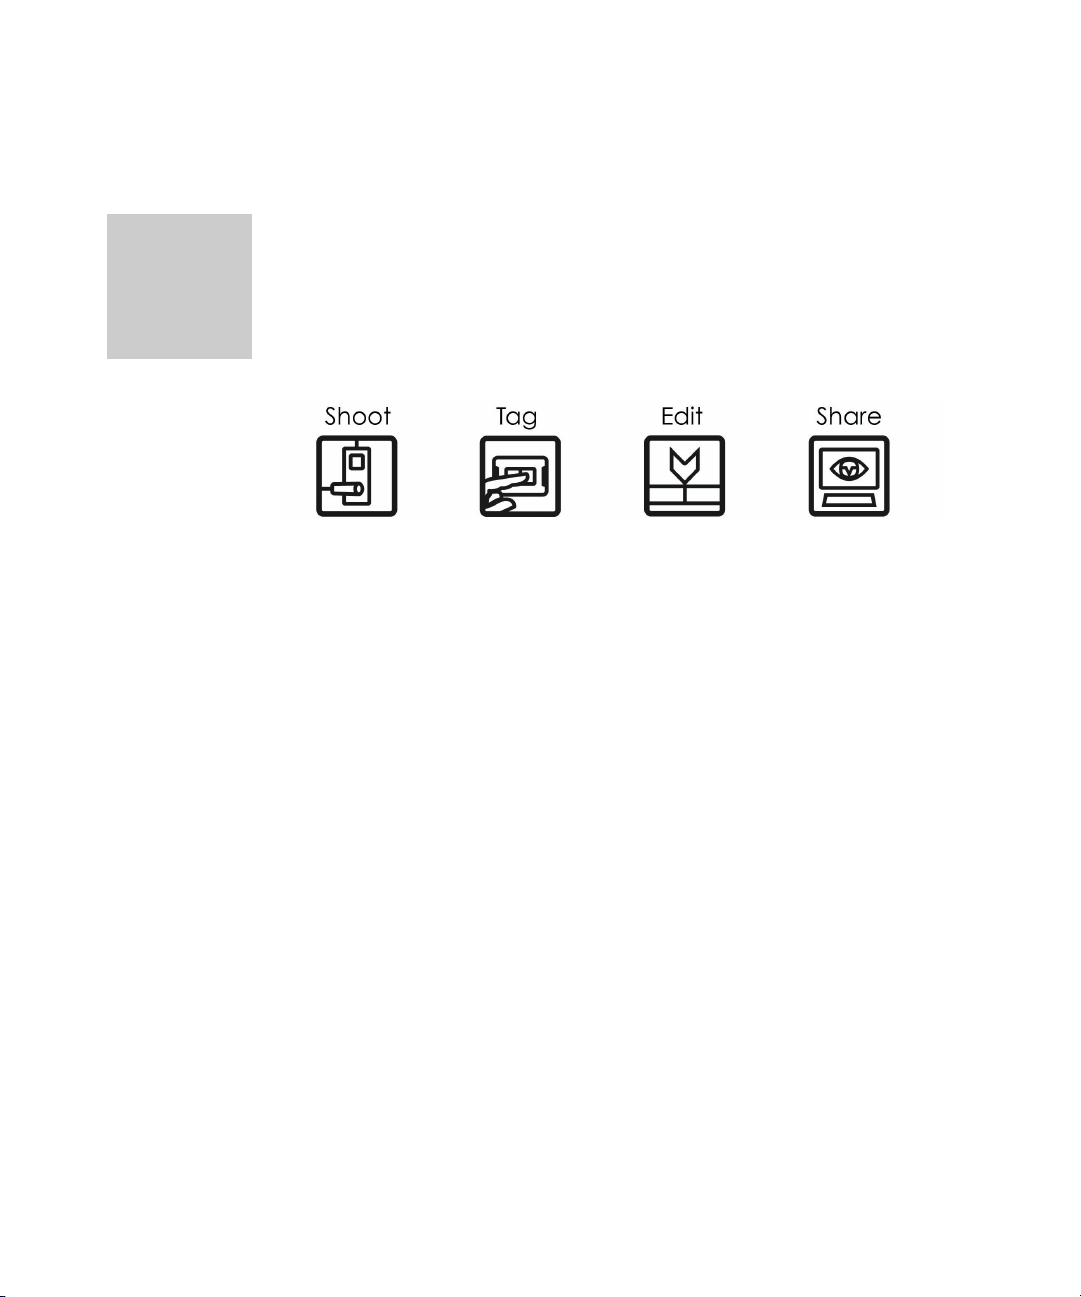
Shoot, Tag, Edit, and Share. The POV.1 makes it easy to shoot great video,
tag interesting shots while you are recording, edit your video, and then share
videos online using the POV Manager software that is included with the
POV.1.
The new POV.1 is a flexible and durable video recording and playback
system designed for the hands-free capture of video on land, sea, or in the
air, under almost any weather conditions. POV means Point Of View, and
this system is built from the ground up to allow you to record video from
almost any point of view imaginable.
POV.1 is designed to be rugged and withstand a wide range of
environmental conditions such as dust, water, and shock. The camera lens
can be mounted almost anywhere including a vehicle, boat, helmet,
headgear, headset, sports equipment, or firearm. Anywhere you need it to be
to catch the action.
The waterproof, shock-resistant recording unit can be attached to your
vehicle, worn on your belt or vest, or stored in a backpack or hydration pack.
The wireless remote control unit can be strapped to your wrist like a watch,
or mounted anywhere within reach.
•
•
•
7
•
•
•

Using the wireless remote you can tag events in the recording so that you
can quickly find them when editing the video. You can use the POV.1’s
special loop recording mode to save individual clips of a pre-set length to
maximize the amount of video you can save on each SD card.
The POV.1 sets a new standard for Point Of View video recording. It can
record DVD-quality video under the most demanding environmental
conditions, it includes Windows-based editing software, and despite its
advanced features and capabilities it is easy to operate and use.
•
•
•
8
Introduction to the POV.1
•
•
•
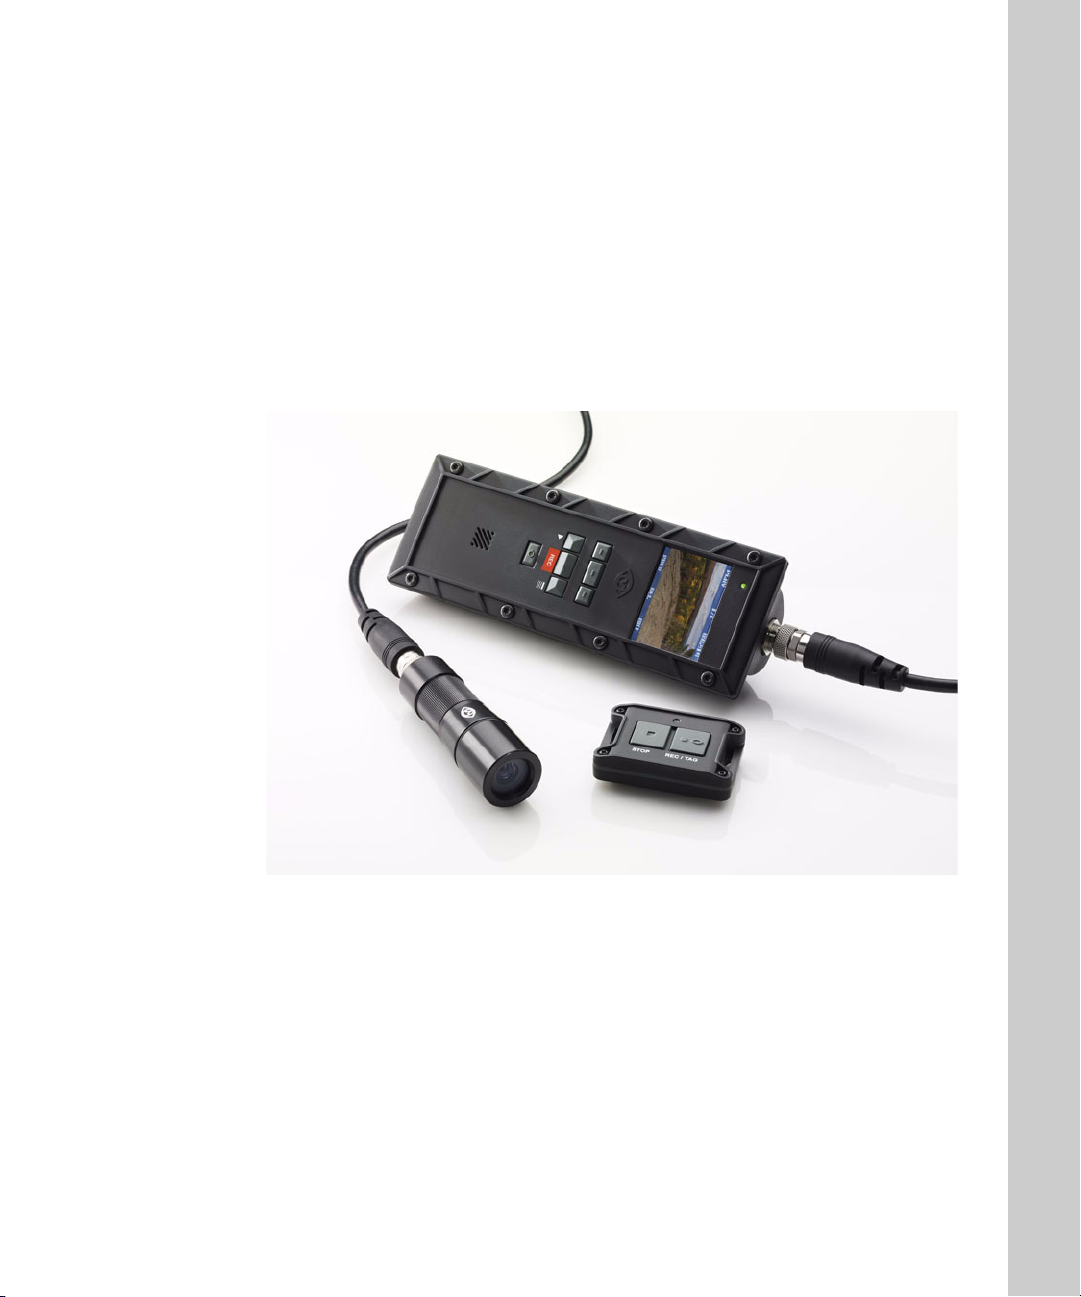
What’s in the Box
The POV.1 consists of four main components:
•
POV.1 Recorder
•
Camera head (and rubber lens cap)
•
Digital A/V cable
•
Wireless remote control
The POV.1 Recorder, Camera Head, Digital A/V Cable, and Wireless Remote
In addition the POV.1 is shipped with the following items:
•
Software CD containing the software and documentation
•
Quick-Start Guide that is printed on the case of the software CD
•
Carrying case
•
SD card (1GB)
•
Four AA batteries used to power the POV.1
What’s in the Box
•
•
•
9
•
•
•

•
USB cable for attaching the POV.1 to a computer
•
Analog A/V cable for attaching the POV.1 to a TV, VCR, or other video
device
•
Mounting accessories for the camera head
•
C-clamp mount
•
C-clamp O ring (1), size #9
•
Wide flange rail base
•
Wide flange Hook and Loop pad
•
Wide flange adhesive pad
•
Tubular rail mount
•
Hook and Loop remote control wrist band
•
Cable guide clip
•
Cable guide Hook and Loop strip
•
LCD protective cover
•
•
•
10
Introduction to the POV.1
•
•
•
Accessories included with the POV.1
Overview of the User Manual
The POV.1 User manual is divided into two main sections:
•
POV.1 Hardware Guide
Tag
. Learn about setting up the POV.1, the user interface, recording and
- This section shows you how to
playing video, mounting the camera head and working with the remote
control
•
POV Manager User Guide
Share
. Learn about installing the POV Manager software, understanding
- This section shows you how to
the interface, managing your videos, playing videos, editing videos, and
sharing your videos online.
Overview of Shoot, Tag, Edit, and Share
The POV.1 is intuitive and easy to use. Although this manual provides
detailed information about using the hardware and software, here are the
basic steps you’ll take to Shoot, Tag, Edit and Share video with the POV.1:
•
Set-up the POV.1 Recorder
•
Connect the camera head to the POV.1 Recorder using the digital A/V
cable
Shoot
Edit
and
and
•
Install the 4 AA batteries into the compartment on the back of the
POV.1
•
Install the SD Card into the compartment on the bottom of the POV.1
•
Mount the camera head
•
Use one of the mounting accessories included with the POV.1
•
Or be creative -- you can just hold onto the camera head, wedge it
somewhere, strap it down with zip ties, or even hold it in place with
duct tape.
•
Shoot video from your point of view
•
Hit the
•
Press the
POWER
RECORD
button
button on the POV.1 or the
REC/TAG
the remote control to shoot some video in Clip mode
•
Tag scenes you like using the
REC/TAG
button on the remote control
TAG
soft key on the POV.1 or the
Overview of Shoot, Tag, Edit, and Share
button on
•
•
•
11
•
•
•
•
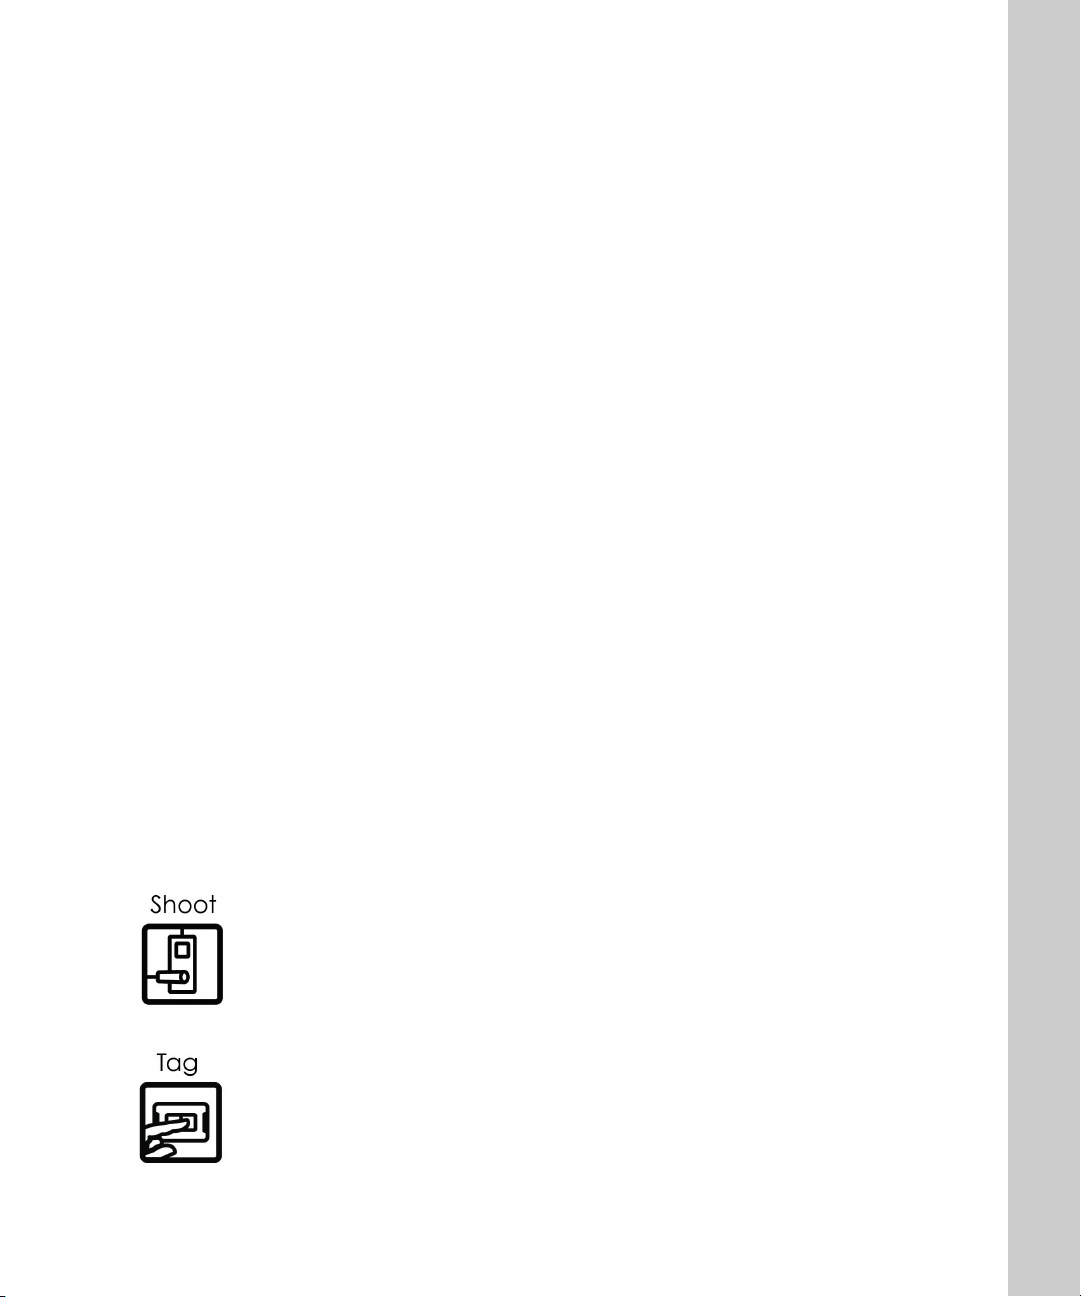
Edit your video with the POV Manager
•
Install the Windows POV Manager software on your PC
•
Hook the POV.1 up to your PC with the USB cable
•
Organize your clips and edit your video with the easy-to-use POV
Manager software
•
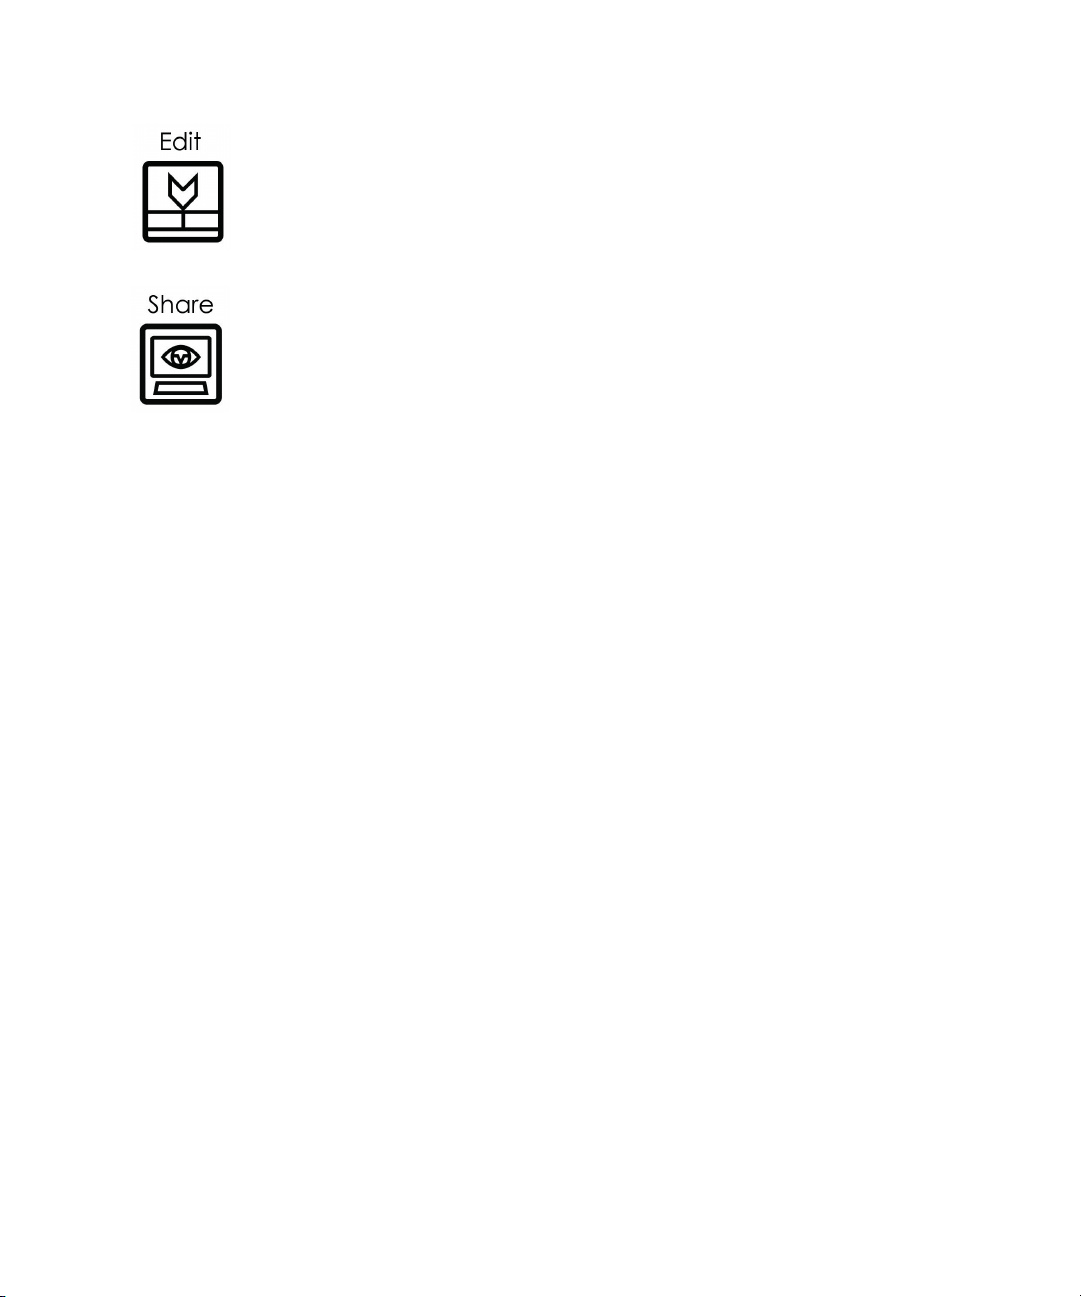
Share your video online
•
Just click
Share
to email video clips or edited video projects to
anyone you want
•
Get your videos posted to the VIO Gallery
•
•
•
12
Introduction to the POV.1
•
•
•

POV.1 Recorder
• • • • • •
The POV.1 Recorder section explains the details of using the POV.1
Recorder to Shoot and Tag your video. To find out how to Edit and Share
your video, refer to the POV Manager User Guide that appears later in this
manual.
Setting up the POV.1
Setting up the POV.1 is very straightforward. Just connect the camera head
to the POV.1 Recorder, install the batteries and SD Card, and you’re ready
to start creating video from your Point Of View.
Protecting the POV.1 Recorder Display
In order to protect the POV.1 Recorder’s LCD screen from scratches the
POV.1 comes with an LCD protective cover, which is a small plastic sheet
that is used to cover the screen.
To install the LCD protective cover:
1. The POV.1 is shipped with a plastic sheet covering the display. If this is
still on the unit remove it.
2. Make sure the LCD screen is clean and free of any dust, smudges,
fingerprints, etc.
3. Peel the paper off the back of the sheet and position the plastic sheet over
the LCD and press it down to secure it.
4. Use your finger to smooth out any air bubbles that may be trapped.
Replacement screen covers are available on our website at www.vio-
pov.com.
Setting up the POV.1
•
•
•
13
•
•
•
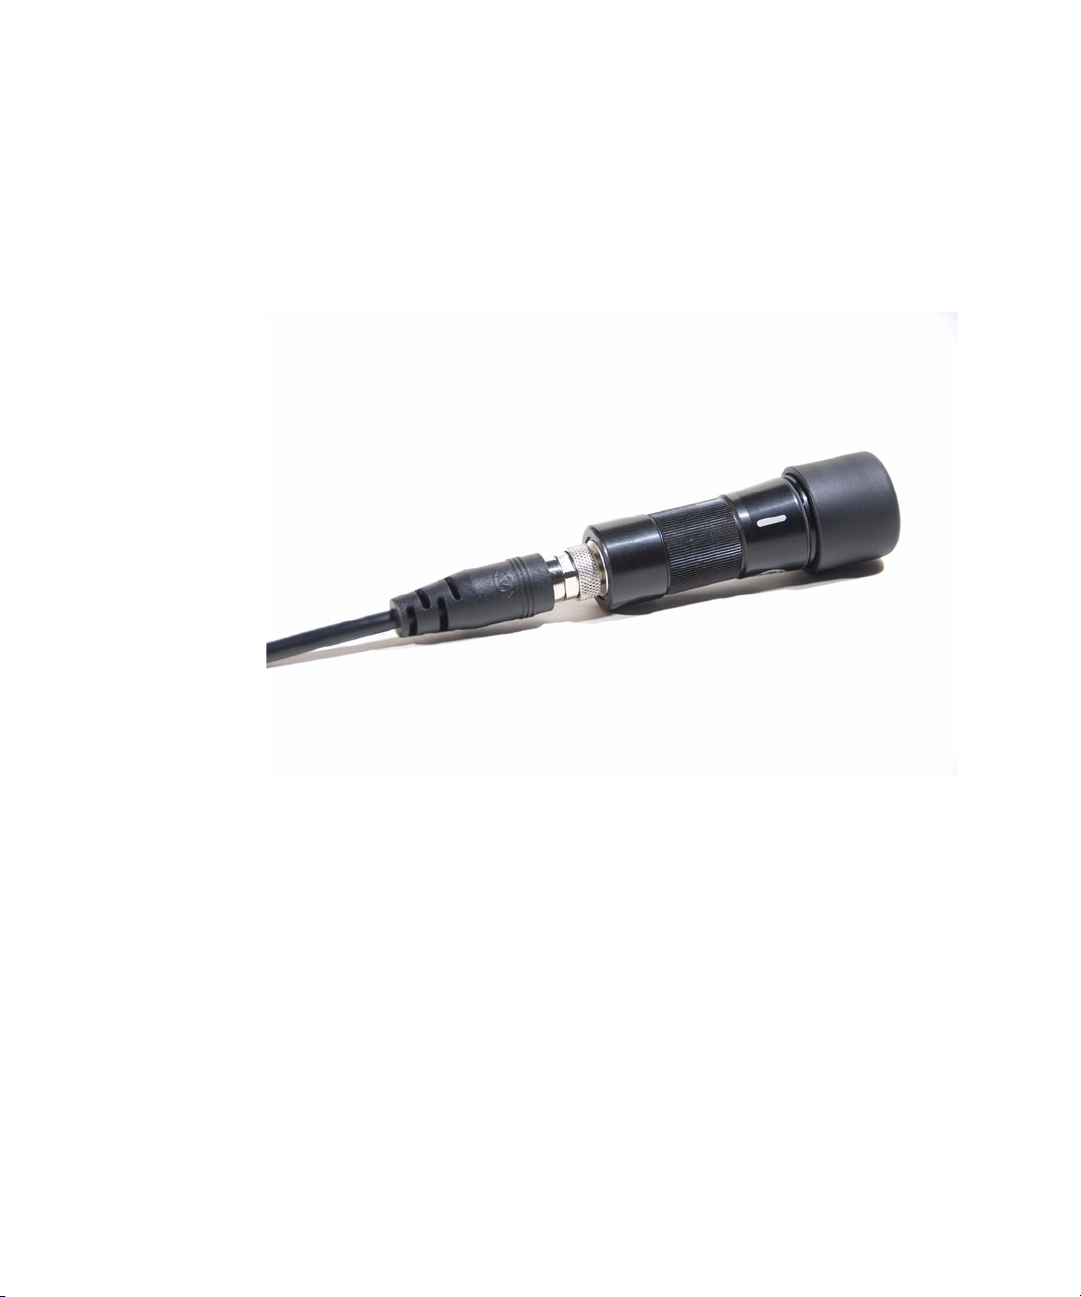
Connecting the Camera Head to the POV.1 Recorder
To start setting up the POV.1, connect the camera head to the POV.1 using
the digital A/V cable. You need to make sure to connect the camera head to
the camera end of the cable. Note that the camera end of the cable is marked
with the V.I.O. logo.
•
•
•
14
POV.1 Recorder
•
•
•
The camera end of the cable is marked with the V.I.O. logo
The digital A/V cable connector has a small notch in it so that it will only
plug in when aligned properly. Do not force the connector since doing that
may damage the connector pins. Once you plug the cable into the camera
head you then need to turn the metal ring to screw the cable in place and
secure the connection.
Now connect the other end of the cable to the connector on the top of the
POV.1. As with the camera head connection, be sure to align the notches,
plug in the connector, and then screw the connector in place.
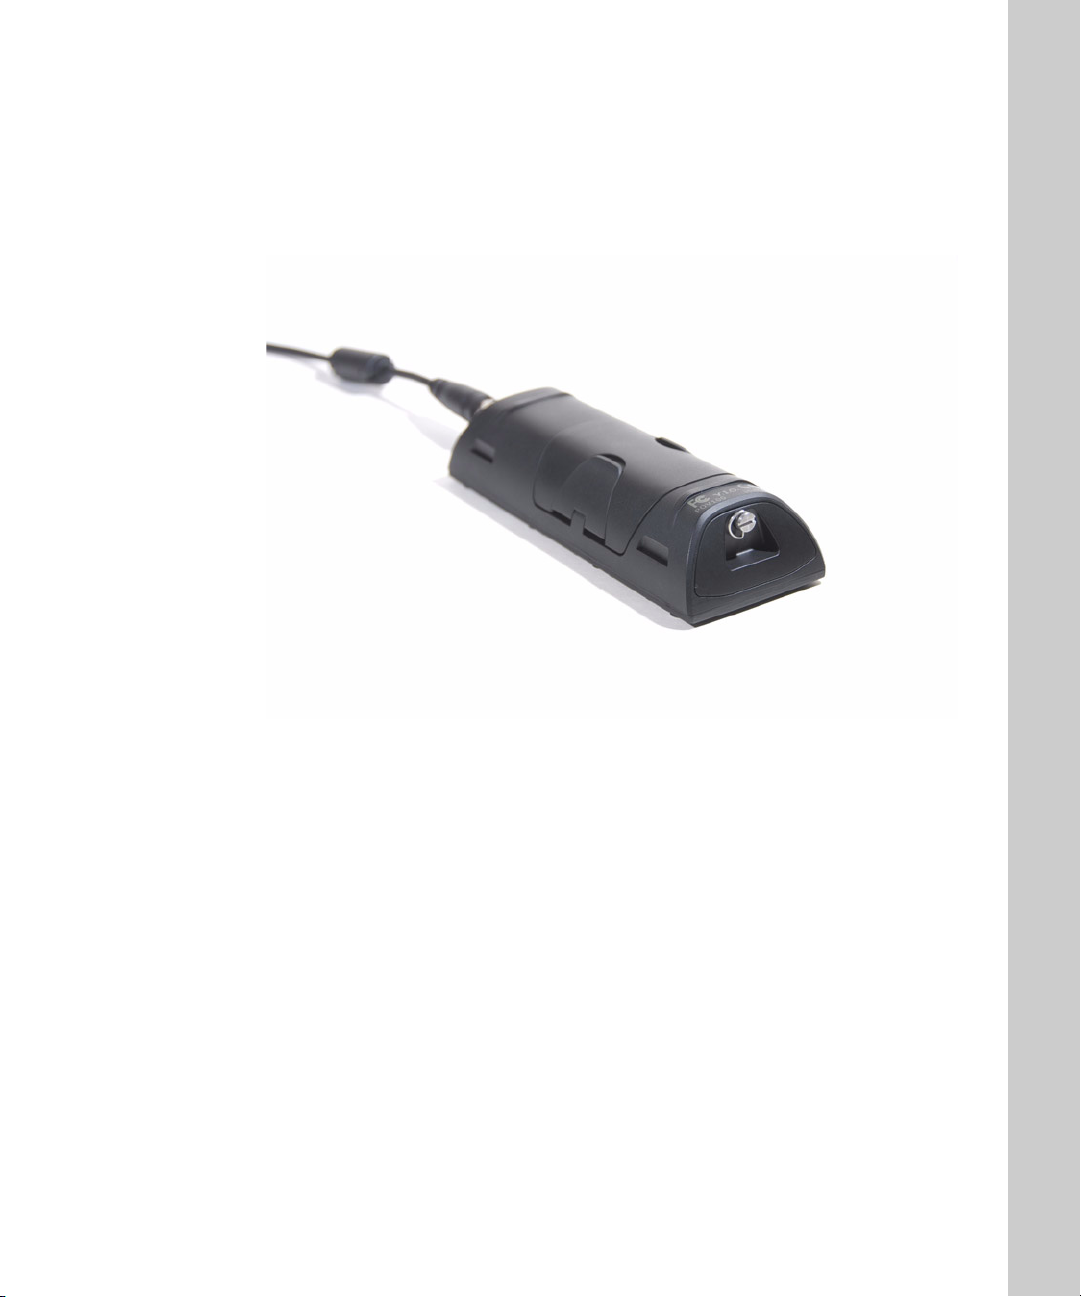
Installing the Batteries
To install the batteries start by turning the POV.1 unit over and place it face
down on a flat clean surface to avoid scratching the screen.
Back of the POV.1
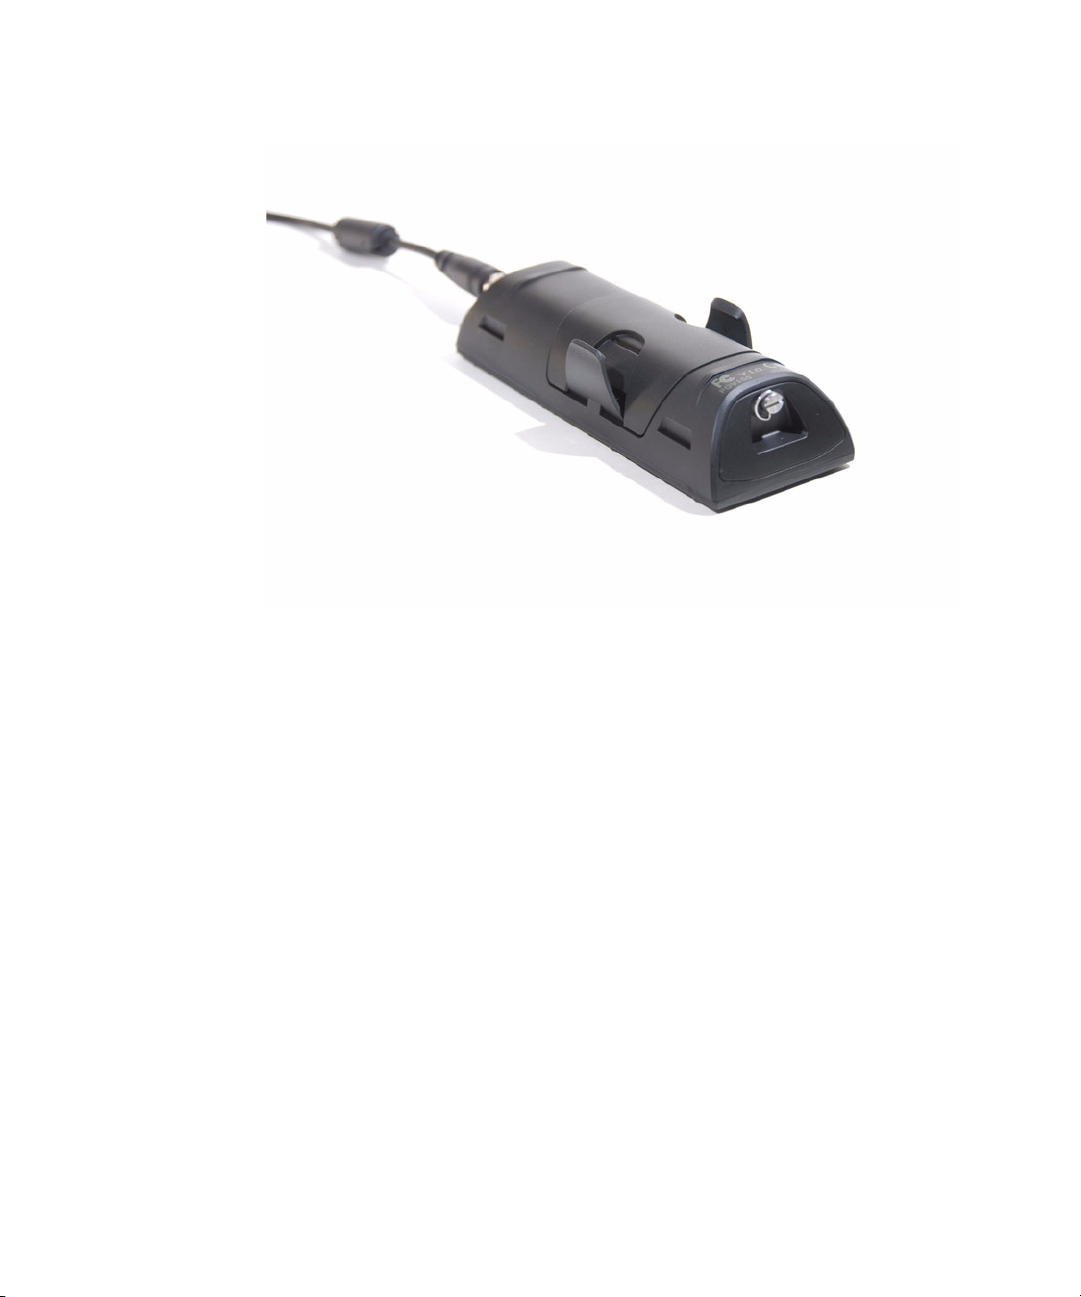
Pull the tabs on each side of the unit out until they stop. Do not force them
down any further than necessary, the tabs only need to be opened as far as is
shown in the photo below.
Setting up the POV.1
•
•
•
15
•
•
•
•
•
•
16
POV.1 Recorder
•
•
•
Back of the POV.1 with the battery compartment tabs opened
Now, remove the battery compartment cover from between the tabs. You
can lift the cover by grasping it at the top and bottom and pulling straight up,
or you can pry it gently using your fingernail or a small screwdriver. Note
that the tabs remain attached to the POV.1 when you lift the cover off.
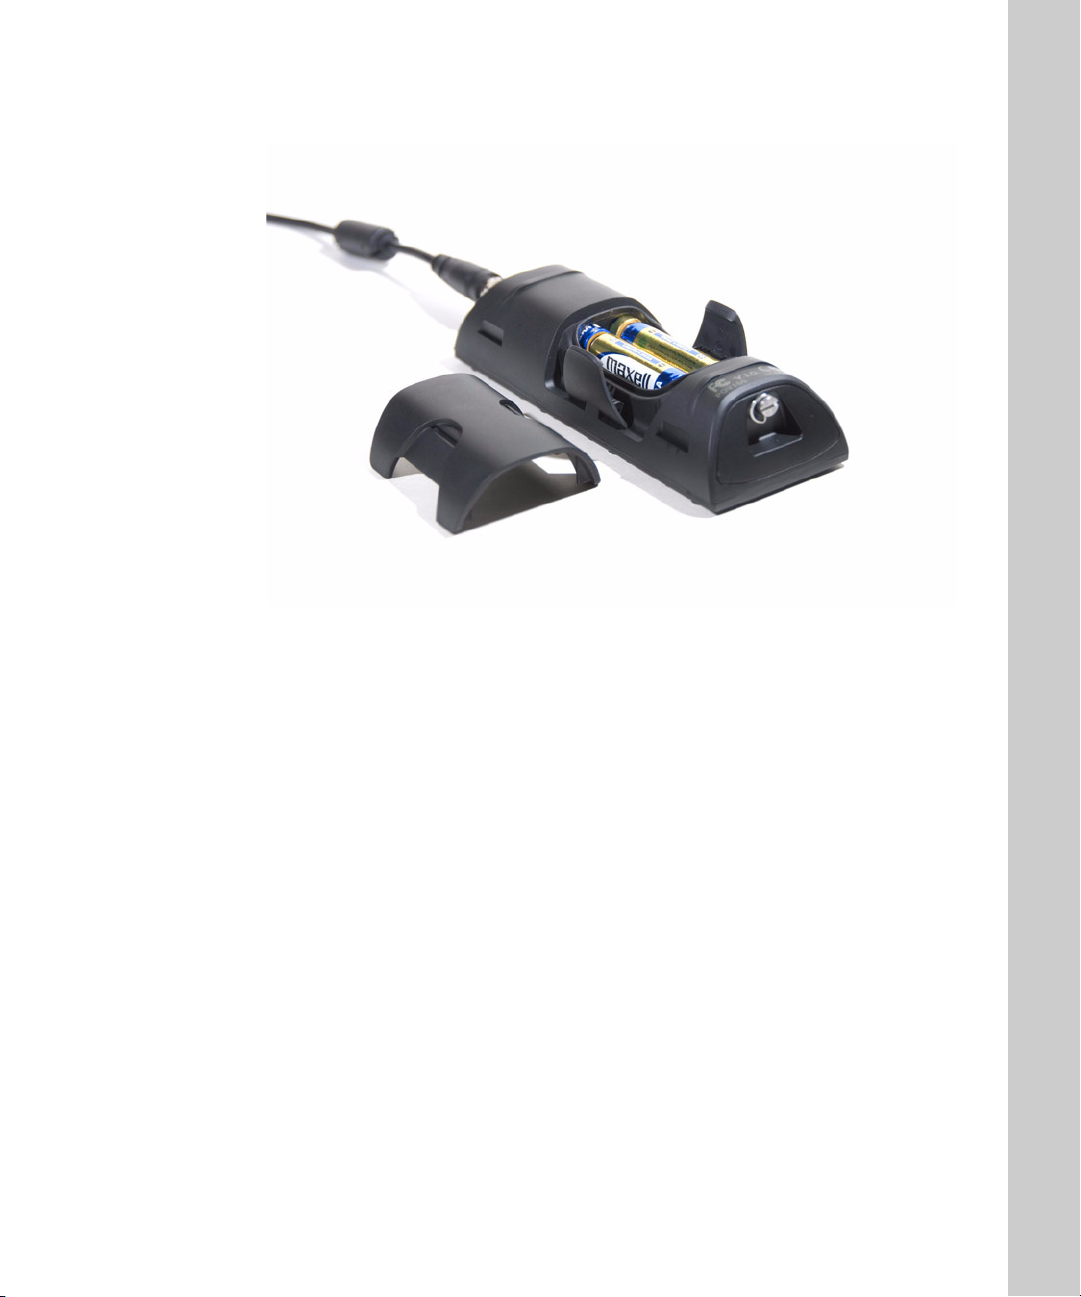
Back of the POV.1 with the battery compartment cover removed
Install 4 AA batteries according to the diagram embossed into the bottom of
the battery compartment. Replace battery cover and push the tabs back into
place.
Installing the SD Card
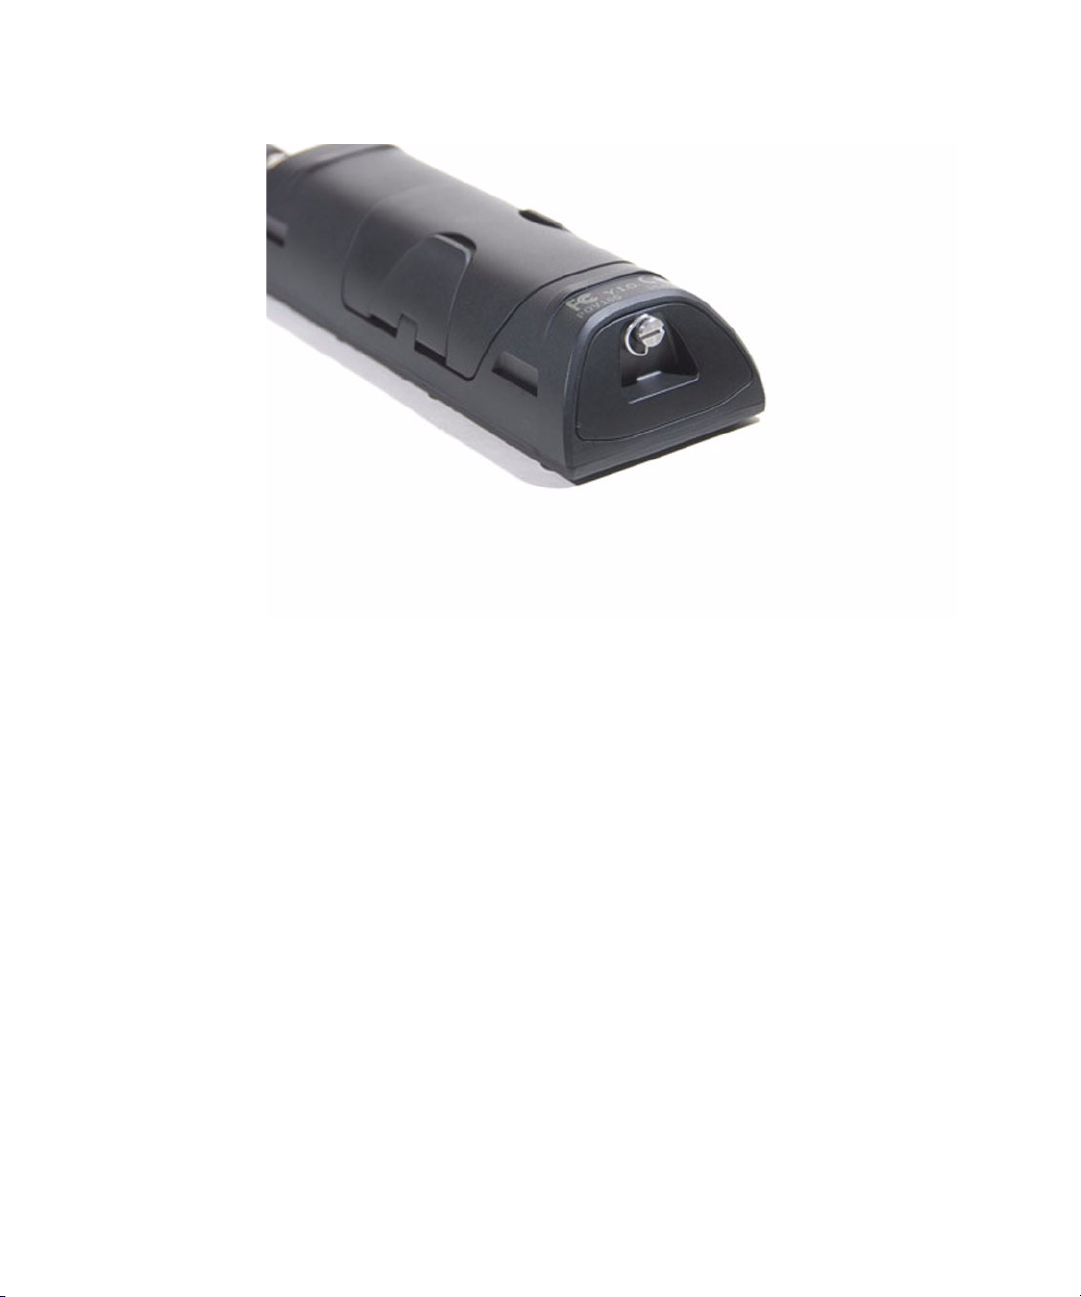
To install the SD card you need to remove the Input/Output Port cover
located at the bottom of the POV.1.
Setting up the POV.1
•
•
•
17
•
•
•
•
•
•
18
POV.1 Recorder
•
•
•
The Input/Output Port cover is located on the bottom of the POV.1
The Input/Output Port cover is attached to the bottom of the POV.1 with a
retaining screw. When the unit is shipped this screw will be loose so that the
Input/Output Port cover will be easier to remove.
Note that when the retaining screw is fully unscrewed it will be loose, but
will not come completely out of its socket.
In order to keep the POV.1 water-resistant the Input/Output Port cover fits
very tightly and you may need to use a small coin to pry it open. Be careful
to pry the cover open gently so as not to damage the cover or its waterresistant seal.
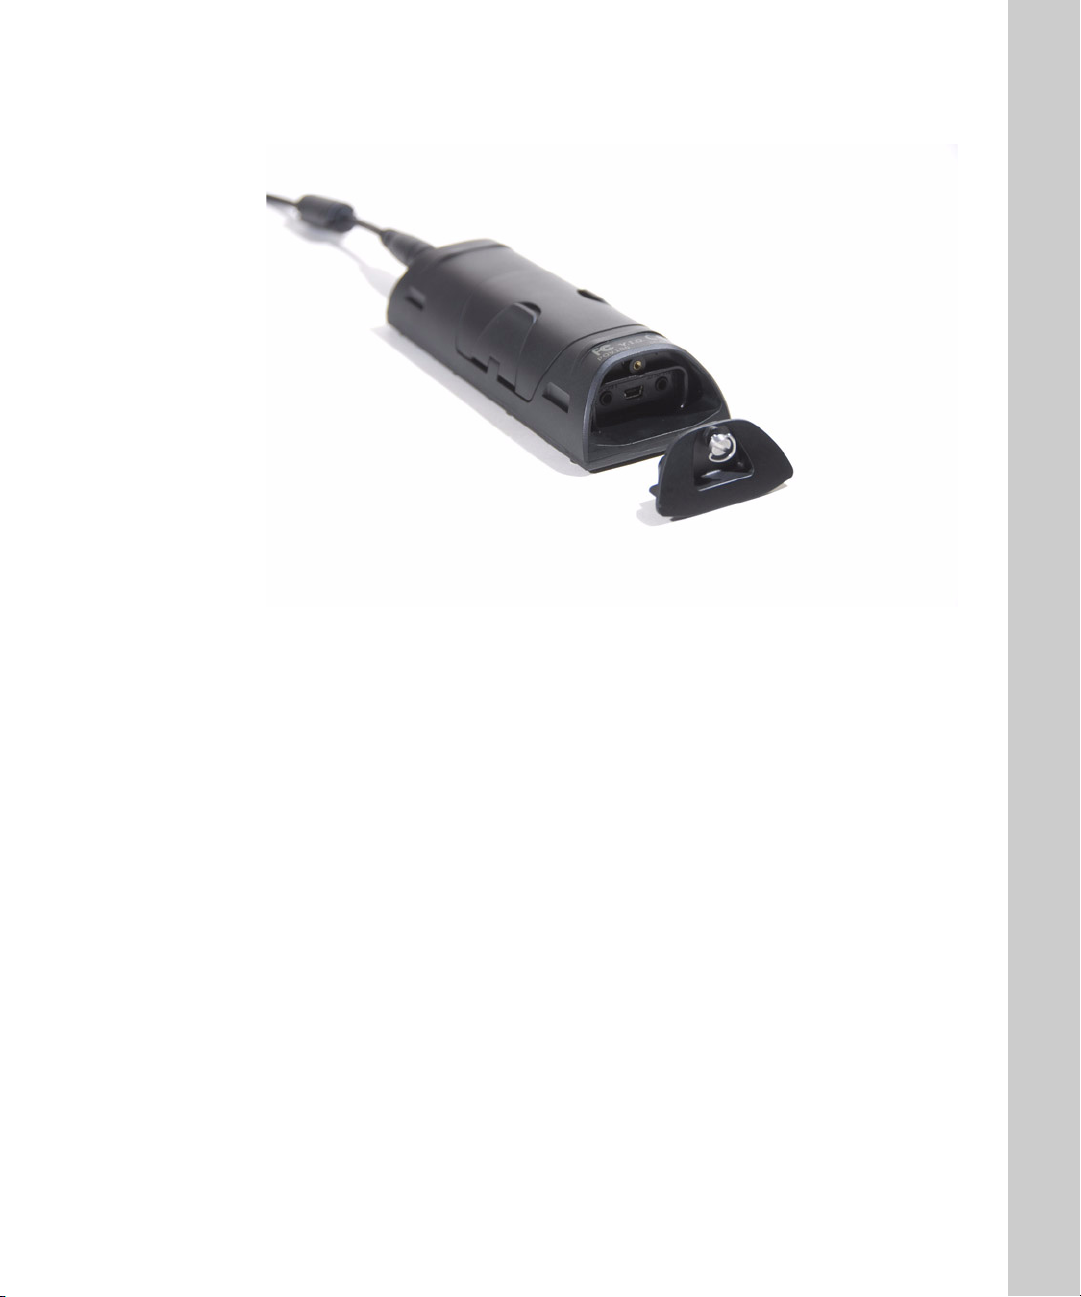
The bottom of the POV.1 with the Input/Output Port cover removed
Once the Input/Output Port cover is removed, insert the SD memory card in
the slot. You should insert the SD card oriented so that the label is facing
towards you and the small notch is in the right top corner - the notched end
of the SD card is the one you insert into the slot. When the card is fully
inserted it will click into place.
Setting up the POV.1
•
•
•
19
•
•
•
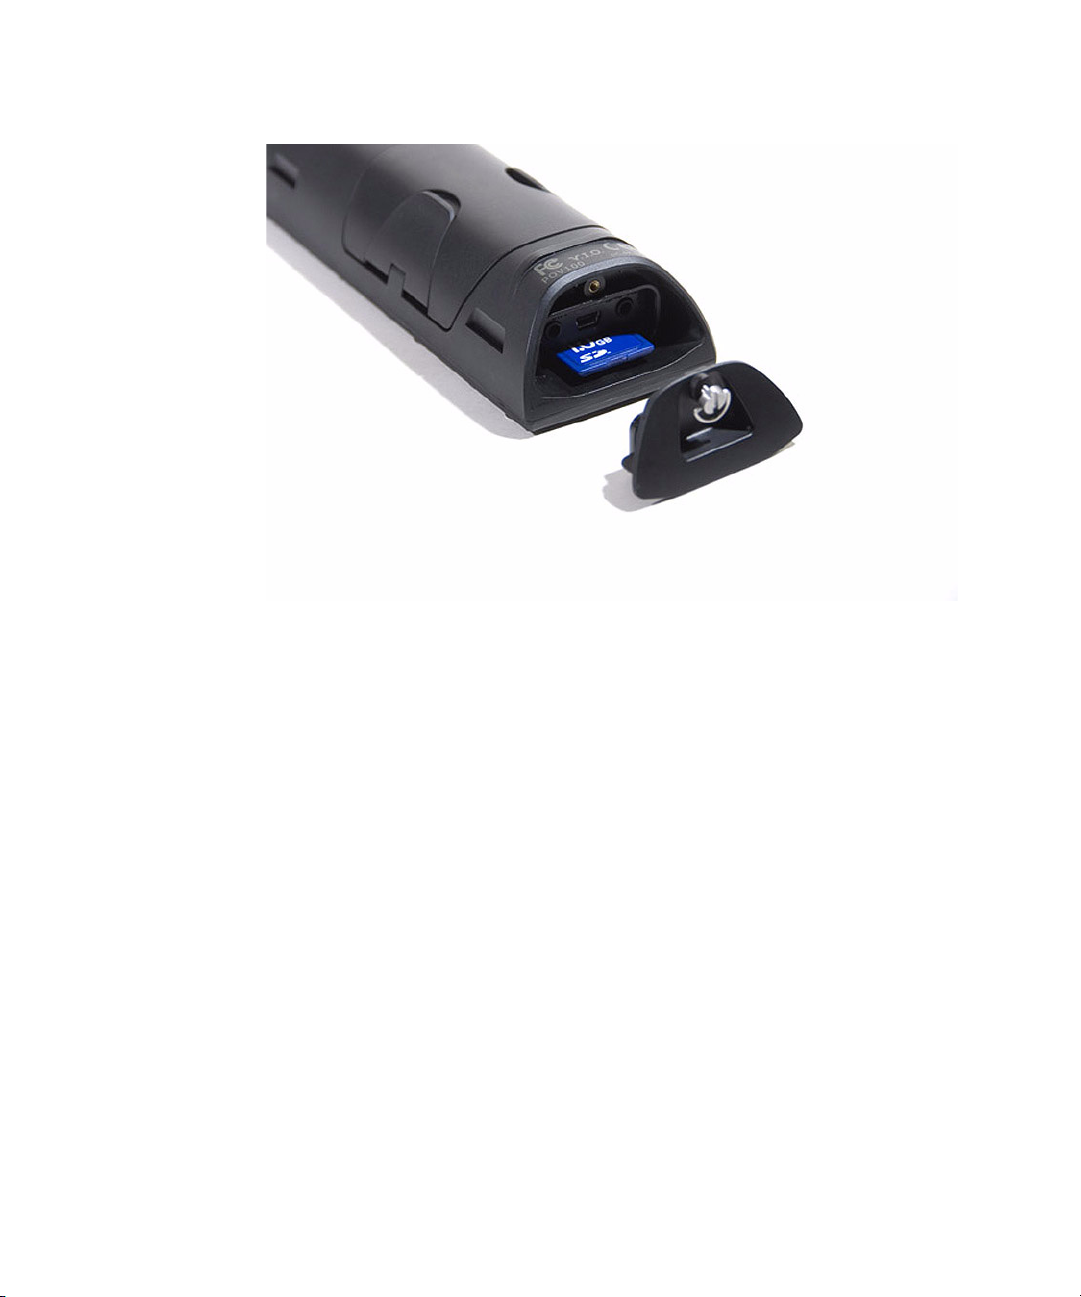
The bottom of the POV.1 with the SD card inserted
Replace the Input/Output Port cover and screw the retaining screw
clockwise until it is tight.
Your POV.1 is now ready for use.
Powering the POV.1
•
•
•
20
POV.1 Recorder
•
•
•
Press the
POWER
button to start the POV.1. The button only needs to be
pressed briefly, holding it down too long will cause the POV.1 to turn off
again.
The POV.1 is normally powered by 4 AA batteries. The POV.1 can also be
powered by the USB cable when it is connected to a computer. However,
when the POV.1 is being powered by the USB cable it is in USB mode and
can only be accessed from the computer - the controls on the unit itself are
disabled with the exception of the
POWER
button. Please note that
batteries can not be recharged from the USB power source.

AA batteries were chosen because they are the most common battery type,
and are readily available almost anywhere in the world.
The amount of recording time you can get from a set of batteries depends on
several factors:
•
the type of batteries you use
•
the internal settings of the POV.1 (such as video resolution)
•
the external environment (operating temperature can affect battery life)
On average a set of standard alkaline batteries should last about 4-5 hours
and lithium ion batteries can last up to 10 hours.
If you want to have a lower-cost and more environmentally friendly solution
you can use rechargeable batteries.
WARNING
: Do not mix old and new batteries. Do not mix alkaline,
standard (carbon zinc), lithium ion or rechargeable (nickel cadmium)
batteries. Dispose of used batteries responsibly.
Powering the Remote Control
The wireless remote control unit uses an A27 12 volt battery, which is
included with the unit and pre-installed.
If you need to replace the battery in the wireless remote control:
1. Place the remote unit on a flat surface with the buttons facing up.
2. Unscrew the four small Phillips screws in each corner and lift the cover
from the remote. Take care to protect the inside of the remote control unit
from dust and moisture while the cover is removed.
3. After changing the battery, replace the cover, tightening the four screws
uniformly to create even pressure against the seal.
Setting up the POV.1
•
•
•
21
•
•
•
Using the POV.1
Before using the POV.1 to record or play back video, you should familiarize
yourself with the layout and controls of the POV.1 main unit.
•
•
•
22
POV.1 Recorder
•
•
•

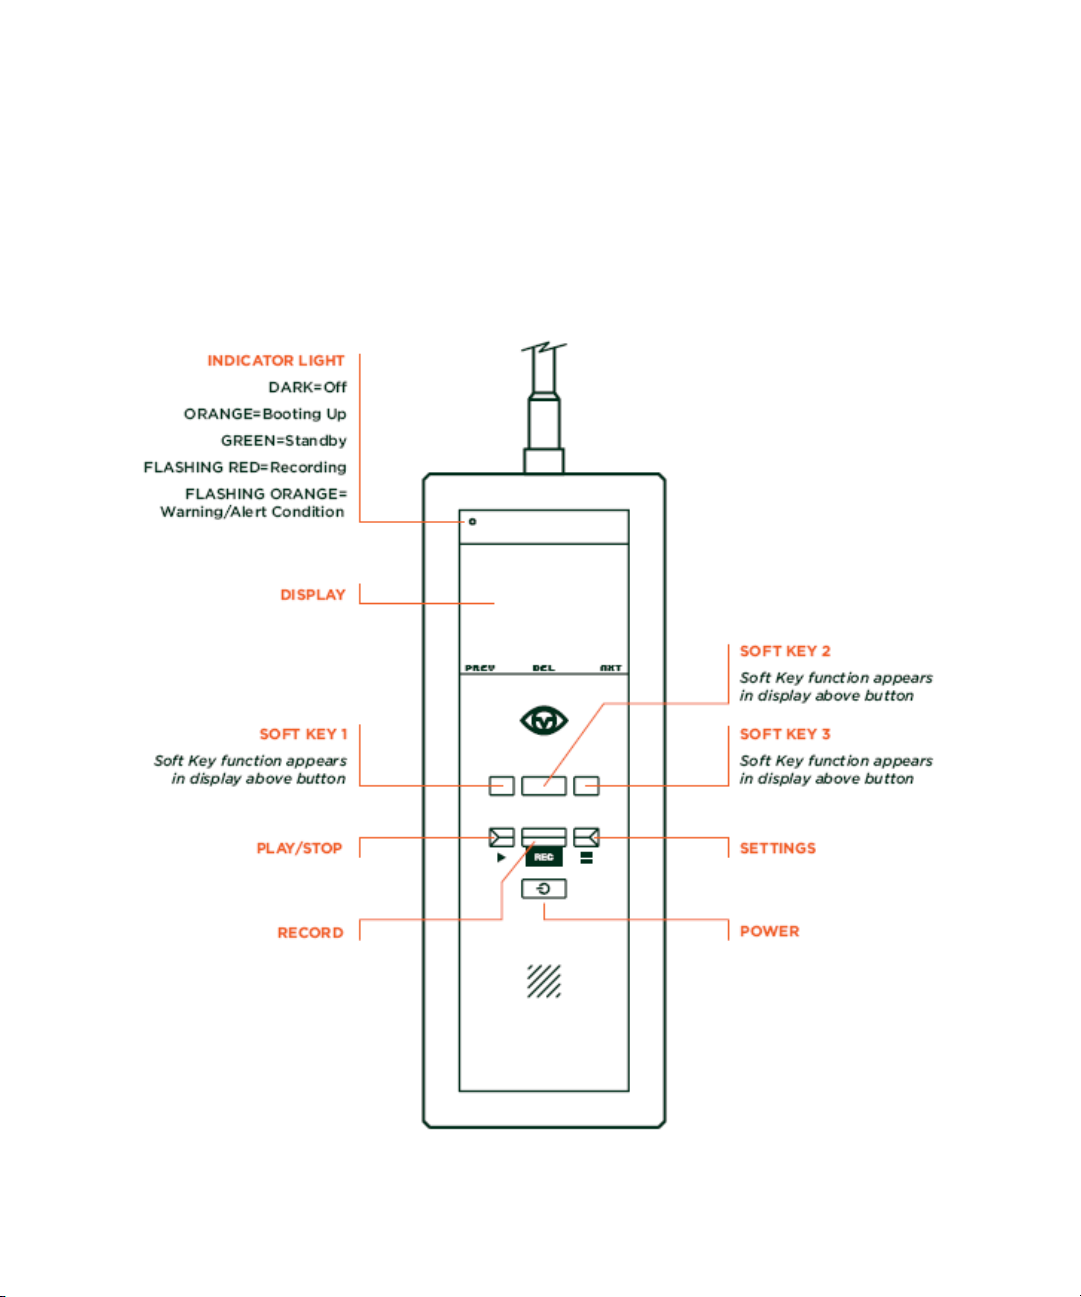
In the upper left-hand corner of the POV.1 is the
INDICATOR LIGHT
which lets you know the current status of the unit:
•
DARK
•
ORANGE
•
GREEN
•
FLASHING RED
•
FLASHING ORANGE
= Off
= Booting Up
= Standby
= Recording
= Warning/Alert Condition
At the top of the POV.1 is the LCD display. The information on the display
changes depending on the current operating mode of the POV.1.
Below the display are three
KEY
changes depending on the current mode of the POV.1. The current
function of each key is displayed above that key at the bottom of the display
area.
Below the row of
•
PLAY/STOP
SOFT KEYS
- In Play mode starts playing the currently selected video.
If a video is currently playing, pressing this button stops playback.
•
RECORD
- Starts recording of video. Pressing this button while
recording stops the recording and places the unit in Standby mode.
•
SETTINGS
- Brings up the Settings menu where you can view and
change the various settings of the POV.1
Below the control buttons is the
on and off.
Recording Video with the POV.1
The POV.1 offers a number of different recording options to suit a wide
variety of applications. You should familiarize yourself with the basic
recording modes and settings so that you can choose the recording method
that is best suited for your needs.
SOFT KEYS
. The function of each
are the three control buttons:
POWER
button. Pressing this turns the unit
SOFT
Recording Video with the POV.1
•
•
•
23
•
•
•
 Loading...