

VINYL WORKS CANADA SNAP - LOCK SLD Quick Start Manual
MODEL# SLD "SNAP - LOCK"
IN-POOL DECK LADDER
IMPORTANT INSTRUCTIONS: Read all instructions carefully & completely to become familiar with
parts, assembly, safety and proper use of this product. Failure to follow these instructions
may result in serious personal injury. SWIM RESPONSIBLY & SAFELY !
TOOLS REQUIRED: 7/16" socket, nut driver & wrench, measuring tape, Phillips (star) screwdriver,
1/8" + 1/4" drill bits & drill, pencil or marker, rubber mallet and a hole saw.
SAFETY INSTRUCTIONS & PROPER USE - ASSEMBLY & INSTALLATION
• This pool ladder has a 300 lb load capacity - one person - when properly assembled & installed
• This pool ladder is designed & intended for use with an above ground pool only and for pool
decks measuring a maximum of 60" high (from the floor of the pool to the floor of the deck)
• Your pool has shallow water - absolutely NO DIVING or NO JUMPING into the pool
• This product conforms to the latest revisions of the ANSI/APSP/ICC recommended standards
for above ground / on ground swimming pool ladders
• For entry & exit of the pool, face ladder at all times. Utilize handrails for safe climbing
• Warning: To prevent entrapment or drowning, do not swim through, behind or around ladder
• Locate ladder solidly on bottom / floor of pool and free from high traffic areas on your pool
deck. Use of a ladder pad is highly recommended to protect pool liner
• Ladder must be secured to pool deck for stability & safety as outlined in this assembly manual
• Keep all ladder parts free from obstructions to avoid possible injury. Do not secure any items to
the ladder. Such objects (eg. thermometers, play toys, ropes) may create a potential for
tripping or entrapment
• NEVER ALLOW CHILDREN TO SWIM UNATTENDED - Nothing replaces parental supervision
• Assemble & install this pool ladder as per the manufacturer’s instructions. Do not deviate from
these instructions
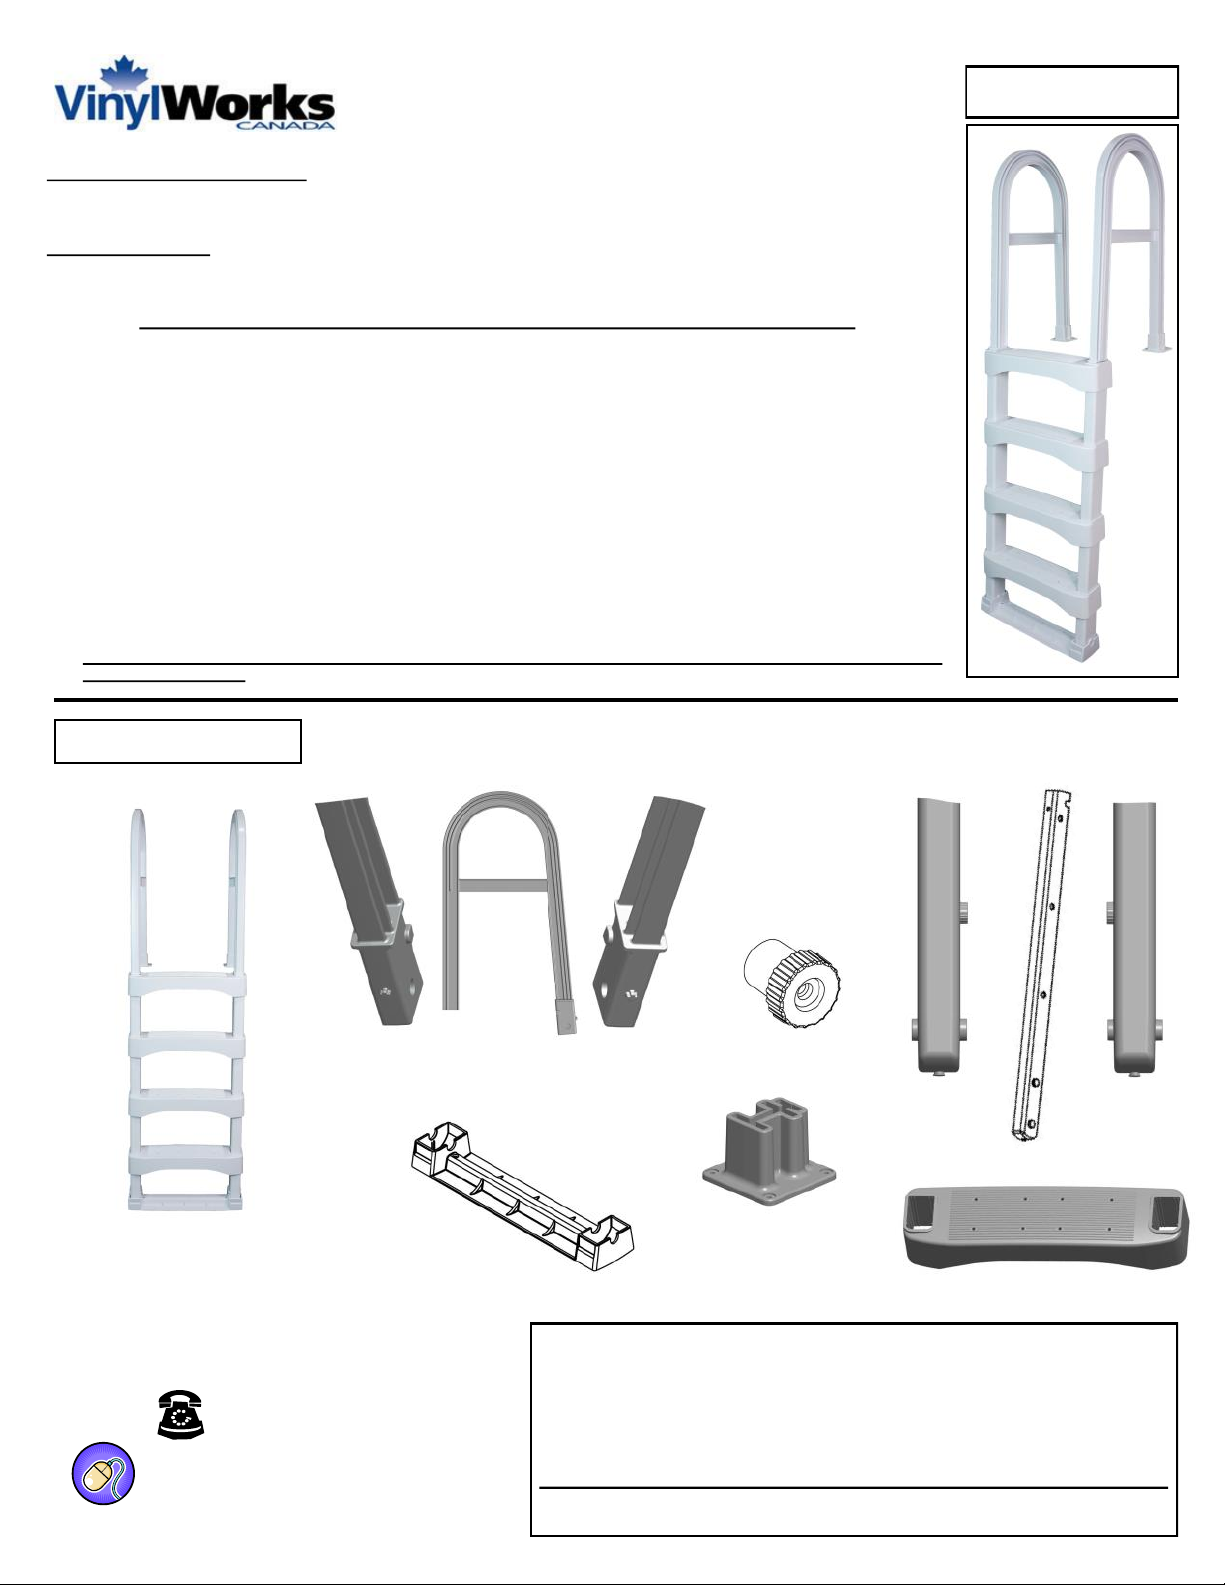
IDENTIFY PARTS
MAKE CERTAIN TO READ ALL INSTRUCTIONS CAREFULLY &
IDENTIFY ALL PARTS BEFORE STARTING THE ASSEMBLY &
INSTALLATION OF THIS POOL LADDER. FOR WARRANTY
INFORMATION PLEASE VISIT OUR WEBSITE. REVIEW SAFETY
INSTRUCTIONS BEFORE USE TO PREVENT INJURY.
FOR ALL REPLACEMENT PARTS VISIT OUR WEBSITE
WWW.VINYLWORKSCANADA.COM
877-VINYL WK
www.vinylworkscanada.com
MODEL # SLD
RIGHT
SUPPORT
LEG
LEFT
SUPPORT
LEG
Identify all parts (ladder & hardware) to make certain you have everything and that they are
free of any damage. Contact manufacturer without delay if something is missing or damaged.
Note: for part identification
and assembly, LEFT & RIGHT
are always determined as if
you are facing the ladder
about to climb.
TREADS
x 6
TREAD
LOCK PINS
BASE
TREAD
x 2
DECK
MOUNT
FLANGE
LEFT
HANDRAIL
RIGHT
HANDRAIL
x 4
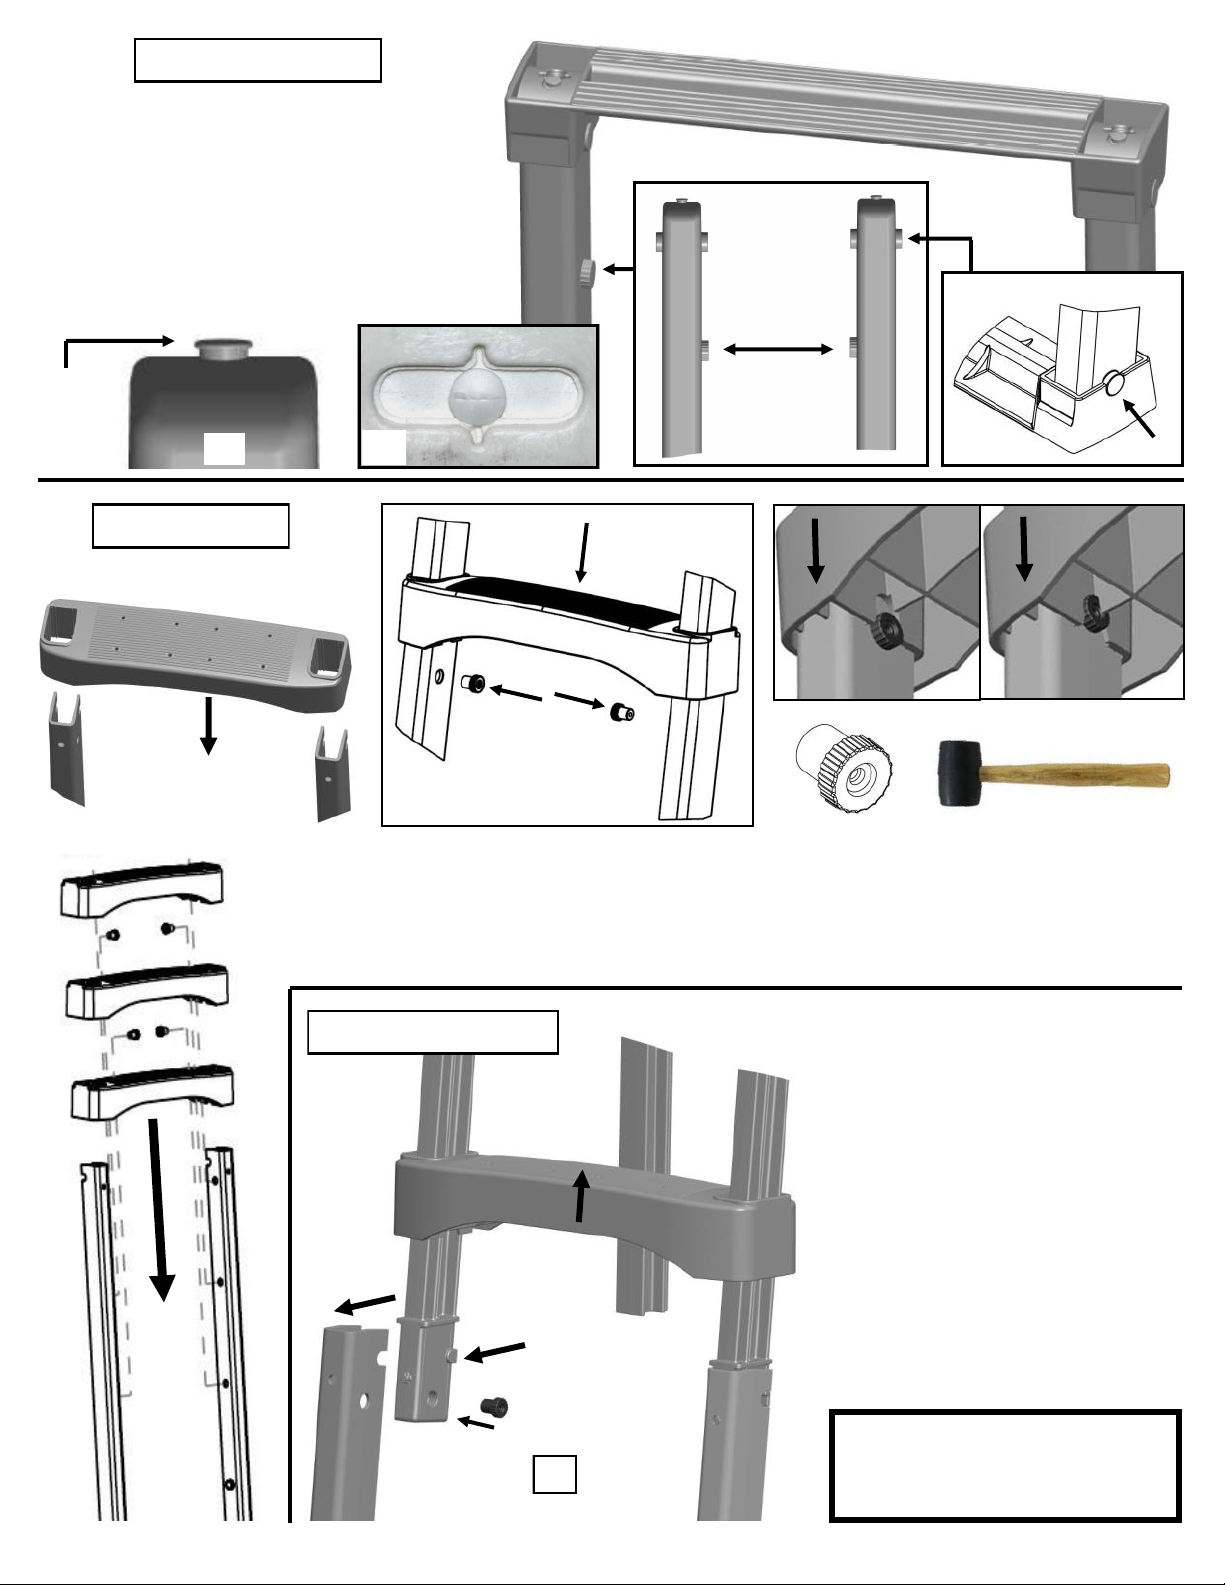
1: FIT BASE TREAD
Turn support legs upside down and fit base
tread over ends. Make certain locking pin knobs
on support legs are facing inward toward each
other (Detail 1.1). Align the button-lock tabs on
the ends on the support legs (1.2) with the
openings in the base tread (1.3). Gently tap
bottom of base tread so the button-lock tabs
protrude through and secure base tread in
place. The locking pin knobs on the support legs
will also lock base tread in place (1.4).
1.1
1.3
1.4
BUTTON
LOCK
TAB
1.2
2: FIT TREADS
Fit three (3) treads onto / over support legs from top with anti-skid surfaces facing up (Detail
2.1 & 2.2). Slide the first tread downward and snap and lock it in place over the tread lock pins
molded on the bottom of the support legs. Use a rubber mallet and gently tap top of tread so it
snaps and locks into place (2.4). For the second and third treads, fit tread lock pins entirely into
the round holes on the support legs (2.2 & 2.3) and slide treads downward. Similarly, snap and
lock treads in place (2.4)
2.1
2.3
1
3
2
2.2
2.4
3: FIT HANDRAILS
L
R
Fit last tread onto / over ends of left
(L) and right (R) handrails with the
anti-skid surface on the top and slide
upwards out of the way (Detail 3.1).
Fit the bottoms of the left and right
handrails into the top of the support
legs, from the back. Each handrail has
three knobs that fit into holes on the
support leg. Fit these tightly and
repeat for both handrails. Fit a tread
lock pin through the round holes in
both the left and right support leg and
into each handrail entirely. Similar to
above, slide the tread downward and
snap and lock the tread in place over
the tread locking pins. Double check
that all treads are securely in place
and locked over all tread lock pins.
3.1
L R
REMEMBER ~ ALWAYS SWIM
SAFELY ~ NEVER JUMP OR DIVE
INTO THE POOL ~ NOTHING
REPLACES PARENTAL SUPERVISION
 Loading...