

Page 1
Warning
The information in this document is subject to modification prior notice.
TRANSTHERM offers no guarantee on this equipment item if it is used for
any specific purpose other than that for which it was designed.
TRANSTHERM cannot be held responsible for any errors in this manual, nor
for any damage linked to or following the provision, performance or use of the
equipment item.
This document contains original information, protected by copyright. All
rights are reserved. All photocopying, reproduction, translation, whether partial
or total, are strictly prohibited, without prior written consent from
TRANSTHERM.
Contents
1
-
Description of your wine cabinet .......................................................P 2
2
-
The various TRANSTHERM cabinet models ....................................P 4
3
-
Installing your wine cabinet ...............................................................P 5
4
-
Layout and load recommendations .................................................P 6-7
5
-
Commissioning...................................................................................P 8
6
-
Temperature settings......................................................................P 9-14
- 1 temperature models.................................................................P 9
- 3 temperature models .........................................................P 10-11
- Multi-temperature models ..................................................P 12-13
- All models................................................................................P 13
- Wine service temperatures.......................................................P 14
-
Everyday wine cabinet maintenance ................................................P 15
7
Important wine information..............................................................P 16
8
-
Operating anomalies....................................................................P 17-18
9
-
bis
Alarms
9
-
GB
Specifications....................................................................................P 19
10
-
Proctecting the environnement .........................................................P 20
11 -
TRANSTHERM
24 rue Francis de Pressensé - 69628 Villeurbanne cedex - France
P1
Page 2

14
13
15
Description of your wine cabinet
1
2
3
4
16
5
6
7
8
12
11
17
P 2
1
Cabinet body
2
Hinge
Room temperature compartment
3
(3 temperature models)
4
Door
Sliding shelf (12 recesses)
5
6
Shelf slider
Hygrometer (only on
7
1 temperature models)
Thermodynamic pump opening
8
9
Maker’s label
Half tray (1 temperature and
10
multi-temperature models only)
Adjustable foot (4)
11
Chiller compartment
12
(3 temperature models)
Storage shelf
13
Rigidity Bar (Large model only)
14
Settings and control panel
15
Cellar board (solid door model,
16
excluding Mas, Cellier, Reserve)
Door guide (for glass door only)
17
9
10
Page 3

Zoom to the control display
1
Corresponds to target setting 1 (cold operation (compressor) for 1Ts; hot
operation (heater) for 3Ts / MultiTs)
2
Corresponds to target setting 2 (hot operation (heater) for 1Ts; cold ope-
ration (compressor) for 3Ts / MultiTs)
Temperature alarm indicator.
3
4
Fault indicator
5
-Turns off the audible alarm (audible warning signal).
- If it is pressed for more than 5 seconds, the programming menu
appears.
GB
6
- It allows you to change from one parameter to another.
- It allows the parameter value to be changed.
7
It displays and / or allows the set point, parameter value to be program-
med.
8
- It allows you to change from one parameter to another.
- It allows the parameter value to be changed.
P3
Page 4
The various PRESTIGE TRANSTHERM
important
cabinet models
In order to better adapt to differing requirements and usages, there are 3 types
of TRANSTHERM wine cabinets.
The 1 temperature Maturing cabinets:
MAS - MANOIR - ERMITAGE - LOFT VINTAGE
Designed to store and mature all wines, these cabinets reproduce the exact
conditions of a natural cellar (one constant temperature), irrespective of the
outside temperature (between 32 and 95 F°).
The 3 temperature Tasting Cabinets:
COTTAGE - CASTEL
In addition to the central maturing area (1 temperature), these cabinets offer
two further, specific compartments for bringing a few bottles to room temperature
(upper compartment) or for chilling them (lower compartment).
The multi-temperature Service cabinets:
MAS - CELLIER - RÉSERVE
Also referred to as "Day Cellars", these cabinets are designed, not for maturing,
but for bringing wines to the right service temperature. They are designed in
such a way as to enable 10 different temperature zones within the same cabinet
(for the larger models).
How do I identify my cabinet model?
Refer to the maker’s label on the bottom of the inner right wall of your equipment
item (see Page 3 No. 9 - serial number)
P 4
Page 5
Installing your wine cabinet
important
ecommendation
important
When unpacking your cabinet, make sure that there are no traces of impact or
deformation and that there are no surface defects.
Carefully remove all of the protections and adhesive strips from the packaging
around your wine cabinet.
Open the door and make sure all components are intact.
Release the electrical lead.
Move your cabinet to its final location.
The place you have selected for your cabinet should:
- Be unencumbered and well ventilated,
- Enable a minimum 10 cm space between the wall and the back of the cabinet,
- Be well away from any heat source,
- Not be too damp (laundry, pantry, bathroom, etc.),
- Have a solid and flat floor,
- Have a standard and accessible electricity supply (standard socket to country
standards, linked to ground with differential trip),
- It is NOT recommended to use a multi-socket or extension lead.
As a security measure, the lock works on a
double movement system. The key should
be pushed inward and turned at the same
time.
In order for you to level off your cabinet as easily as possible, it is equipped with 4 adjustable feet. However, we do recommend that you tighten
the back feet to the maximum and use the front feet to create a level (a spirit level is recommended for this operation).
GB
WAIT 48 HOURS BEFORE PLUGGING IN THE CABINET
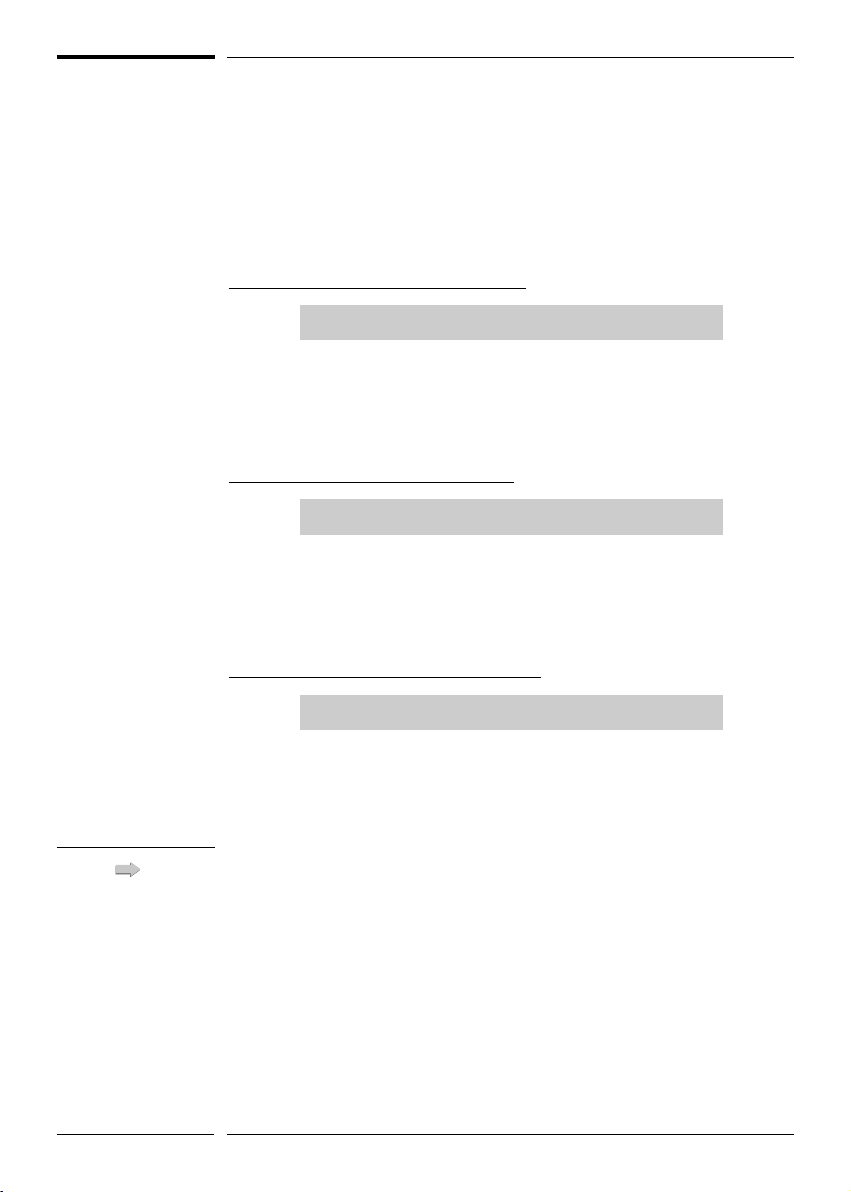
Should you need to move your cabinet, never tilt it more than 45° and always
sideways, on the side that the electrical cable comes out (right hand side when
looking at the cabinet).
P 5
Page 6
Layout and loading recommendations
important
important
Your wine cabinet may be equipped with several types of shelves
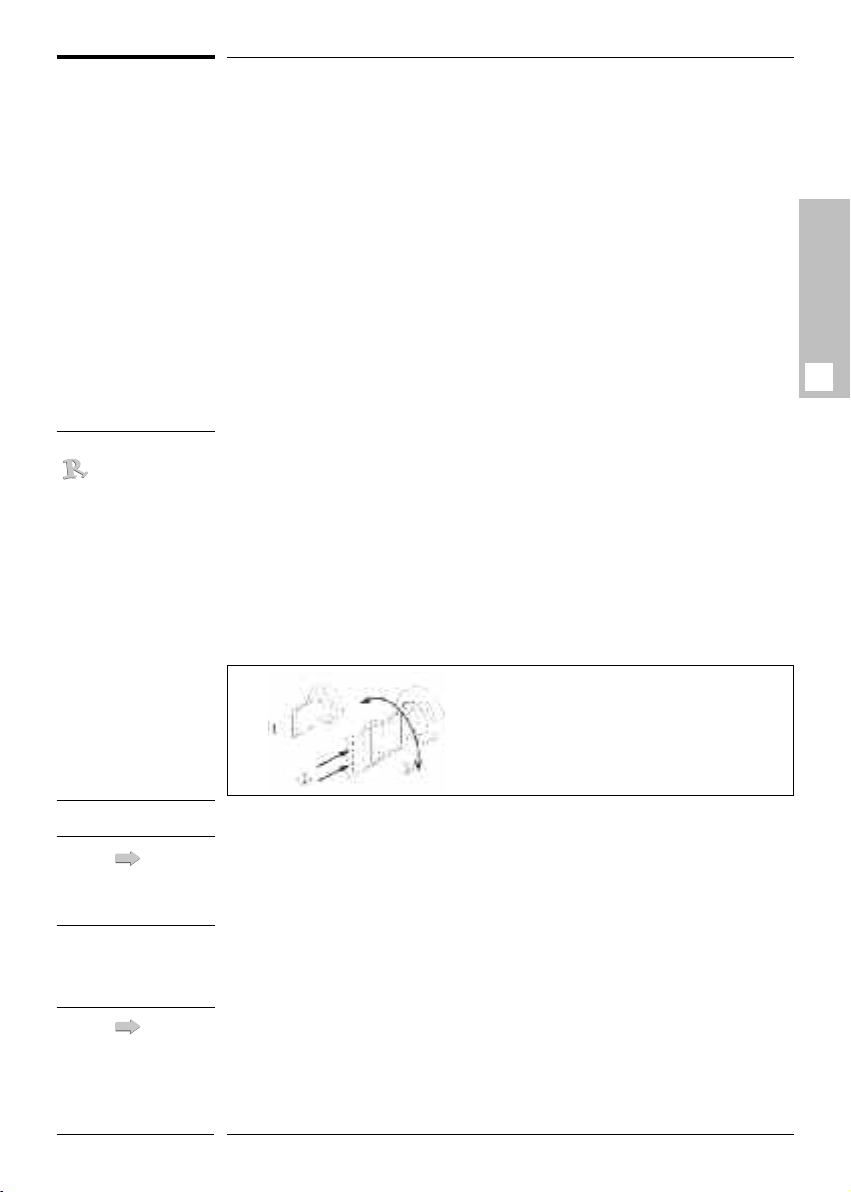
Storage shelf
Designed to hold stacked bottles, this shelf has 11 recesses.
To arrange the bottles on a storage rack, continue as follows:
- Be sure the shelf does not touch the back wall.
- Start by arranging the bottles in each recess in the back row, bottom of bottle
against the rear stop and neck securely resting in a cradle.
- Continue with the front row, placing the bottles in the opposite direction.
- Continue arranging by piling the bottles, taking care that no bottle touches the back
wall.
A storage shelf can carry up to 7 rows of 11 traditional Bordeaux bottles (100 Kg)
Never slide out a storage shelf – as the bottles could fall.
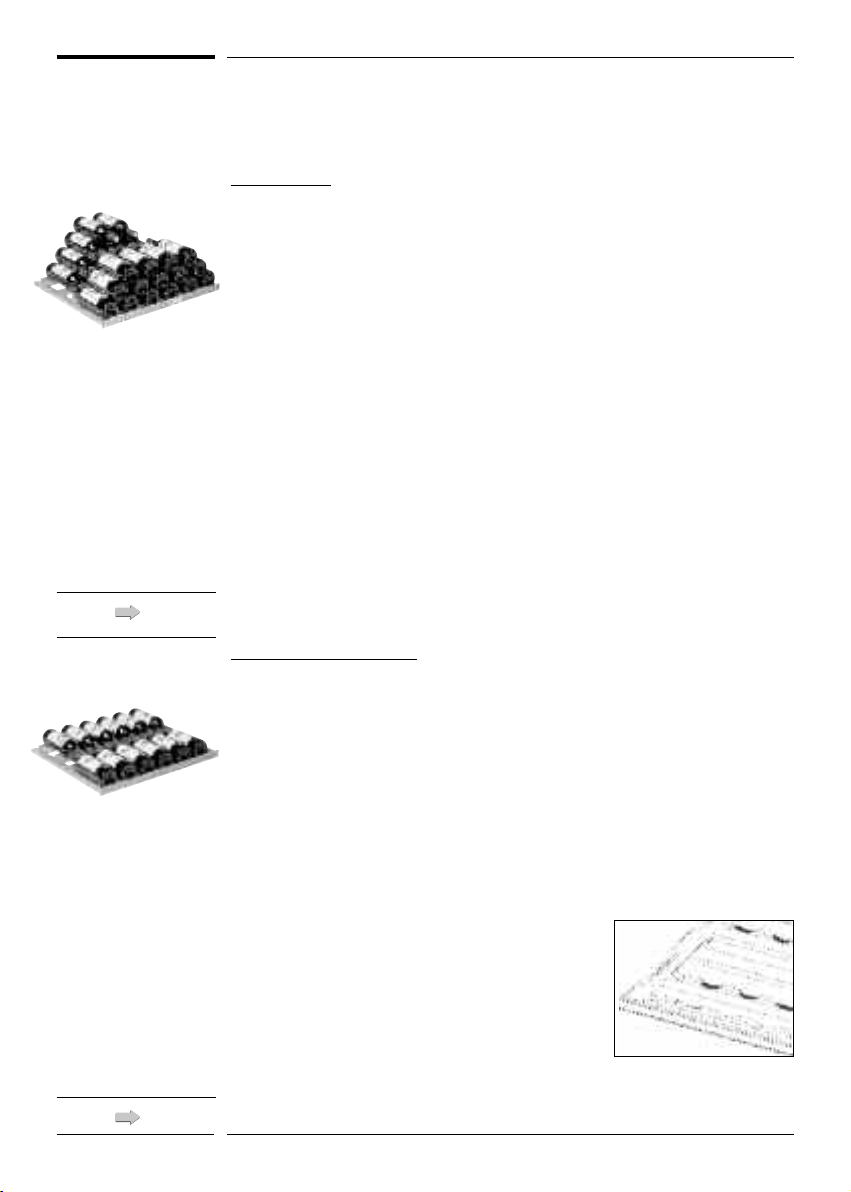
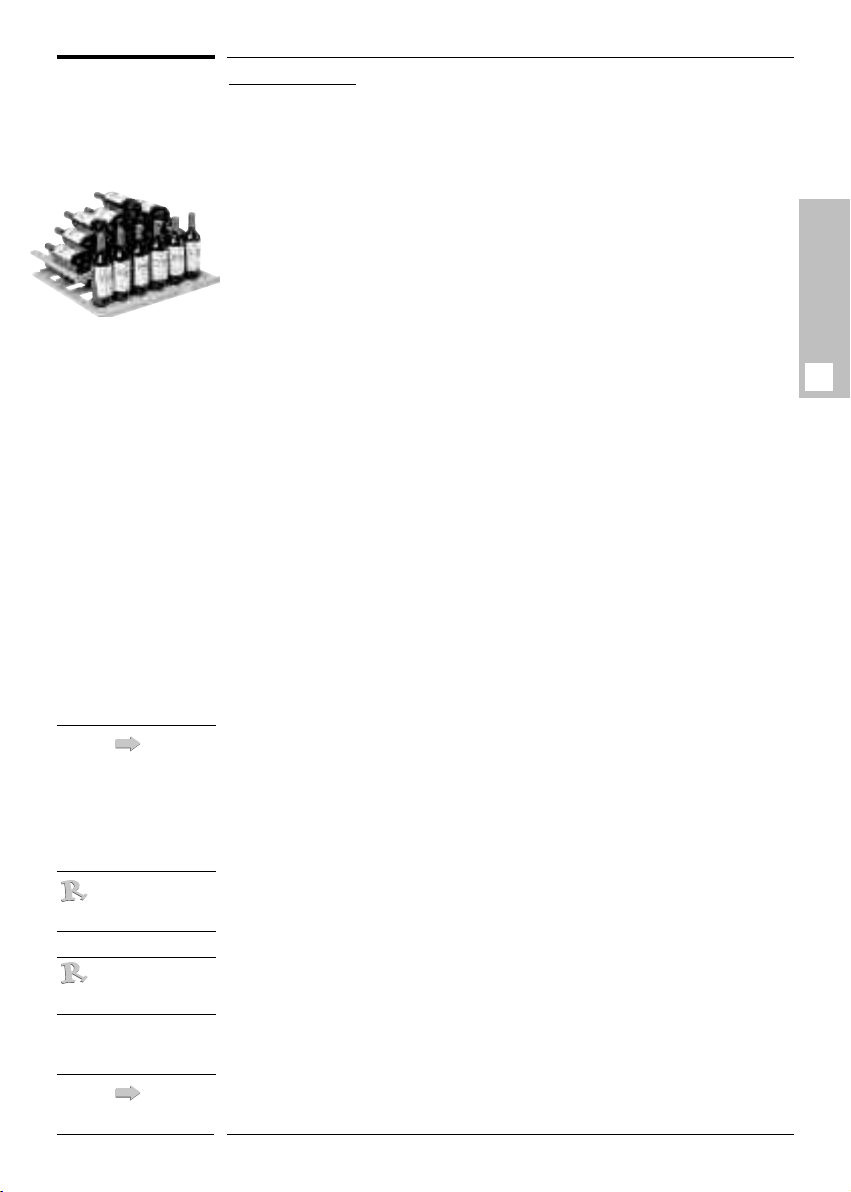
Sliding shelf : easy-glide
Designed to store just one row of bottles, this shelf has 12 recesses (holding a
maximum of 12 traditional Bordeaux bottles).
To arrange the bottles on a sliding rack, continue as follows:
- pull the shelves towards you up to the stop
- Start by arranging the bottles in each recess in the back row, bottom of bottle
against the rear stop
- Continue with the front row, placing the bottles in the opposite direction.
- Never place more than one row of bottles on a sliding shelf.
- In the event of mixed layout (storage/slider), arrange the sliding shelfs at
the centre of your cabinet.
Discover a new unique patented Transtherm device
fitted on shelves, which allows you to use your cabinet daily without vibration, which is harmful to your
wine!
Affix the pads to the recesses of the first row of bottles.
Never pull out more than one loaded sliding shelf at a time
P 6
Page 7
Presentation Kit
important
ecommendation
important
ecommendation
Designed for both storage and bottle presentation, this kit is made up of:
- 1 universal rack (13 recesses),
- 1⁄2 rack (6 recesses)
To arrange the bottles on a presentation kit, continue as follows:
- be sure the shelves do not touch the rear wall.
On the 1⁄2 rack:
- start by arranging the bottles in each recess, bottom of bottle towards the
back (6 traditional Bordeaux bottles)
- continue the arrangement by piling the bottles (5+6+5 = 16 traditional
Bordeaux bottles) making sure that the base of the bottles does not touch the
back wall.
Maximum load on half rack: 22 traditional Bordeaux bottles
On the sliding shelf:
- start by arranging the bottles in each recess, bottom of bottle towards the
back (6 traditional Bordeaux bottles)
- to present your bottles, arrange them upright on the front of your rack.
Maximum load on a universal shelf: 13 traditional Bordeaux bottles
The presentation kit has a maximum capacity of 35 traditional Bordeaux bottles
GB
Never slide the sliding shelf or the half rack when they are being used as a
presentation kit. All of the bottles could fall.
Generally speaking, never slide a rack that has several bottles piled on it,
or when it has vertically presented bottles on it.
You should remember that if you do not have enough bottles to fill your wine
cabinet, it is better to distribute the load over all of the shelves available, so as
to avoid "all on top" or "all below" type loads.
The shelves all have a label slot, designed to receive the pre-cut cards delivered with your cabinet, thus helping you to identify the position of your favourite wines at a glance.
Never alter the position of your cabinet’s rigidity bar (see page 3, N° 14),
NEVER move this part while the cabinet is loaded.
P 7
Page 8

Commissioning
important
Once you have waited 48 hours, connect your cabinet to the mains,
having checked that there is power to the socket (check fuses and their amperage,
the state of the trip, and if necessary try out another electrical appliance to
verify the supply).
- Once connected to the mains, make sure that the Off/On switch, on the right
of your cabinet’s control panel, is set at "On" (I).
- As soon as your wine cabinet is plugged in, as long as the switch is set at
"On" (see diagram above), and the ambient temperature is higher than the
temperature you require, the green operating indicator for the cold circuit
comes on (unless this is a 1 temperature model, and is placed in an area that
has a temperature close to 12°C). The thermometer starts up and shows the
temperature.
P 8
In the event of malfunction, turn to page 17 & 18
.
Hygrometry for 1 temperature cabinets
(References MA1XP, MA1XP, ER1XG for Asia and Australia only)
Installing the cartridge of clay pellets:
- Remove the small rack from the bottom of the cabinet
- Open the 4 bubble wrap packets and remove the bricks
- Lock them together using the dowels to make 1 large rectangle and place this
directly on the floor of the unit
- Dampen the 4 cartridges with 2 or 3 glasses of water.
- Replace the small rack which will now sit on top of the groove.
Page 9

Temperature settings for 1 temperature models
The temperature control(s) and setting(s) are adjusted from your wine cabinet’s
settings panel, as shown below:
Maturing
emperature display
t
Hot circuit indicator light (Red)
Keyboard
Lighting
ON / OFF
witch
s
General
ON / OFF
witch
s
Lighting ( LED 1)
Lighting (LED2)
Cold circuit indicator light (Green)
If the loading configuration or location of your cabinet justifies it, it is possible to adjust the temperature setting within a limited range of
(42°F to 64°F)
*Please note:
(for an ambient temperature of 25°C (77F°)).
original temperature setting is 12°C (54°F)
The
6°C to 18°C
when the
wine cabinet leaves the factory.
To adjust the temperature of your 1 temperature cabinet:
Comments: As soon as you see the display flash during setting, you have approximately 50 seconds to change or confirm, otherwise, you must restart the process.
If the setting has not been recorded, your cabinet will retain its original settings.
Press and hold down the key for 5 seconds. “St” will appear on the display
St
”: maturing temperature setting).
(“
Press to read the set temperature*.
Press to increase the set temperature, or
Press to lower the set temperature.
To save your setting
, press for 5 seconds until the temperature is displayed.
Otherwise, it will be necessary to restart the process.
Pressing Set:
the set temperature of the “ST”
setting.
Pressing Set twice:
return to the “ST” display
Pressing Set:
the set temperature of the “F4”
setting.
Pressing Set twice:
return to the “F4” display.
Pressing Set:
the “H4” setting value:
H4=O means that the warning
alarm is active.
H4=1 means that the warning
alarm is disabled
Pressing Set twice:
return to the “F4” display.
Pressing! for
5 seconds
allows you
to access:
“ST” allows you to set the wine
maturing temperature (for 1 and 3
« ST »
temperature models) or the upper
section (for multi-temperature
models).
Allows you to change from “ST” to “F4” then “H4”.
“F4” Allows you to set the tempera-
ture of the chilling compartment (for
« F4 »
3 temperature models) or the lower
section (for multi-temperature
models)
Allows you to change from “ST” to “F4” then “H4”
“H4” Allows you to activate or disa-
« H4 »
ble the warning alarm, if a malfunction occurs.
Please note:
- The lighting function is manually controlled (“Light” On/Off switch). If you are no longer using it, remember to switch off the lighting.
Allows you to read
Allows you to
Allows you to read
Allows you to
Allows you to read
Allows you to
P 9
GB
Page 10

Temperature settings for 3 temperature models
The temperature control(s) and setting(s) are adjusted from your wine cabinet’s
settings panel, as shown below:
Chilling temperature
isplay
d
Hot circuit indicator light
Red)
(
aturing temperature
M
display
Lighting ON /
FF
O
switch
General ON / OFF
witch
s
Keyboard
Lighting (LED2)
Cold circuit indicator light
(Green)
Lighting (LED1)
Service
temperature switch
3 temperature cabinet models have 3 zones:
• The first “low” zone
, called the
chilling
compartment. Its temperature setting is governed by the temperature requested in the maturing compartment.
For this reason, should you wish to set a chilling compartment temperature
of less than 8°C / 46°F, the temperature in the maturing compartment should
be less than 12°C / 54°F (approx.10°C / 50°F).
The second “central” zone
•
, called the
nal set temperature is 12°C (54°F)
maturing
compartment. Its
, on leaving the factory.
origi-
It is possible to adjust the temperature setting within a limited range of 12°C
to 14°C. (53.6 to 57,2 F°)
In extreme conditions, a slight temperature gradient may appear in the maturing compartment.
To adjust the temperature of your maturing zone:
Comments: As soon as you see the display flash during setting, you have approximately 50
seconds to change or confirm, otherwise, you must restart the process.
If the setting has not been recorded, your cabinet will retain its original settings.
Press and hold down the key for 5 seconds. “St” will appear on the display (“St”: maturing temperature setting).
Press to read the set temperature*.
Press to increase the set temperature, or
Press to lower the set temperature.
P 10
To save your setting
, press the and hold for 5 seconds until the temperature is displayed.
Otherwise, it will be necessary to restart the process.
The third “upper” zone
•
original temperature setting is 18°C (64°F)
Its
, called the
service temperature
, on leaving the factory.
This setting cannot be adjusted by the user.
compartment.
Page 11

Please note:
- The service temperature control is operated manually and is turned on and off by
pressing the switch on the left-hand side (see diagram).
- When in “on” mode, the red light located on the switch is lit.
- When in “off” mode, the light is off.
- The temperature of this compartment is not displayed.
- When the button is put in “on” mode: the setting is 18°C, it is activated at 15°C and
switches off when the temperature reaches 18°C.
- Once the wine has reached serving temperature, do not forget to remove your bottles
and put the switch in the “off” position: If you forget to turn off the service temperature button the temperature will be regulated between 15°C min. and 18°C max.
- The lighting function is manually controlled (“Light” On/Off switch).
If you are no longer using it, remember to switch off the lighting.
Pressing! for
5 seconds
allows you
to access:
“ST” allows you to set the wine
maturing temperature (for 1 and 3
« ST »
temperature models) or the upper
section (for multi-temperature
models).
Allows the different parameters to be displayed.
Allows the different parameters to be displayed.
“H4” Allows you to activate or disa-
« H4 »
ble the warning alarm, if a malfunction occurs.
Pressing Set:
the set temperature of the “ST”
setting.
Pressing Set twice:
return to the “ST” display
Pressing Set:
the “H4” setting value:
H4=O means that the warning
alarm is active.
H4=1 means that the warning
alarm is disabled
Pressing Set twice:
return to the “
Allows you to read
Allows you to
Allows you to read
Allows you to
H4” display.
GB
P 11
Page 12

Temperature settings for multi-temperature models
The temperature control(s) and setting(s) are adjusted from your wine cabinet’s
settings panel, as shown below.
ower temperature
L
isplay
d
Lighting (LED1)
Multi-temperature cabinet models have a temperature range starting at
(42°F to 46°F) at the bottom
n the lower section
• I
It is possible to adjust the temperature setting. Please note, however, that there is
no upper or lower limit.
Please note: Its recommended setting range is
To adjust the temperature of your “lower” section:
Comments: As soon as you see the display flash during setting, you have approximately 50
seconds to change or confirm, otherwise, you must restart the process.
If the setting has not been recorded, your cabinet will retain its original settings.
Press and hold down the key for 5 seconds. “St” will appear on the display.
Press , “F4” will appear on the display (“F4”: chilling compartment temperature setting).
Press You will be able to read the set temperature displayed.
Press to increase the set temperature, or
Press to lower the set temperature.
To record your setting,
perature is displayed. Otherwise, it will be necessary to restart the process.
Otherwise, it will be necessary to restart the process.
Pressing! for
5 seconds
allows you
to access:
Hot circuit indicator light (Red) Lighting
Upper temperature
display
Keyboard
Lighting (LED2)
and reaching
14°C to 16°C (57°F to 60°F) at the top
N / OFF
O
witch
s
Cold circuit indicator light (Green)
, the original set temperature is 7°C, on leaving the factory.
6°C to 8°C (42°F to 46°F)
press the button and hold for 5 seconds, until the tem-
“ST” allows you to set the wine
maturing temperature (for 1 and 3
« ST »
temperature models) or the upper
section (for multi-temperature
models).
Allows you to change from “ST” to “F4” then “H4”.
“F4” Allows you to set the tempera-
ture of the chilling compartment (for
« F4 »
3 temperature models) or the lower
section (for multi-temperature
models)
Allows you to change from “ST” to “F4” then “H4”
“H4” Allows you to activate or disa-
« H4 »
ble the warning alarm, if a malfunction occurs.
Pressing Set:
the set temperature of the “ST”
setting.
Pressing Set twice:
return to the “ST” display
Pressing Set:
the set temperature of the “F4”
setting.
Pressing Set twice:
return to the “F4” display.
Pressing Set:
the “H4” setting value:
H4=O means that the warning
alarm is active.
H4=1 means that the warning
alarm is disabled
Pressing Set twice:
return to the “F4” display.
General ON / OFF
witch
s
6°C to 8°C
.
Allows you to read
Allows you to
Allows you to read
Allows you to
Allows you to read
Allows you to
.
P 12
Page 13

important
important
In the “upper” section
important
•
ving the factory. It is possible to adjust the temperature setting.
It is possible to adjust the temperature setting, within a recommended range of
16°C to 18°C. (60 to 64,4 F°)
Please note that the lower and upper limits of this setting range are 6°C and 18°C
(42,8 to 64,4 F°) respectively.
To adjust the temperature of your “upper” section:
Please note:
- Once you see the display flash during setting, you have about 50 seconds to change or
confirm your setting, otherwise you will have to restart the process.
- If no setting has been recorded, your cabinet will retain its original settings.
Press and hold down the key for 5 seconds. “St” will appear on the display (“St”:
maturing temperature setting).
Press you will be able to read the set temperature displayed*.
Press to increase the set temperature, or
Press to reduce the set temperature.
To save your setting
rature is displayed.
Otherwise, it will be necessary to restart the process.
Please note:
- The lighting function is manually controlled (“Light” On/Off switch). If you are no longer
using it, remember to switch off the lighting.
To ensure that your wine cabinet functions optimally, we recommend that you set your
appliance with a difference of 10°C between the top value and the bottom value.
, its original temperature setting is
, press the button and hold for 5 seconds, until the tempe-
16°C
(60°F), on lea-
Temperature Settings for all models
GB
°C / °F Conversion Table
°C °F
6 42
8 46
10 50
12 54
14 57
16 60
18 64
20 68
It may be that despite the recommendations in this manual, you still do not
achieve quite the desired temperature. Every situation is unique, and it may
be that a few slight corrections are needed.
You will need to wait approximately 48 hours before noticing the effects of
a temperature adjustment.
P 13
Page 14

Wine service temperatures
French wines
Alsace 10°C 50F°
Beaujolais 13°C 55,4F°
Sweet white Bordeaux 6°C 42,8F°
Dry white Bordeaux 8°C 46,4F°
Red Bordeaux 17°C 62,6F°
White Burgundy 11°C 51,8F°
Red Burgundy 18°C 64,4F°
Champagne 6°C 42,8F°
Jura 10°C 50F°
Languedoc-Roussillon 13°C 55,4F°
Provence Rosé 12°C 53,6F°
Savoie 9°C 48,2F°
Dry White Loire Wines 10°C 50F°
Sweet White Loire Wines 7°C 44,6F°
Red Loire Wines 14°C 57,2F°
Rhône wines 15°C 59F°
Sweet South-West wines 7°C 44,6F°
Red South West Wines 15°C 59F°
Australian wines
Cabernet franc 16°C 60,8F°
Cabernet sauvignon 17°C 62,6F°
Chardonnay 10°C 50F°
Merlot 17°C 62,6F°
Small grape Muscat 6°C 42,8F°
Pinot noir 15°C 59F°
White Sauvignon 8°C 46,4F°
Semillon 8°C 46,4F°
Shiraz 18°C 64,4F°
Verdhelo 7°C 44,6F°
(provided as an indicator only)
P 14
Other wines
Californian 16°C 60,8F°
Chilean 15°C 59F°
Spanish 17°C 62,6F°
Italian 16°C 60,8F°
Page 15

Everyday care of your wine cabinet
ecommendation
important
Your TRANSTHERM cabinet is a simple tried and tested item of equipment.
The following few operations enable you to obtain optimum operation and an
extended life cycle.
1 - Regularly remove dust (twice a year) from the condenser (black metal grill
fastened to the back of your wine cabinet).
2 - Completely clean the inside of your wine cabinet once a year, taking care to
ensure that you have unplugged and unloaded it (use water and a non caustic cleaning product, and make sure to rinse well).
Hygrometry
You cabinet is equipped with an exclusive TRANSTHERM system enabling
the creation, inside your wine cabinet, of the correct humidity level required to
perfectly seal the corks in your bottles
This system uses the water retrieved from condensation, which is then recycled.
Should the humidity level in your cabinet ever reach critical level (less than
50%), just add one or two glasses of water to the lower tray of your cabinet.
The 1 temperature cabinets
(References MA1XP, MA1XM, ER1XG for Asia and Australia only)
- If the outside humidity is very low, and the door is opened frequently, you
will need to moisten the Pozzolana bricks again
- If the outside humidity is extremely high you will need to remove the little
condensation water bung (located at the bottom, on the left hand side of your
cabinet). Keep this bung and replace it in the event that the outside humidity
should drop.
GB
The long life of your wine cabinet depends on regular monitoring, especially
of anything that may appear abnormal, and informing us of any anomalies
found.
P 15
Page 16

Important wine information
Your TRANSTHERM cabinet has been designed to guarantee the optimum
conditions for storing and/or serving your wine
Wine is a highly complex product, requiring long and gentle development and
needs specific conditions in which to reach its full potential.
All wine is stored at the same temperature, only the temperatures for serving
and wine tasting can vary depending on the type of wine (see the table on page 14)
This being the case and just like the natural caves used by wine producers, it
is not the exact temperature that is important, but its constancy. In other words,
as long as the temperature of your cabinet is between 10 and 14° C, your wine
will be stored in perfect conditions if the temperature is not subject to any
significant fluctuation
However, it is advisable to be especially careful concerning the values shown
on your wine cabinet's hygrometer, which, due to its location in the wine cellar
will always have tendency to display a lower humidity level.
IRRESPECTIVE OF THE CAUSE, IF YOU NOTICE EITHER
ABNORMAL TEMPERATURE OR HUMIDITY LEVELS INSIDE
YOUR CABINET, BE REASSURED THAT ONLY LONG EXPOSURE
TO THESE ABNORMAL CONDITIONS CAN HAVE A DETRIMENTAL
EFFECT ON YOUR WINES.
P 16
Page 17

Operating anomalies
ecommendation
important
important
important
When starting up
The compressor does not work, even though the desired temperature is
lower than the ambient temperature:
Check the wall socket by plugging in any electrical appliance and ensure that
the ON/OFF switch is in position (I).
The compressor does not stop:
1- Put your hand on the condenser (metallic grid located the length of the exterior rear wall of your appliance).
If the condenser is cold, contact your retailer.
2- If the condenser is hot, check the temperature setting controls according to
the model (see previous chapter). If there is no fault in the settings, contact
your retailer.
When functioning
The regulator(s) is / are displaying a temperature / temperatures lower
than the desired temperature(s):
1-Check the temperature setting controls (see pages 9 to 13 of this manual).
2-Check that the hot circuit red indicator light is lit.
GB
The regulator(s) is / are displaying a temperature / temperatures higher
than the desired temperature(s):
1-Check the temperature setting controls (see pages 9 to 13 of this manual).
2-Check that the cold circuit green indicator light is lit.
If the power lead (cable) is damaged, it must be replaced by the manufacturer,
its after-sales service or similarly qualified persons, for safety reasons.
Children must be supervised in order to ensure that they do not play with the
appliance.
In both of the above cases, if (after you have corrected any possible settings
faults and checked that the circuit indicator lights are lit) the fault persists,
contact your retailer.
In all cases, if your appliance does not seem to be functioning correctly, unplug
it and contact your retailer.
THE USE OF GLASS DOORS HAS AN EFFECT ON PERFORMANCE
P 17
Page 18

important
P 18
Any intervention on the cold circuit should be performed by a refrigeration
technician, who should carry out an inspection of the circuit sealing system.
In the same way, any intervention on the electrical circuit should be performed
by an qualified electrician.
ANY INTERVENTION PERFORMED BY A TECHNICAL SERVICE
NOT APPROVED BY TRANSTHERM WILL LEAD TO THE GUARANTEE BEING CONSIDERED AS NULL AND VOID.
Alarms
The cabinets are fitted with alarms:
Some examples:
High temperature alarm:
-
relation to the set temperature.
The alarm is activated at 24°C (75,2F°)
The alarm is deactivated at (24°C) – 1°C, i.e. 23°C ((75,2F°)-1,8F°, i.e.73,4F°).
Low temperature alarm:
-
tion to the set temperature.
The alarm is activated at 1°C
The alarm is deactivated at (1°C) + 1°C, i.e. 2°C. ((33,8F°)-1,8F°, i.e.35,6F°)
Sensor(s) alarm:
-
Occurs when a sensor is not properly connected or is
faulty.
Anti-frost alarm:
-
Activated when the inside of the cabinet drops to a tempe-
rature of 1°C .
Please note:
- When the alarm is activated, this is indicated
bly via a
warning signal
. The latter is activated if validated by the “H4” parameter.
To adjust the H4 setting:
Please note:
As soon as you see the display flash during setting, you have approximately 50 seconds
to change or confirm, otherwise you must restart the process.
If no setting has been recorded, your cabinet will retain its original settings.
Press the button and hold for 5 seconds and “ST” will appear on the display
(“St”: setting of the maturing temperature).
Press, “H4” will appear.
Press to read the “H4” setting value.
Press or to change the “H4” value i.e. from 0 to 1 or from 0 to 1.
To record your setting
temperature is displayed.
Otherwise, you must restart the process.
The “H4” value is set at the original 0 value on leaving the factory.
When an alarm is activated, you have the possibility of directly switching off
the audible warning signal by pressing .
- Some alarms are automatically deactivated, which means that once the
appliance is operating normally, the visual and audible alarms stop.
- Other alarms are reactivated, which means that the user must intervene
manually:
- Press and at the same time. “
play will return if the cabinet is operating correctly.
In case of a persistent fault please contact your retailer.
Occurs when the temperature is too high in
Occurs when the temperature is too low in rela-
visually
on the display as well as audi-
, press the button and hold for 5 seconds, until the
rES
” will appear. The temperature dis-
Page 19

Model
MAS 1T
LOFT VINTAGE
MANOIR
ERMITAGE
COTTAGE
CASTEL
MAS MT
CELLIER
RÉSERVE
Specifications
Reference
MA1TP
2
LOXXP
2
MA1TM
2
2ER1TG
2CO3TM
2CA3TG
2MAMTP
2CEMTM
2REMTG
emperatures
T
1
1
1
1
3
3
multi
multi
multi
Height
820 to
840 mm
1110 à
1130 mm
1460 to
1480 mm
810 to
1
1830 mm
1460 to
1480 mm
1810 to
1830 mm
820 to
840 mm
1460 to
1480 mm
1810 to
1830 mm
idth
W
680 mm
680 mm
680 mm
680 mm
680 mm
680 mm
680 mm
680 mm
680 mm
epth
D
680mm
680mm
680mm
680mm
680mm
680mm
680mm
680mm
680mm
eight
W
0 kg
5
1 kg
6
3,5 kg
6
8 kg
7
63,5 kg
78 kg
50 kg
63,5 kg
78 kg
etting
S
precision
+/- 1,5°C
/- 1,5°C
+
+/- 1,5°C
/- 1,5°C
+
+/- 1,5°C
+/- 1,5°C
+/- 1,5°C
+/- 1,5°C
+/- 1,5°C
isplay
D
precision
+/- 1°C
/- 1°C
+
+/- 1°C
/- 1°C
+
+/- 1°C
+/- 1°C
+/- 1°C
+/- 1°C
+/- 1°C
GB
Model
MAS 1T
LOFT VINTAGE
MANOIR
ERMITAGE
COTTAGE
CASTEL
MAS MT
CELLIER
RÉSERVE
* Weight without racks
** Estimated values
*** Depending on country this may vary. For the specific values for your equipment item, please consult the maker’s label on it.
Electrical
power**
95W
95W
114W
114W
170W
178W
167W
167W
167W
Consumption
per 24 hrs**
0,8 Kwh/24h
0,8 Kwh/24h
0,8 Kwh/24h
0,8 Kwh/24h
0,9 Kwh/24h
0,9 Kwh/24h
0,9 Kwh/24h
0,9 Kwh/24h
0,9 Kwh/24h
Voltage***
230
230
230
230
230
230
230
230
230
HZ
frequency***
50
50
50
50
50
50
50
50
50
Usage restrictions
T°min. T°max.
0°C
0°C
0°C
0°C
15°C
15°C
35°C
35°C
35°C
35°C
30°C
30°C
12°C 35°C
12°C
12°C
35°C
35°C
P 19
Page 20

Protecting the Environment
Disposing of packaging:
The packaging used by Transtherm is manufactured using
recyclable materials.
After unpacking your cabinet, take the packaging to a refuse
collection point. For the most part, it will be recycled.
In accordance with legal provisions regarding protecting and
caring for the environment, your wine cabinet contains no
C.F.C.s.
To save energy:
- Install your cabinet in an appropriate place (see page 7) and within the
recommended temperature ranges.
- Keep the door open for as short a time as possible.
- Ensure that the door seal is in good condition and check that it is not damaged. If it is damaged, contact your Transtherm retailer.
N.B.: Caring for the environment: when replacing your wine cabinet, consult
the local municipal refuse department in order to observe the appropriate recycling procedure.
For refrigerant gases, substances and some parts in the wine cabinets,
Transtherm uses recyclable materials which require a special packaging disposal procedure to be used.
Condemn the lock so that children cannot accidentally shut themselves inside
the cabinet.
Place unusable appliances out of use by unplugging them and cutting the
power supply.
P 20
Page 21

Vorwort
Die Angaben in diesem Dokument können ohne Ankündigung geändert werden.
TRANSTHERM gewährt keine Garantie, wenn das Gerät anders als seine
gedachte Zweckbestimmung eingesetzt wird.
TRANSTHERM haftet nicht für Fehler, die diese Anweisung enthalten könnte
und auch nicht für Schäden in Zusammenhang oder im Anschluss an die
Lieferung, Leistung oder Verwendung des Gerätes.
Die in diesem Dokument enthaltenen Original-Informationen sind mit
Copyright geschützt. Alle Rechte vorbehalten. Das Dokument darf ohne zuvoriges
und schriftliches Einvernehmen von TRANSTHERM weder ganz noch teilweise
fotokopiert, vervielfältigt oder in andere Sprache übersetzt werden.
Inhalt
1
-
Weinklimaschrank - Beschreibung.....................................................S 3
2
-
Die verschiedenen Weinklimaschrank-Modelle TRANSTHERM .....S 4
3
-
Aufstellen des Weinklimaschranks.....................................................S 5
4
-
Hinweise zur Einrichtung und Befüllung .......................................S 6-7
D
5
-
Inbetriebnahme ...................................................................................S 8
6
-
Temperaturregelung.......................................................................S 9-14
- 1-Temperaturschränke................................................................S 9
- 3-Temperaturschränke.....................................................S 9-10-11
- Mehr-Temperaturschränke .......................................................S 12
- Alle Modelle ............................................................................S 13
- Serviertemperaturen von Weinen.............................................S 14
-
Allgemeine Pflege des Weinklimaschranks......................................S 15
7
Wissenswertes über Wein .................................................................S 16
8
-
Betriebsstörungen........................................................................S 17-18
9
-
Warnmeldungen ............................................................................... S 18
bis
9
-
Gerätekenndaten ...............................................................................S 19
10
-
Umweltschutz ...................................................................................S 20
11
-
TRANSTHERM
24 rue Francis de Pressensé - 69628 Villeurbanne cedex - France
S 1
 Loading...