

Vintage Cellars N'FINITY PRO HDX 46 Dual Zone Wine Cellar User Manual

46-Bottle Dual Zone Wine Cellar
INSTRUCTION MANUAL
PLEASE READ THIS MANUAL CAREFULLY BEFORE INSTALLING AND OPERATING.
Important Note: Upper zone must be set 4°F colder than lower zone.
1

TABLE OF CONTENTS
Contents Page #
Diagram & Description of Wine Cellar 3
Important Safety & Pre-Use Instructions 4
Installation Instructions
(a) General Installation Instructions 4
(b) Installation of Unit as a Built-In Cellar 5
Operating Y our Wine C ellar
(a) Control Panel and Temperature Setting 6
(b) Display Window 7
(c) Temperature for Serving Wine 7
Door Lock 8
Layout & Storage 8
Removing the Telescopic Shelf 8
Care & Maintenance 8
Technical Information 10
Troubleshooting Guide 10
Warranty Information 11
2
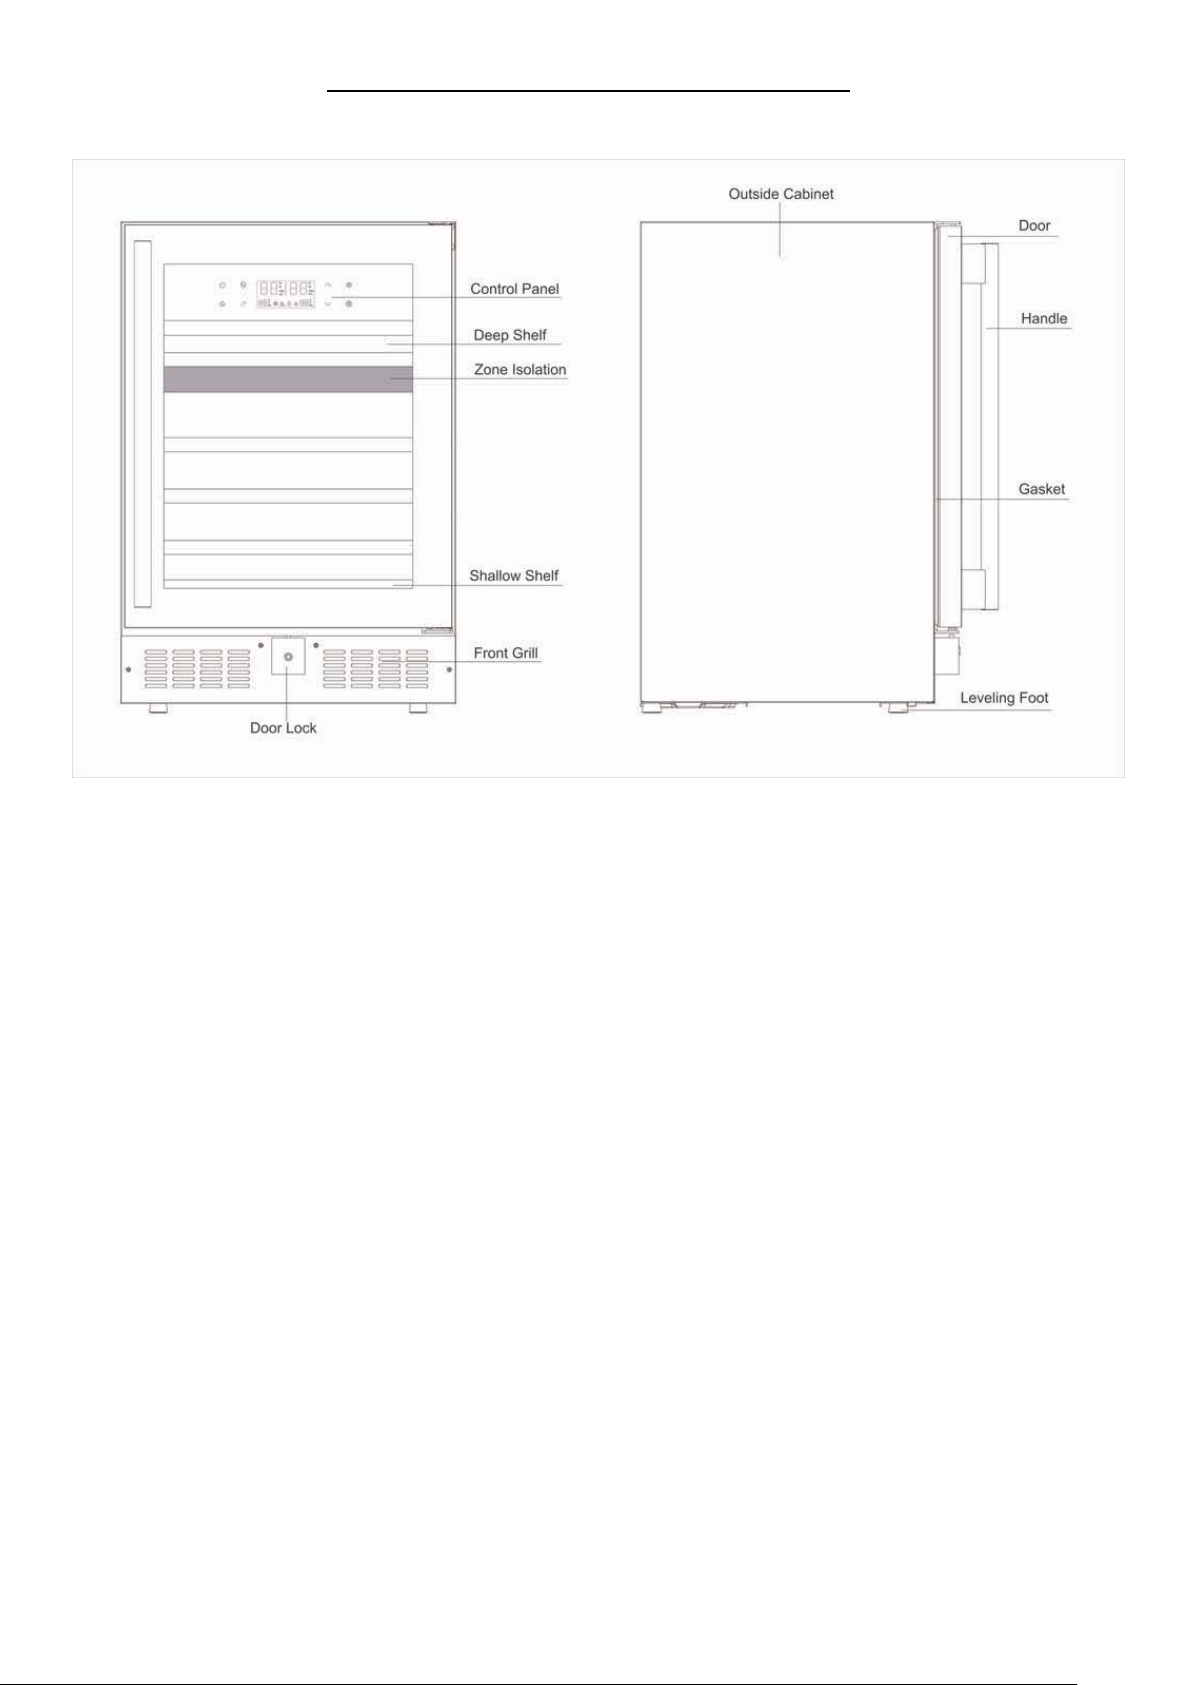
DIAGRAM & DESCRIPTION OF WINE CELLAR
Stainless Steel Frame Door Version
YOUR WINE CELLAR ALSO INCLUDES THE FOLLOWING:
• Instruction manual
• 6 pull-out shelves (5 telescopic)
• 2 keys
• 1 stainless steel door handle- for stainless steel frame door version. No handle for glass door version.
3

IMPORTANT SAFETY & PRE -USE INSTRUCTIONS
WARNING
Read all instructions before using the wine cellar.
DANGER: Risk of child becoming trapped in new cellar, old wine cellar/refrigeration unit, or large boxes.
Junked or abandon ed ap pli ances, b oxes and other containers are sti ll dang erous , e ven if the y wi ll “jus t sit in
the garage for a few days”.
Before you throw away your old wine cellar or refrigeration unit: 1. Take off the door. 2. Leave the
shelves in place so that children cannot climb inside.
Never allow children to operate, play with, or crawl inside the appliance.
Never clean appliance parts with flammable fluids. The fumes can create a fire hazard or explosion.
Do not store in the vicinity of any other applia nc e. D o not s tor e near g as ol in e or a ny other flammable vapor s .
The fumes can create a fire hazard or explos ion.
-Save these instructions-
To reduce the risk of fire, electrical shock, or injury when
using your appliance, follow these basic precautions:
BEFORE USING YOUR WINE CELLAR
Remove the exterior and interior packaging.
Before connecting the wine cellar to the power source, let it stand upright for approximately 2 hours.
This will reduce the possibility of a malfunction in the cooling system from handling during
transportation.
Clean the interior surface with lukewarm water using a soft cloth.
INSTALLATION INSTRUCTIONS
(a) General Installation Instructions
This appliance is designed for free standing installation or can be recessed into cabinetry.
Place your wine cellar on a flat, solid floor that is strong e nough to support the unit when it is ful ly
loaded. T o level your wine cellar, adjust the front leveling leg at the bottom of the wine cellar.
When moving your wine cellar, please do not incline it more than 45 degrees.
Locate the wine cellar away from direct sunlight and sources of heat (stove, heater, radiator, etc.).
Direct sunlight ma y affect the acrylic coating and h eat sources may increase electrical consum ption.
Extreme cold ambient temperatures may also cause the unit to perform improperly.
Avoid locating the unit in damp areas.
Plug the wine cellar into a dedicated (for this ap pliance only), properly installed and grounded wall
outlet. Do not under an y circum s tances cut or r em ove the third (grounding) prong f r om the po wer c ord.
Any questions concerning power and/or electrical grounding should be directed to a certified electrician
or authorized product service center.
4
 Loading...